How to Make a Free Motion Embroidery Stitch Pillow
I recently discovered free motion embroidery and I love it! I combined two of my most favorite passions, art, and sewing, and created this painted and embroidered DIY pillow.

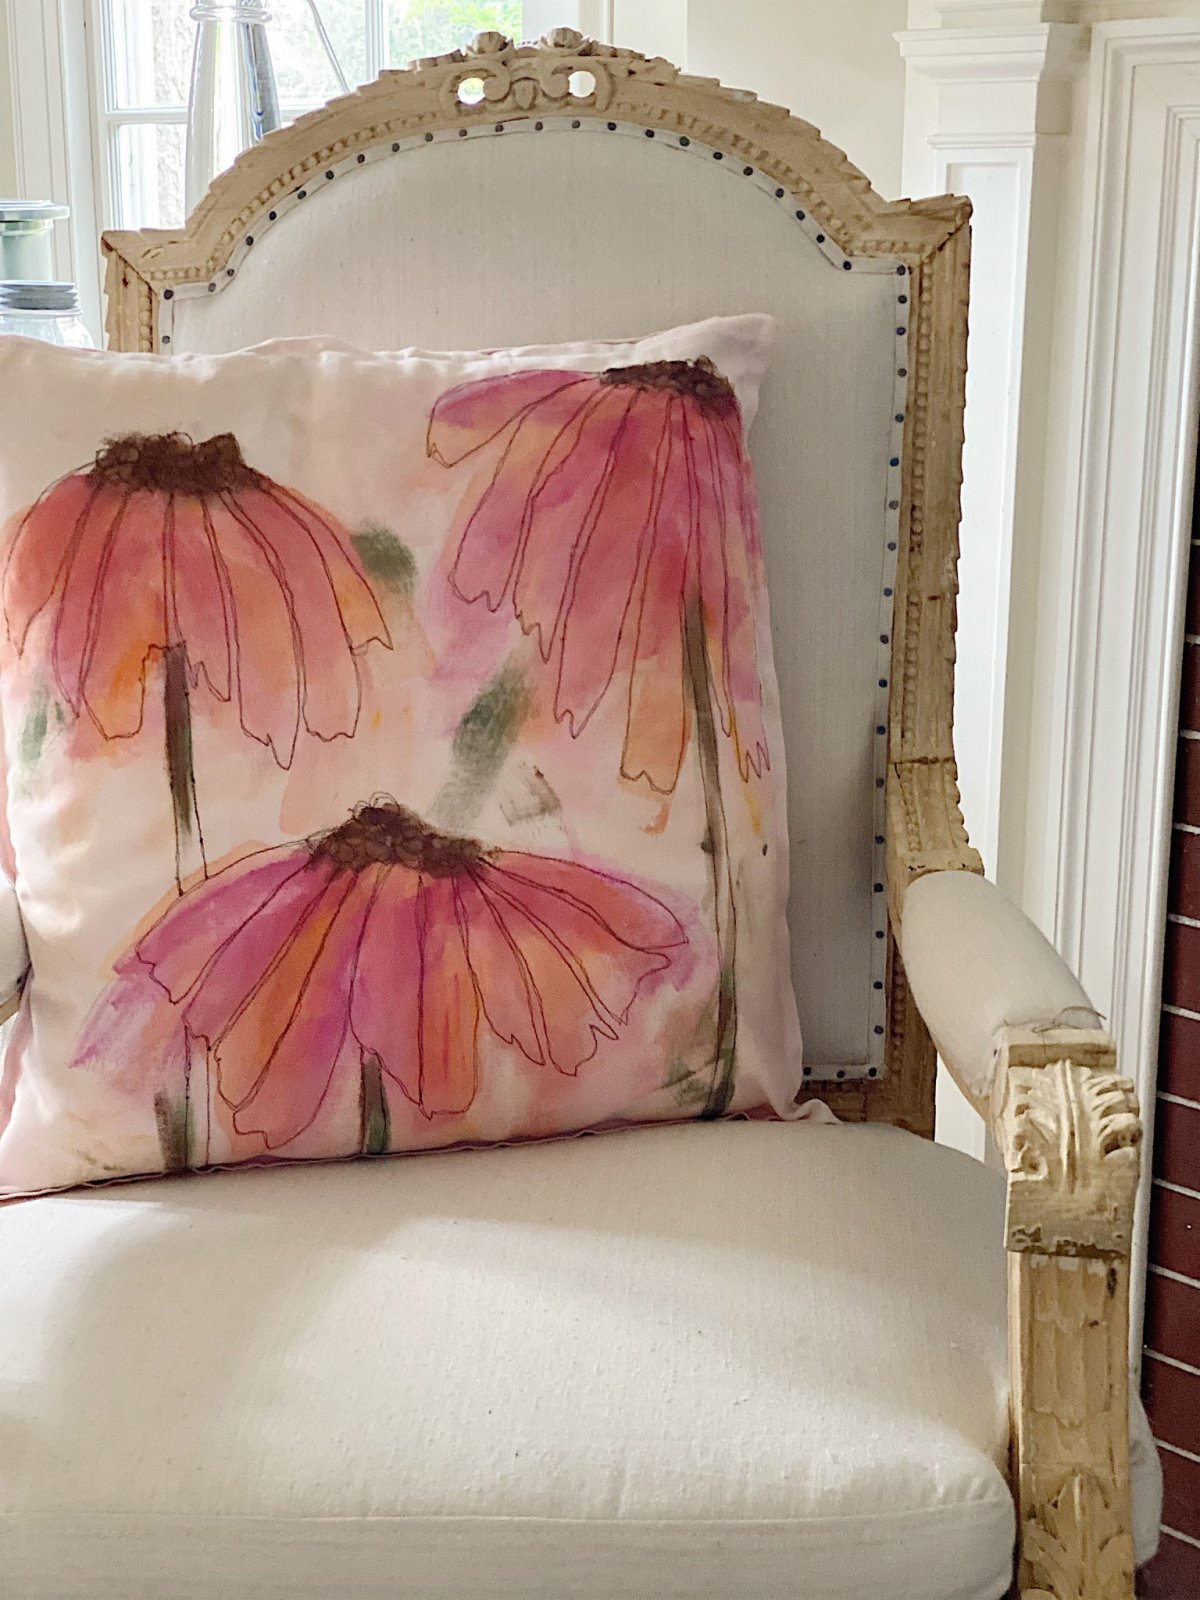
I think this is my new favorite DIY. It’s true. I discovered free motion embroidery and I love it. I bet when you first looked at this you probably didn’t even know it was stitched. Haha. Fooled ya! It’s a DIY pillow.
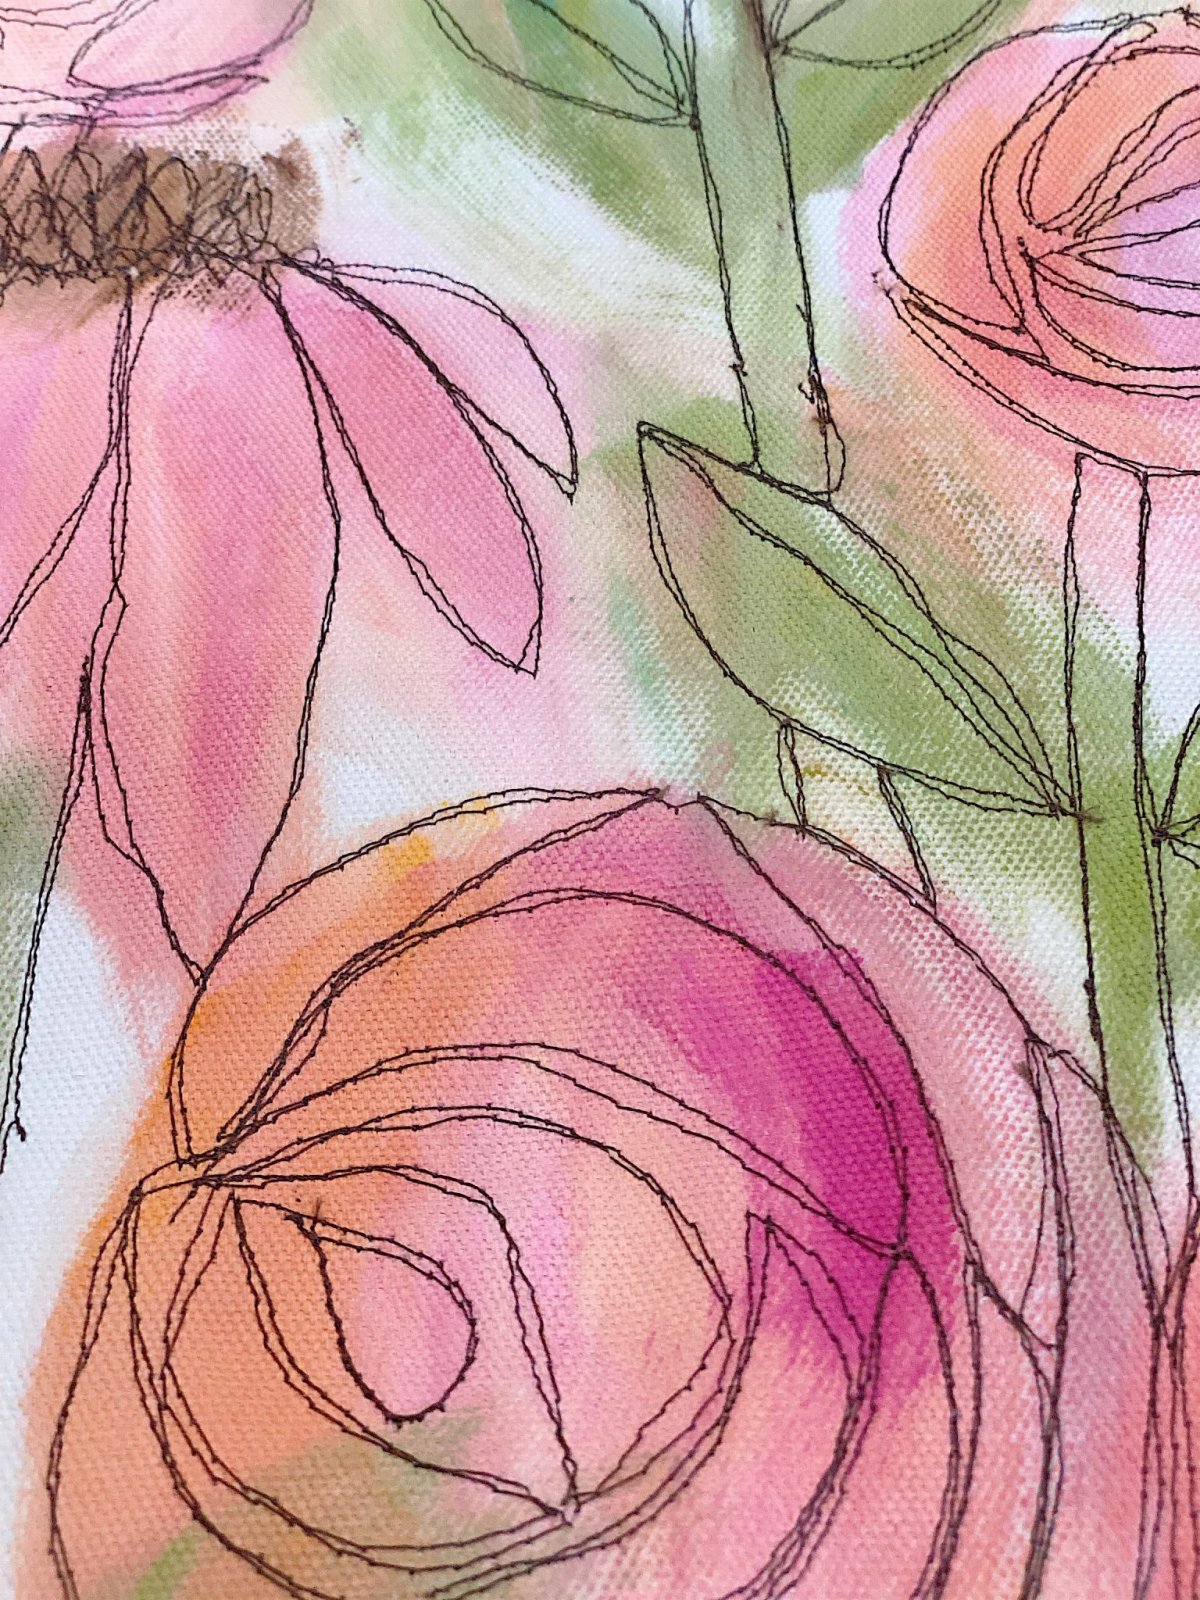
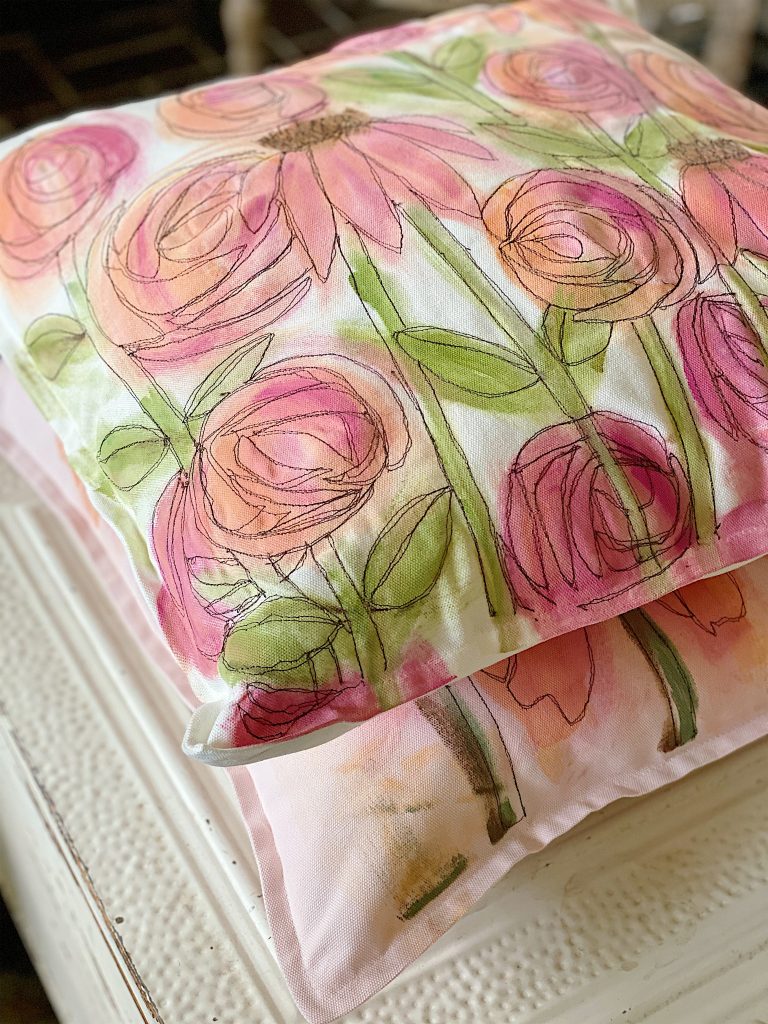
I actually painted this DIY pillow first and then added the detail with free motion embroidery.

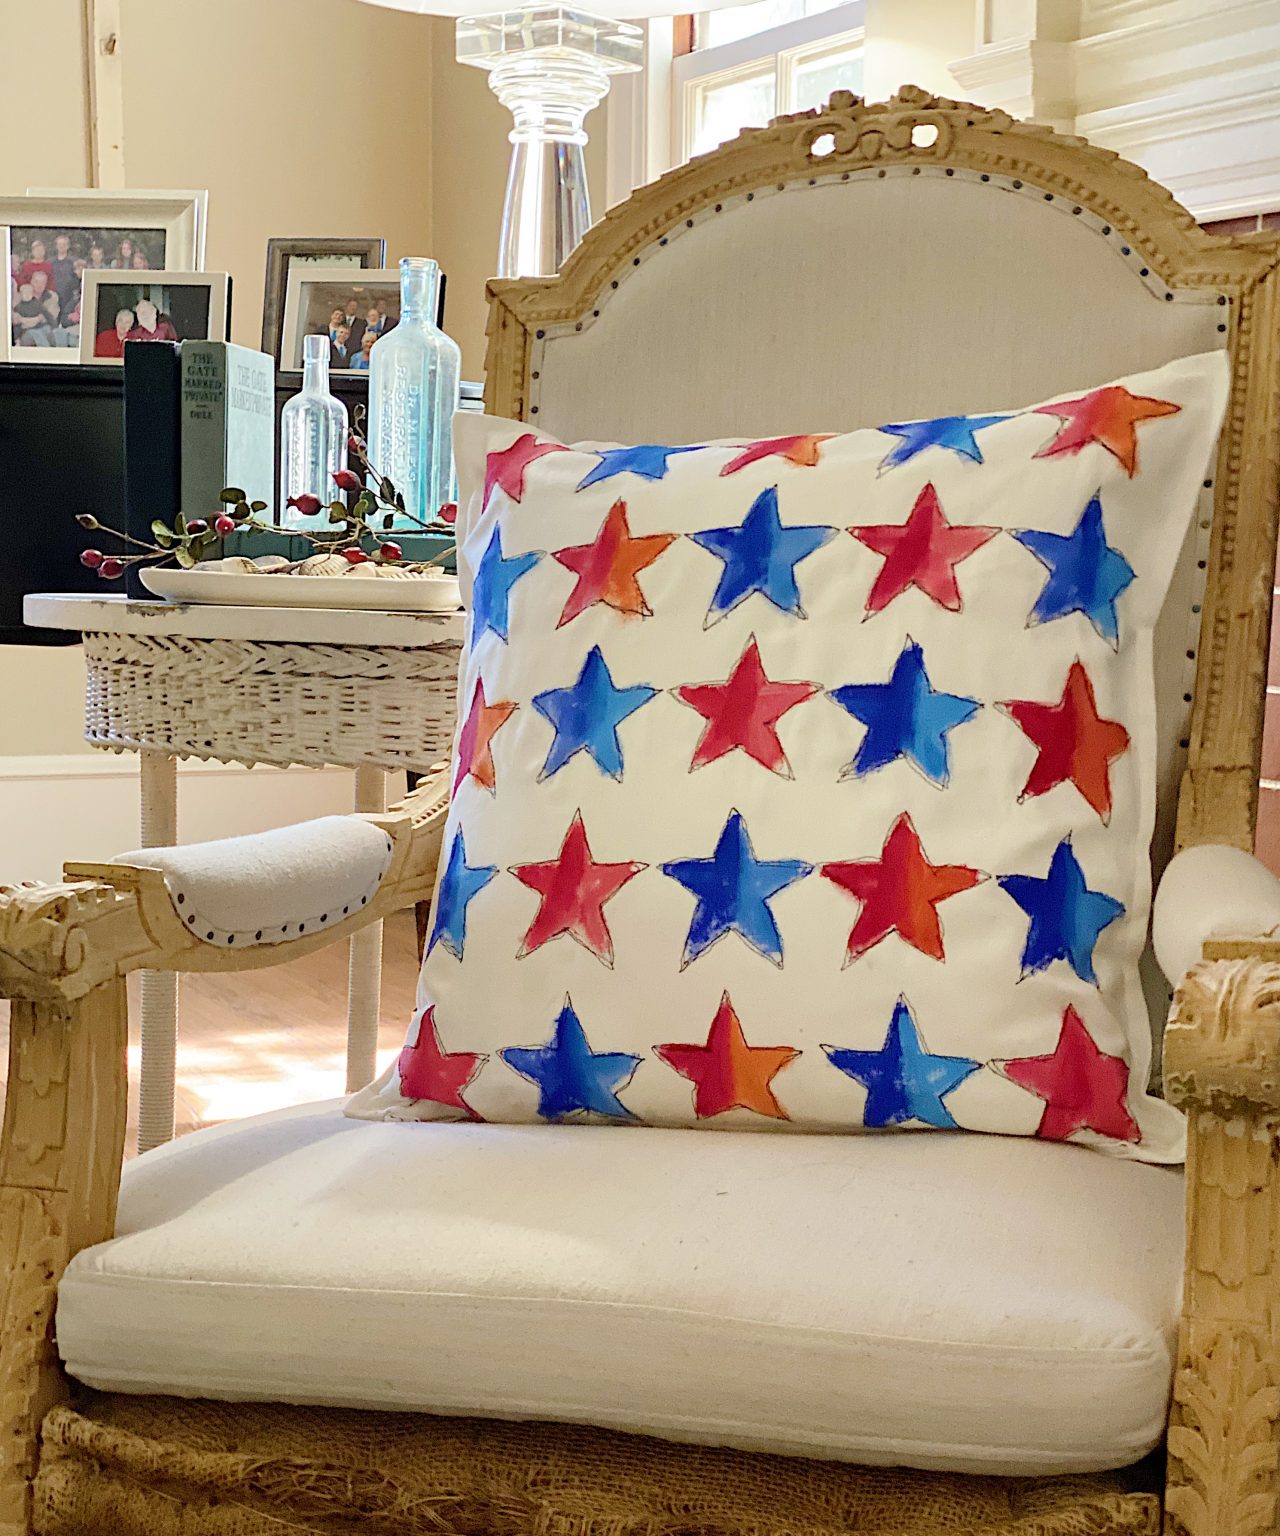
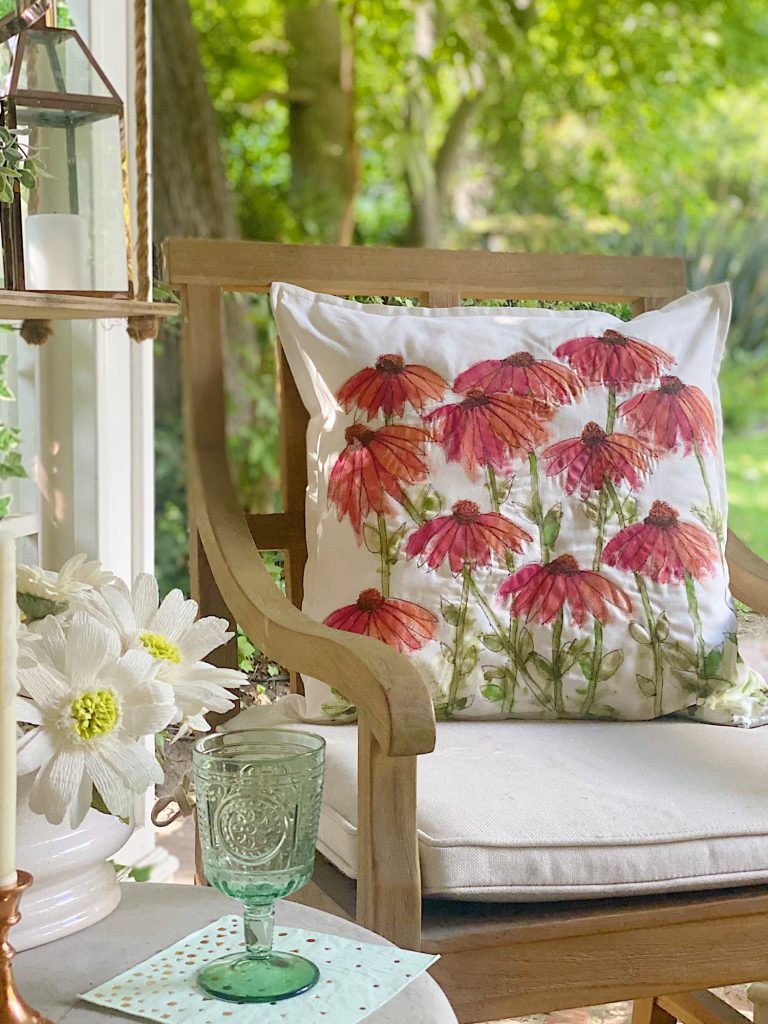
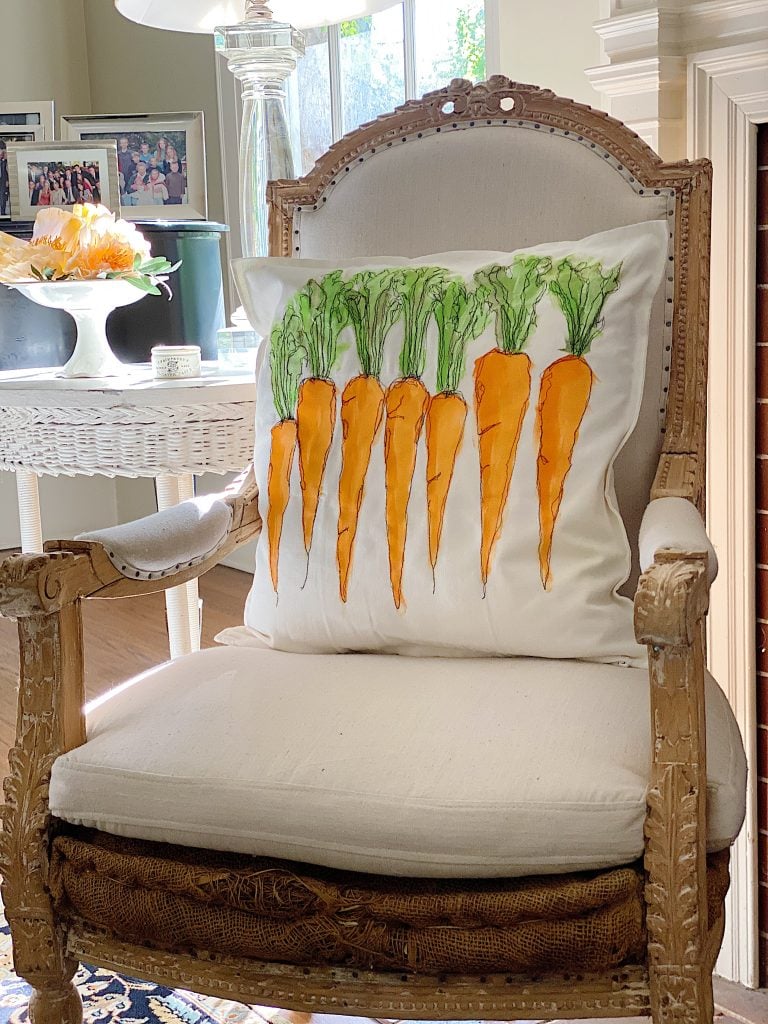
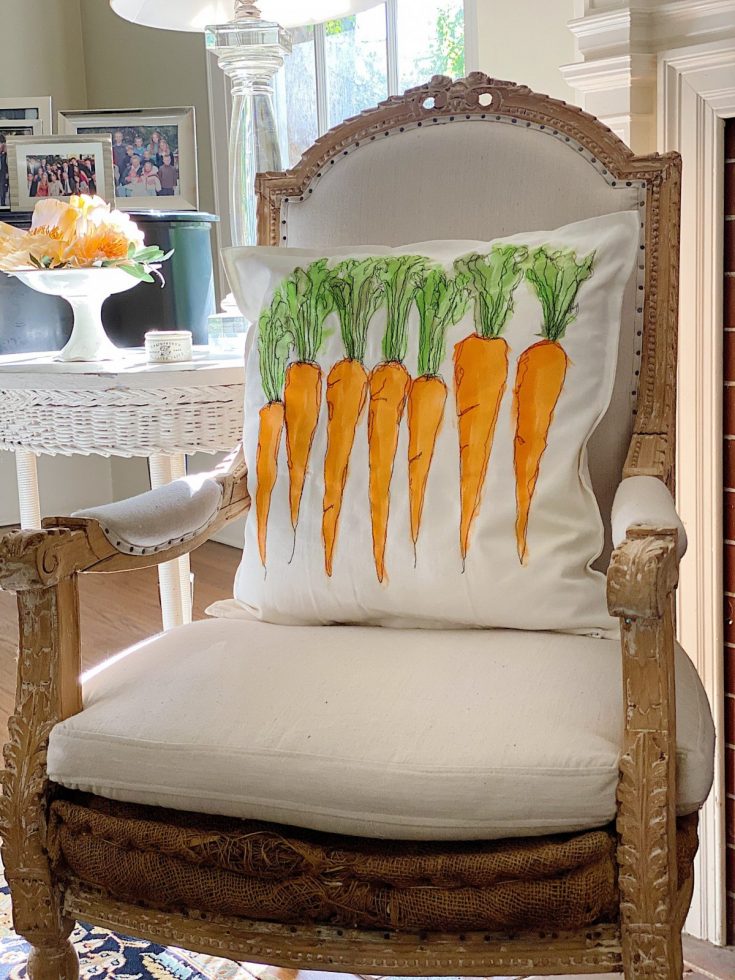
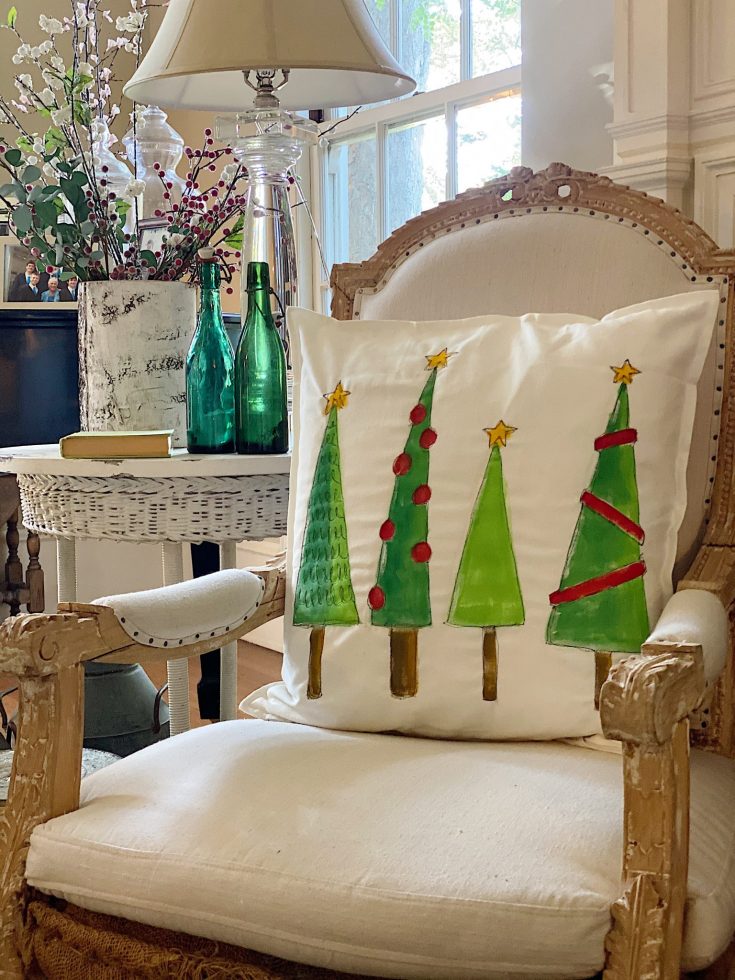
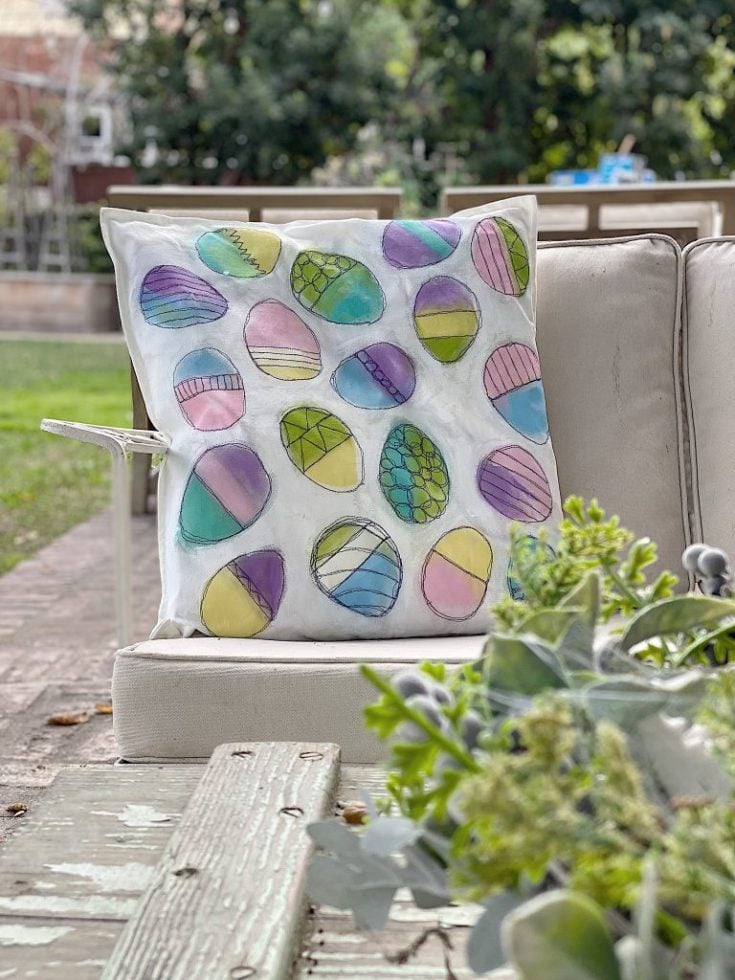
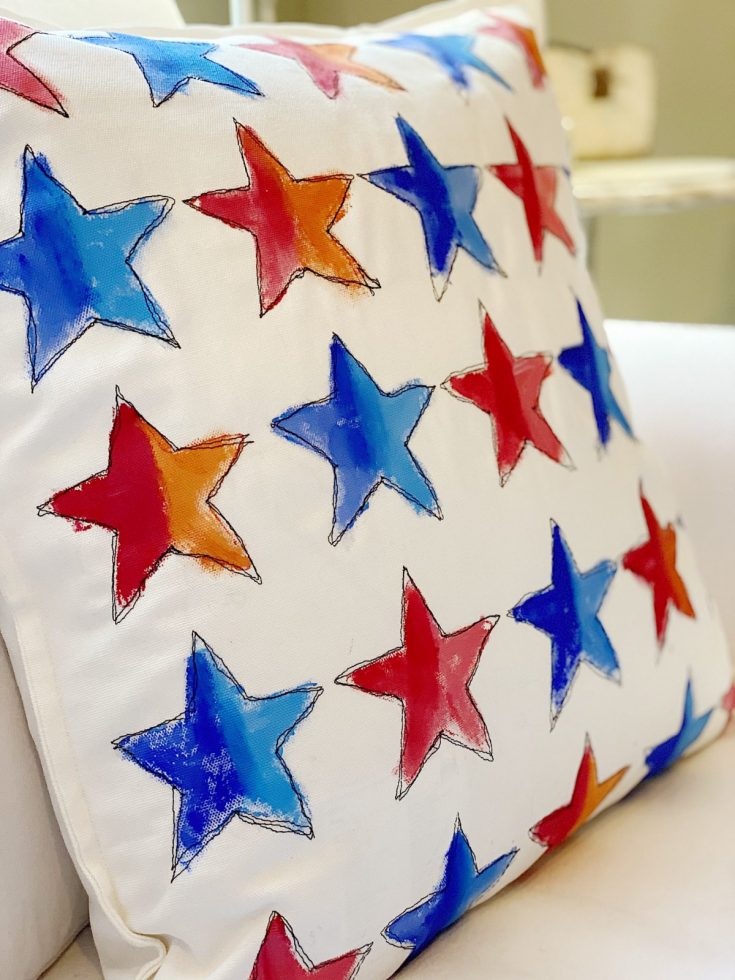
Look at all of the Free-Motion Embroidery DIY Pillows I Have Made
Just tap on any link to see the DIY for the pillow.


If you are enjoying my blog, you can sign up to receive my blog updates here.
.What is free motion embroidery?
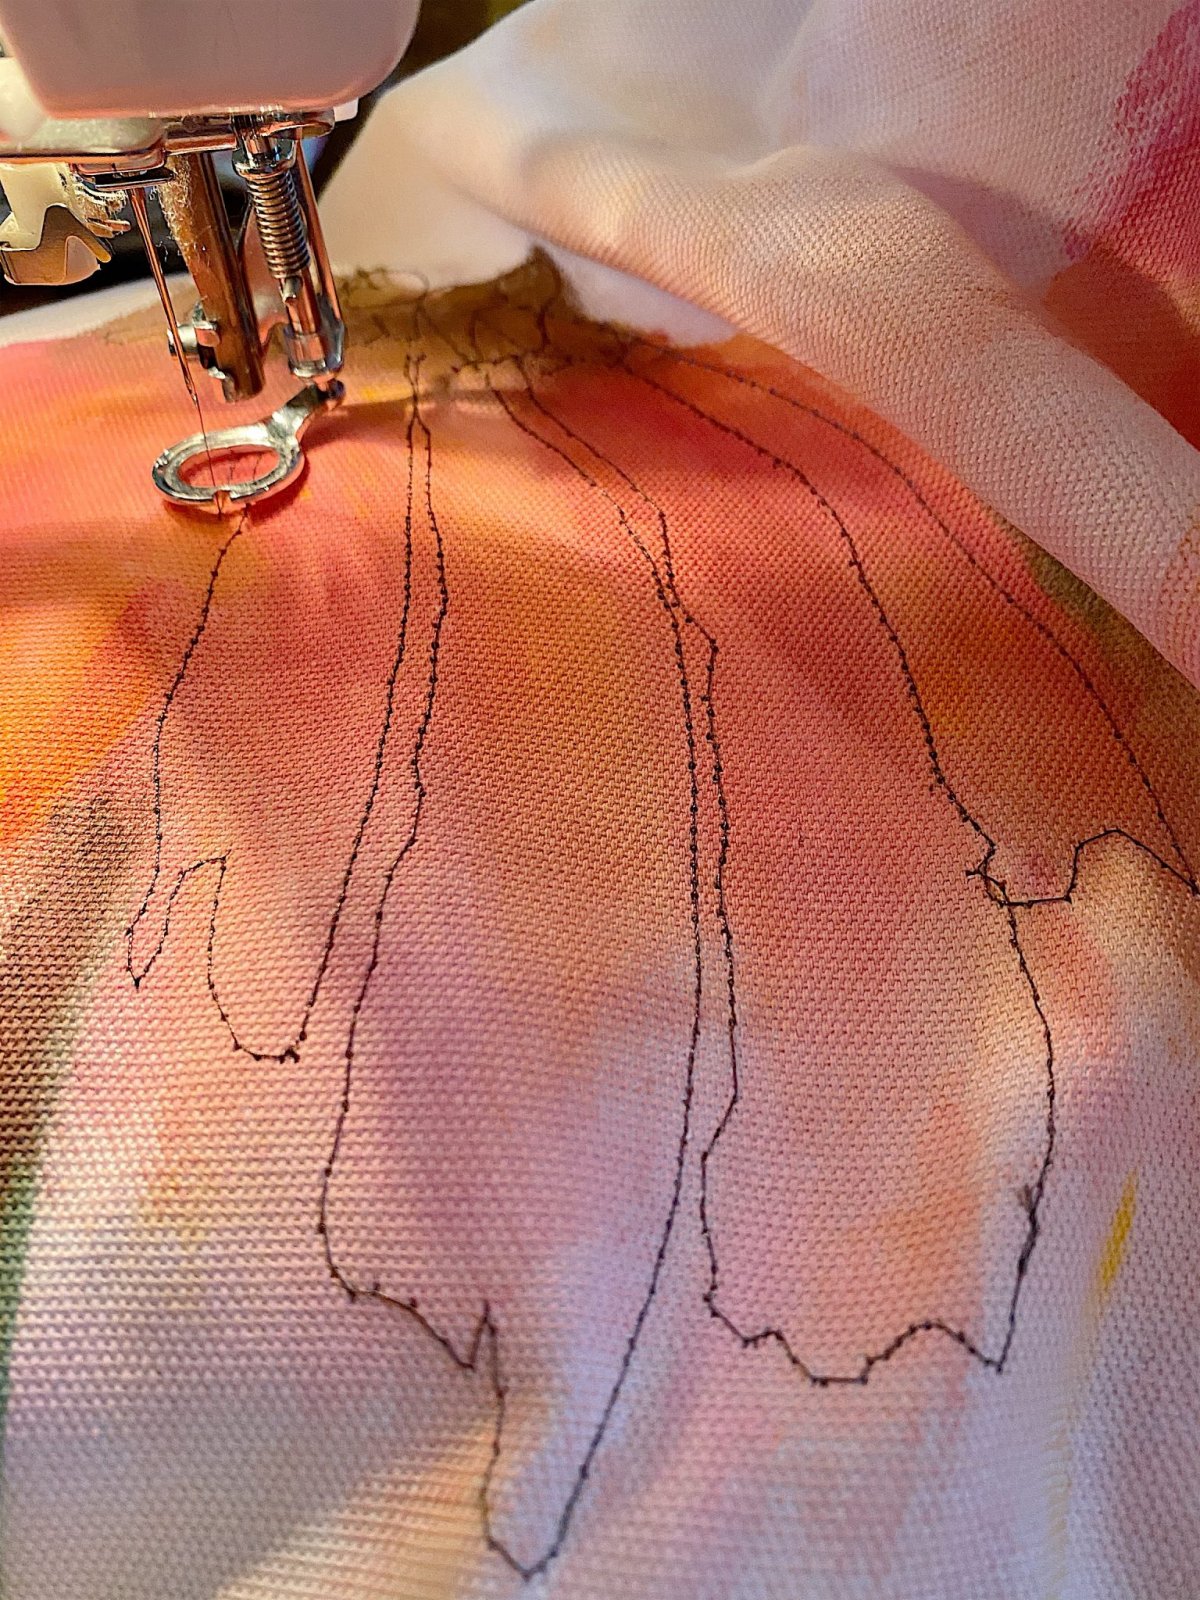
Free motion machine embroidery is a type of sewing that you do on a regular sewing machine but you can move the material in any direction while sewing it on your machine. Normally when you sew, the machine automatically moves the fabric forward. When you sew free motion embroidery, you get to move the fabric so you determine exactly where you want to sew. You can move sideways, forward, backward to create any shape you want. All you need is a quilting foot (or darning foot) and to lower the feed dogs on your sewing machine.
The free-motion quilting foot, sometimes called a darning foot, is designed so that the sewing machine needle passes through a small ring on the foot. Instead of hopping, these feet float over the fabric without providing pressure. The Foot releases the fabric when the needle is in the up position, allowing you to move the fabric freely.
This is a free-motion foot for your machine. This foot may vary based on tour type of machine but I linked a “universal” one. This means … you don’t need a special sewing machine to do this!
Why do you need to lower the “feed dogs” on your machine when stitching free-motion embroidery? Feed dogs are the little teeth on your sewing machine that feed your fabric evenly through the sewing machine. These are extremely important because they help us produce perfectly spaced, even stitches whenever we sew garments, piece quilts, or applique shapes on our machine. If you lower the feed dogs for free-motion embroidery, you can move the fabric freely.
For this DIY pillow, I lowered the feed dogs using a lever on my machine and it was easy. If you can’t find the feed dog lever on your machine you can leave the feed dogs up and use a Supreme Slider instead.
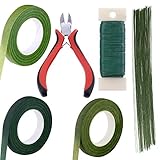
What You Need to Make a Free Motion Embroidery Pillow
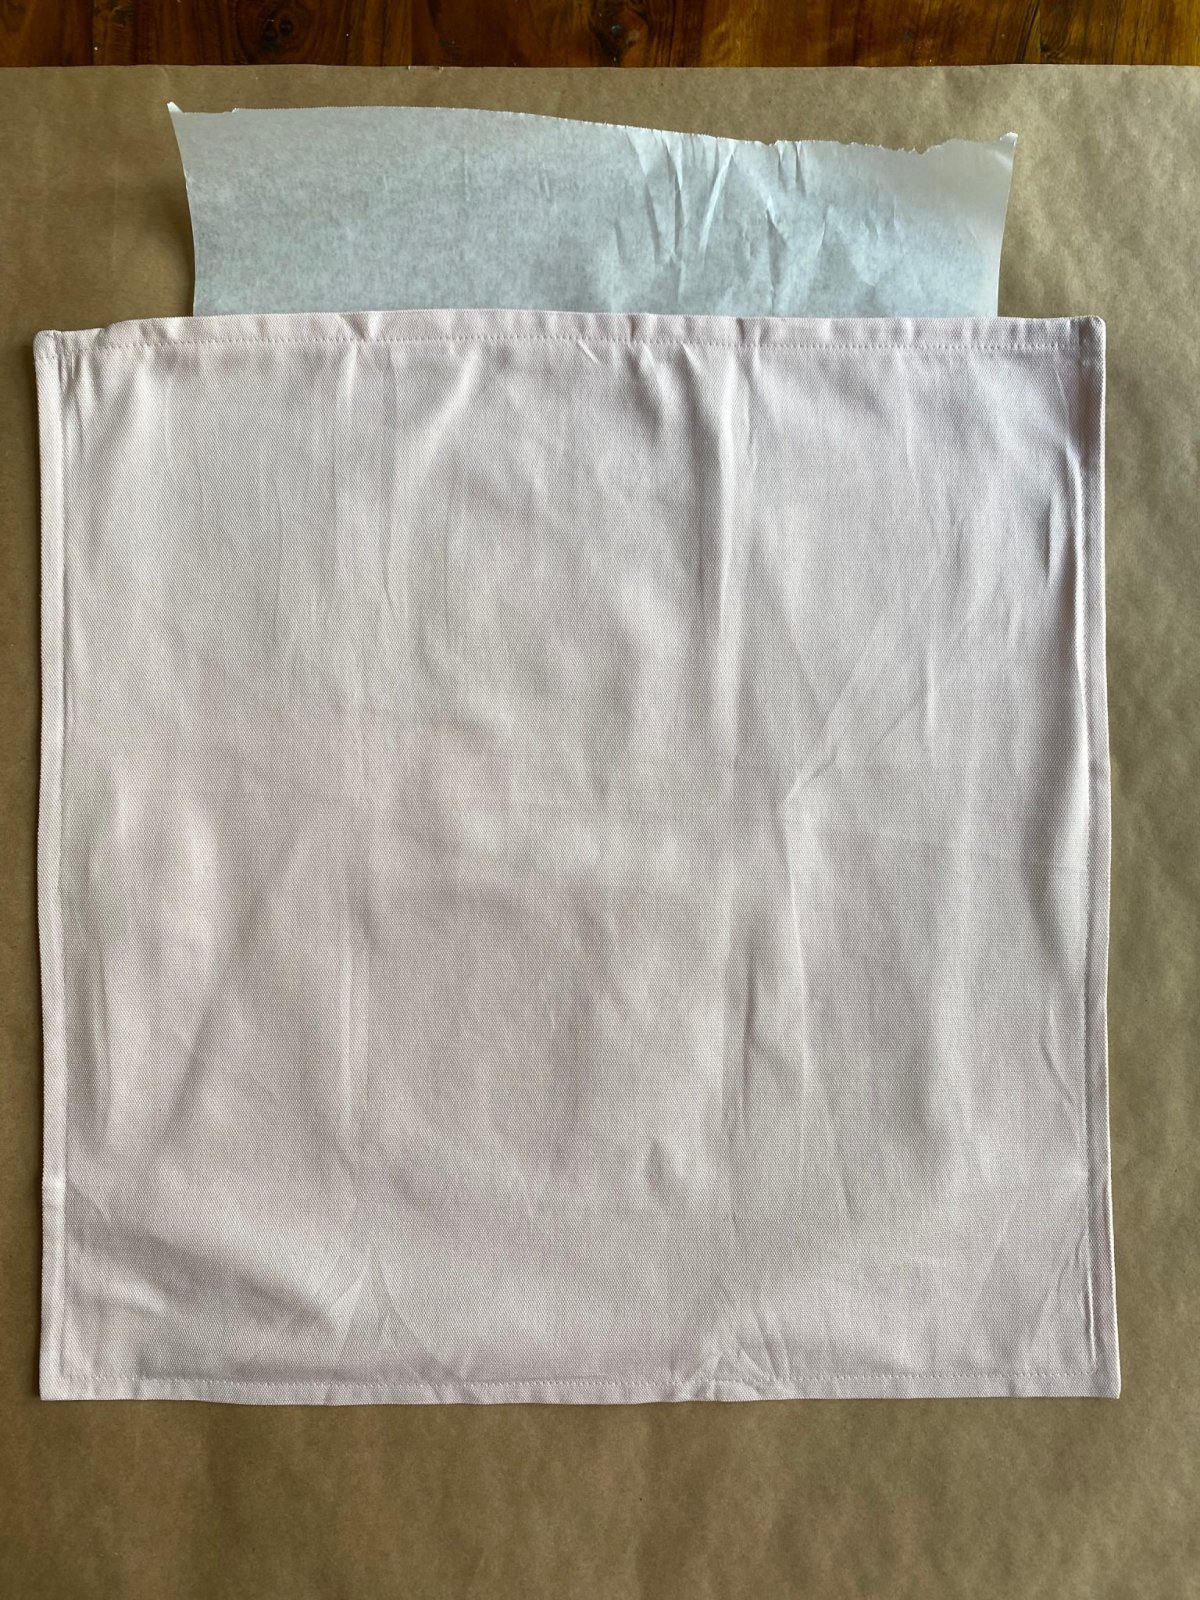
Pillow cover (I used the Gurli 20″ cover from Ikea)
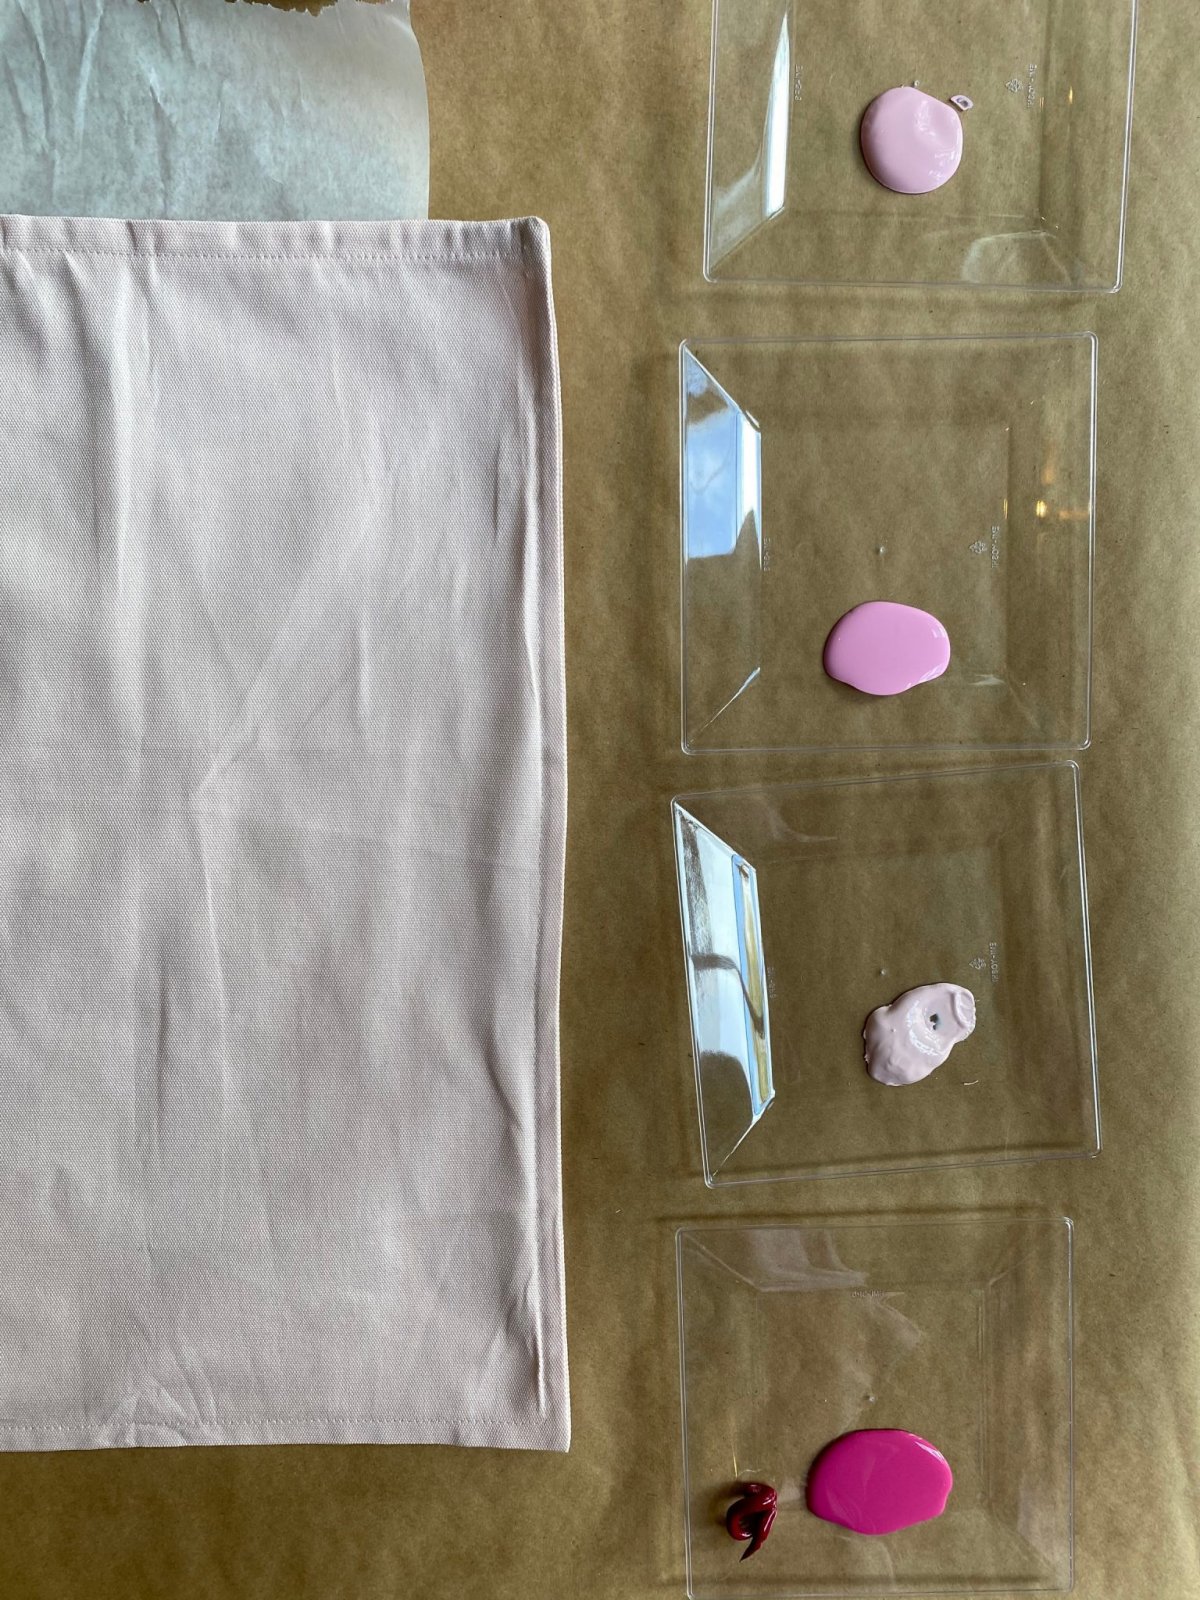
Acrylic paint and brush
Dark Embroidery thread (I used brown)
Parchment paper or cardboard to fit inside the pillow while painting.
Free motion quilting foot for your machine (varies by sewing machine brand)


How to Make a Free Motion Embroidery Stitch Pillow
To prevent the paint from leaking through place a piece of parchment paper or cardboard inside the pillow.
Select your design. You can use inspiration from craft paper (as seen below) or anywhere!

Choose your color palette and place paints on paper plates. Feel free to mix the colors as this will result in a more cohesive color palette.
Paint shapes on the pillow, not flowers. I like just painting shapes and not things.
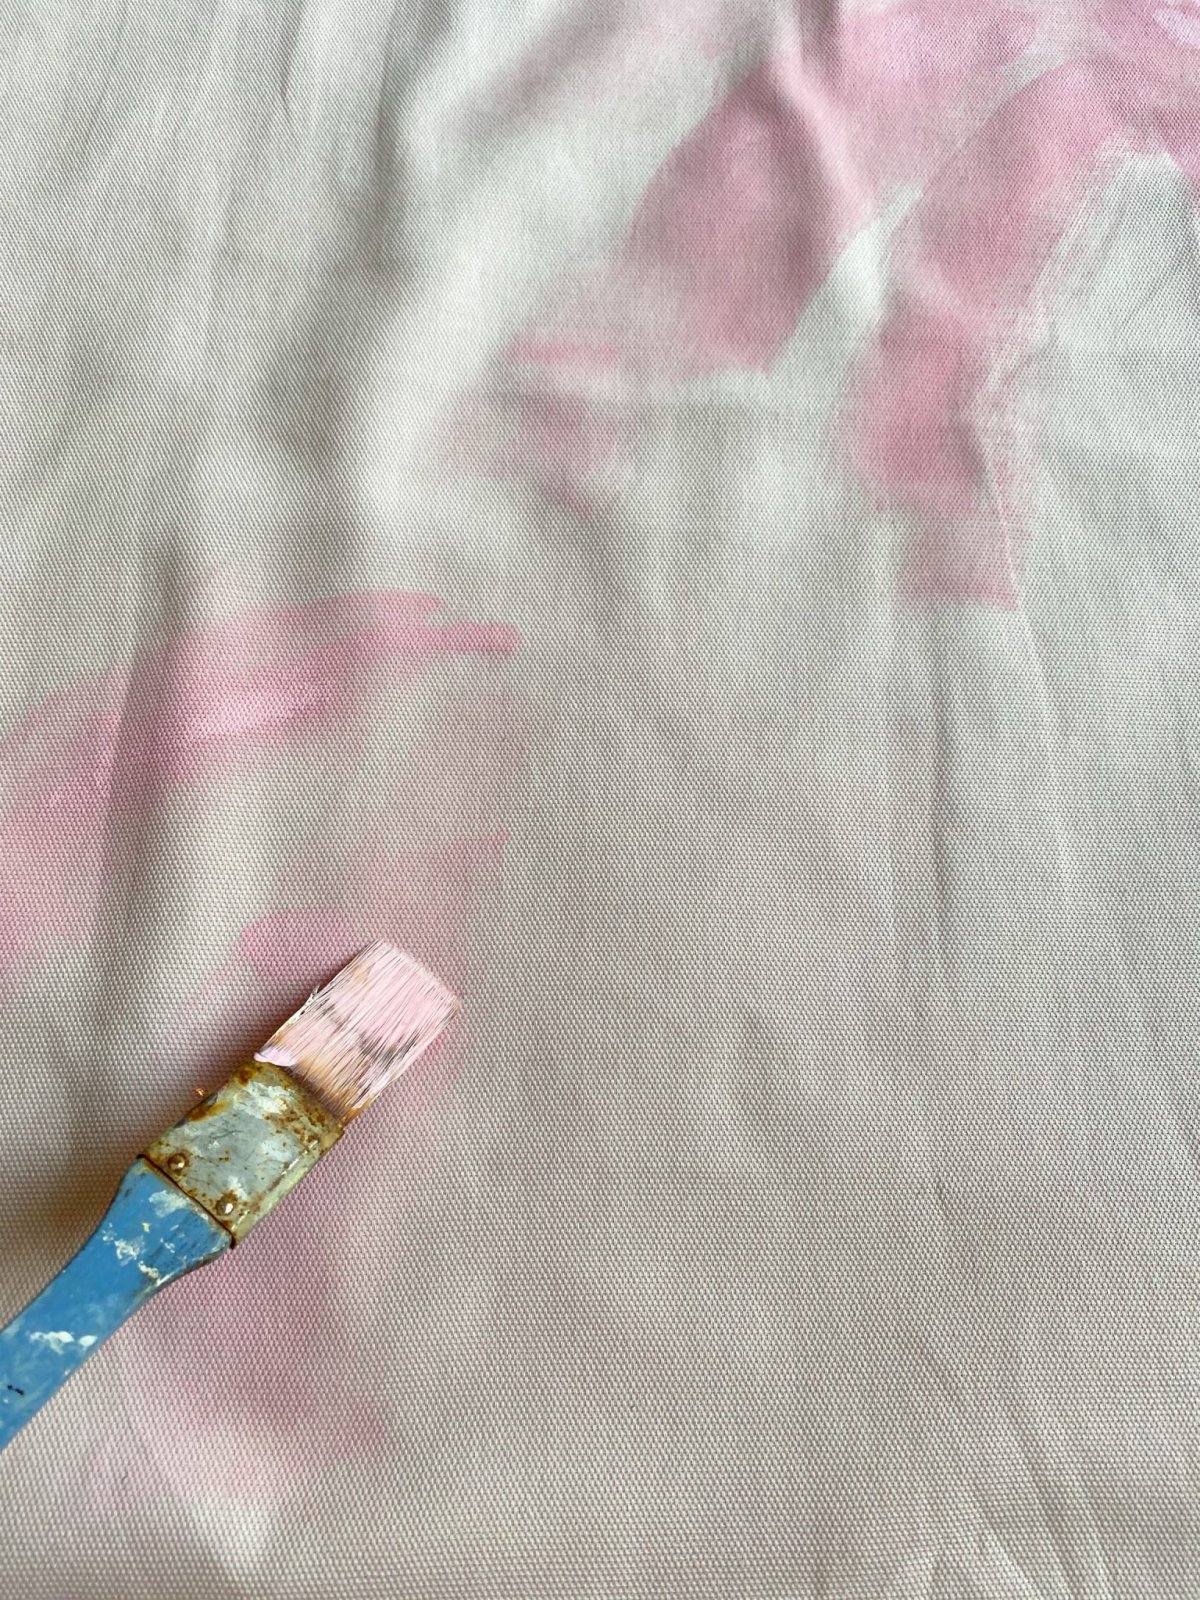
At this point, all you are trying to do is add color shapes, not specific flowers (the embroidery is for that).
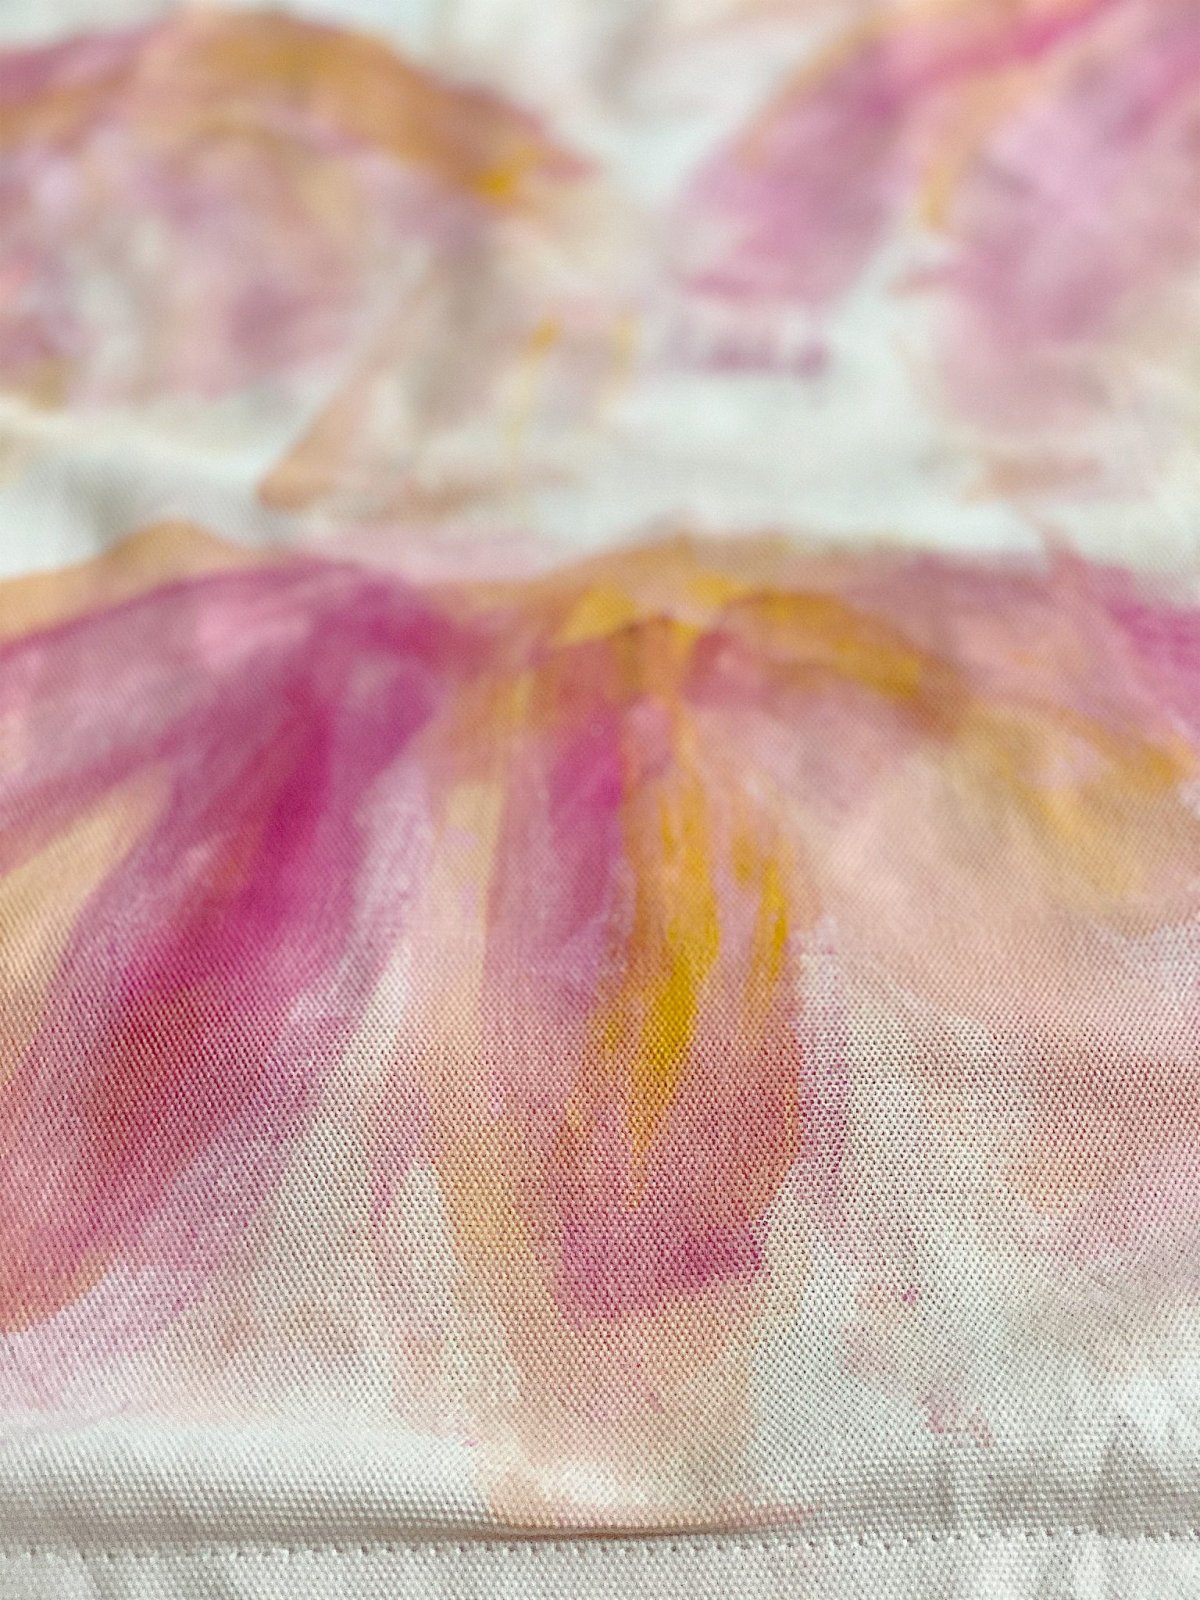
Also, vary the colors and don’t just use one color. I added some orange to depict a warmer color of sunlight.
Let the pillow dry overnight. Or if you are impatient like me, dry it with your hairdryer.
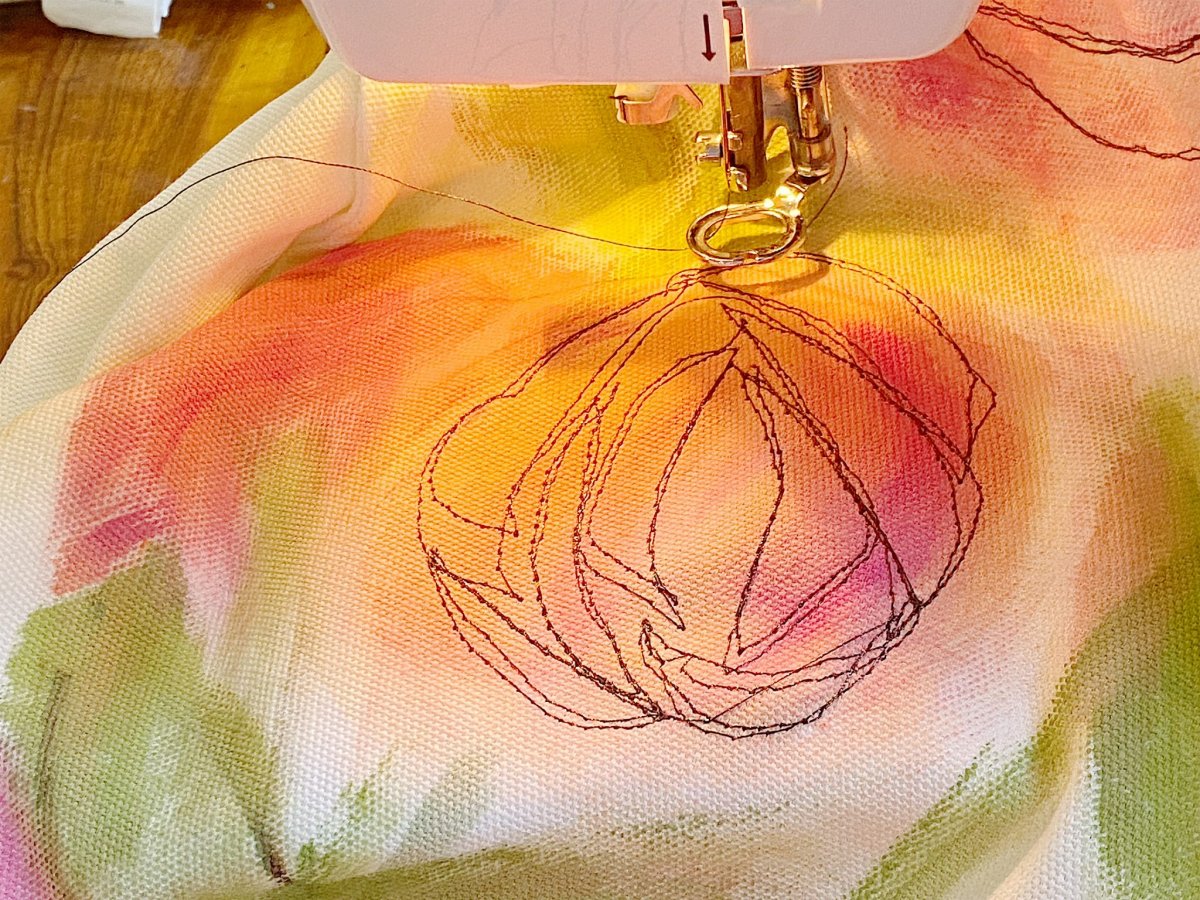
How to Sew Free Motion Embroidery
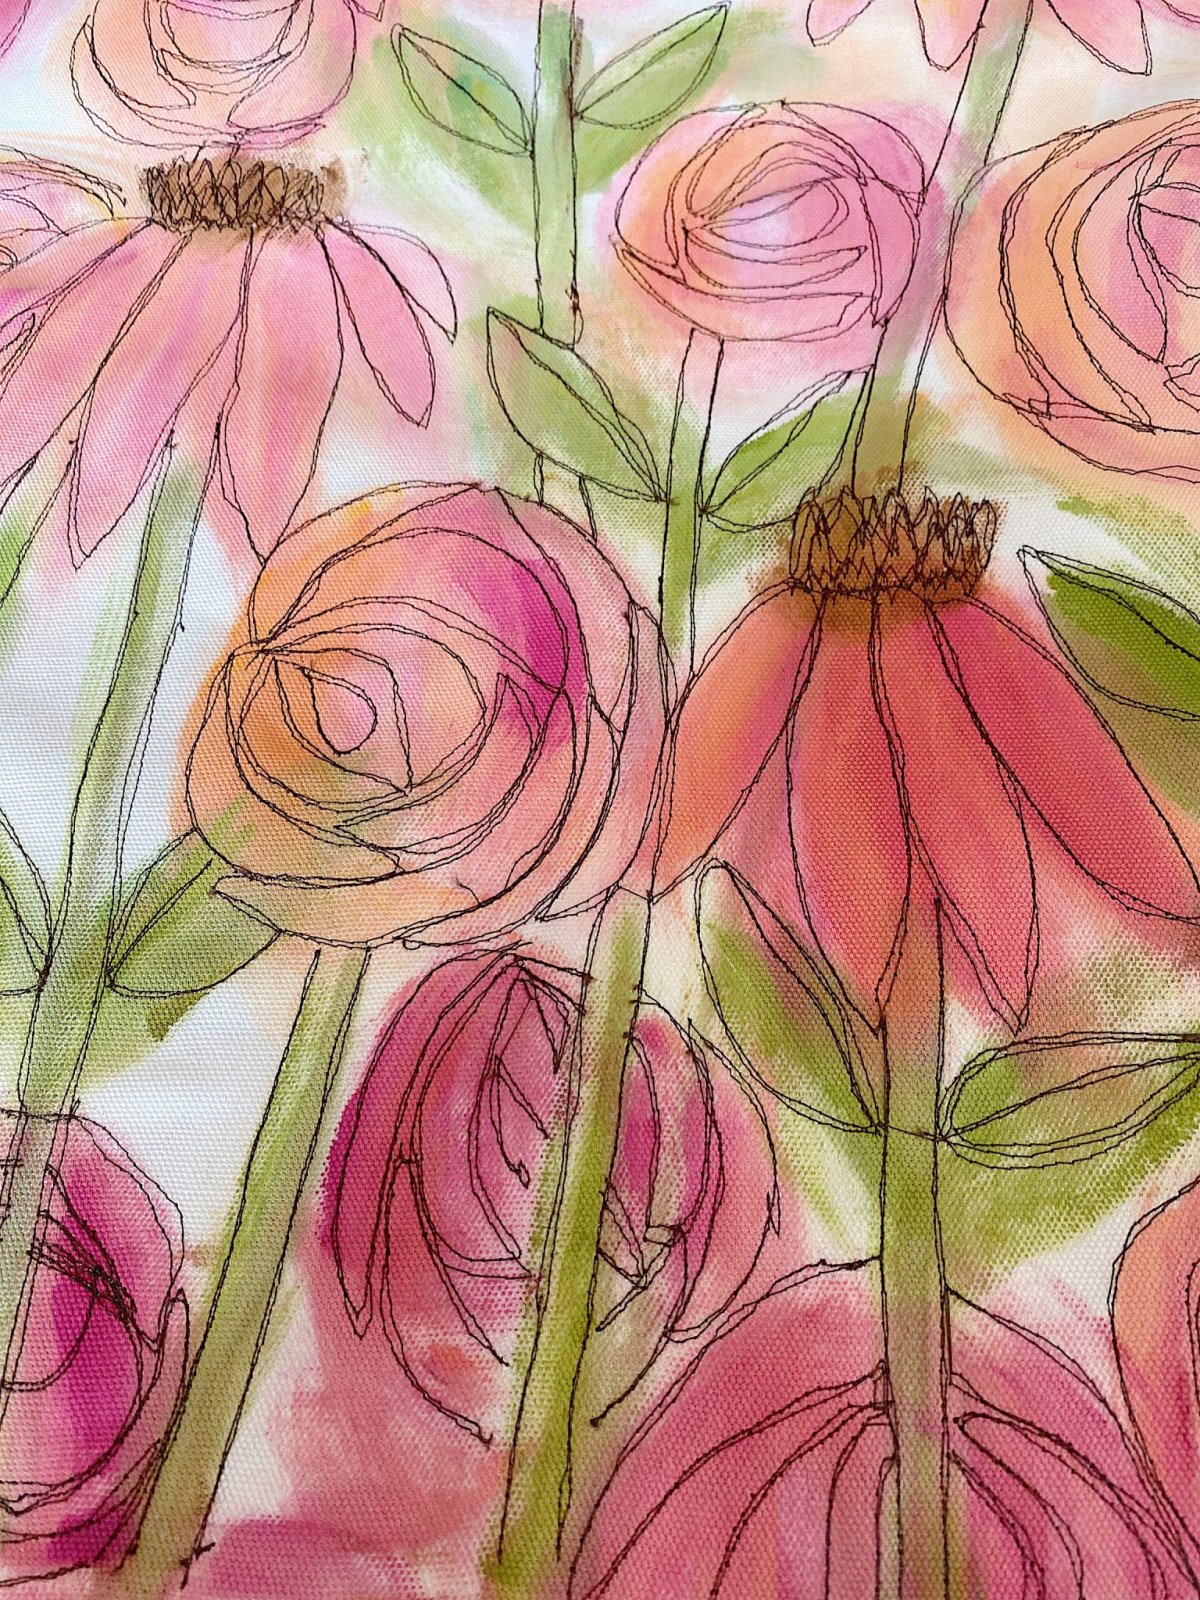
The best thing about free embroidery is that it doesn’t need to be perfect. I love how it looks when the two layers of stitches don’t match. And I love being able to push the fabric wherever I want it to go.
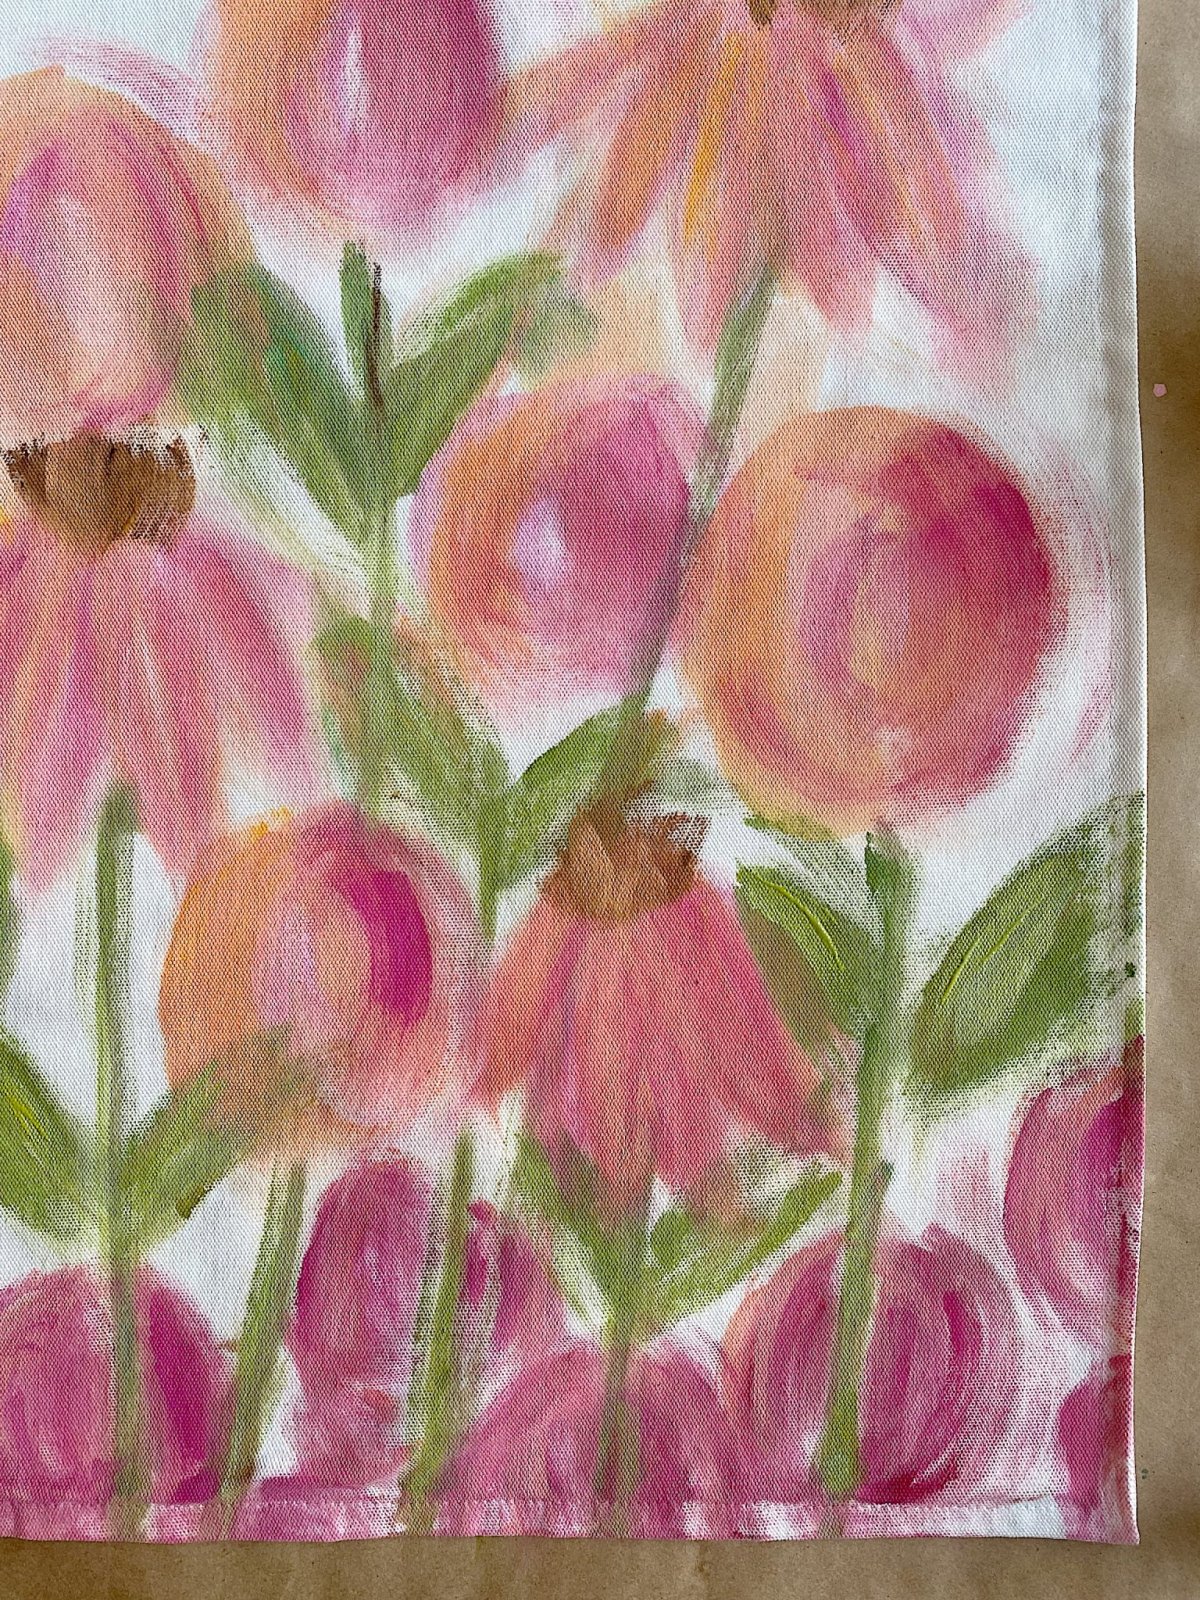
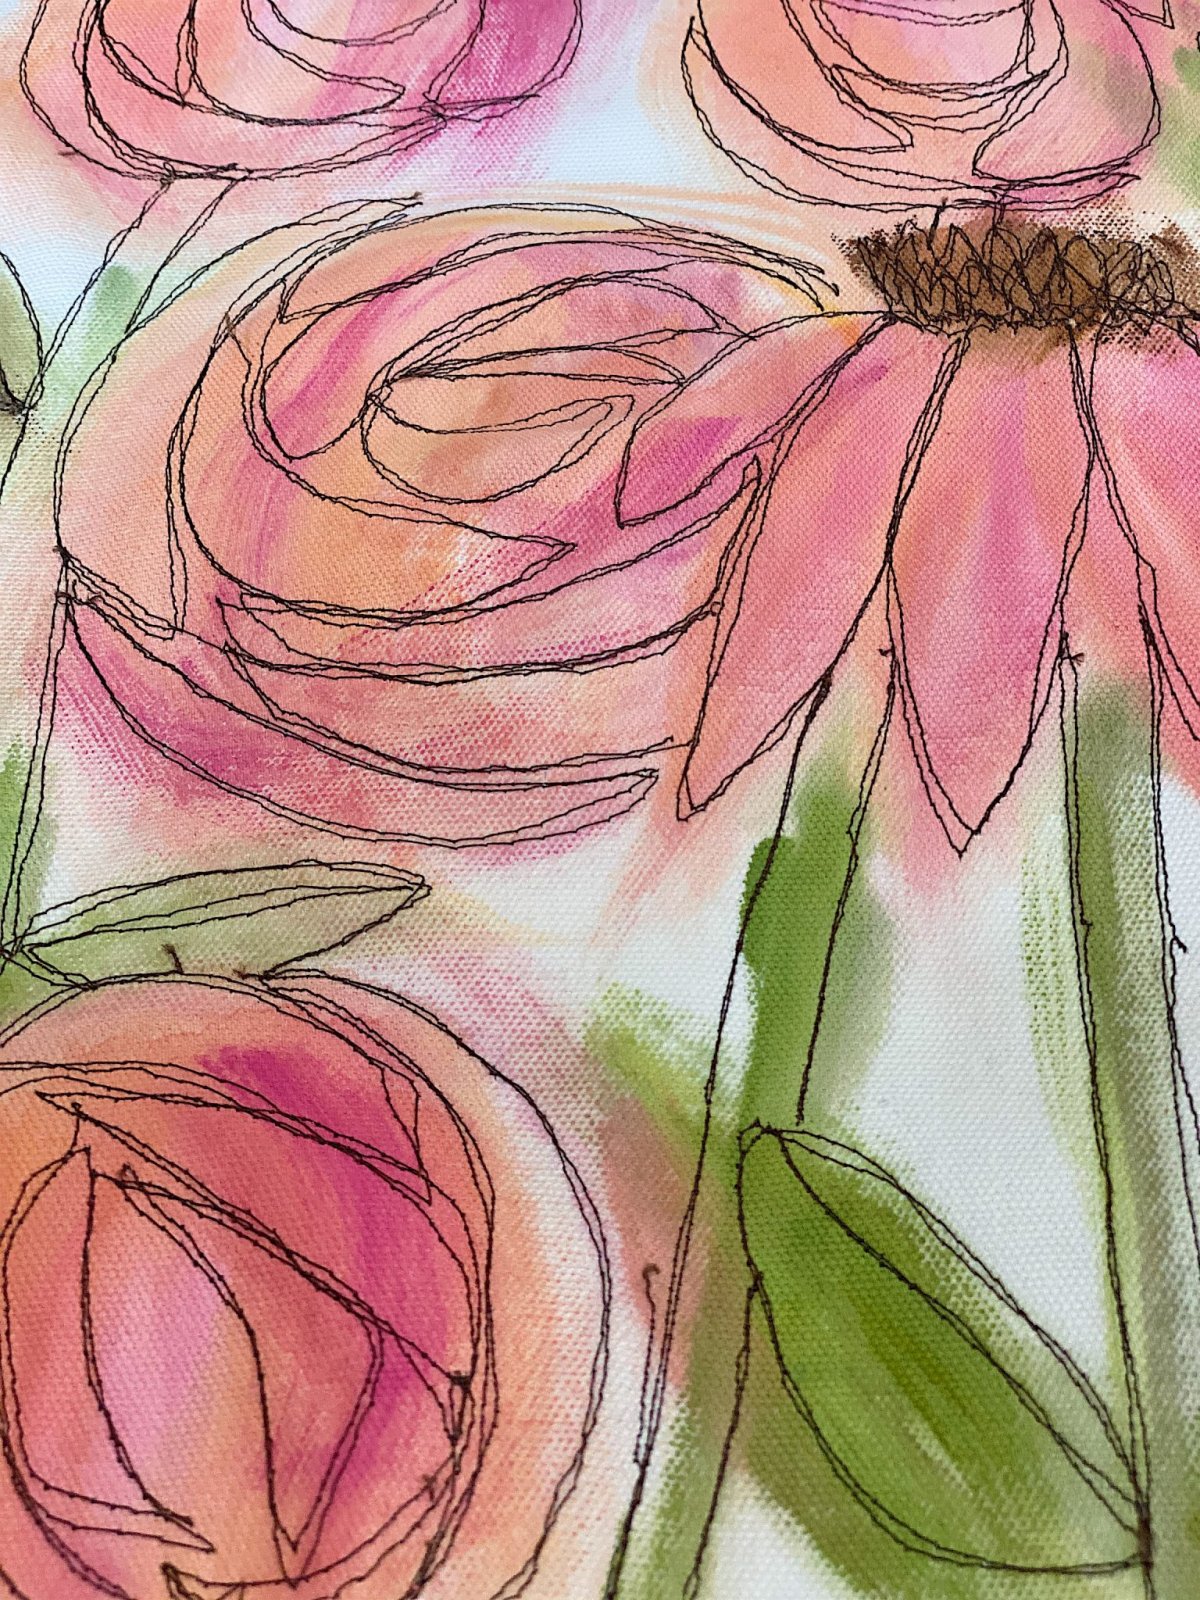
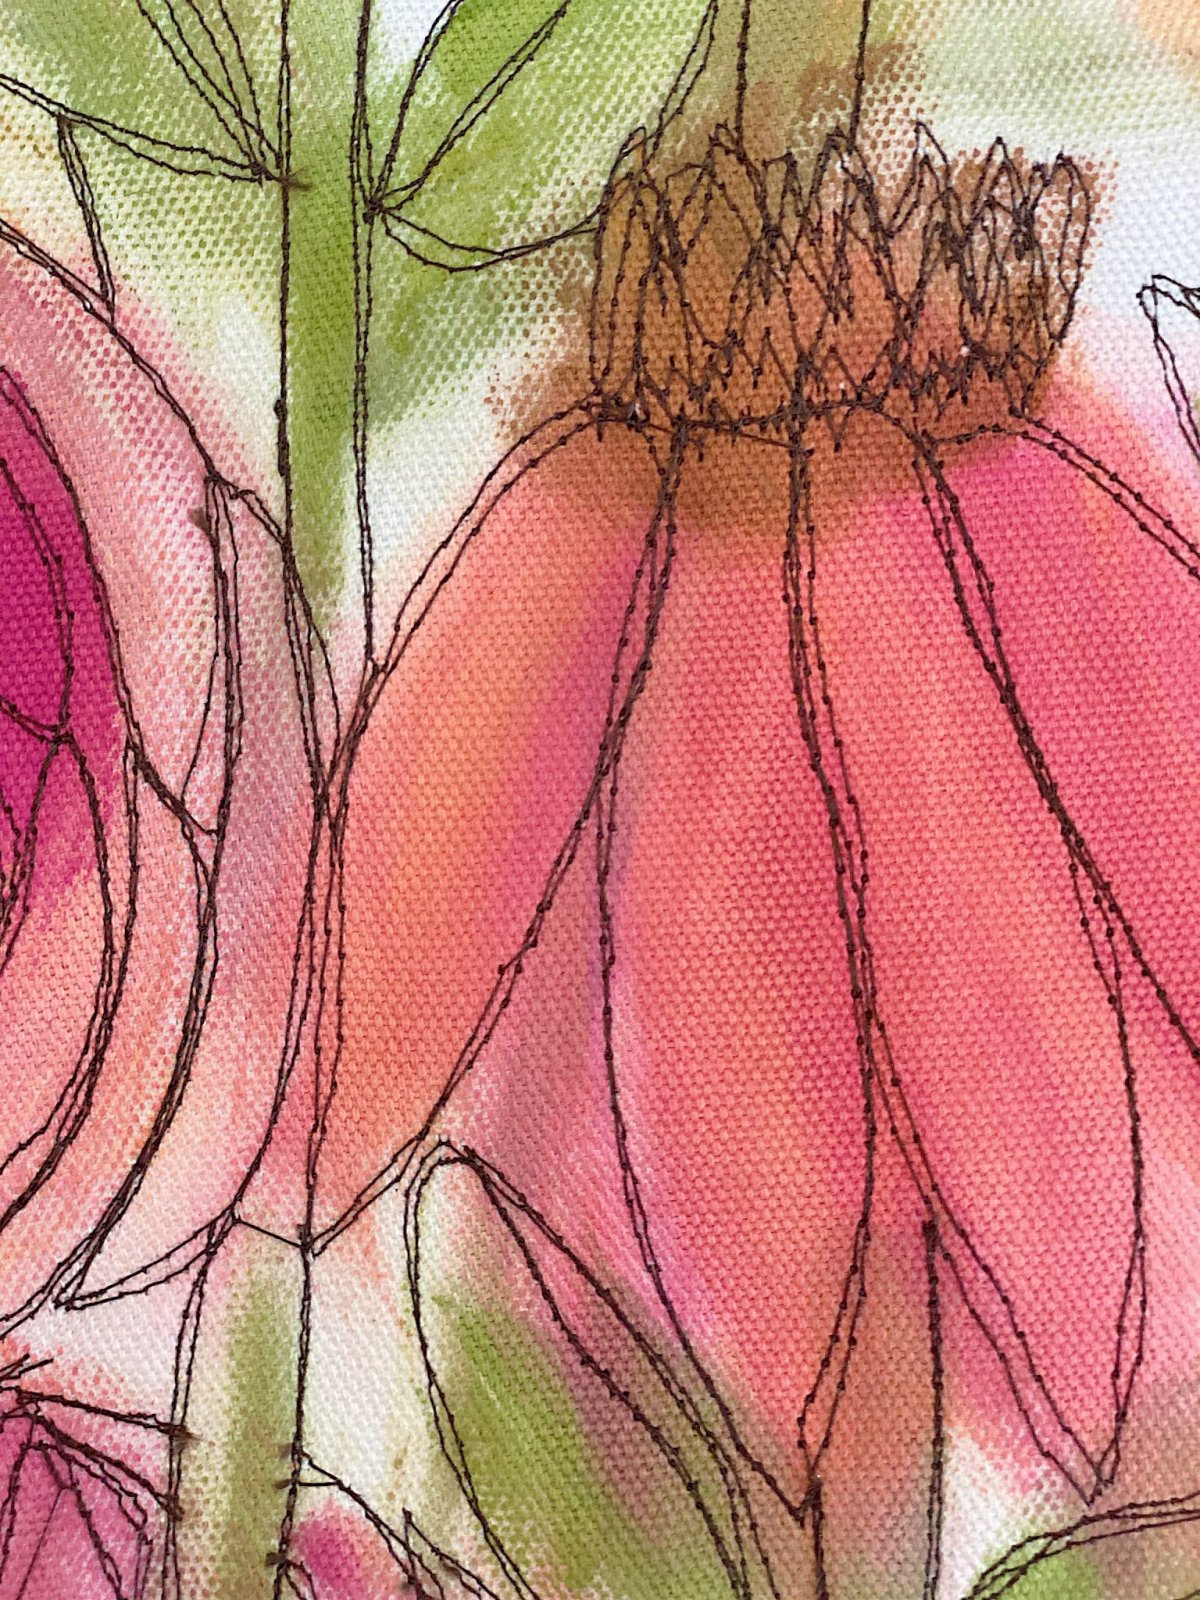
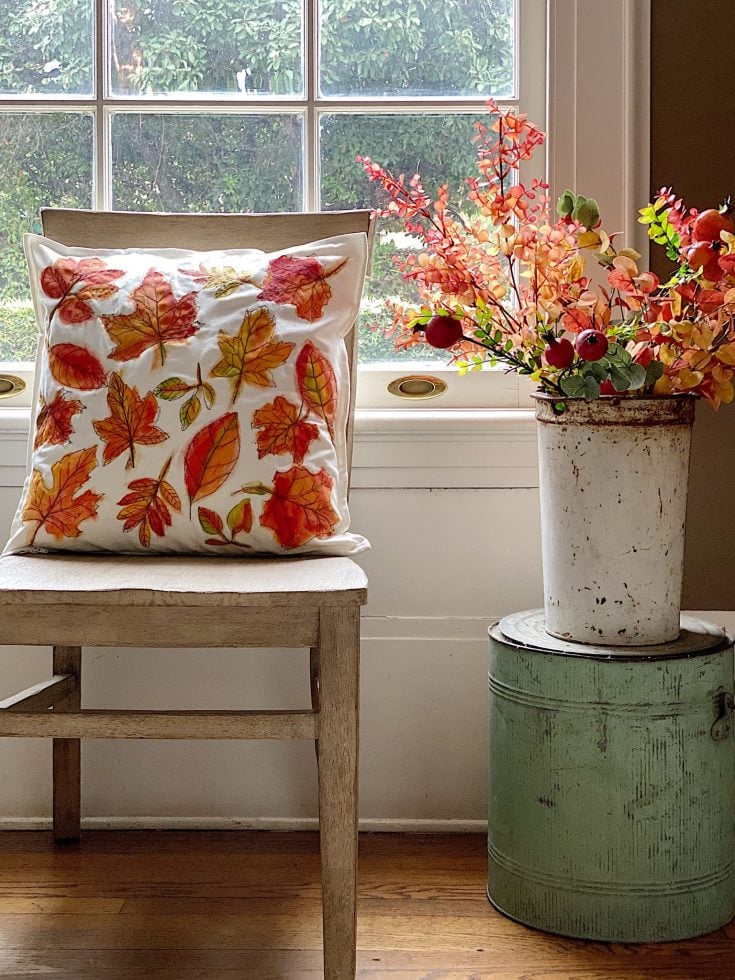
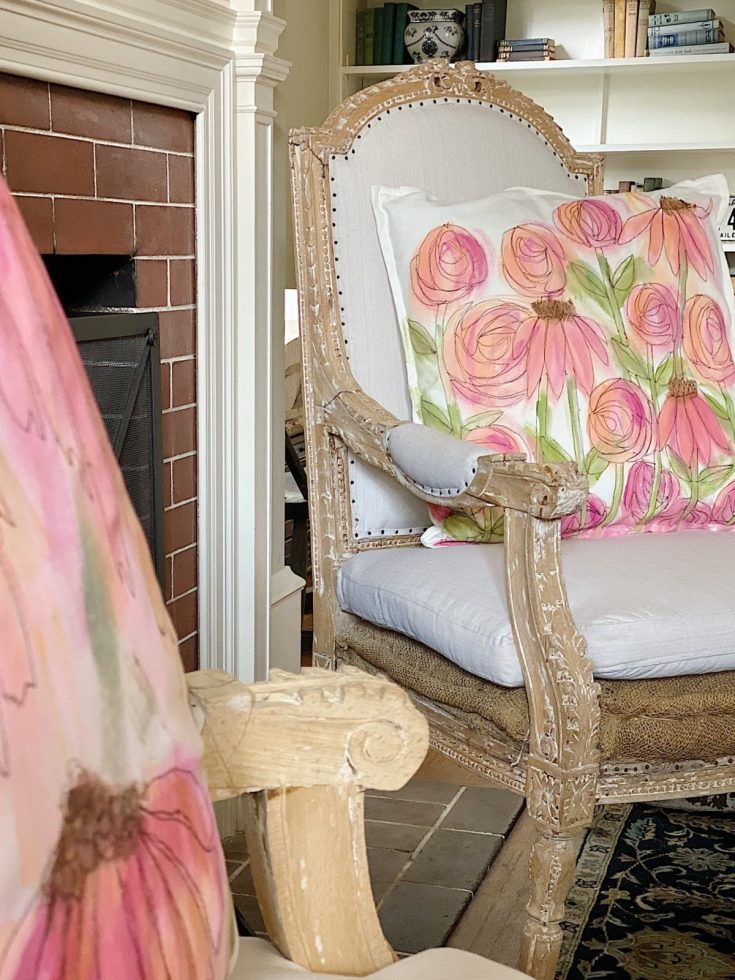
I loved making these roses. I had no pattern and all I did was sew a lot of crescent shapes. It was “free-handed” and not perfect. That is why I like it so much. As you can see, I roughly stitch over the round painted shape, not worrying if the shape was covered or if I stitched out of the lines.
As you can see here, the leaves I stitched barely conformed with the green painted “stems and leaves”. But I love that too!
This was so much fun.
Watch the video to see how to make this pillow.
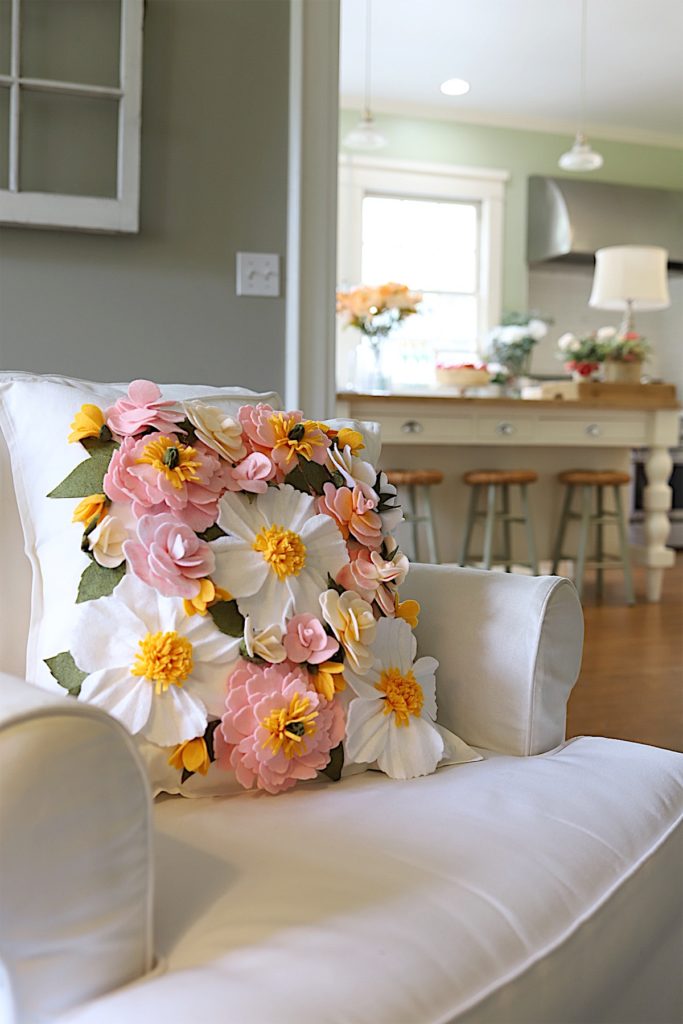
I love how the finished pillow looks in our living room.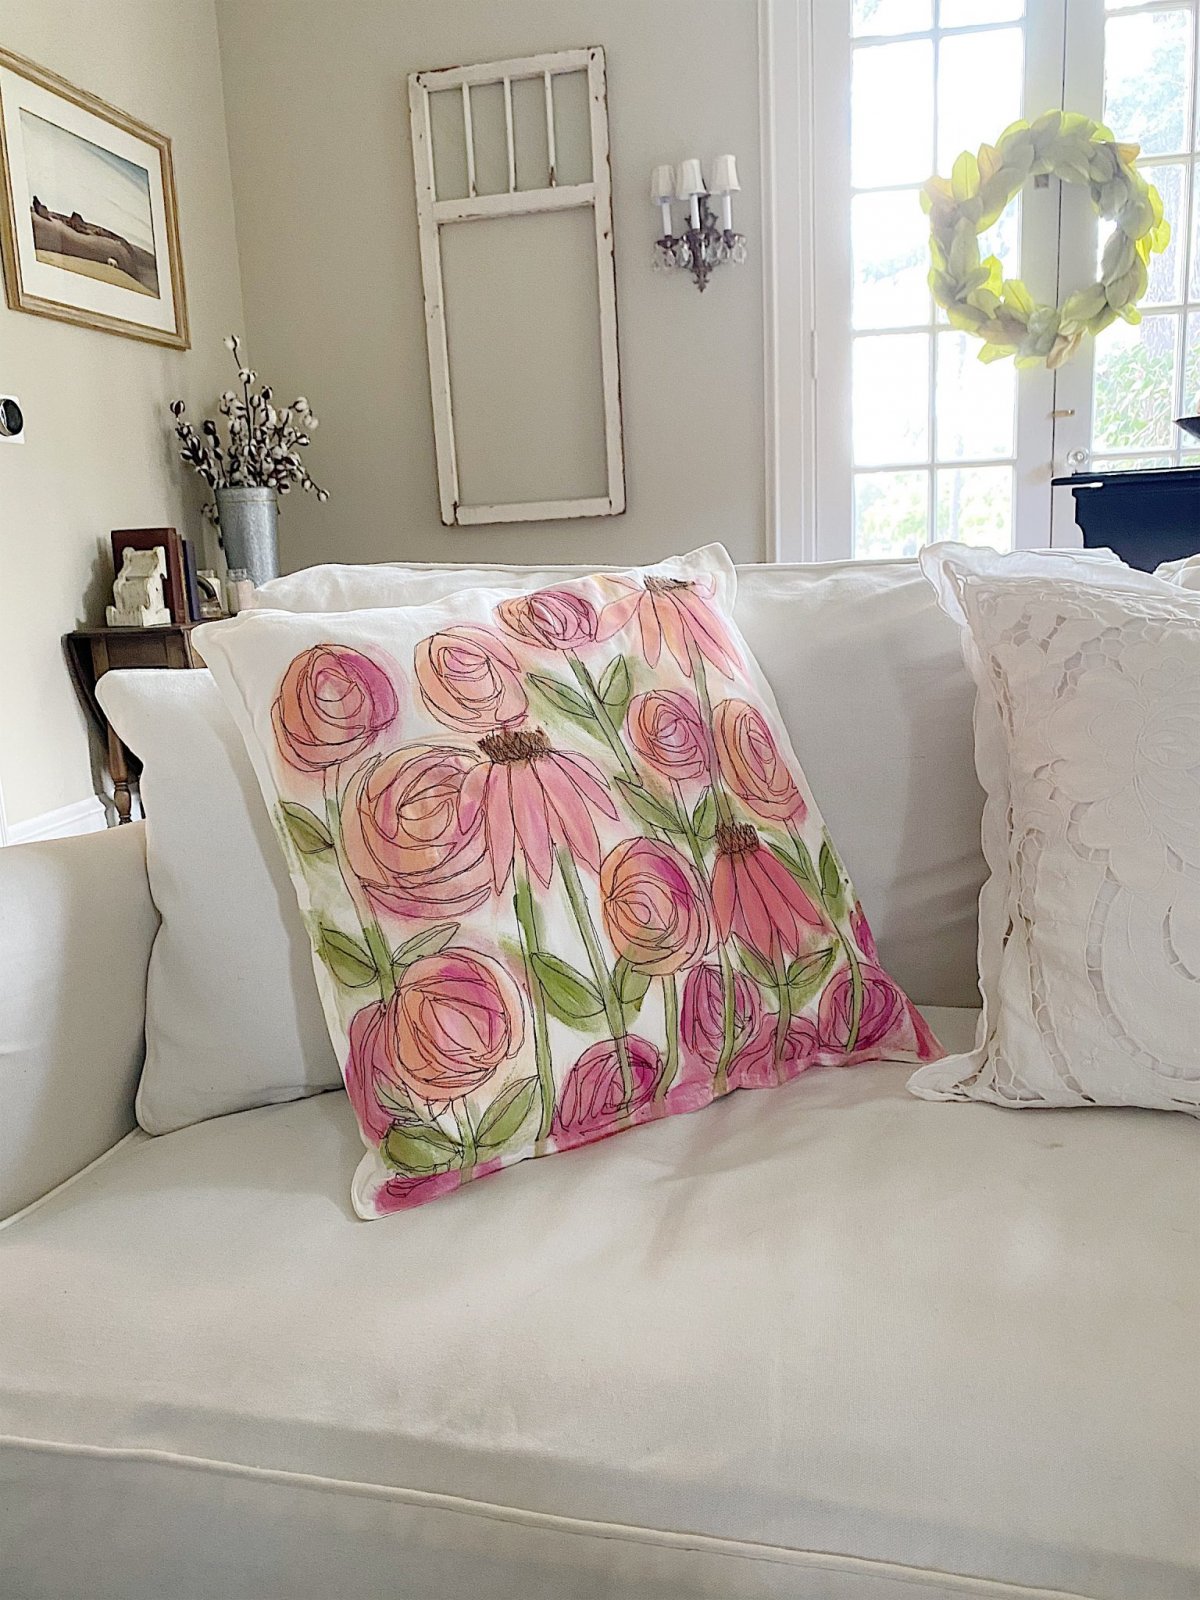
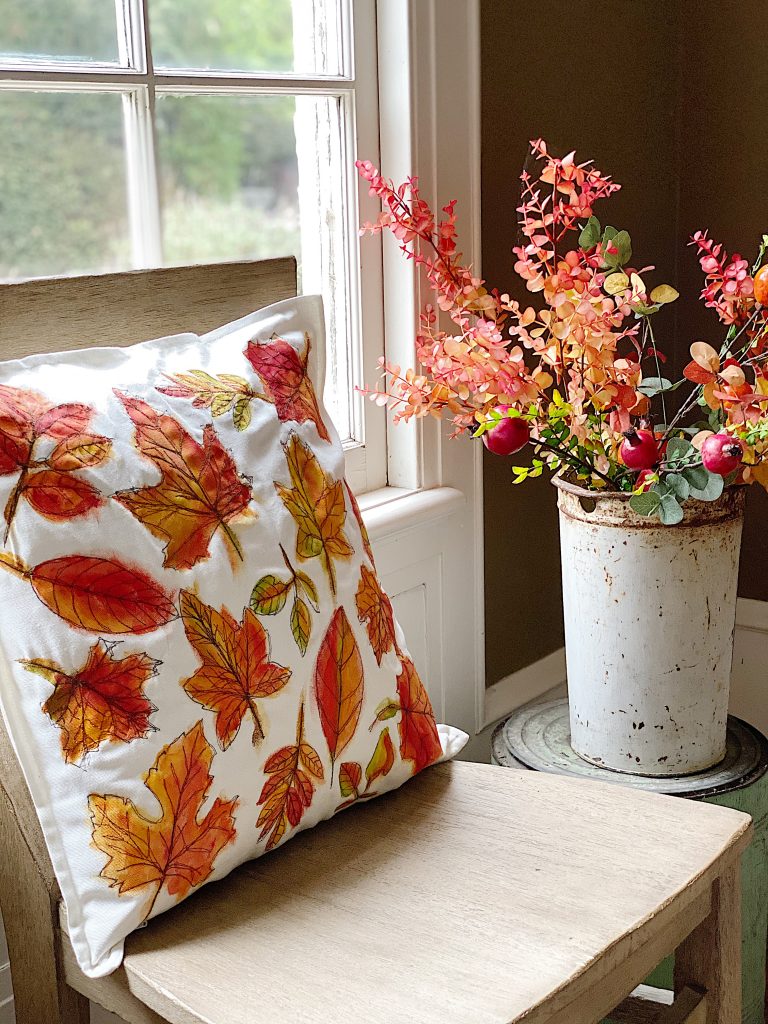
This is the other one I made.
I really love these colors. I hope I have inspired you to give this (or any of the other seven free-stitch embroidery pillows I have made) a try.
Links to the Items Shown in This Flower Pillow Post


Similar Posts

Pin the image below to your Craft or sewing boards on Pinterest (just click the Pin button in the top left corner). You can also follow along with me on Pinterest!
For more real-time updates, follow me on Instagram @My100YearOldHome


This is so interesting. I will share with my stitching friends. We meet weekly to crosstitch, needlepoint or do handwork. They are very creative and will enjoy seeing this method. Thank you for sharing.
What a fun craft project. I love that you get to paint and sew. My very first job in high school was at a fabric store as well! I loved it and learned so much from the talented people that would shop in our store. I made lots of prom dresses for friends, but making costumes was my favorite. I made all of my kids Halloween costumes when they were little and it was so much fun!
Is there anything you can’t do? These pillows are beautiful and if I saw them in a store, I’d expect to pay a fortune. I’m so thankful to have found your site. I don’t know what I did prior to finding it. Lol. I did get my materials to make your pinecones wreath this weekend. Will probably start it today.
Thank you for bringing so much into my life. I’m truly thankful. 😊
This looks like so much fun! Your pillows are absolutely gorgeous! I am going to have to give this a try! Thanks for this wonderful tutorial! 😊
Your pillows are simply gorgeous, Leslie! If I hadn’t gotten a “D” in Home Economics during the sewing portion of class, I’d attempt to make one! They are beautiful!
I love the flower pillows ! I am going to have to try this. I love all your DIY stuff…..My mother taught my sisters and I to sew when we were younger. I still love to sew and love to craft and make unique things that everyone else doesn’t have in their homes. You are very talented and I love that you share it with us.
Absolutely beautiful! Your talents abound!! ❤️ I’m a pretty novice sewer, and I have a new machine I’m trying to figure out! Will definitely have to give this a try! Thank you for sharing this wonderful project!
These are gorgeous! I do not have a sewing machine, but I’m wondering if one of those little handheld sewing machines would work for this project?
Oh this is so amazing Leslie!
LOVE HOW THESE PILLOWS LOOK! WHAT FUN TO BE ABLE TO USE YOUR PAINTING AND SEWING EXPERIENCE! I MAY NEED TO GIVE THIS A TRY – I HAVE ALSO SEWN SINCE I WAS YOUNG AND AM ALWAYS LOOKING FOR NEW INSPIRATION. BEAUTIFUL!
How are you not sewing through the front and back of the pillow cover? How are you able to insert the pillow form?
The pillows are beautiful! A unique idea that looks do-able. Thank you for the great idea.
LOVE LOVE LOVE this soooooo much & I’m definitely trying!!!! Thanks for this awesome tutorial!!!!
How did I miss this post?? I am obsessed with pillows and this is definitely a DIY that I have to try!! Thank you for sharing this idea, I can’t wait to try this!!
How did I miss this post?? I am obsessed with pillows and this is definitely a DIY that I have to try!! LOVE This!!!!!
Thank you for sharing this idea, I can’t wait to try this!!
I can’t wait for you to try as well, Thank you!
Slid..I love this. Wha ti am not understanding is your reference to craft paper? What is that ? (The drawing you showed of flowers.) Where do you find something like that?
We need to see your wedding dress!!😉
Hahah! Now that would be quite the blog!
Oh my goodness! I missed this post! These pillows are stunning and I’m all about these!!! Thank you so much! 🌸
Thank you so much, Rikki!
When I was reading it, I was having a lot of fun with it. Even I’ve enjoyed reading a few more posts. I appreciate your time and effort in putting this article together. I noticed you can spend a lot of time reading comments and replying to comments. You care a lot more. I have seen all your posts so far. It was as successful as the previous posts.
Thank you for following along, Toha! I am so glad you are enjoying.
I love these pillows. I may try this soon. Have to get up the courage. I love your crafting ideas so much! You a e great taste!!