DIY – Making My Favorite Placemats
Have you ever found an item that you love so much, that if you could, you would order every color available? That’s how I feel about these Pier 1 burlap placemats.
Sadly, they aren’t available in any other color or fabric. Ugh! But I solved that problem. I made my own! Today I am going to share with you how to make your own Pier 1 pleated placemats.
Here is what you need.
SUPPLIES
30 yards of 2″ trim (with a finished edge on both sides)
1 1/2 yards heavy cotton fabric (try to find one that doesn’t fray easily)
Pins, thread
Scissors or Fiskars Fabric Circle Cutter
12″ circle pattern
Before I started making the placemat, I did some online shopping for the 2″ wide trim. I knew I had to use trim for the ruffle because I there was no way I was going to hem thirty yards of cut fabric! Originally I was going to use burlap ribbon as there are a lot of 2″ options online. But I found this 2″ black twill at a trim store in Los Angeles and I paid less than $1 a yard.
I bought the cotton twill fabric at Joanne’s. I picked it because it didn’t ravel at all and that is important. My total costs for the ten placemats was about $40.00 or $4.00 a piece. Since these placemats are available only in the brown burlap, I am going to make some more.
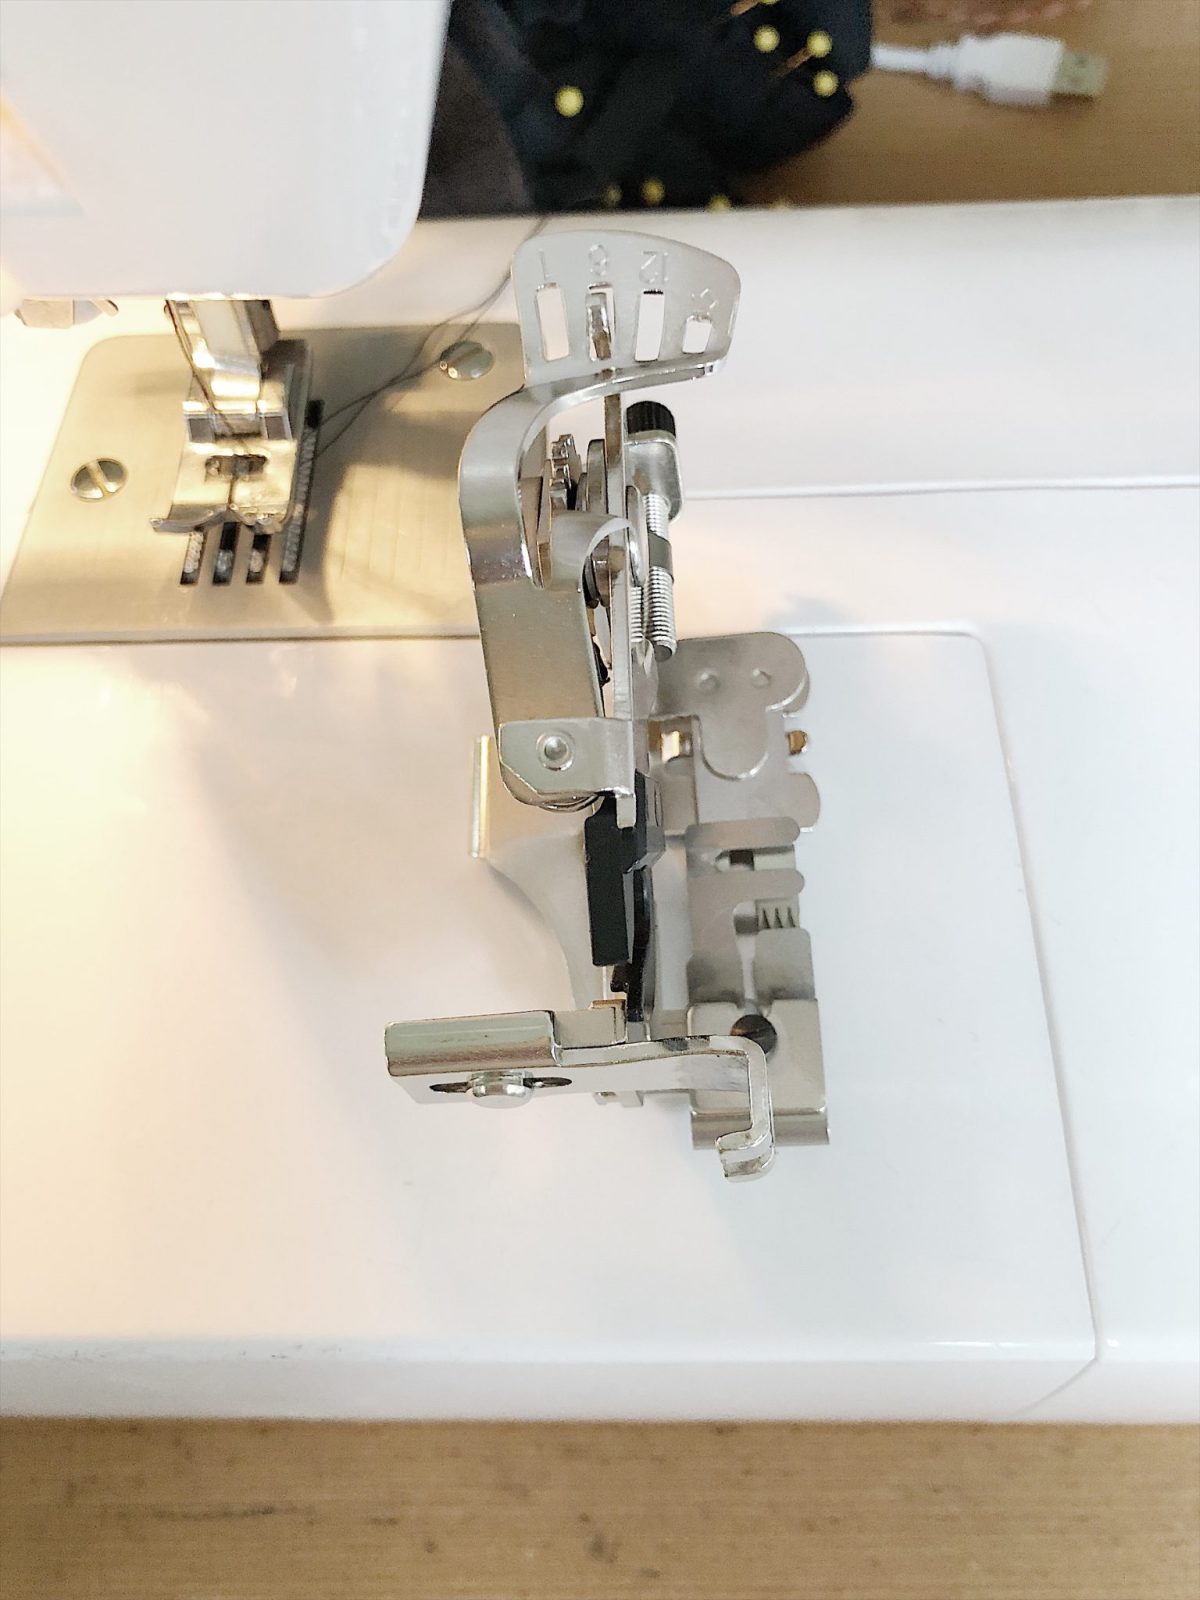
At first, I thought I was brilliant to buy a ruffler attachment for my sewing machine. But the attachment only makes a knife pleat (vs. the box pleat I wanted.) I spent about three hours trying to get a perfect pleated ruffle and it just didn’t happen. So I decided to make the ruffle myself.
I copied the ruffle exactly as it was on the Pier 1 placemat. I made a measurement guide by cutting a 5/8″ piece from an index card. And then I started pleating.
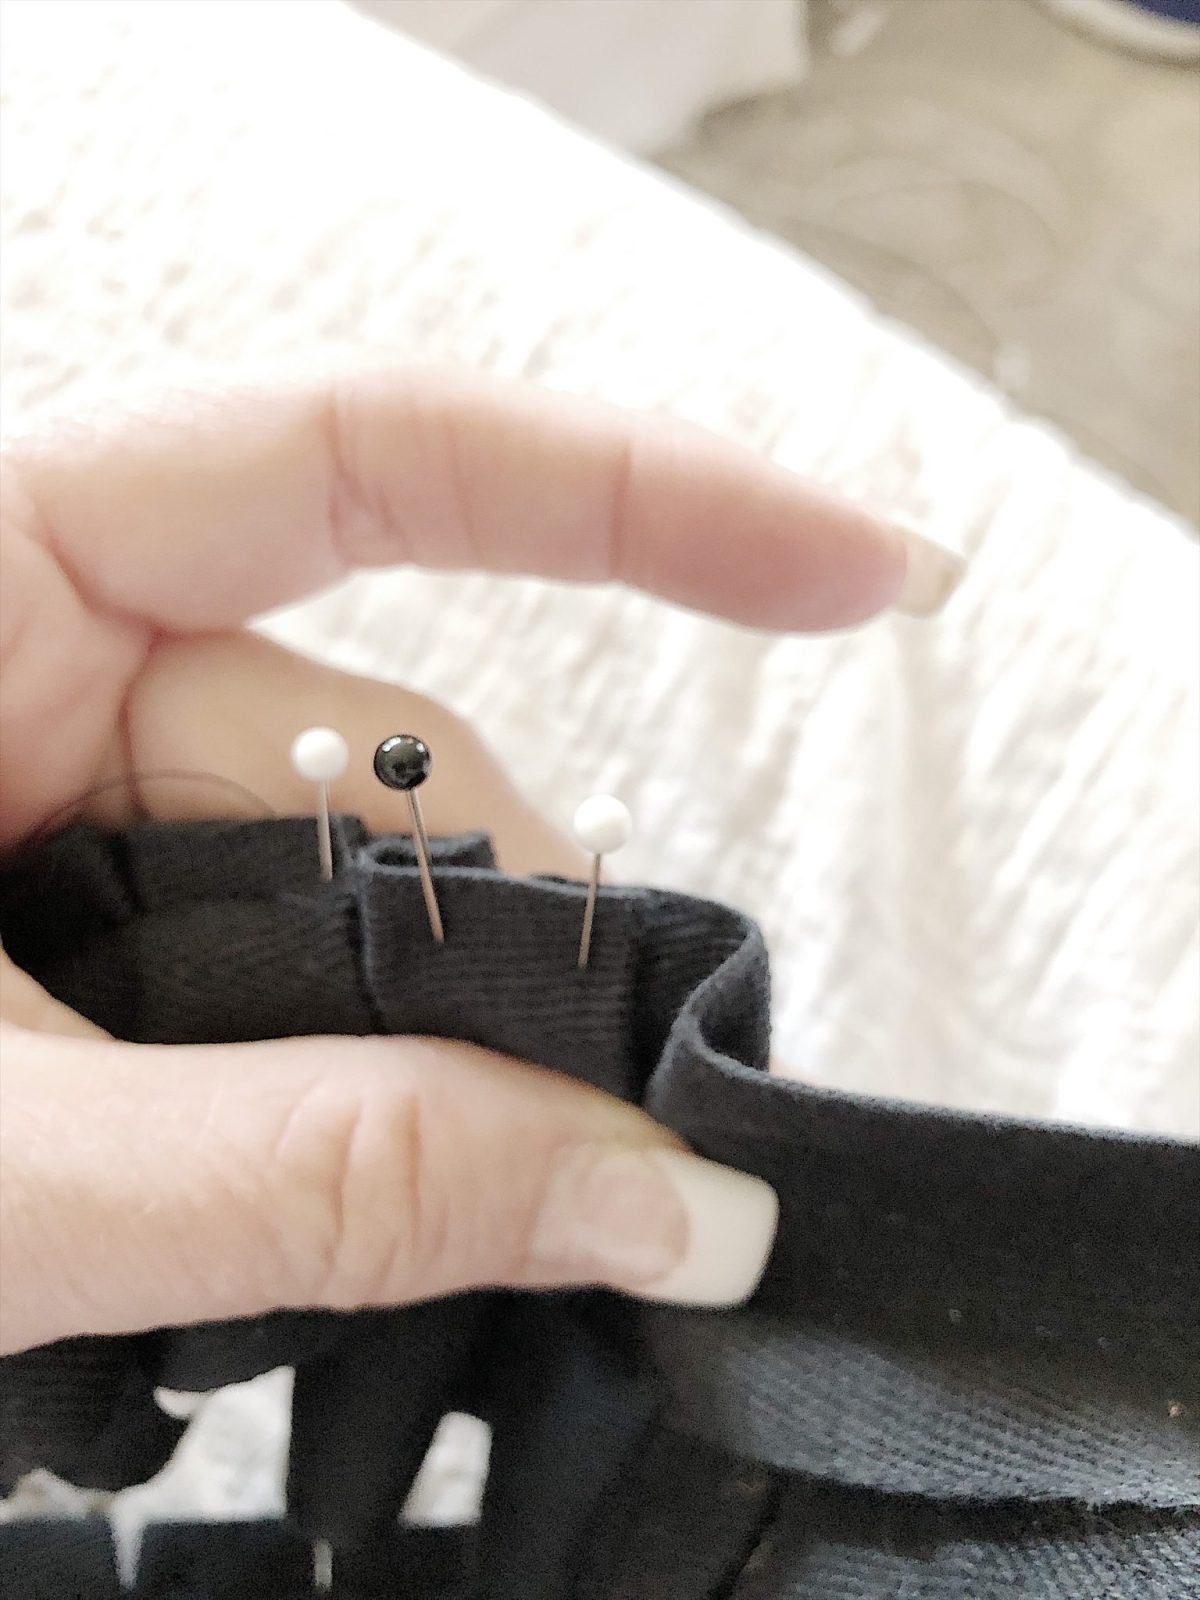
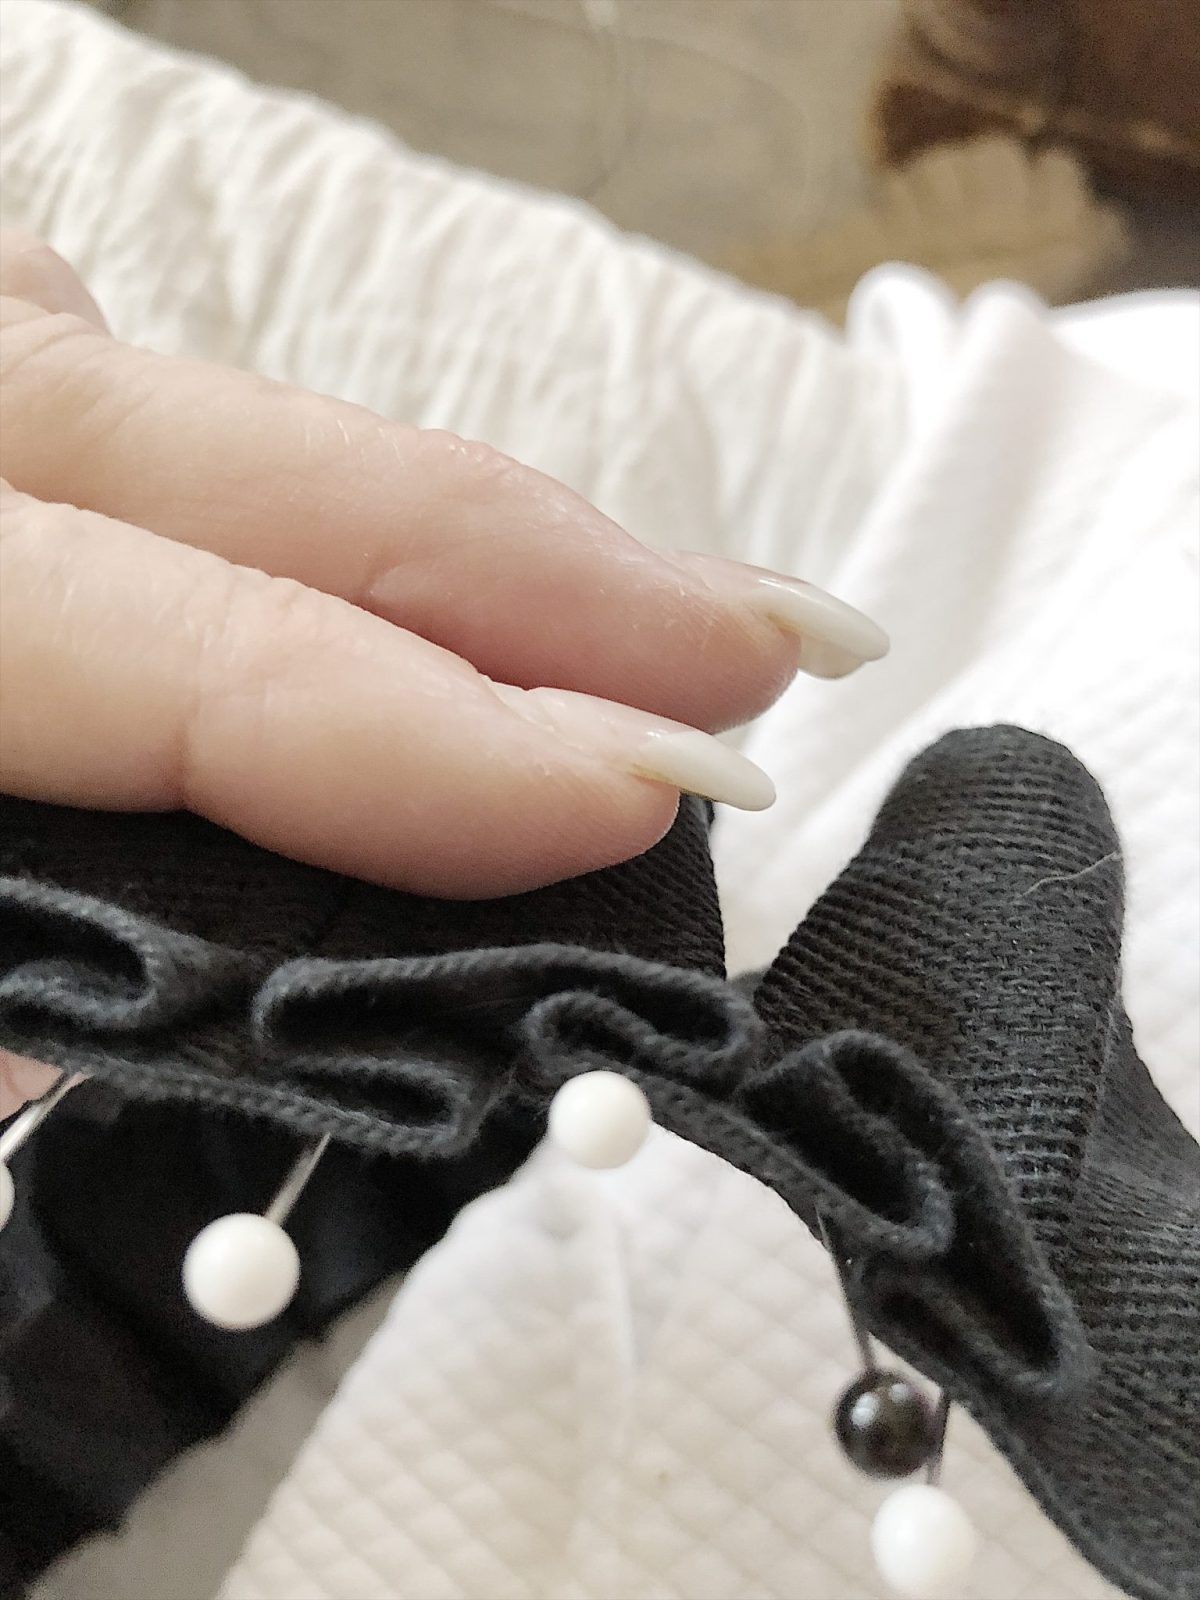
Start out by making a small pleat about 1/2″ wide. Pin it, as seen below. Then place the guide on top of the ruffle.
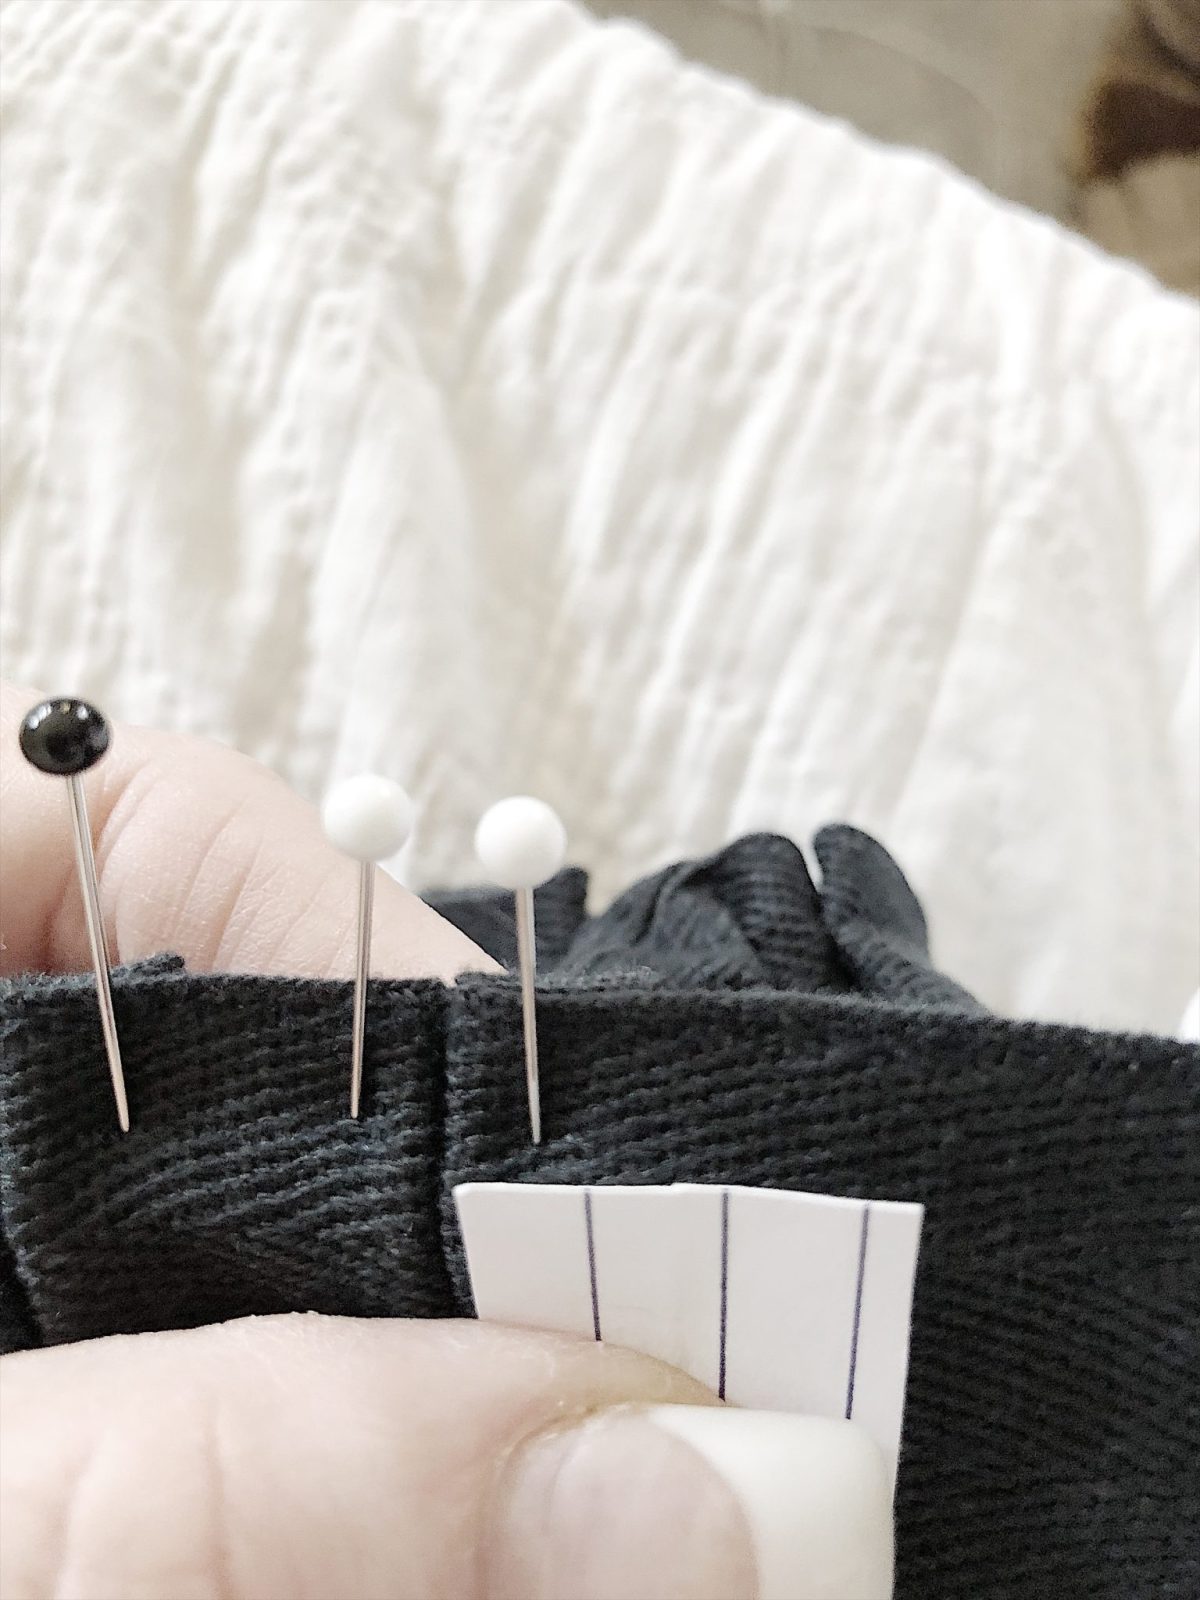
Fold back a pleat so that the ruffle is the size of your guide.
Fold it forward and pin it.
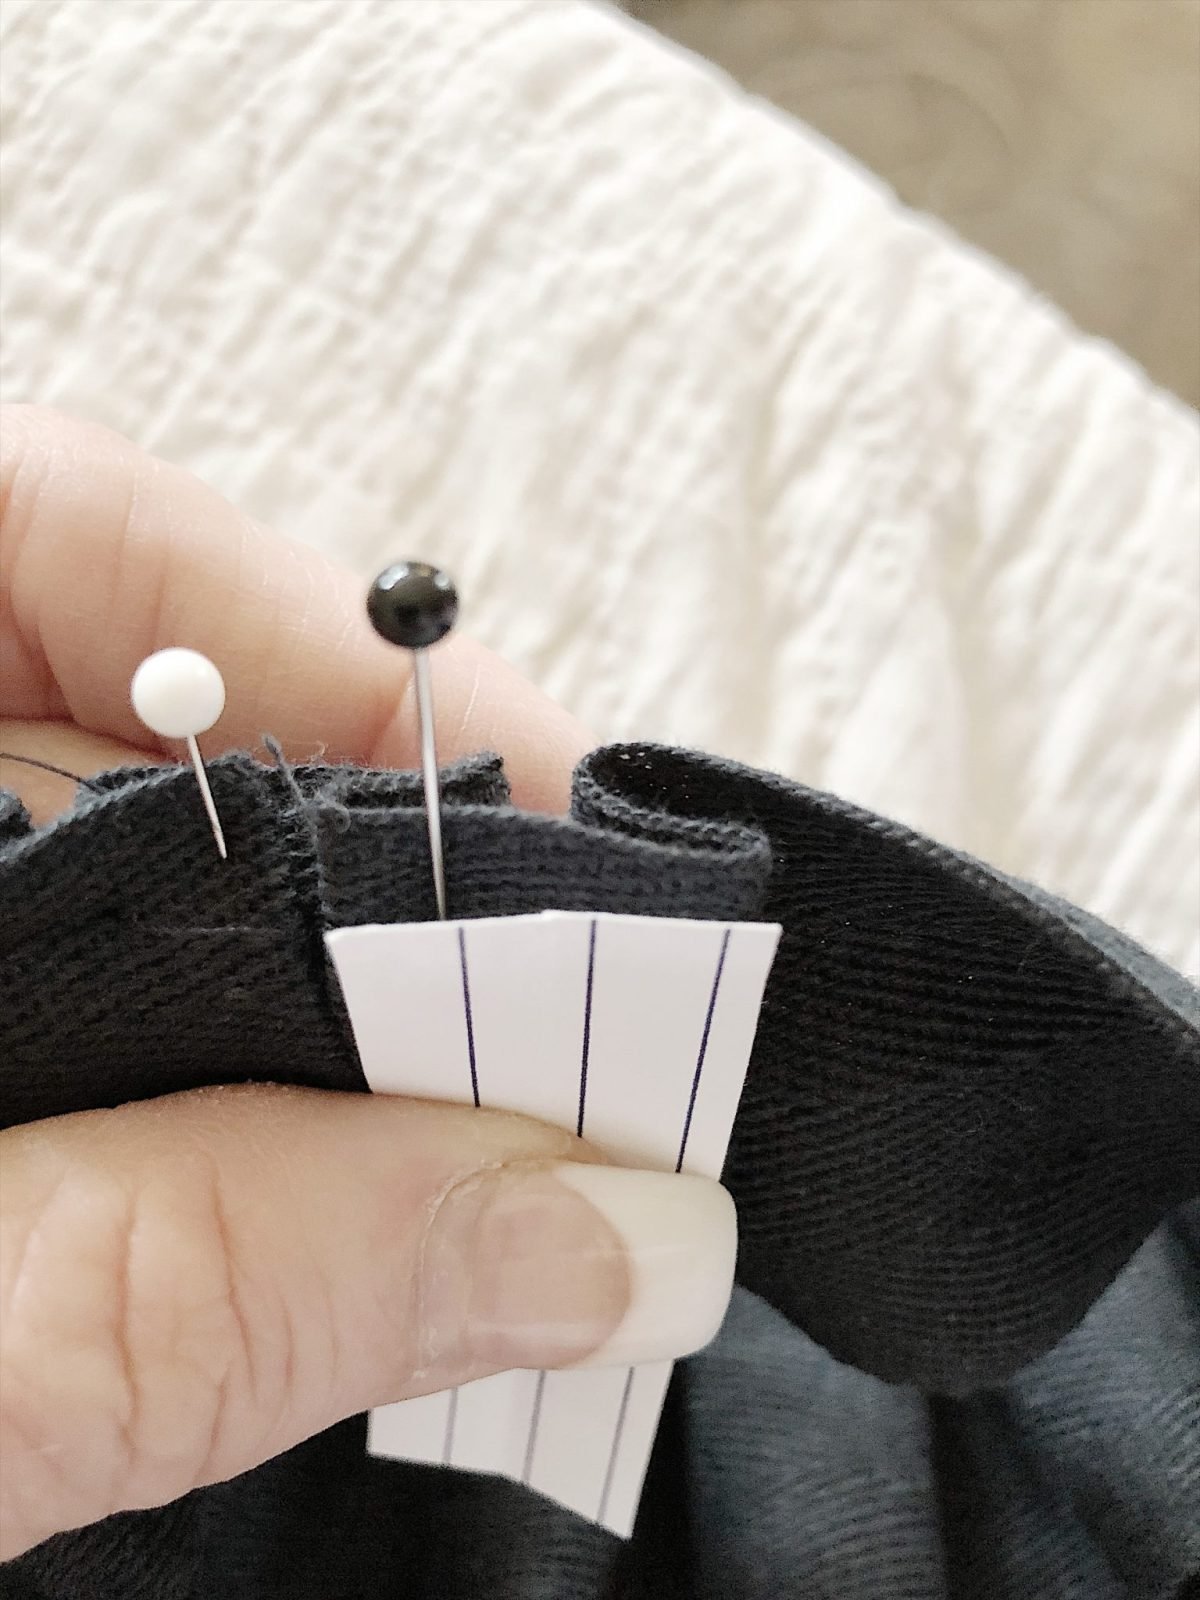
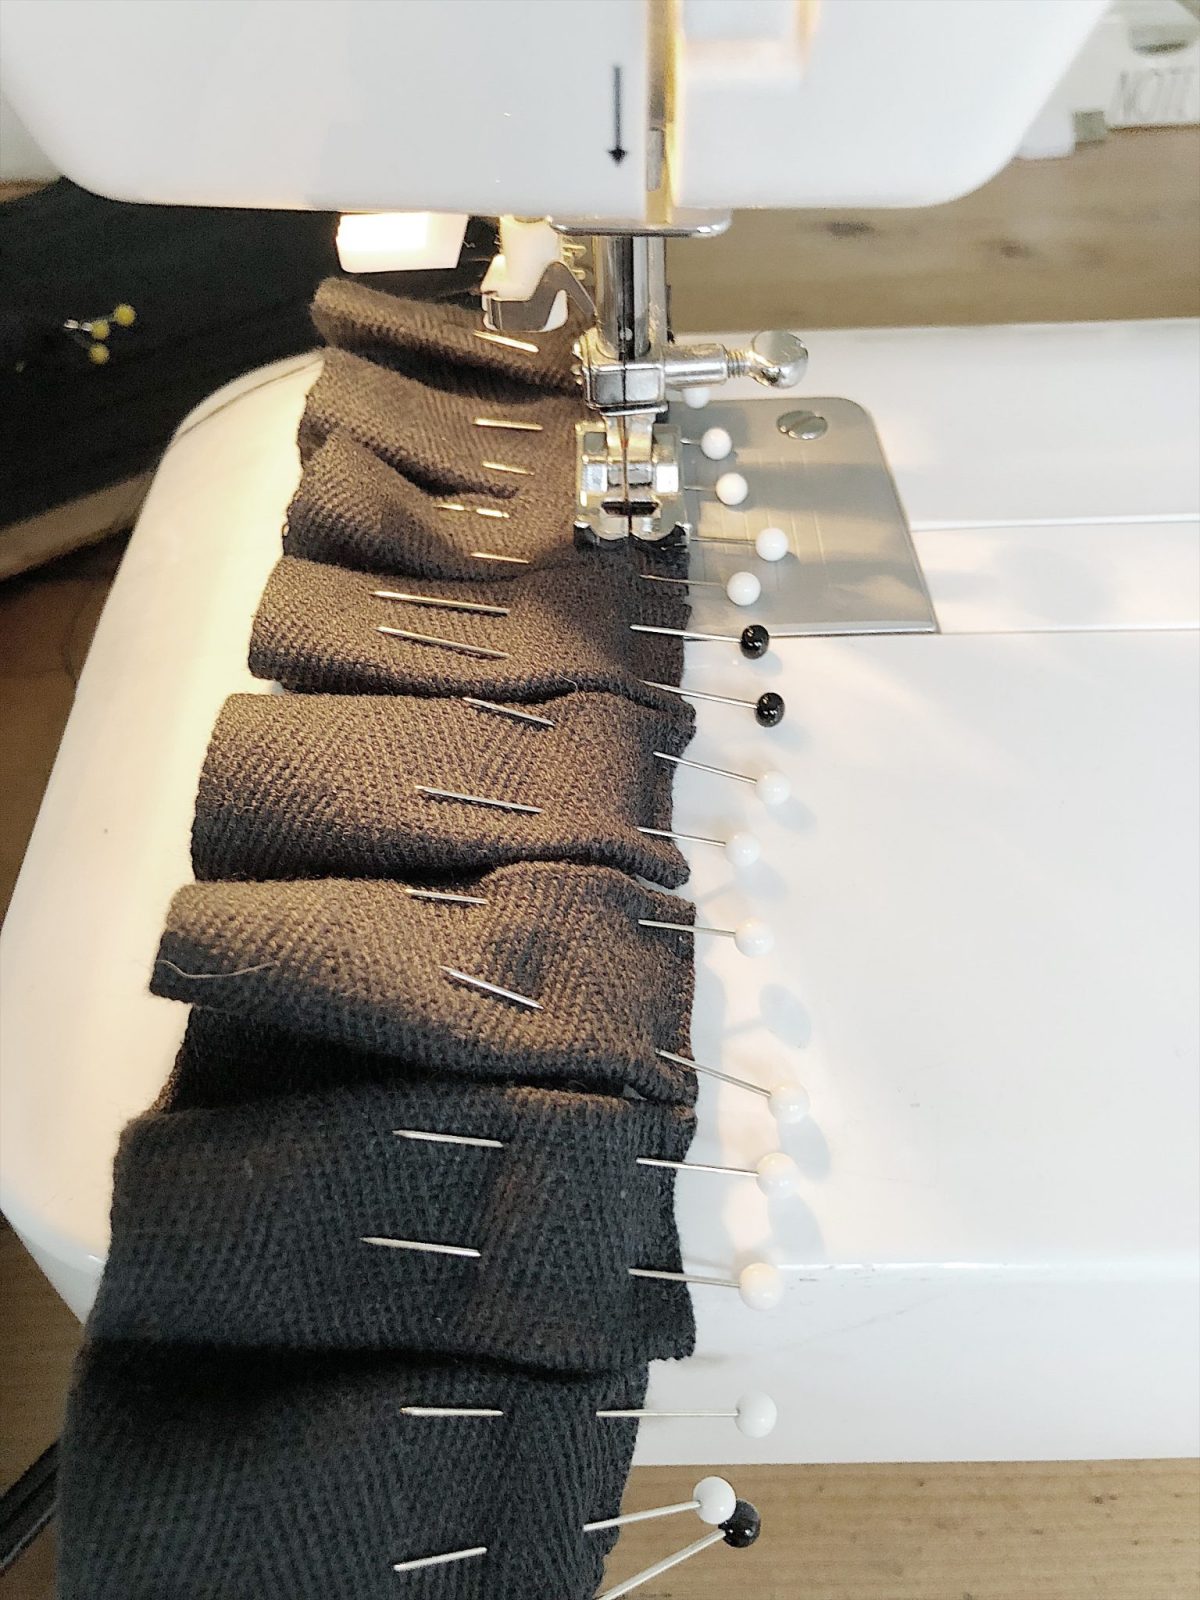
Continue making the ruffle for all 30 yards of trim. Just so you know, I pinned the entire ruffle while watching the Opening Ceremonies of the Olympics. After a while, you don’t even need the guide because you can just eyeball the pleat width.
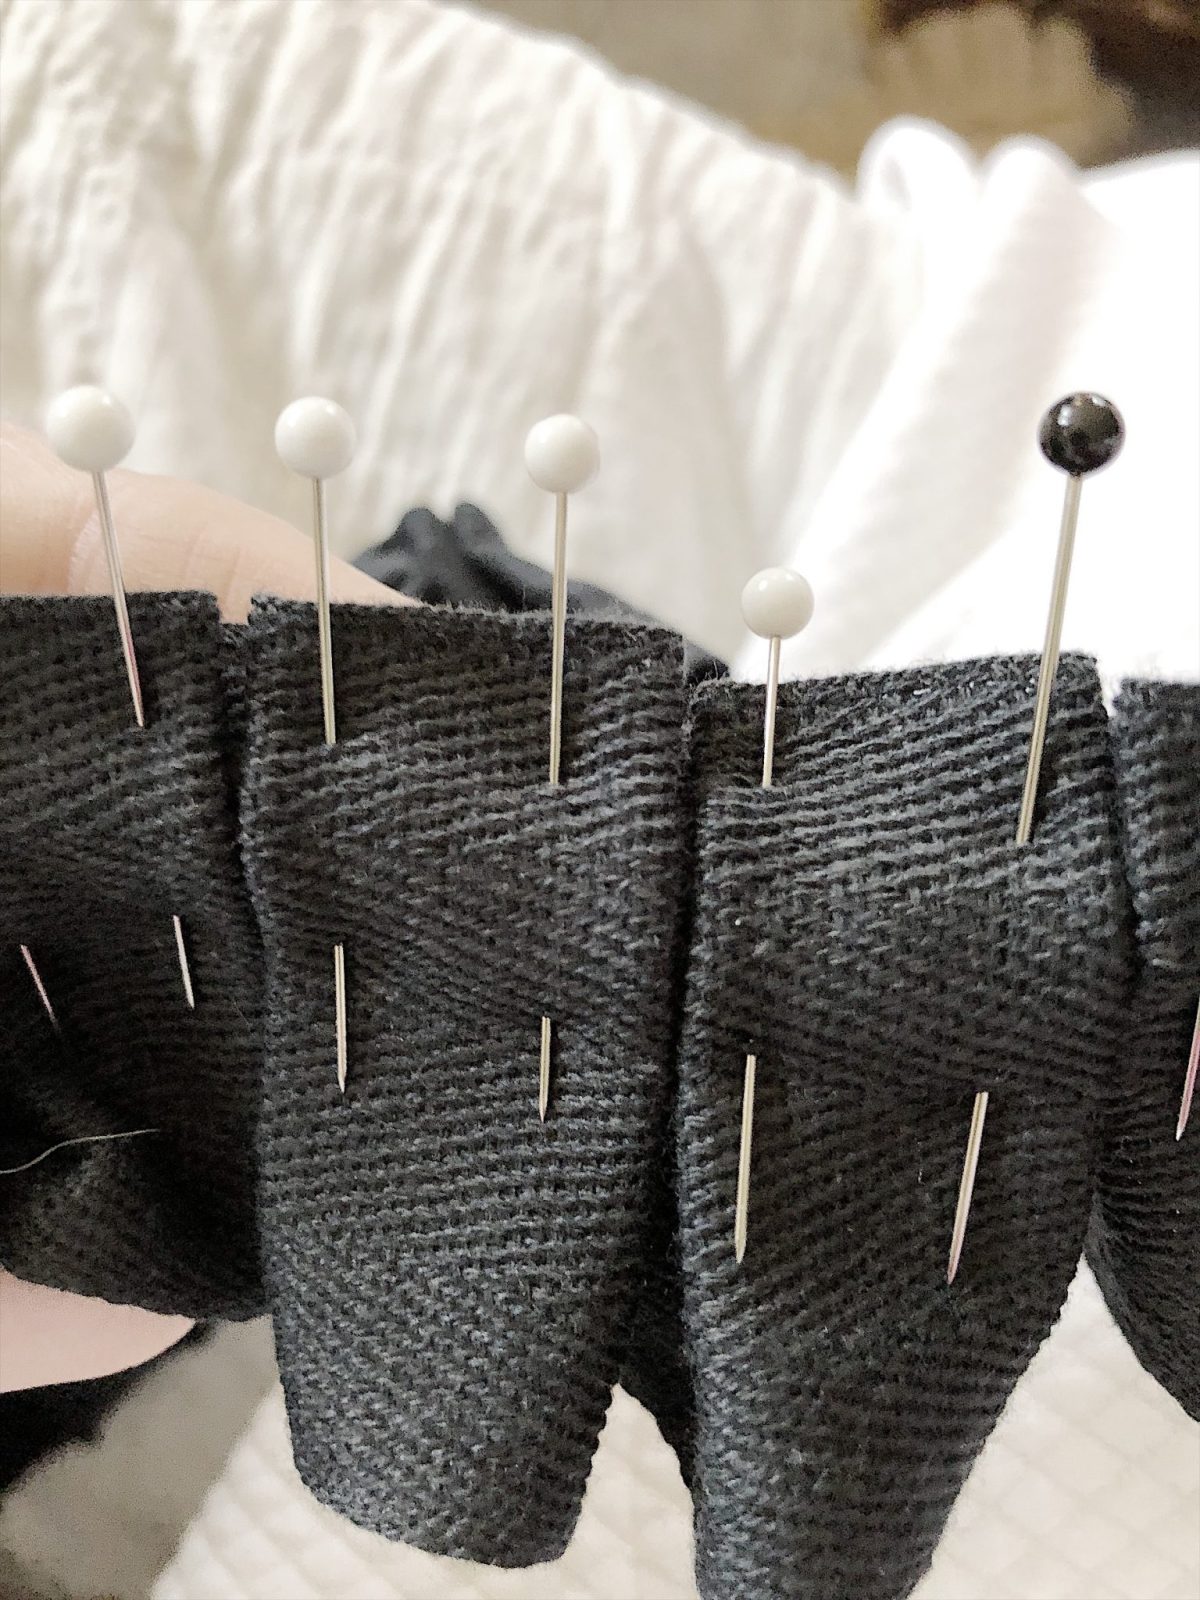
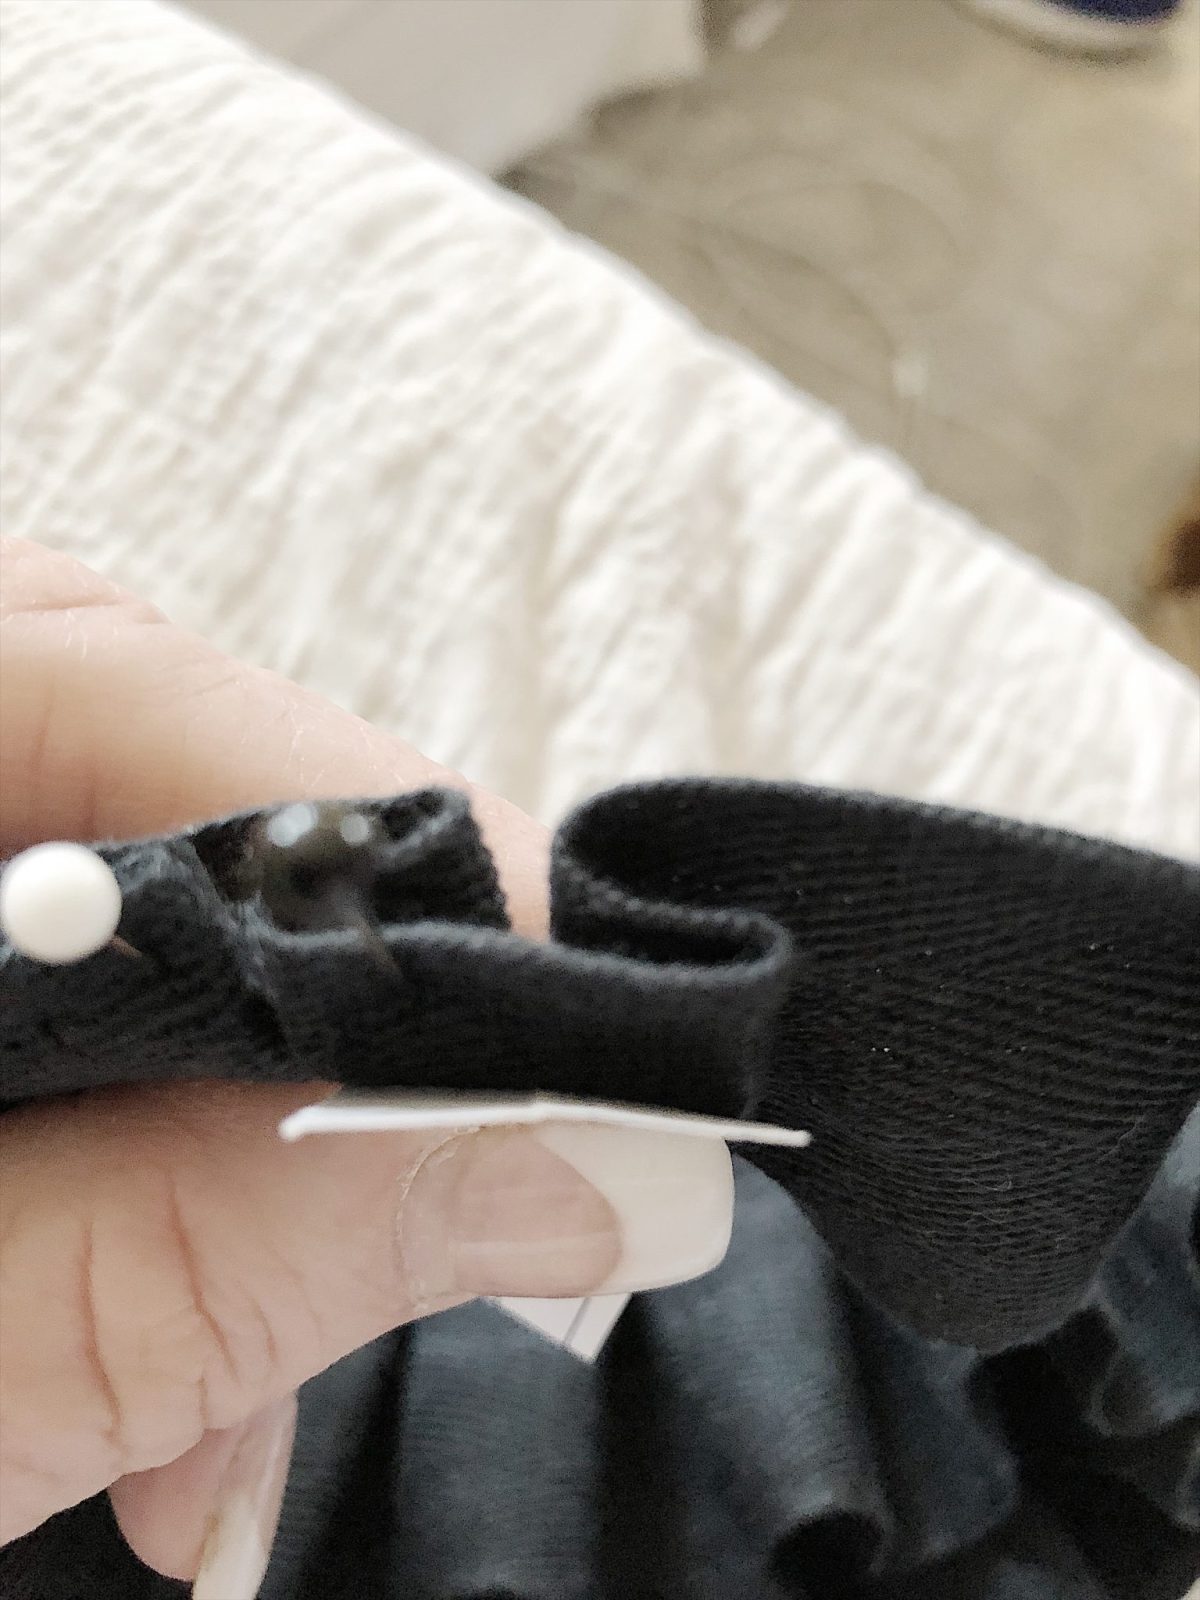
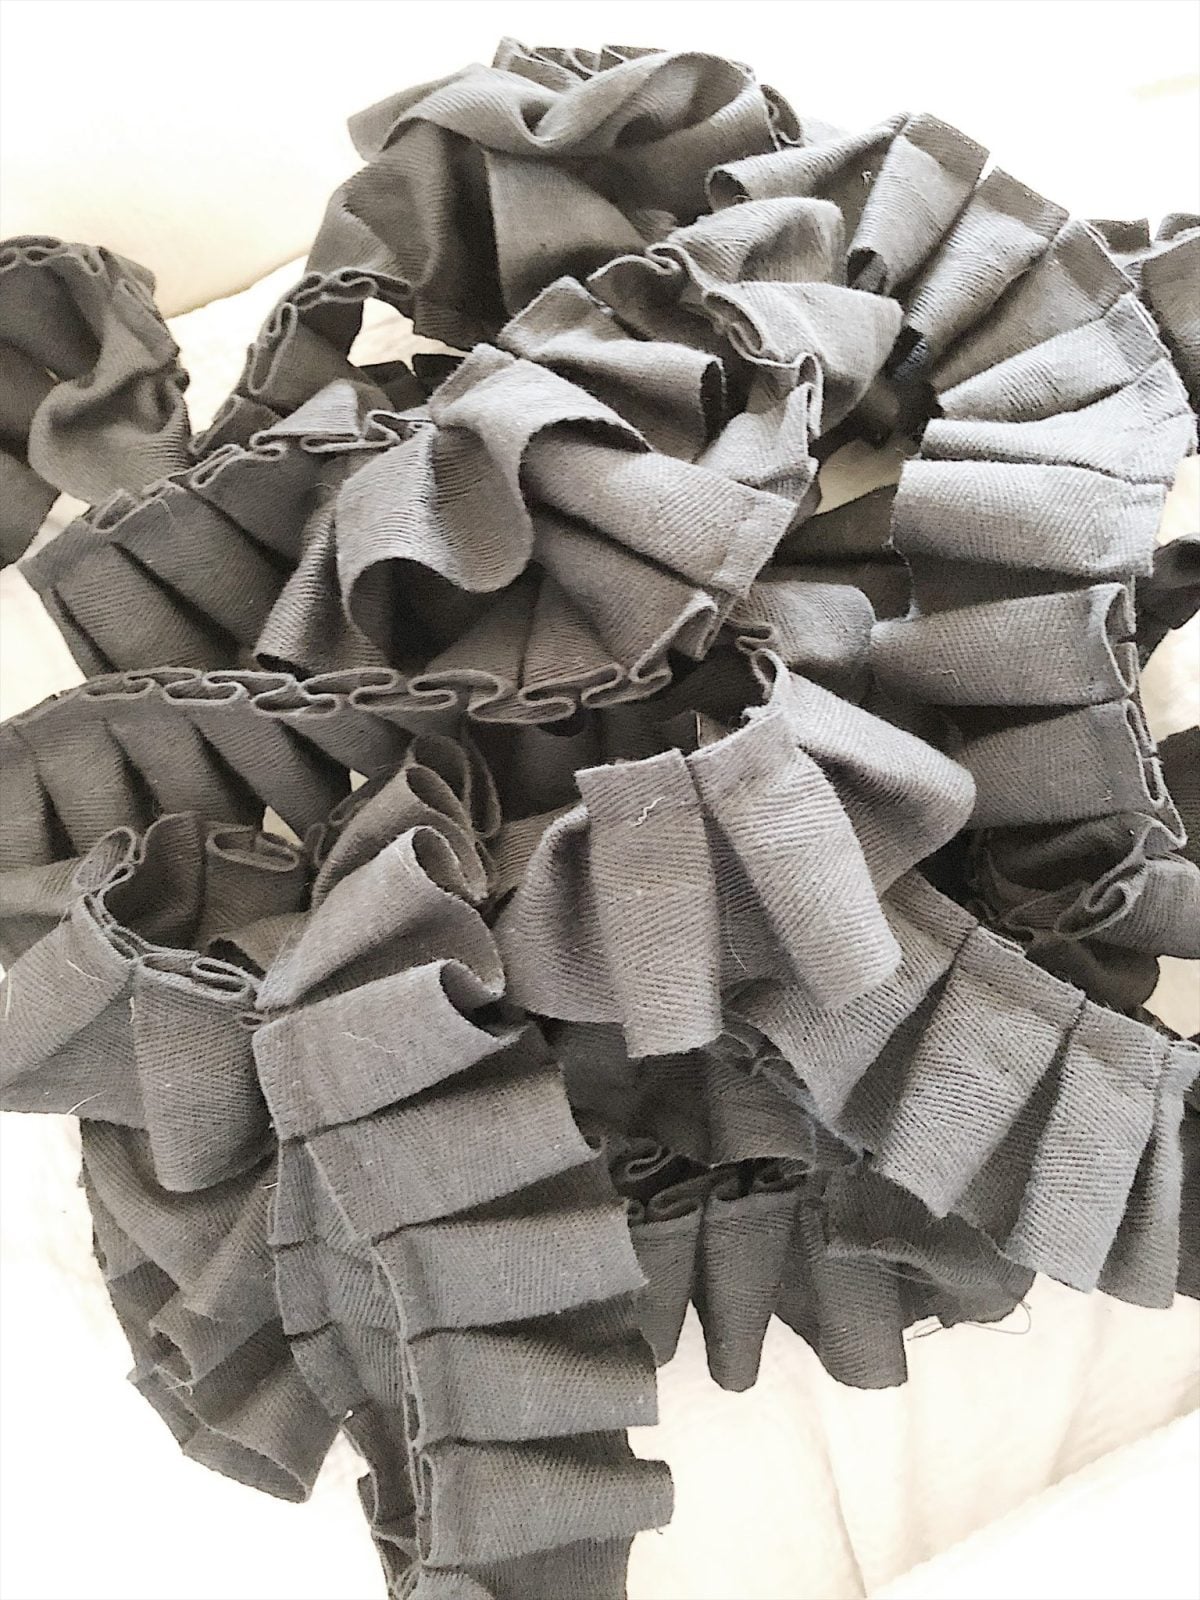
This is how the pleated ruffe looks from the front (top view). The bottom ruffle shows the back side.
And this is what the pinned ruffle looks like!
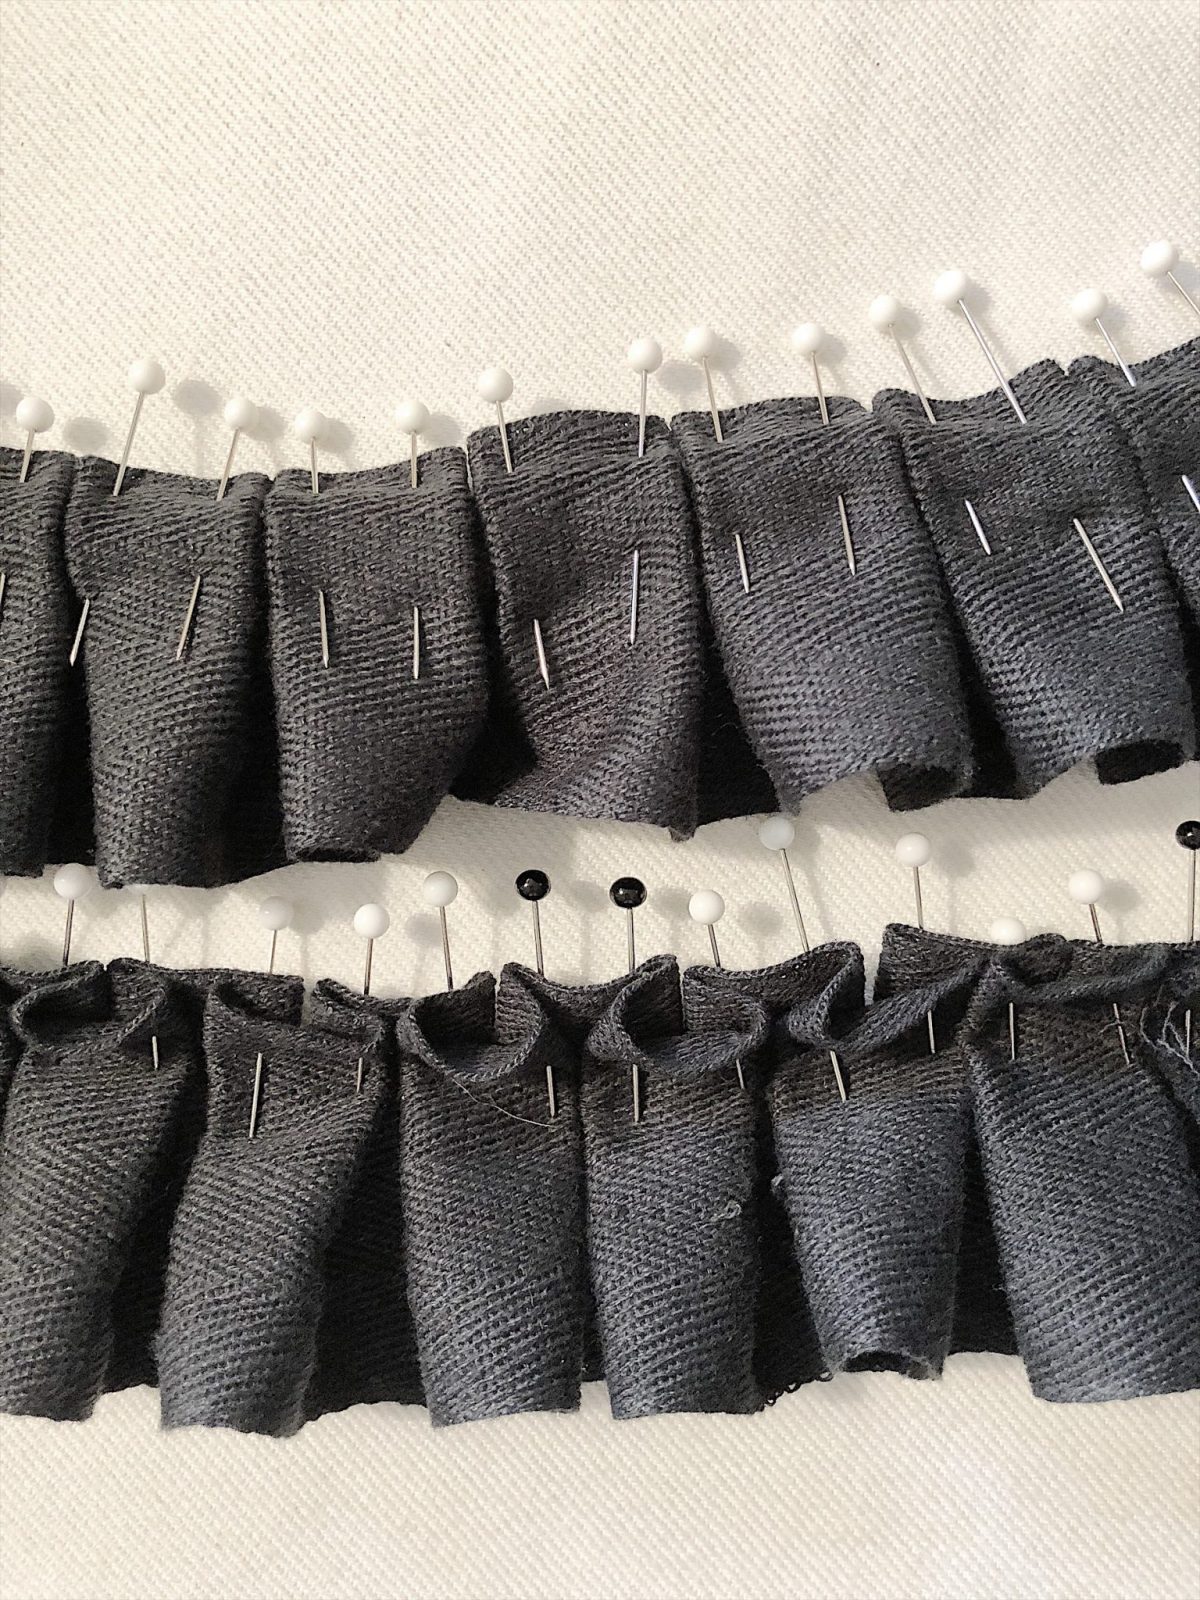
Sew the entire ruffle in place about 1/3″ from the edge. I used the edge of the pressure foot as my guide.
Here is the finished ruffle. Yay! The rest is the easy part, I promise.
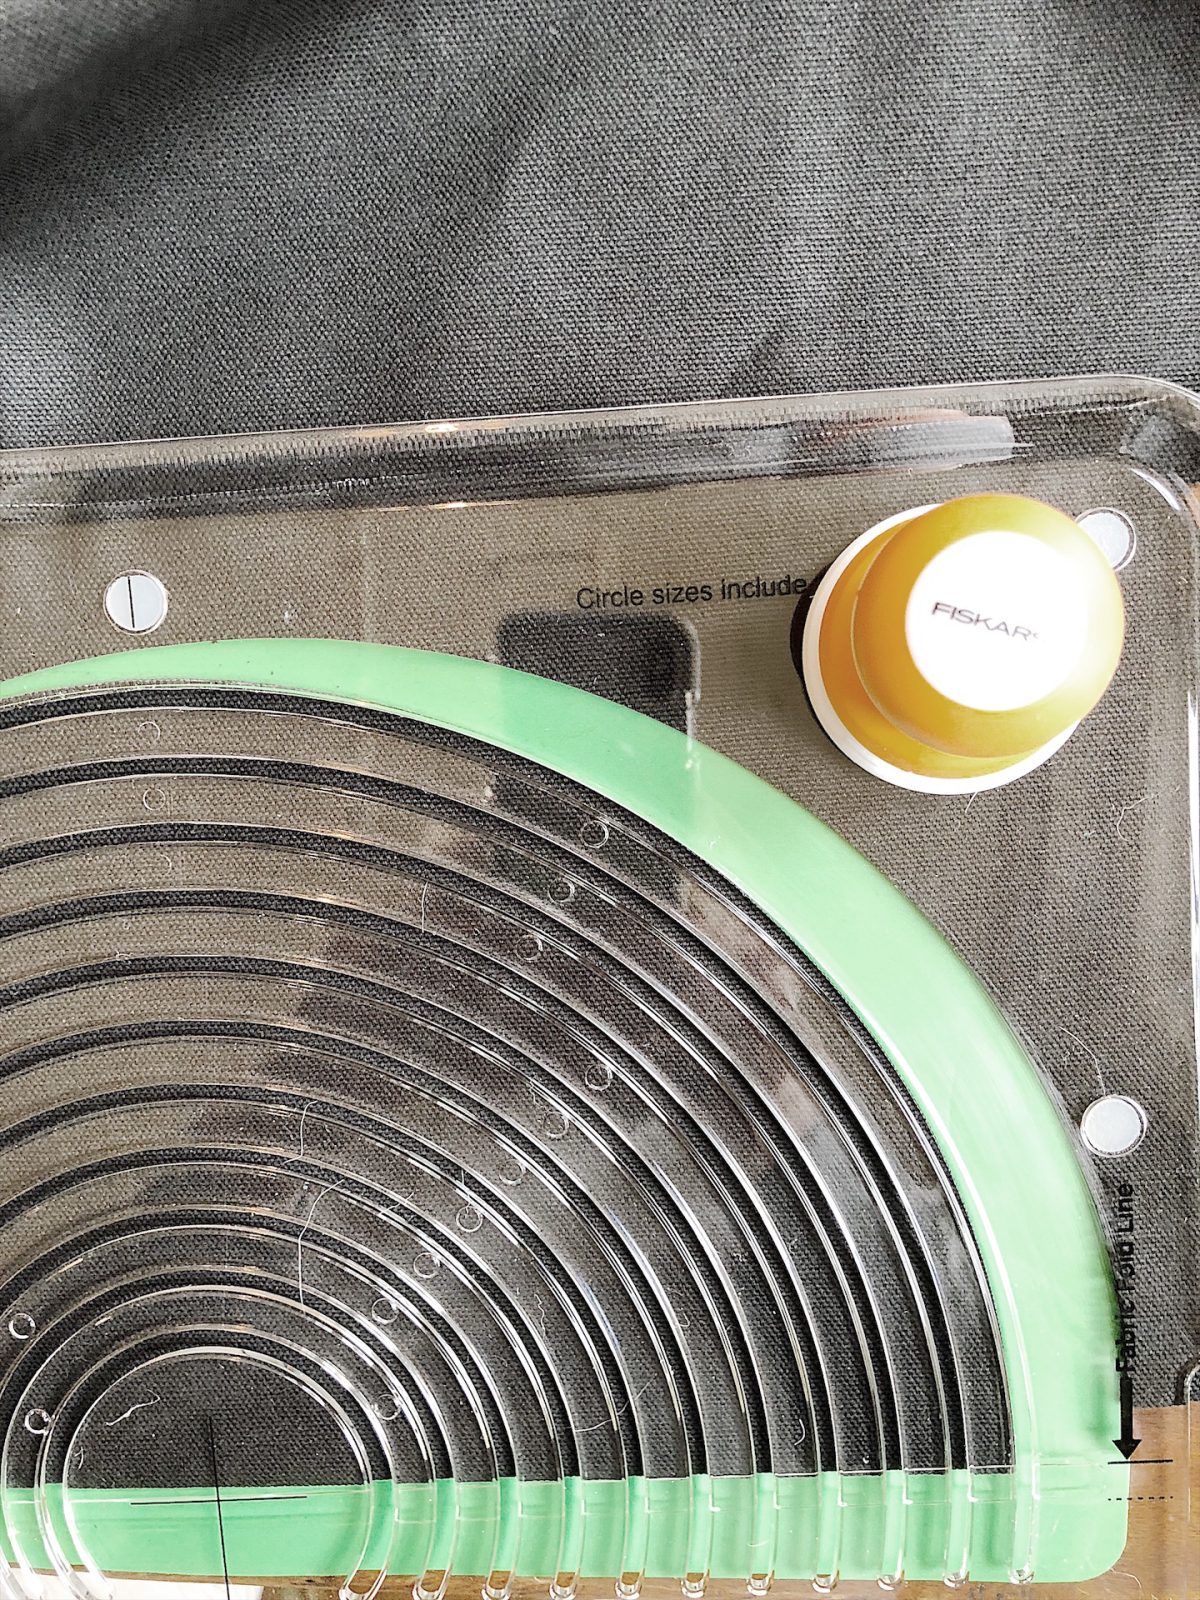
The next step is to cut the 12″ round placemats out of fabric. Originally I was intending to make a 12″ circle pattern and cut them out with scissors. But I saw this amazing Fiskars Fabric Cutting Circle and read the reviews and decided to give it a try. This was one of those spontaneous decisions that could have been a total waste, but I am so happy I did it. It literally took seconds to cut out a circle and each one was absolutely perfect! There are also a lot of circle sizes available to cut so I do think I am going to use this tool a lot.
I cut 11 circles, just to make sure I had enough.
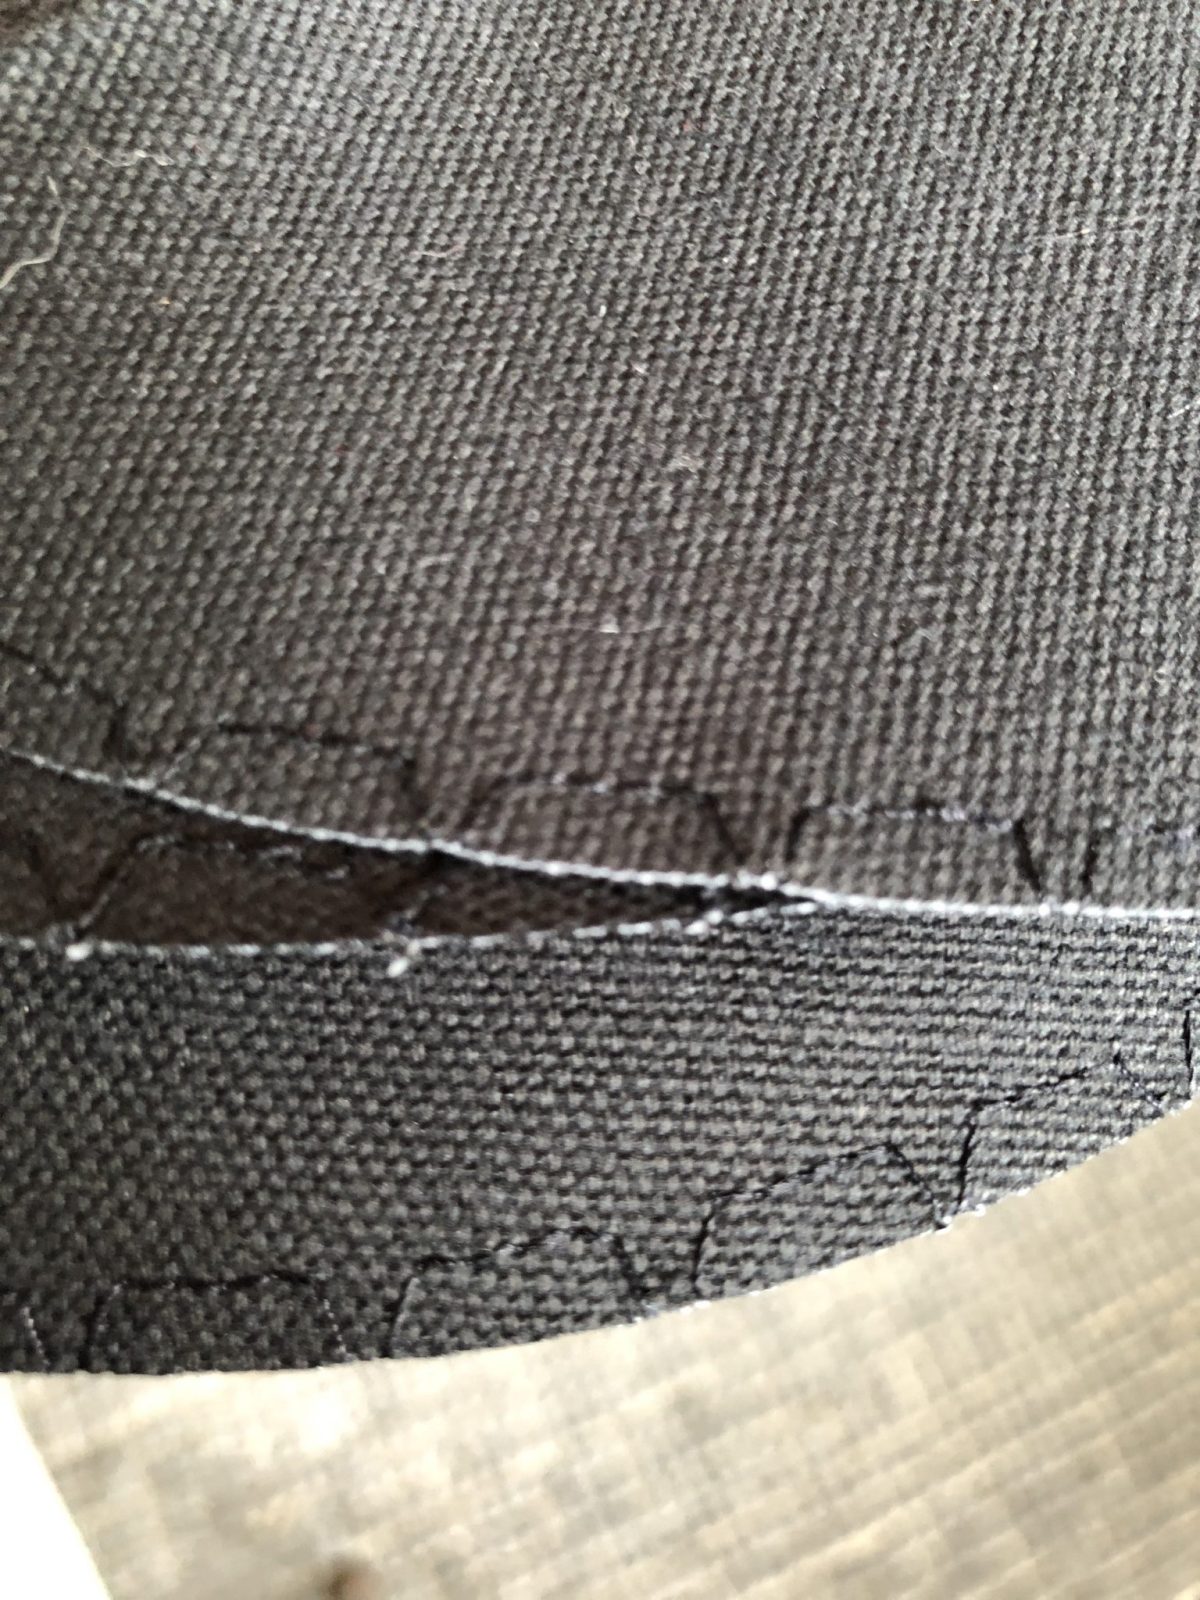
Next, I sewed an overlapping stitch on the edge of every placemat so they wouldn’t ravel.
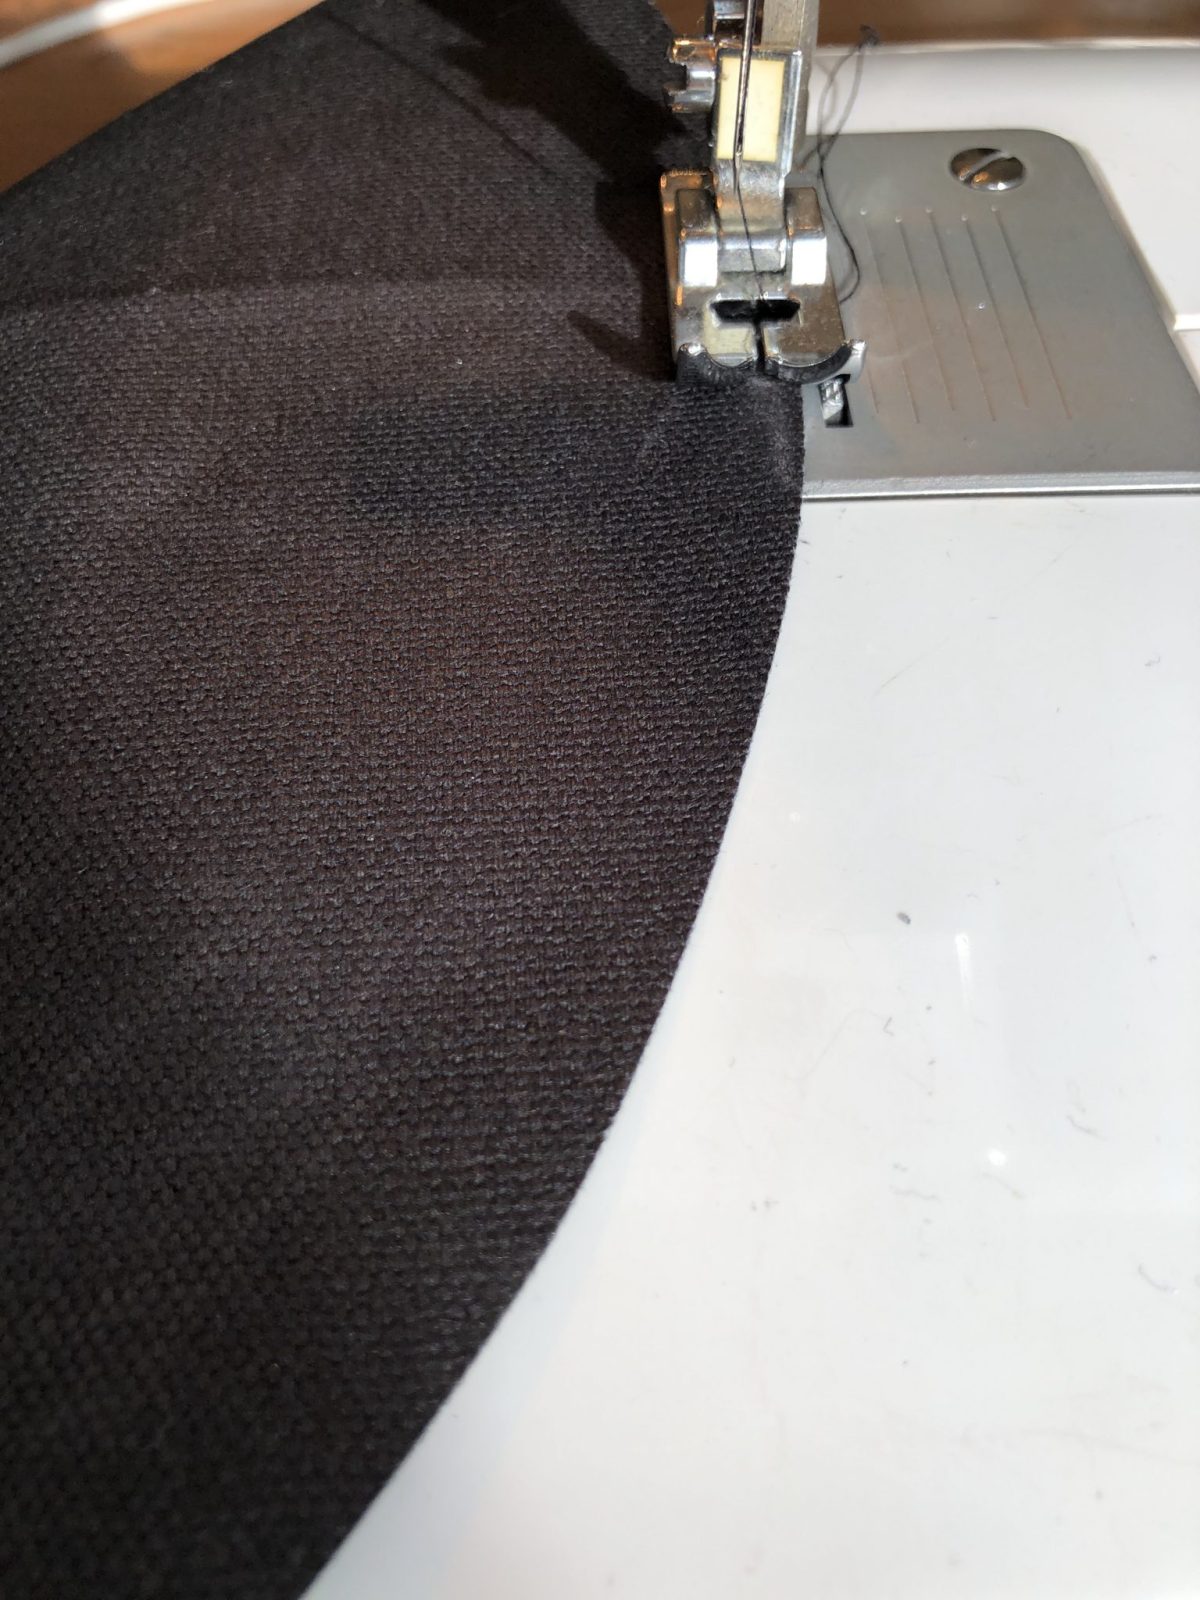
This is what the edge of the stitching looks like.
Next, pin the ruffle with about a 3/8″ overlap, on each placemat, making sure the ends meet to form a complete pleated ruffle. If they don’t fit exactly, go back and repin and adjust it so that they do fit.
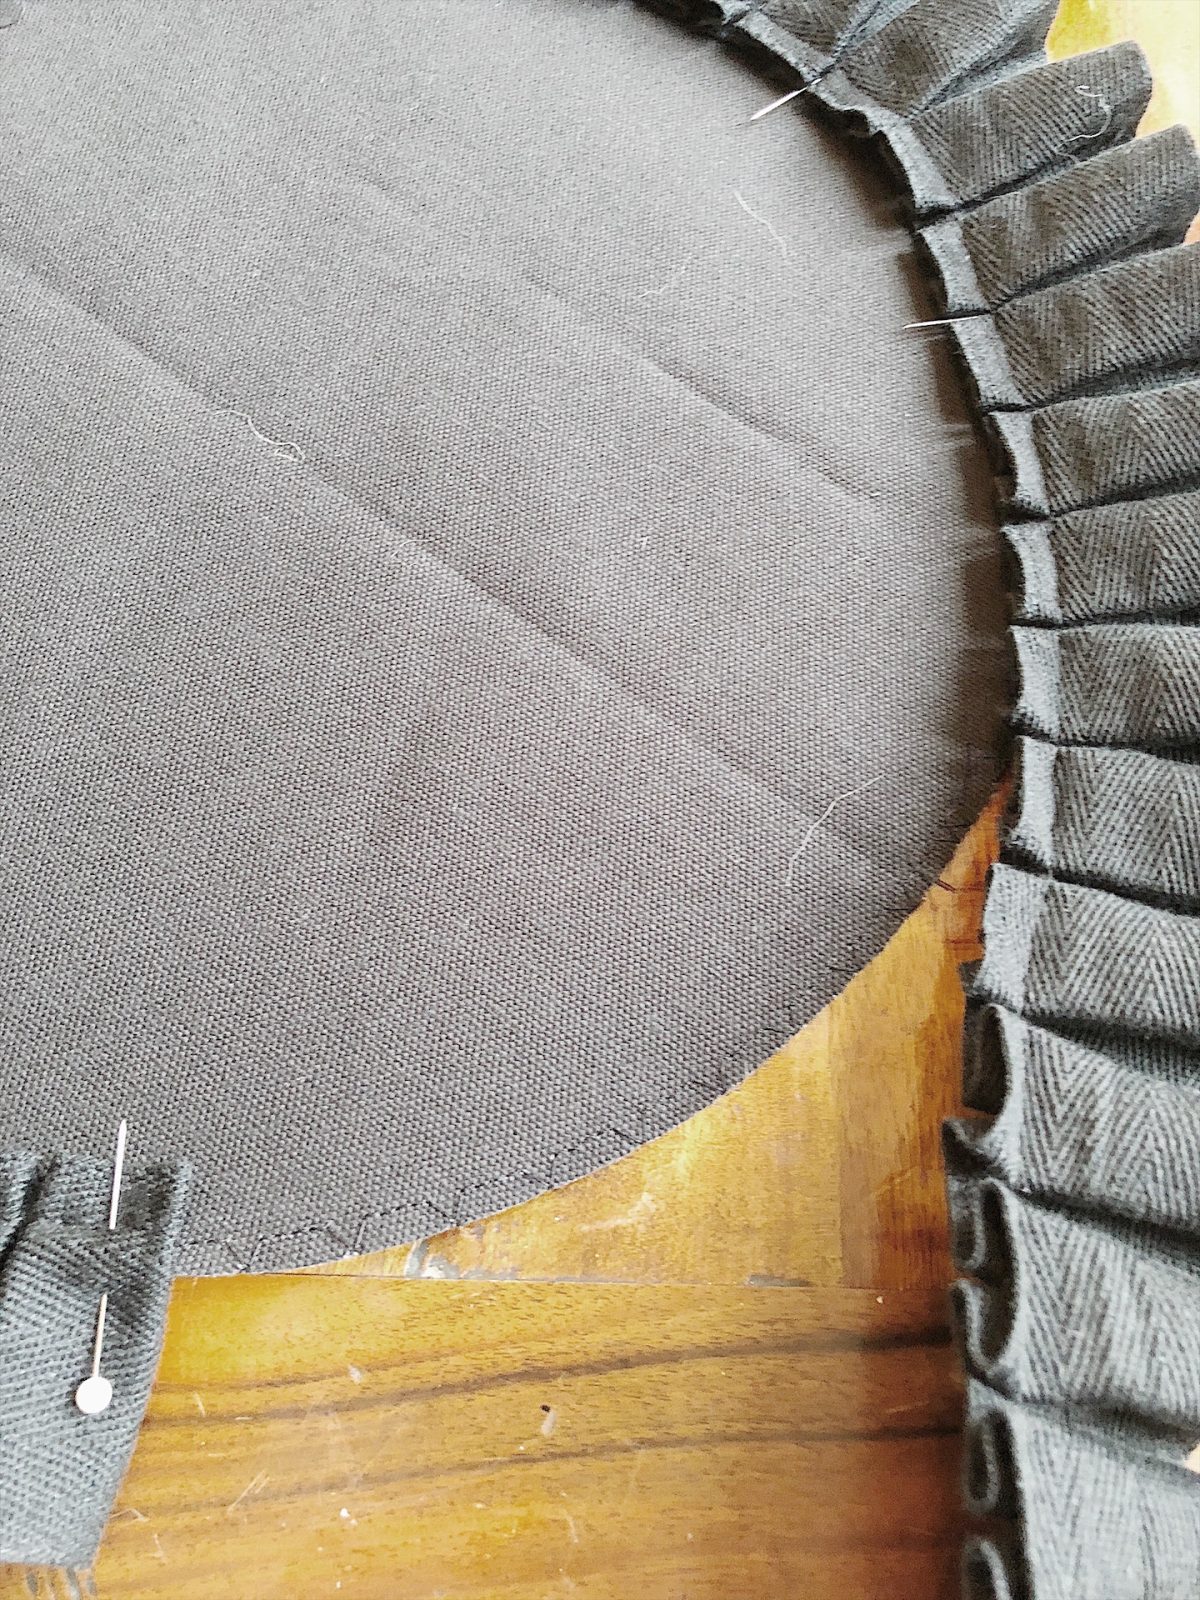
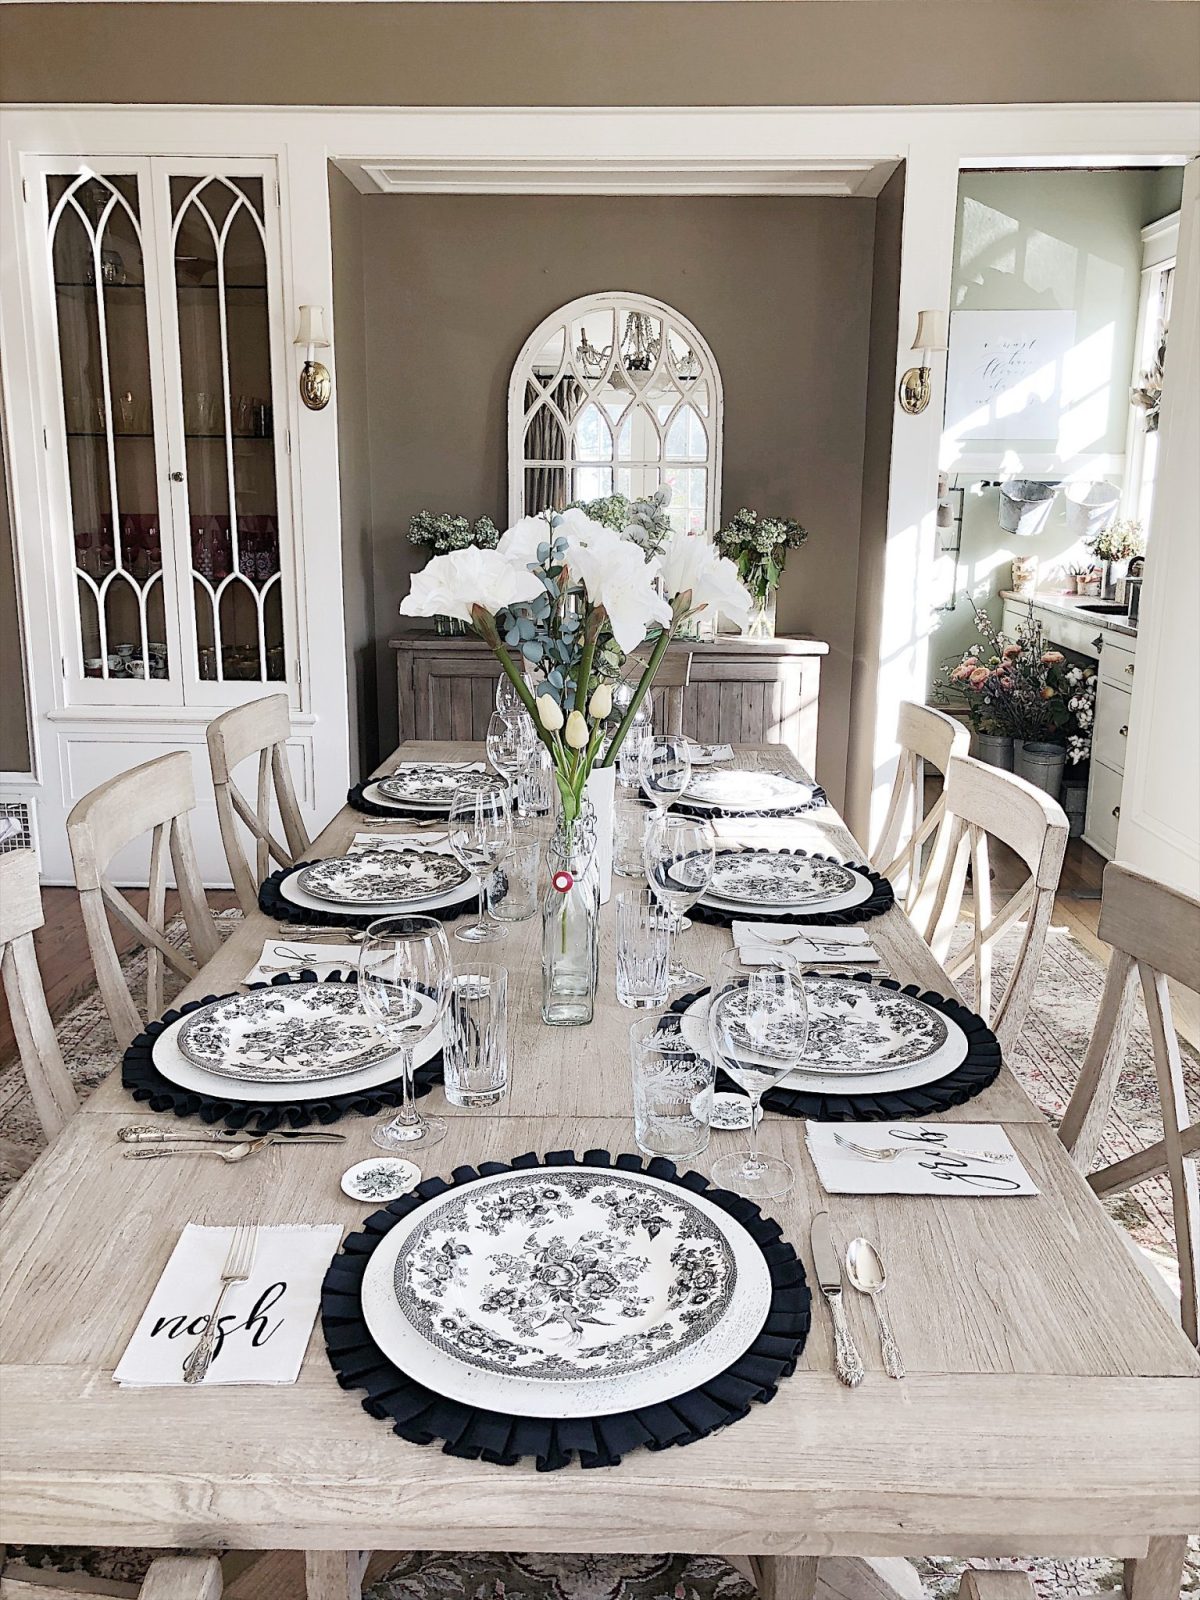
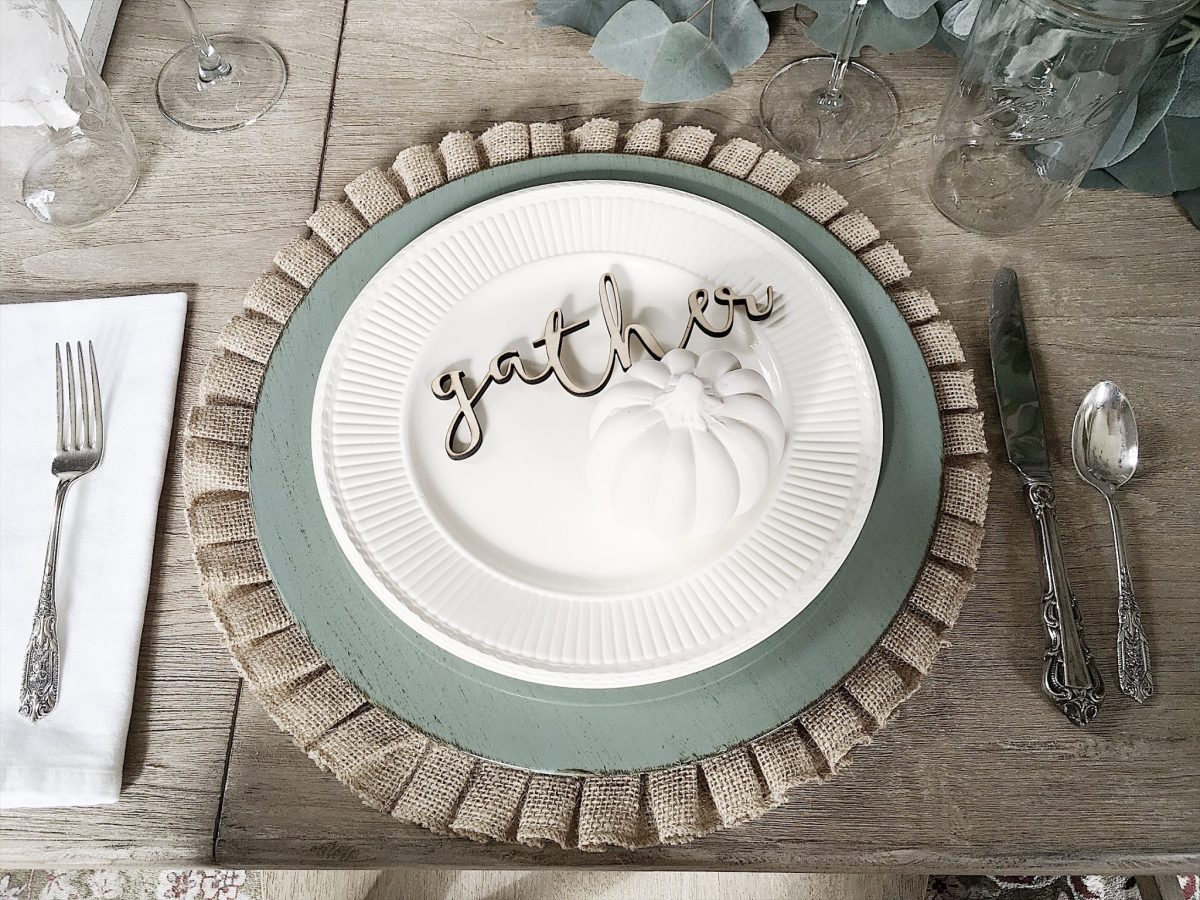
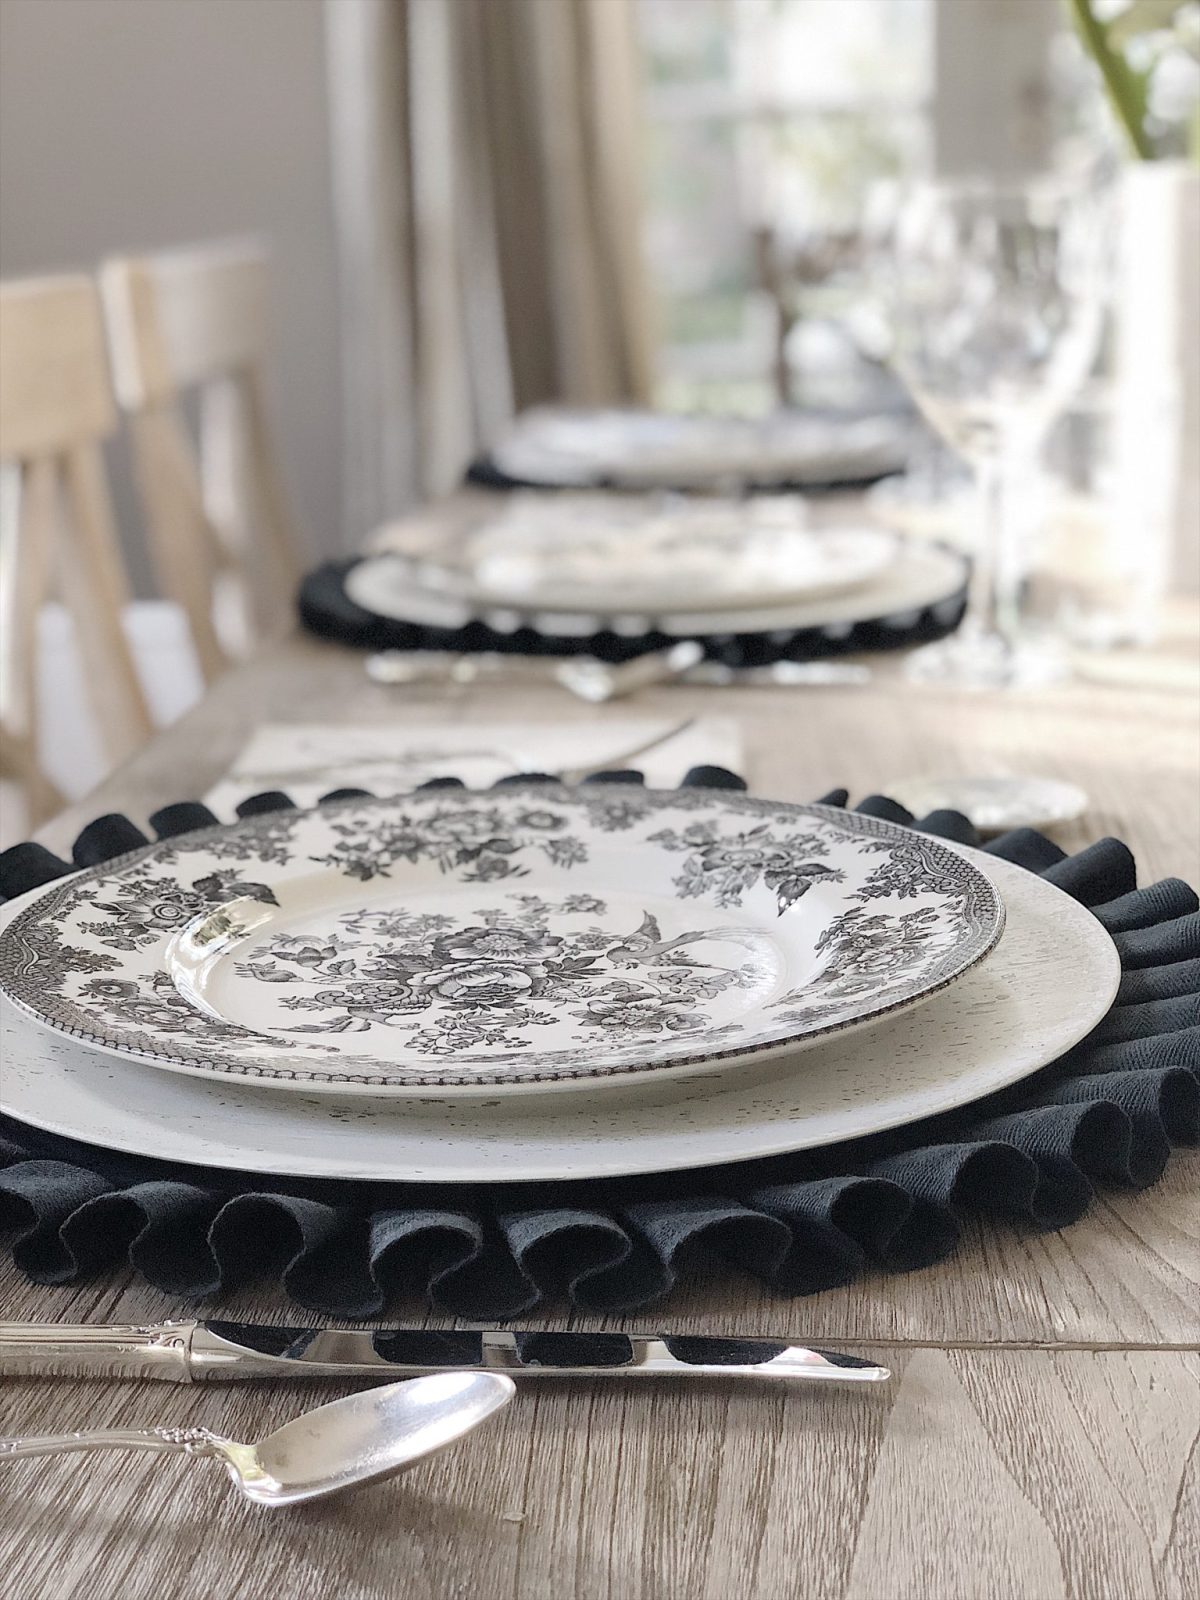
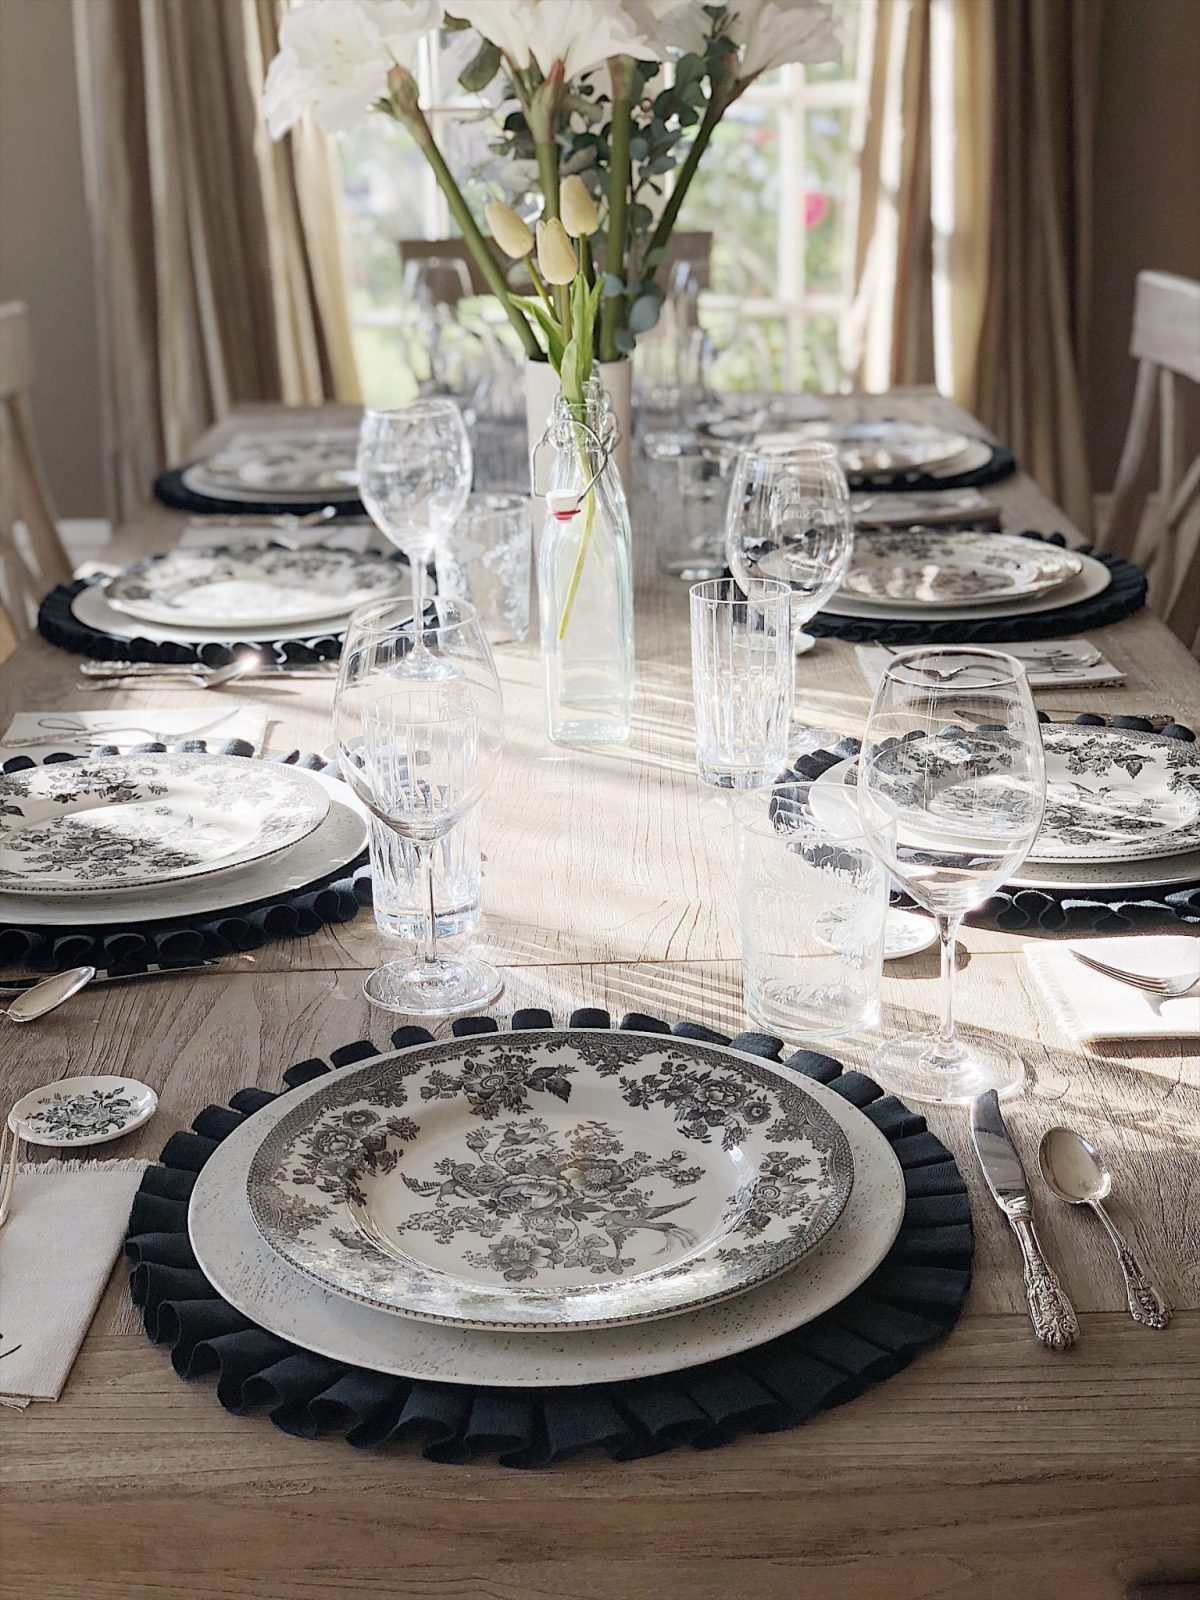
By the way, the photo below shows the placemat right side up. (When I first bought the ones from Pier 1 I could not figure out which way was up!). And you kind of need to use chargers with this placemat. Of course, I love that. If you don’t want to use chargers, then I would make the circle of fabric 10″ or 11″, instead of 12′.
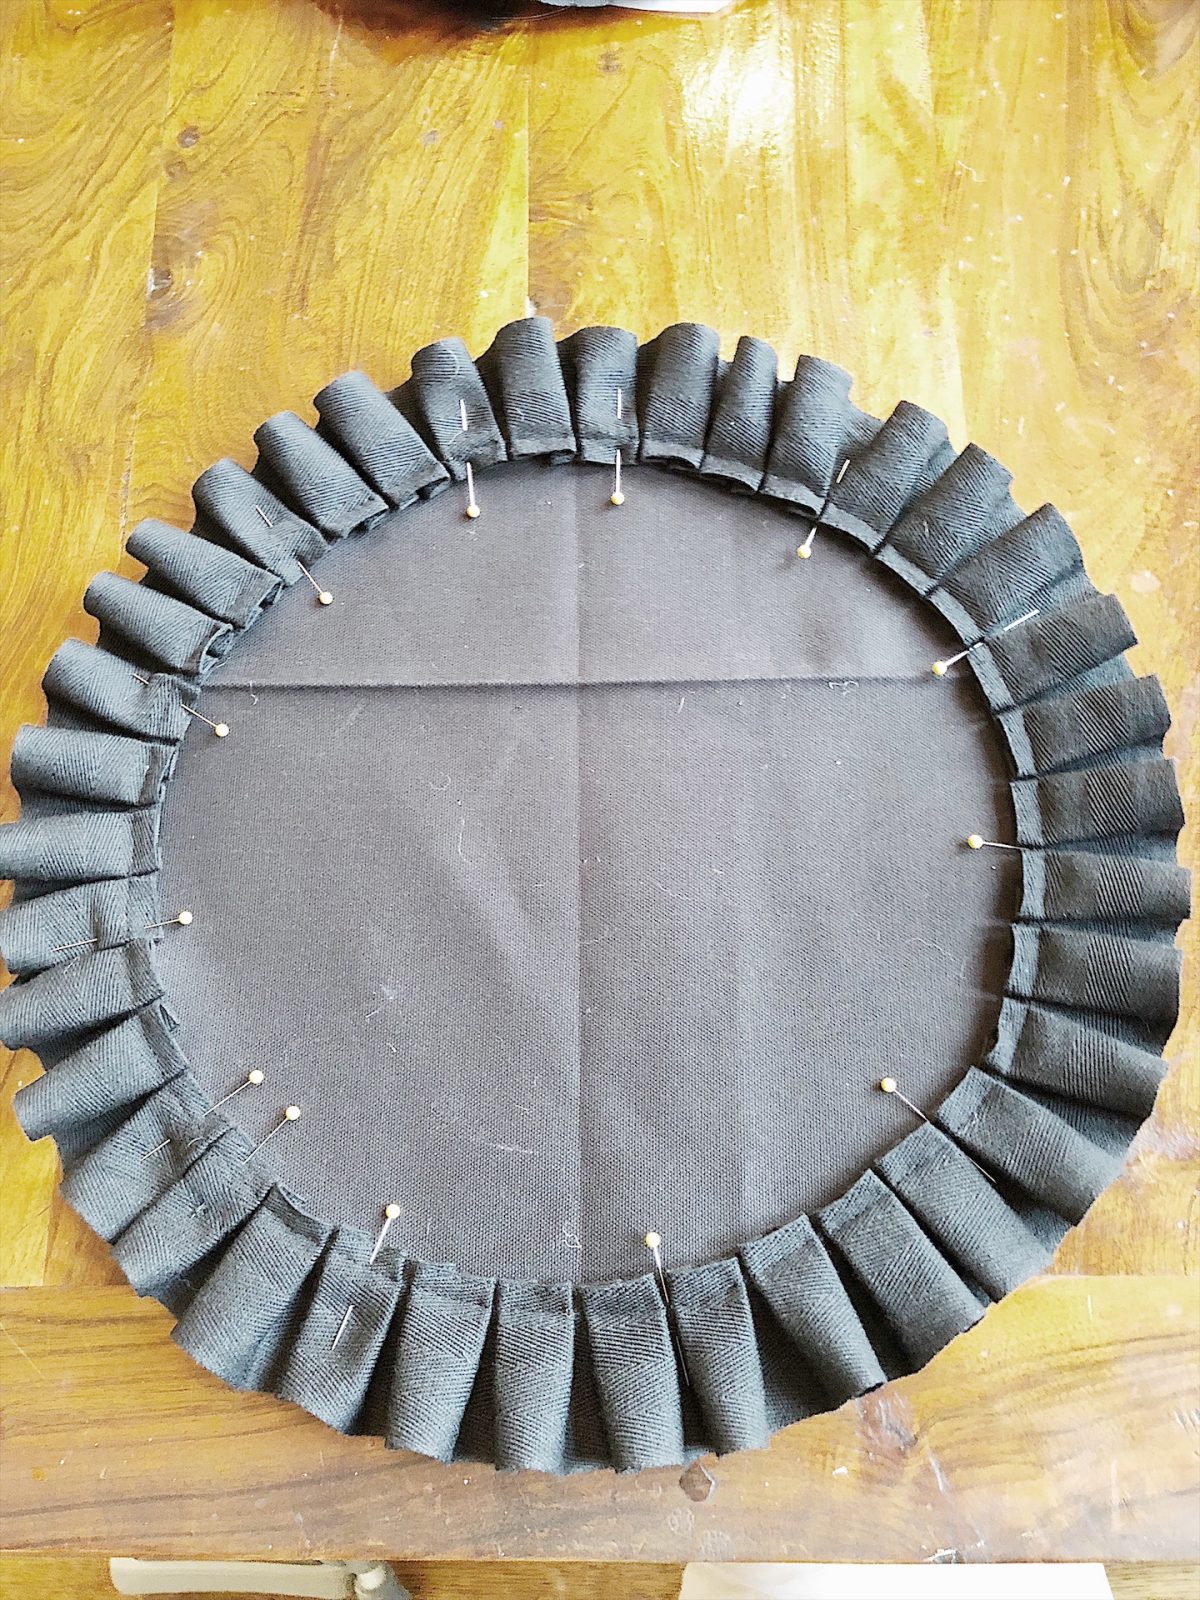
The last step is to sew the ruffle to the placemat. I used a zig-zag stitch to make it stronger.
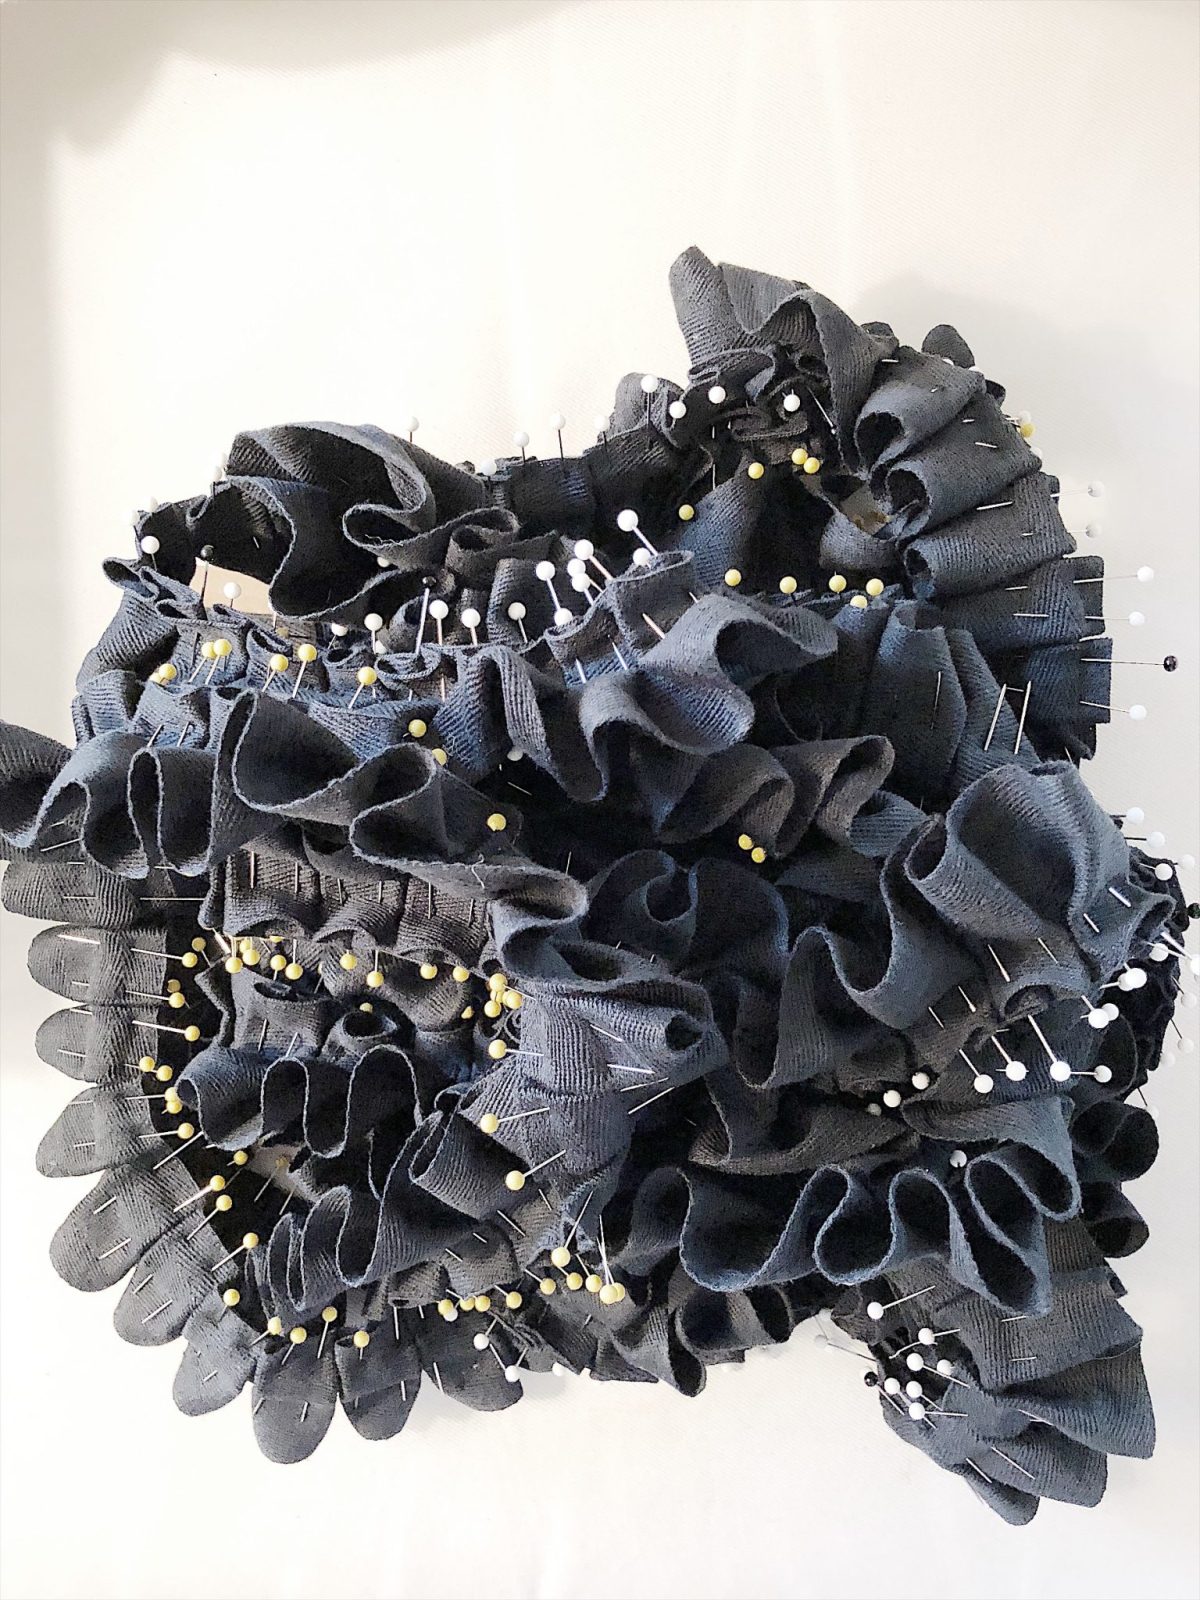
Here are more photos of the finished placemats. I absolutely love them!


For more real-time updates, follow me on Instagram @My100YearOldHome


Very cool Leslie!!! Good directions and pictures!!!
Thank you for the tutorial. I have square dinner plates so I will try and make a square template versus a circle when applying the pleats. Your table looks so lovely!
Those are adorable!! I’m going to need to pin this to try to make at some point!
Wow.. yep.. those are the perfect touch. I need to do this project. Thanks for sharing:).. Where on Earth did you find your table btw.. I love it!!
Wow! These are spectacular! At first I thought you may have just dyed the ones from Pier 1. What I love about this is you can use any color that matches your china! I am now inspired for my next dinner party! Do you have a sense for how long it took you–from start to finish? Also, I’ve never seen the circular cutter….great idea!
These are beautiful! Would you please share the name of the trim shop where you found your trim? I would love to make some of these for my home. Thank you so much for sharing your clever idea and easy to follow directions!
Your table looked so beautiful I had to read the whole thing. I will most likely never make these but I enjoyed your easy to understand instructions and pictures. New to your blog, but love your home and decorating.
Your table looked so beautiful I had to read the whole thing. I will most likely never make these but I enjoyed your easy to understand instructions and pictures. New to your blog, but love your home and decorating. I am not crafty but know beauty.
I don’t do a lot of ‘formal’ entertaining but these are so beautiful!!! I will watch for some trim somewhere, oh and some chargers too!!! Do you know roughly how much trim you used for each placemat? If you used up the whole 30 yards, I’d guess you used almost 3 yards for each placemat?Thanks!!!
I absolutely love this!!!! Now I feel like I need to invest in a sewing machine!! ???????? You did a beautiful job!!!
I’m in love with this. I don’t do these but my girlfriend do and this would be a surprise for her as long as my shoulders would allow me too. Thank you for sharing how you achieved them. I’ve got 2 rolls of burlap with different trimmings on them but they’re the normal colour brown. It can easily be used too. Much love to you.
Wow, wow, wow is all I can say. Thank you so much for such elaborate step by step instructions on how to make these. They are soooo nice. I will definitely make some for my table. Sadly the fabric shops in my tiny country at the bottom of Africa (Eswatini) do not much when it comes to different types and textures of fabric, but I will make a plan.
Thanks so much! Wow, it is so amazing to know I have a reader all the way in Eswatini! Thanks so much for your support and good luck with trying out this DIY!
I loved the way you gave us instructions on DIY. I want to try it asap. Thank you so much and God bless you.
Best regards and keep going on your projects.
I love the idea of making my own DIY placemats! It’s such a fun way to personalize my dining table, and I can’t wait to try out the techniques you shared. Thanks for the inspiration!
I love this DIY placemat idea! It’s such a creative way to personalize my dining table. Can’t wait to try this out with my kids—they’ll have a blast choosing their designs! Thanks for sharing!
Oh yay! Let me know how it turns out for you 🙂
I love this DIY placemat idea! It’s a perfect way to add a personal touch to my dining table. I can’t wait to try out different materials and designs. Thanks for sharing such an inspiring project!
I absolutely loved this DIY placemat tutorial! The step-by-step instructions were super easy to follow, and I couldn’t believe how quickly I was able to create my own unique designs. Can’t wait to show them off at my next dinner party! Thanks for the inspiration!
I absolutely love this DIY placemat idea! It’s such a creative way to personalize my dining table and make mealtime more special. Can’t wait to try out the different designs! Thank you for the inspiration!
I absolutely love this DIY placemat idea! It’s such a fun and creative way to personalize my dining table. I can’t wait to try out different materials and patterns. Thanks for the inspiration!