Decorative Summer Clay Trinket Dishes – A Handmade Summer
These Decorative Summer Clay Trinket Dishes were inspired by the cutest cocktail-themed paper napkins, and the moment I saw them, I knew they needed to become a summer DIY.
Using air-dry clay, I created both square and round dishes that are playful, functional, and perfect for summer entertaining or gifting. Summer crafting always pulls me toward projects that feel colorful, relaxed, and just a little unexpected.


Decorative Summer Clay Trinket Dishes
There is something about summer crafting that makes me want to create projects that feel playful, colorful, and just a little unexpected.
And this week’s project may be one of my favorite summer clay crafts yet.
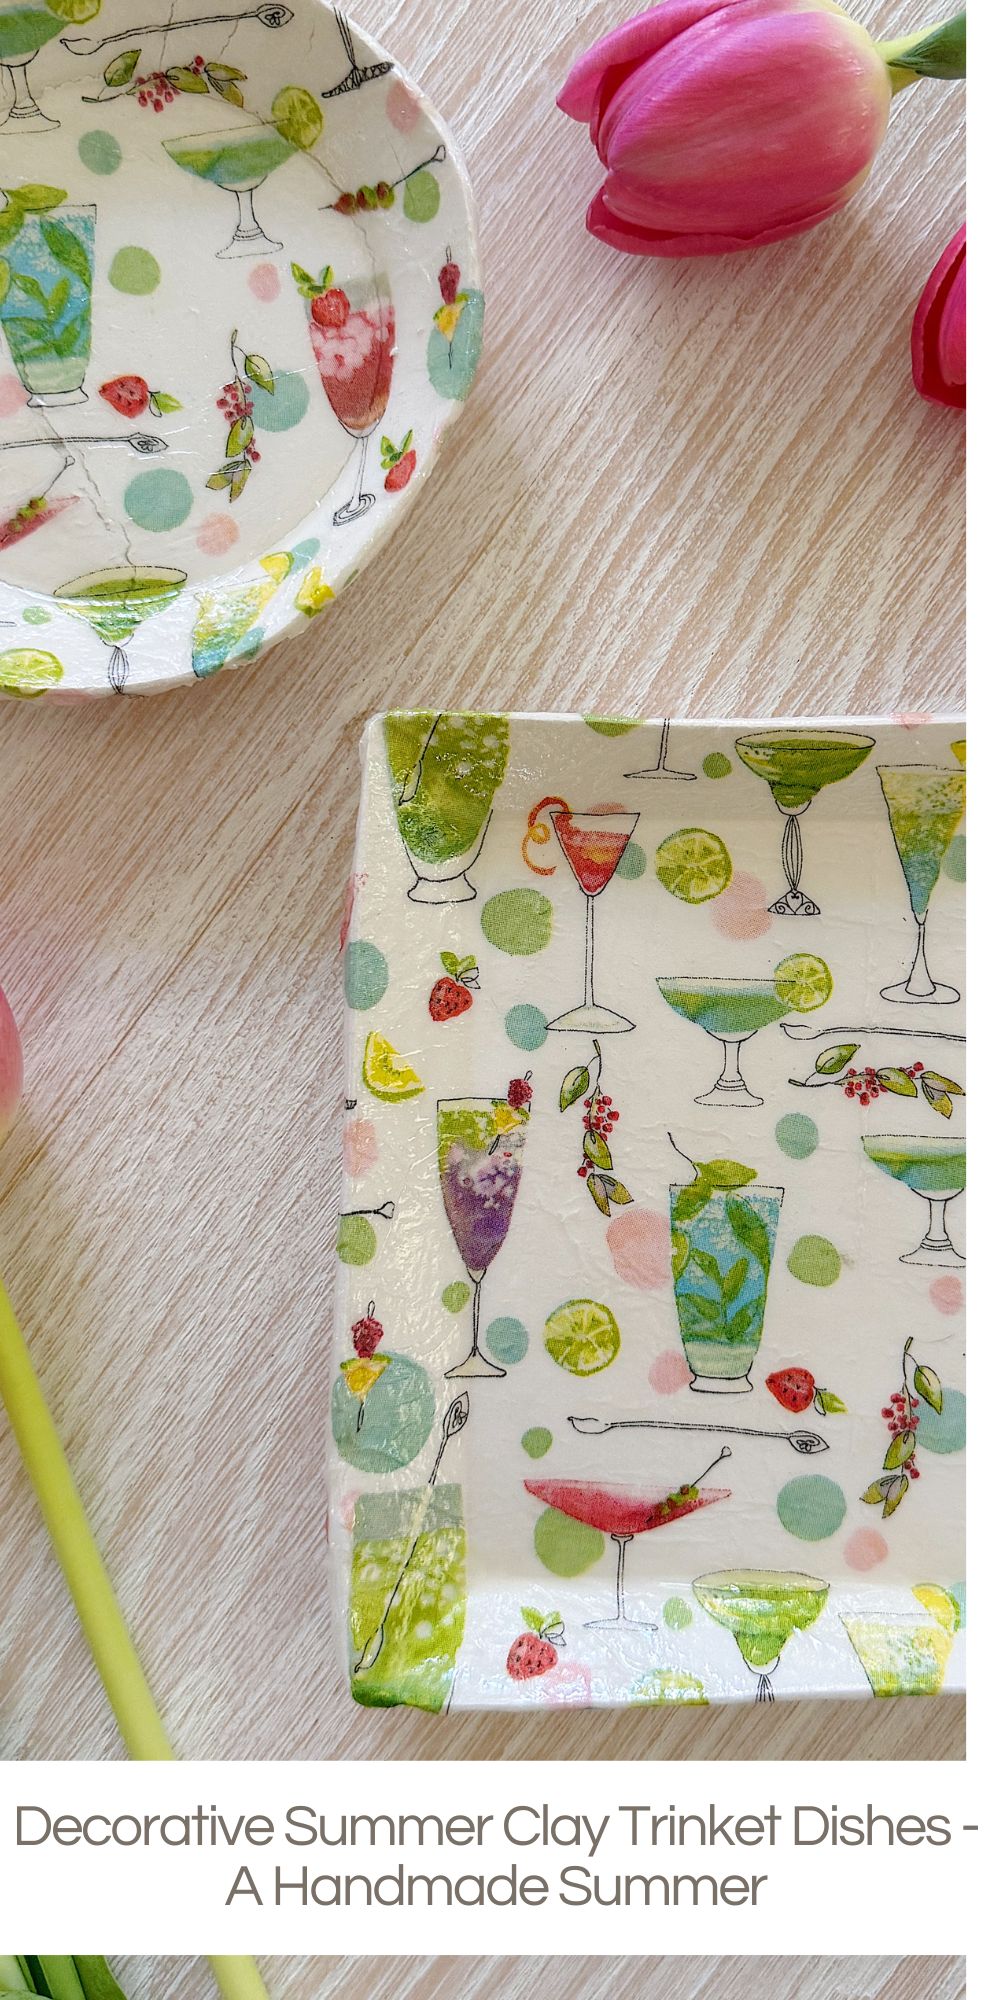
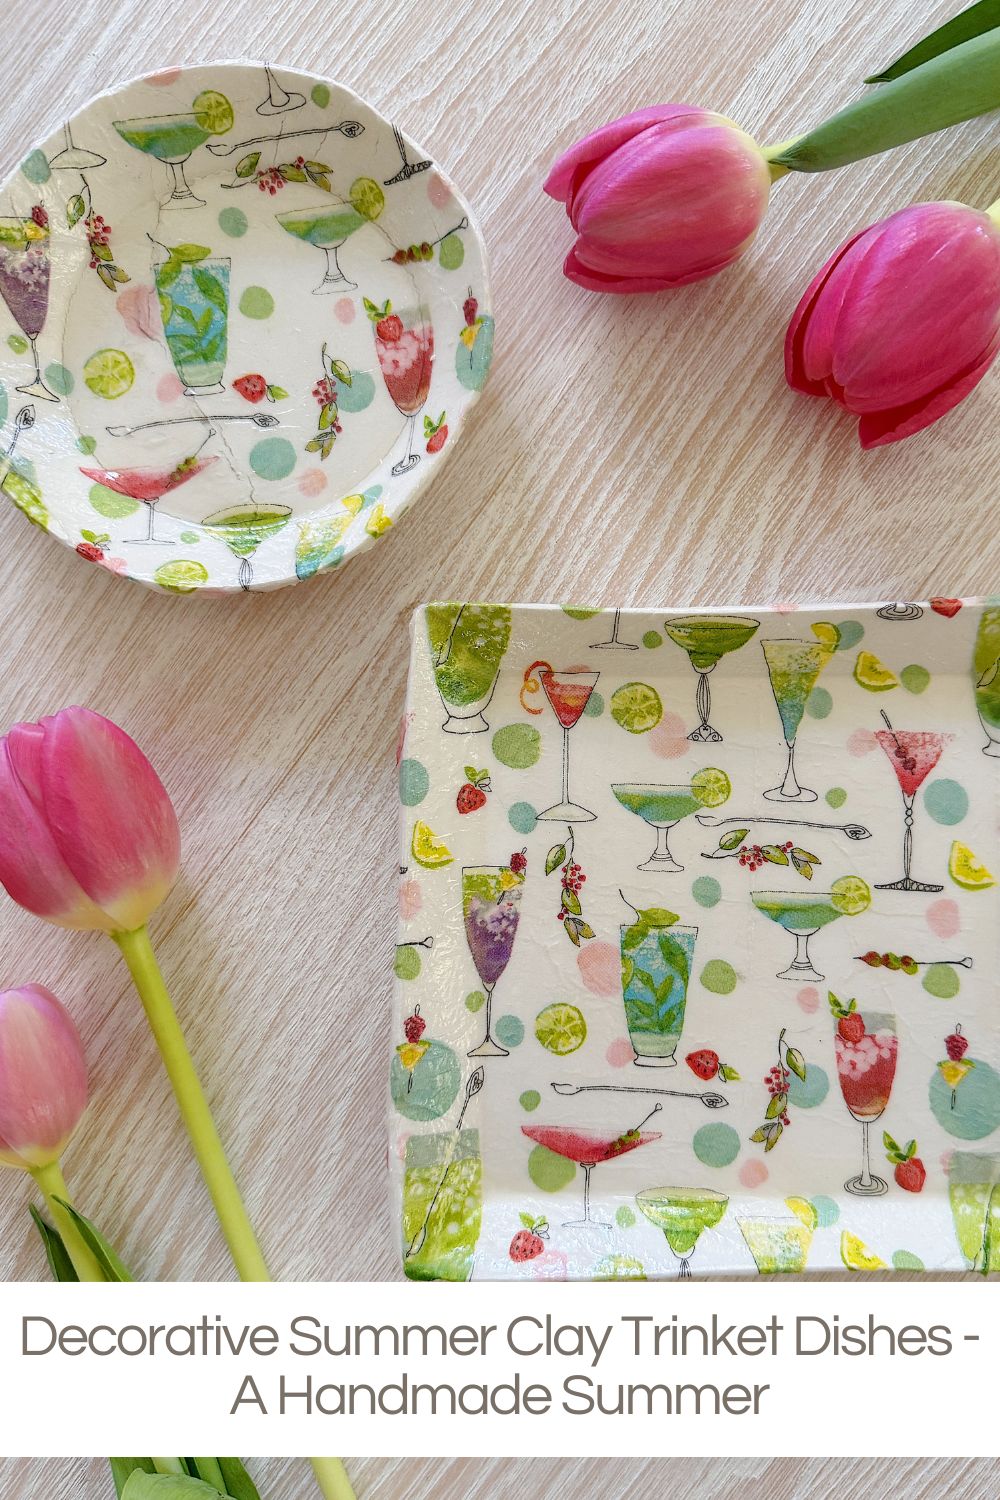
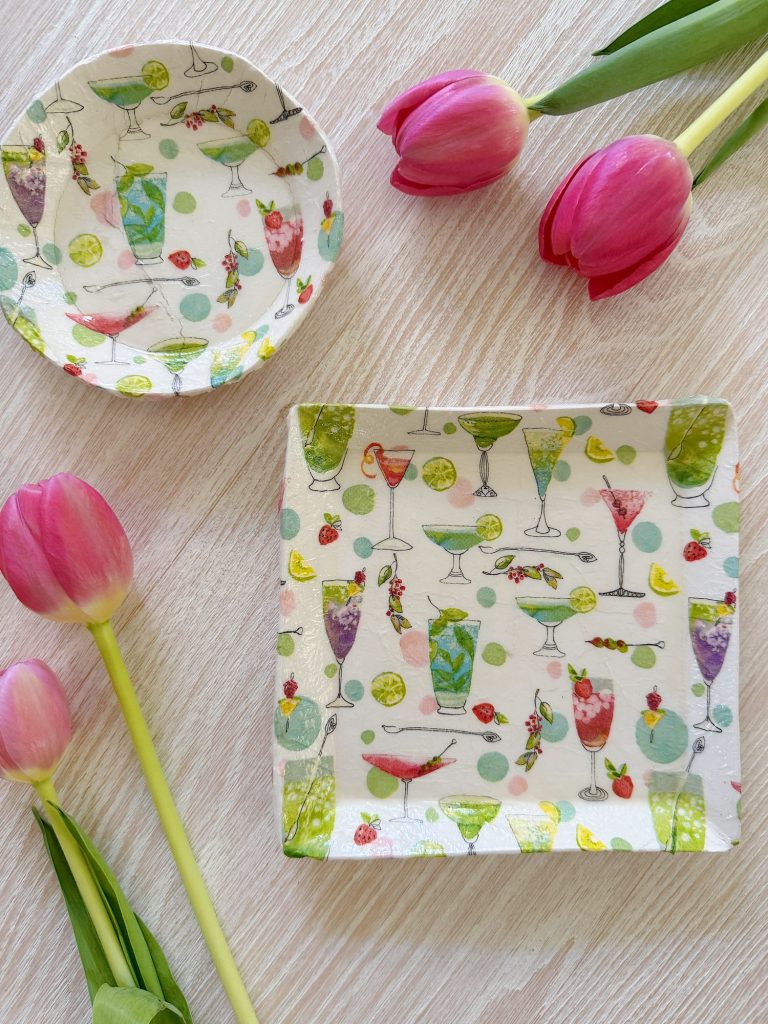
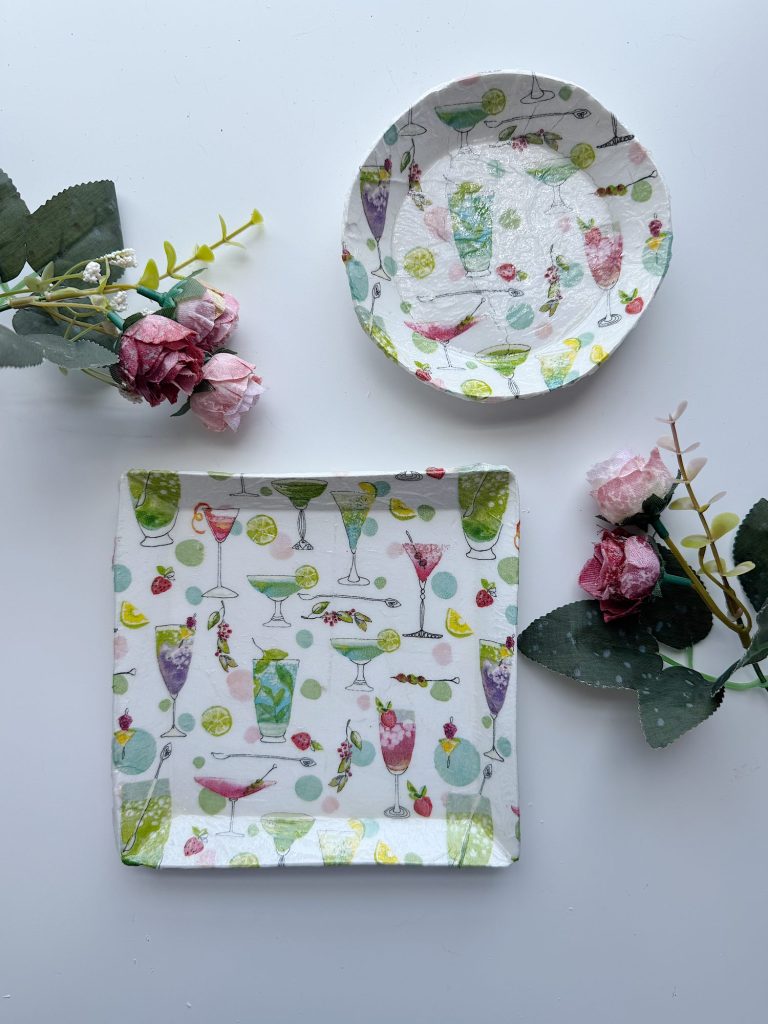
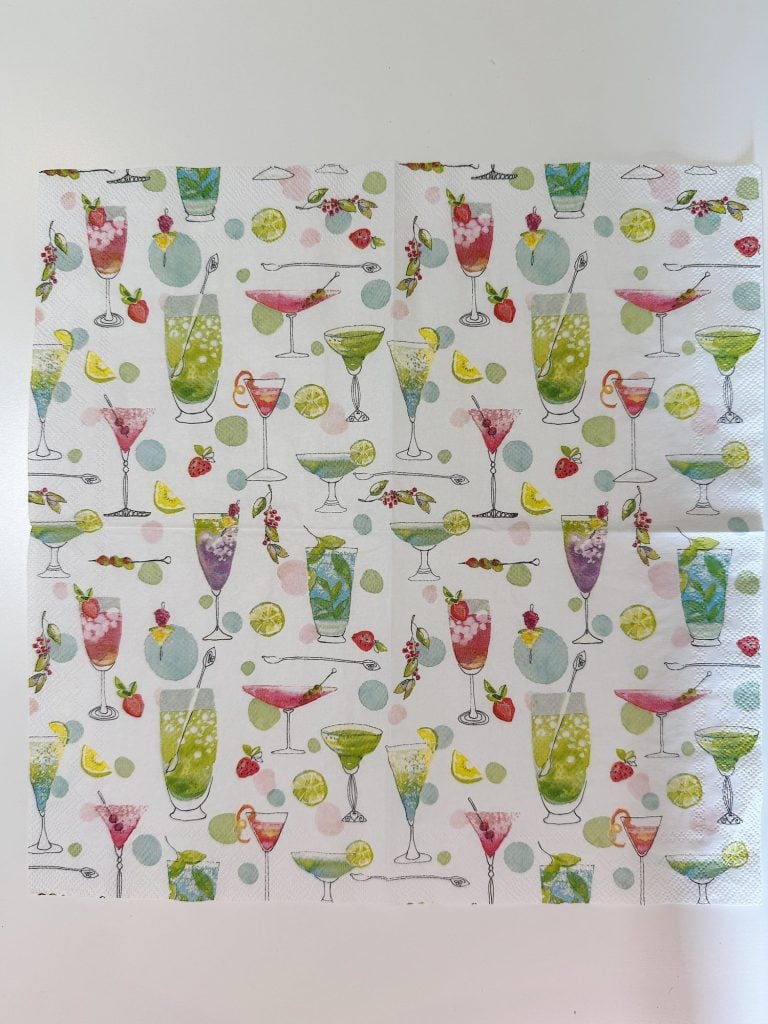
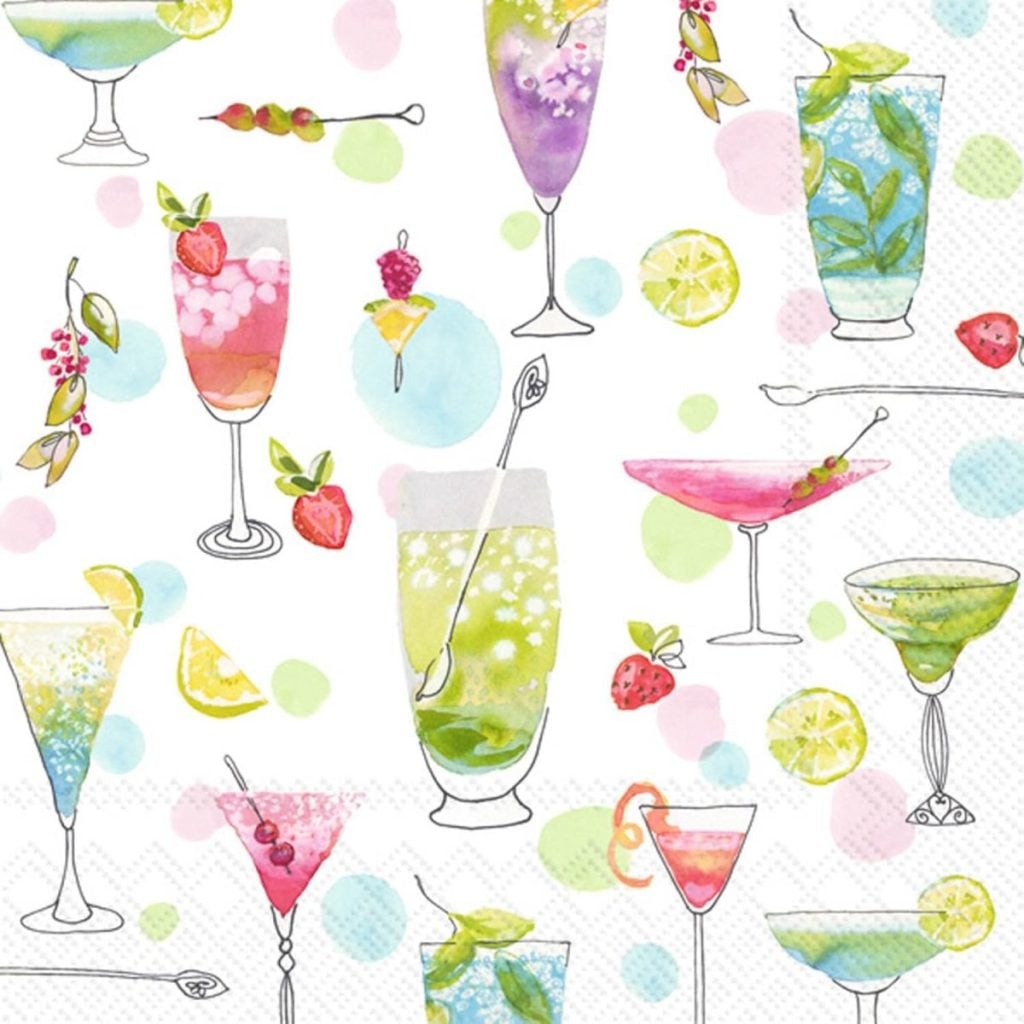
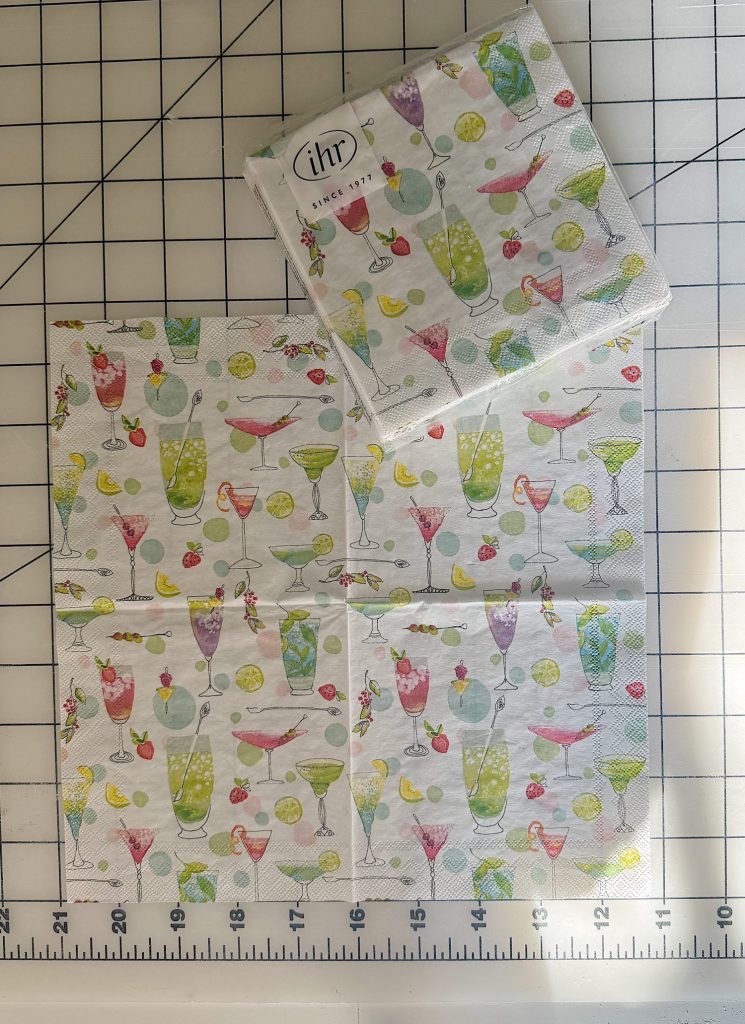
These decorative clay trinket dishes were inspired by the cutest cocktail-themed paper napkins I found, and honestly, the moment I saw them, I immediately knew they needed to become a summer craft project.
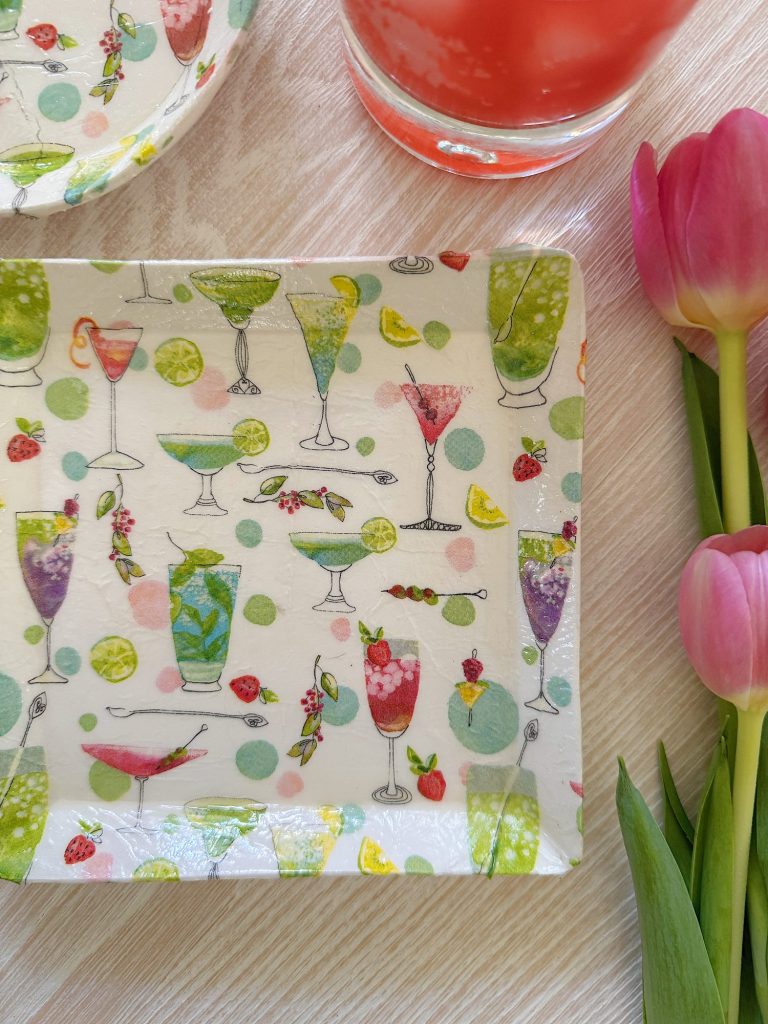
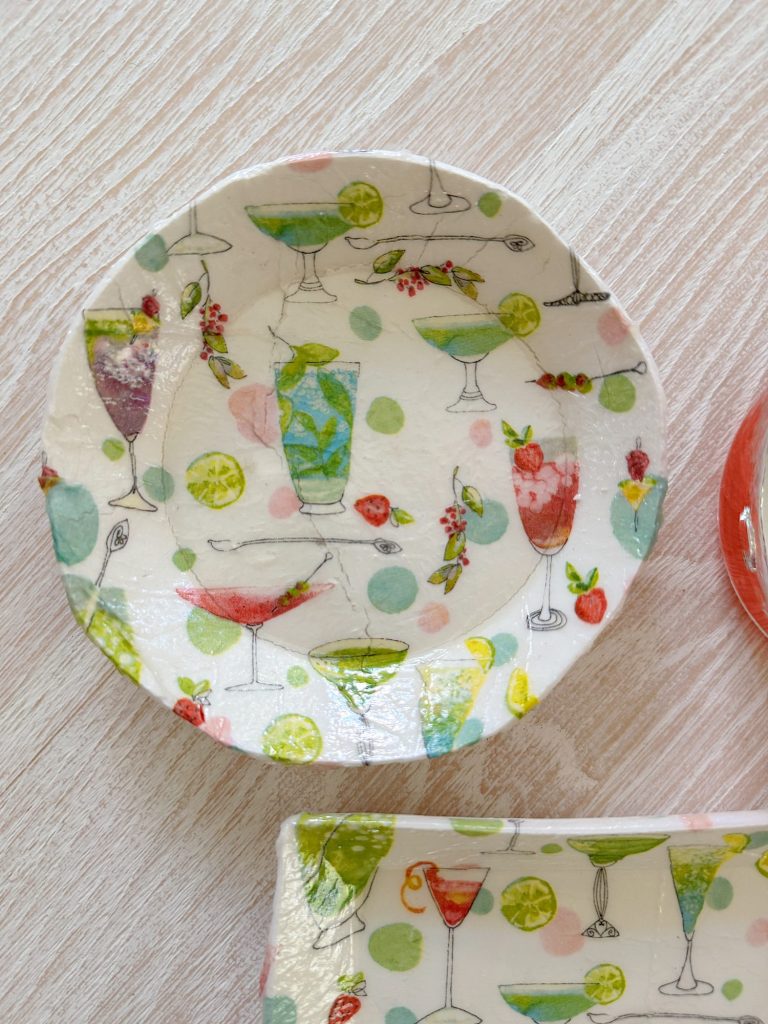
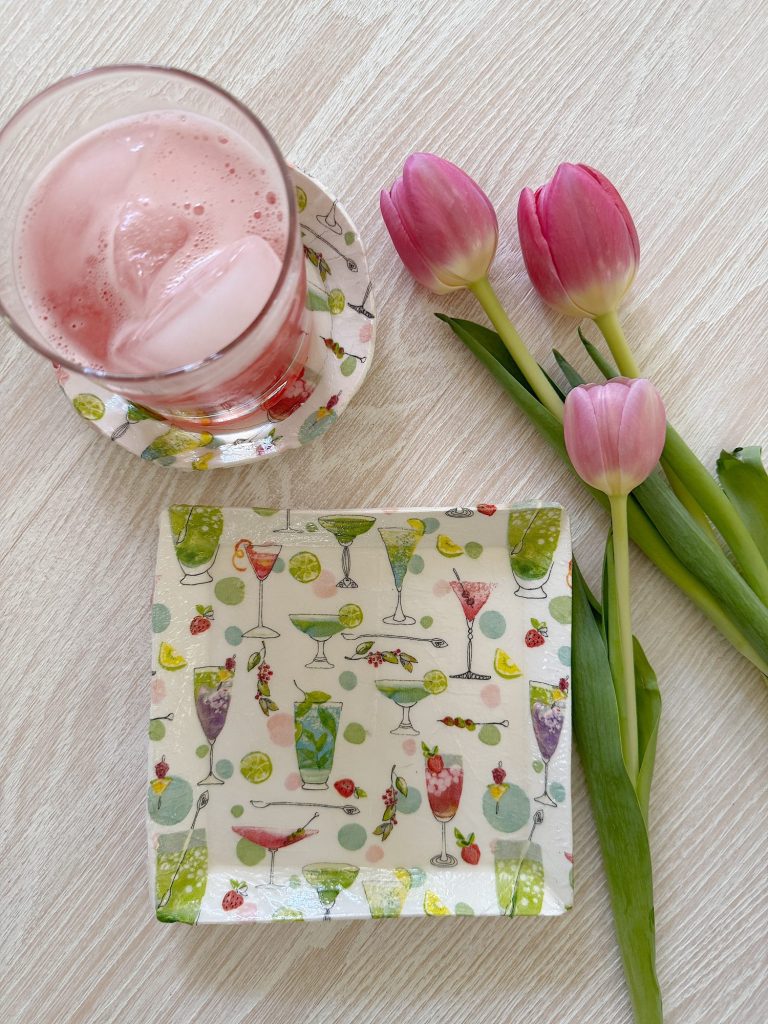
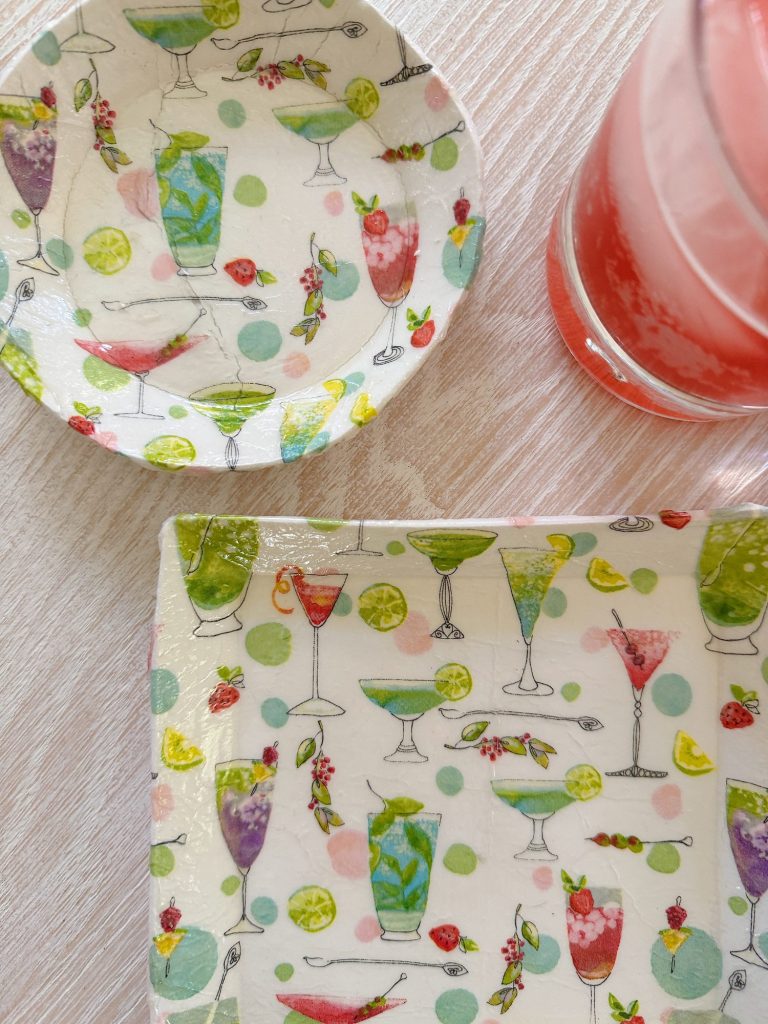
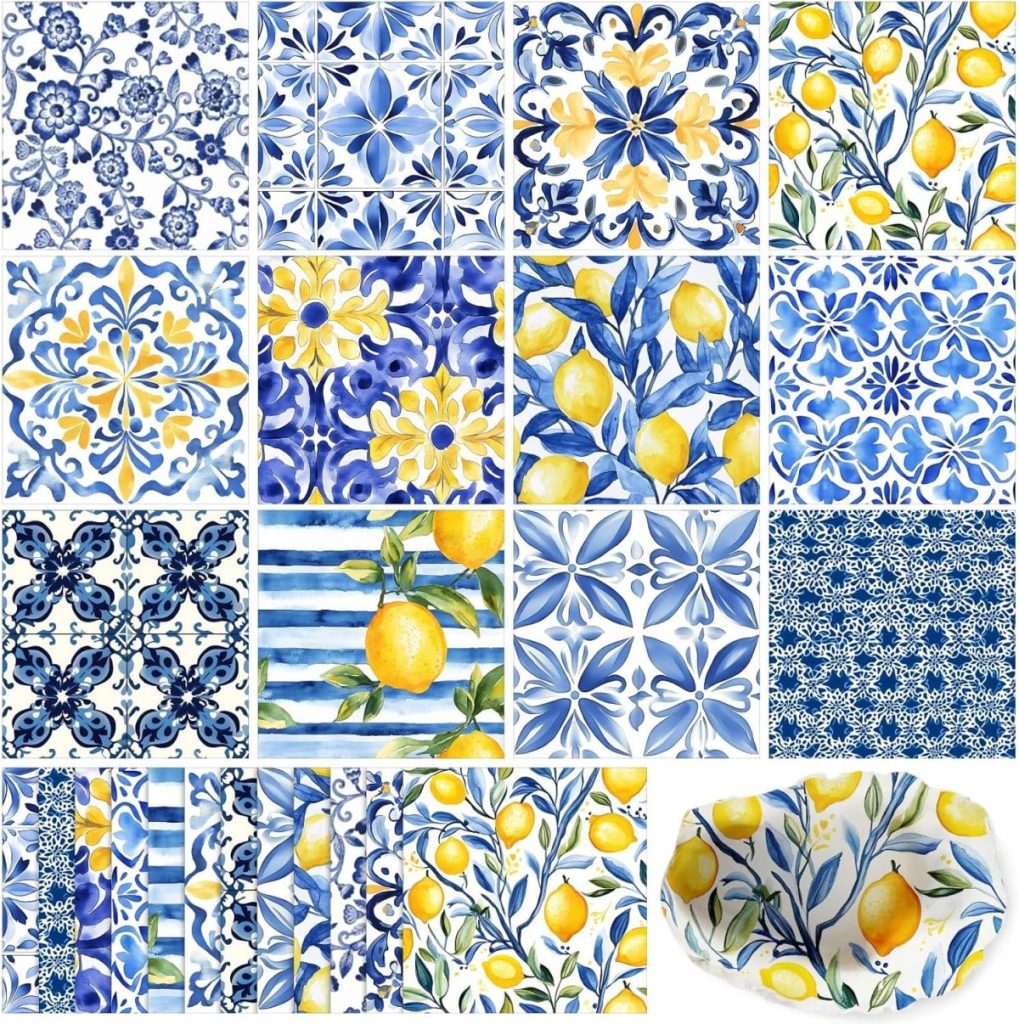
The napkins feature colorful cocktails, citrus slices, berries, and soft watercolor-style designs in the prettiest summery colors. They felt cheerful, relaxed, and perfect for the entertaining season.
So this week for A Handmade Summer, I used air-dry clay and decorative paper napkins to create both square and round trinket dishes that are equal parts functional and decorative.
And the best part?
They are surprisingly easy to make.
If you made any of my decorative clay dishes from A Handmade Spring, then this project will feel very familiar. The process is almost exactly the same, but this time the finished dishes have a fun summer entertaining vibe that feels perfect for:
- jewelry trays
- bedside dishes
- cocktail napkin holders
- entertaining accessories
- hostess gifts
- beach house decor
And honestly, once you make one, you’ll probably want to make several more.
Why I Love Air Dry Clay Projects


I have worked with air-dry clay for years, and I still think it is one of the easiest and most approachable crafting materials available.
Unlike traditional clay, there is:
- no kiln
- no firing
- no complicated equipment
You simply shape it, let it dry, and decorate it.
That simplicity makes it perfect for experimenting with creative ideas and decorative finishes.
And honestly, I love that air-dry clay projects always feel slightly organic and handmade. Tiny imperfections actually add character, making the finished pieces feel artistic rather than overly manufactured.
For this project, I wanted the dishes to feel:
- soft
- modern
- slightly imperfect
- handmade
- summery
- playful
And the cocktail napkins added exactly the right amount of color and personality.
The Decorative Napkins Inspired Everything
Sometimes, a single crafting supply can completely inspire an entire project.
That is exactly what happened here.
The moment I found these cocktail-themed paper napkins, I knew I wanted to use them with clay.
The designs are so fun:
- colorful cocktails
- citrus slices
- berries
- soft watercolor details
- playful summer colors
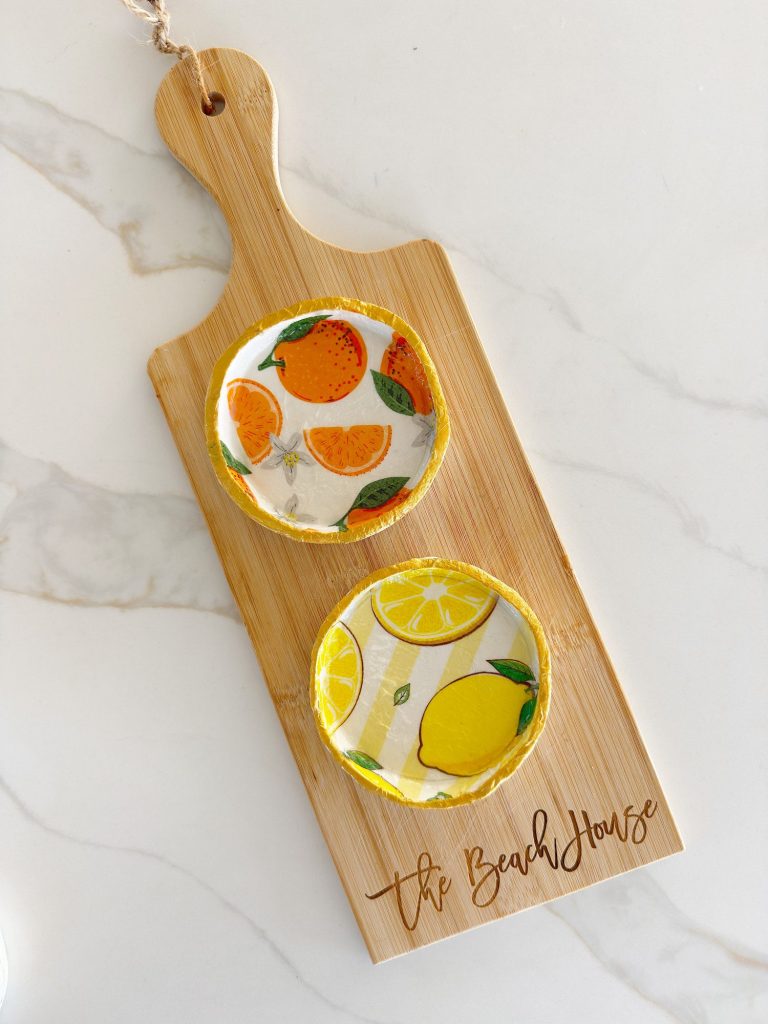
And because the illustrations are scattered across the napkin, each dish ends up looking completely unique depending on which part of the design you use.
I especially love projects where no two finished pieces are exactly alike.
The colors also work beautifully for summer entertaining because they feel bright and cheerful without being overly bold.
Honestly, these napkins alone make me happy.
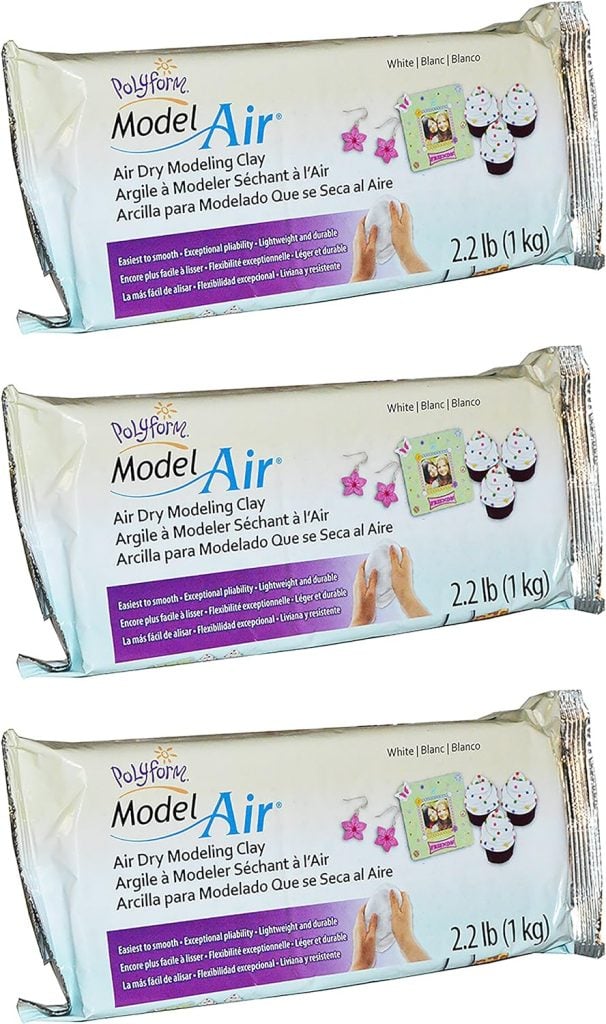
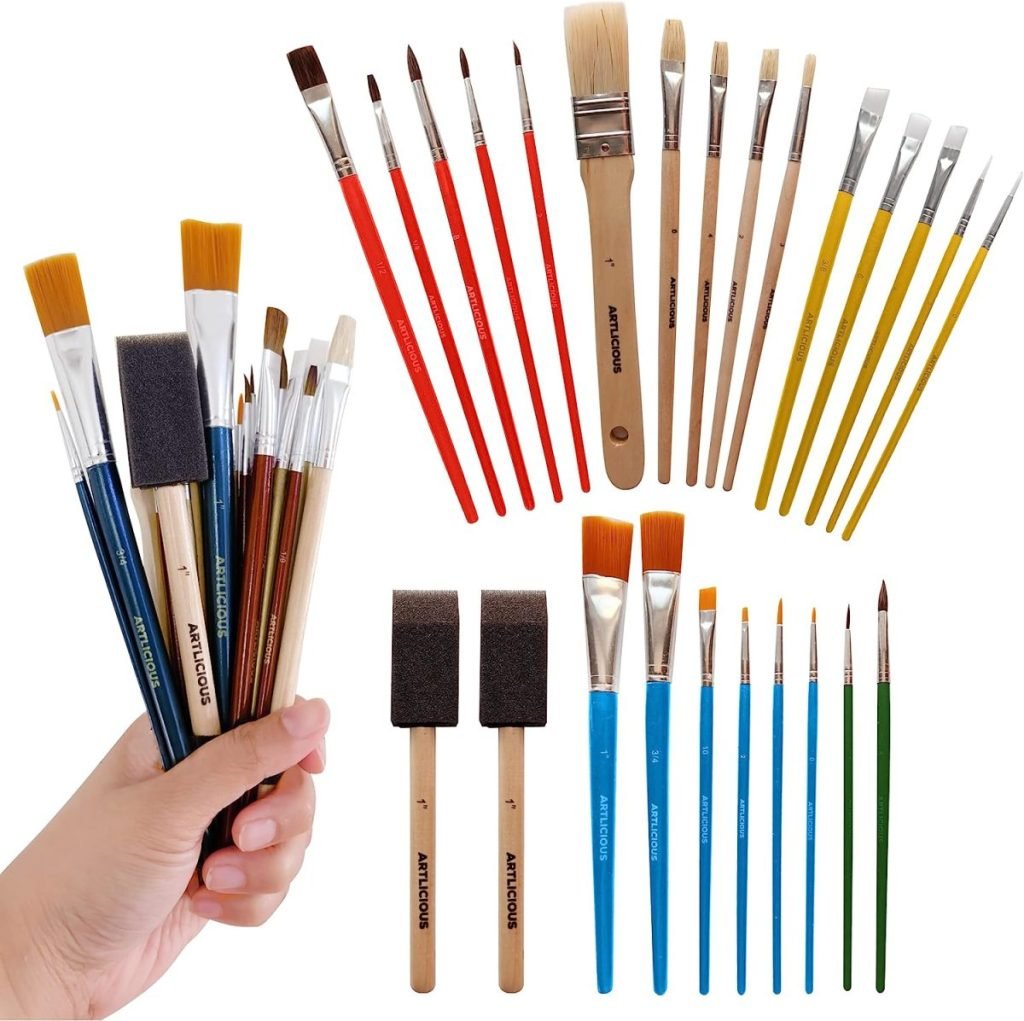
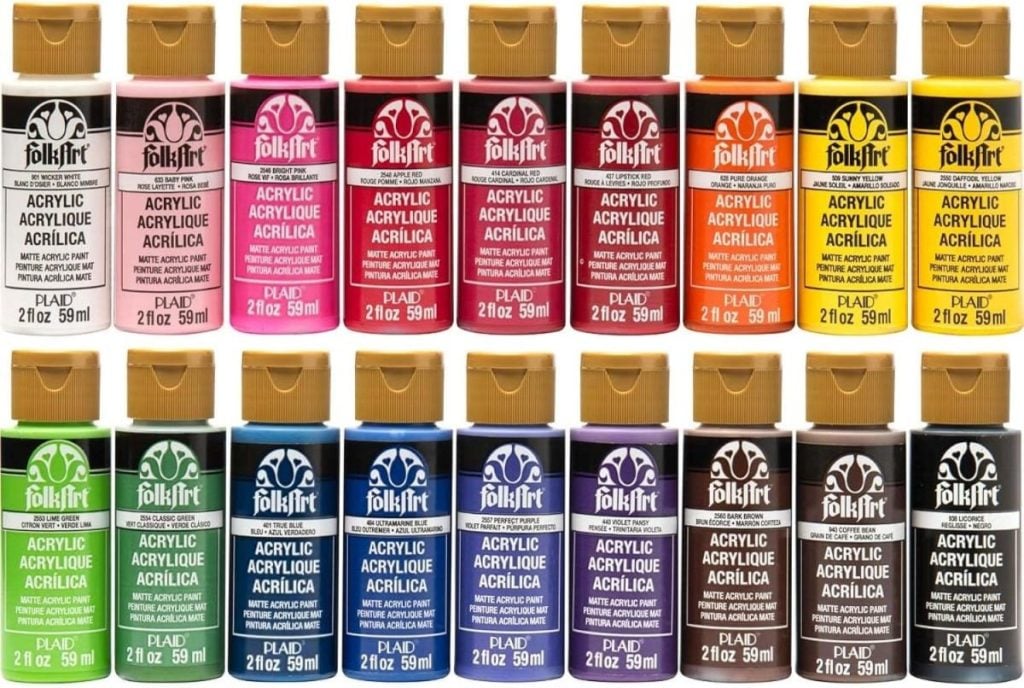
What You Need to Make Decorative Clay Trinket Dishes

One reason I love this project is that the supply list is very simple.
You will need:
- air dry clay
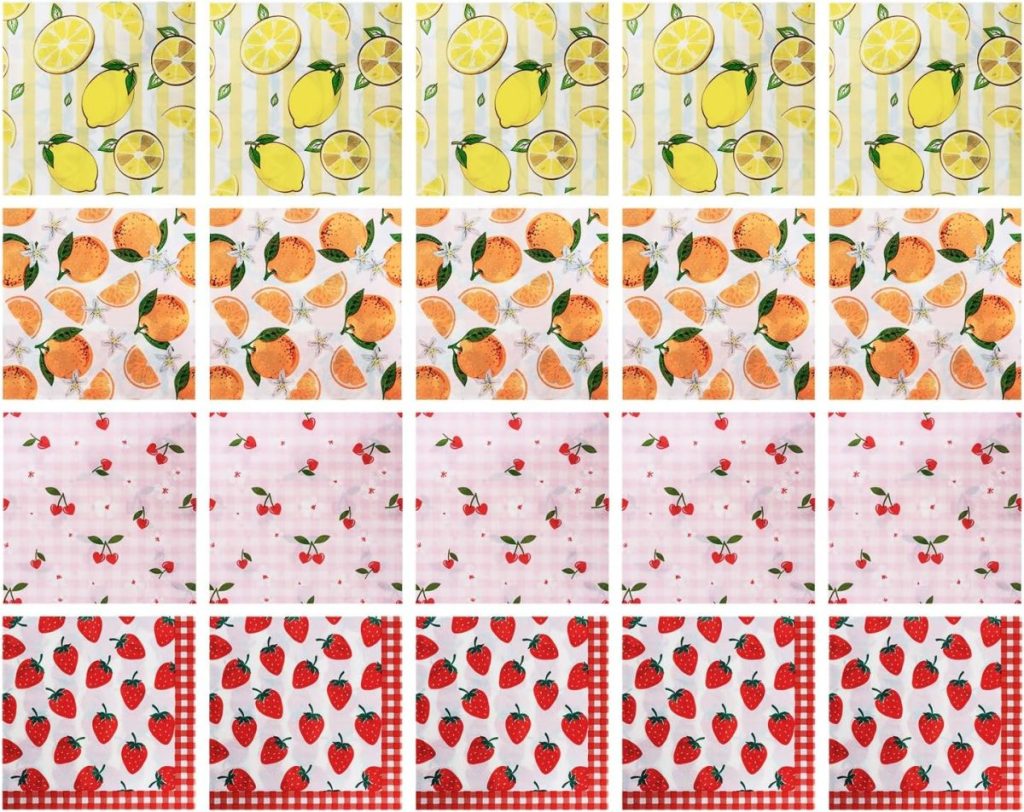
- decorative paper napkins
- rolling pin
- wooden guide sticks (or two 3/8″ thick rulers)
- craft knife
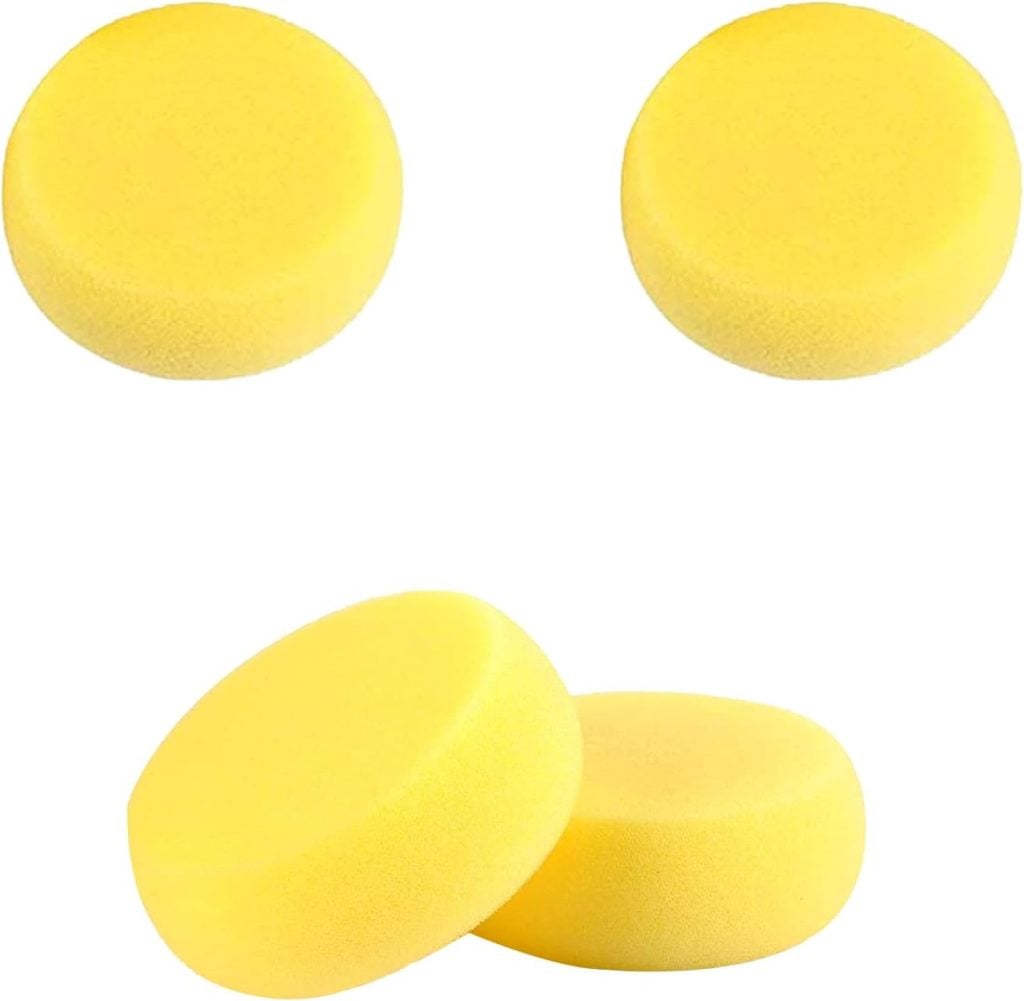
- clay sponge
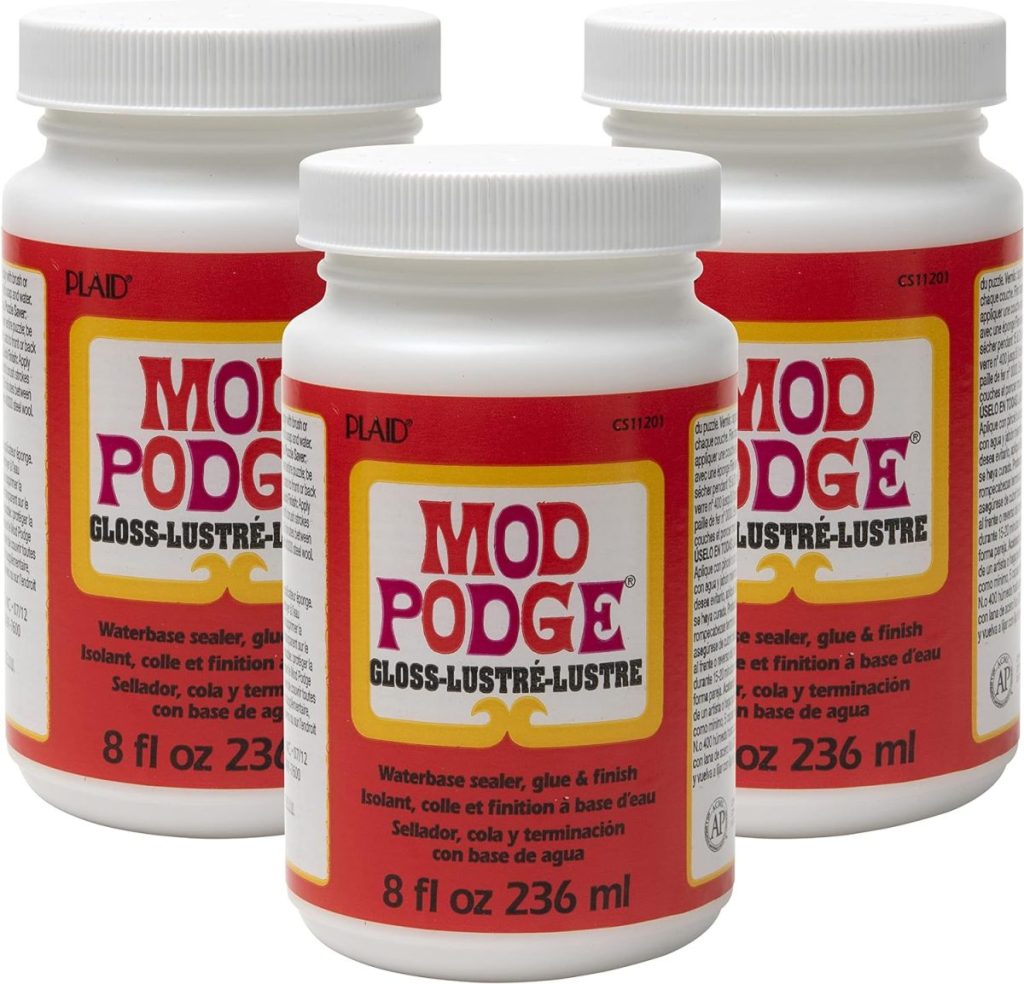
- Mod Podge
- acrylic paint
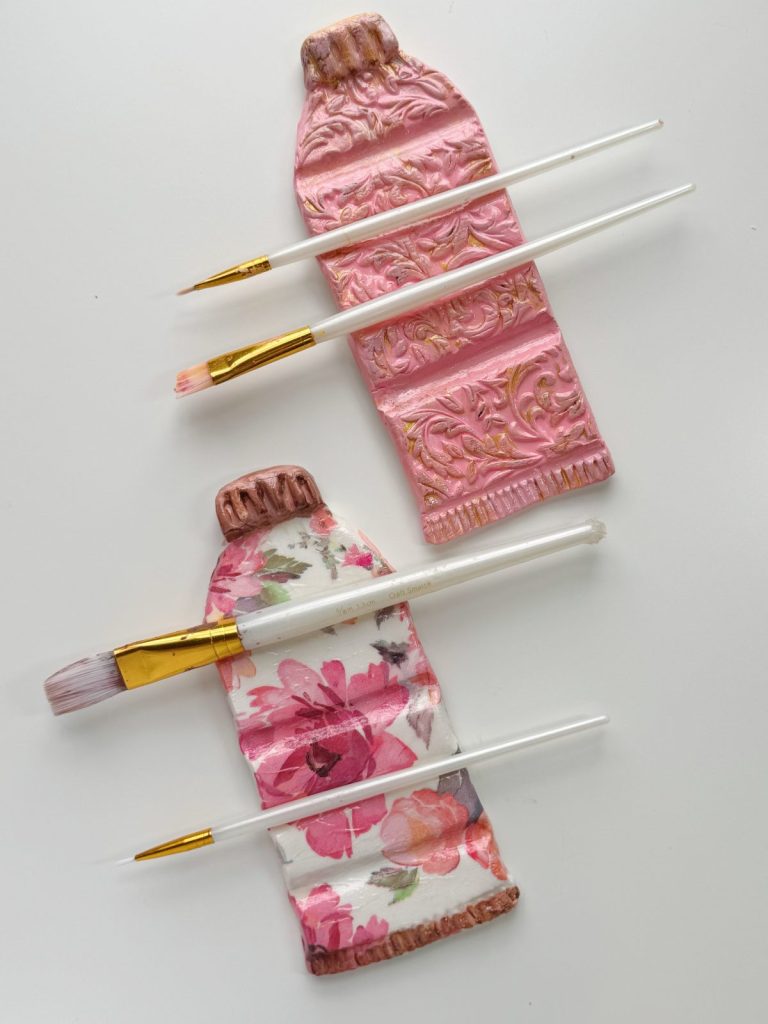
- paint brushes
- small bowls or clay forms for shaping
- sandpaper
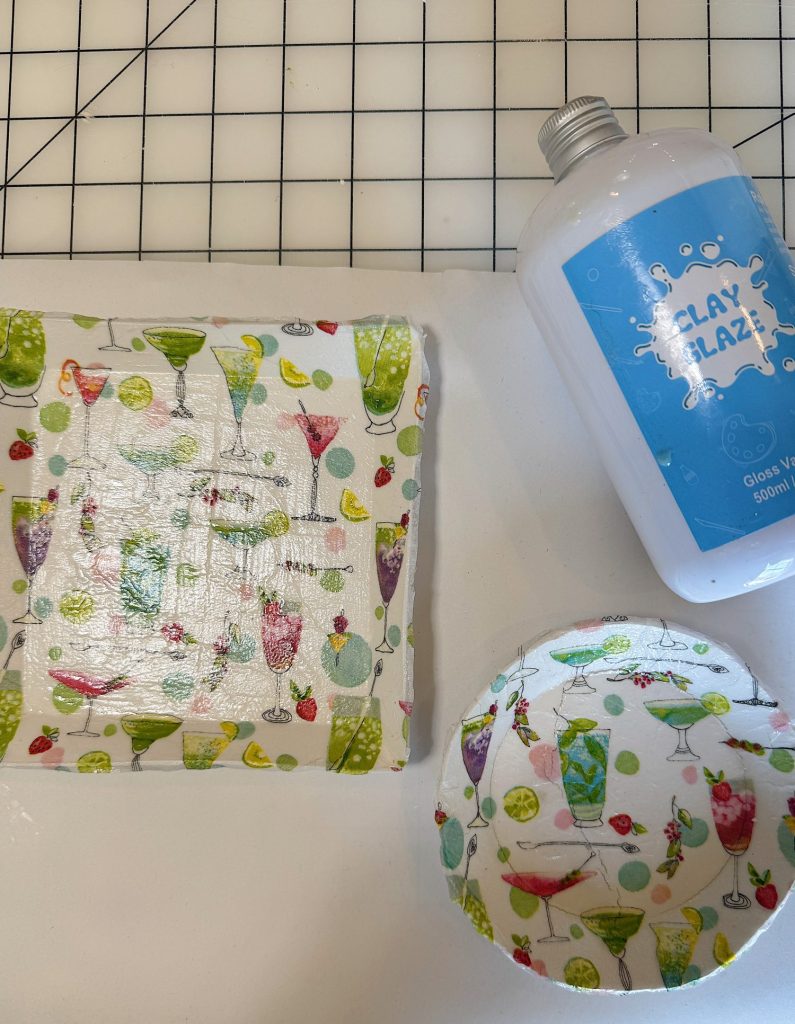
- Clay Glaze or sealer
I may use affiliate links on this blog, which means I earn a small commission if you make a purchase through them. The price will be the same whether you use the affiliate link or go directly to the vendor’s website using a non-affiliate link.
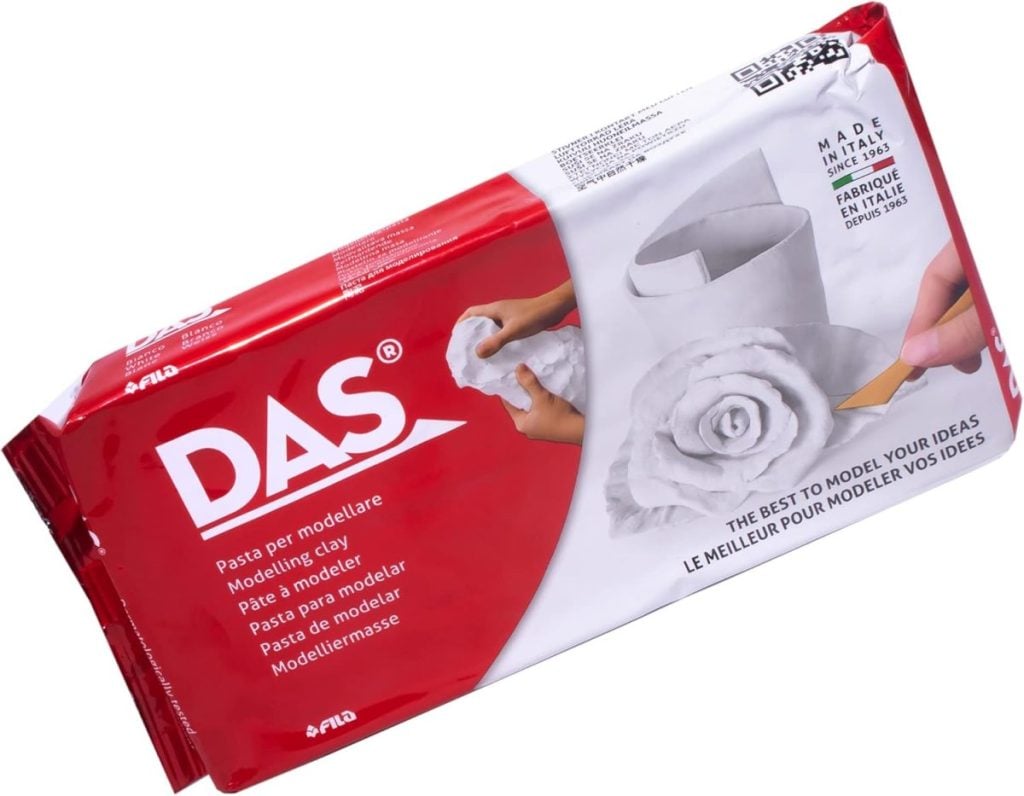

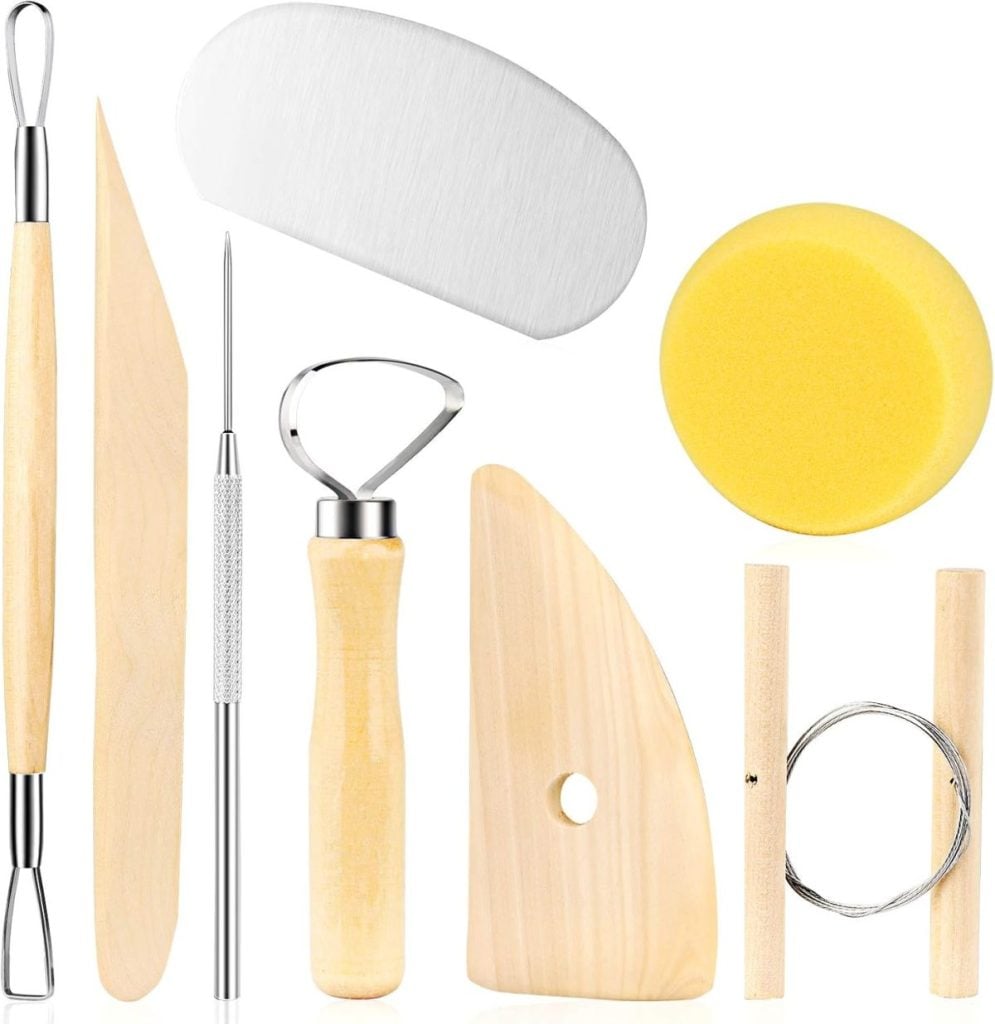
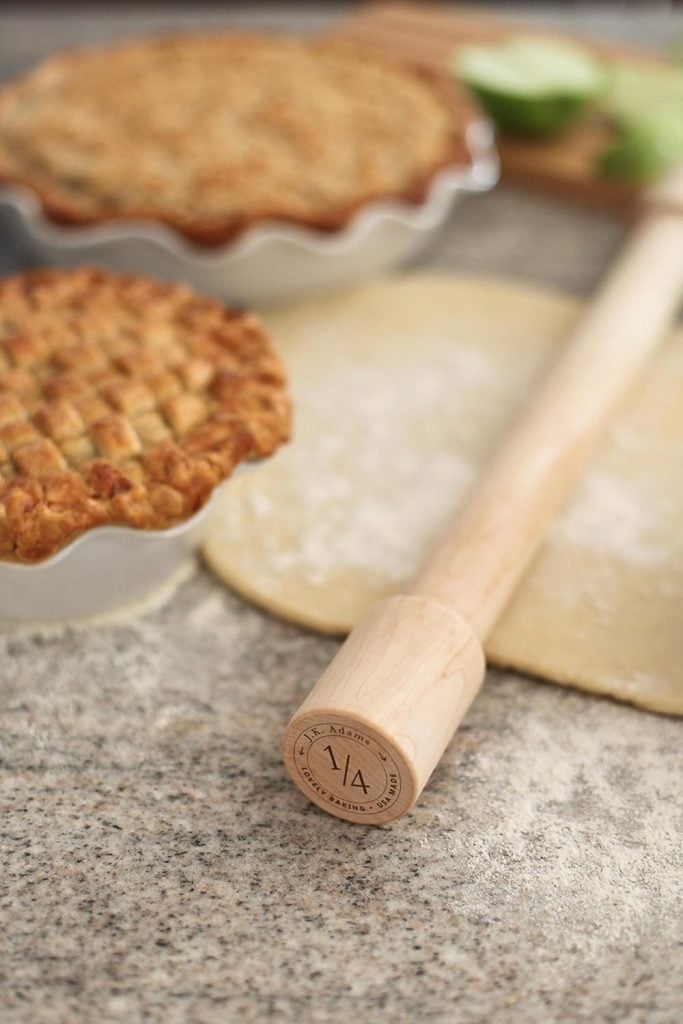
The wooden guide sticks are especially helpful because they keep the clay an even thickness while rolling.
And honestly, even though the project looks elevated and artistic, the actual process is very beginner-friendly.
How I Made the Clay Dishes

I started by rolling out the air-dry clay using wooden guide sticks on each side to keep the thickness consistent. I like to use a 1/4″- 3/8″ thickness.
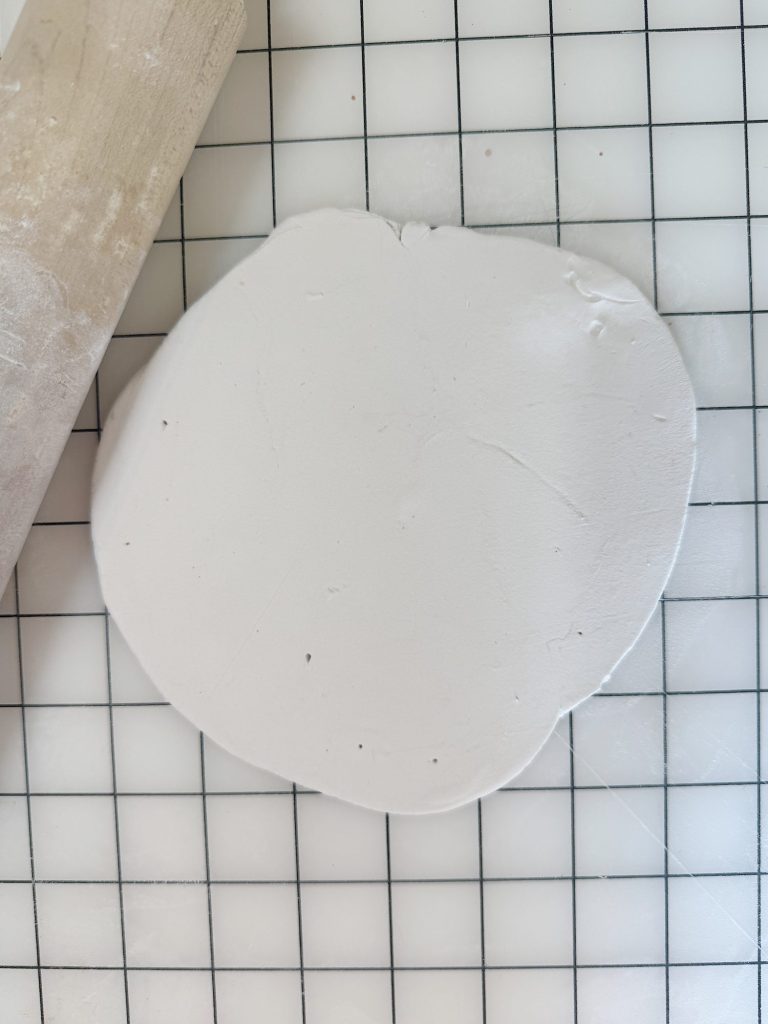
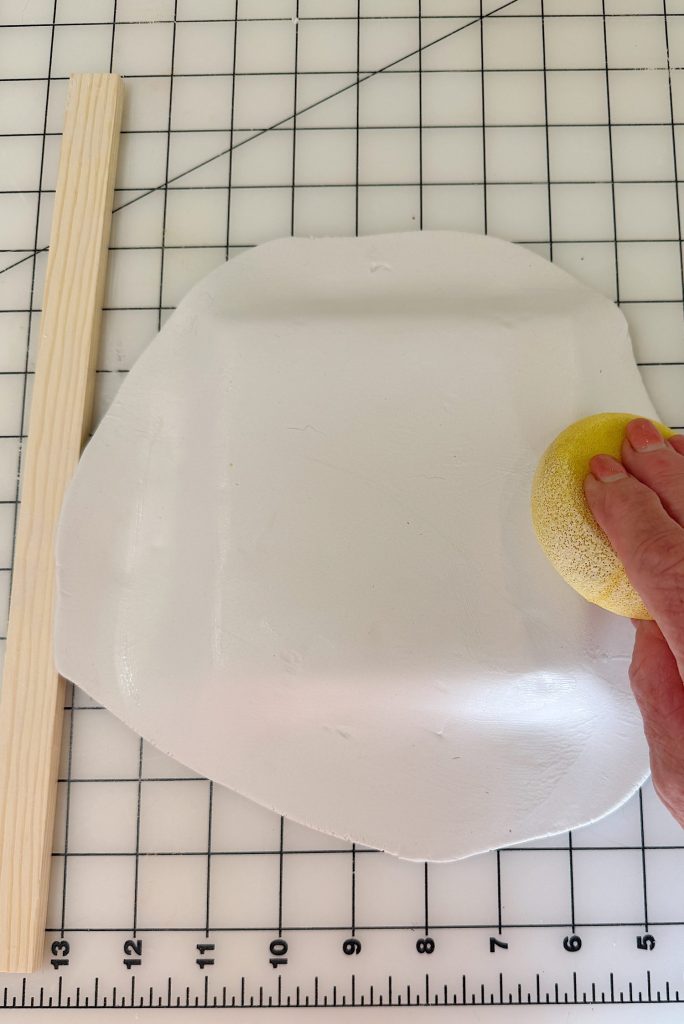
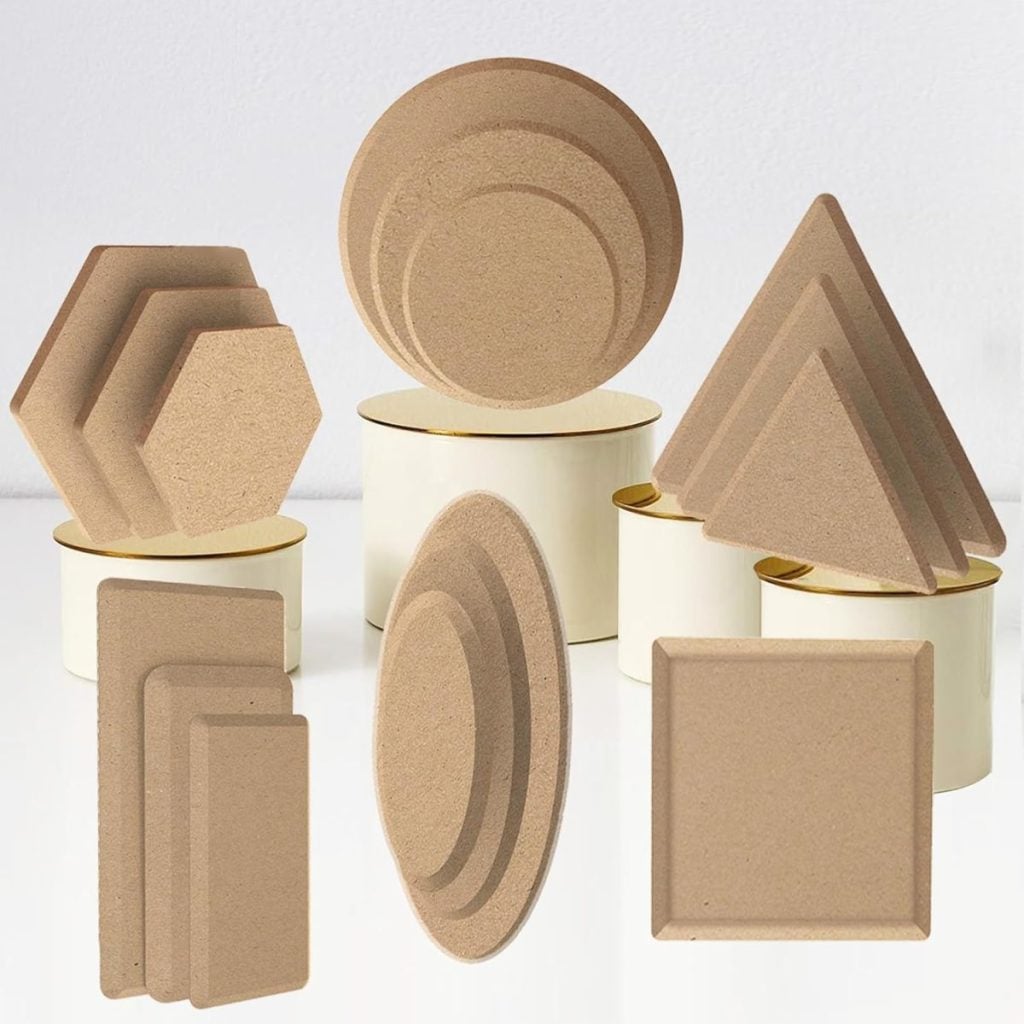
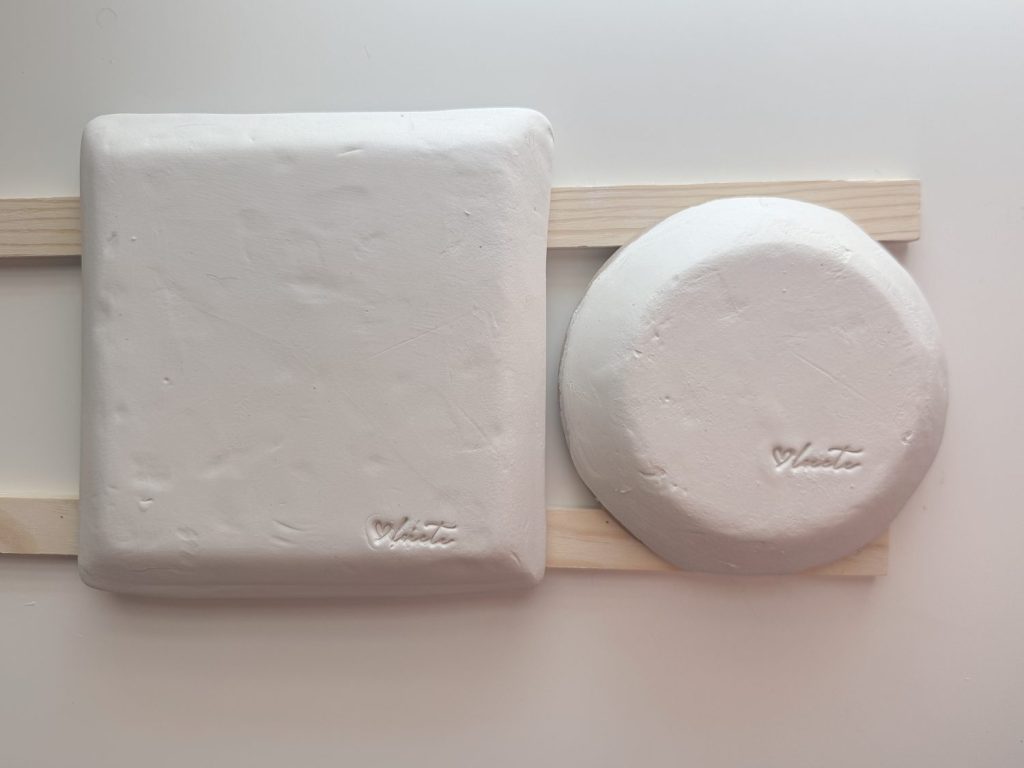
Once the clay was smooth and evenly rolled, I cut:
- one square shape
- one round shape
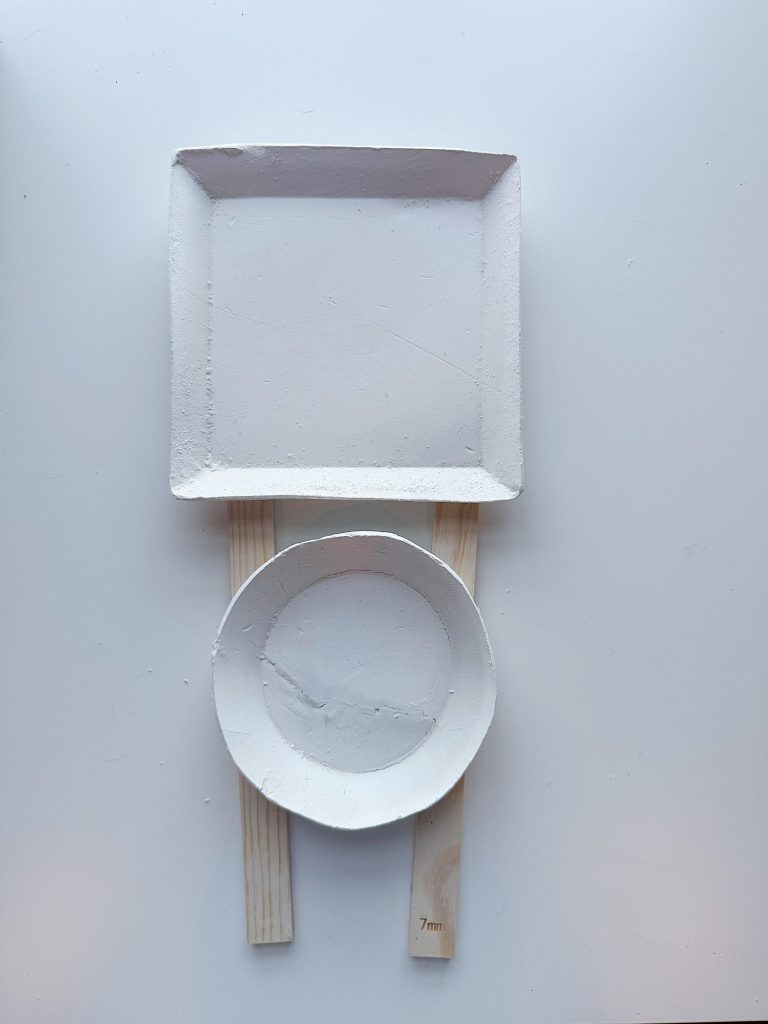
I wanted to experiment with both styles because I love having a mix of shapes when decorating or entertaining.
The square dish feels:
- modern
- clean
- slightly architectural
While the round dish feels:
- softer
- organic
- relaxed
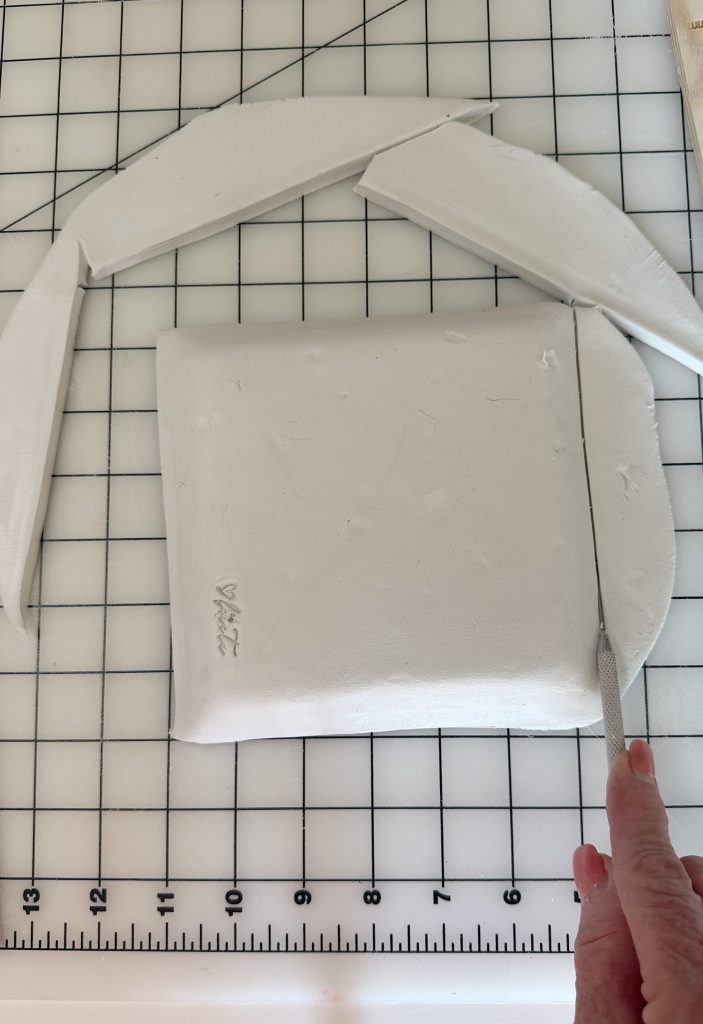
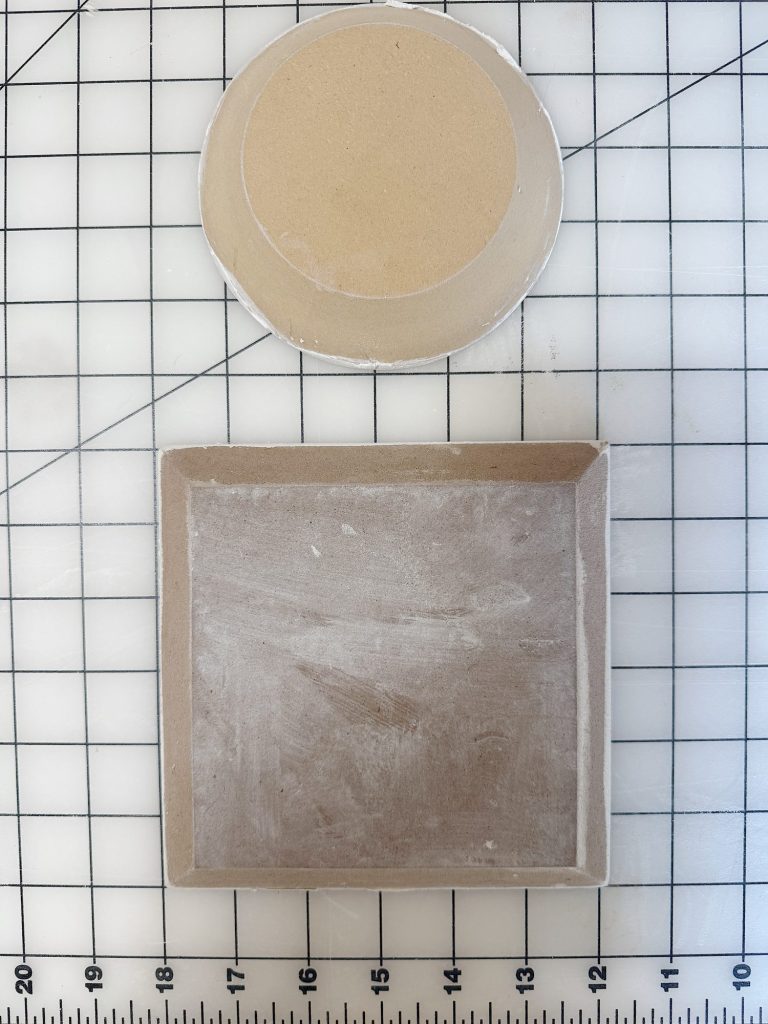
After cutting the shapes, I carefully draped the clay over forms so that the edges would gently curve upward as it dried.
Remove the clay from the form when it is partially dry, or after an hour or so. Don;t wait until it is hard.
This step always feels a little magical because flat clay suddenly starts to look like an actual dish.
I then smoothed the edges and allowed the clay to dry completely before sanding any rough areas.
And honestly, at this stage, they already looked beautiful in their simple matte white form.
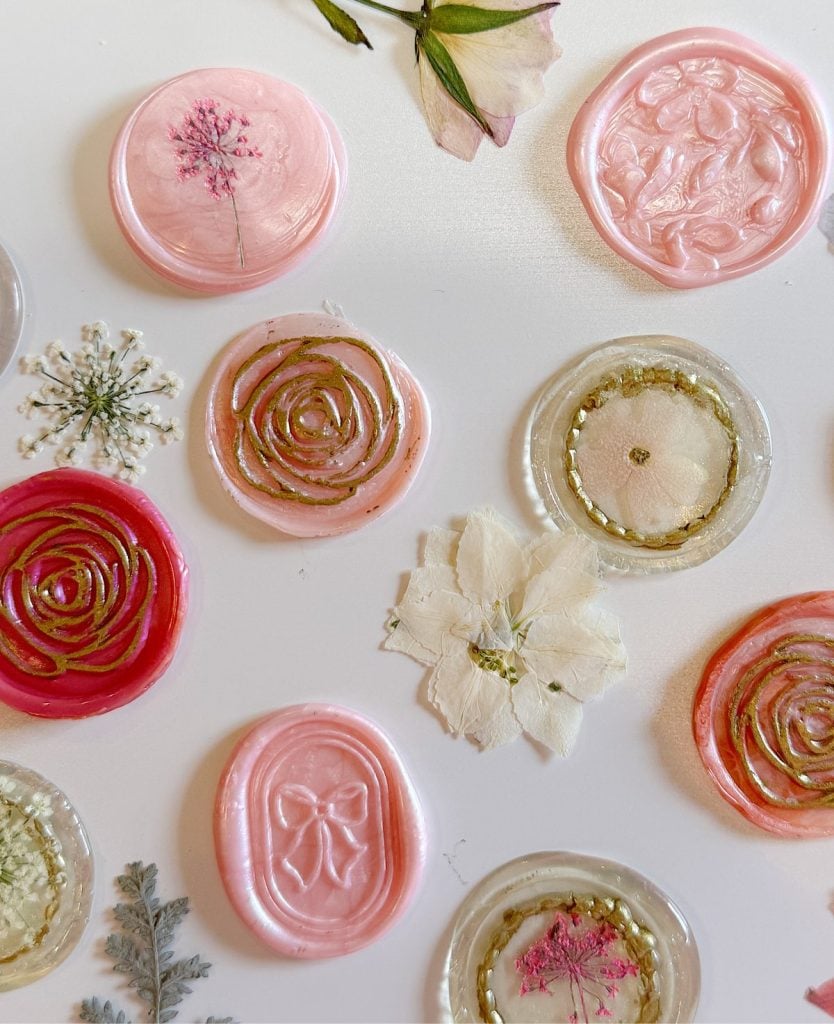
Adding the Decorative Napkins
This is always my favorite part of the process.
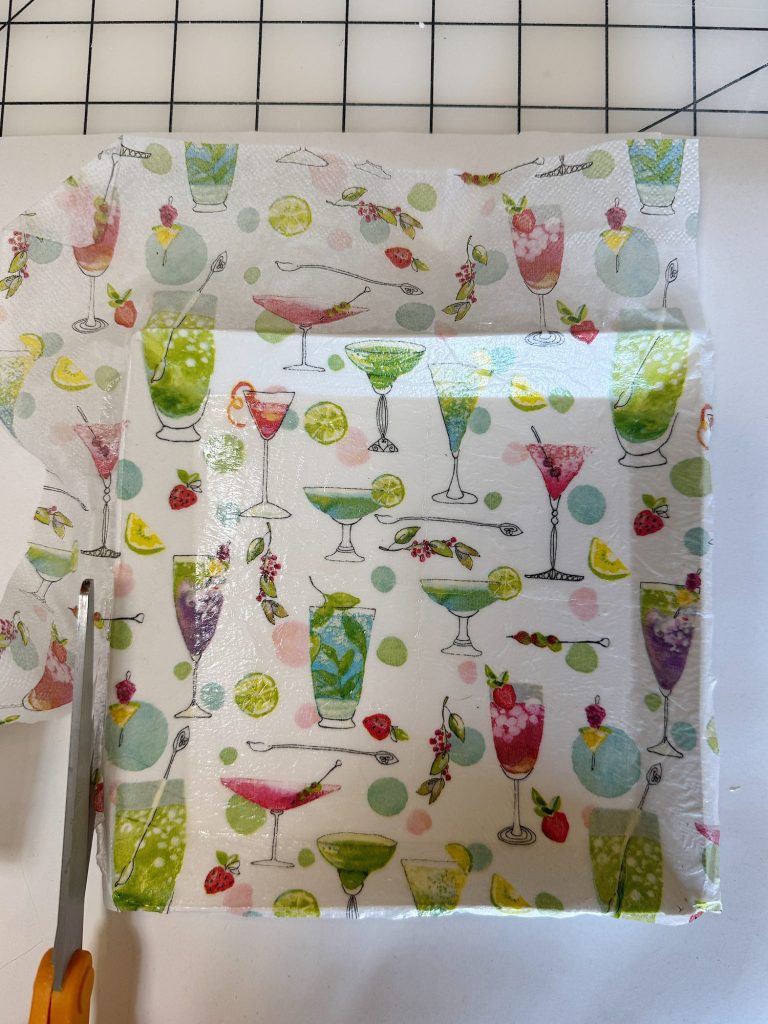
Once the clay dishes were fully dry and smooth, I carefully separated the top decorative layer from the napkin.
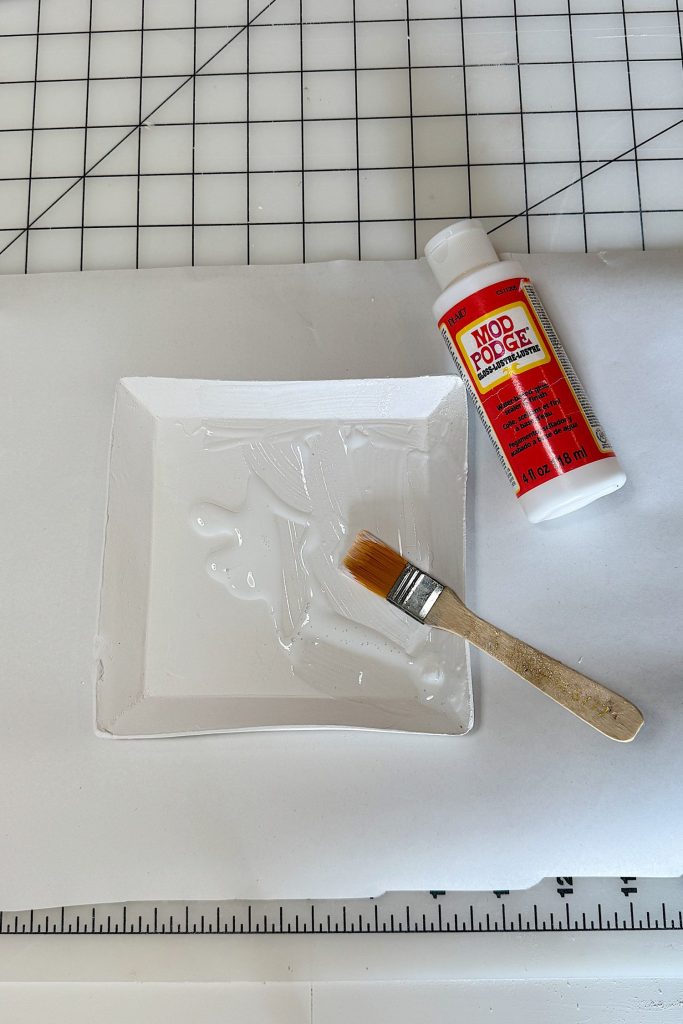
Cover the dish with a coat of Mod Podge.
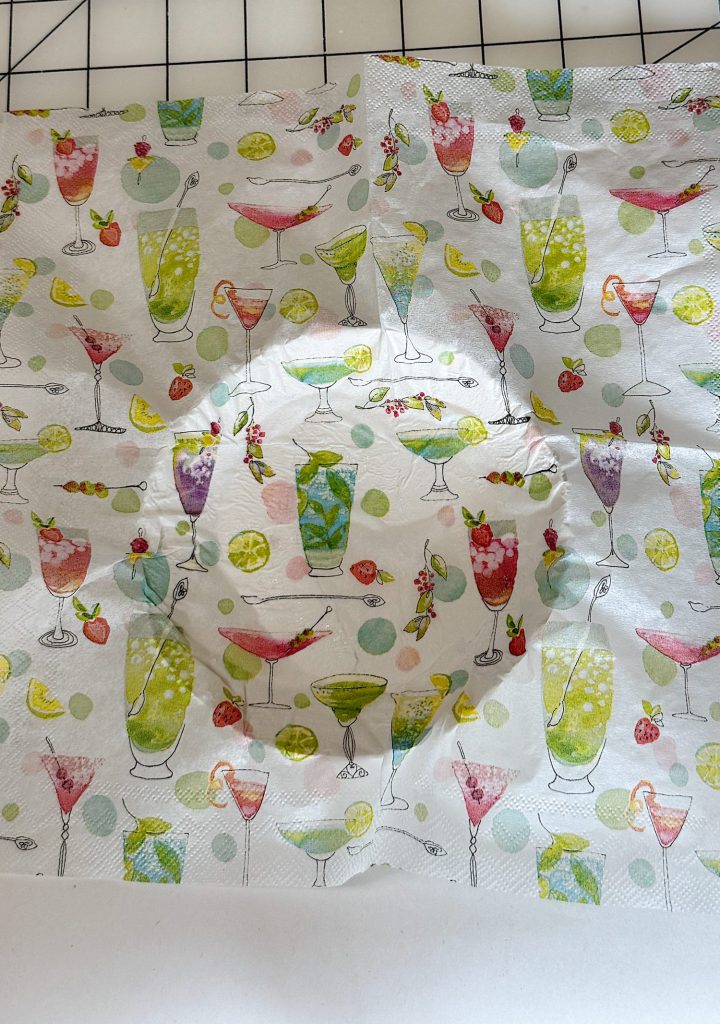
I used the napkin as is and pressed it into the clay dish. You can also cut and arrange the cocktail illustrations on the dishes before applying Mod Podge.

After carefully pressing the napkin into the dish, gently add another coat of Mod Podge over the entire surface.
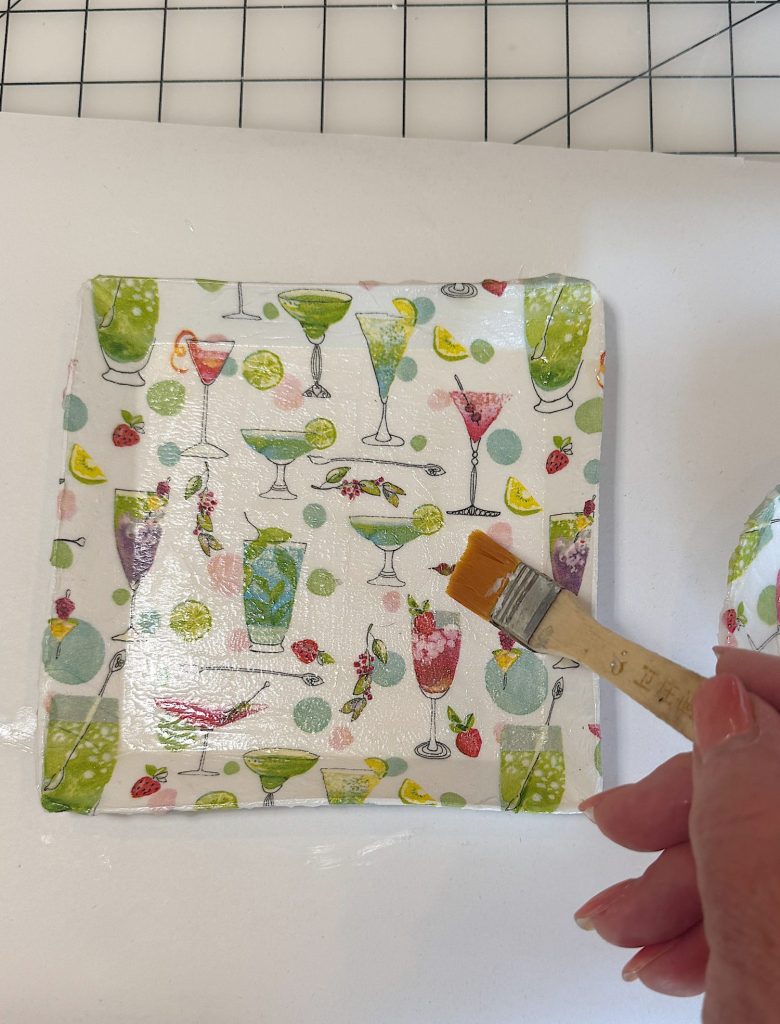
Let the clay dishes dry before adding the top coat of Clay Glaze.
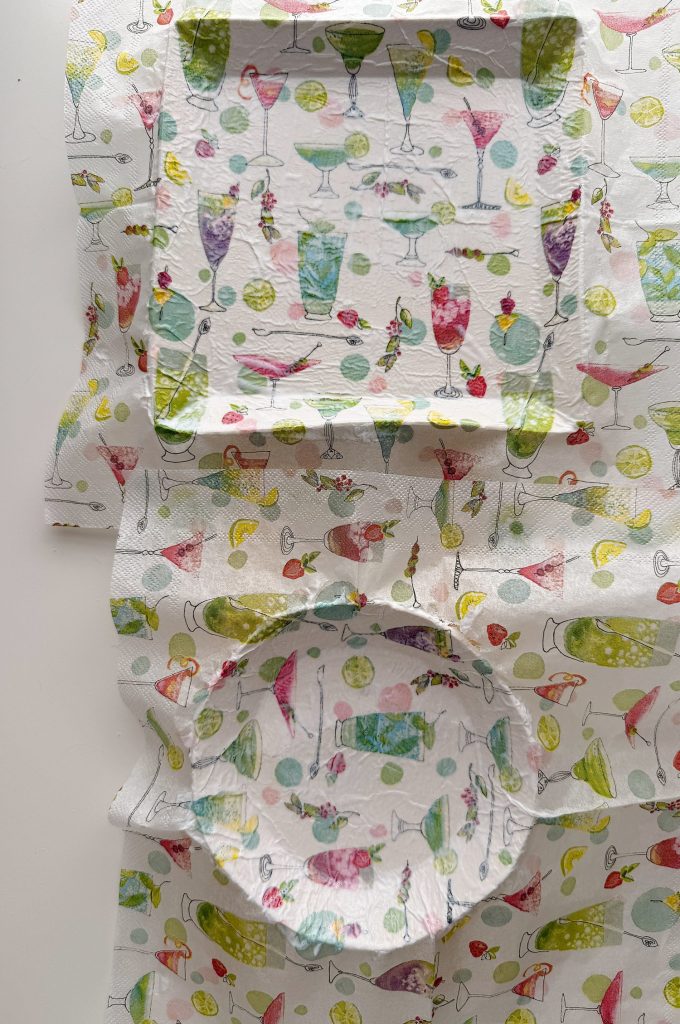
Cut away the extra napkin and dover with Clay Glaze for a glossy finish.
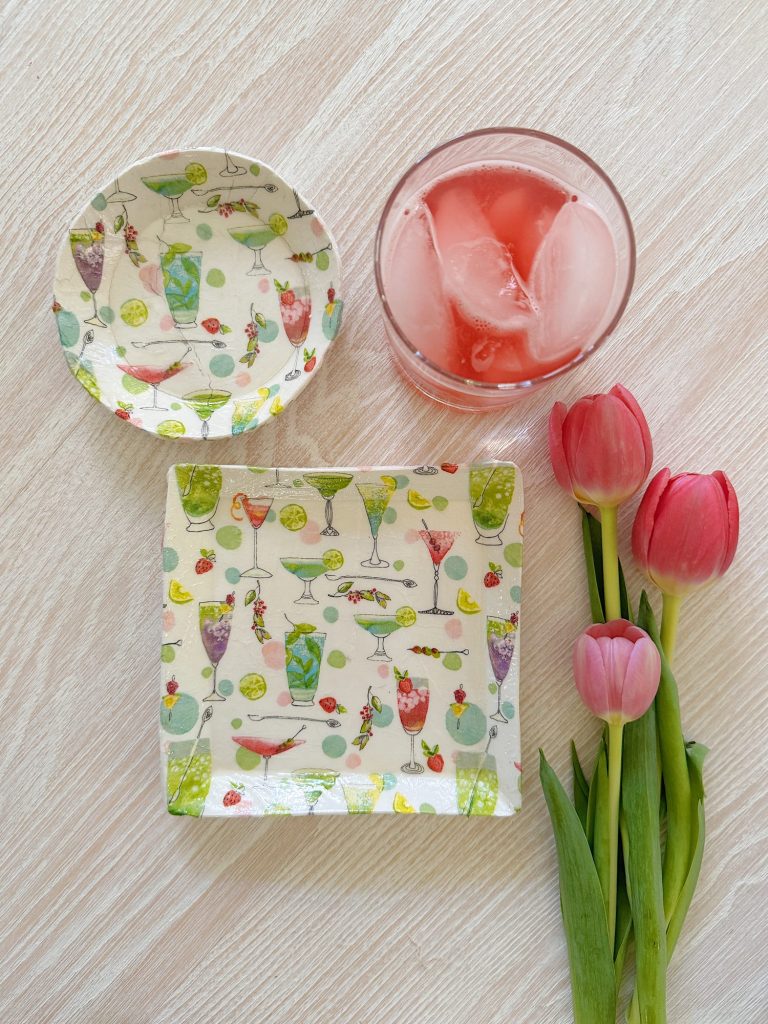
The watercolor-style artwork transfers beautifully onto clay because the designs almost look hand-painted once sealed.
I especially love how:
- the cocktails wrap softly around the edges
- the citrus colors brighten the white clay
- and the soft pinks and greens feel perfectly summery
And because every section of the napkin is different, each dish becomes one-of-a-kind.
Honestly, this is one of those crafting techniques that looks much more complicated than it actually is.
Why These Make Perfect Summer Gifts
As soon as I finished these dishes, I started thinking of all the ways they could be used or given as gifts.
They would make adorable:
- hostess gifts
- birthday gifts
- beach house gifts
- bridesmaid gifts
- jewelry dishes
- bedside trays
And because they are handmade, they feel personal and thoughtful in a way store-bought gifts sometimes do not.
I also think projects like this are wonderful because they combine beauty with function.
The dishes are decorative, but they are also genuinely useful.
And honestly, I love crafts that become part of everyday life instead of simply sitting on a shelf.

Summer Crafts Feel Different
I have noticed over the years that my summer crafts always feel a little lighter and more playful than projects I create during other seasons.
Summer projects tend to involve:
- bright colors
- entertaining
- handmade gifts
- beach-inspired details
- relaxed textures
- casual creativity
And these clay dishes fit perfectly into that style.
They feel cheerful without being overly themed, and they add just enough color to make a summer table or bedside table feel special.
I also love that this project combines:
- paper crafting
- clay
- decoupage
- entertaining
- home decor
All in one simple DIY.
Tips for Working with Air Dry Clay
If you are new to air-dry clay, here are a few things I have learned over the years that make projects much easier.
Roll the Clay Evenly
Using guide sticks helps prevent thin areas from cracking as they dry.
Smooth the Edges Early
It is much easier to smooth edges before the clay fully dries.
Let the Clay Dry Completely
Rushing the drying process can cause warping or cracks.
Sand Lightly
A little sanding creates a much more finished and professional look.
Seal the Finished Piece
A clay glaze or sealer helps protect the surface and gives the dishes a beautiful, soft finish.
And honestly, the more you work with air-dry clay, the easier and more enjoyable it becomes.
My Favorite Thing About This Project

I think what I love most about these decorative clay dishes is that they feel artistic and handmade without being difficult.
They are the kind of project that looks:
- elevated
- creative
- custom
- boutique-inspired
But the process itself is simple and relaxing.
And honestly, those are often my favorite kinds of crafts.
I also love that the cocktail-themed artwork gives the dishes such a fun summer personality. They feel playful, colorful, and perfect for this season.
Final Thoughts
This week’s A Handmade Summer project reminded me once again why I love crafting with air-dry clay so much.
It is approachable, creative, forgiving, and endlessly versatile.
And combining clay with decorative paper napkins creates such beautiful results with very little effort.
These decorative summer trinket dishes now feel like tiny pieces of summer sitting around my craft room, and honestly, I already want to make more using different napkin designs and shapes.
I have a feeling this may become one of my favorite summer crafting techniques yet.

How to Follow Along With A Handmade Summer
Each week, a new spring craft will be shared here on the blog. I will also be sharing behind-the-scenes moments, progress videos, and finished projects on Instagram so you can see each craft come to life.
You can jump in at any point. There is no need to start at the beginning or complete every project. Choose the ones that speak to you and make them your own.
If you love seasonal crafting, this series is designed to inspire you throughout the summer.
Here are all of the A Handmade Summer craft projects so far. I can’t wait to share all twelve.
Latest Posts
-
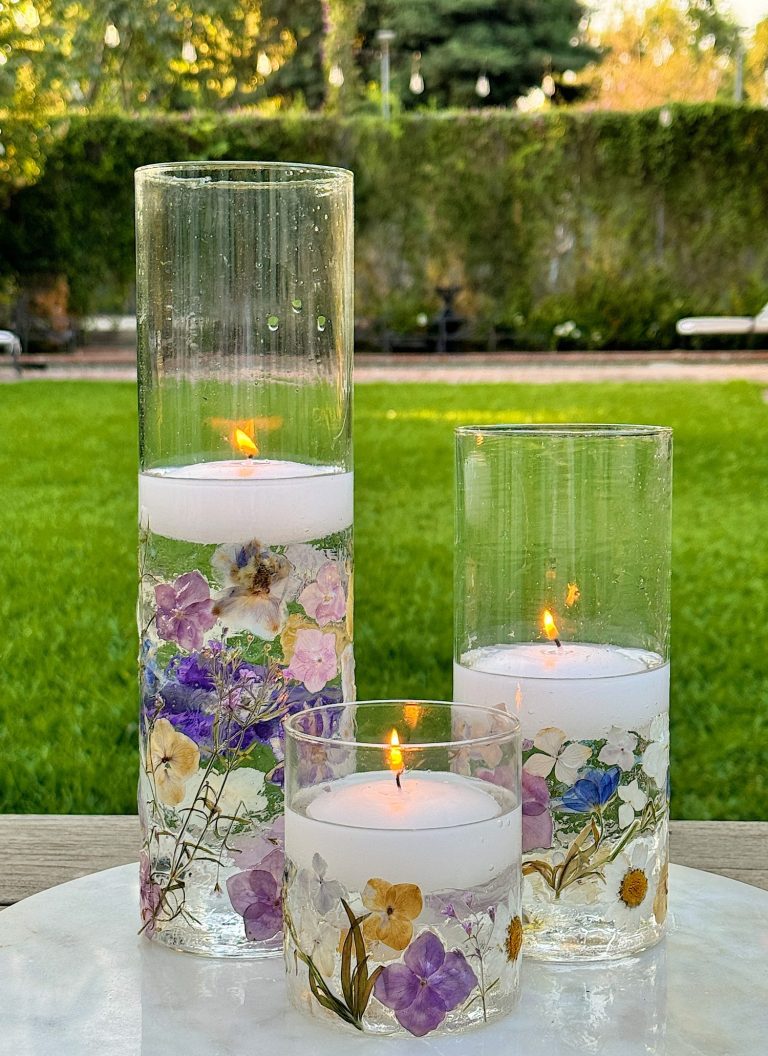
DIY Pressed Flowers
DIY pressed flowers are a beautiful and charming addition to any home decor. When made into candle holders, they are stunning. These delicate creations bring a touch of nature indoors and can be customized to fit any style or occasion. Whether you want to create a romantic centerpiece, a whimsical decoration, or a unique gift,…
-
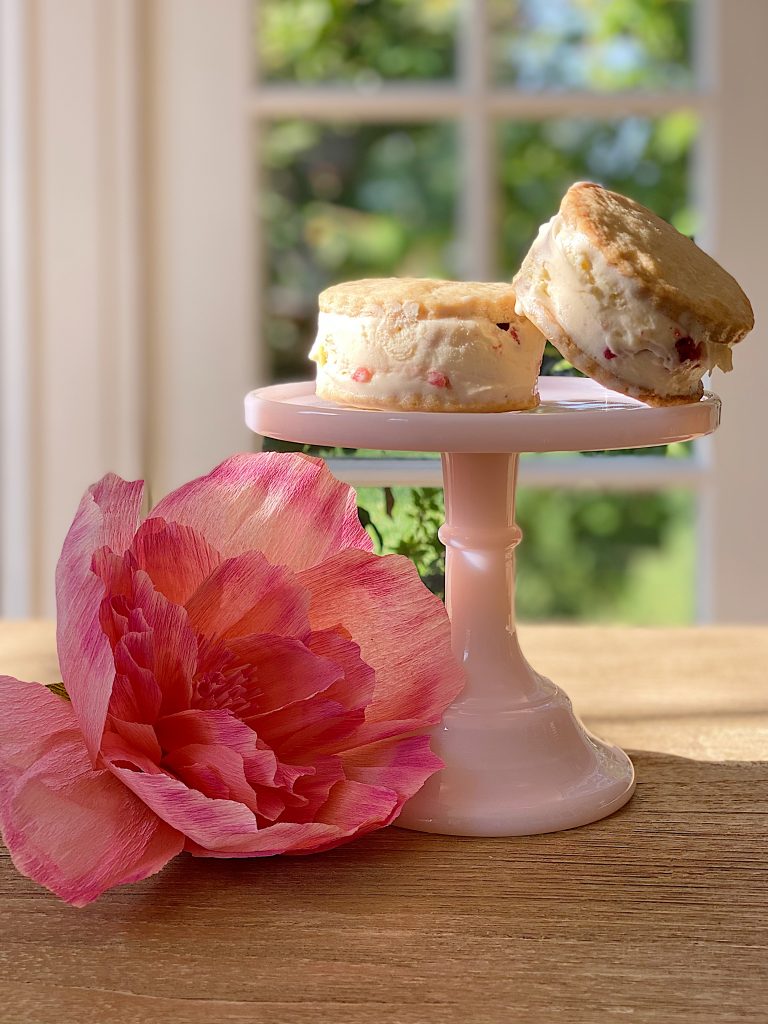
How to Make Strawberry Shortcake Ice Cream Sandwiches
Today, I am sharing my strawberry shortcake ice cream sandwiches. It’s strawberry season, so what could be better? These strawberry shortcake ice cream sandwiches are easy to make and taste amazing. Can you think of anything better for a hot summer day?
-
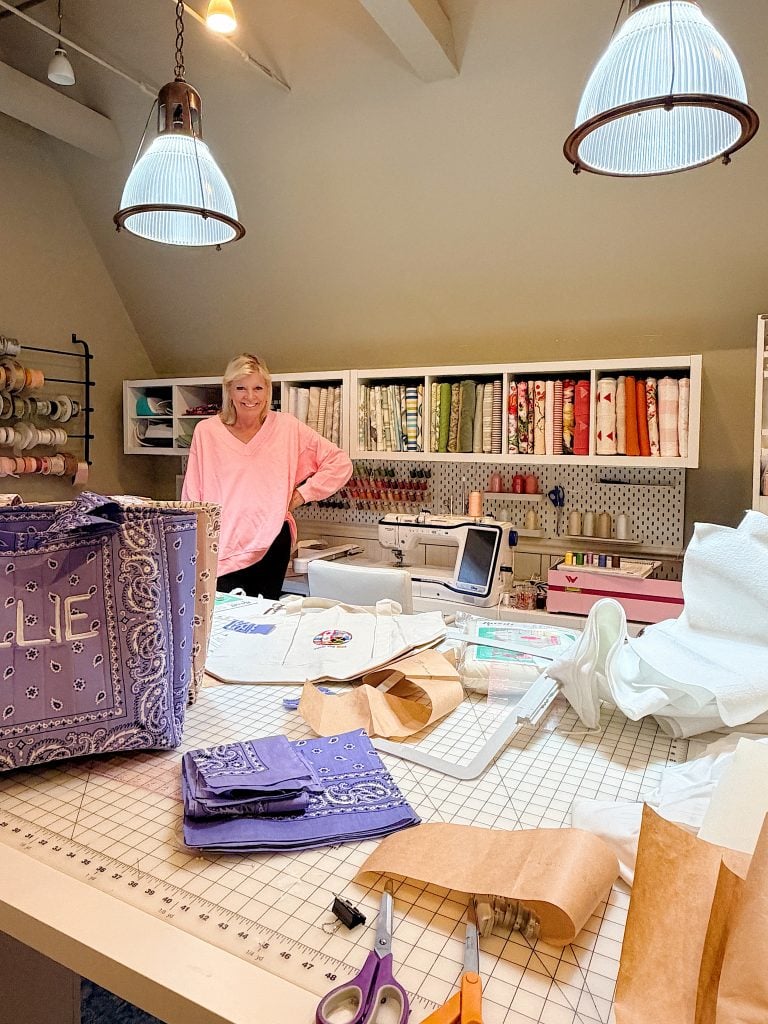
What’s on My Summer Craft Room Table Now – Mondays in the Craft Room
If you’ve ever wondered what my craft room really looks like in the middle of a busy creative season, today is your lucky day. Spoiler alert: it isn’t picture-perfect! Right now I have embroidery projects, sewing projects, and supplies covering just about every work surface, and I wouldn’t have it any other way. Today I’m…
-
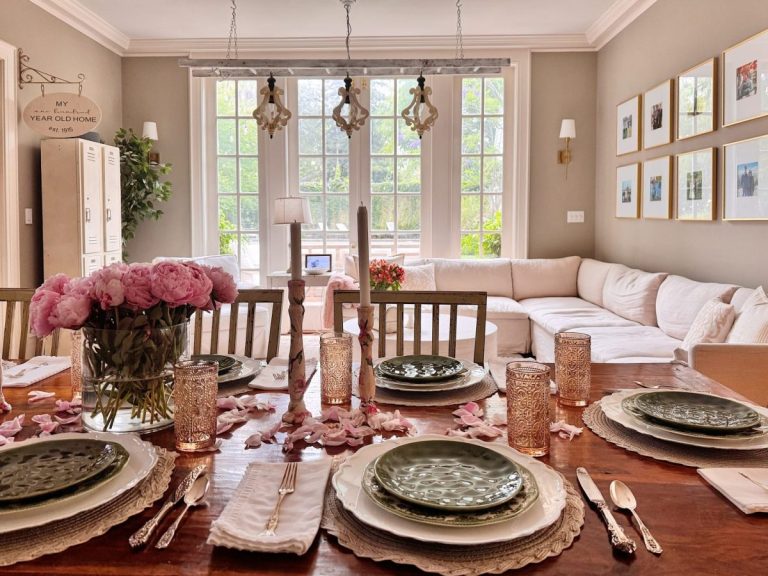
The Best Summer Decor Finds and Sunday Morning Coffee
I have been decorating our home for summer, and I don’t remember having this much fun decorating with summer decor. I love our home’s lighter, brighter feel and have spent days thinning things out to make it more comfortable! We are also celebrating the dads in our family, and I wanted to wish everyone a…
My Recent Instagram Posts

You can pin the image below to your boards on Pinterest (click the Pin button in the top left corner) or follow me on Pinterest!

For more real-time updates, follow me on Instagram @My100YearOldHome

Great project! I am buying the napkin design you used as It reminds me of the Nicole Miller ties that my late husband wore to work. Nicole Miller made fabulous fabrics and these napkins are reminiscent of her designs. A new project for me. Many thanks.
I am so happy these napkins brought you fond memories. This project really brought me joy. Hope all is well.
Leslie