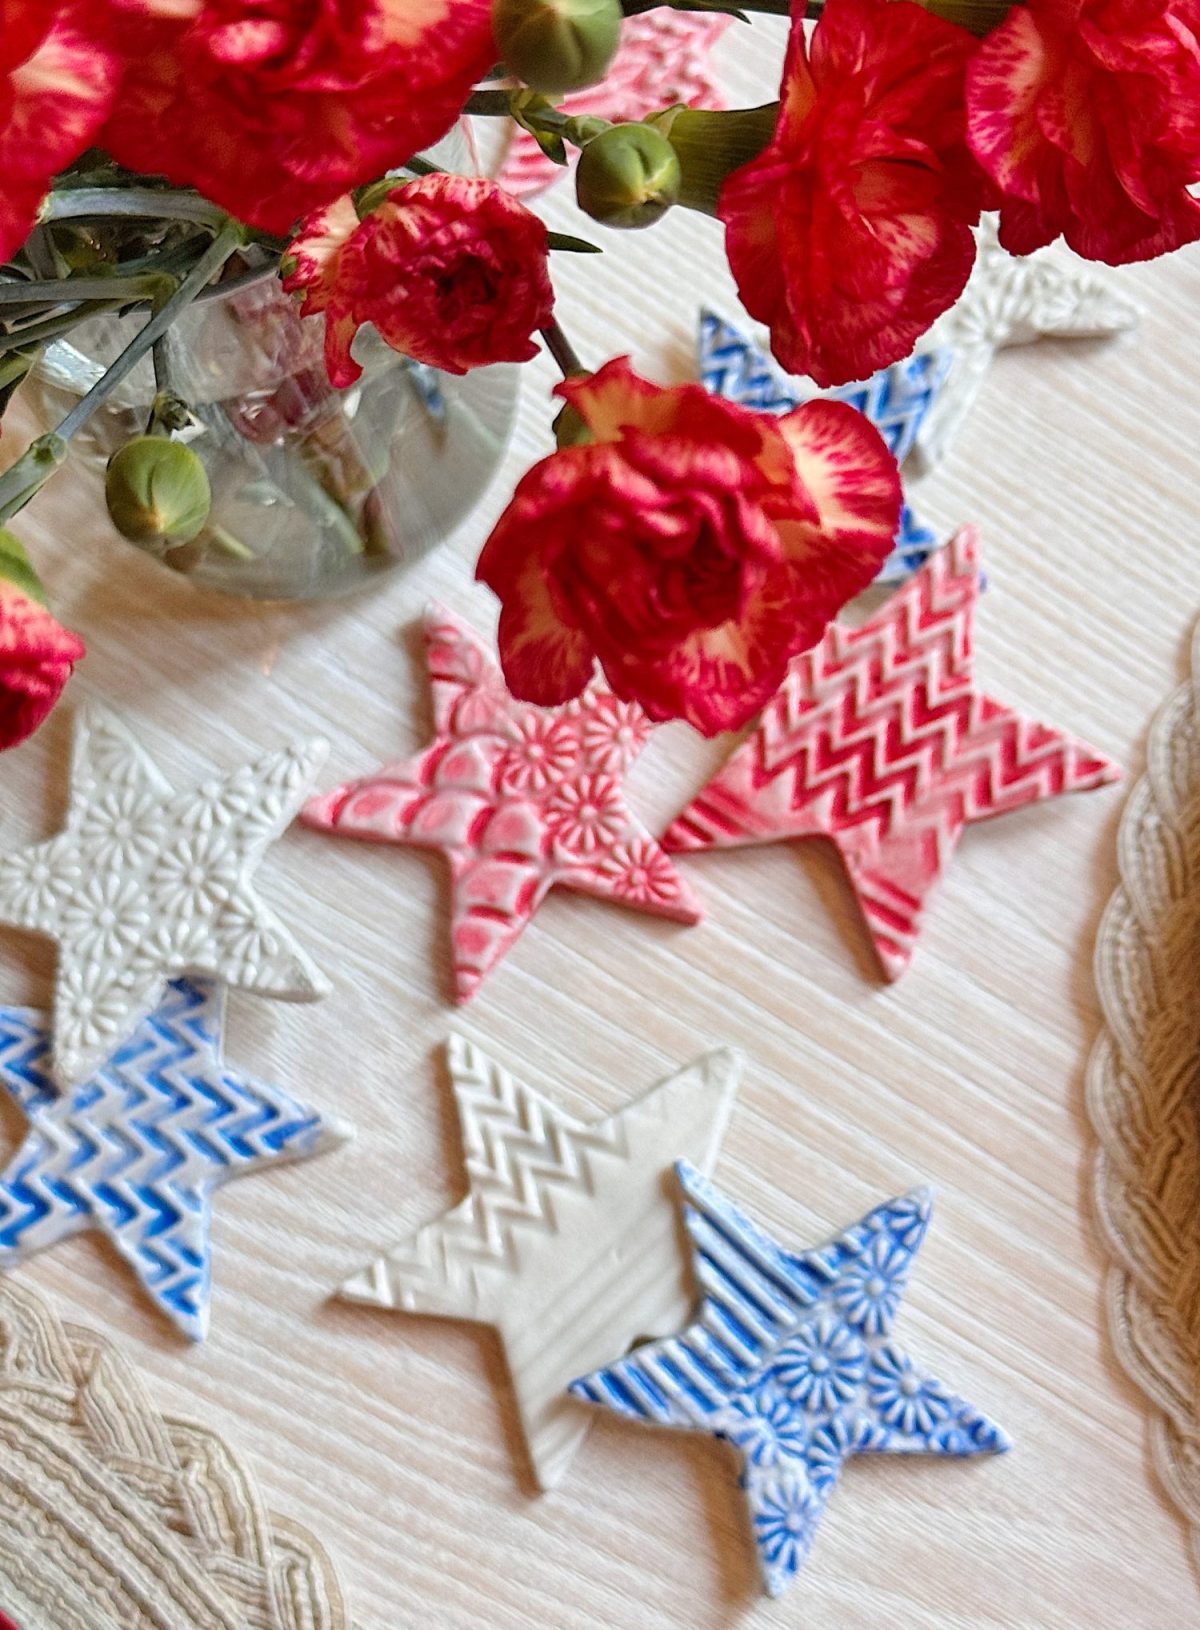
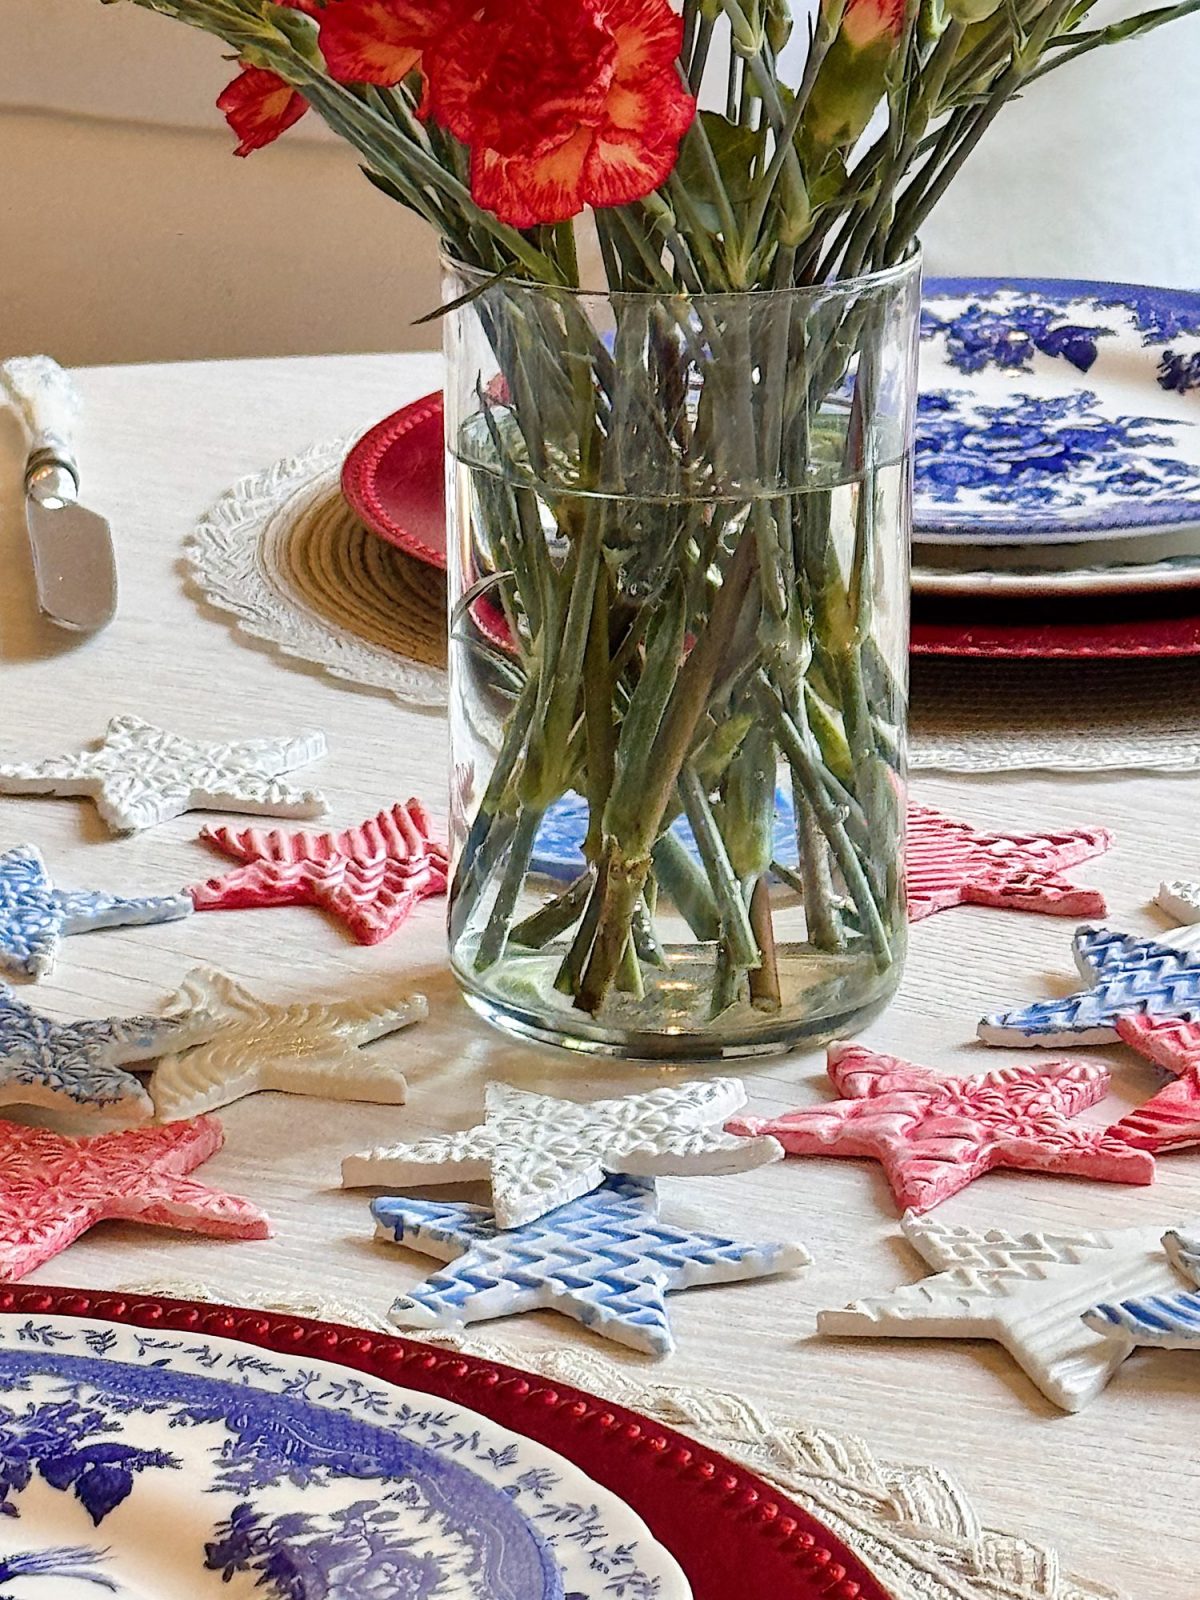
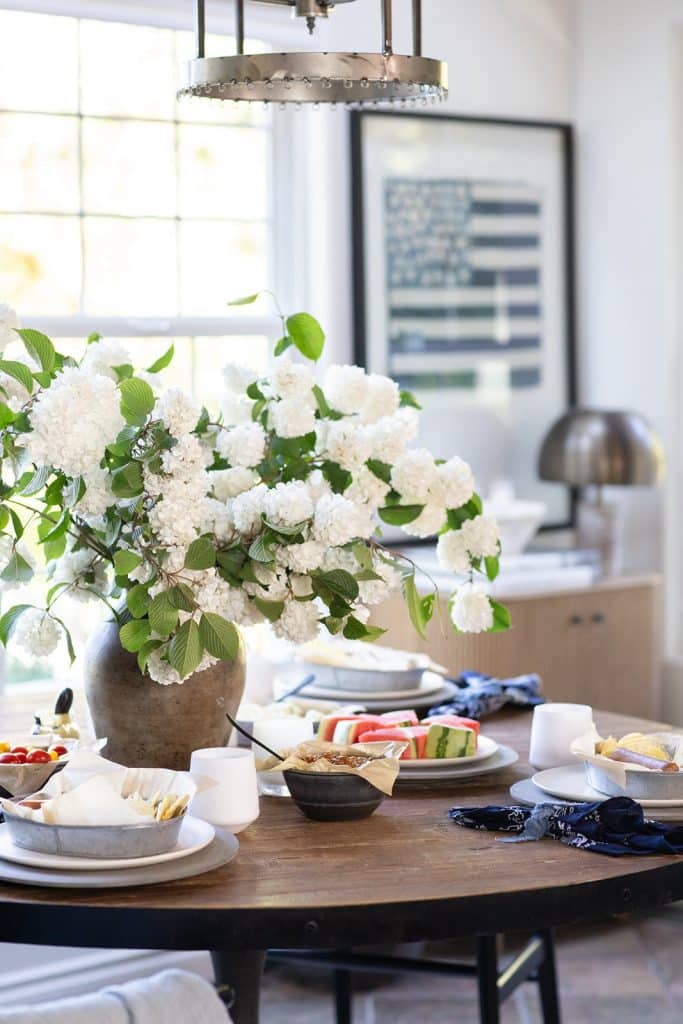
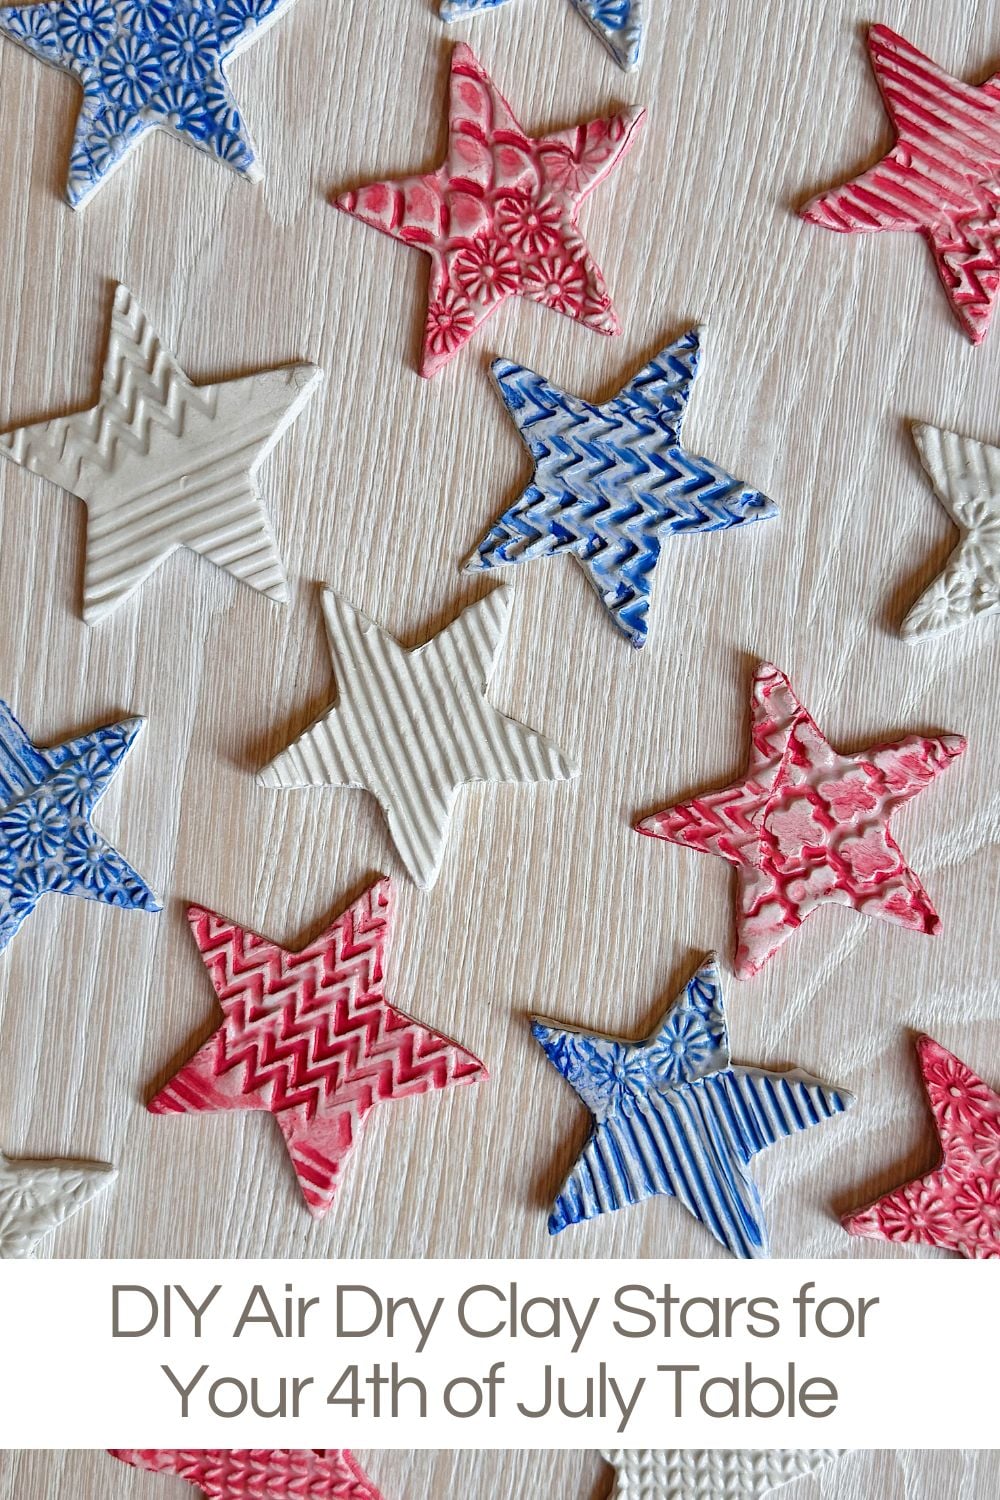
DIY Air Dry Clay Stars for Your 4th of July Table
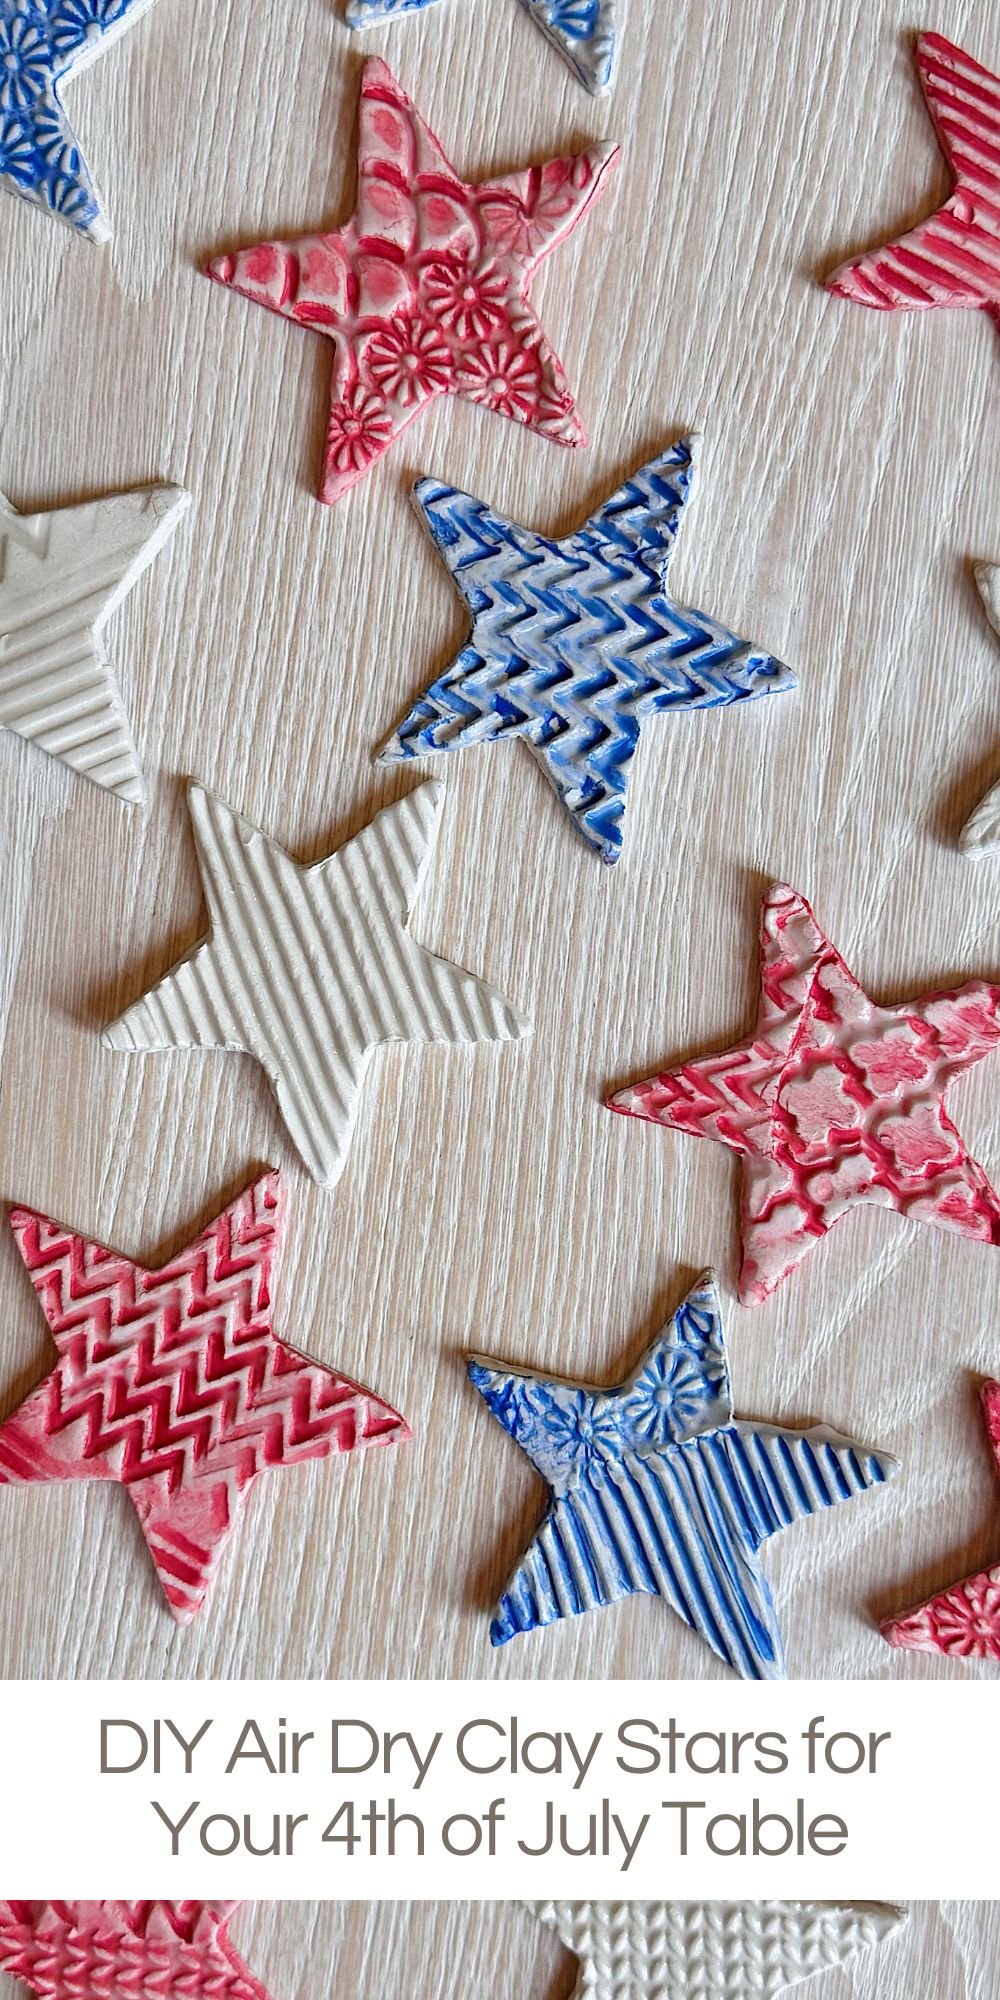
Every holiday table needs a little extra sparkle, and for the 4th of July, nothing says festive like a sprinkling of handmade air dry clay stars in red, white, and blue.
This year, I wanted to create something more personal and artistic for our celebration, so I pulled out my stash of air-dry clay and made a batch of beautiful, textured star decorations. These DIY air-dry clay stars turned out even better than I imagined, and the best part is that they were so easy to make!


Air Dry Clay Stars for Your 4th of July Table
Whether hosting a backyard barbecue, a beachside dinner, or just decorating your table for a festive breakfast, these stars are the perfect handmade touch to celebrate Independence Day.

I used the same simple process I’ve shared for Christmas, Easter, and Valentine’s Day, just with a patriotic twist!
On this blog, I may sometimes use affiliate links, which means I earn a small commission if you make a purchase through the link. The price will be the same whether you use the affiliate link or go directly to the vendor’s website using a non-affiliate link.


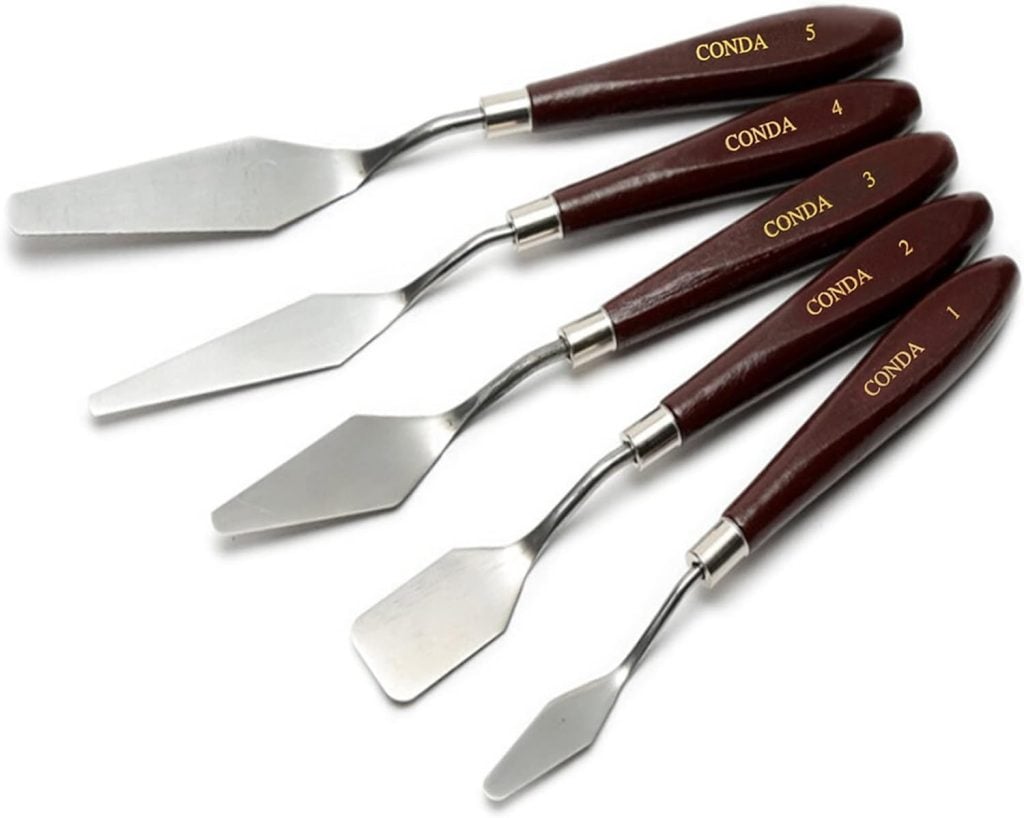
What You’ll Need

Here’s everything I used to create my 4th of July air-dry clay stars:
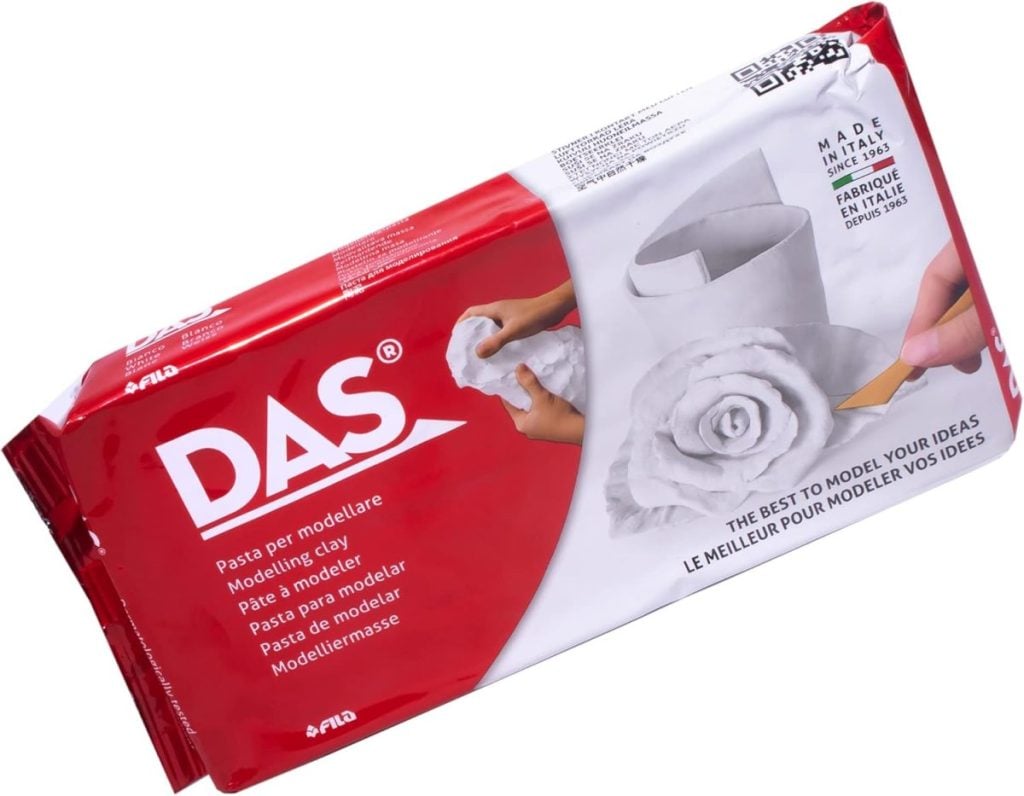
- Air-dry clay (I used white—no baking needed!)
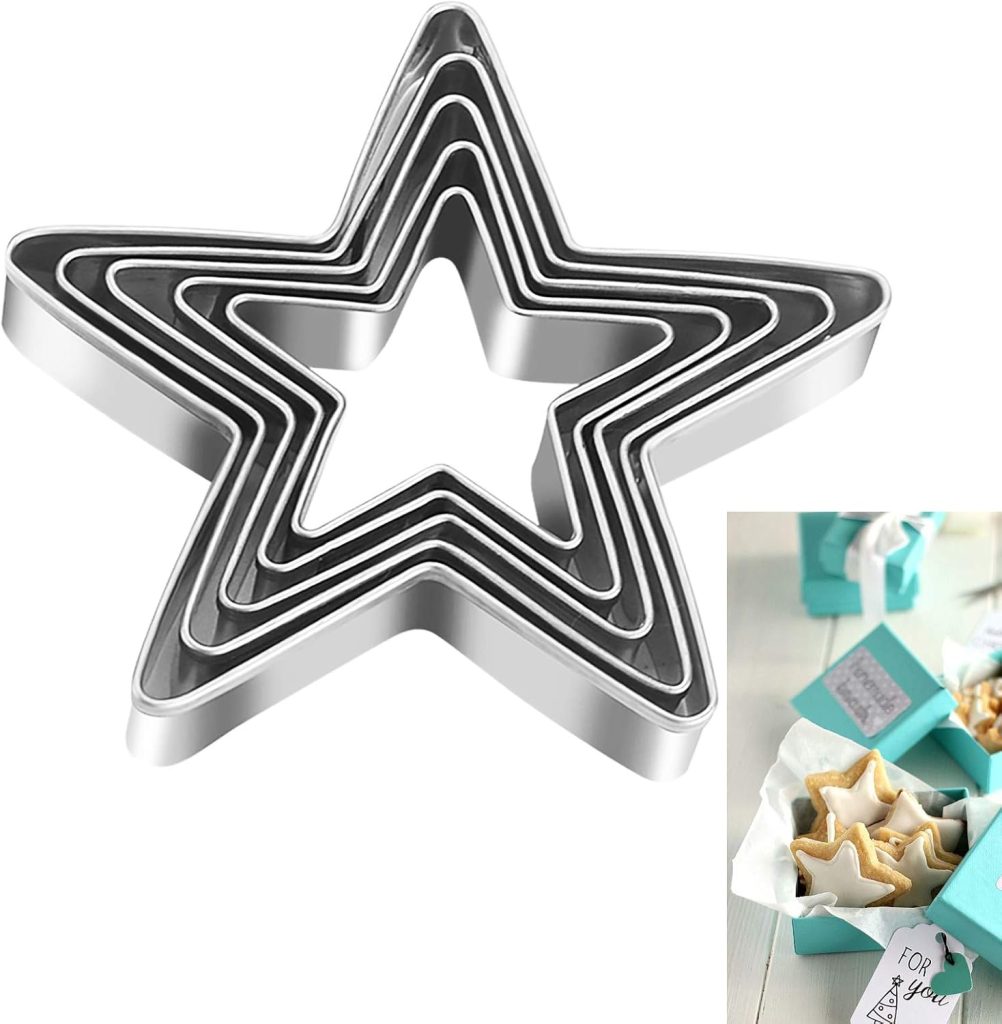
- Star-shaped cookie cutters (various sizes if you want variety)
- Textured rollers (you can also use lace, stamps, or stencils for texture)
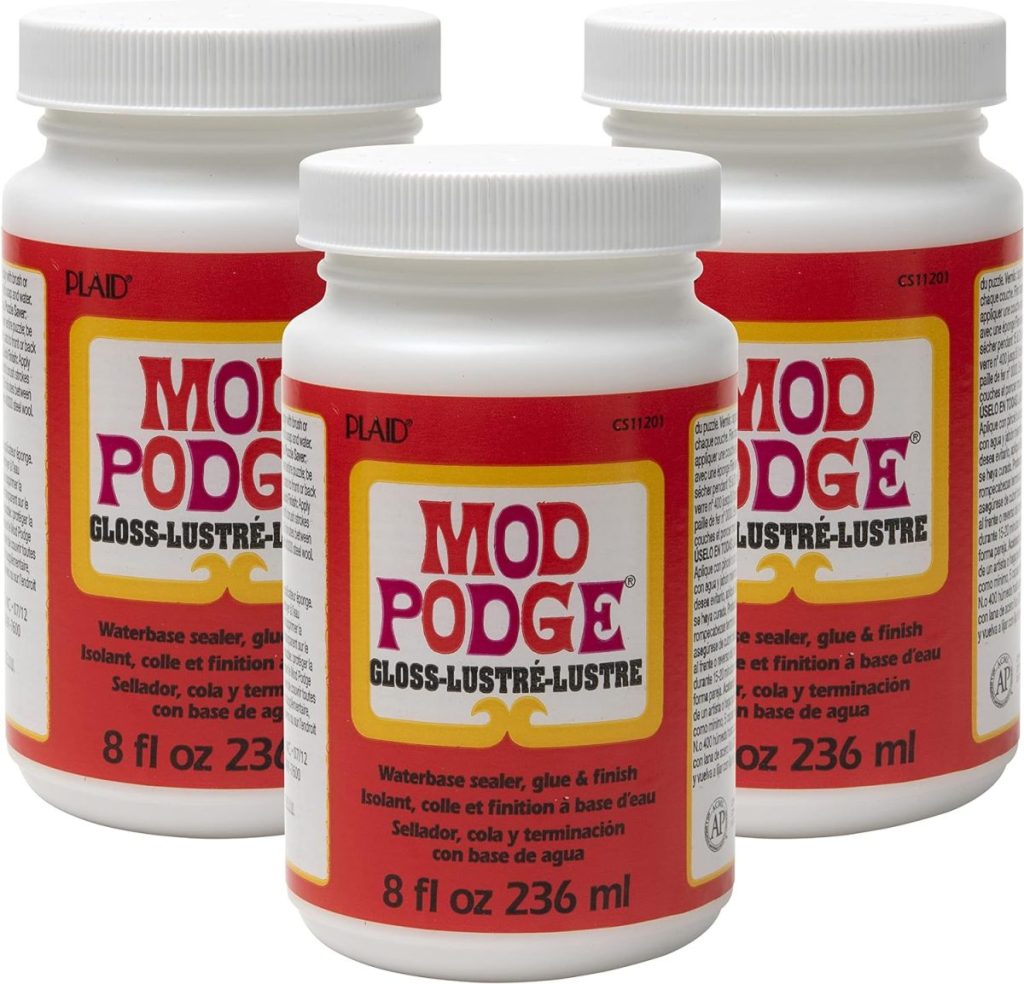
- Mod Podge (for sealing the surface before painting)
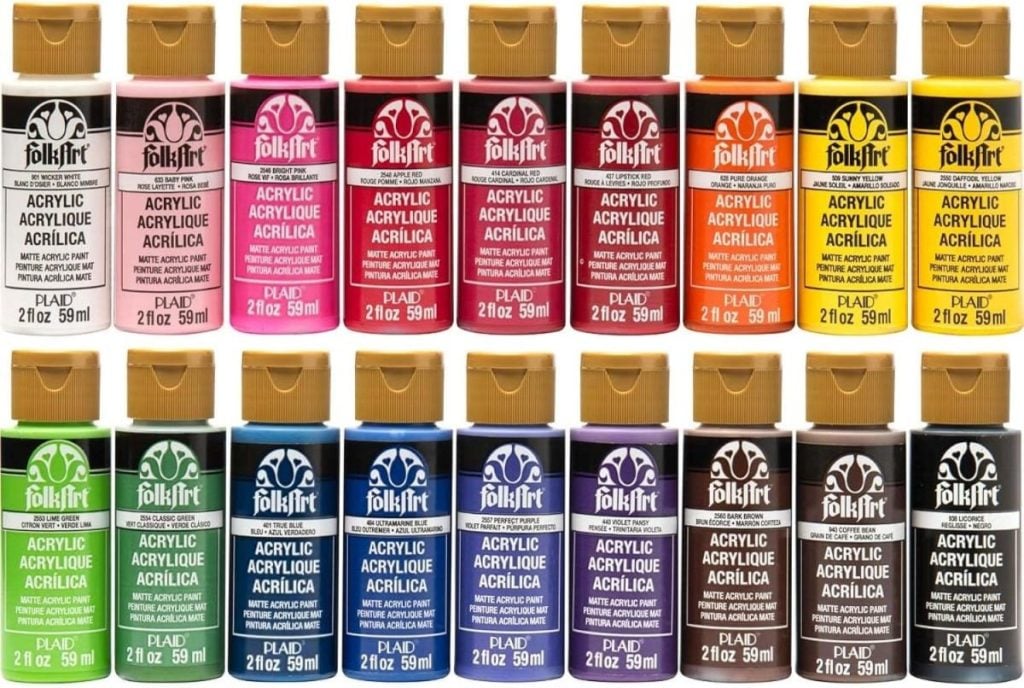
- Acrylic paint in red, white, and blue
- Clear glaze (I used a glossy brush-on craft glaze)
- Rolling pin or clay roller
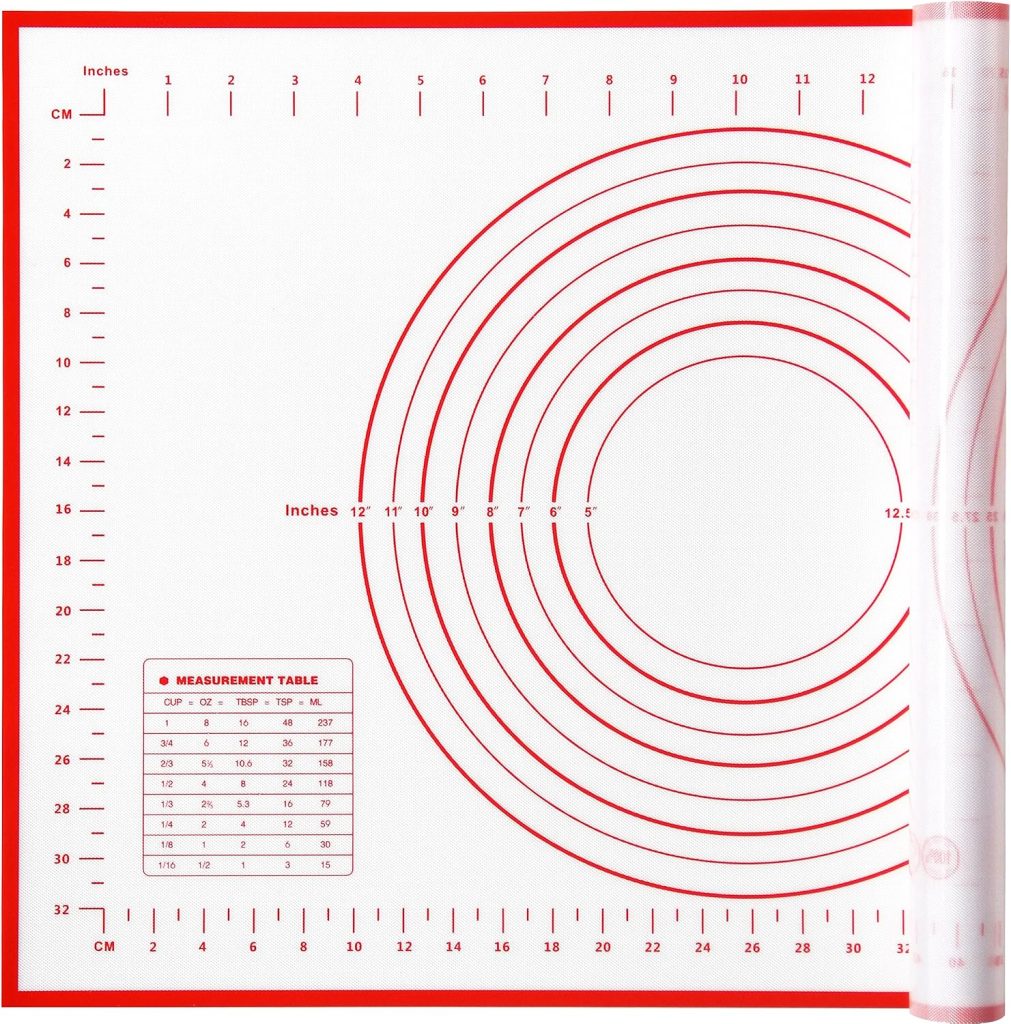
- Cutting mat or smooth surface
- Plastic knife or clay blade
- Soft sanding block or nail file (optional, for smoothing edges)


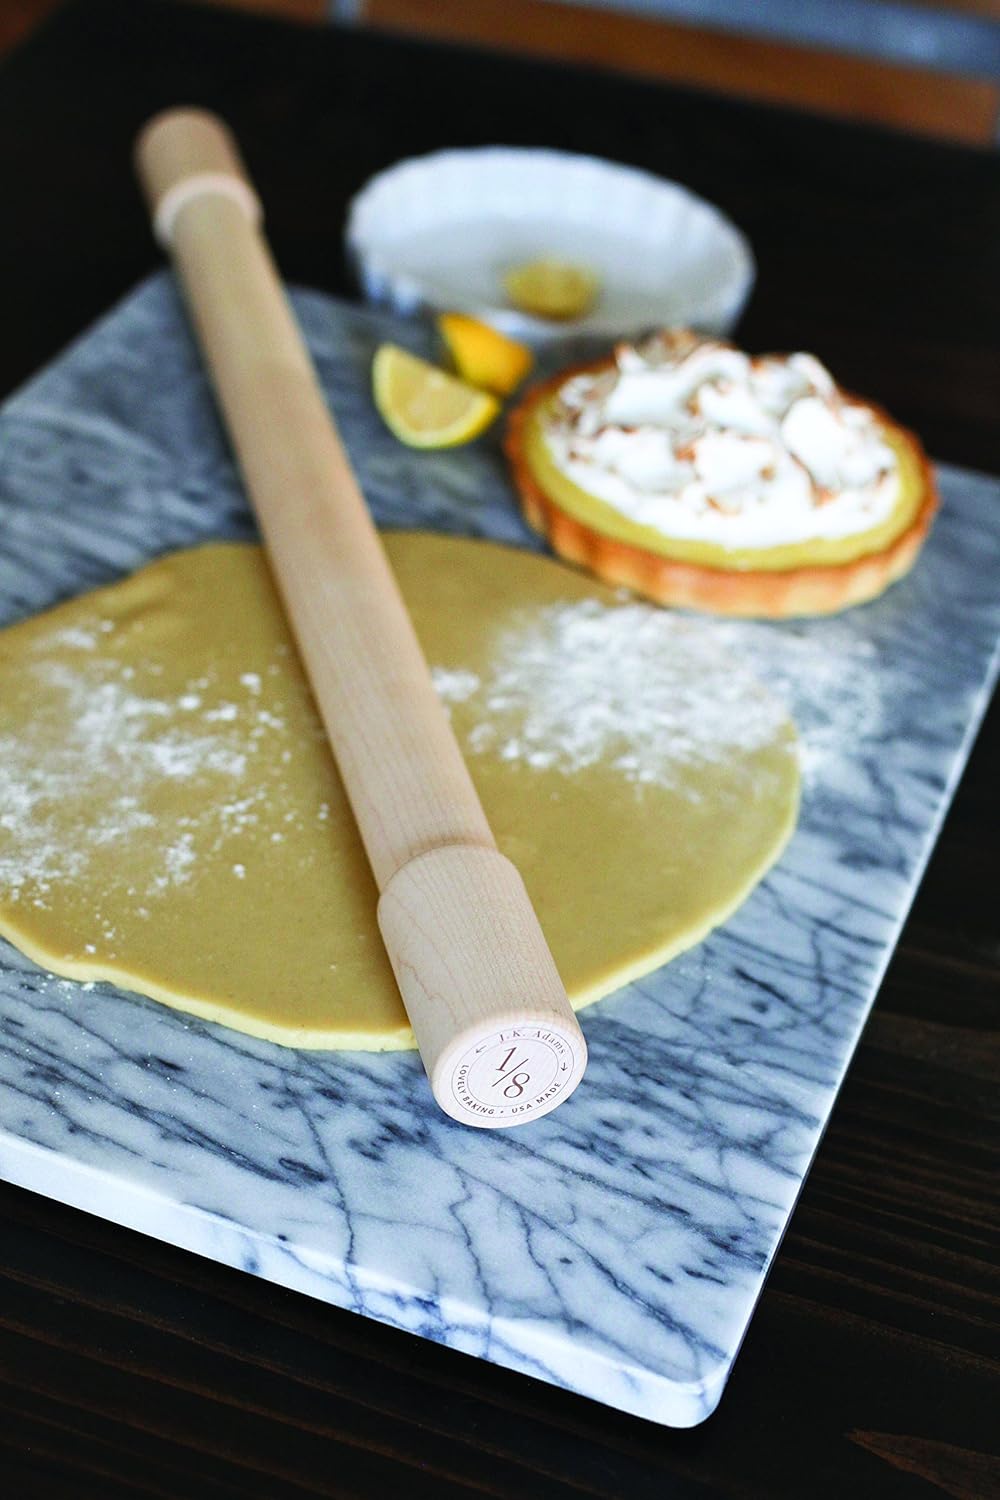
Step One: Roll Out the Clay
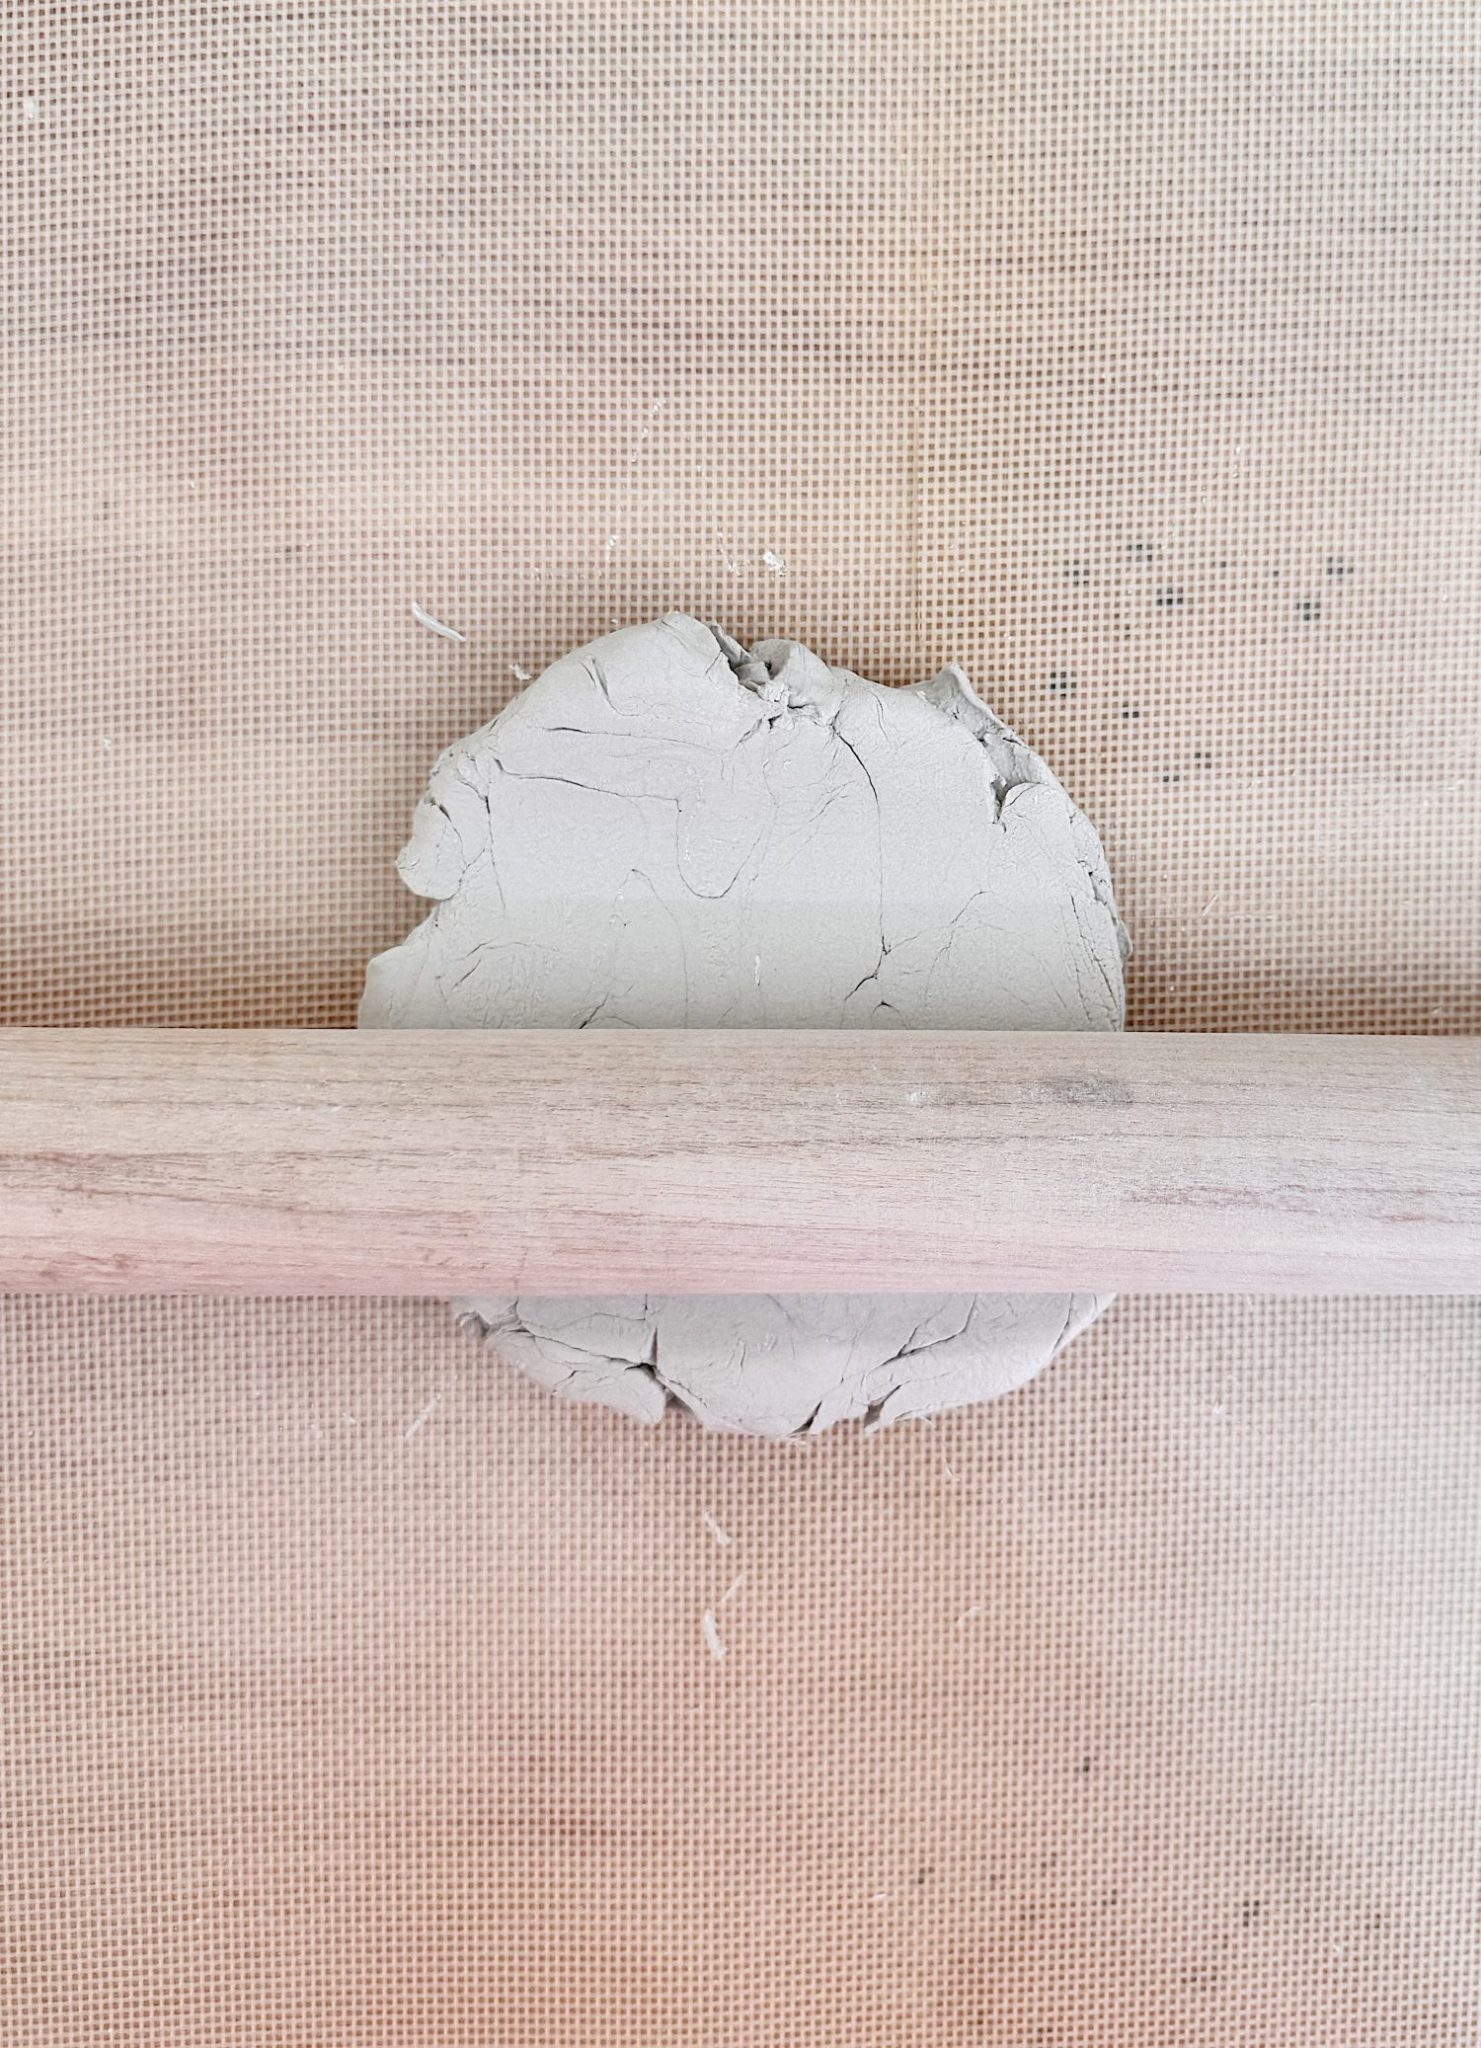
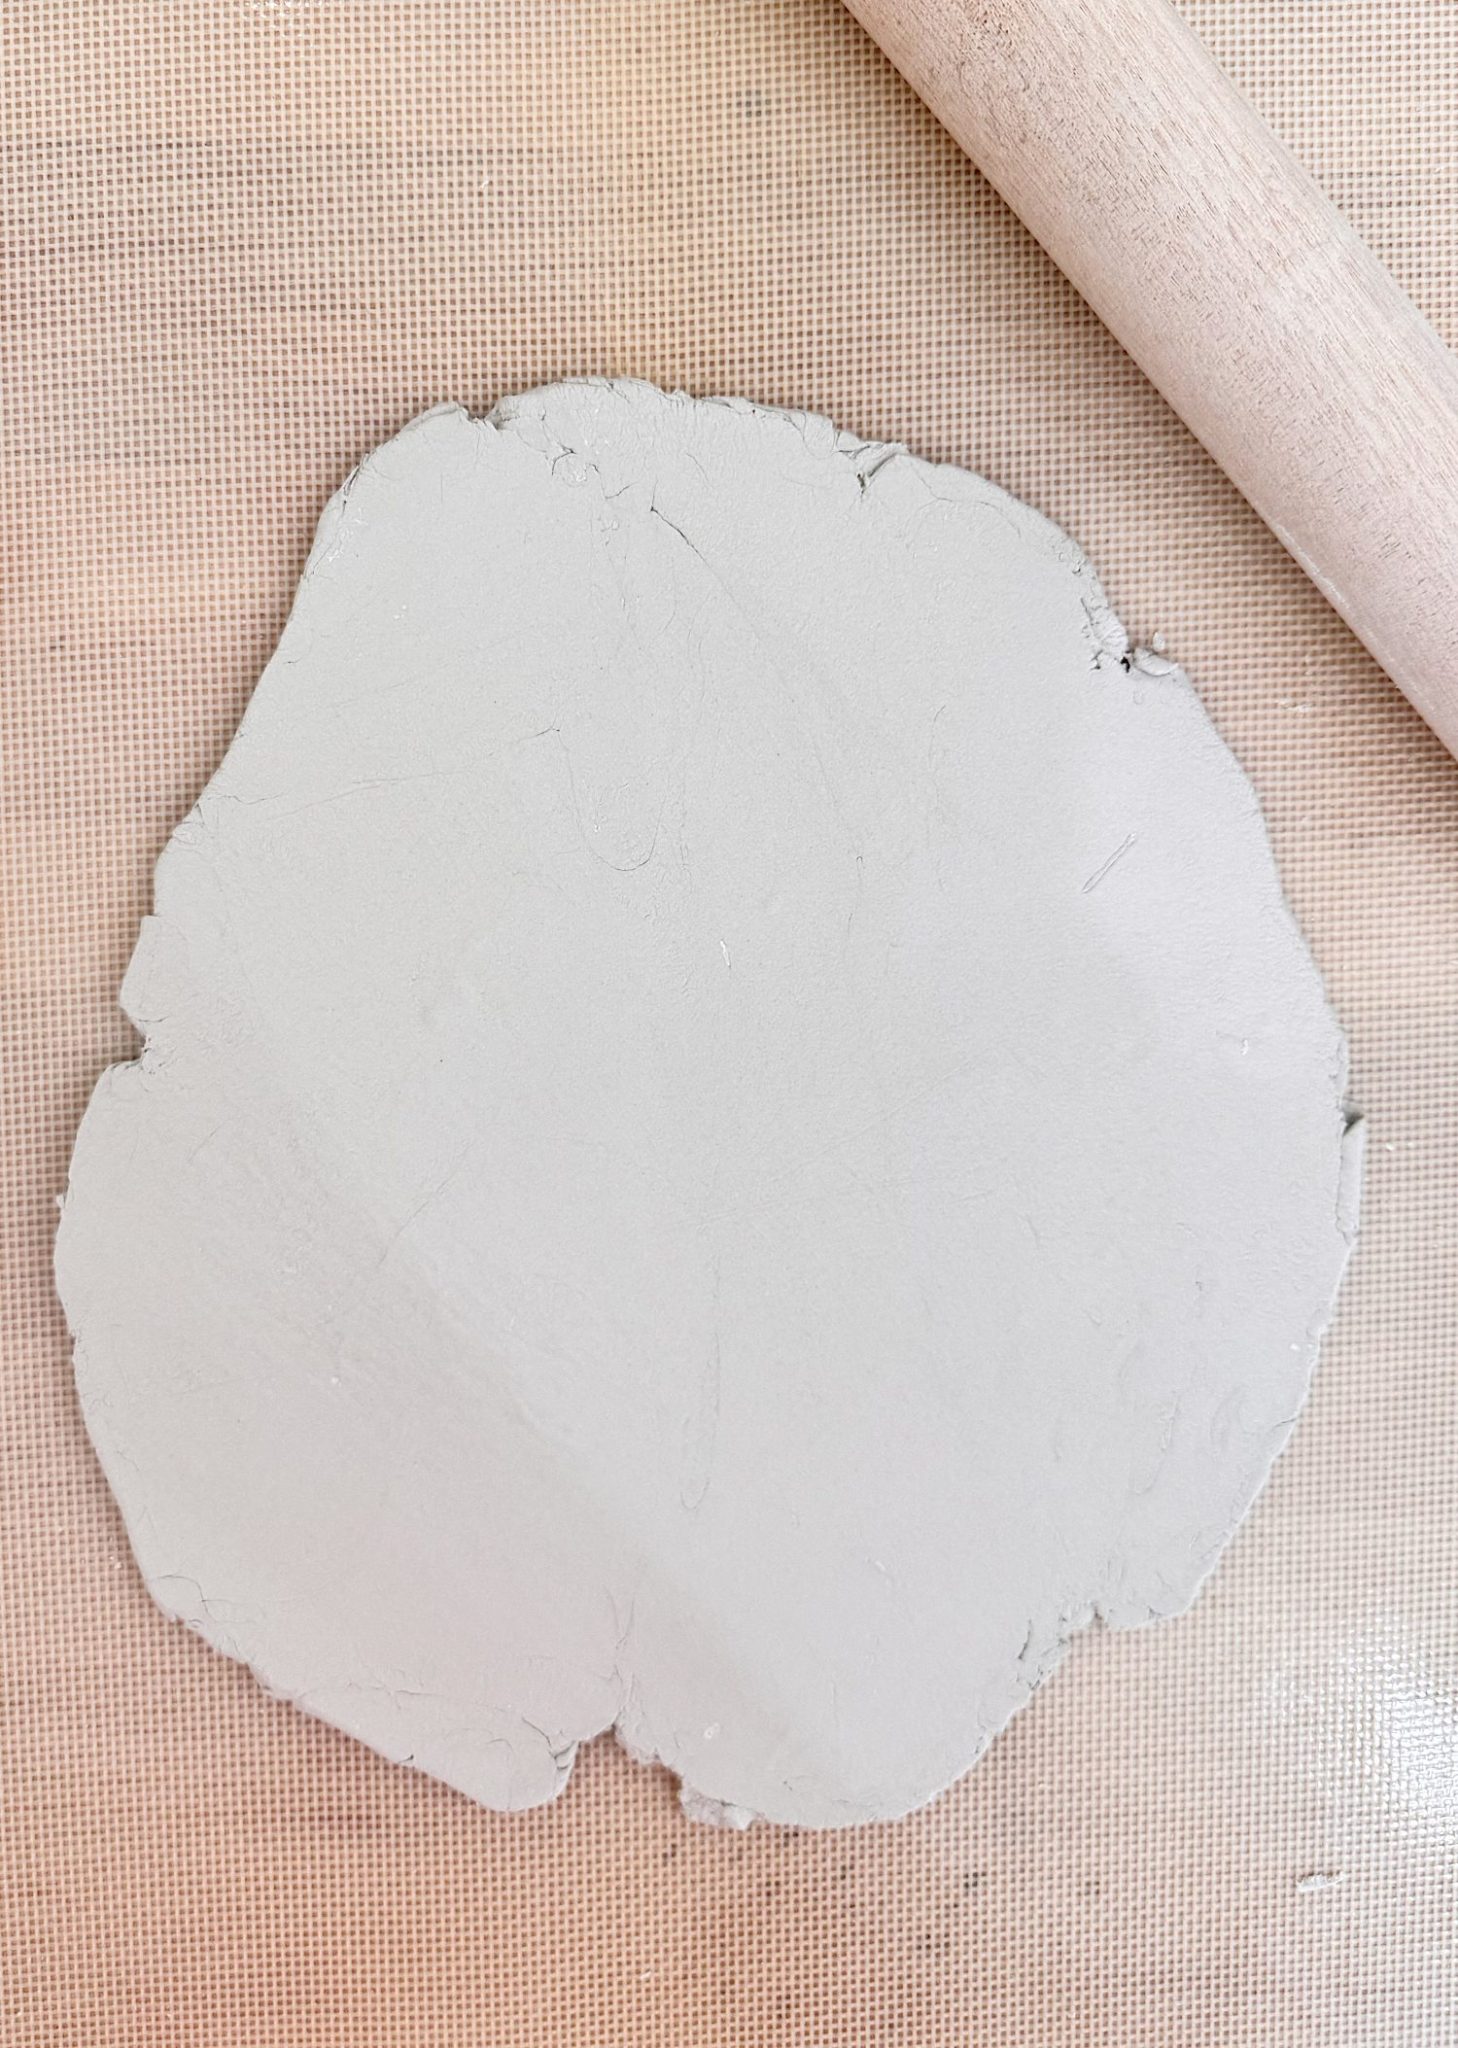
Start by pulling off a chunk of your air-dry clay and working it in your hands to warm it up. This makes it more pliable and easier to roll.
Roll it out on a smooth surface to about 1/4” thickness. I like working on a flexible cutting mat to lift the shapes later.
Tip: Be sure the clay is rolled evenly so your stars are dry, flat, and smooth.
Step Two: Add Texture
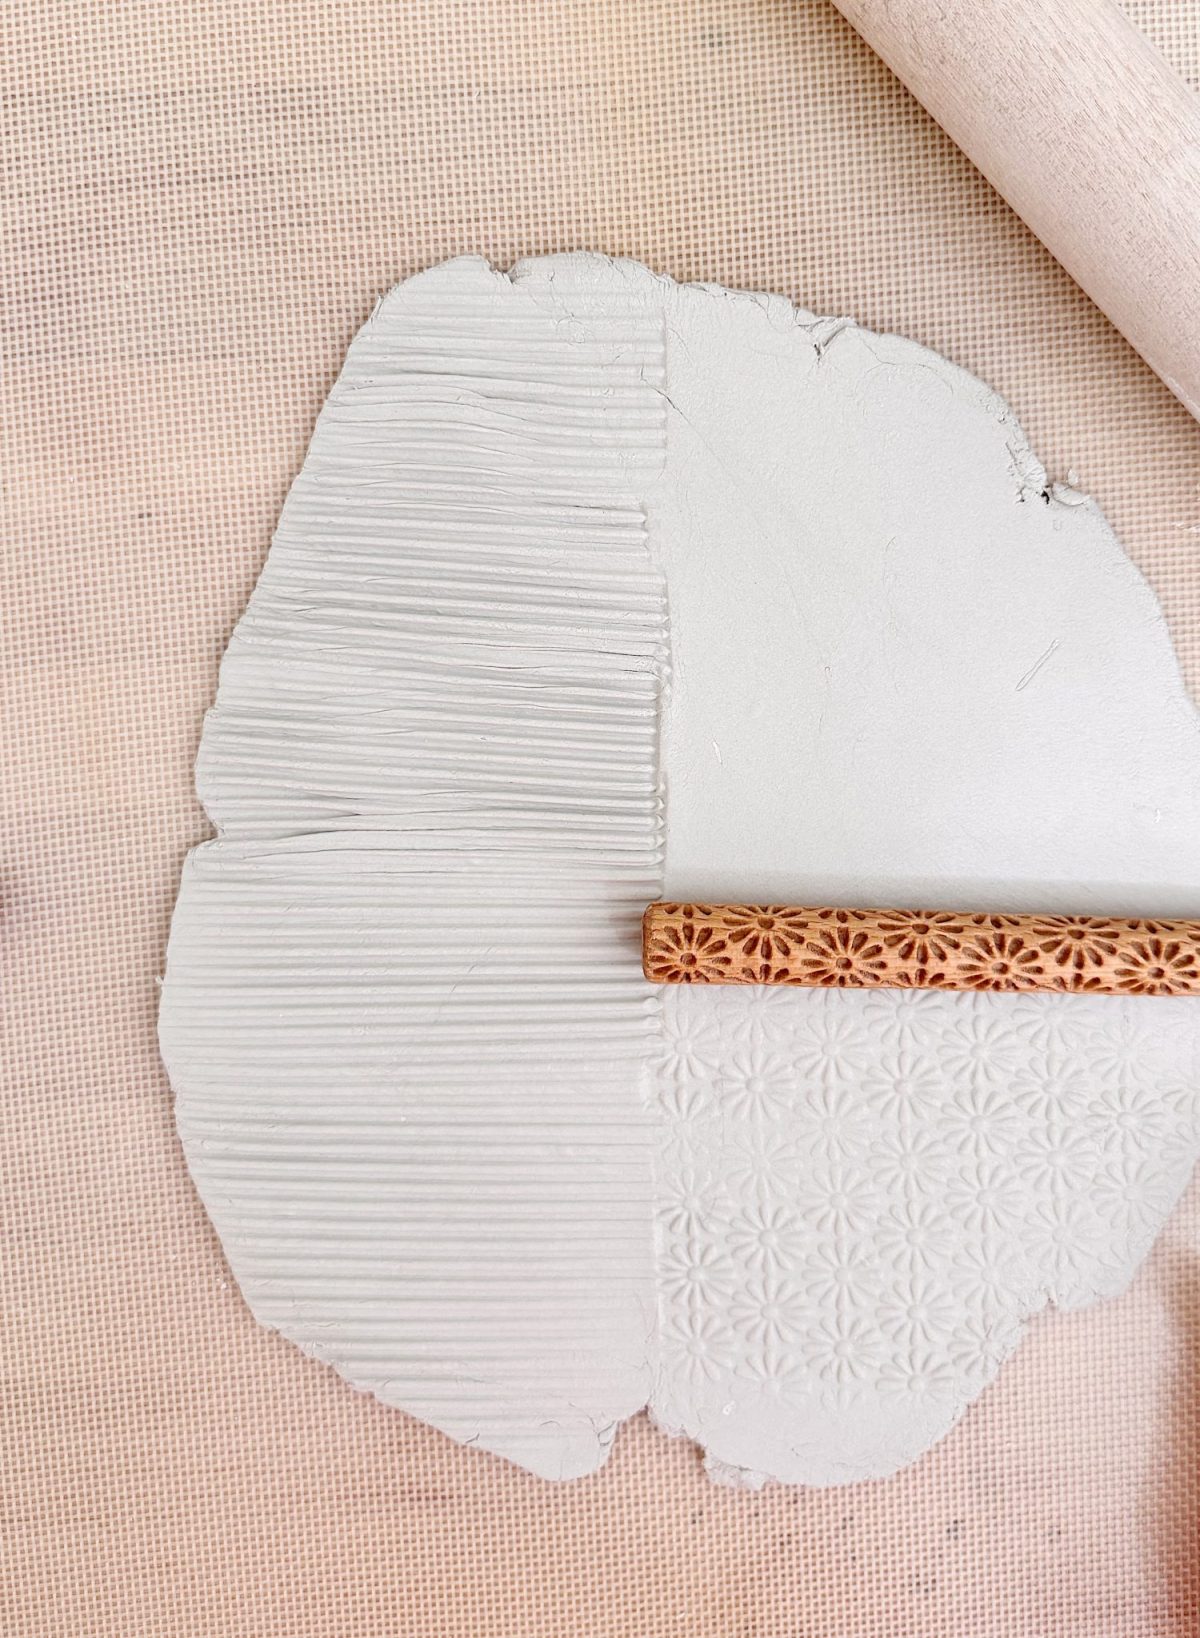
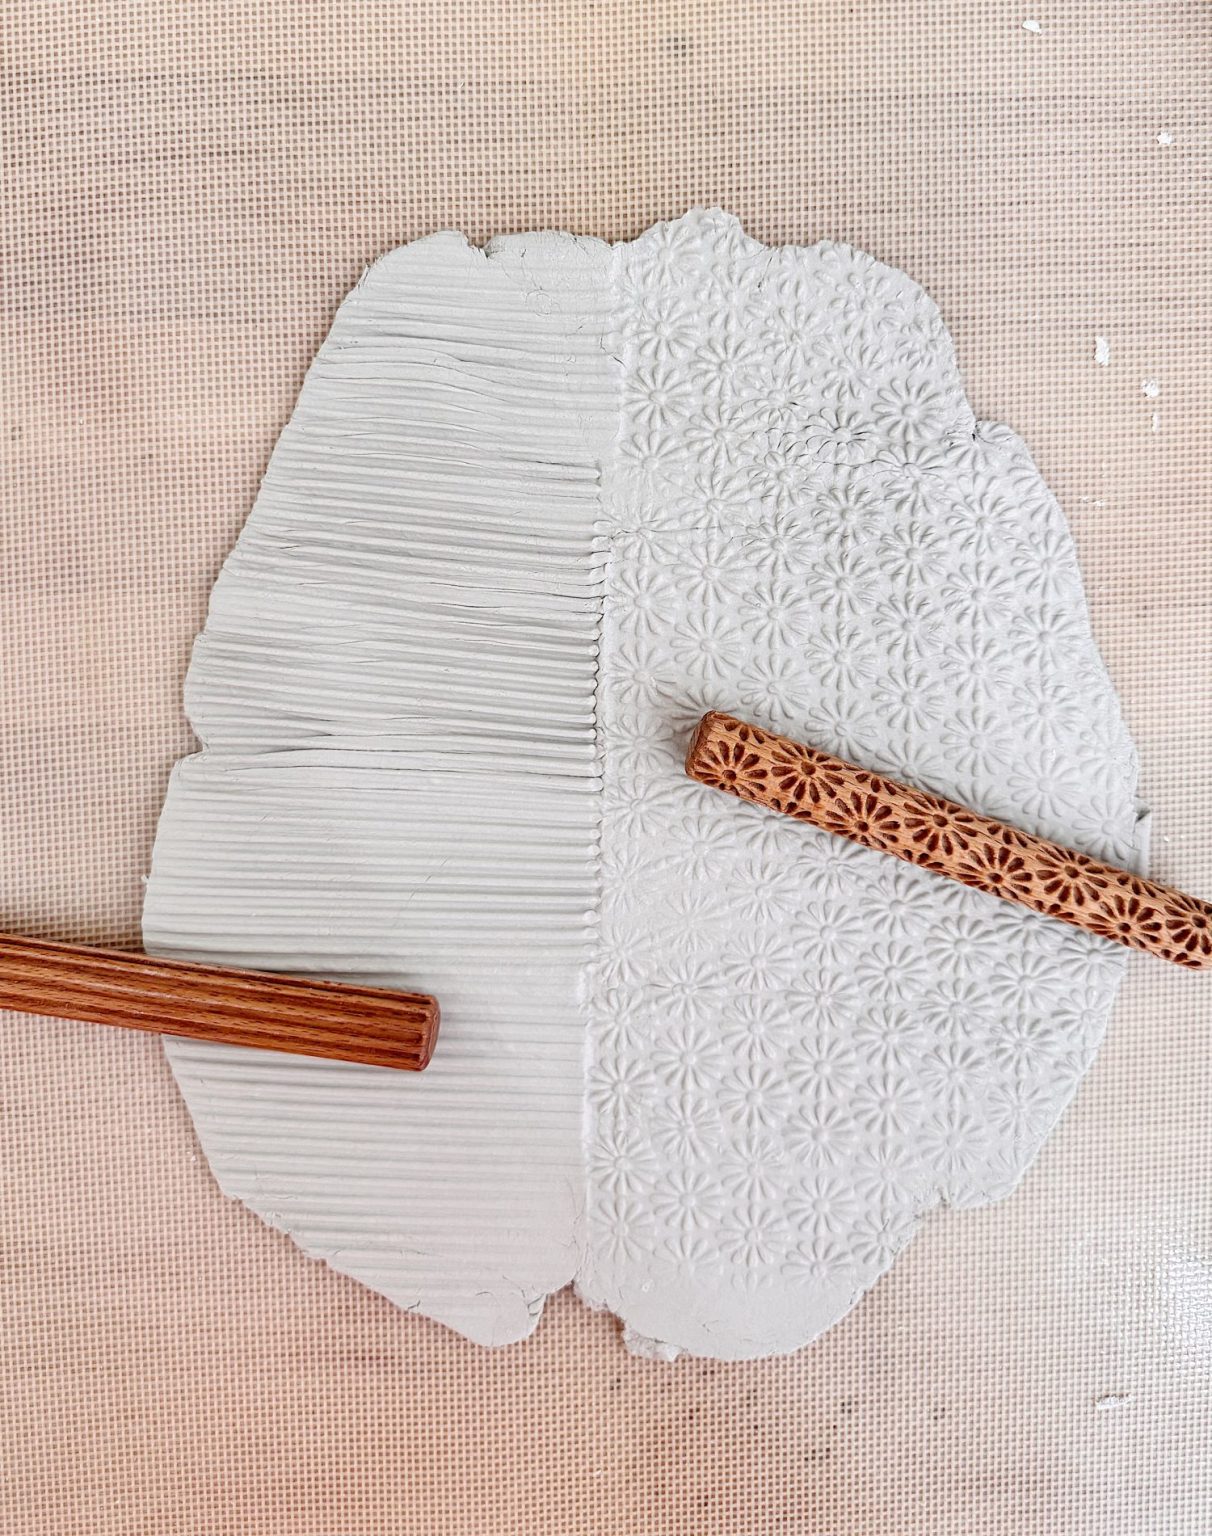
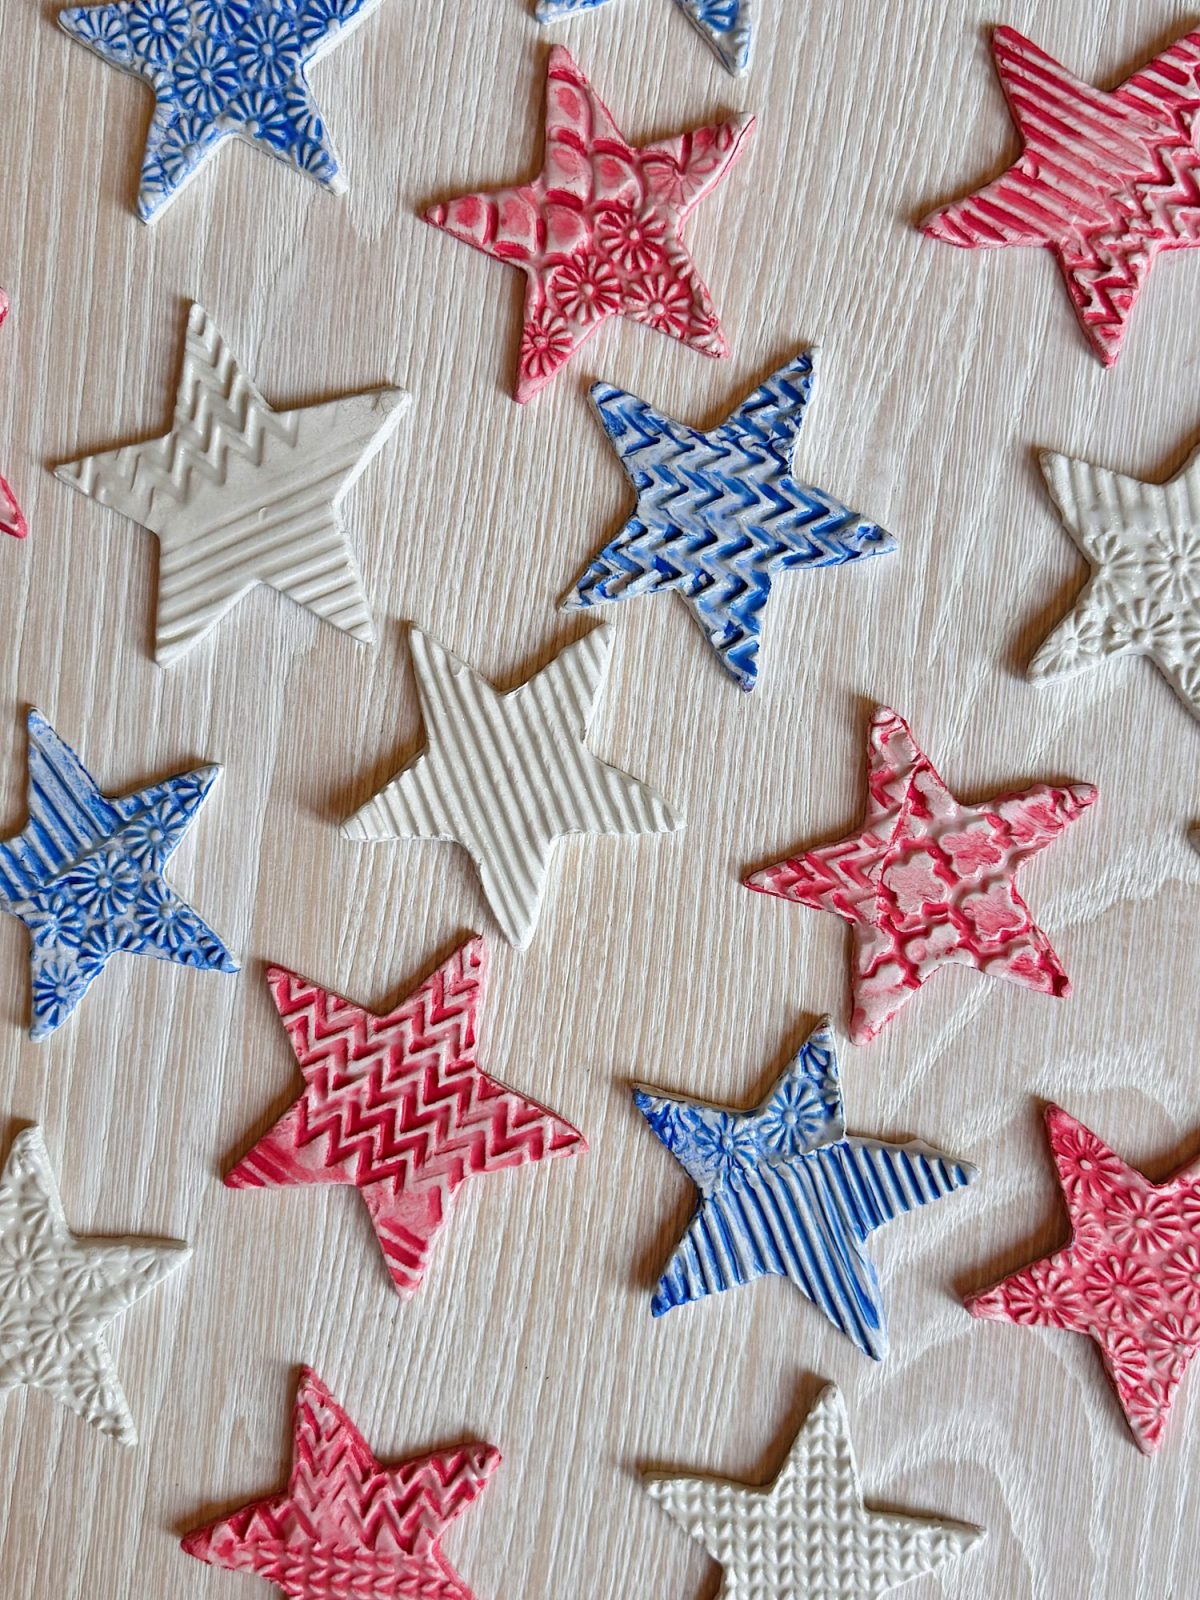
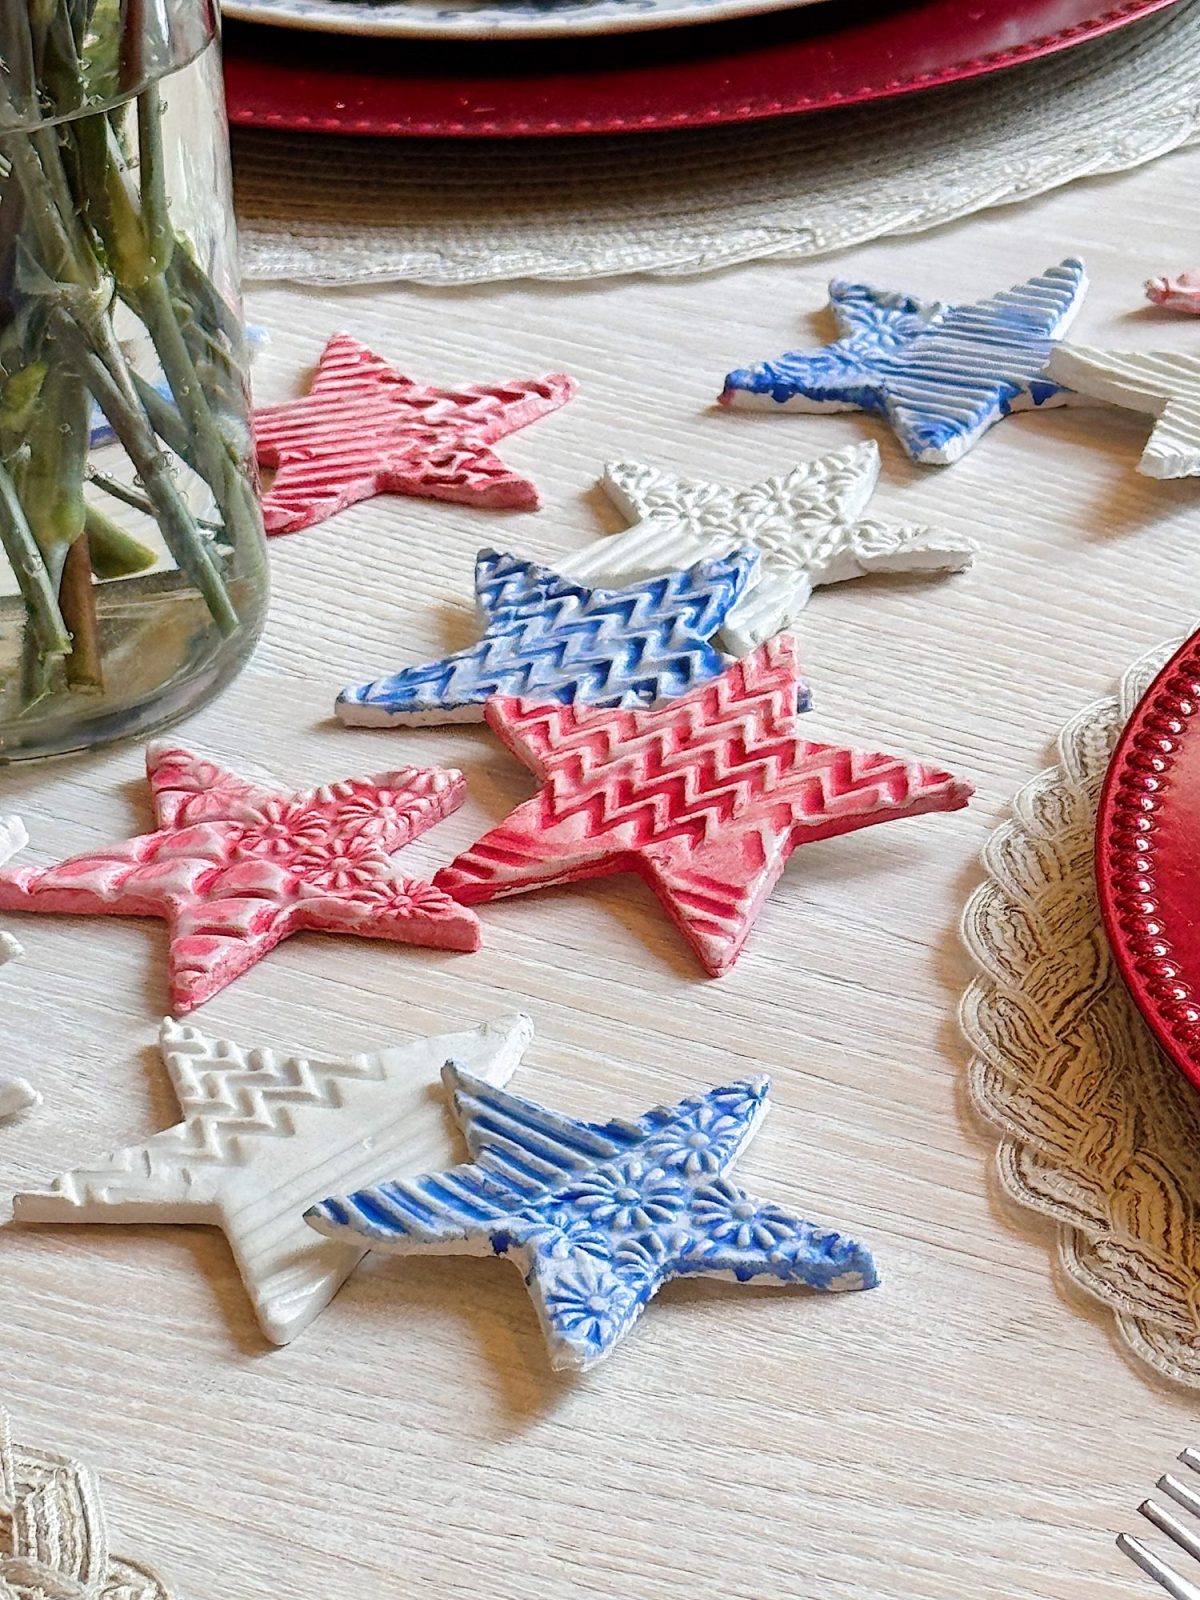
This is the fun part! I used textured rollers for these stars, and they made all the difference. I cut some in one pattern and others that had both patterns in the stars.
To add texture:
- Gently roll or press the design onto the clay surface.
- Be careful not to press too hard—you want the pattern visible without flattening your slab.
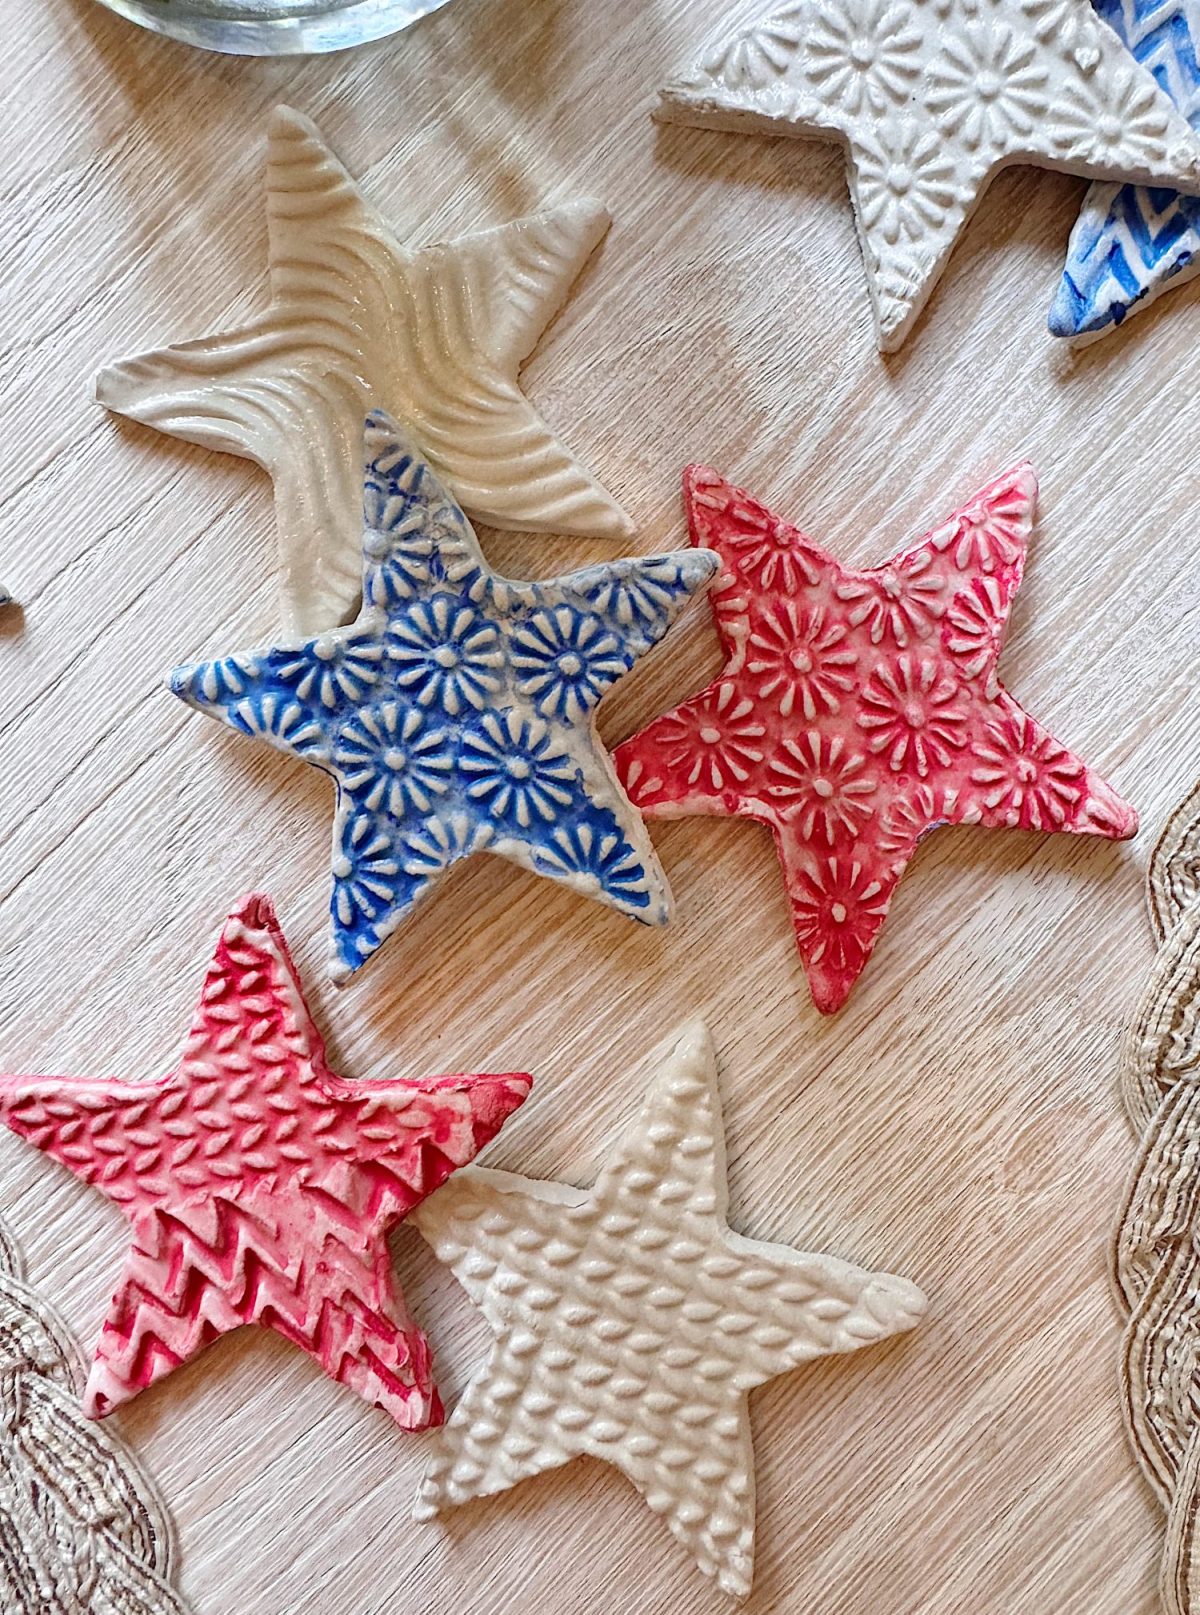
Don’t be afraid to mix textures! I made a few stars with different patterns and grouped them for an eclectic, layered look on the table.
Step Three: Cut Out Your Stars

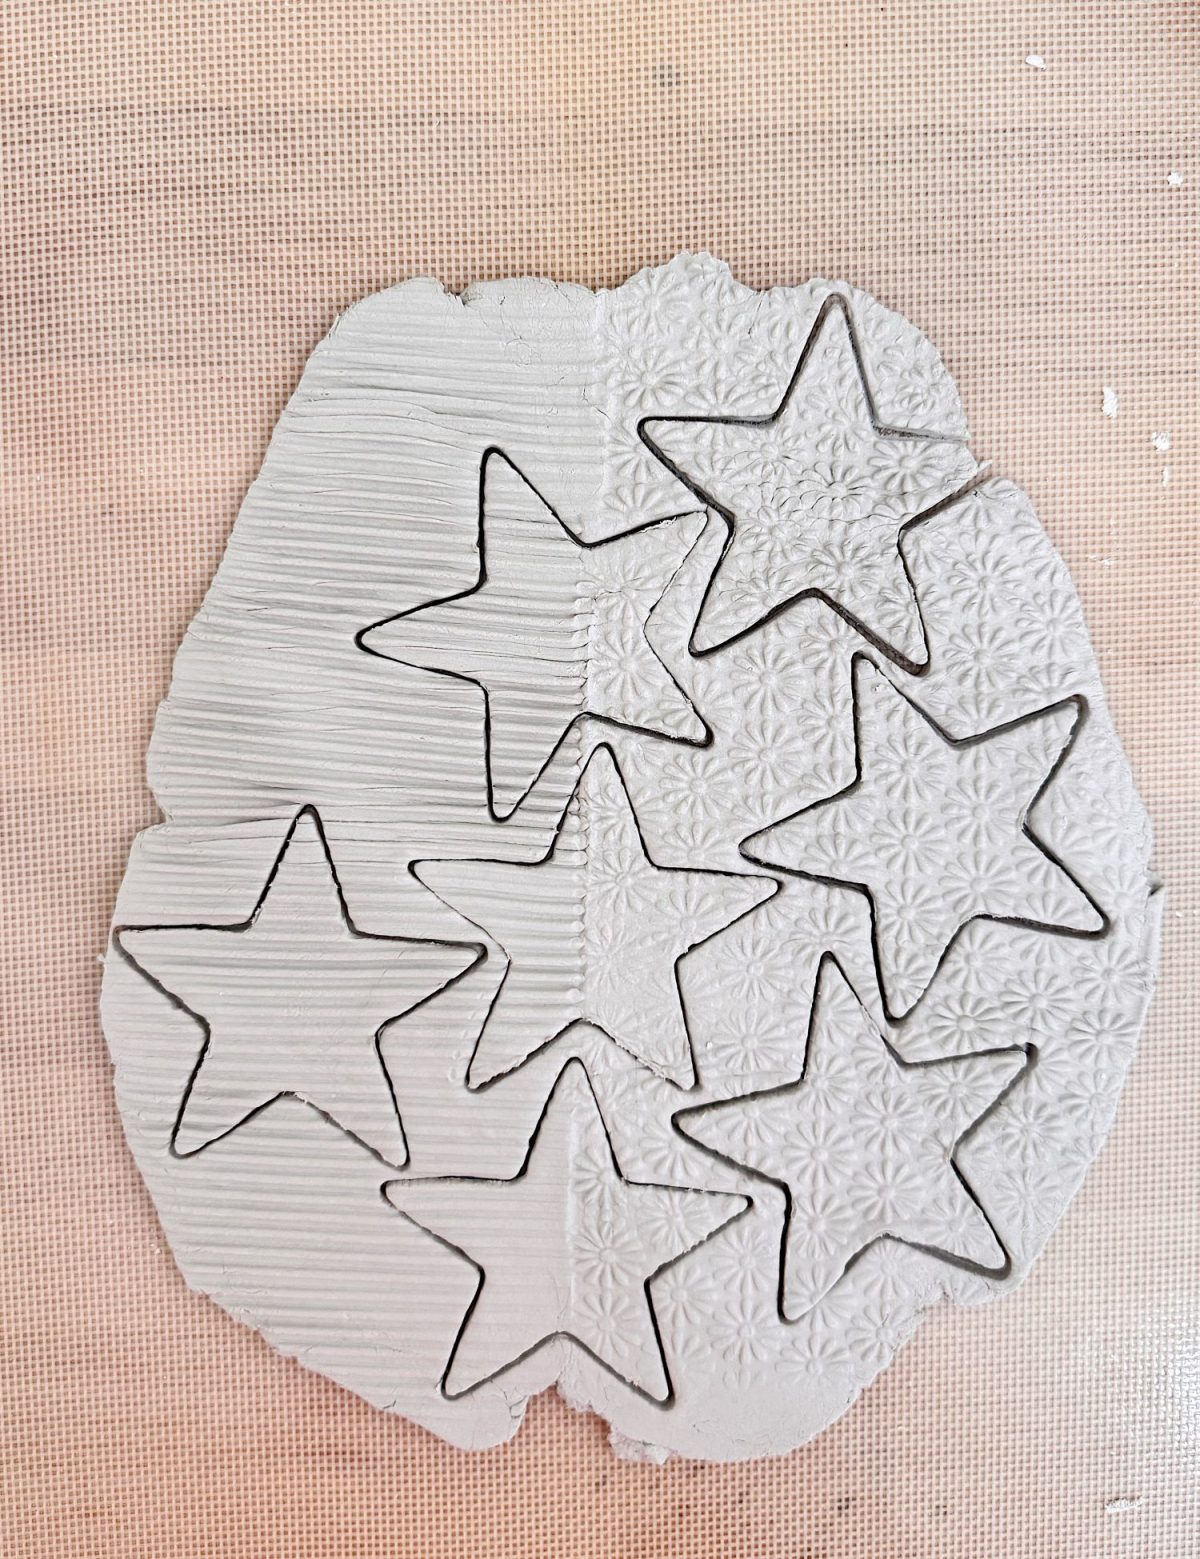
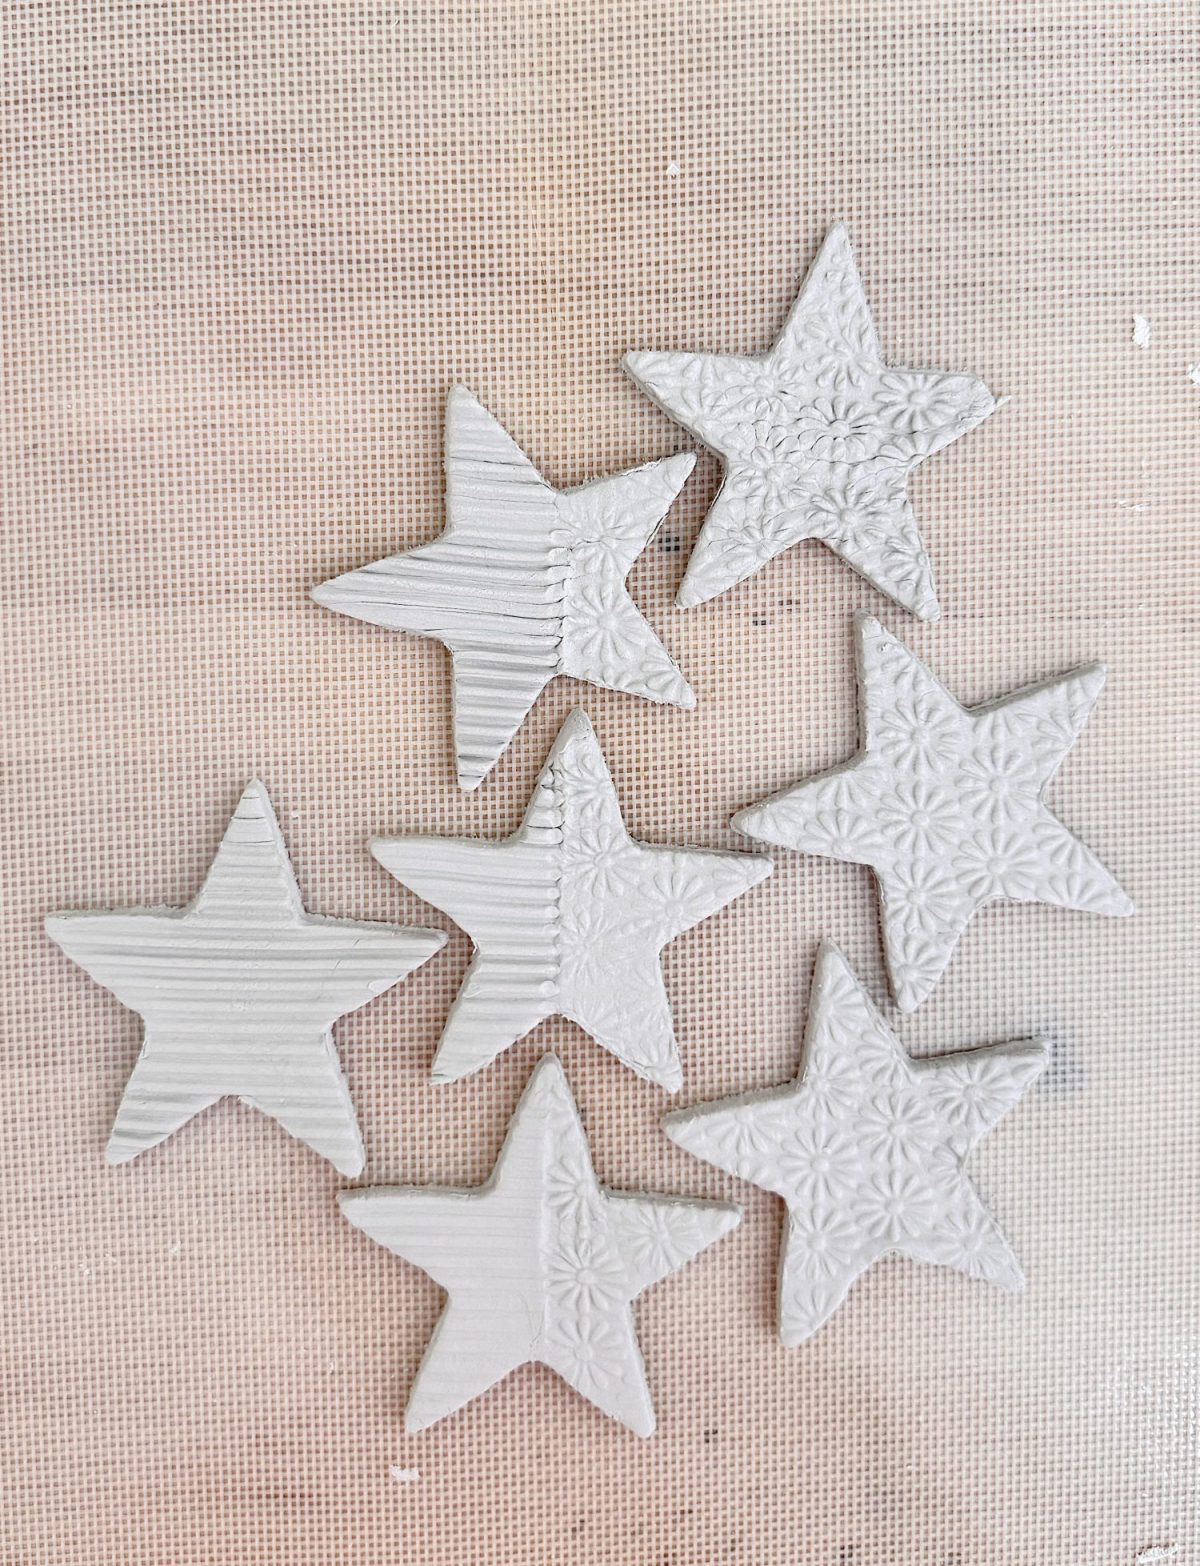
Use your cookie cutters to cut out as many stars as you can. I made a mix of small and medium-sized ones—some for place cards, some for centerpieces, and a few I even tied onto napkins with ribbon.
Once cut, use a clay blade or a plastic knife to carefully lift each star from the mat.
If you want to turn these into hanging ornaments or garland, punch a hole near the top with a straw or skewer now.
Step Four: Let Them Dry
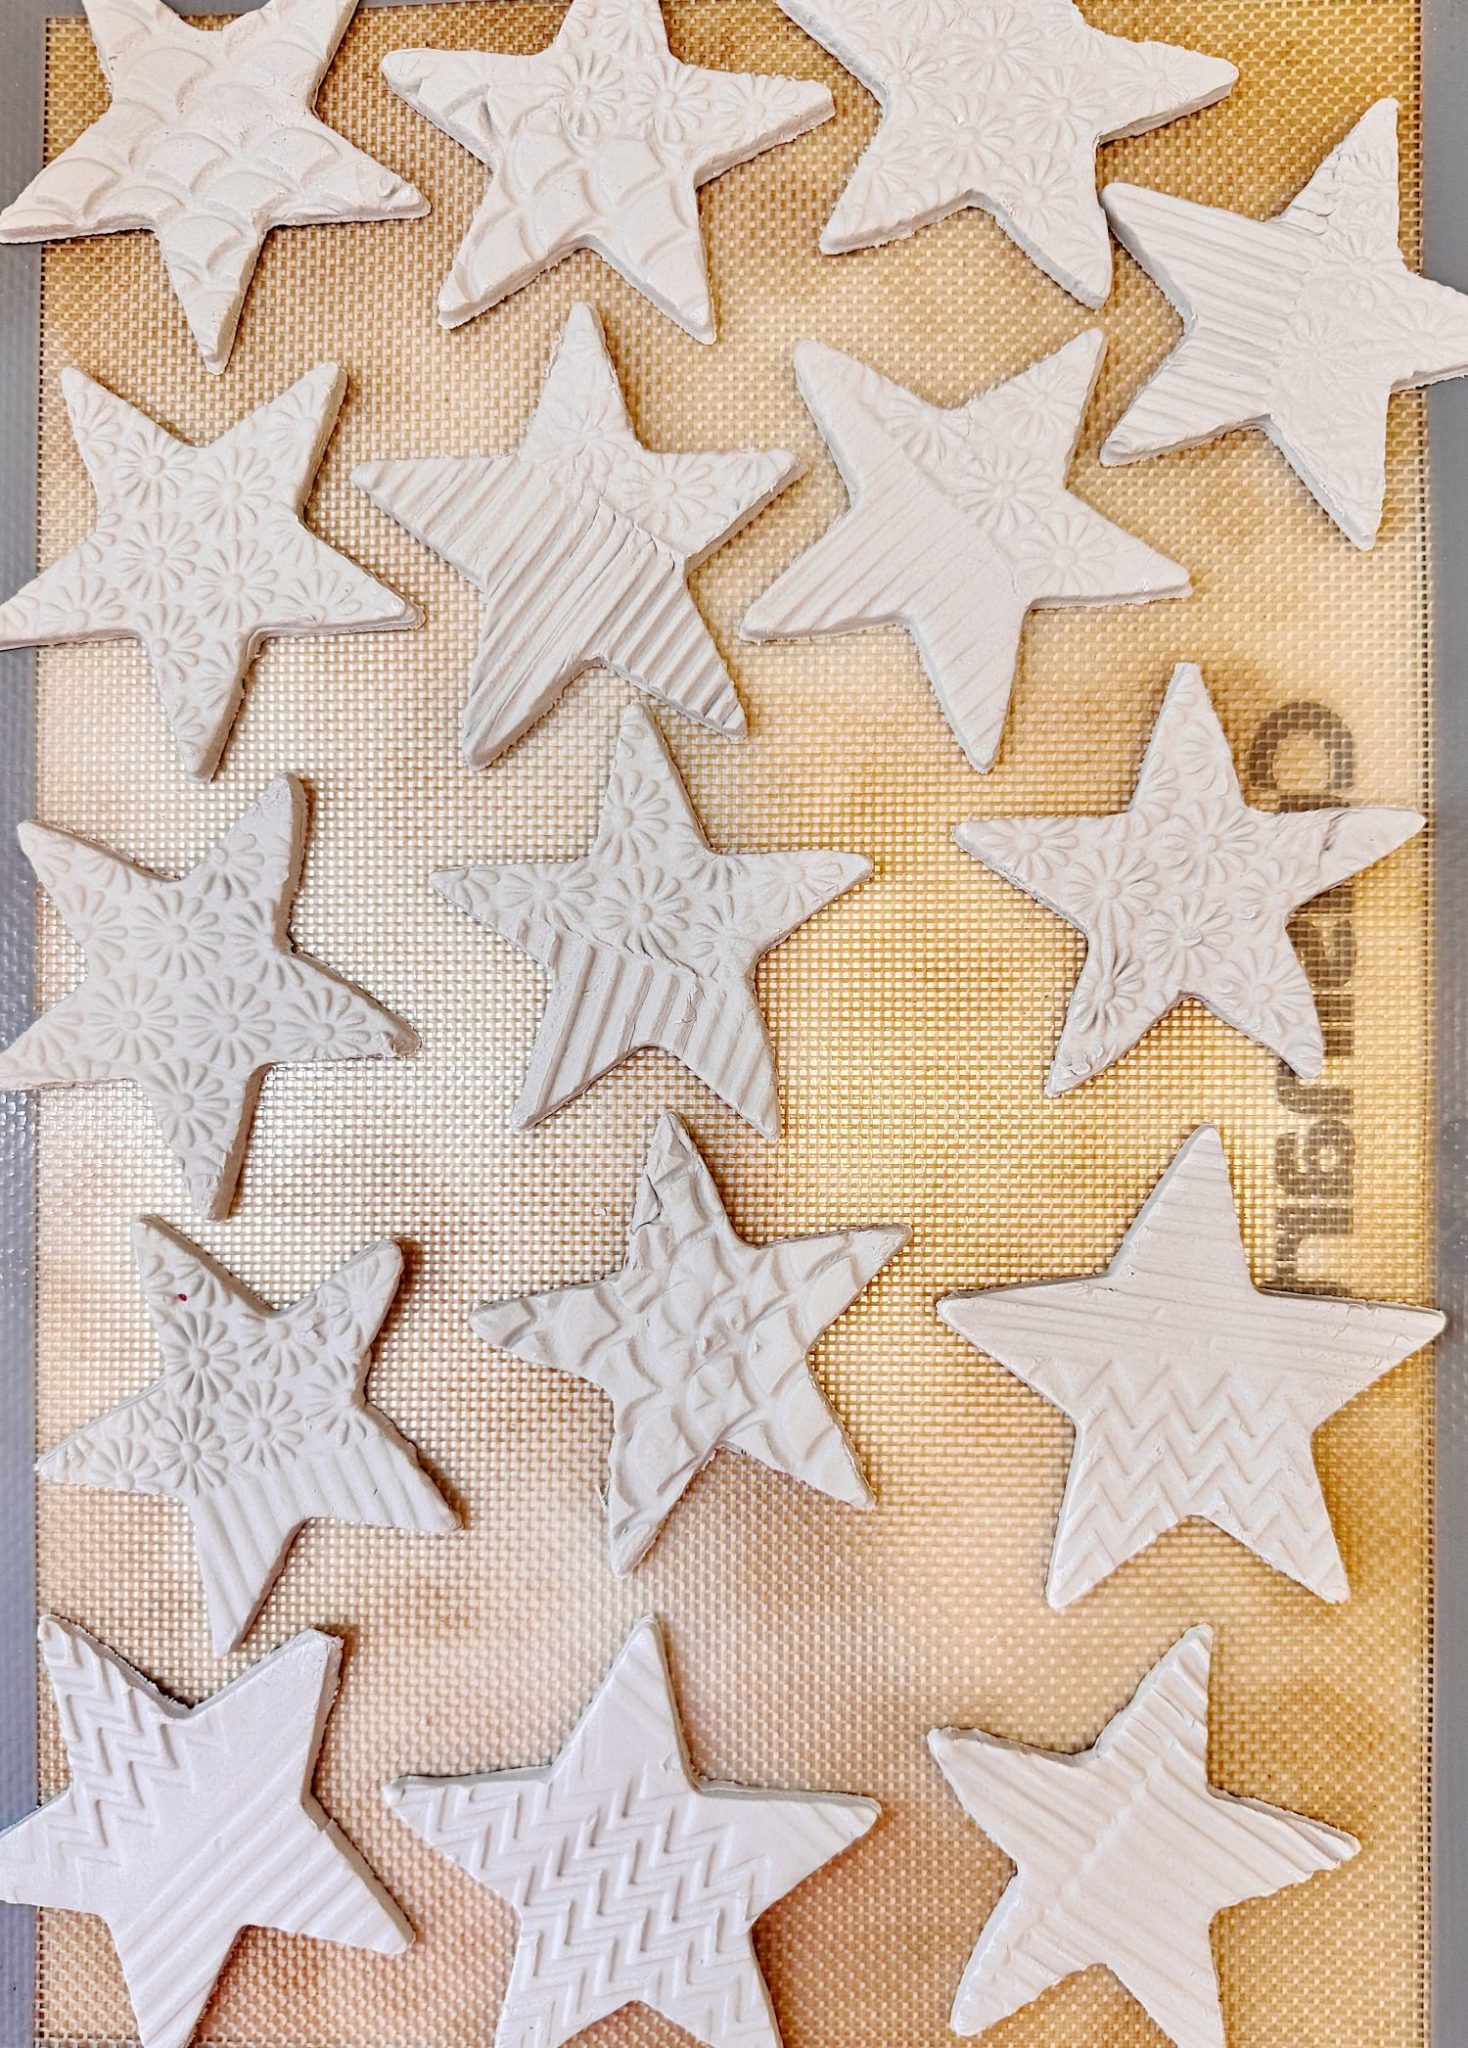

Lay all your stars on a flat surface (I used parchment paper on a tray) and let them dry completely.
Depending on the clay you’re using and your room’s humidity, this can take 24 to 48 hours. Flip them once during the drying process to prevent curling.
To speed up the process, place the air dry clay stars in the oven at 250 degrees. Bake for 15 minutes, flip, and bake another 15 minutes, or until dry.
Tip: If the edges look rough after drying, use a fine sanding block or nail file to smooth them out before painting.
Step Five: Seal with Mod Podge
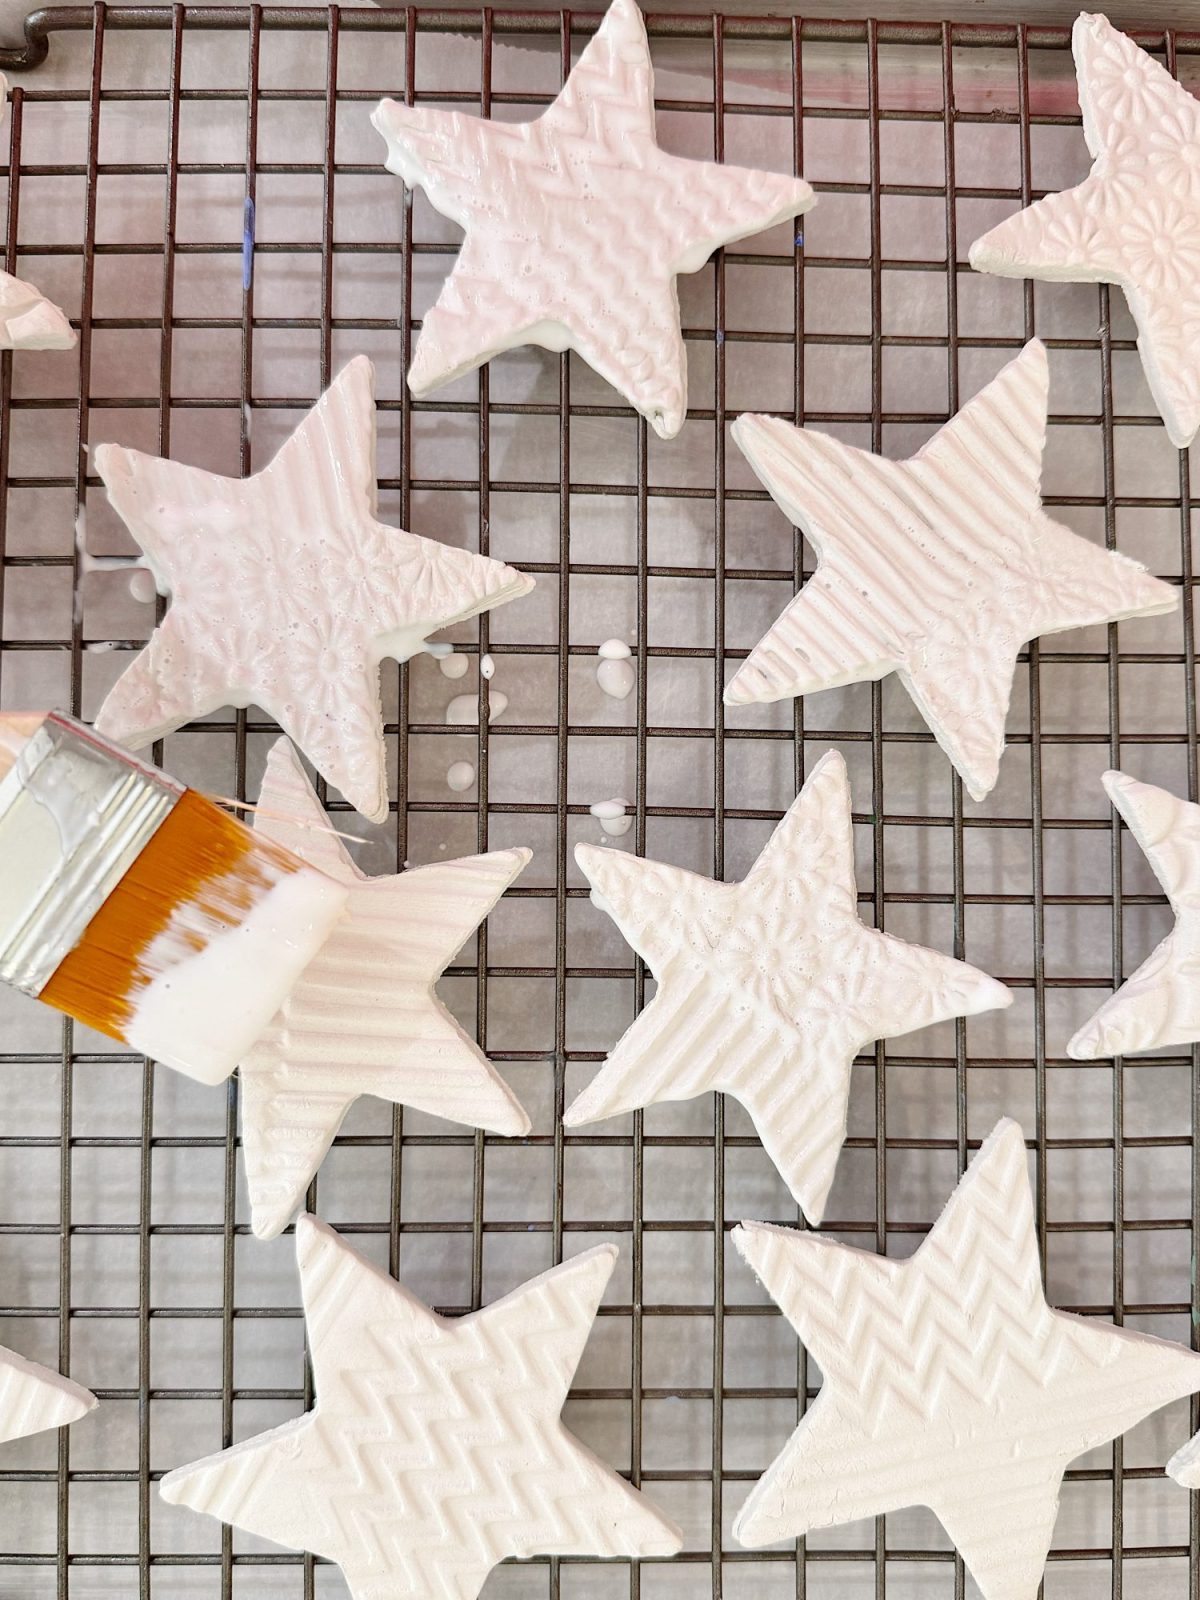
Before painting, I gave each star a coat of Mod Podge. This step helps seal the clay and creates a smooth surface for painting.
Most importantly, it prevents the paint from soaking into the clay, so when you paint the stars, they look more like ceramic pieces.
Step Six: Time to Paint!
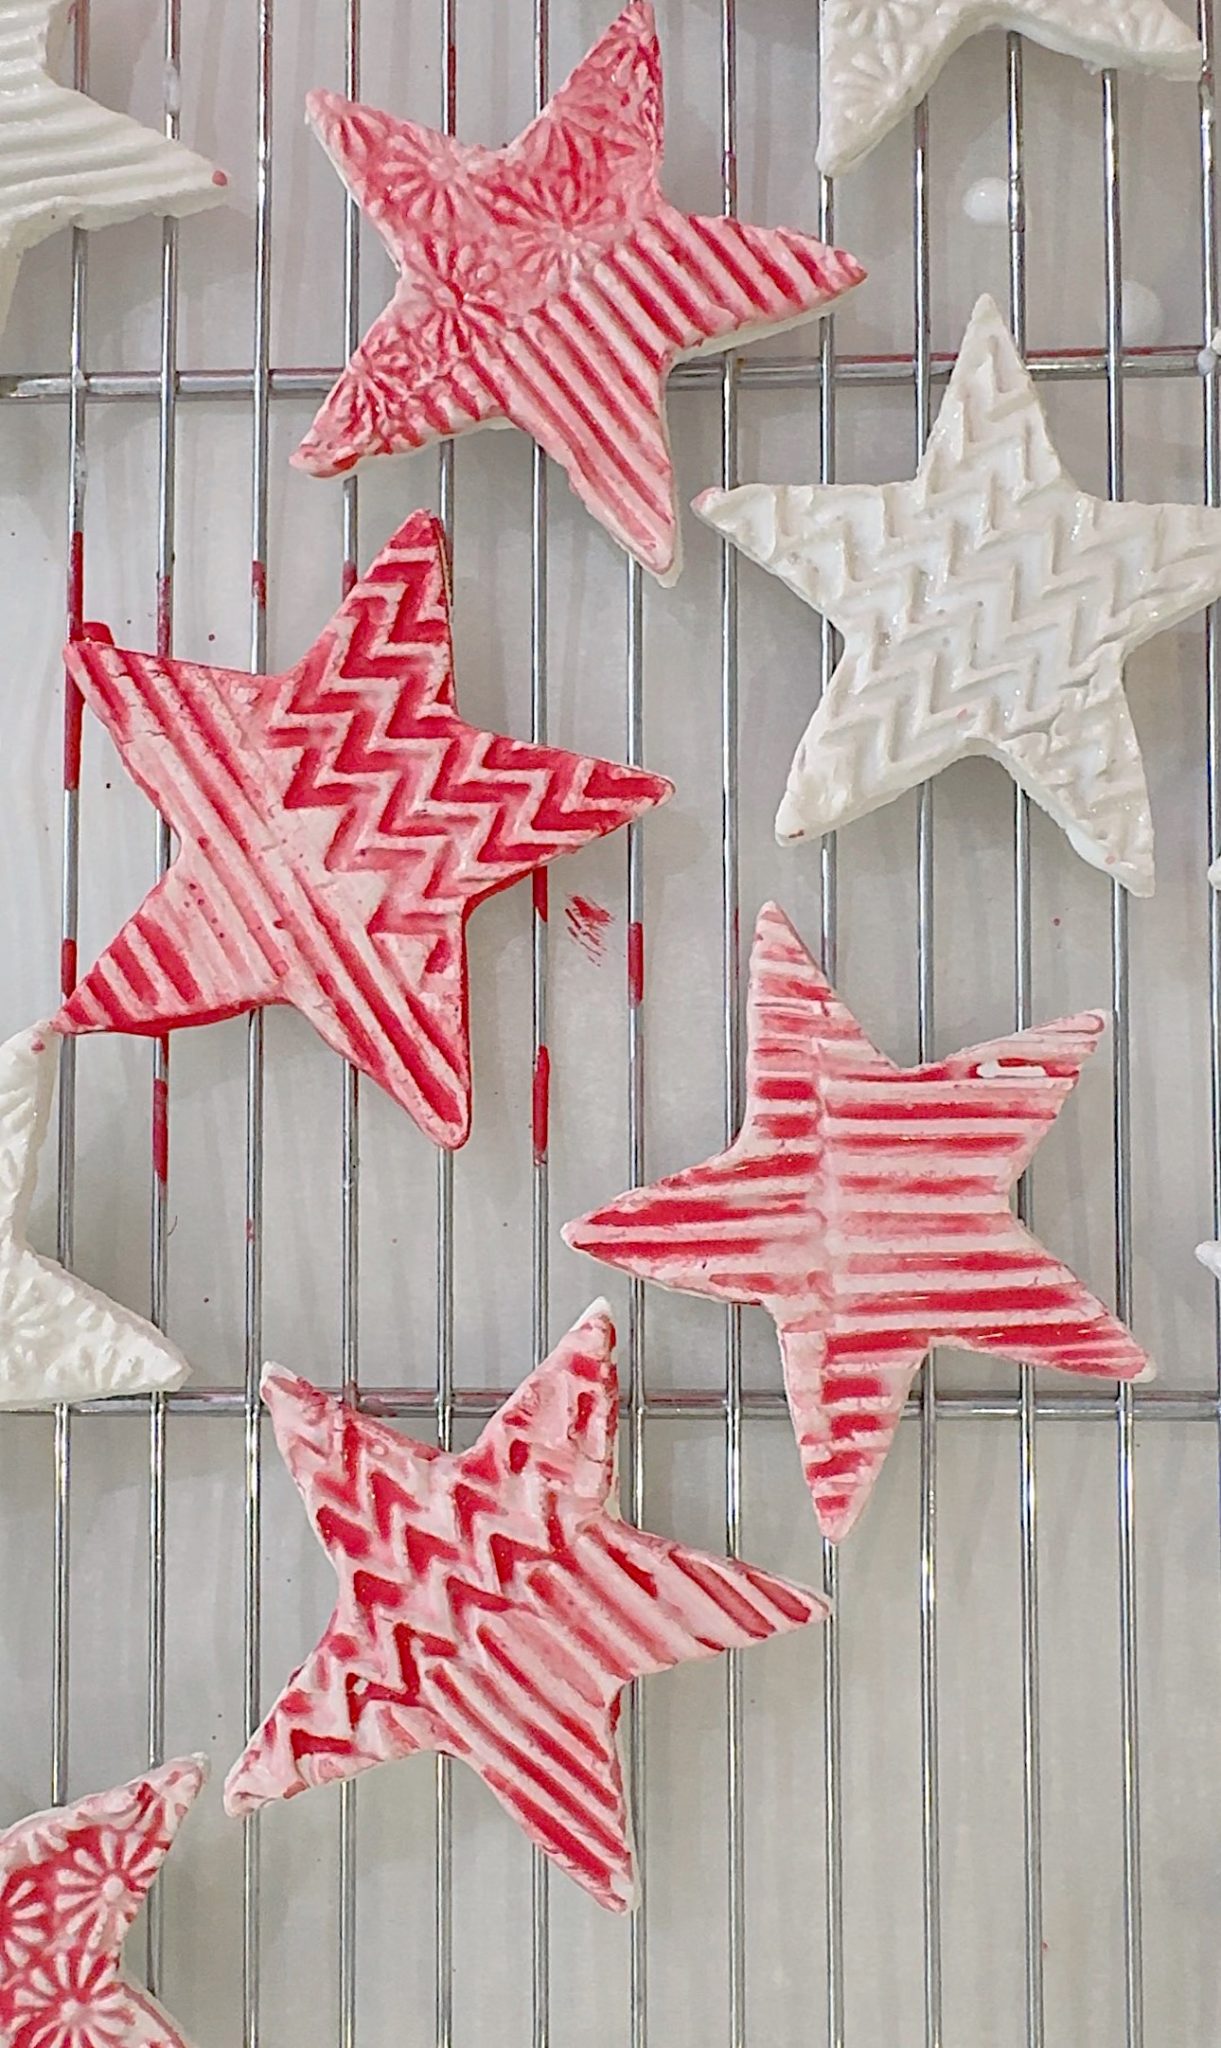
I stuck with a classic red, white, and blue palette—though you could play with metallics, pastels, or a weathered vintage look.
Here’s how I painted mine:
- Solid Stars: I painted all the stars entirely red, white, or blue.
- Layered Colors: You can also paint a few white and then dry brush blue or red over the texture to highlight the design.
- Speckled Finish: Dip a toothbrush in paint and flick it across the surface for a fun, speckled finish.
Acrylic paint dries quickly, which means you can layer colors or add detail without much waiting. Solid-color stars are just as beautiful if you’re working with kids or just want an easy project.
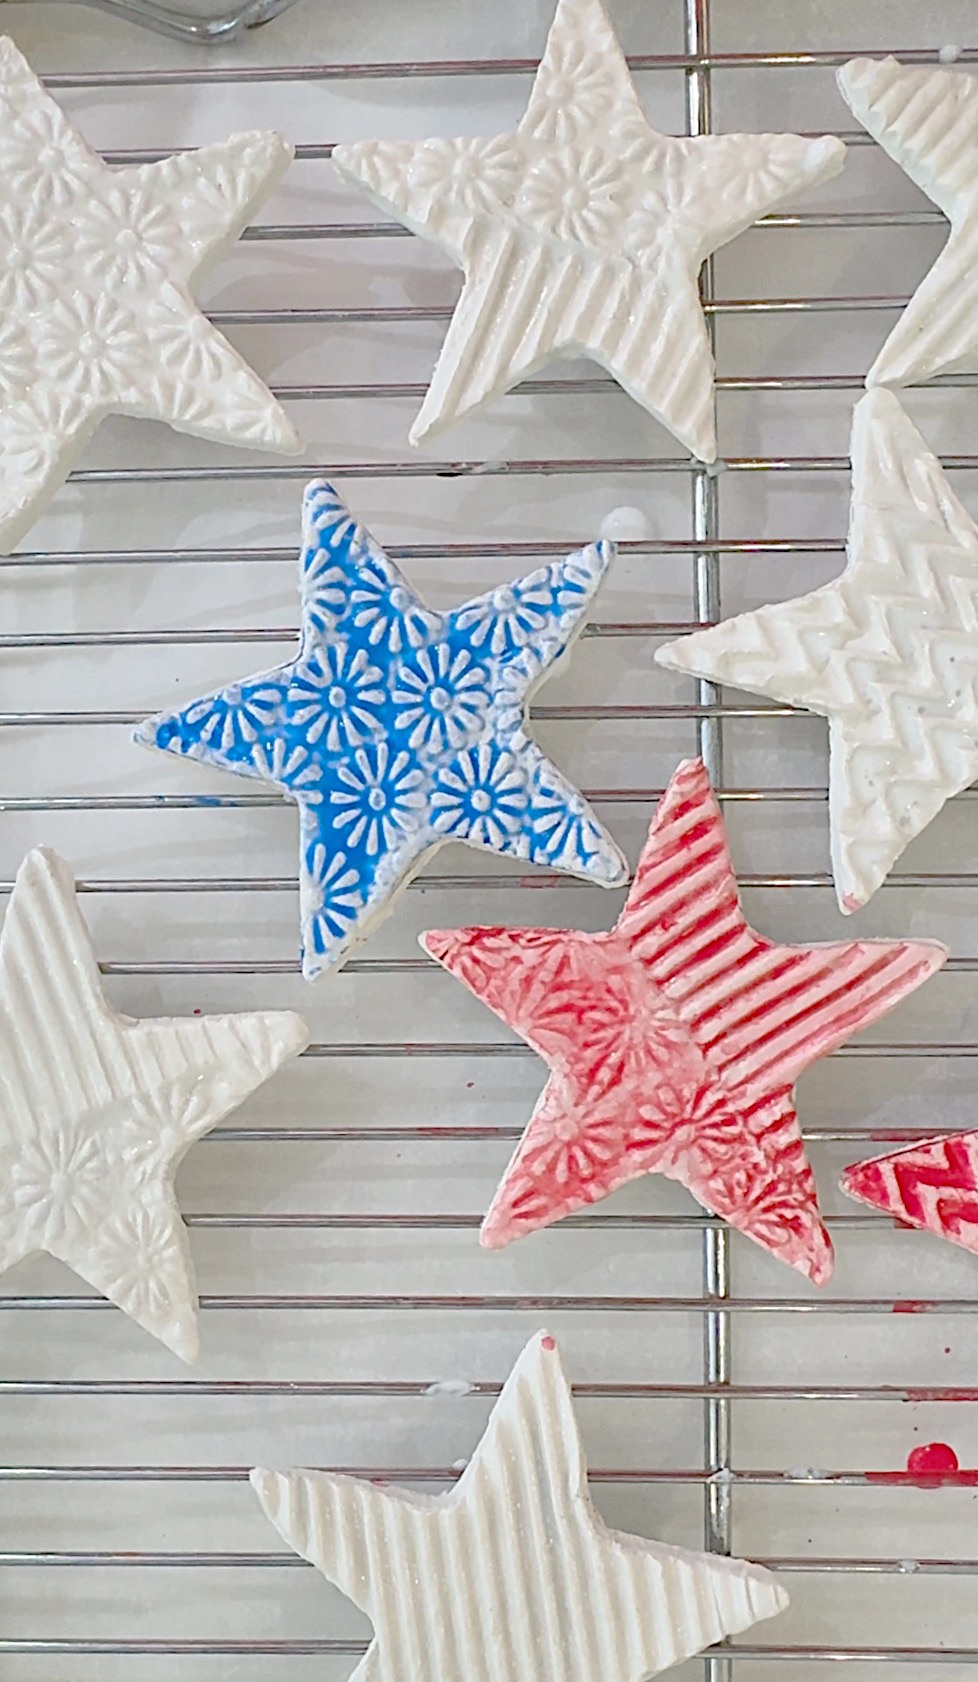
Step Seven: Glaze for Shine
Once the paint dried, I added a coat of clear glaze to each star. This step is optional—but I love the shine it gives. It makes the stars look finished and gives them a bit of durability, especially if you’re using them outdoors or want to save them for future holidays.
I used a brush-on craft glaze with a glossy finish and let it dry overnight.
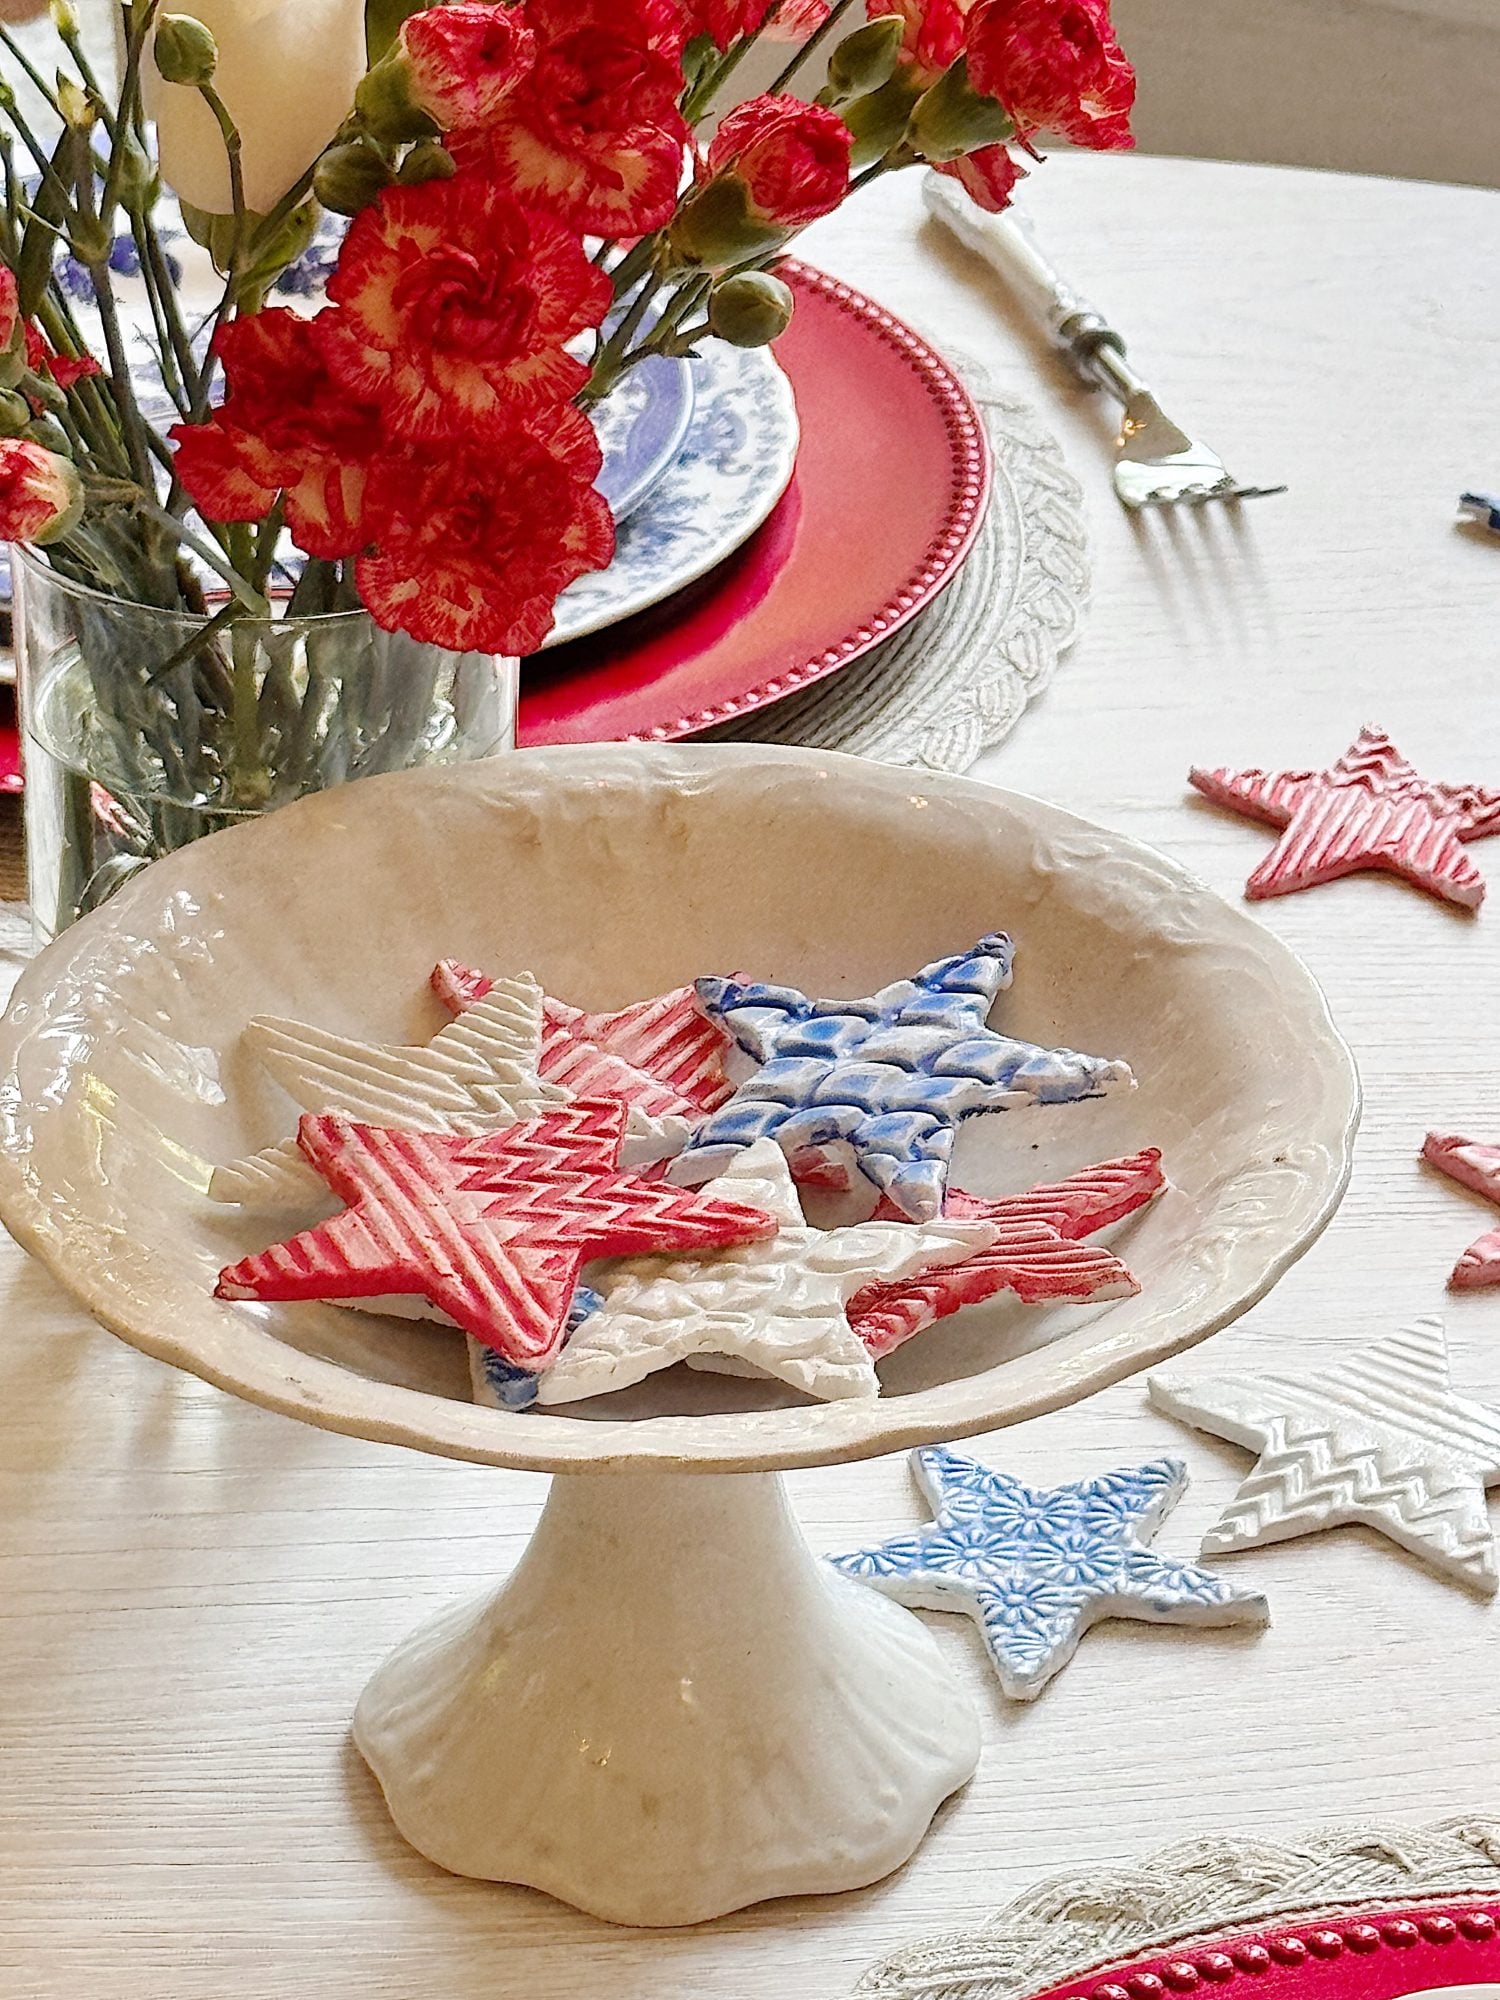
Ways to Use Your 4th of July Air Dry Clay Stars
This is where things get creative! These clay stars are incredibly versatile, and I had so much fun using them throughout our holiday table.
Here are some of the ways I used them:
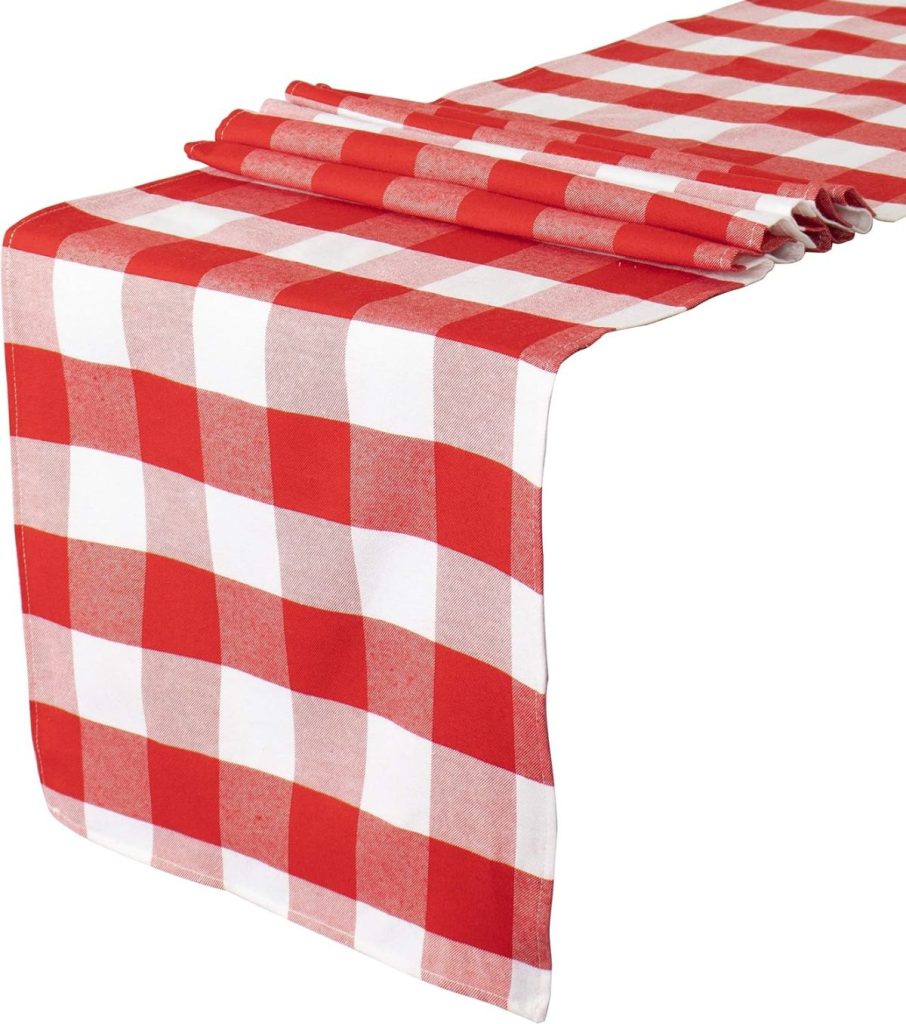
- Table Scatter: I sprinkled stars across my blue-and-white gingham table runner for an instant 4th of July charm.
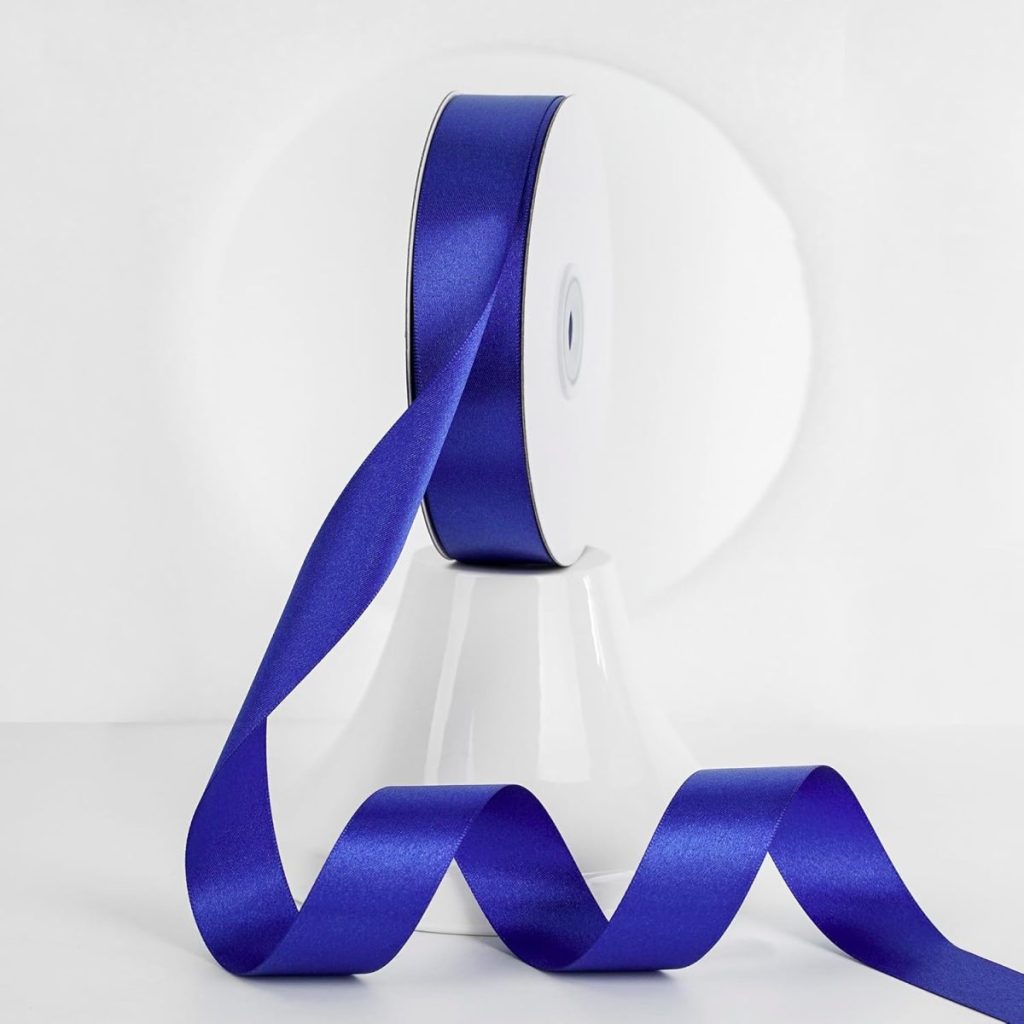
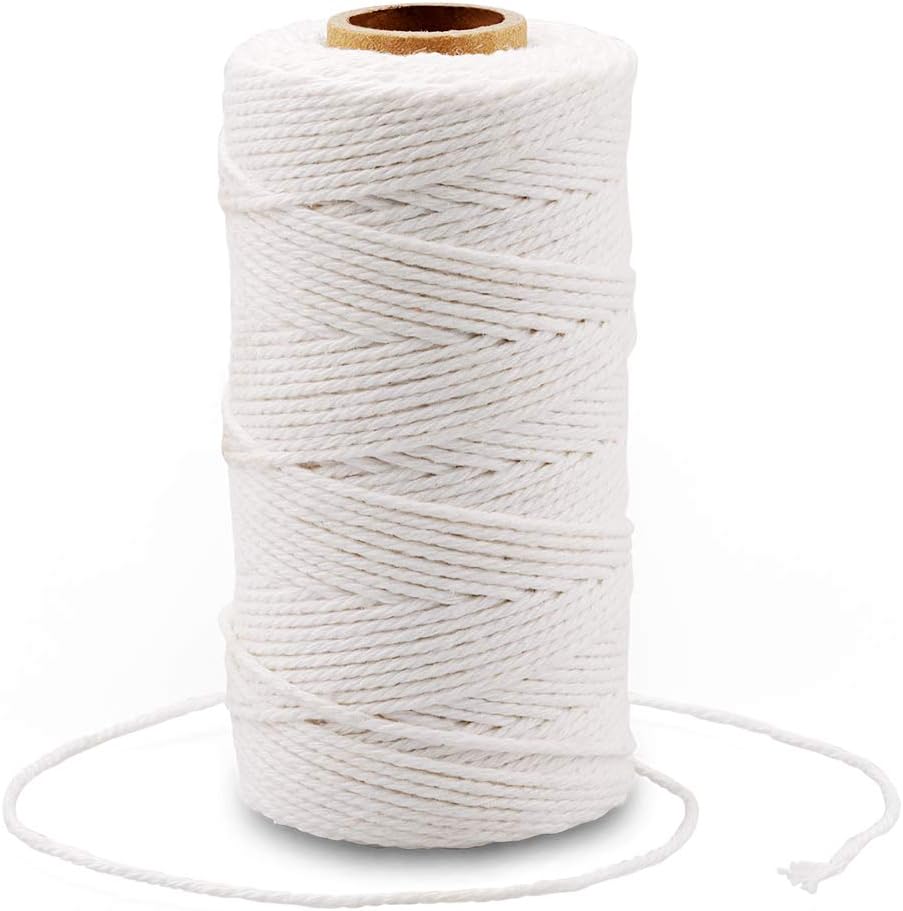
- Place Cards: Before drying, poke a hole in the top of the star. Then, tie the stars with a ribbon around napkins and add handwritten name tags.
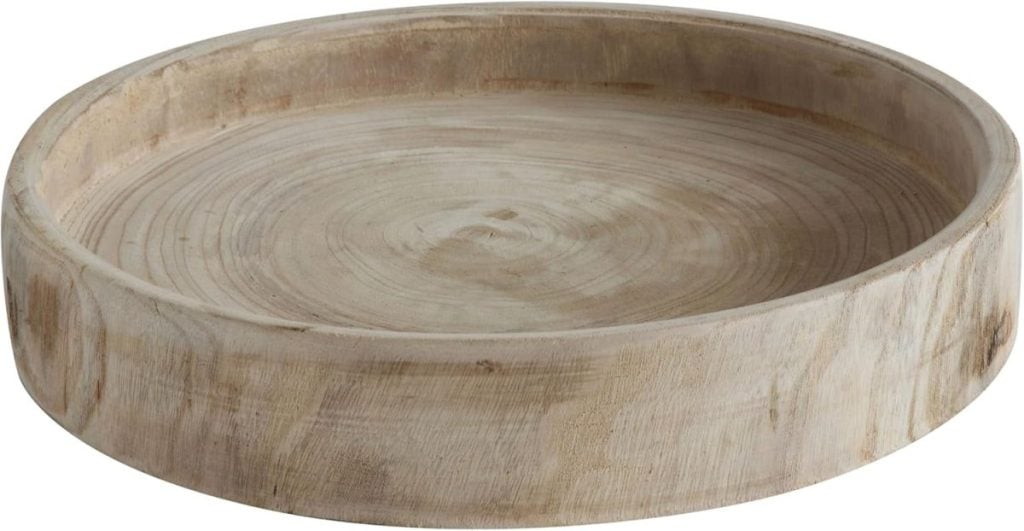
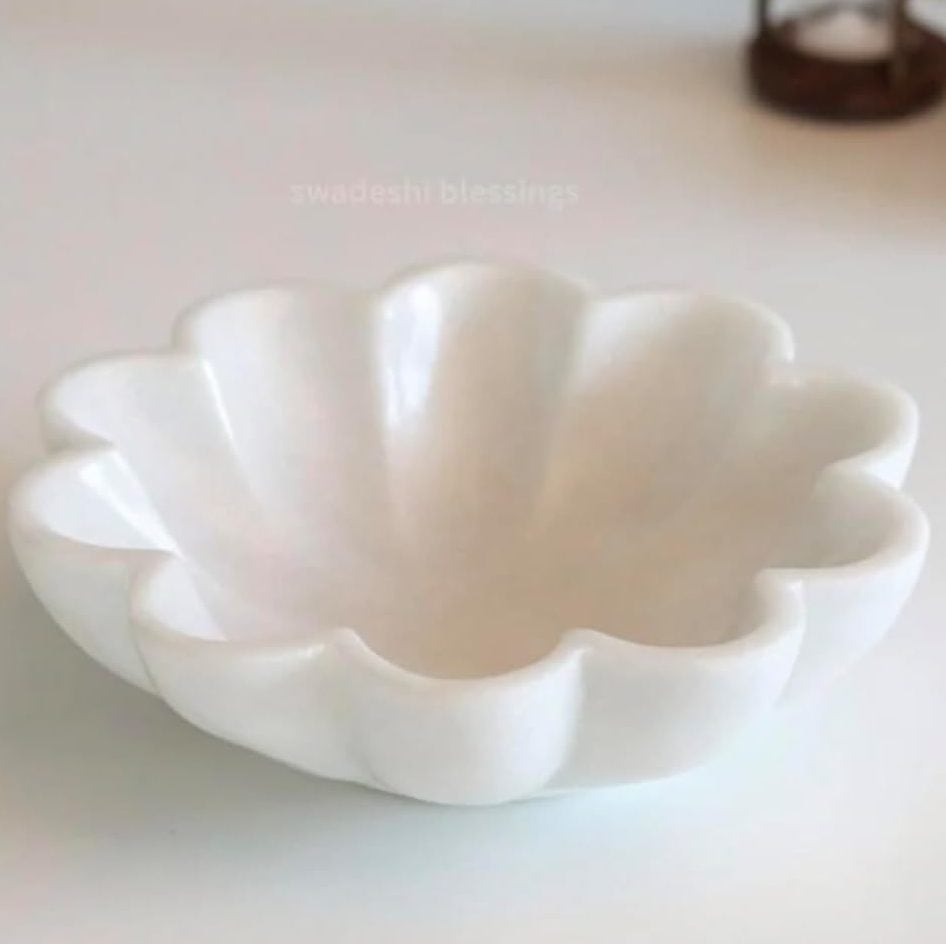
- Centerpiece Fillers: I filled a vintage bowl with mini flags, dried flowers, and clay stars.
- Garland: String a few stars with holes onto twine and hang them across your mantel.
- Take-Home Favors: Each guest received a star at their place setting to take home. A sweet little handmade memento!
The best part? These can be used year after year. Store them in a tin or box with tissue paper to protect them.
A Few Tips I Learned Along the Way
As with all clay crafts, I learned a few helpful lessons during this project:
- Less is more with water. Don’t over-wet your clay or brush—it can warp the shape.
- Texture tools matter. Deeply etched rollers and stamps work best. Light textures tend to disappear after drying and painting.
- Make extra! These stars are quick to make; you’ll be glad to have extras for decorating or gifting.
- Mix finishes. I loved pairing matte-painted stars with glossy glazed ones for dimension.
Why I Love This Craft
There’s something incredibly satisfying about making seasonal decor by hand, especially when it involves clay. This project was inexpensive and fun and yielded so many charming pieces to use in different ways. I loved watching these simple stars come to life with each step—from soft clay to finished sparkly decor.
And the best part? You don’t need a kiln, fancy materials, or much time. Just a little air-dry clay, creative flair, and a dash of red, white, and blue.
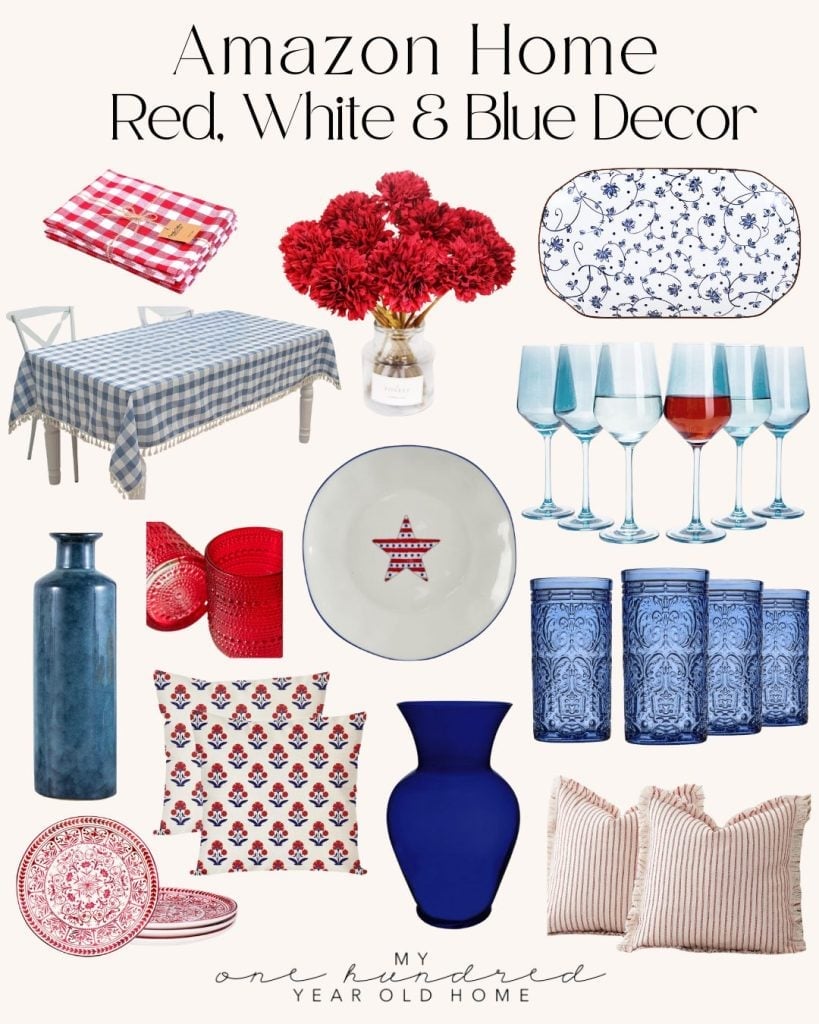
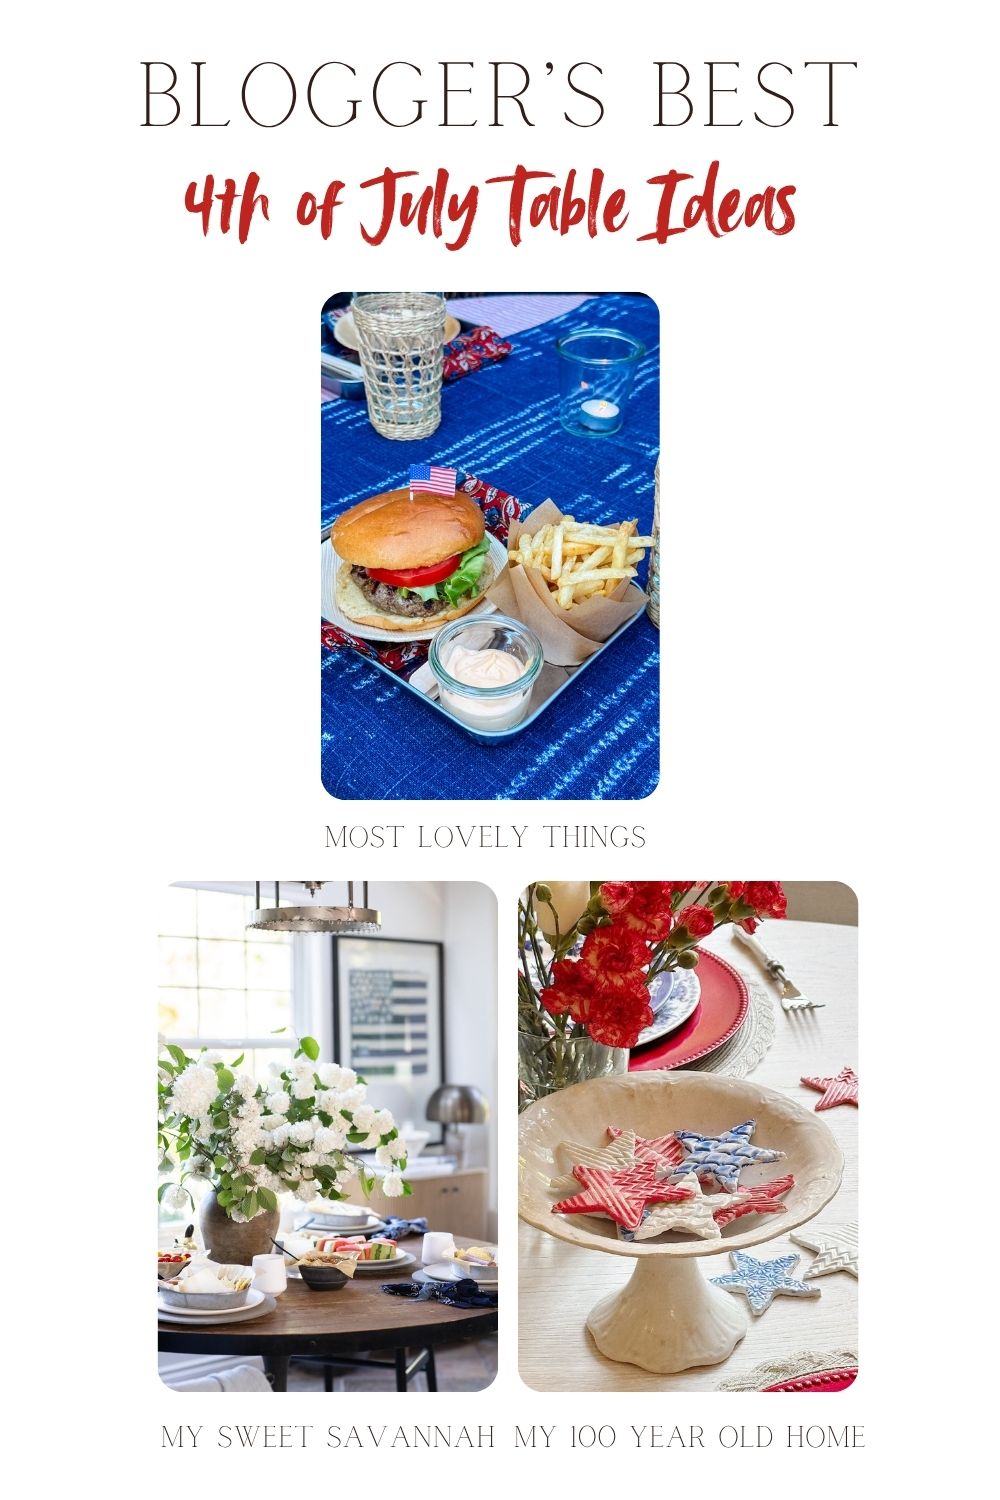
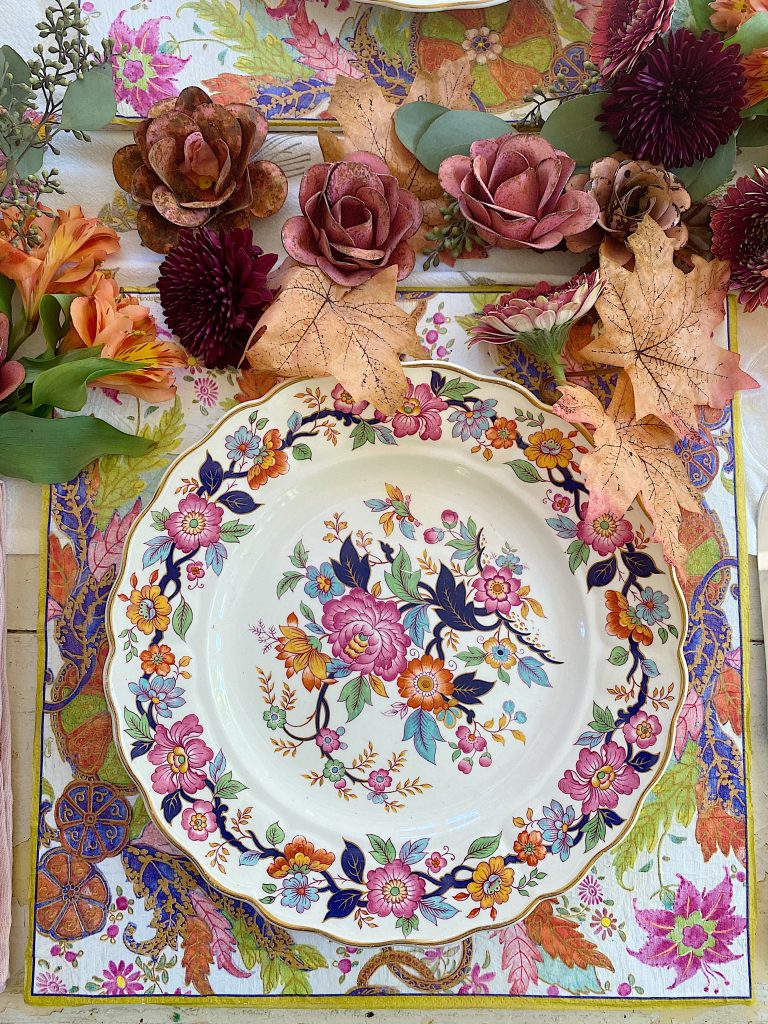
Blogger’s Best 4th of July Table Ideas
All American Tablescape Ideas for a Simple Fourth of July | My Sweet Savannah
This All American Fourth of July tablescape brings together timeless charm and simple summer style. With thrifted finds, natural blooms, and classic cookout favorites, it’s an easy and inspiring way to celebrate the holiday with heart and tradition.

A Creative Way to Serve Burgers & Fries This Summer | Most Lovely Things
A fun and creative way to serve burgers and fries on the 4th of July or anytime!
Red, White & Blue Favorites
Latest Posts
-
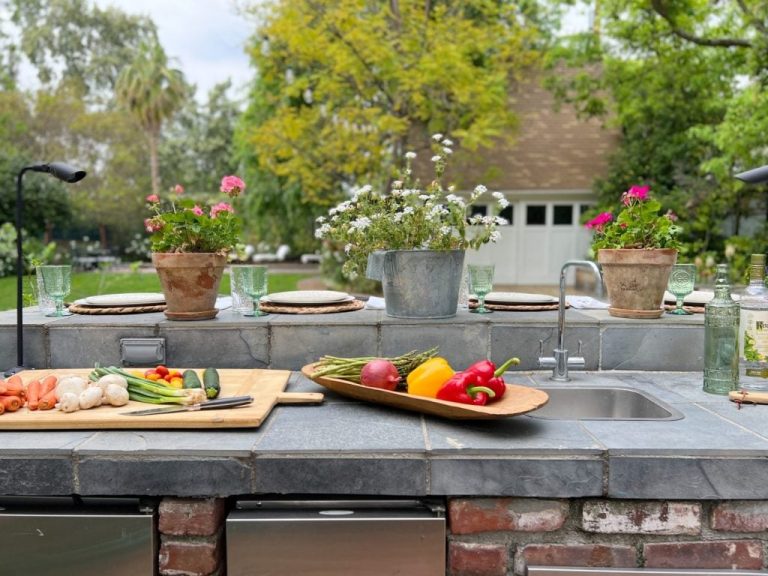
Grilling Perfectly and Tips to Use Your Outdoor Grilling Station
It’s time to fire up the grill and embark on a flavor-filled journey of outdoor cooking! It’s time to have fun with your outdoor grilling station. Planning a successful BBQ cookout is an art that combines culinary skills, creativity, and a dash of hosting finesse. I have crafted The Essential Summer Grilling Guide to help…
-
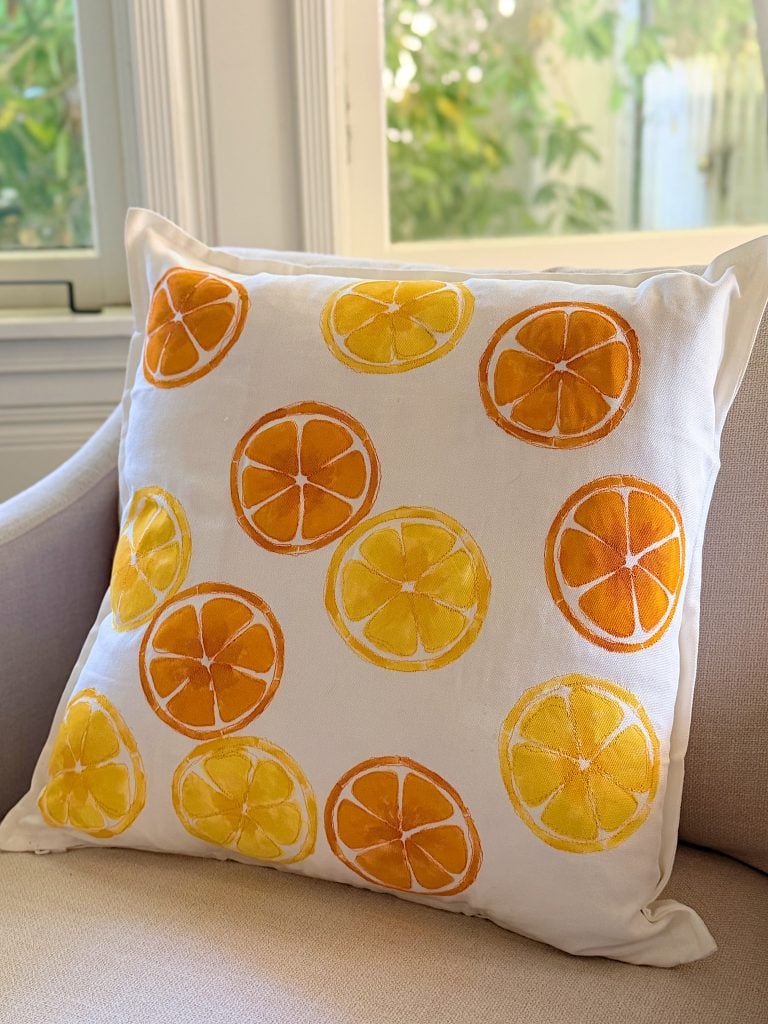
A Citrus Pillow – A Handmade Summer
A handmade pillow is one of the easiest ways to add a fresh, custom touch to your home, and this cheerful citrus design is perfect for summer. Using a simple white pillow cover, a citrus stencil, acrylic paint, and a little free-motion embroidery, you can create a one-of-a-kind accent pillow that looks boutique-made without spending…
-
Pink Lemonade Pie
Summer is the season for refreshing and light desserts, and what could be better than a tangy, creamy, and perfectly chilled Pink Lemonade Ice Cream Pie? This delightful dessert is perfect for hot days, picnics, barbecues, or any summer gathering. Its vibrant color and mouthwatering flavor will surely be a hit for kids and adults….
-
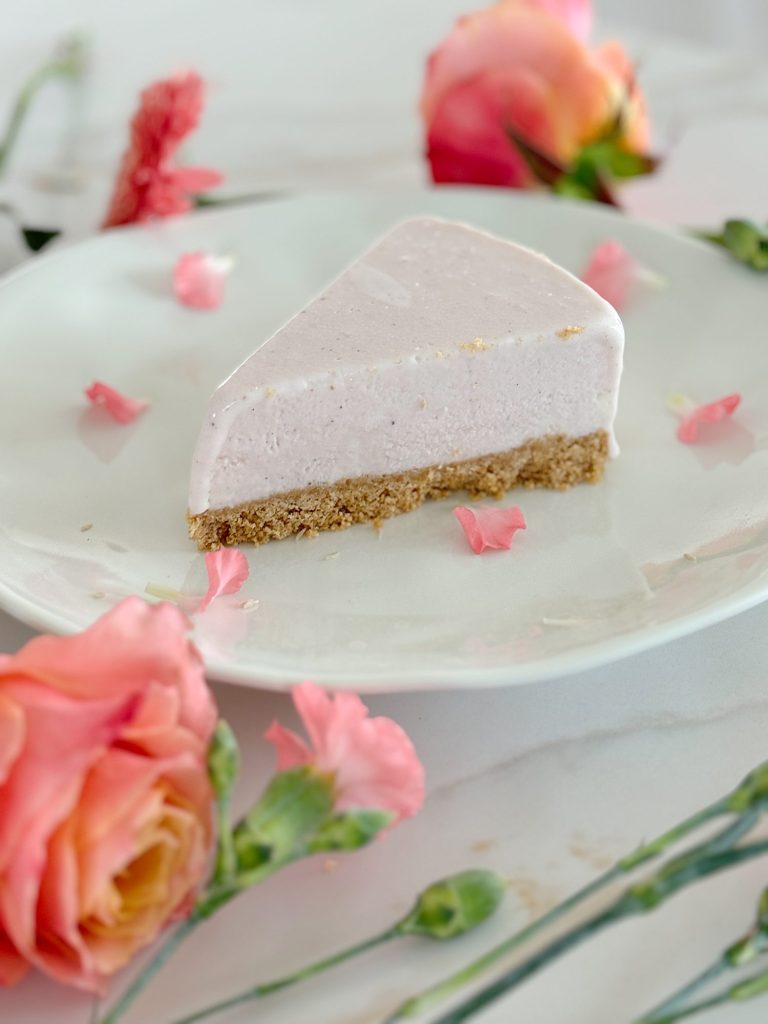
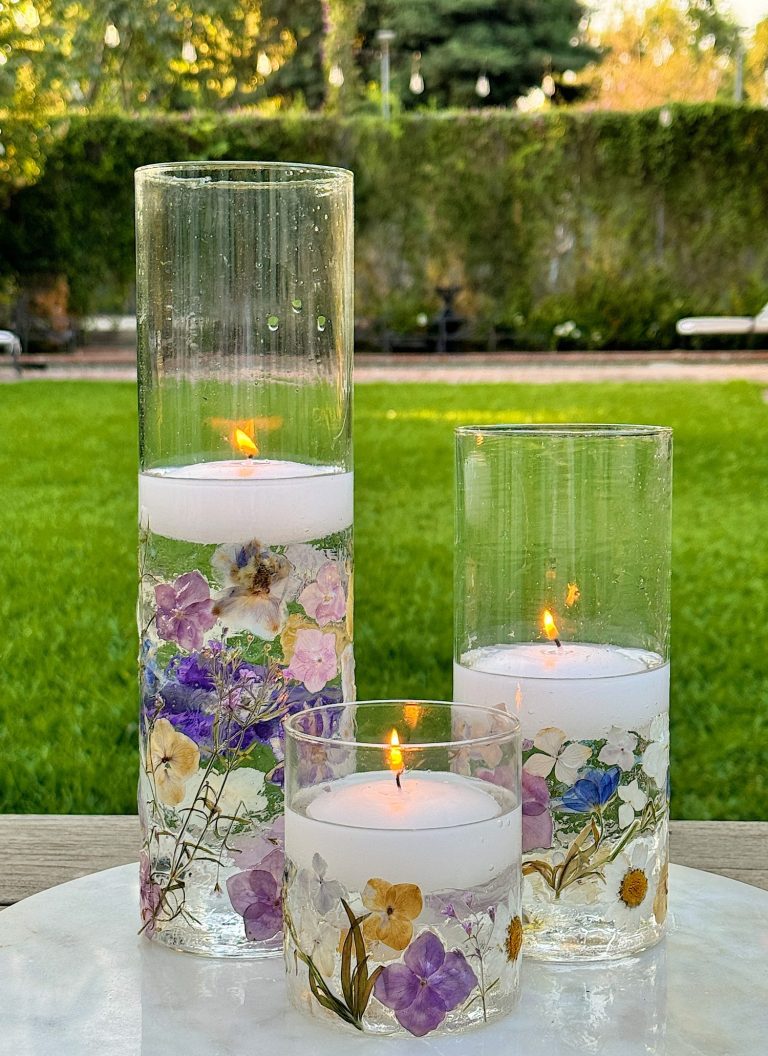
DIY Pressed Flowers
DIY pressed flowers are a beautiful and charming addition to any home decor. When made into candle holders, they are stunning. These delicate creations bring a touch of nature indoors and can be customized to fit any style or occasion. Whether you want to create a romantic centerpiece, a whimsical decoration, or a unique gift,…
My Recent Instagram Posts

You can pin the images below to your boards on Pinterest (click the Pin button in the top left corner) or follow me on Pinterest!
For more real-time updates, follow me on Instagram @My100YearOldHome
I love your red, white & blue clay stars! The different patterns on each look so interesting and add something special to your table decor!
Lovely table setting for the 4th.
What a fun project! I loved these red, white and blue stars.