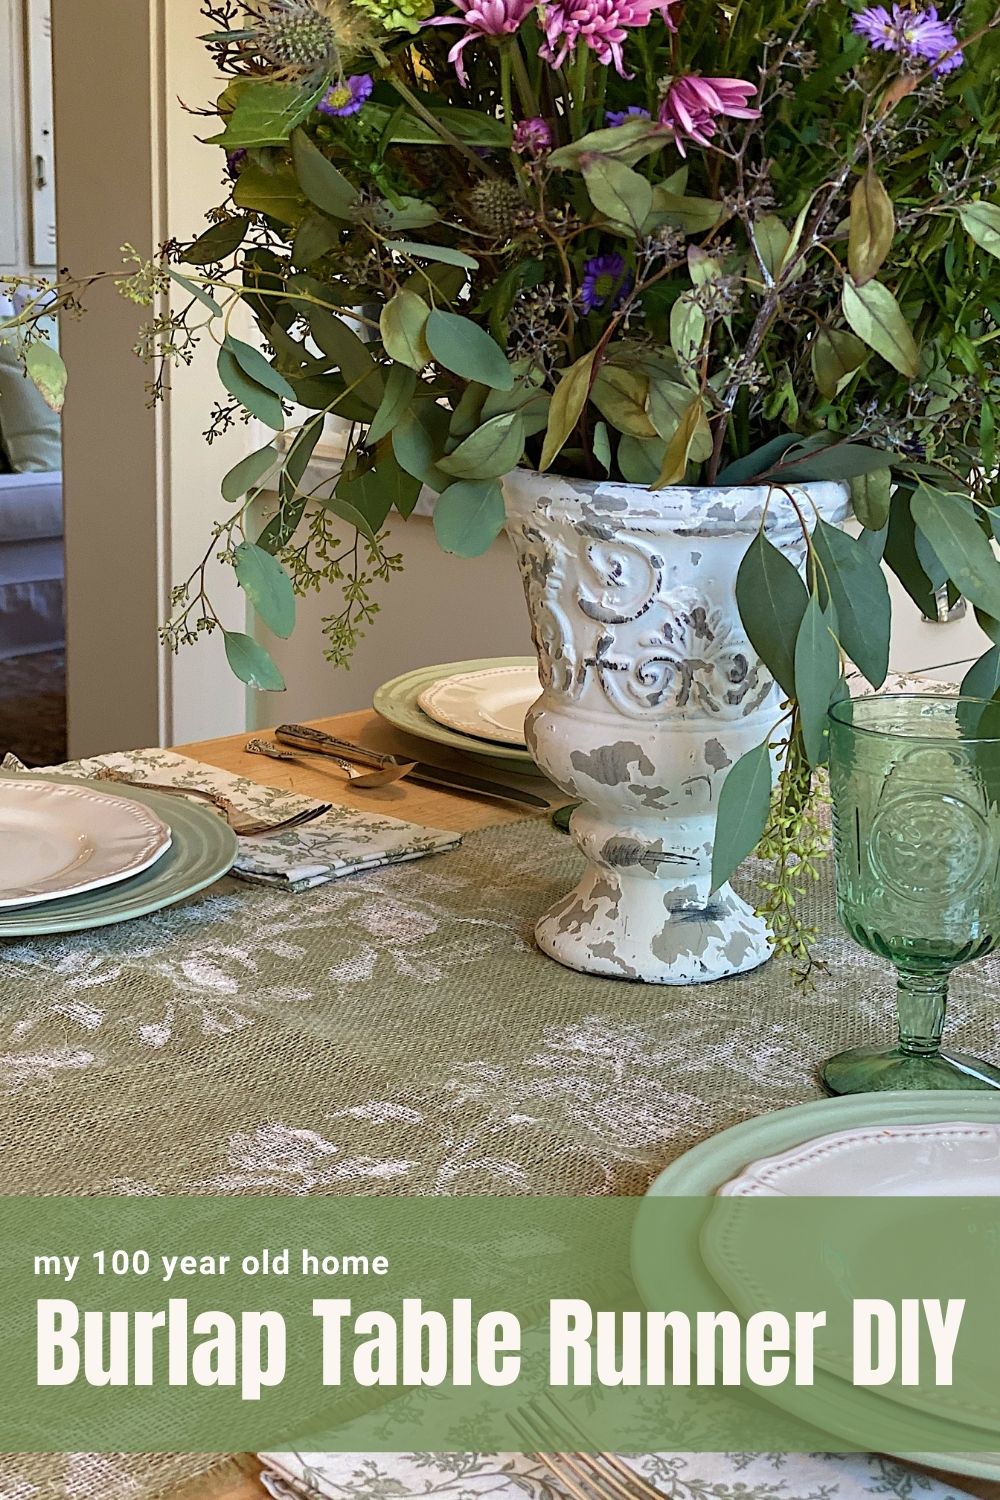
Burlap Table Runner DIY
This easy DIY Burlap Table Runner can be made in less than an hour. I love this farmhouse burlap table runner that I made with burlap fabric and a paint roller.
One of my favorite things is to try to figure out how to add a splash of color or dimension to a table. This DIY does both! Whether you are a master crafter or a crafting newbie, this craft is for you! Are you ready to learn how to make this?


My new book, A Home to Share, is available now! Click here for more details!

A Farmhouse Table Runner
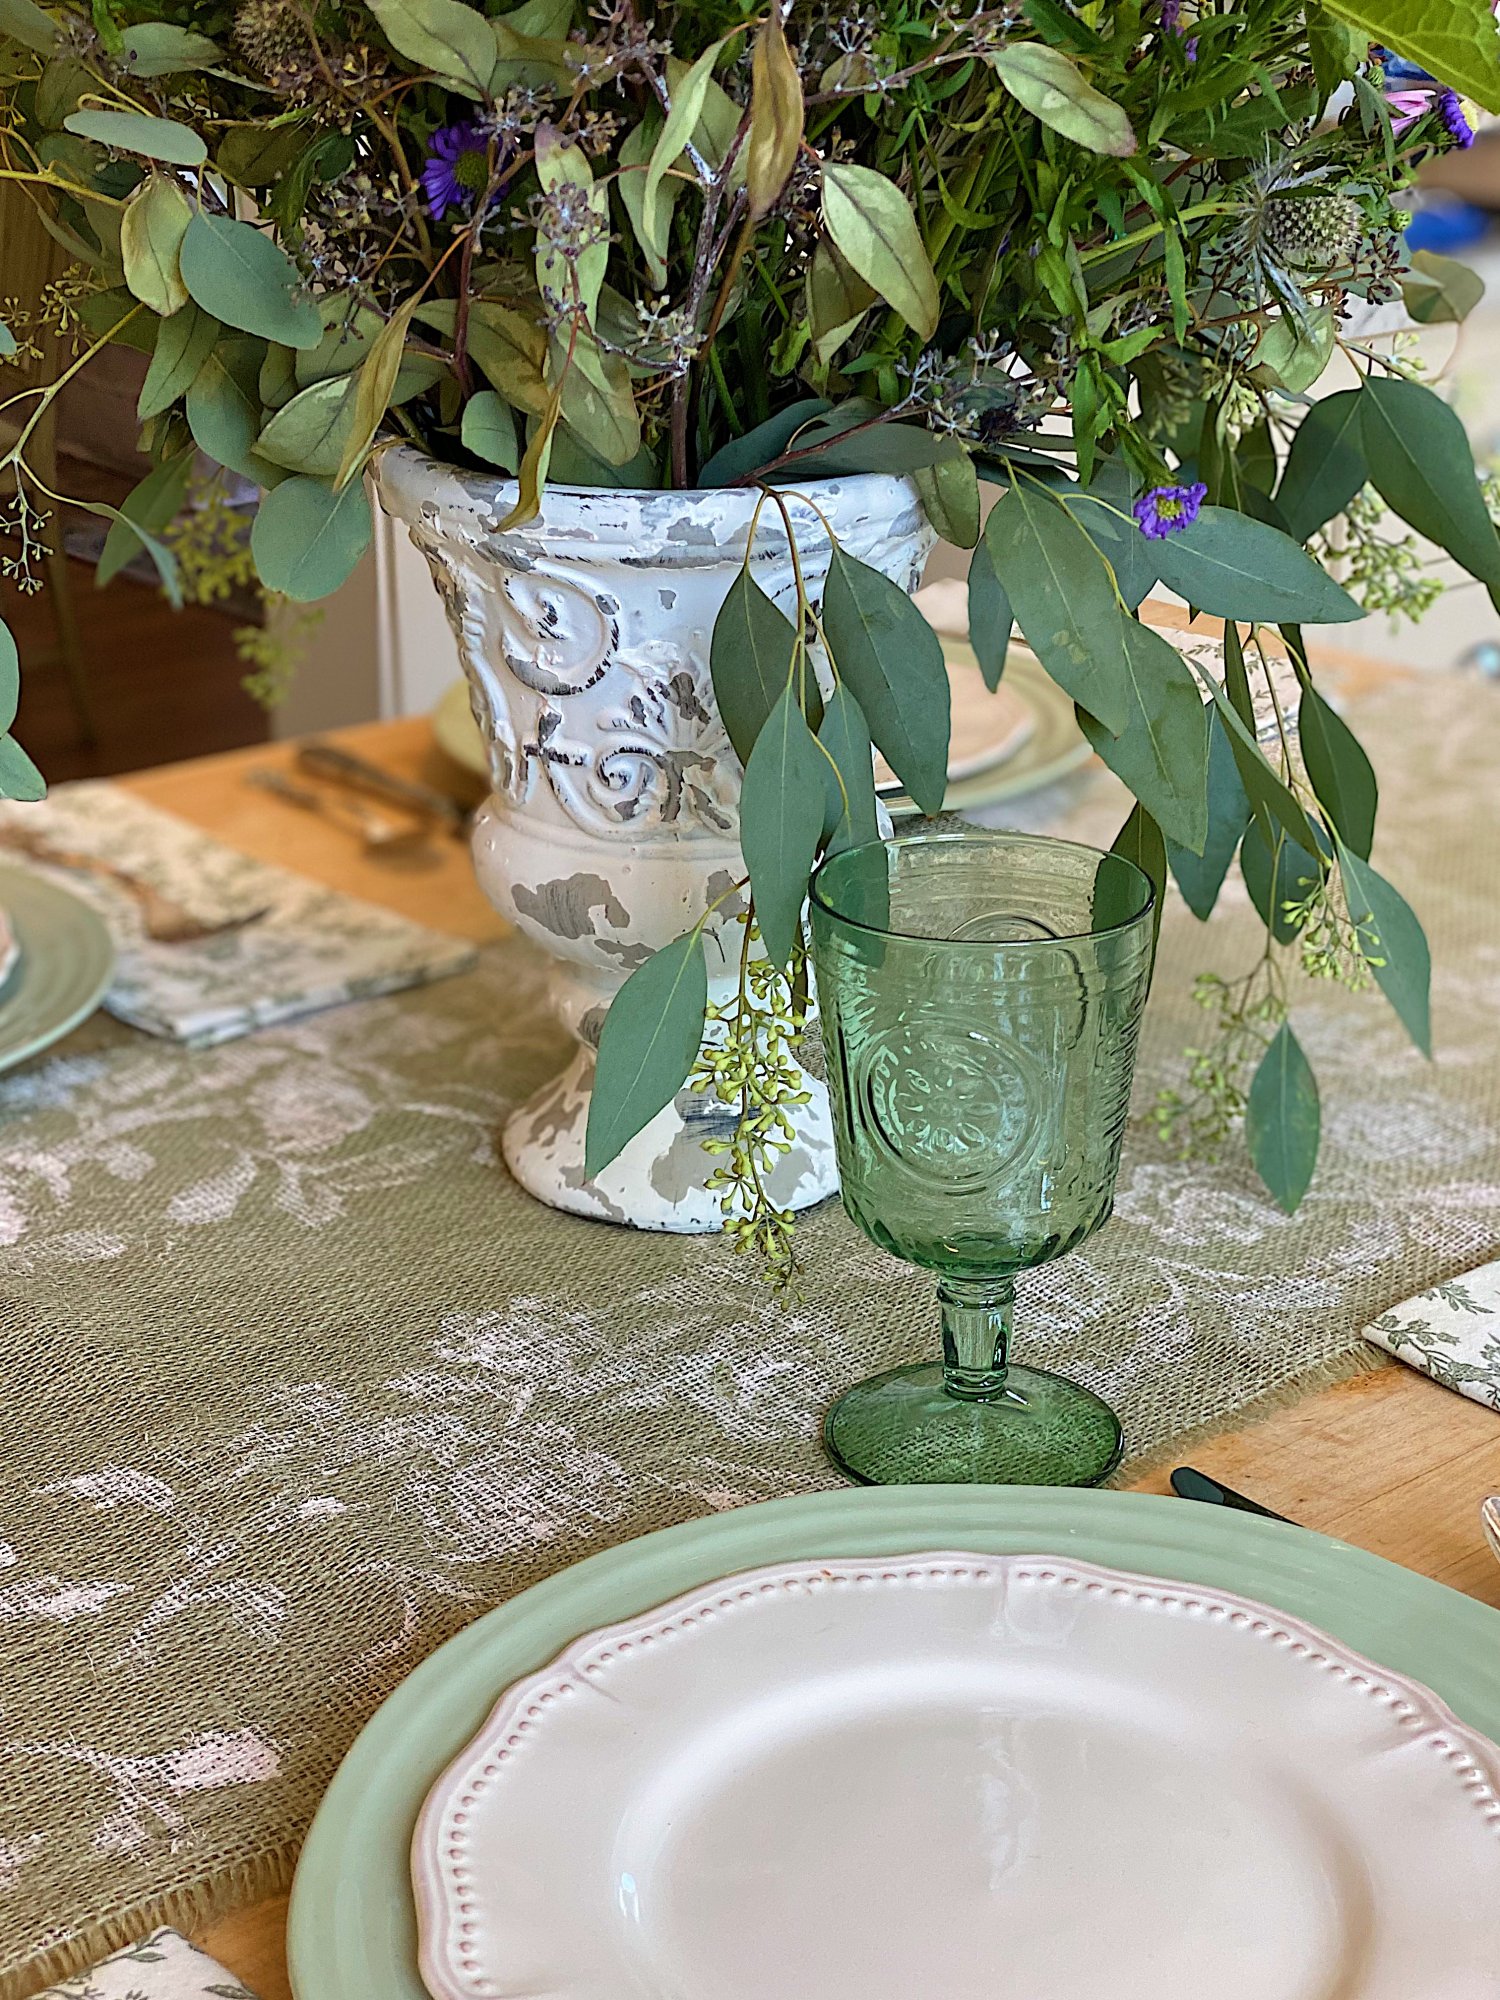
I love to make table linens and I have been wanting to make a burlap table runner for quite some time! Since I had some leftover sage green burlap, from when I made a burlap farmhouse table cover, I had all of the supplies in my craft room. The thing that most don’t realize about this runner is that it is so easy.
You can buy a burlap runner or make one and then all you have to do is use a paint roller to “paint” the design. It is so simple to make.
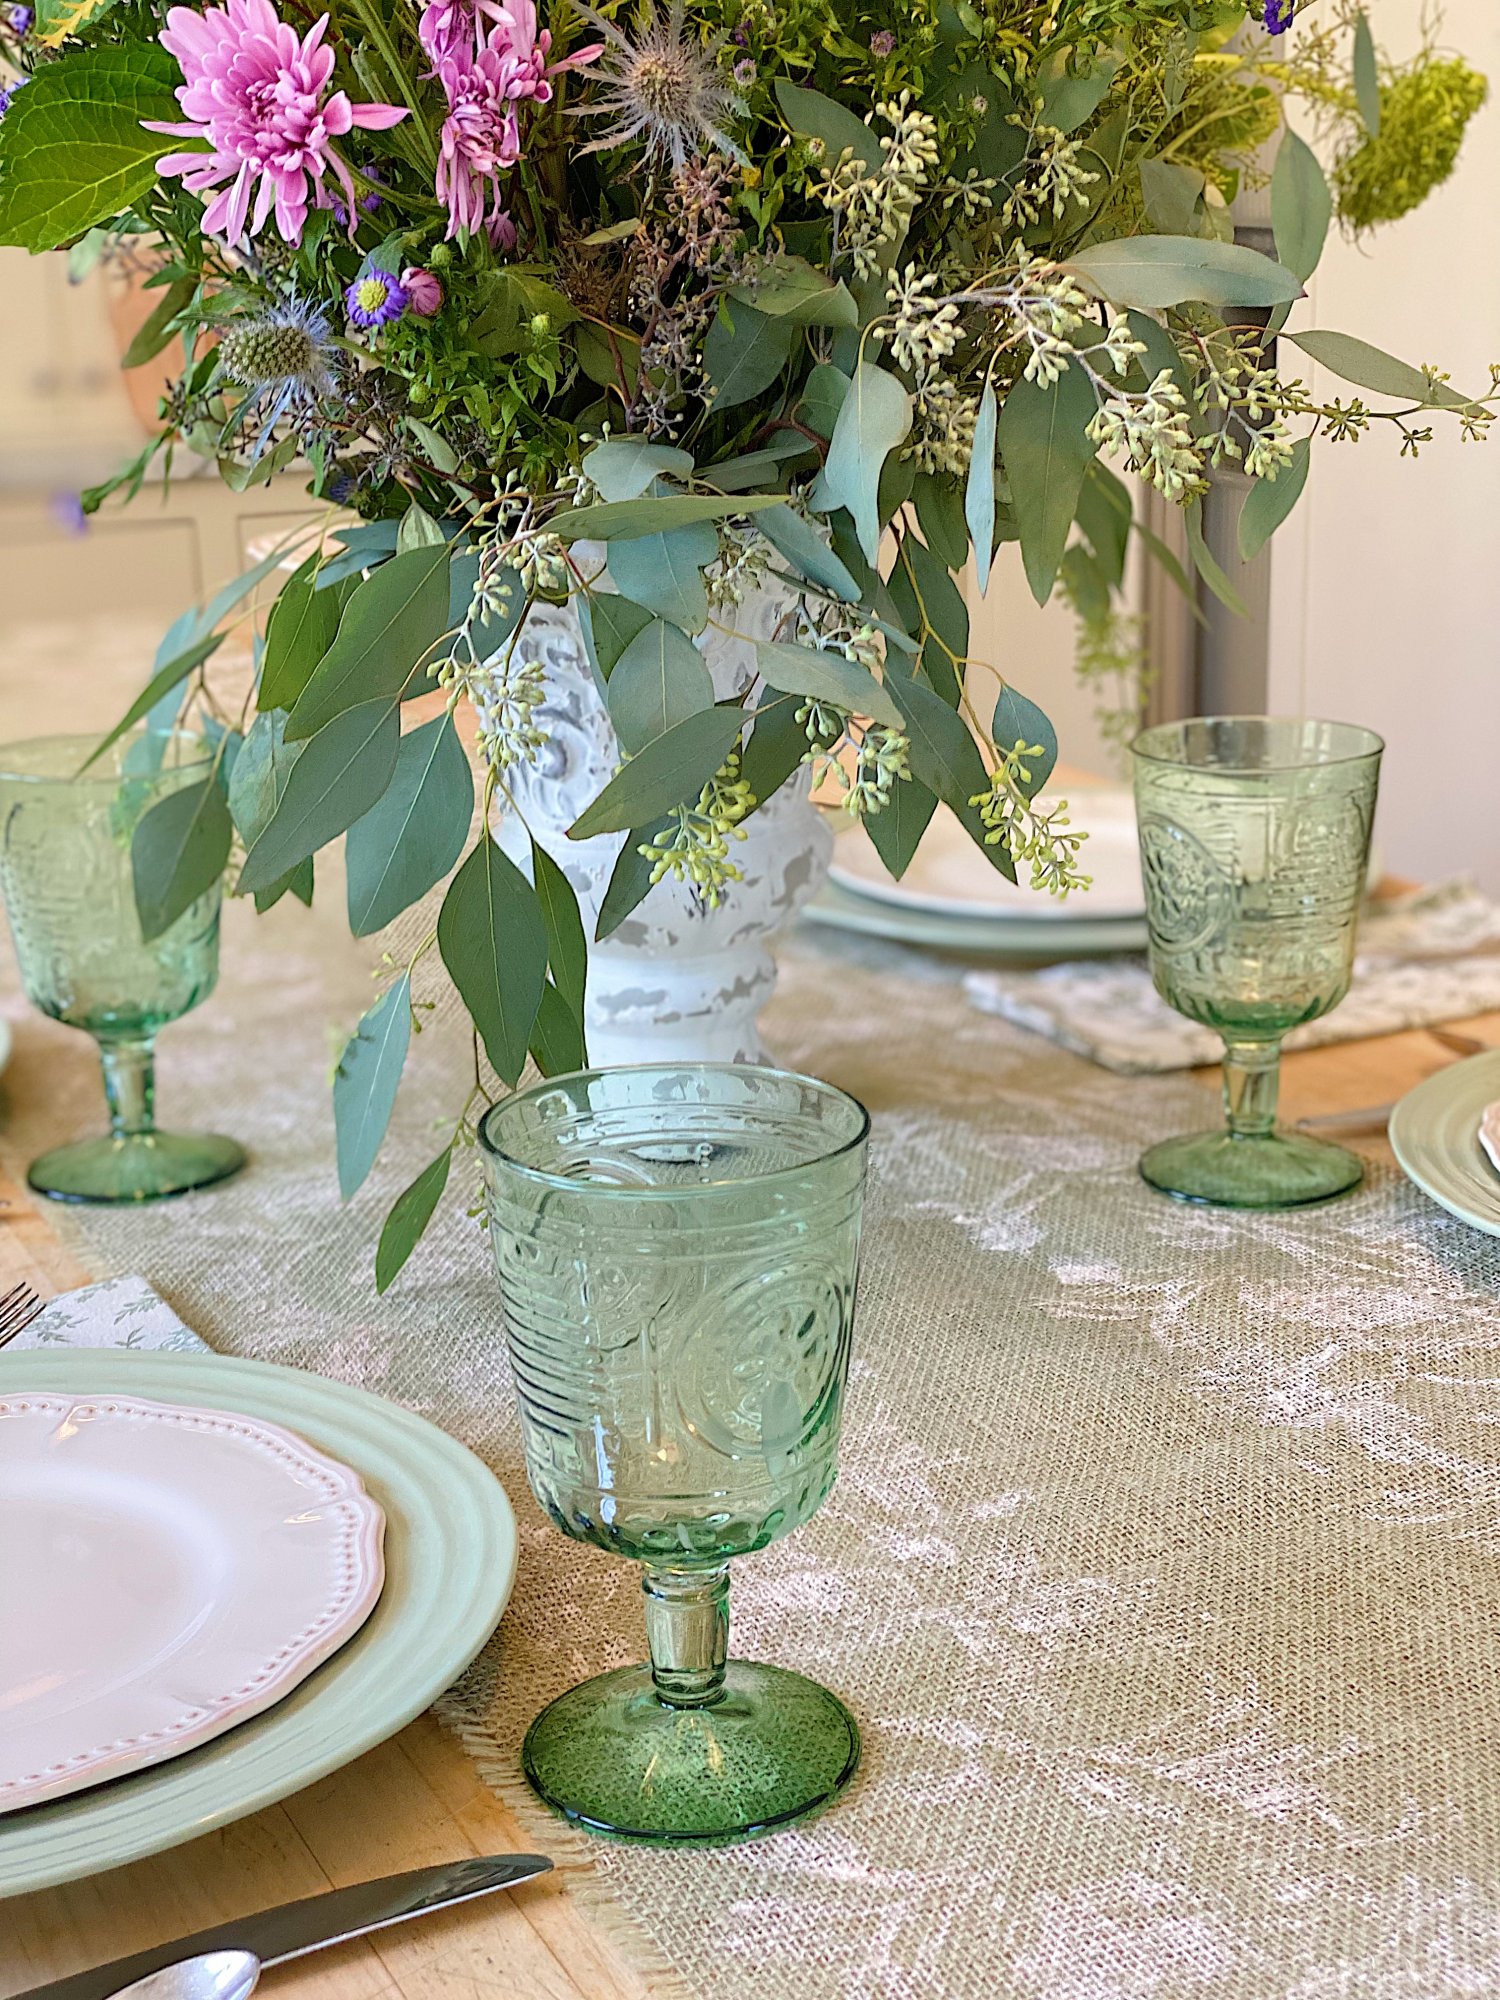
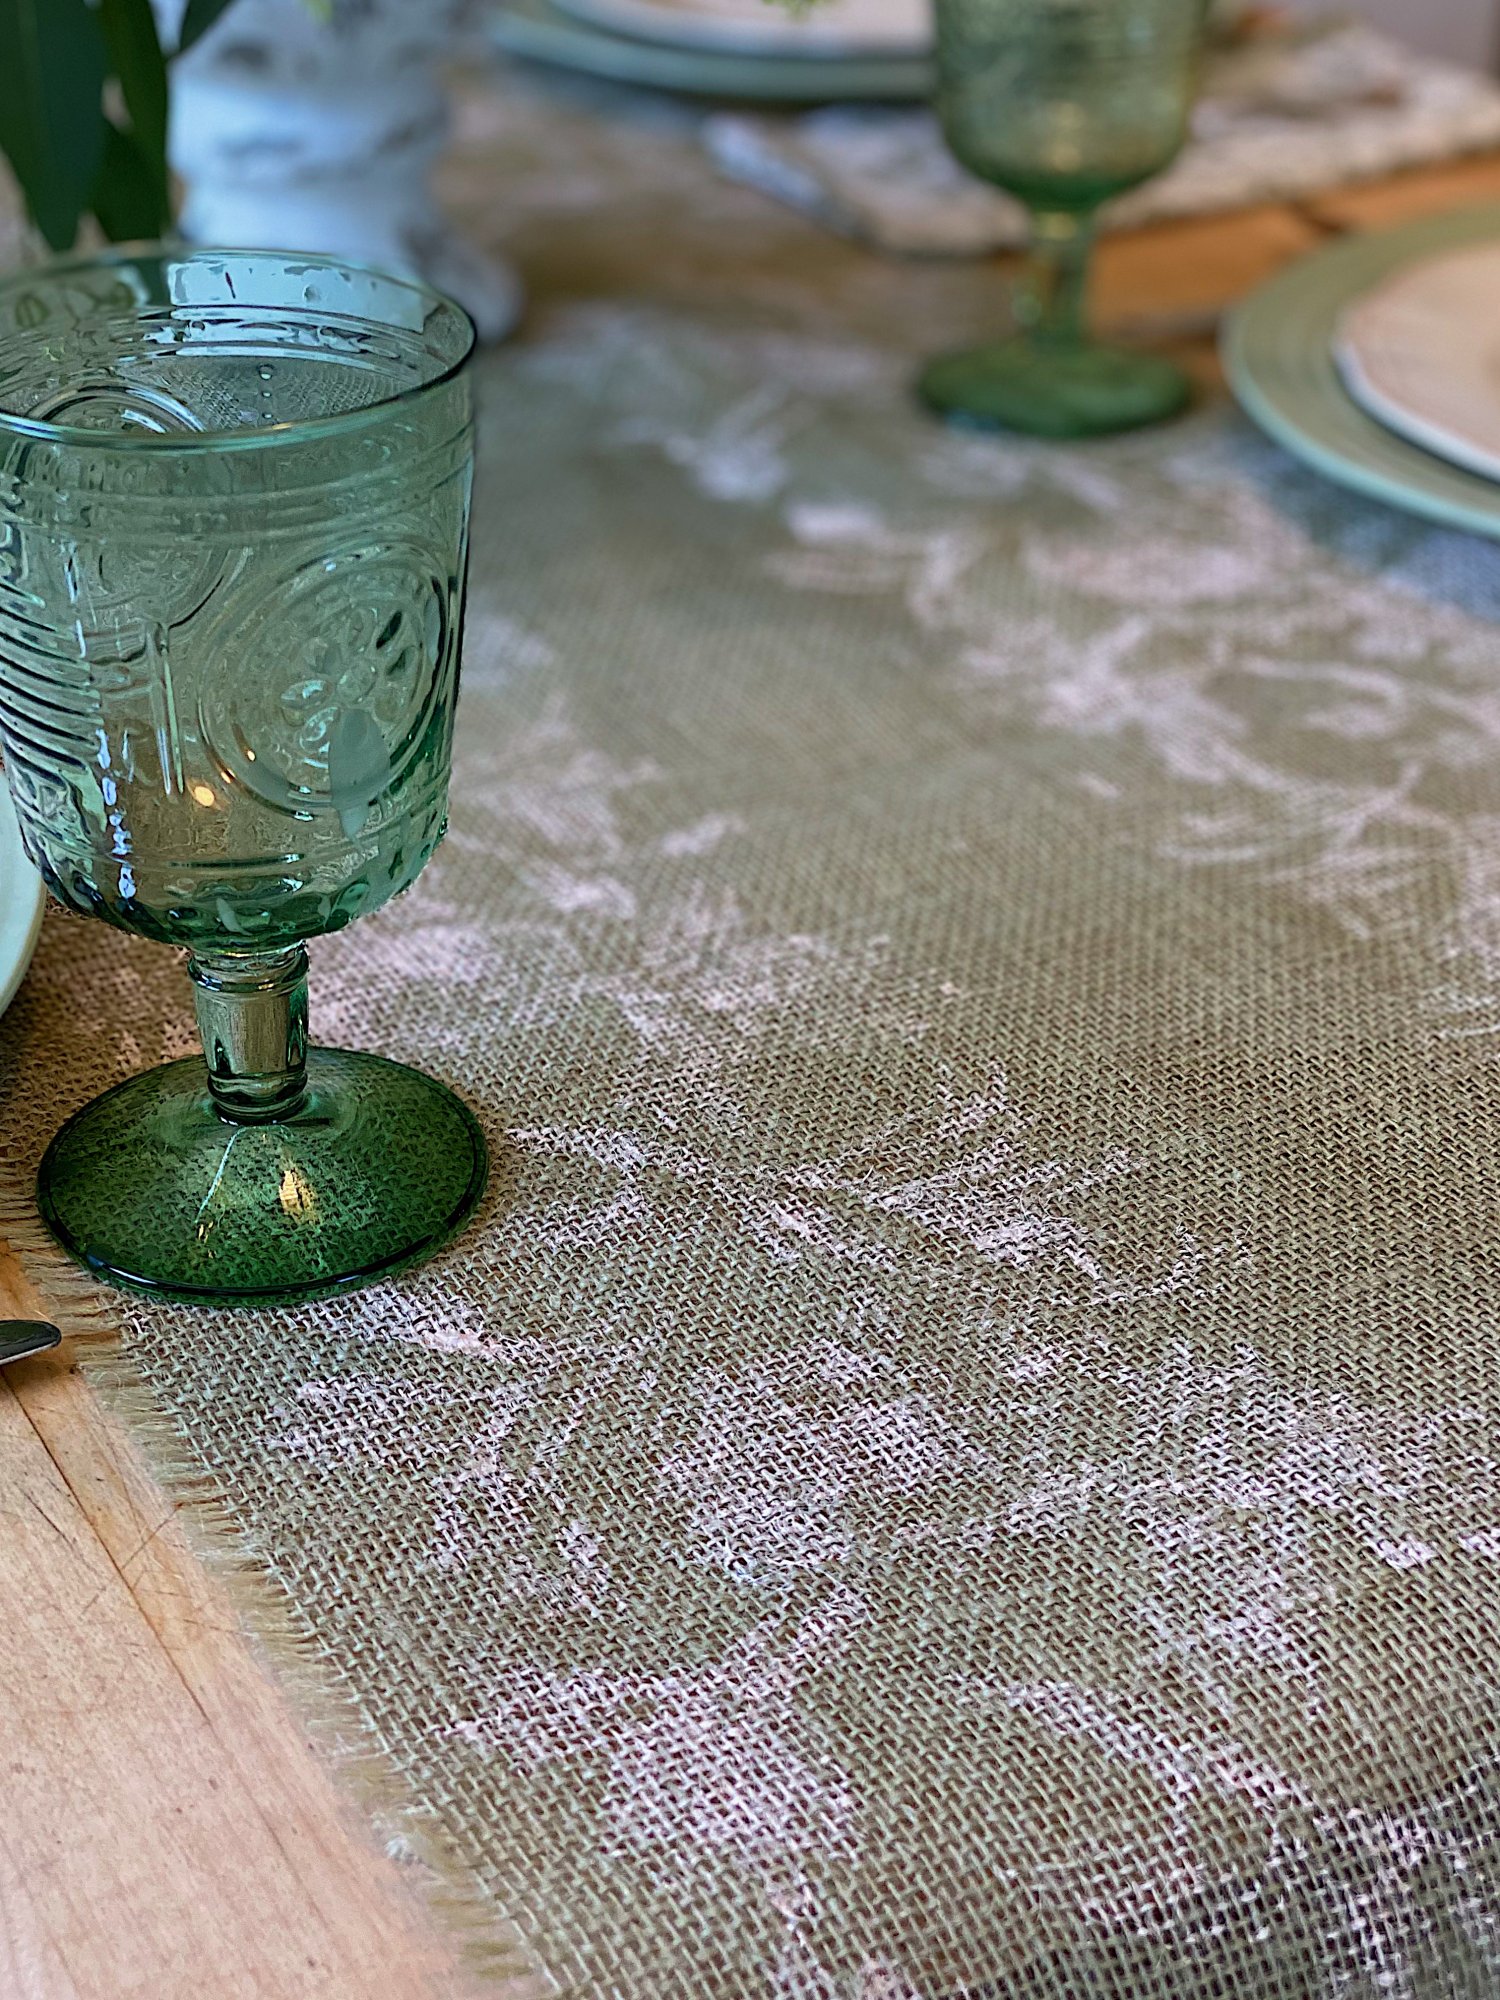
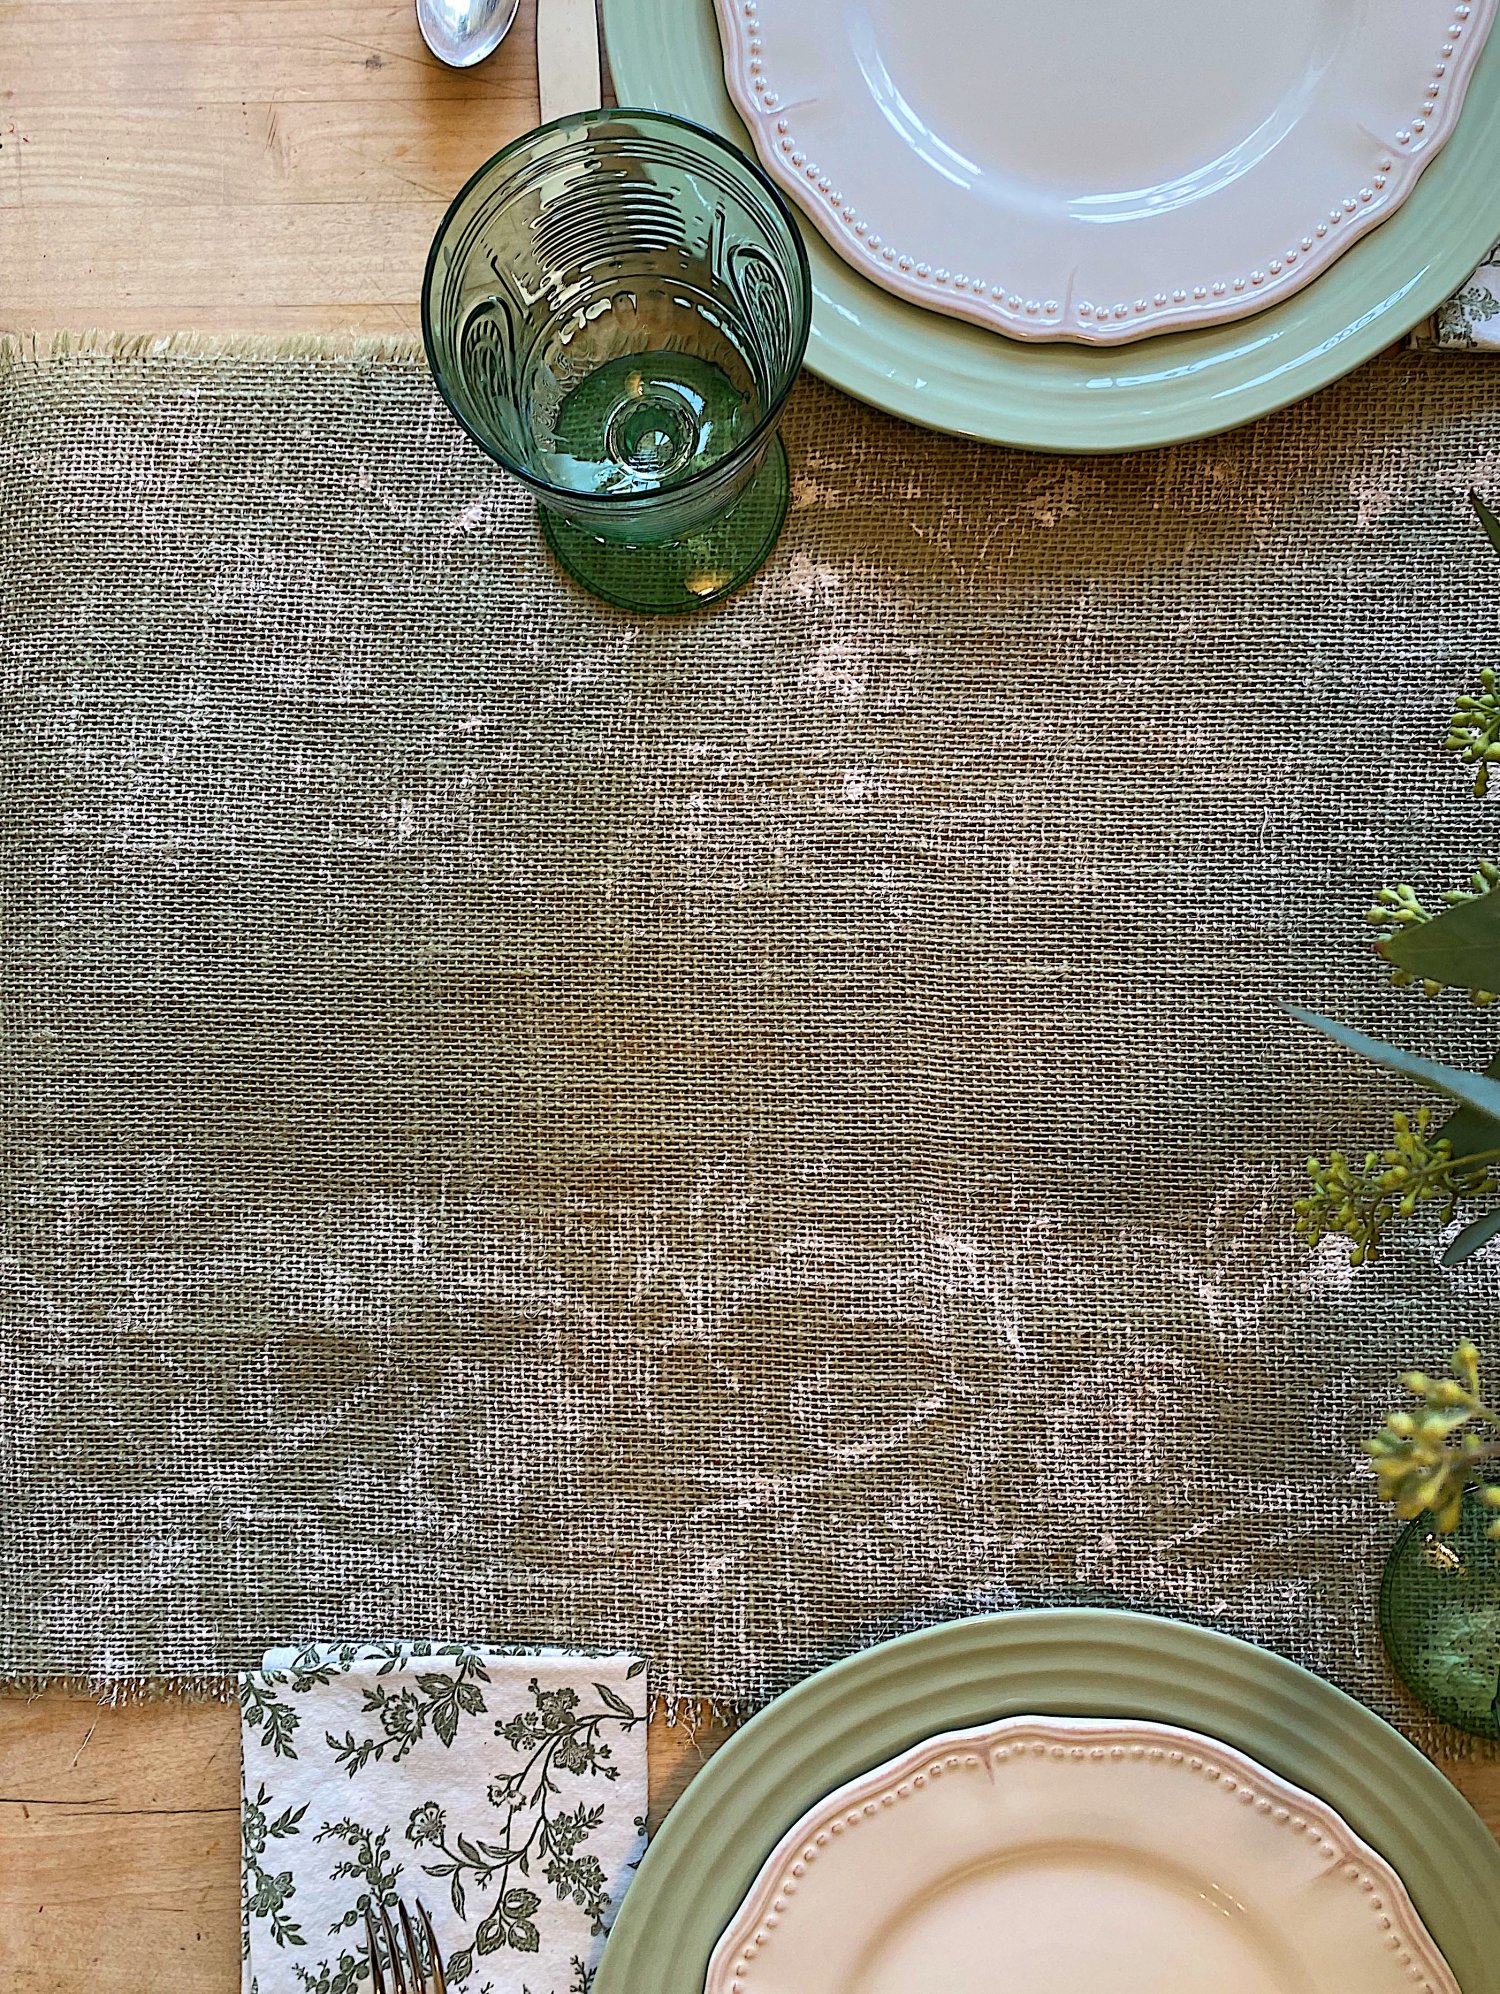
Isn’t the simplicity of this runner wonderful? It’s such a great style and goes with about any white, off-white, or green china and I love that I had plenty of dishes and glassware to set up this table.
This table runner adds a lot of decor and texture to my table.

If you are enjoying my blog, you can sign up to receive my blog updates here.
.How to Make a Burlap Table Runner
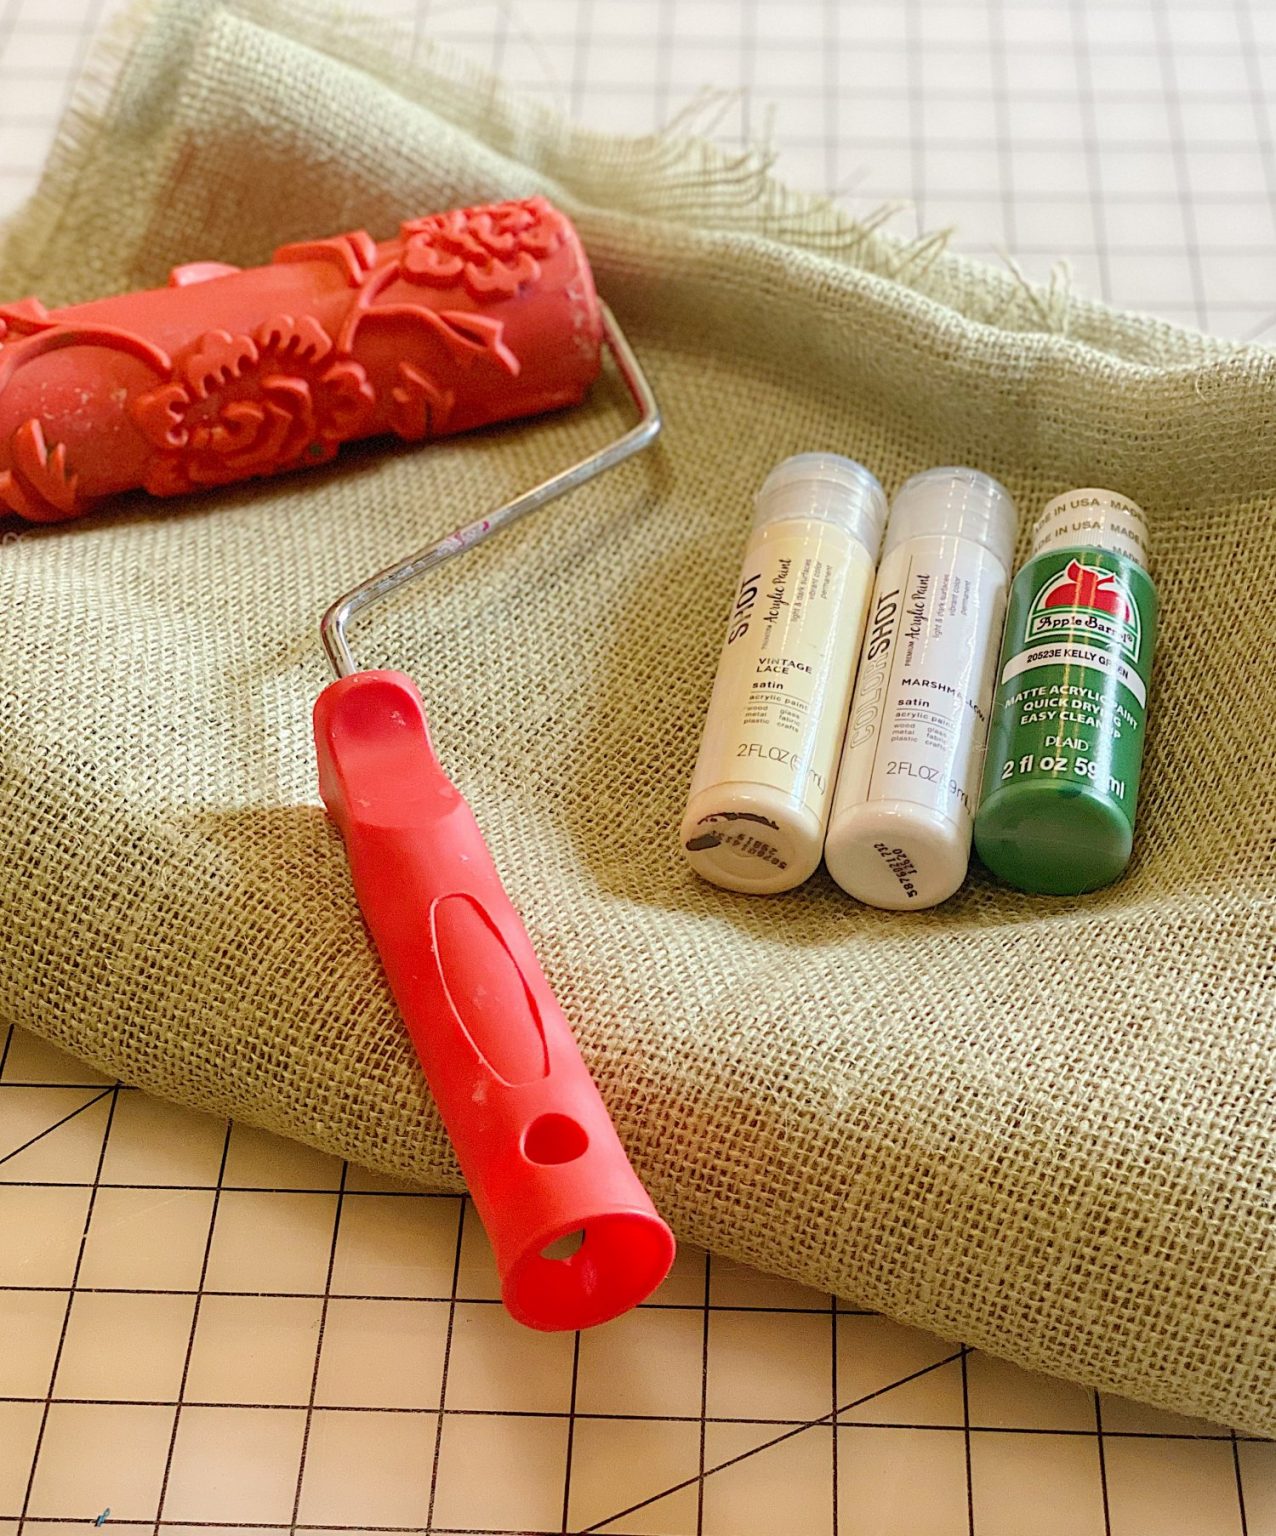
- one – to make this burlap table runner, all you need is 2 yards of burlap (for a 72″ runner, you can adjust the size as needed) or a premade burlap runner, my favorite paint roller, and some acrylic paint. I mixed white and beige paint to make an off-white paint color.
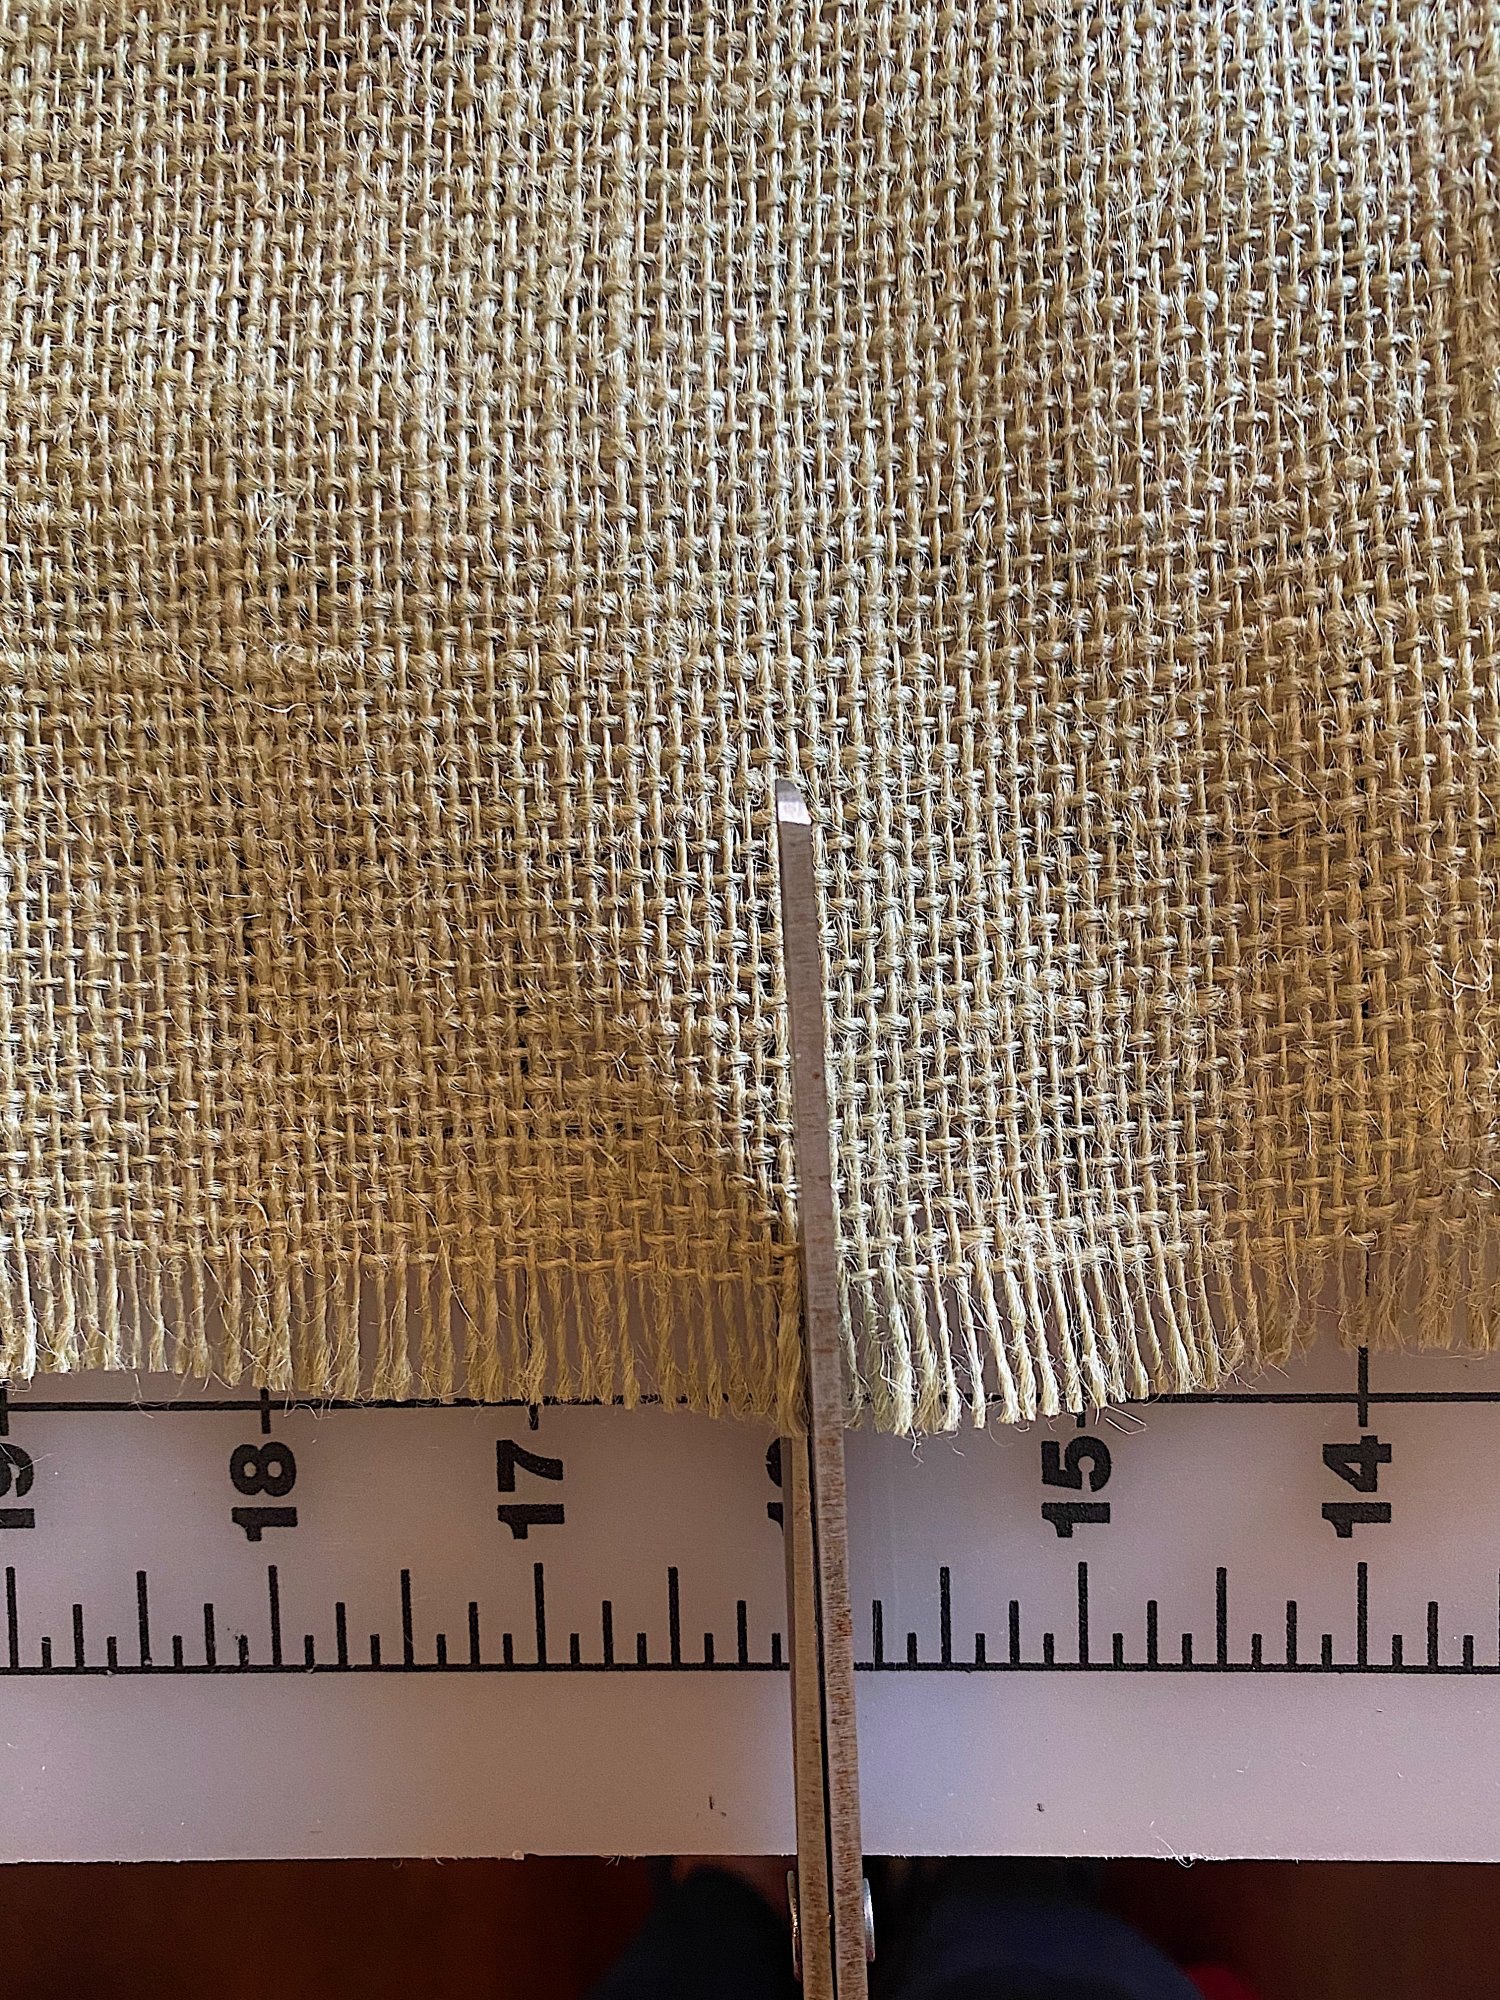
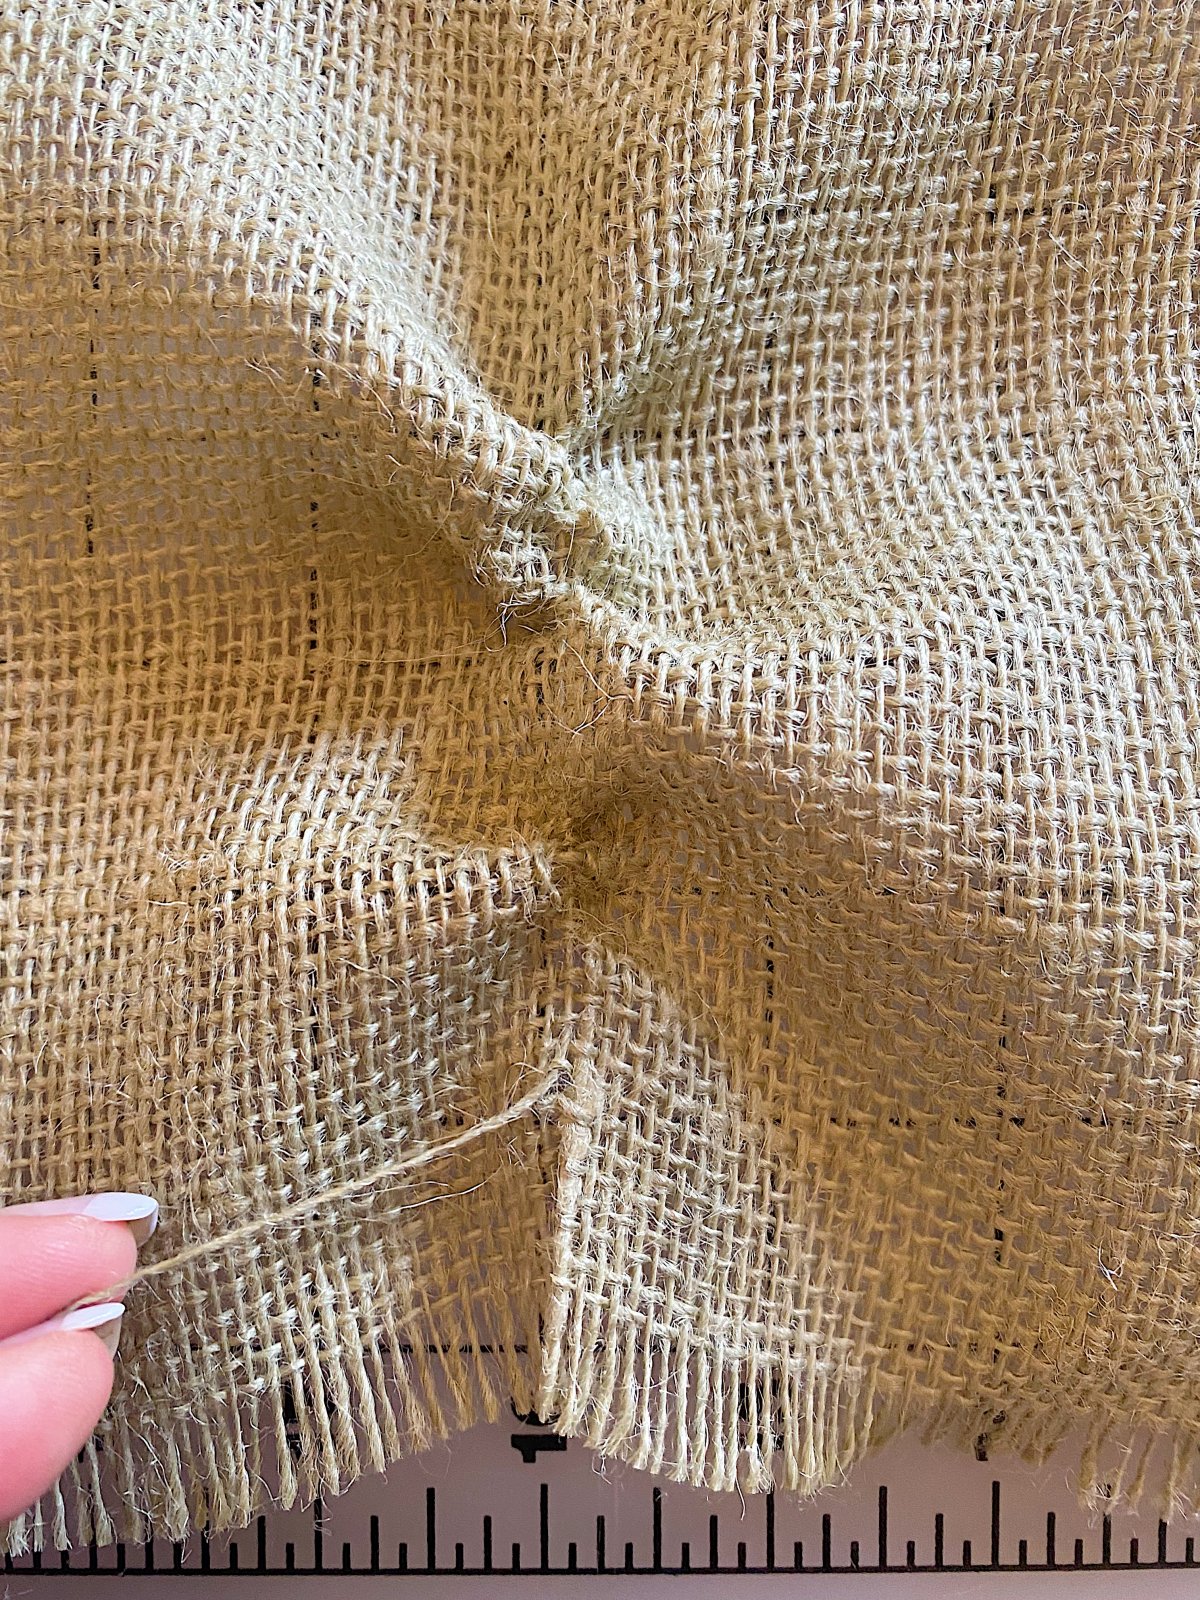
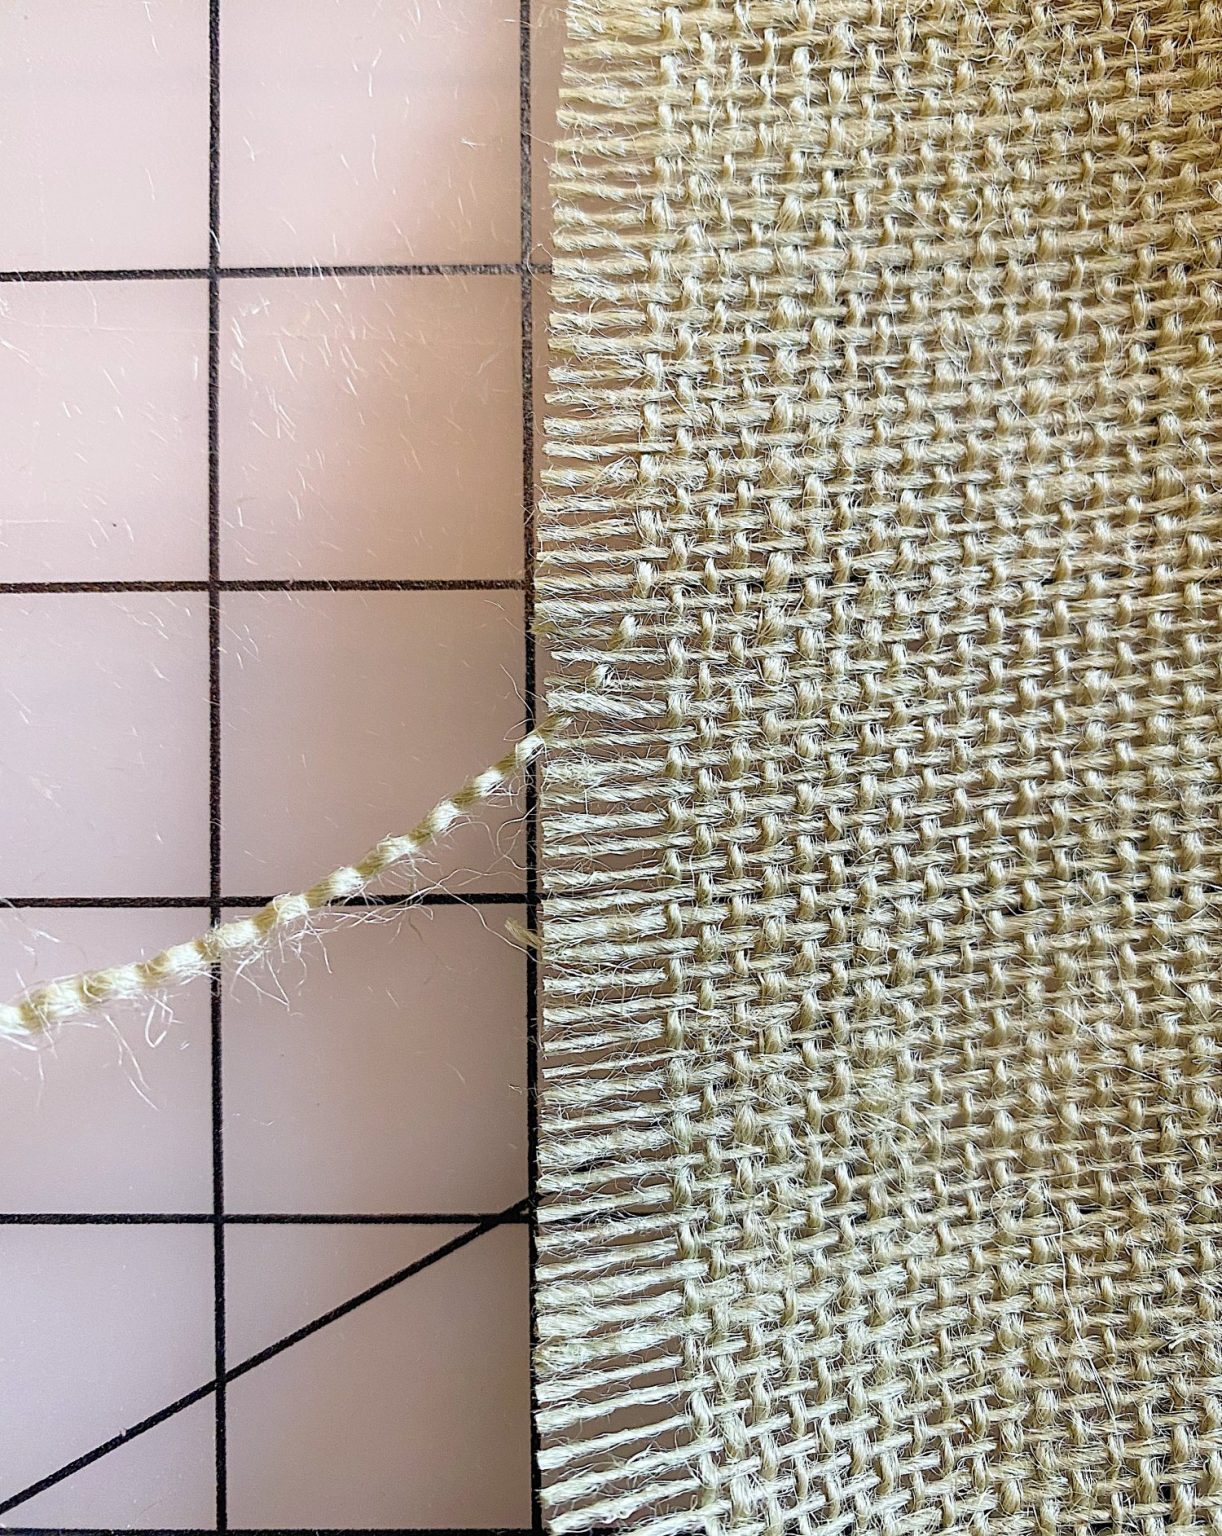
- two – measure the width of the runner (I made mine 16″ wide) and make a 1/2 clip to mark the width.
- three – slowly pull the thread at the 16″ mark all the way through the piece of fabric. By removing the thread, you are creating a cut line.
You can also buy a table runner if you don’t want to make the runner. Here is an entire page of options to buy a burlap table runner.
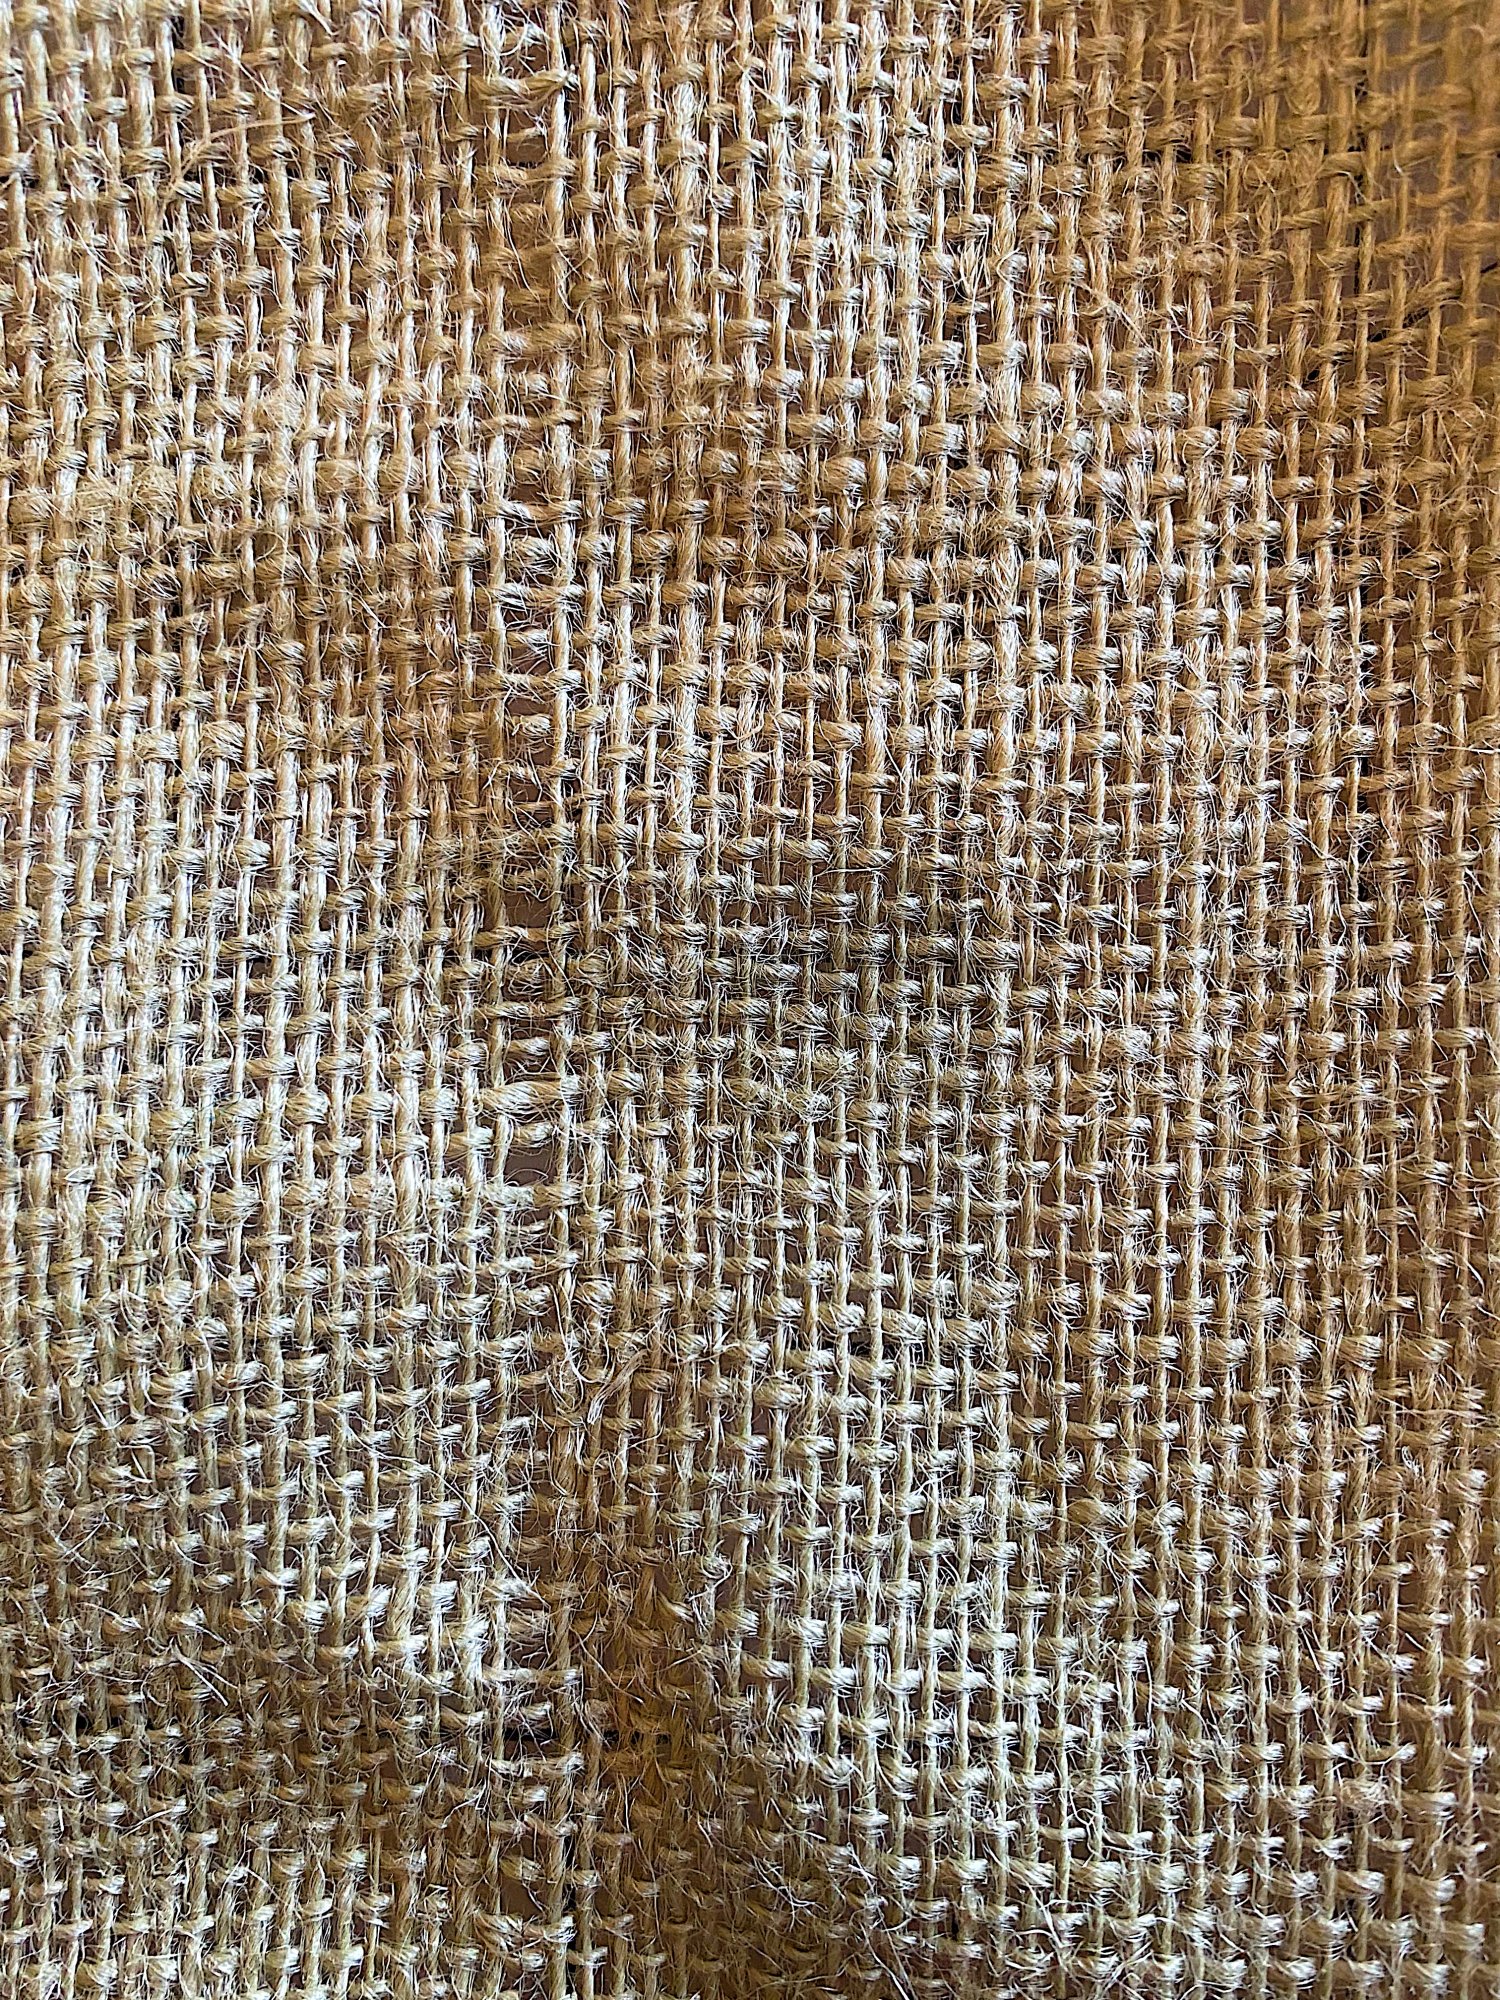
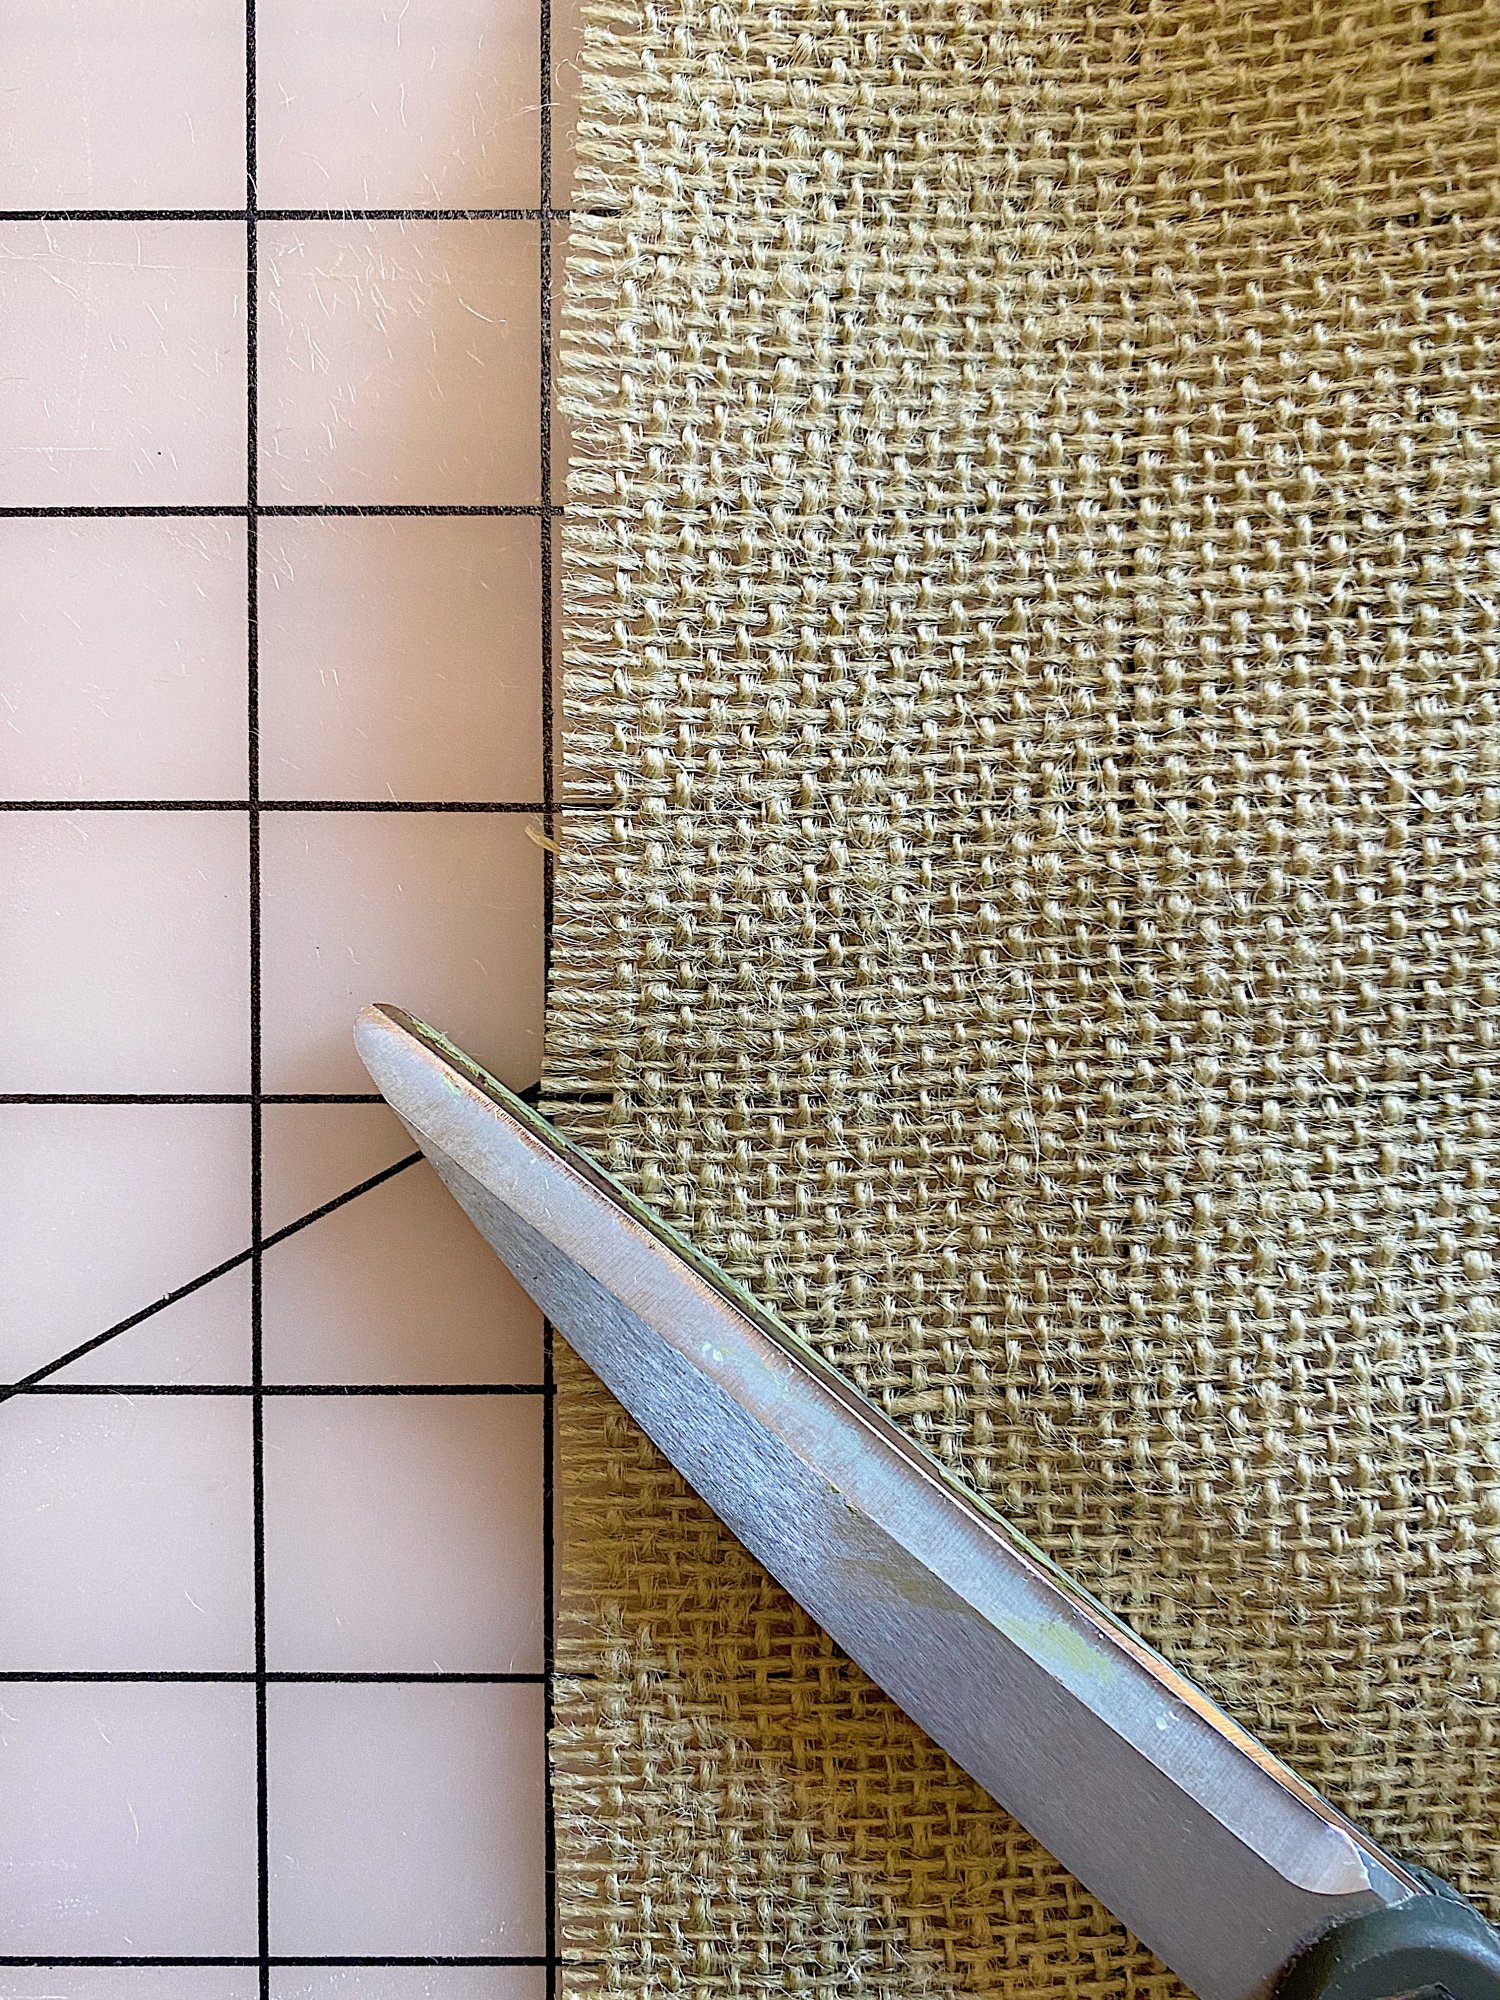
- four – the missing thread is what your cut line looks like! Slowly cut along the line all the way through the fabric.
- five – once you cut along the edge, this is what the edge should look like.
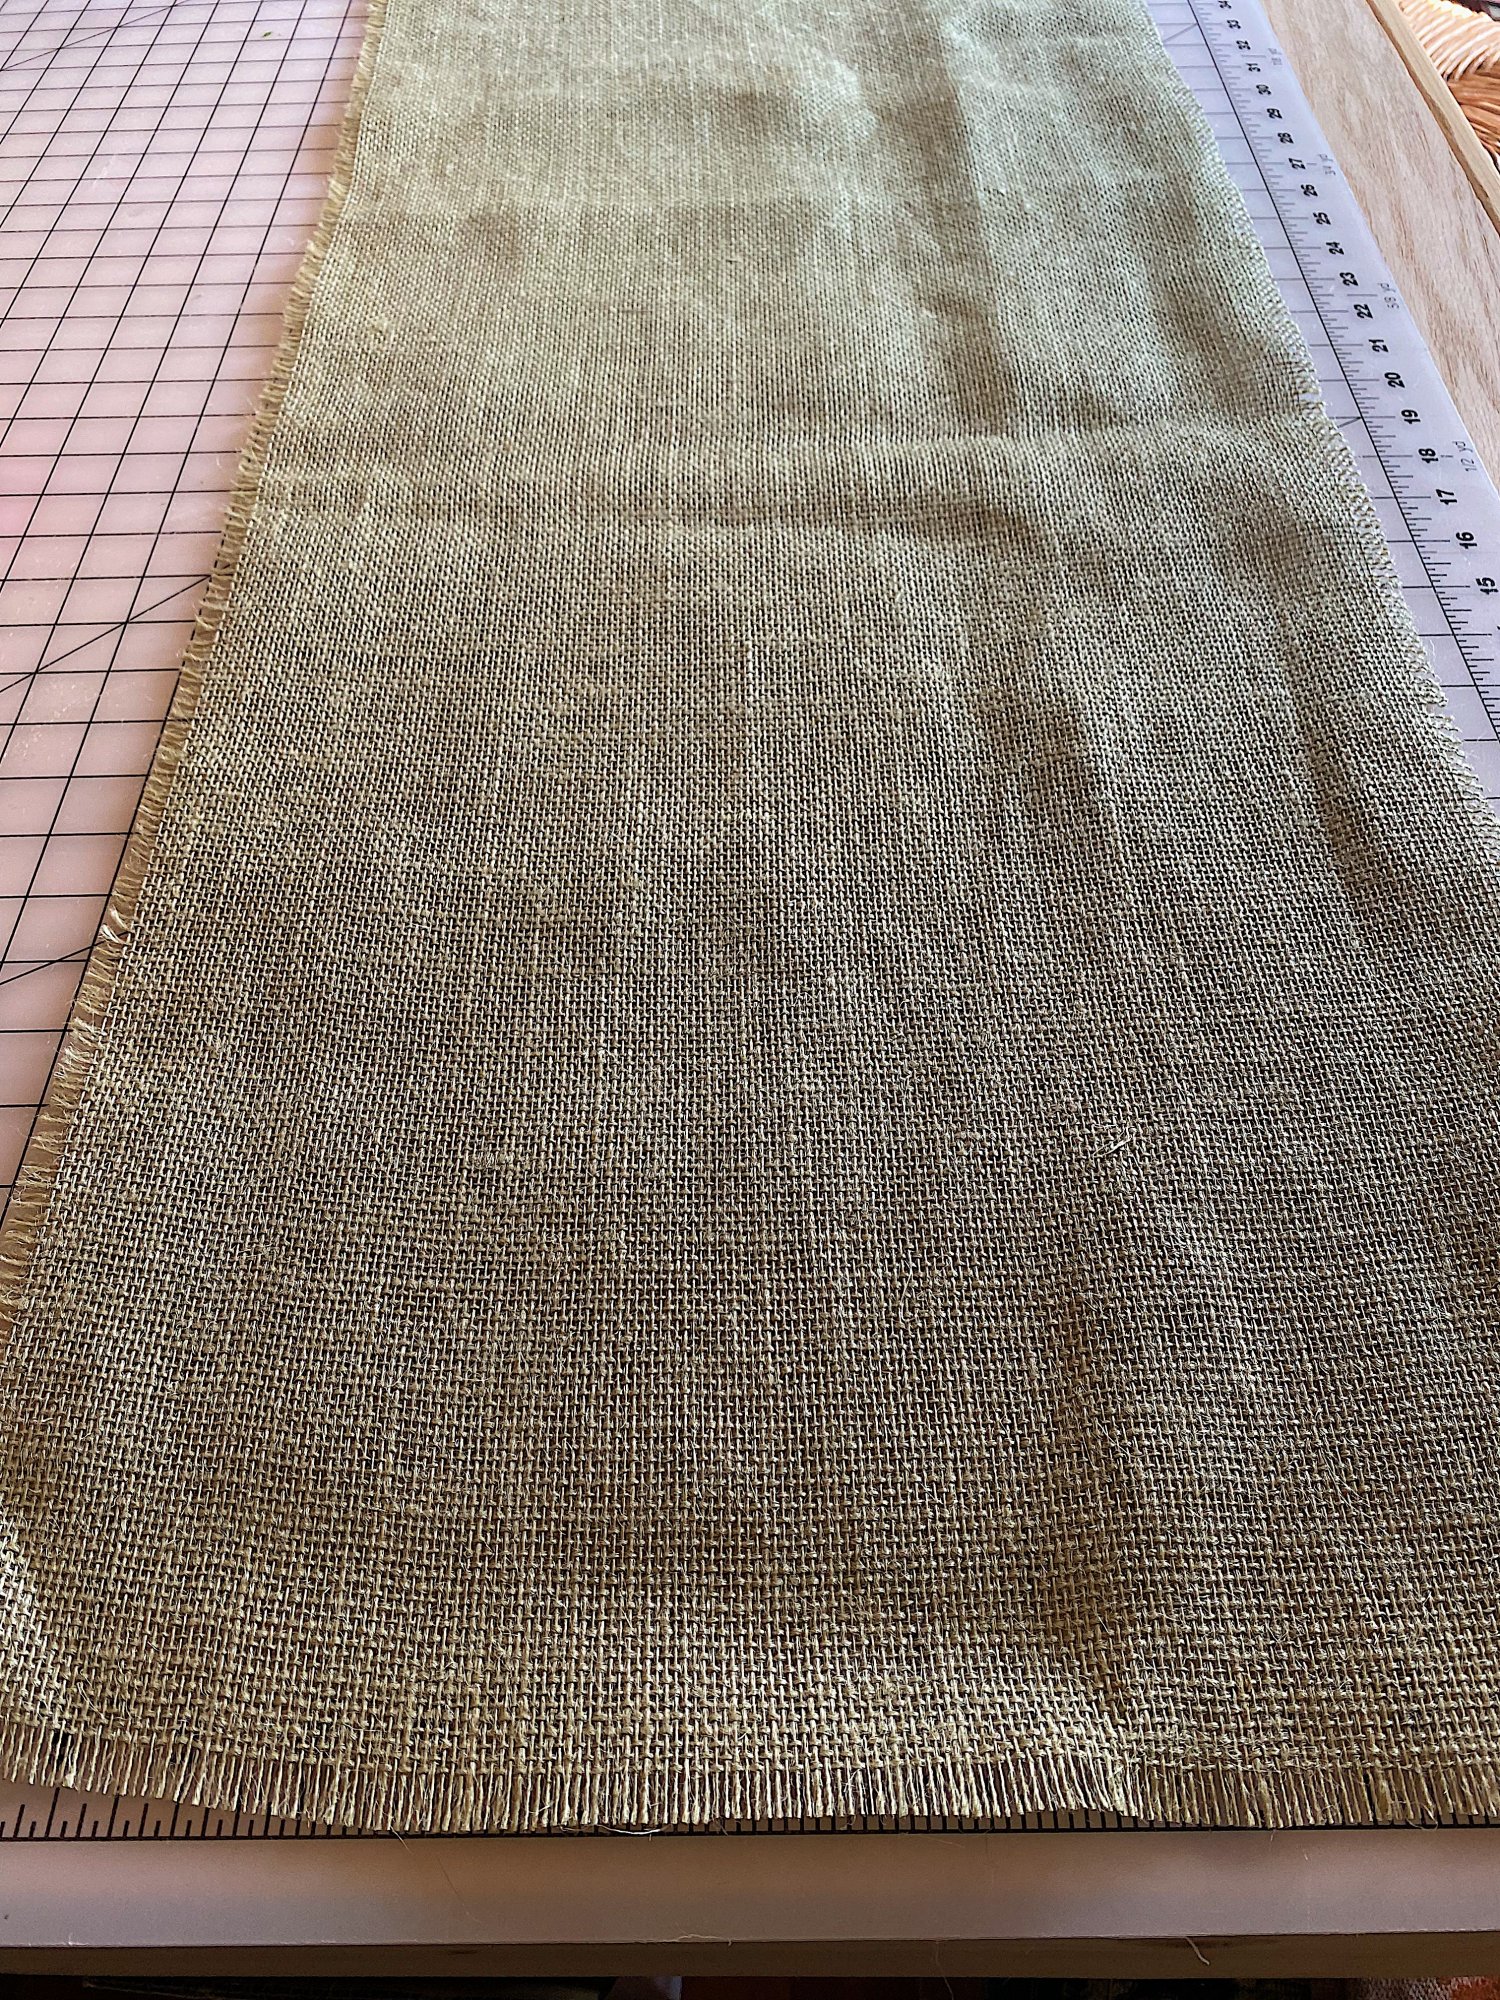
- six – once I cut around all of the edges, you can see what my scrap of fabric looked like.

- seven – slowly pull the threads on the edges to the desired look. Do the same on all edges.
- eight – mix your paint. You can use one color. I wanted off-white and I just mixed some white with a little bit of tan paint.
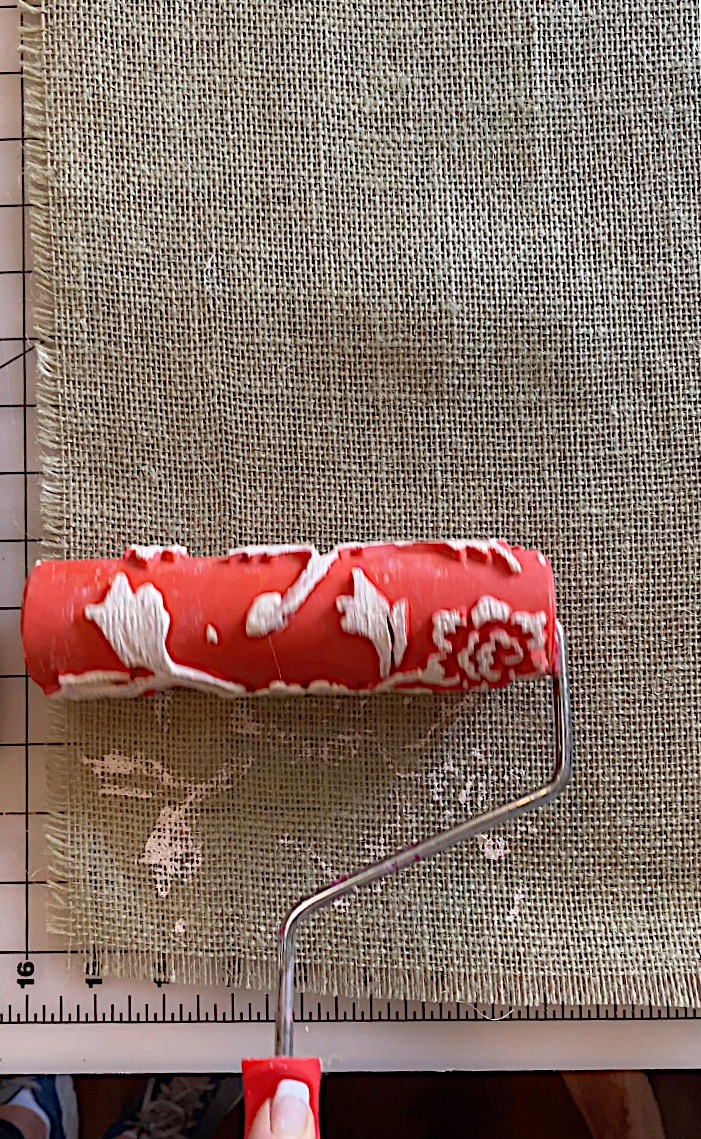
- nine – spread the paint on a flat paint and roll the paint roller to cover the entire roller. Roll as far as you can before the paint runs out. It should be about one and a half rolls. Add more paint and continue. If you want, you can place the roller in the position where you stopped to continue the pattern. Once the paint is dry, use an iron on a low setting to set the paint. After it is ironed, the paint is permanent.


I decided to paint a row of flowers on each side of the roller even though I could also have painted down the middle of the runner. But I can give you a tip, it is much easier to paint along the edge because you can use it as a guide. Painting down the middle might be a bit harder to keep it straight.
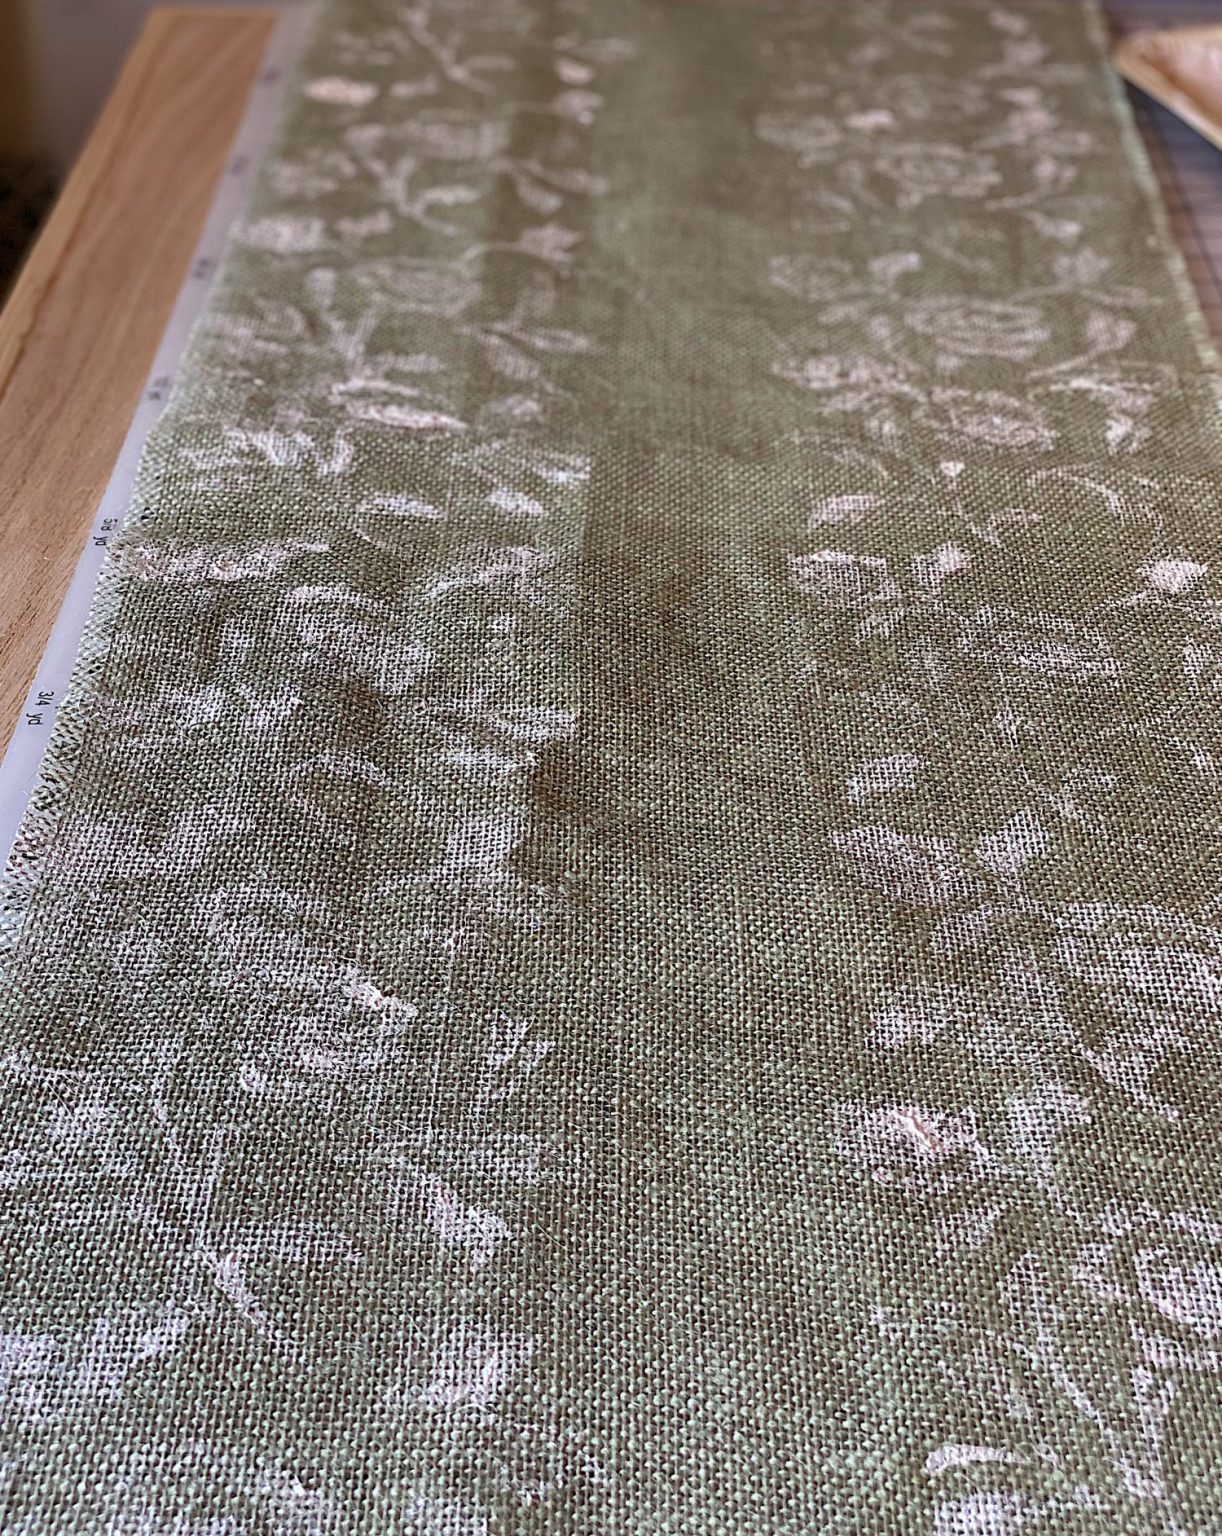
You can see the design here. It’s a look that it isn’t overly defined.
I mentioned that it took very little time to make this burlap table runner. It should take you less than an hour. If you start with a premade burlap runner (there are links below) it should take you only about twenty minutes!
I cannot wait to make a few more of these runners and I definitely want to make one for the holidays. Wouldn’t it look cute with snowflakes?


Watch My Amazon Live
Click here to watch any of my Amazon Live shows. All shows are recorded.
This live show is titled Fall Home Decor for Every Room in Your House.

Frequently Asked Questions
If you must wash burlap, hand wash it separately in cool water using mild soap. Be sure to handle the burlap gently as the wet burlap can be brittle. Don’t wring it or twist the fabric so be careful.
Yes. Once the paint is dry, iron the paint on the fabric. Once this is done it will be permanent.

Similar Posts

Fabric Crafts with Friends
I love joining my friends to see what kind of projects they share! I think you are going to love all of these projects!
Tatertots and Jello
Dollar Store Stamped Leaf Napkins Dollar Store Stamped Leaf Napkins

Dress up your Autumn table by creating DIY stamped napkins with leaves from your neighborhood.
The DIY Mommy
How to Sew Simple DIY Chair Pads
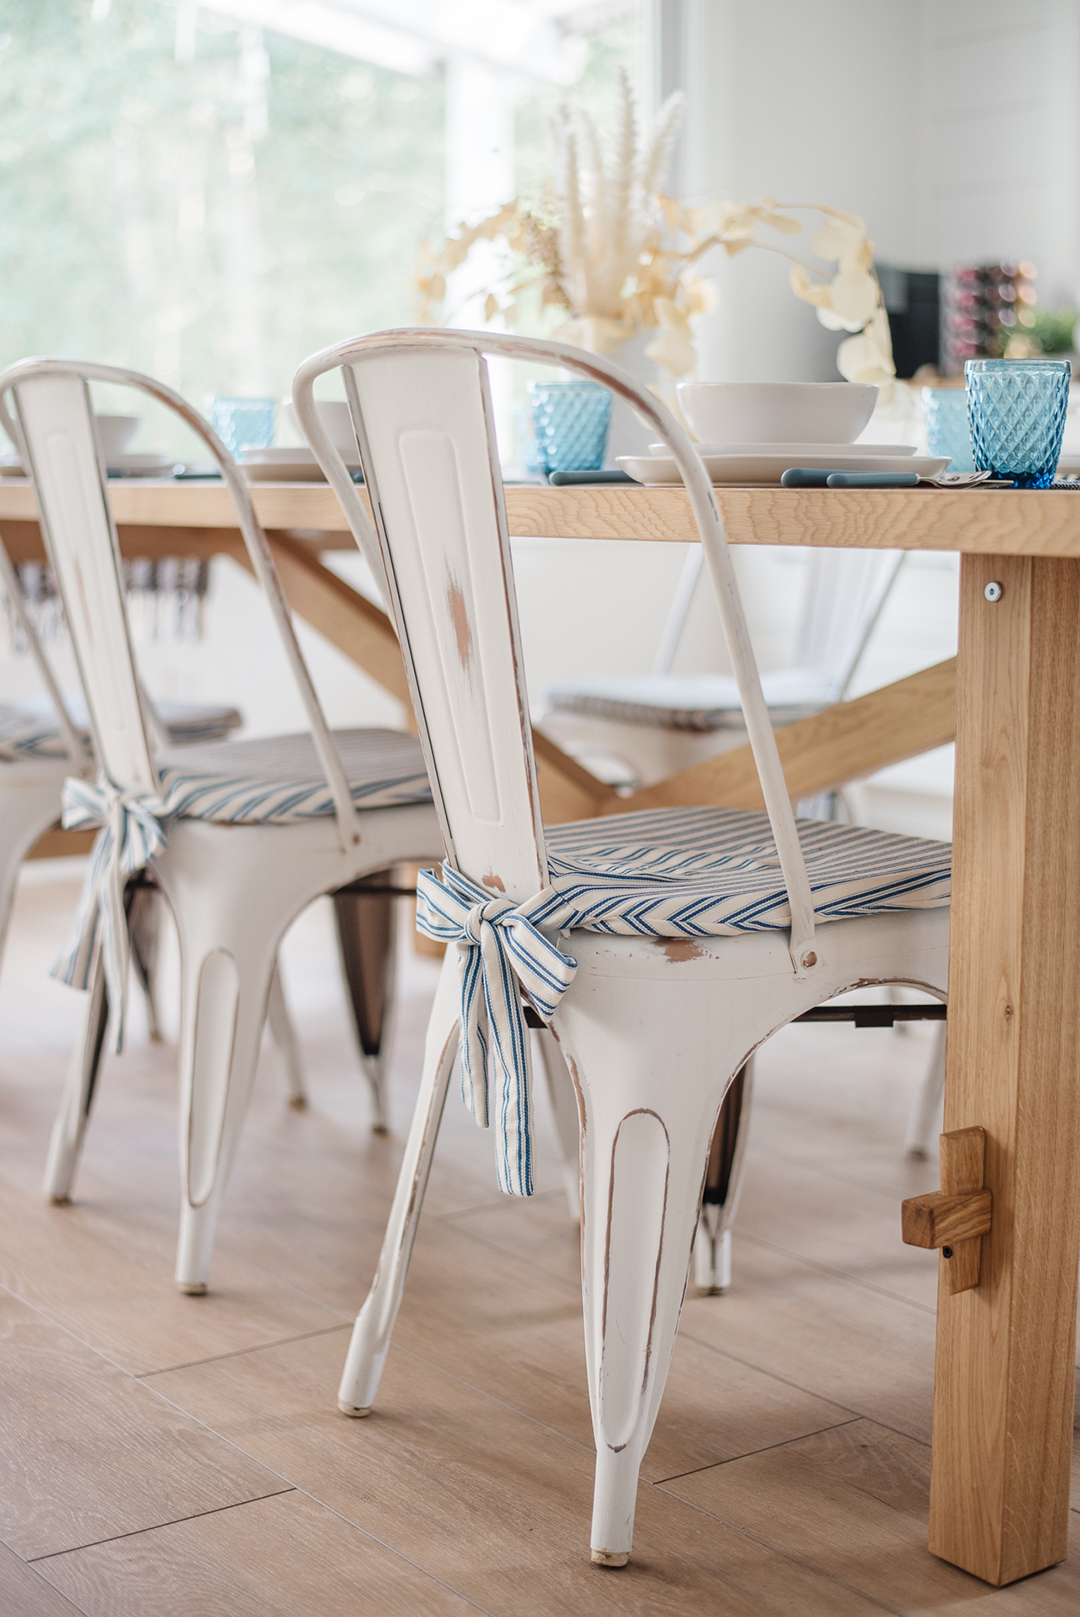
Need to make your metal farmhouse bistro chairs comfier? Learn how to sew these simple DIY chair pads with adorable bow ties at the back! These are an easy beginner’s sewing project and you can make them match any decor style.
My 100 Year Old Home
Burlap Table Runner DIY

This easy DIY Burlap Table Runner can be made in less than an hour. I love this farmhouse burlap table runner that I made with burlap fabric and a paint roller.
Thistlewood Farms
Simple and Easy DIY Crafts
Celebrate fall with these easy fabric projects. Make a fabric pumpkin or a hydrangea pillow and so much more with these easy step-by-step instructions!
Happy Happy Nester
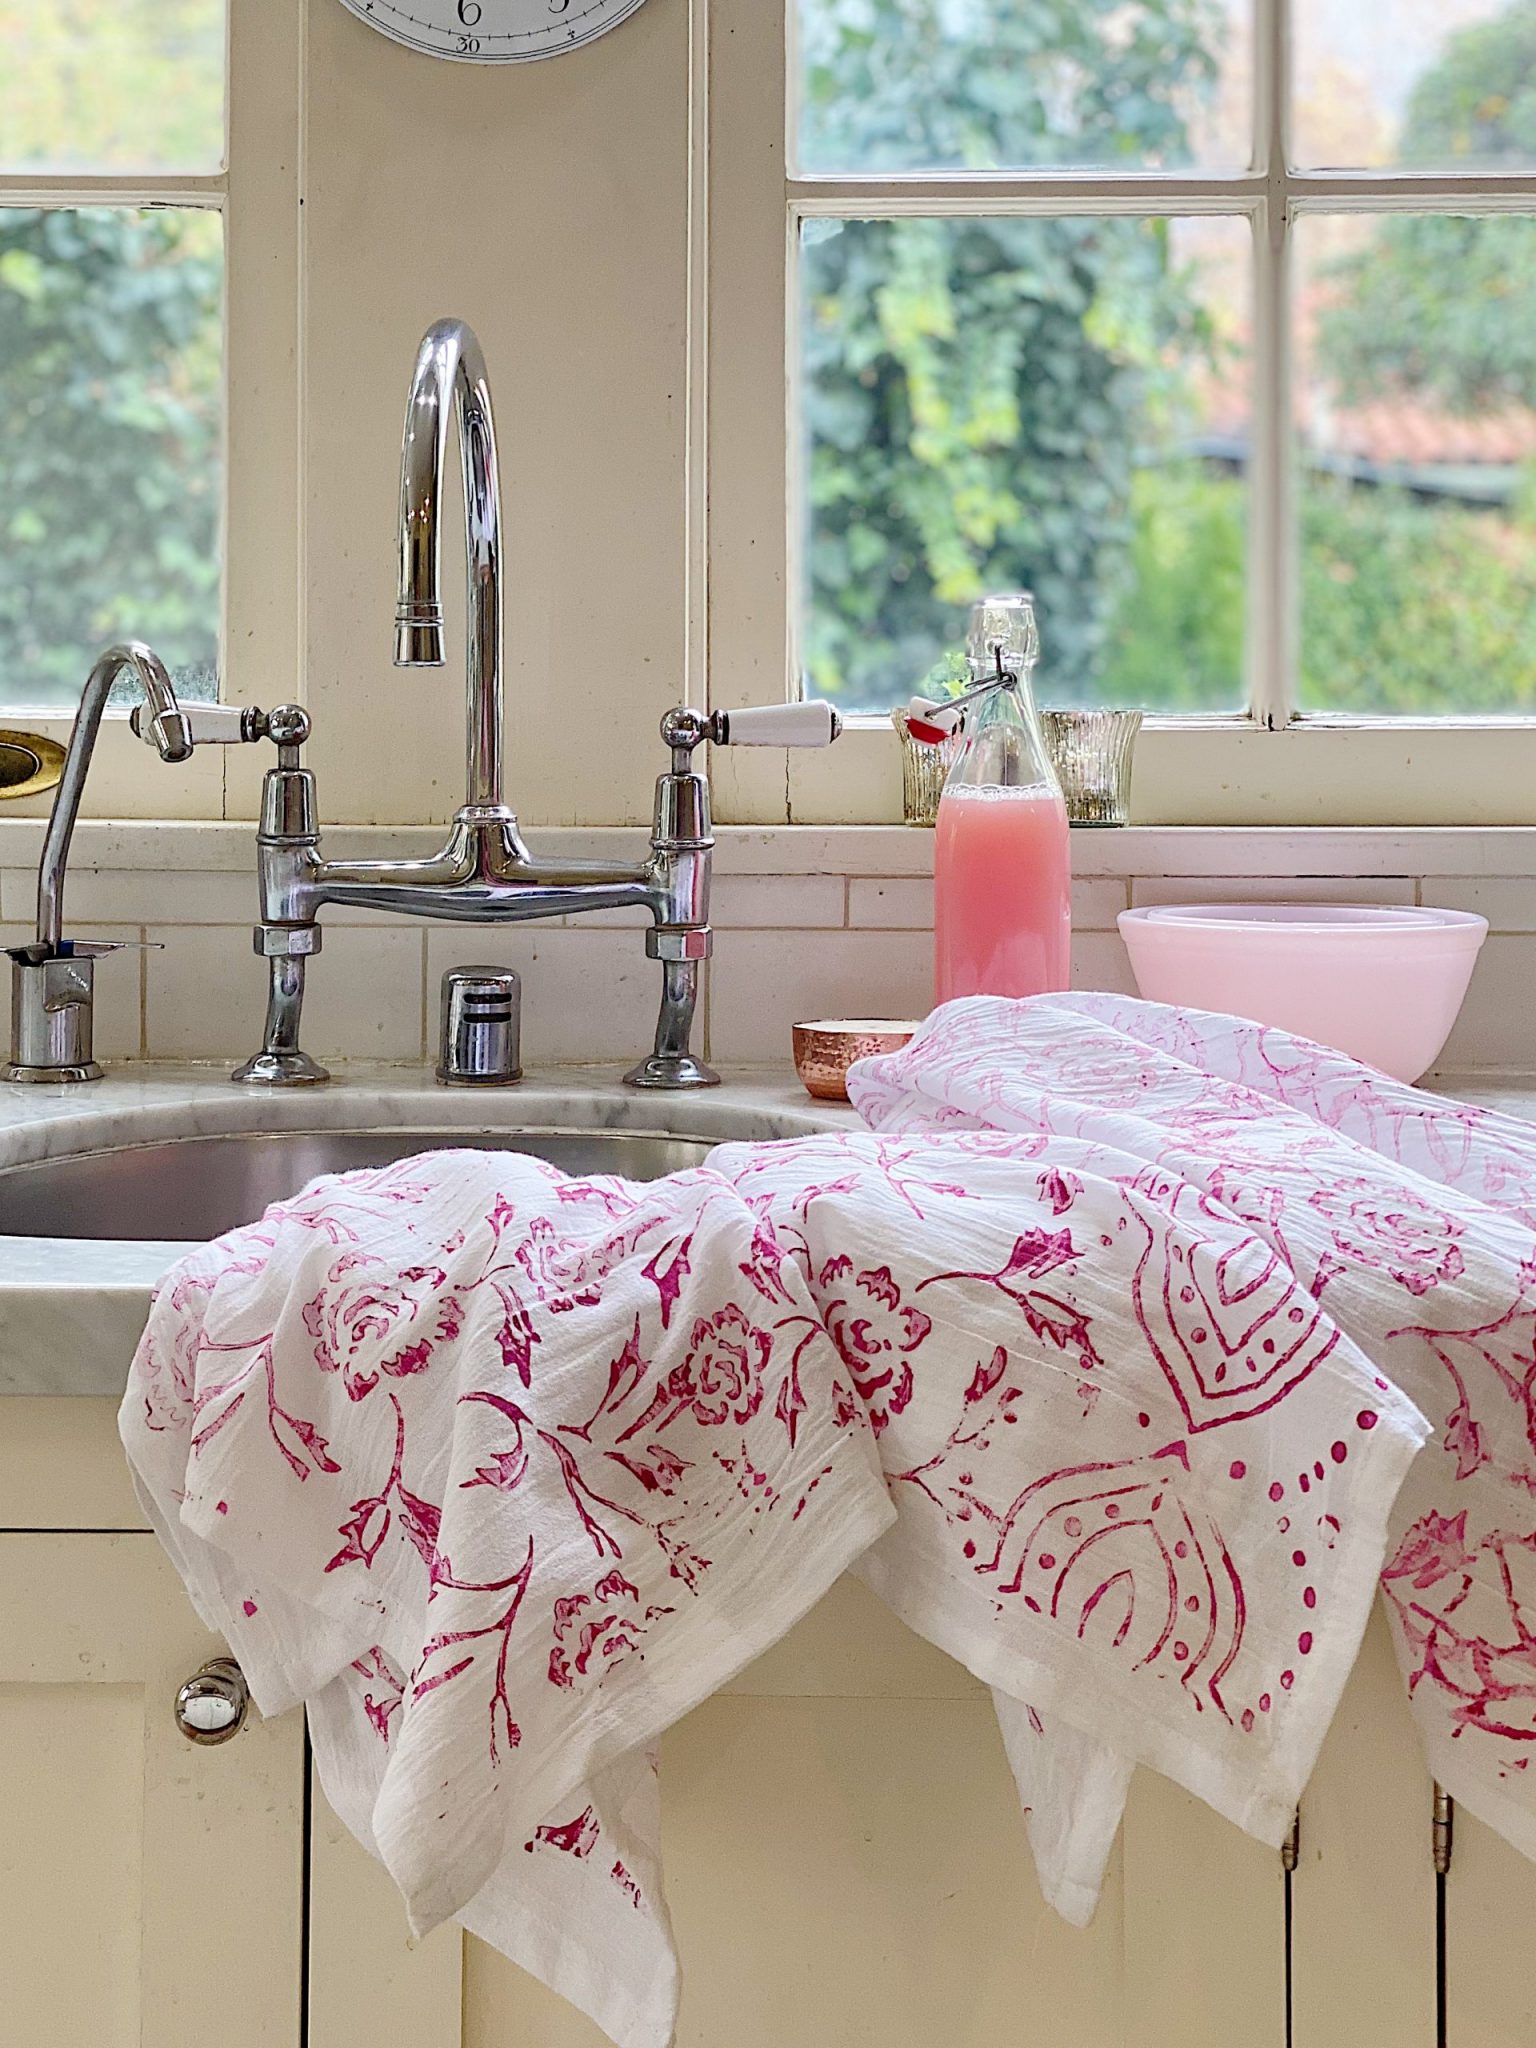
How to Paint on Fabric with Stencils

This easy DIY fabric project turns a plain linen towel into a pretty kitchen towel with a French Queen Bee print. Learn how to paint on fabric using a laser stencil in this easy tutorial.
Pin the image below to your decor boards on Pinterest (just click the Pin button in the top left corner). You can also follow along with me on Pinterest!
For more real-time updates, follow me on Instagram @My100YearOldHome

Beautifully set table. Love the green plates.
Thank you Stephanie!
Love your ideas and instructions.
I am so glad you are enjoying Carol🥰