Warm Apple Pie Recipe
Fall baking is one of my favorite things so I made the most beautiful Warm Apple Pie. I used a stamp from Iron Orchid Designs!
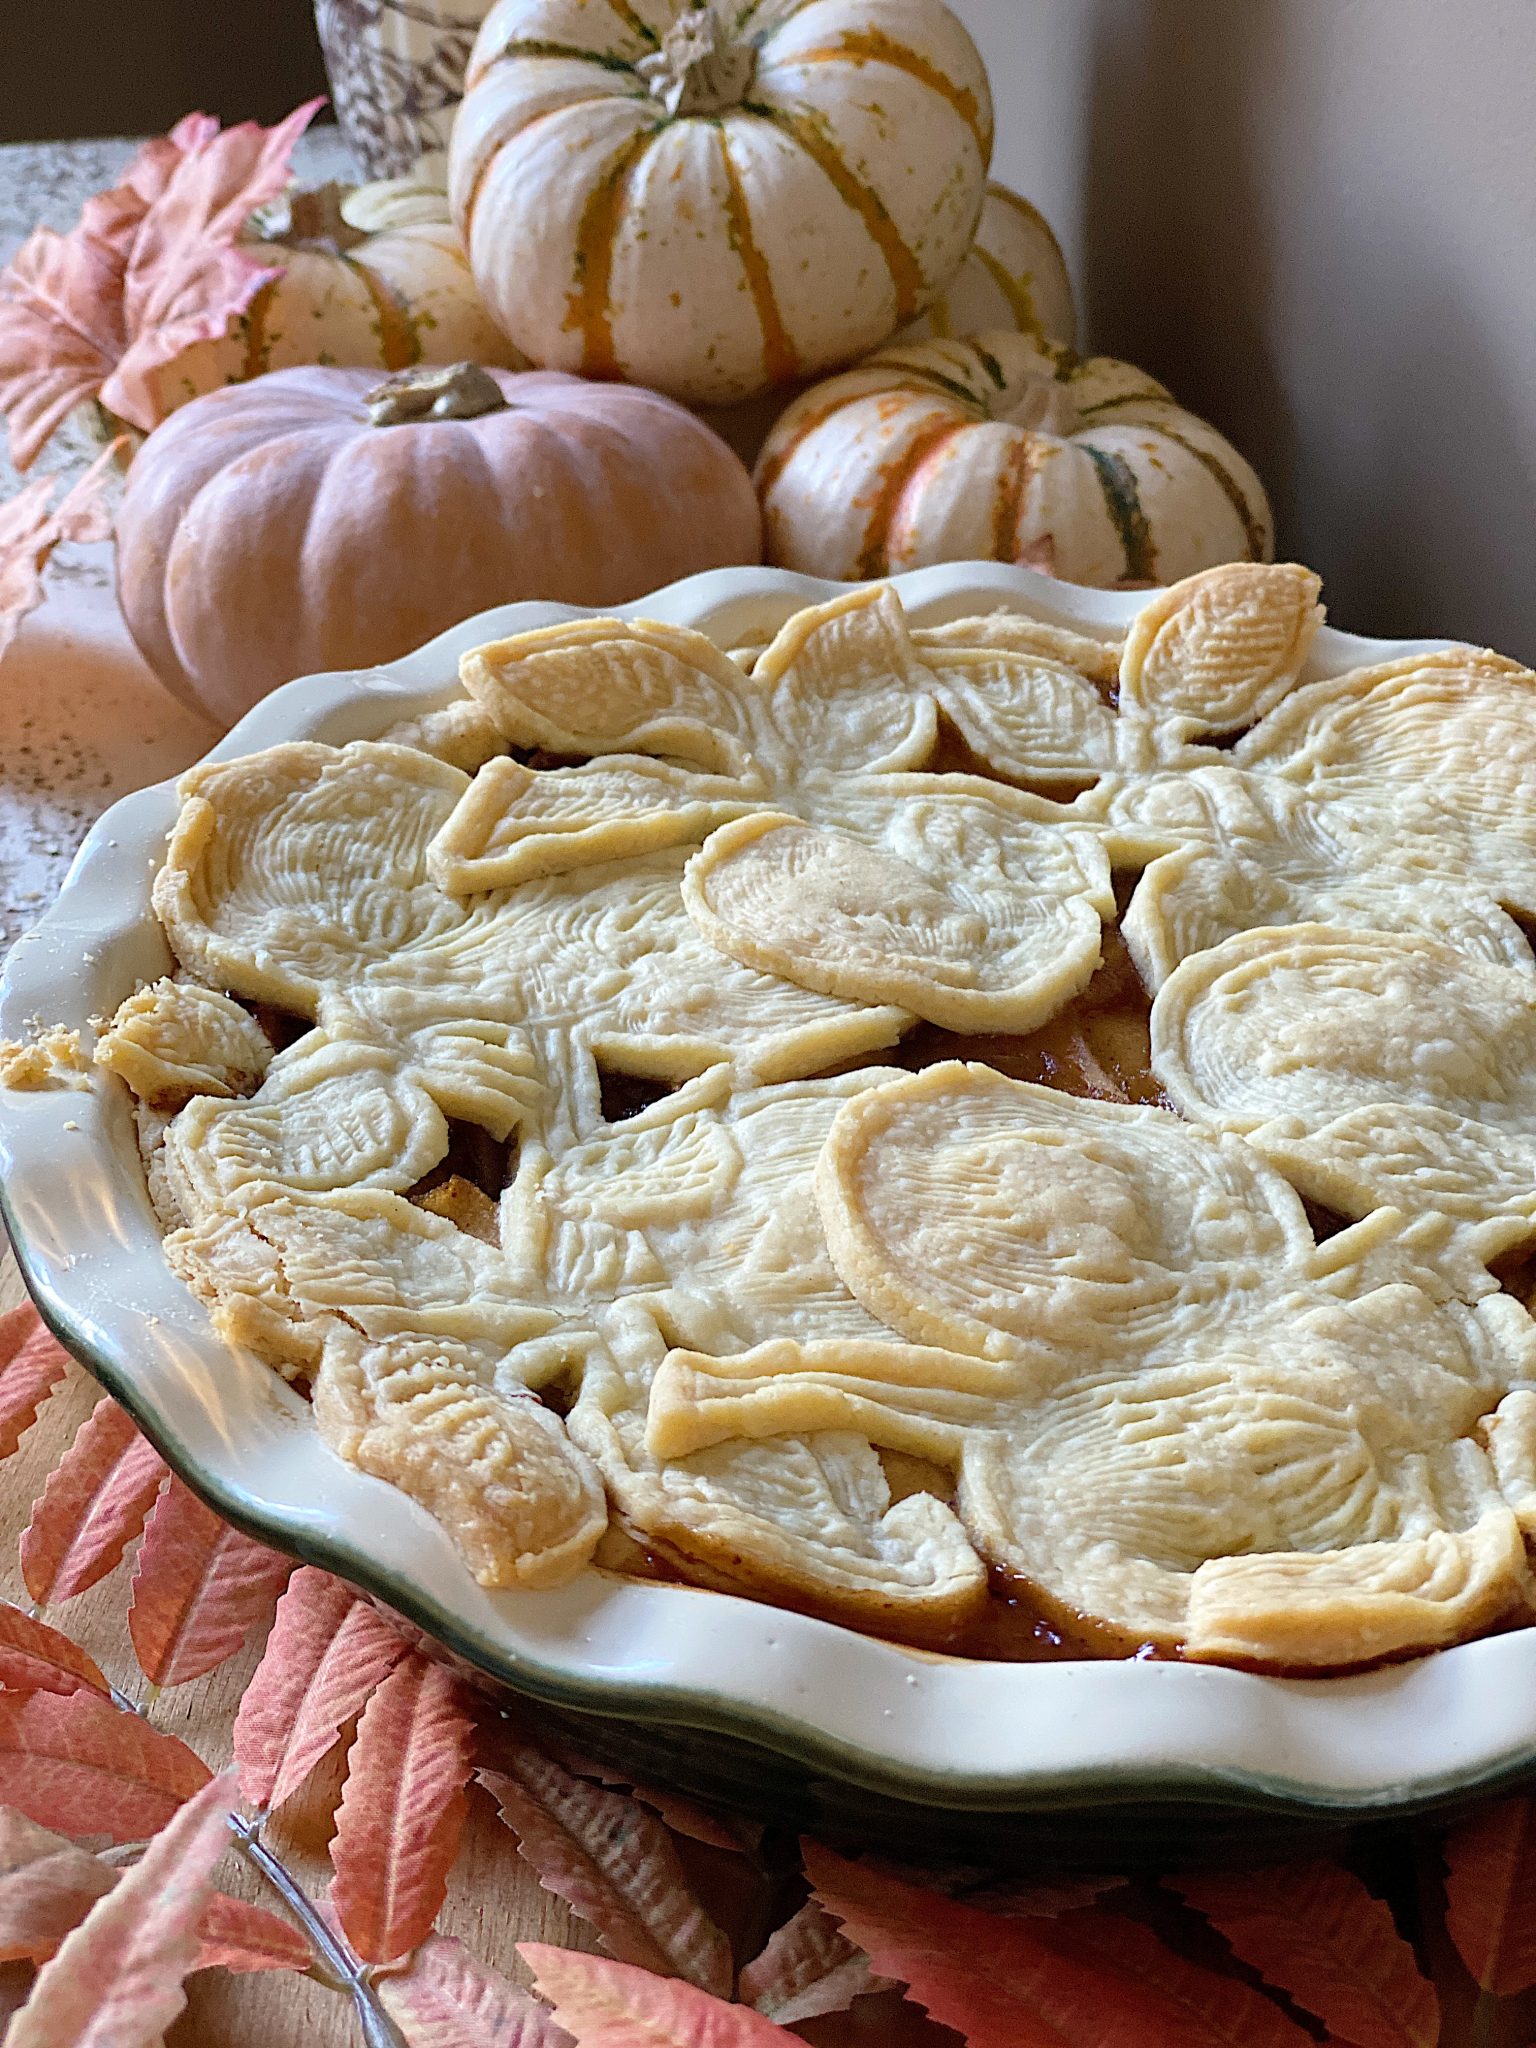
I love making pies and I really enjoy adding a twist to the crust on top. Today I used my favorite apple pie recipe and a stamp of apples and leaves to make the decorative crust.
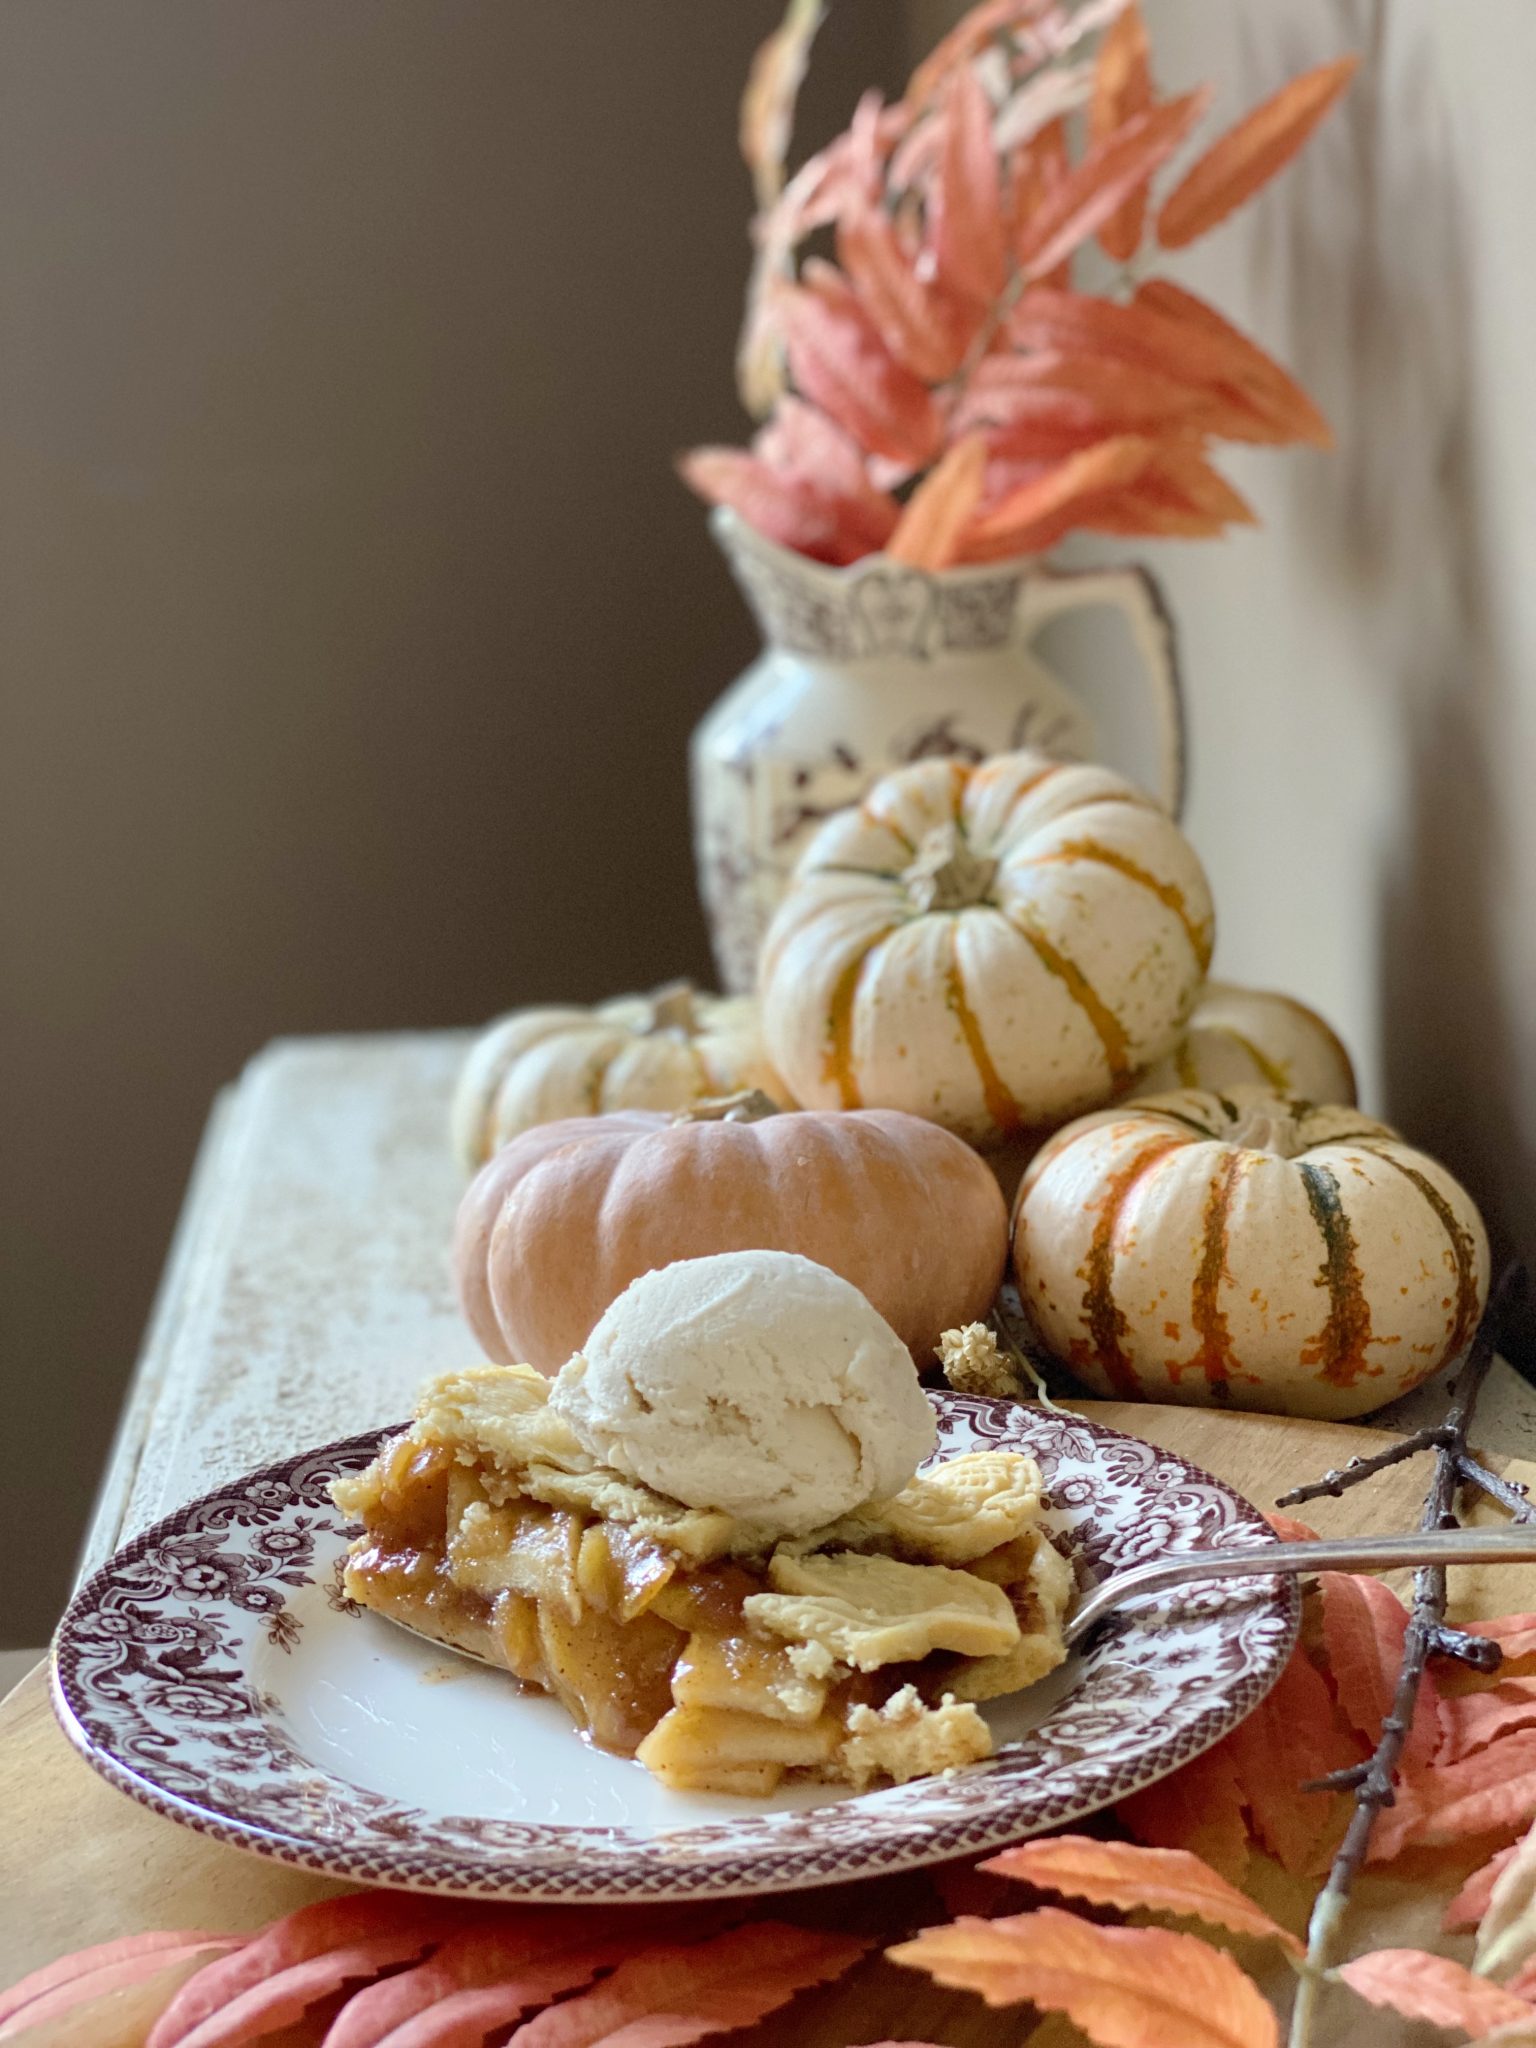
Warm Apple Pie A La Mode, Yes Please!
I love fall baking. After the heat of summer (when I cook a lot of salads and grill to keep things light), it’s nice to have fall baking waiting in the wings. Fall baking is all about warmth and comfort, which is the equivalent of wrapping yourself in a big blanket in front of the fire, but with food.
As soon as fall arrives, warm apple pie is one of my go-to, most absolute favorite things to bake. In our house, nothing says I love you quite like a plate of warm apple pie a la mode. It is like a big hug on a plate.
I have shared my favorite apple pie recipes with you before, but you know me, I wanted to take my original recipe and elevate it. So, as the saying goes, if it ain’t broke, don’t fix it so I didn’t change the recipe, just the presentation.
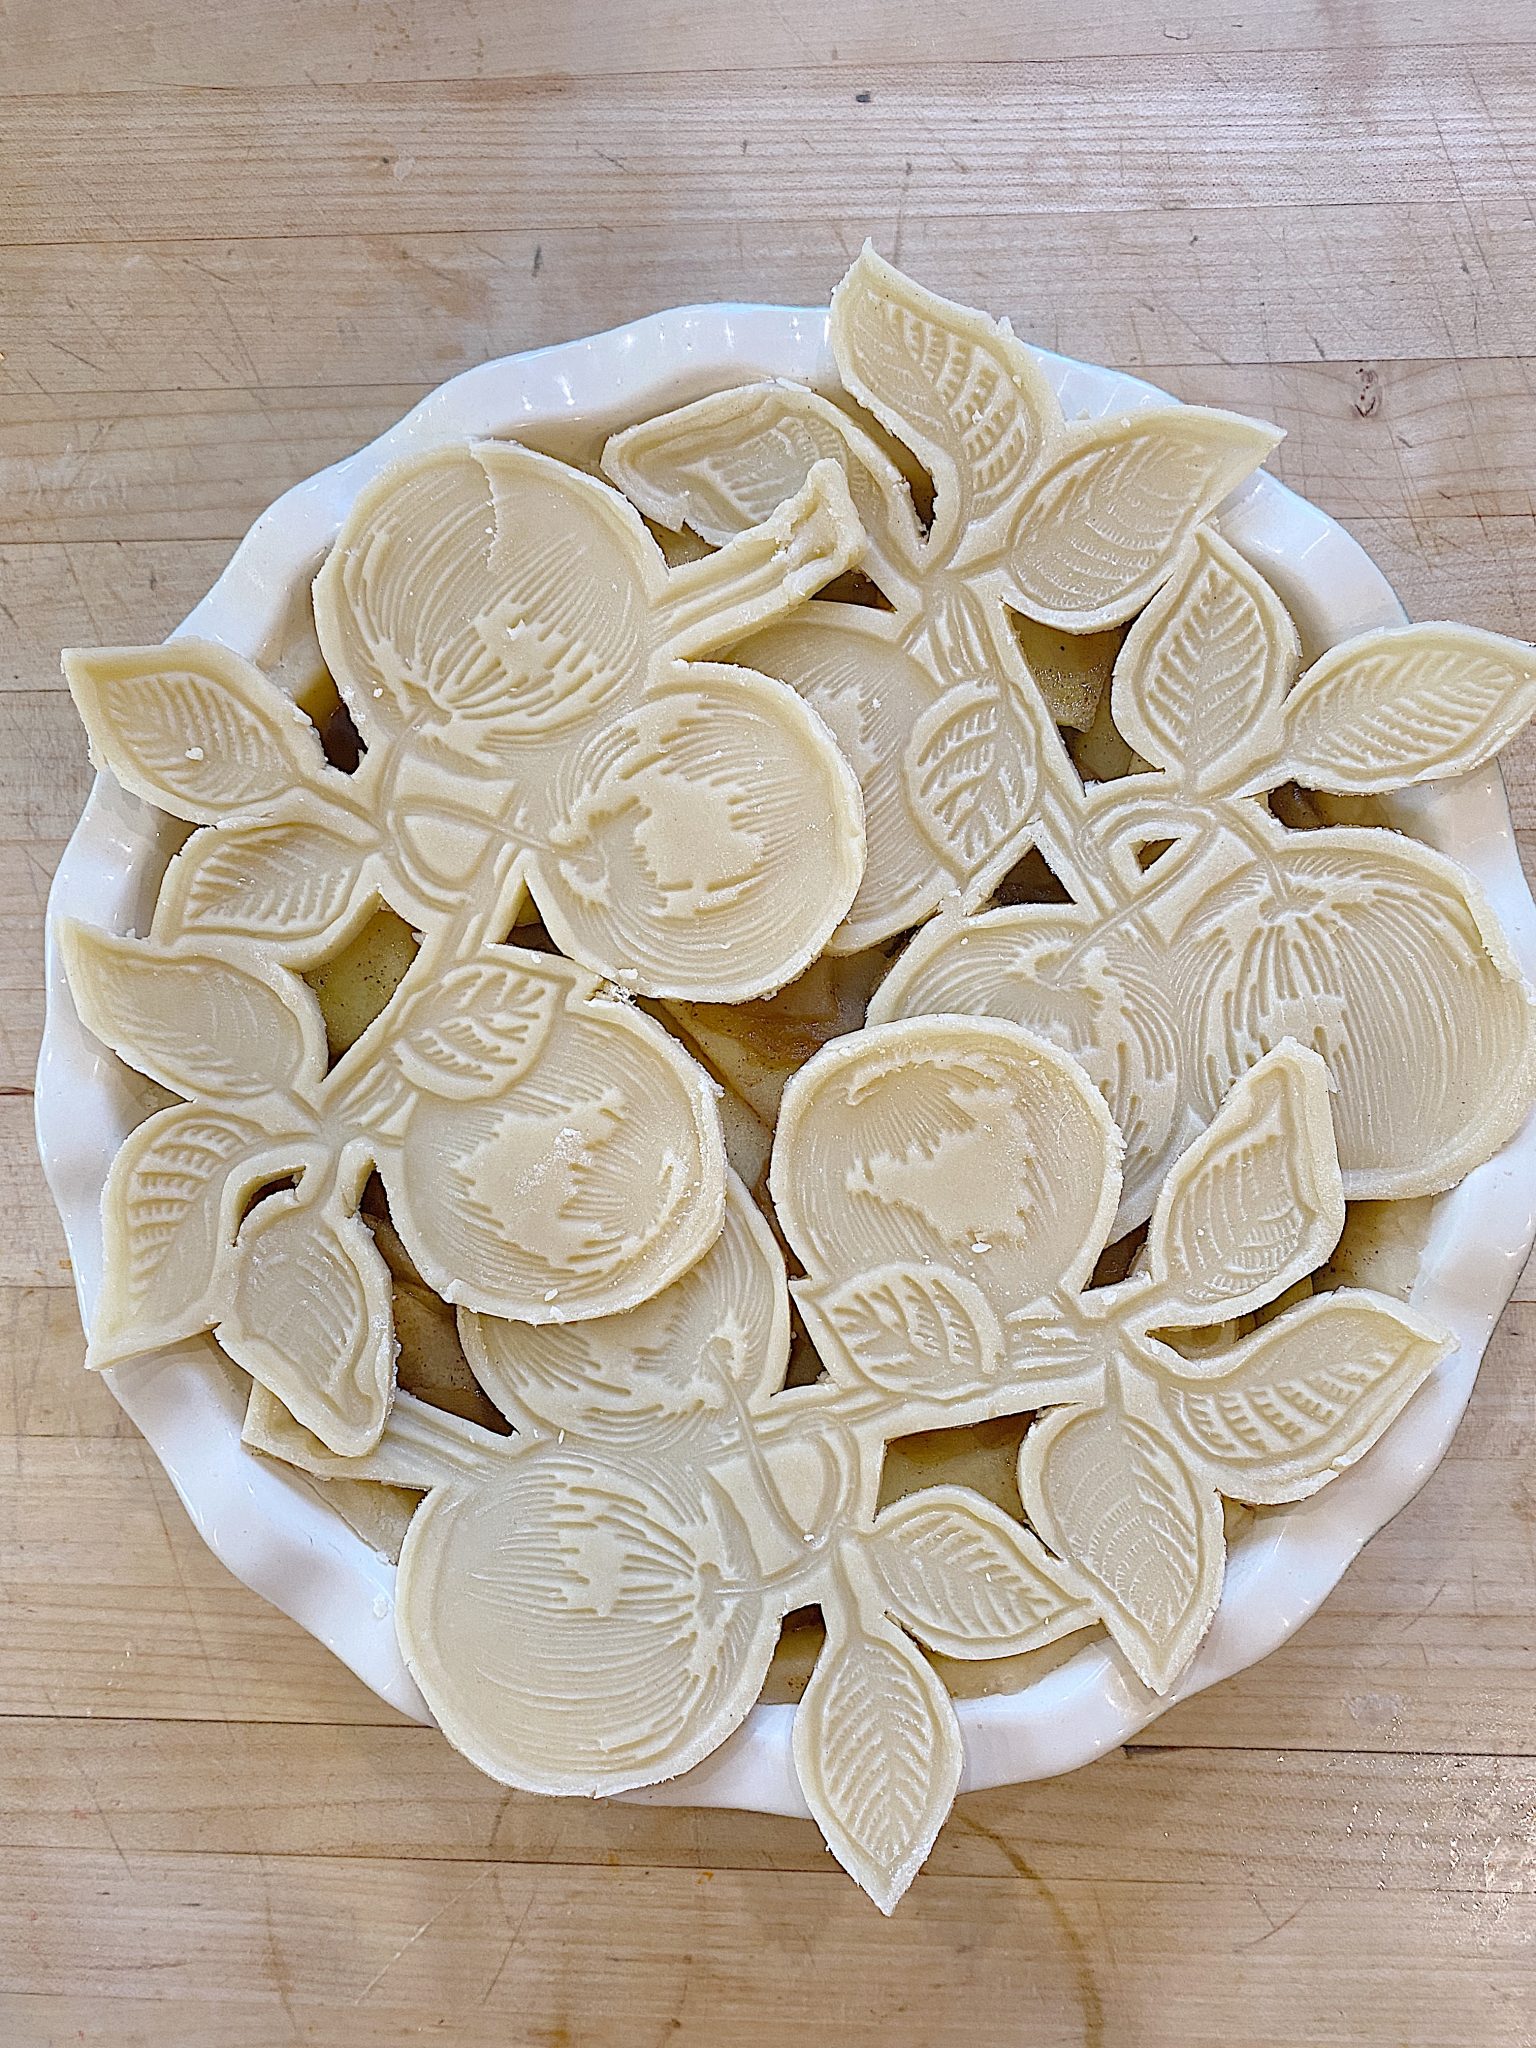
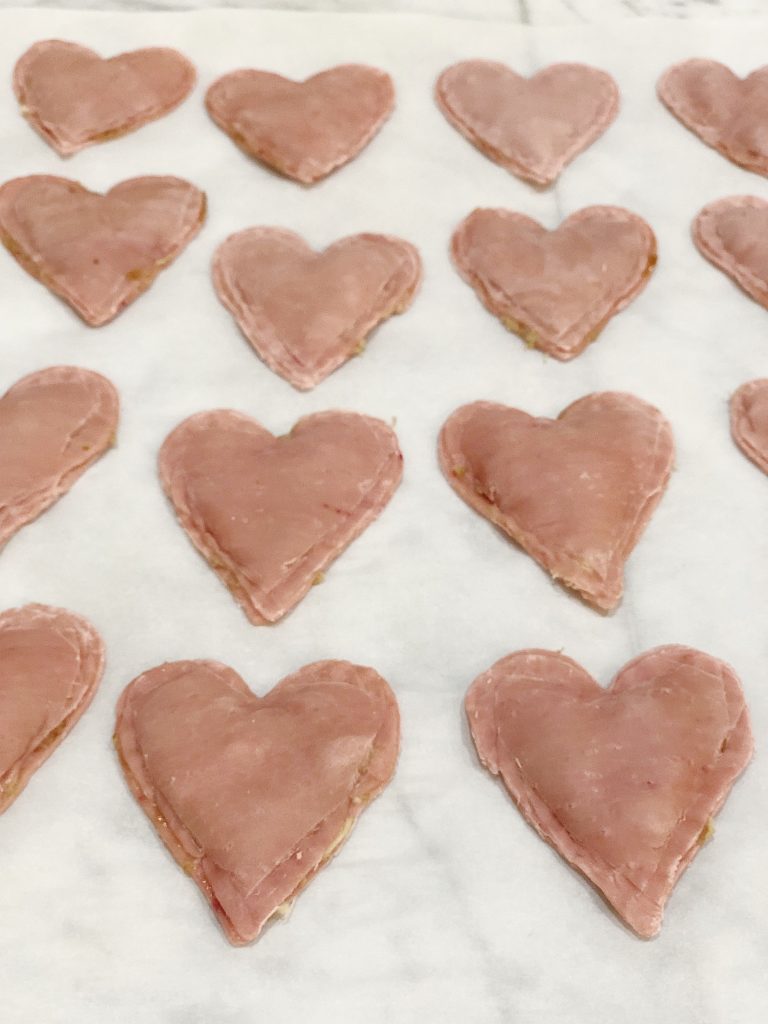
I am kind of obsessed with the products from my new friends at Iron Orchid Designs and I have shared some of my past craft projects with you that I have made with their products. I made several projects with their moulds and air-dry clay and I made plate chargers with a leaf motif and a cake plate with rope moulding. It’s incredible how inspired I have been with their products and I have been thinking about how I could use the stamps or moulds in baking. I now have so many ideas! The first (and there are many more to come) is this amazing decorative pie crust. I used one of their new stamps from the Fall Harvest collection featuring apples, pumpkins, and leaves.
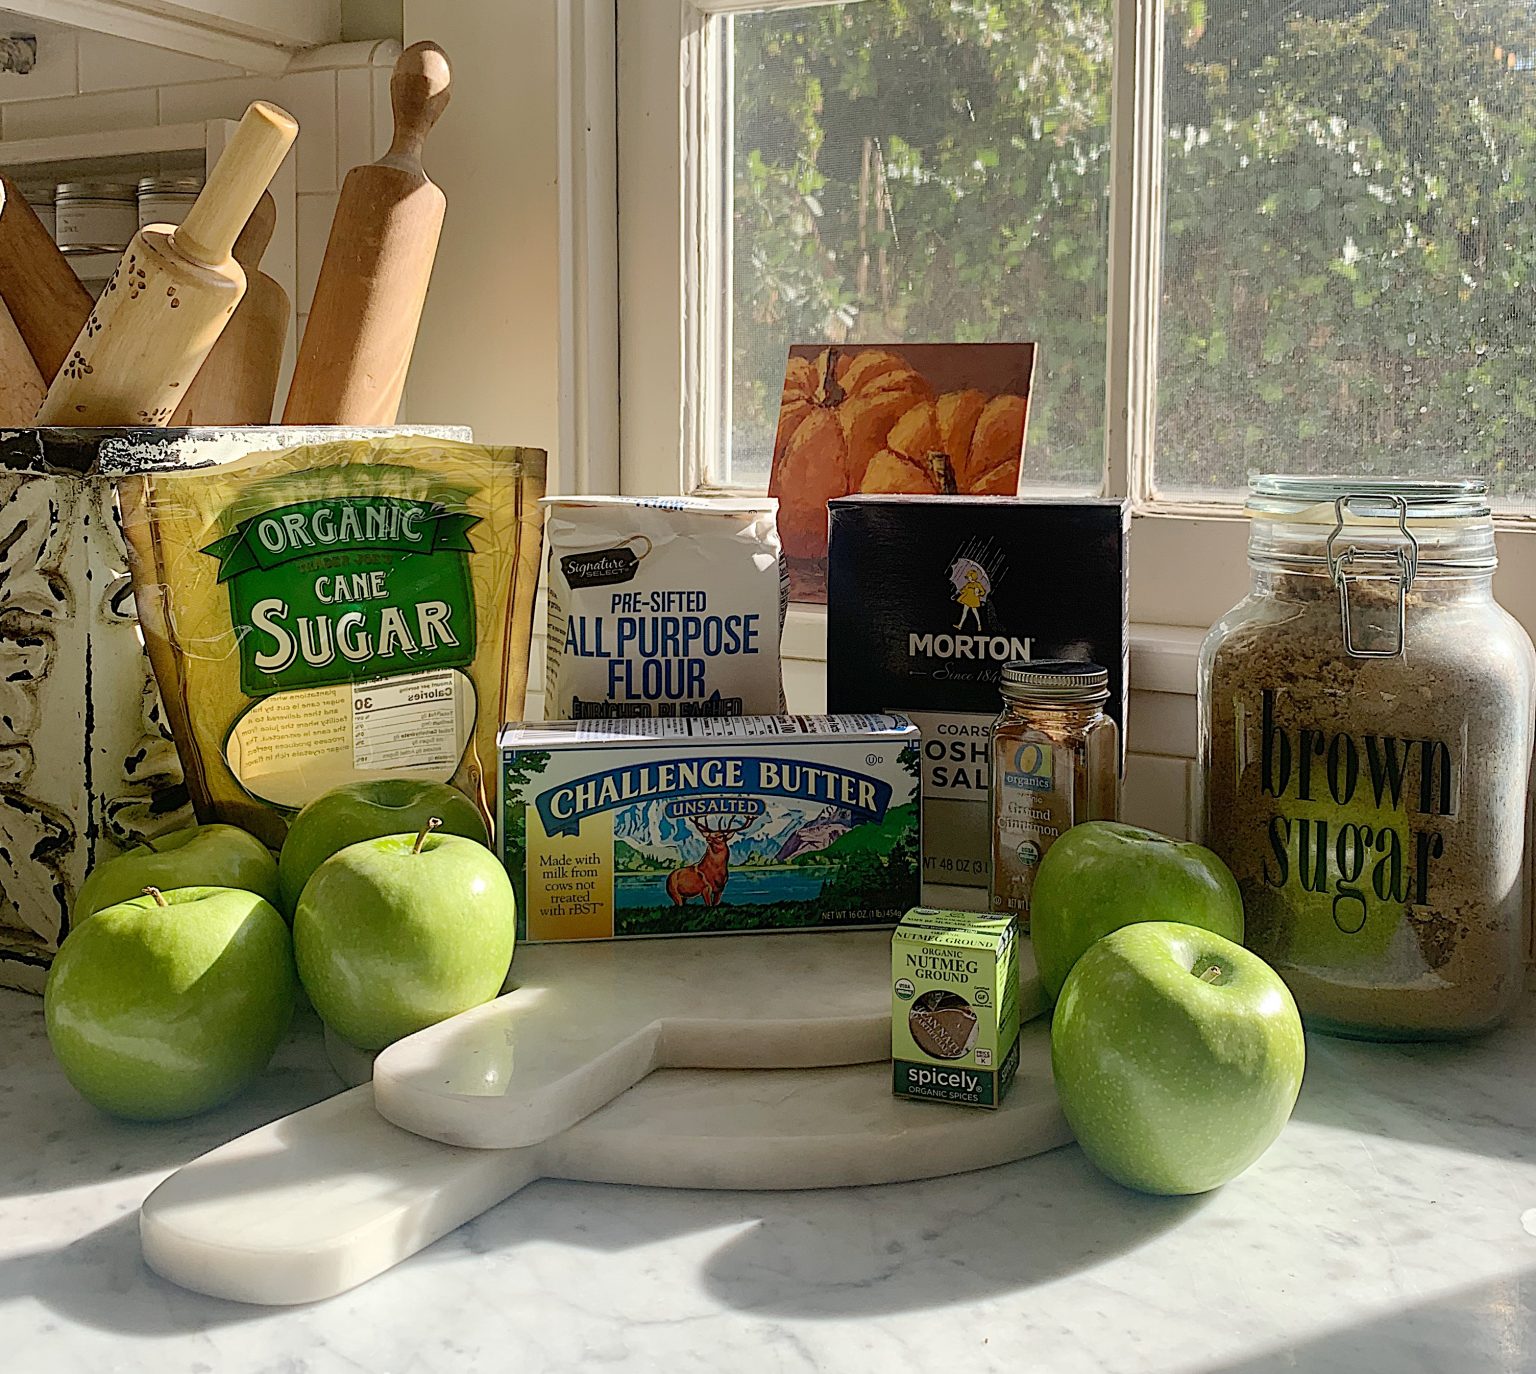
I started by making the pie crust first. It needs to chill for at least an hour before you can begin rolling it out or cutting it out for a decorative pie crust.
Do you use rolling pins with an edge? They come in different heights and allow you to always roll to the same width of pie crust every single time!
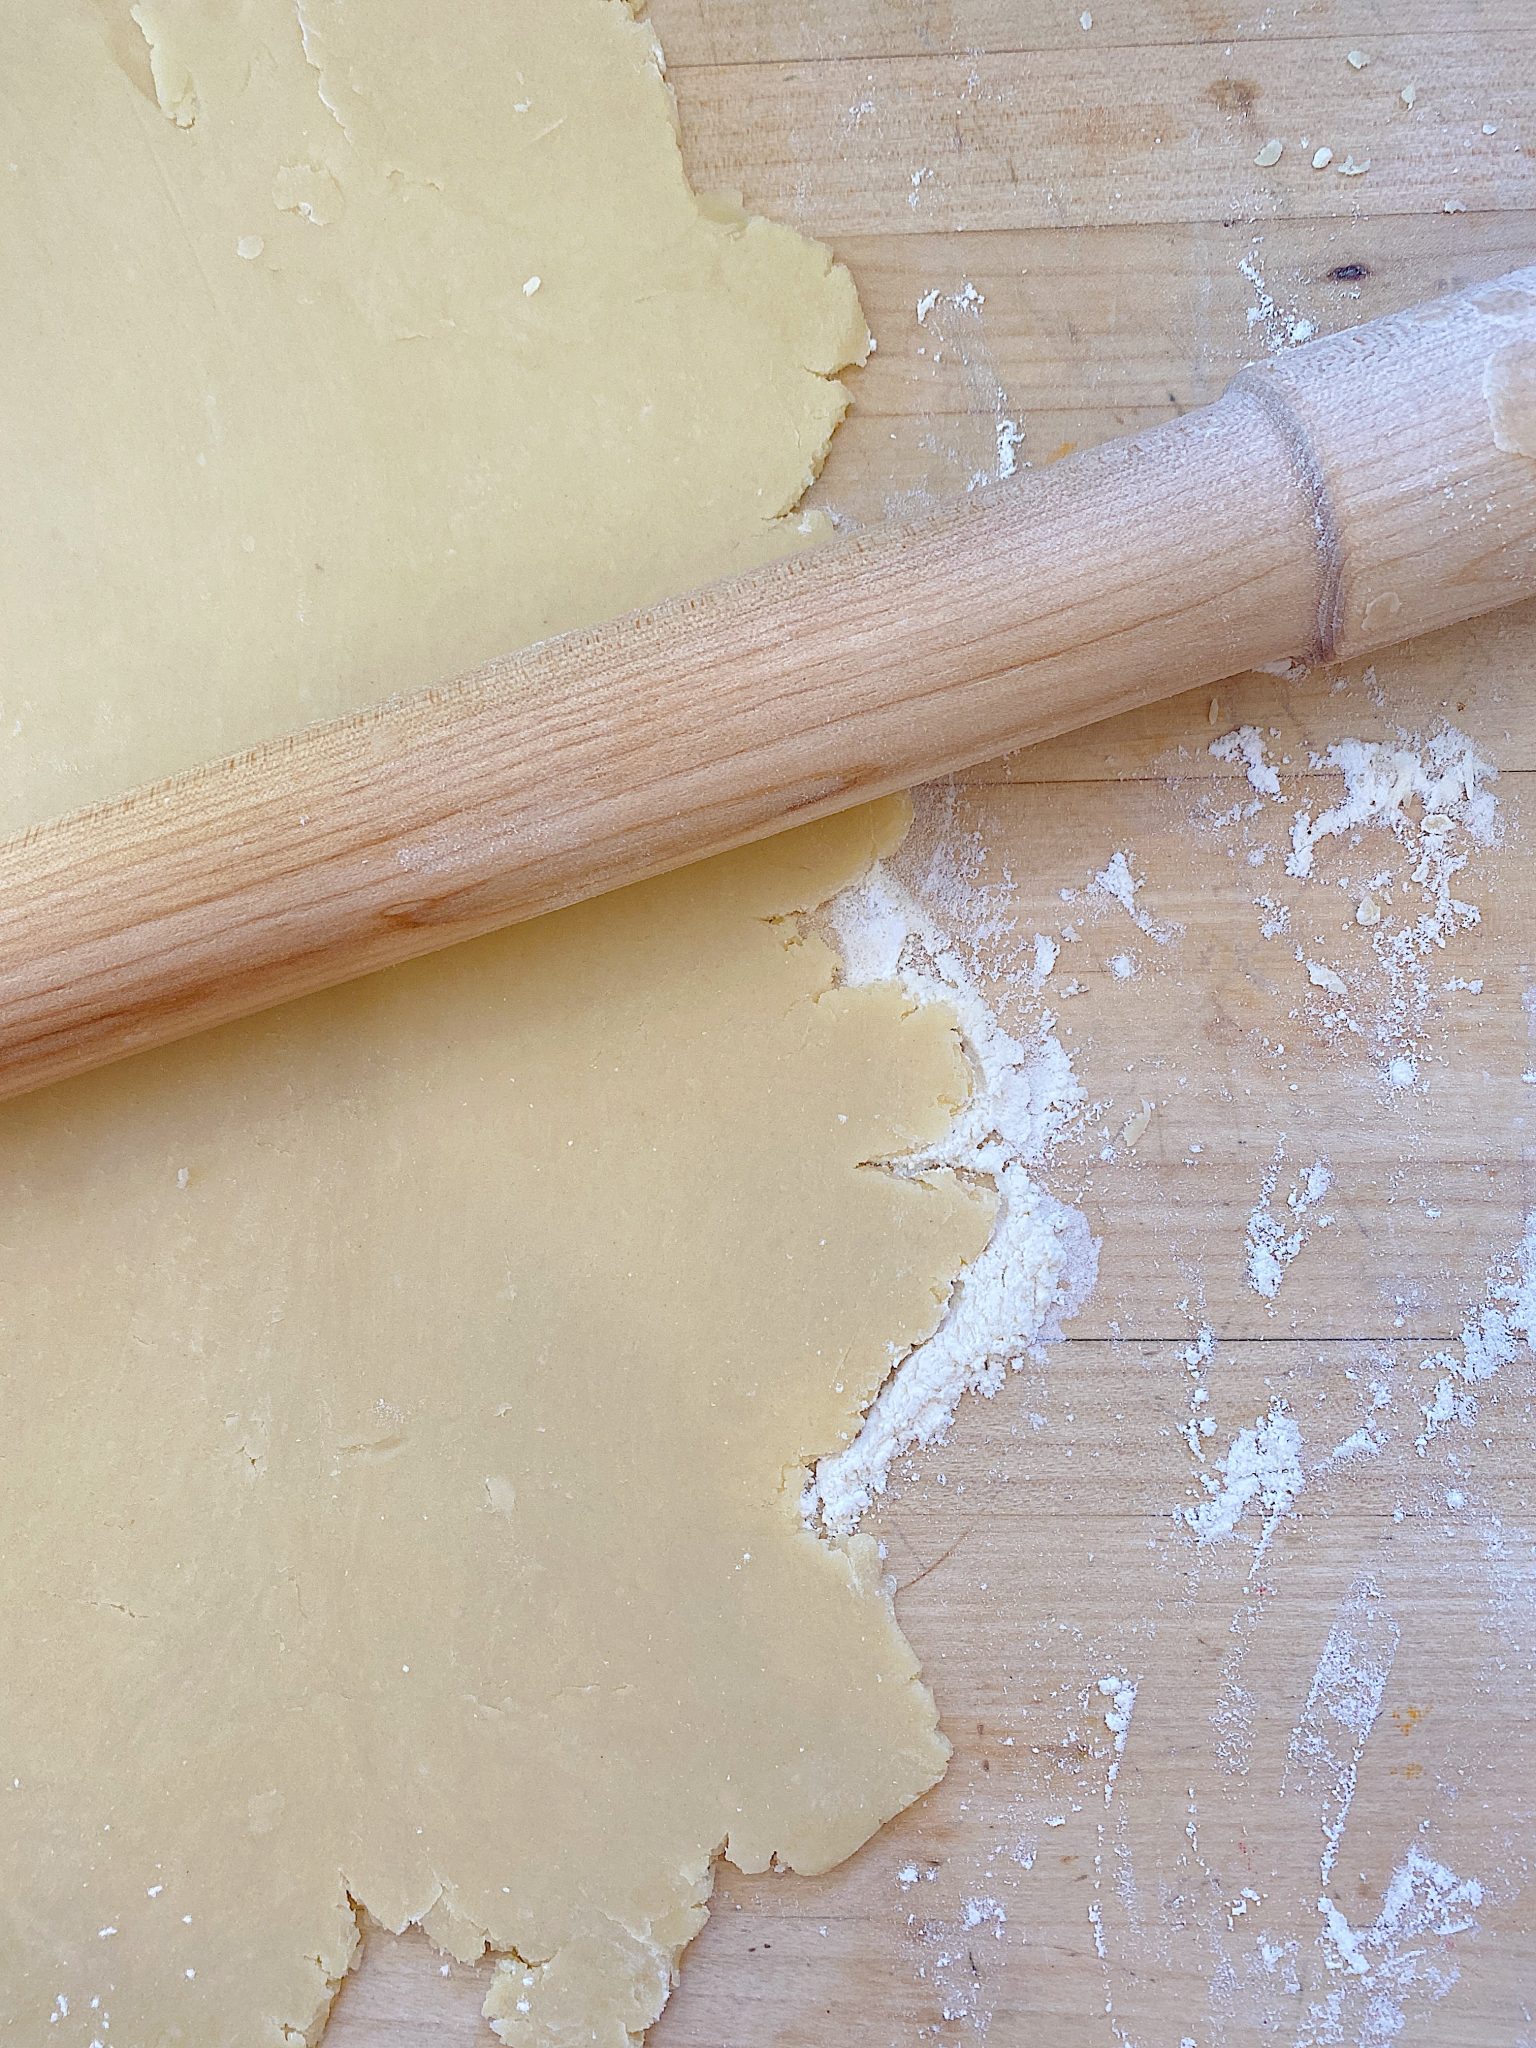
Once the dough has chilled, make sure to use lots of flour when you roll out of the dough also so your beautifully stamped dough doesn’t stick to the rolling surface. I also used a lot of flour on the stamp, brushing off excess with a pastry brush, so that the stamp wouldn’t stick to the dough.
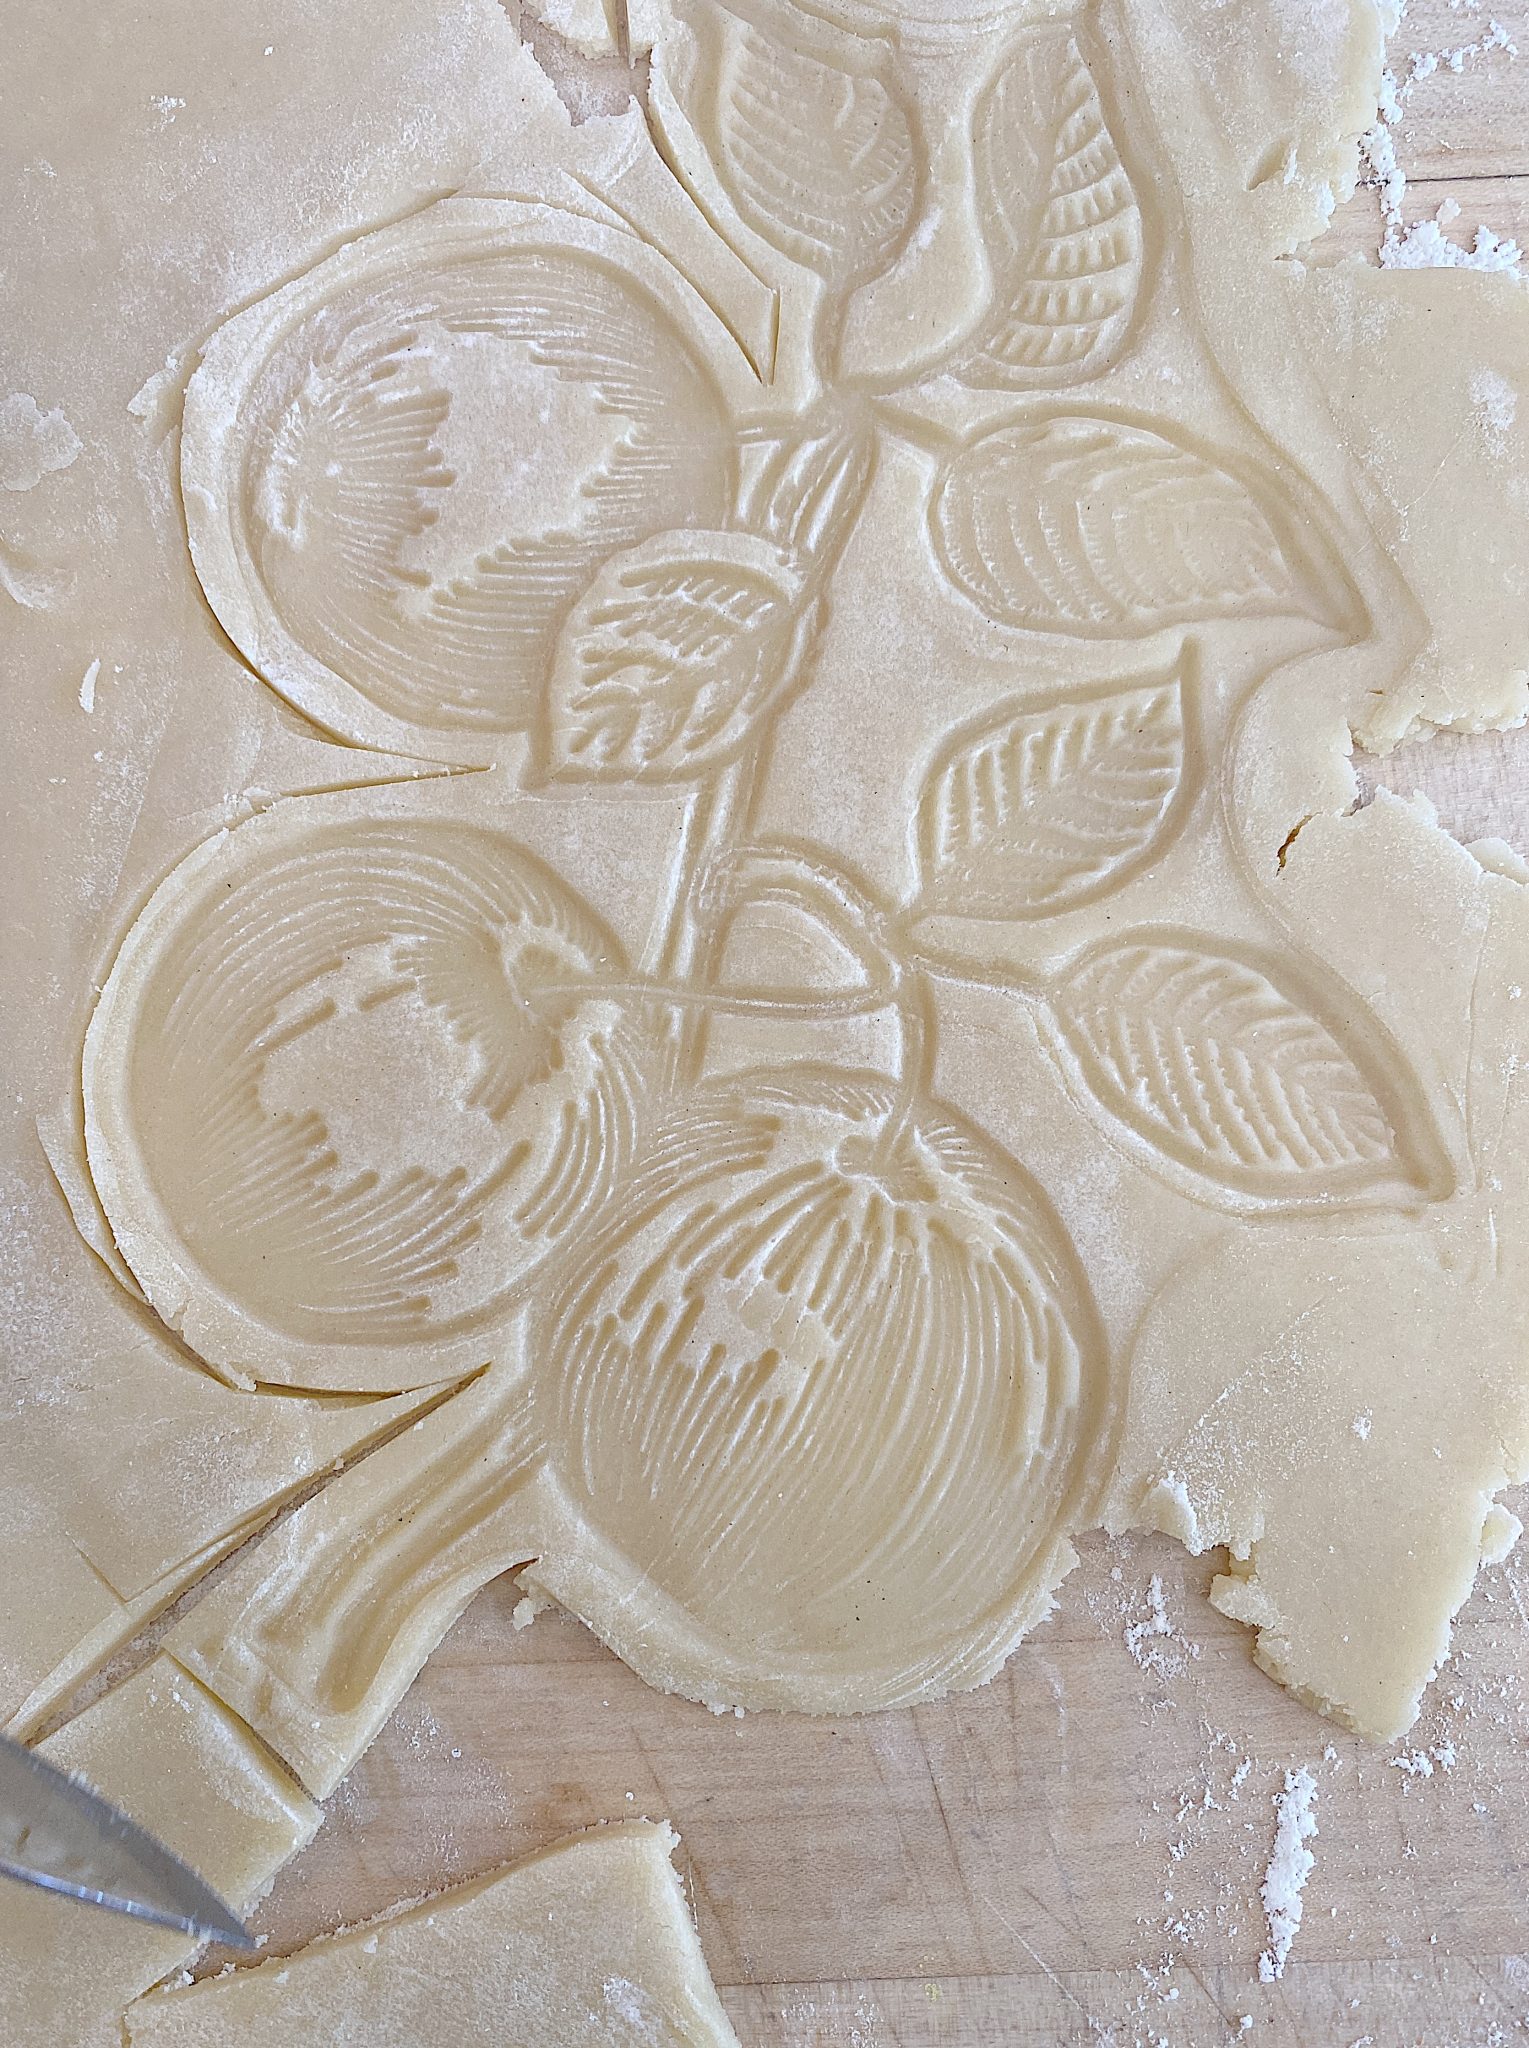
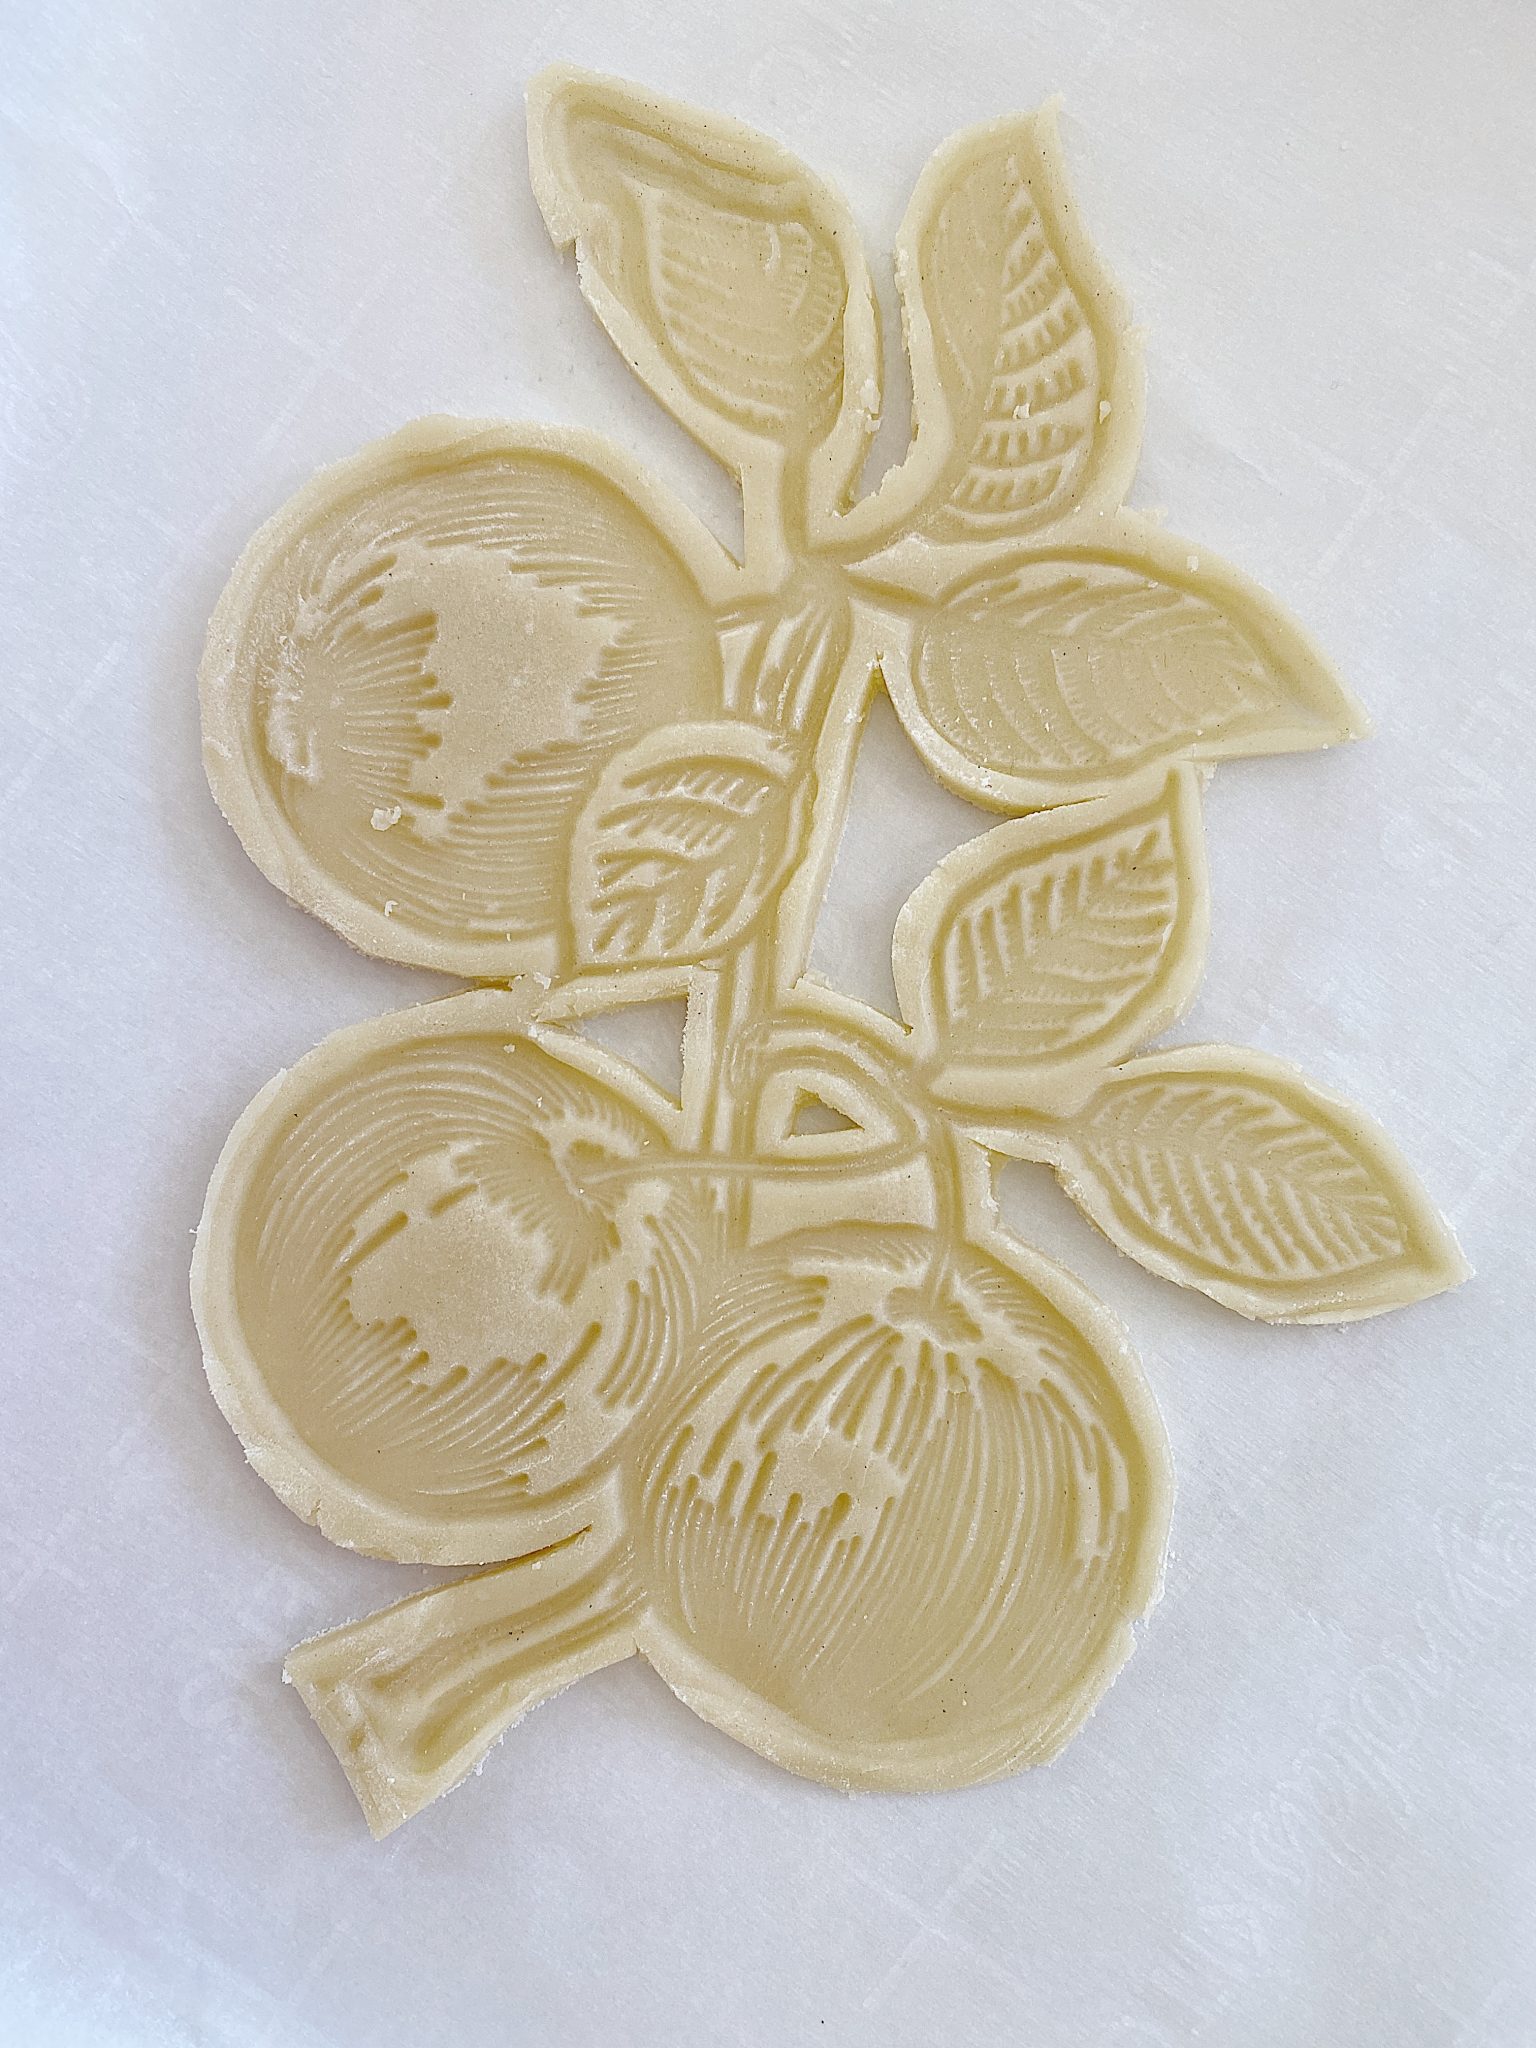
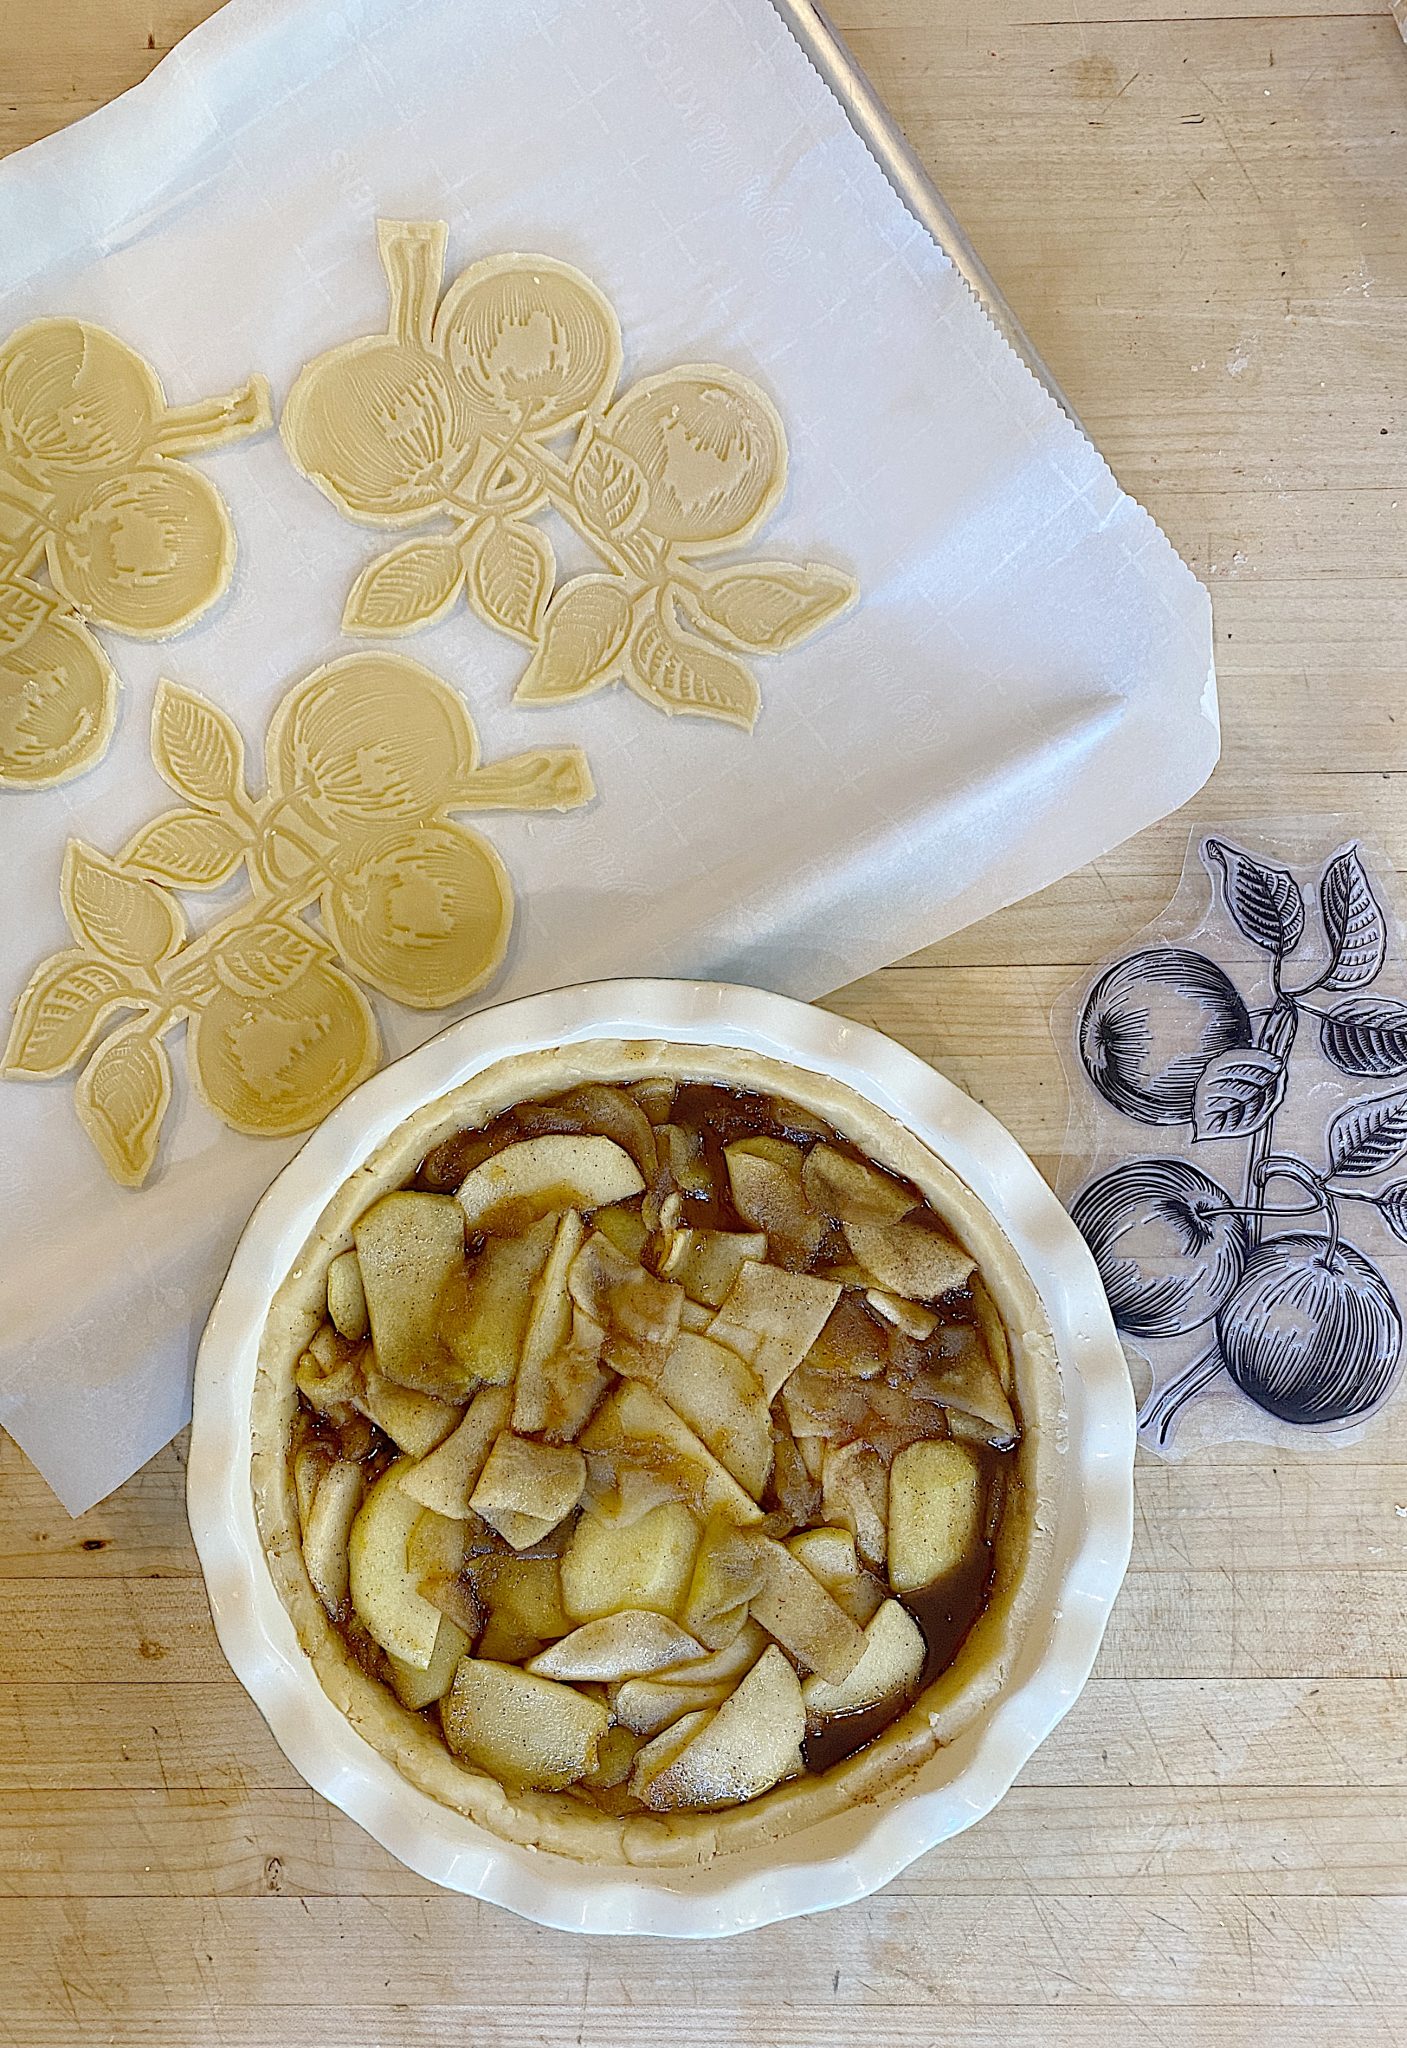
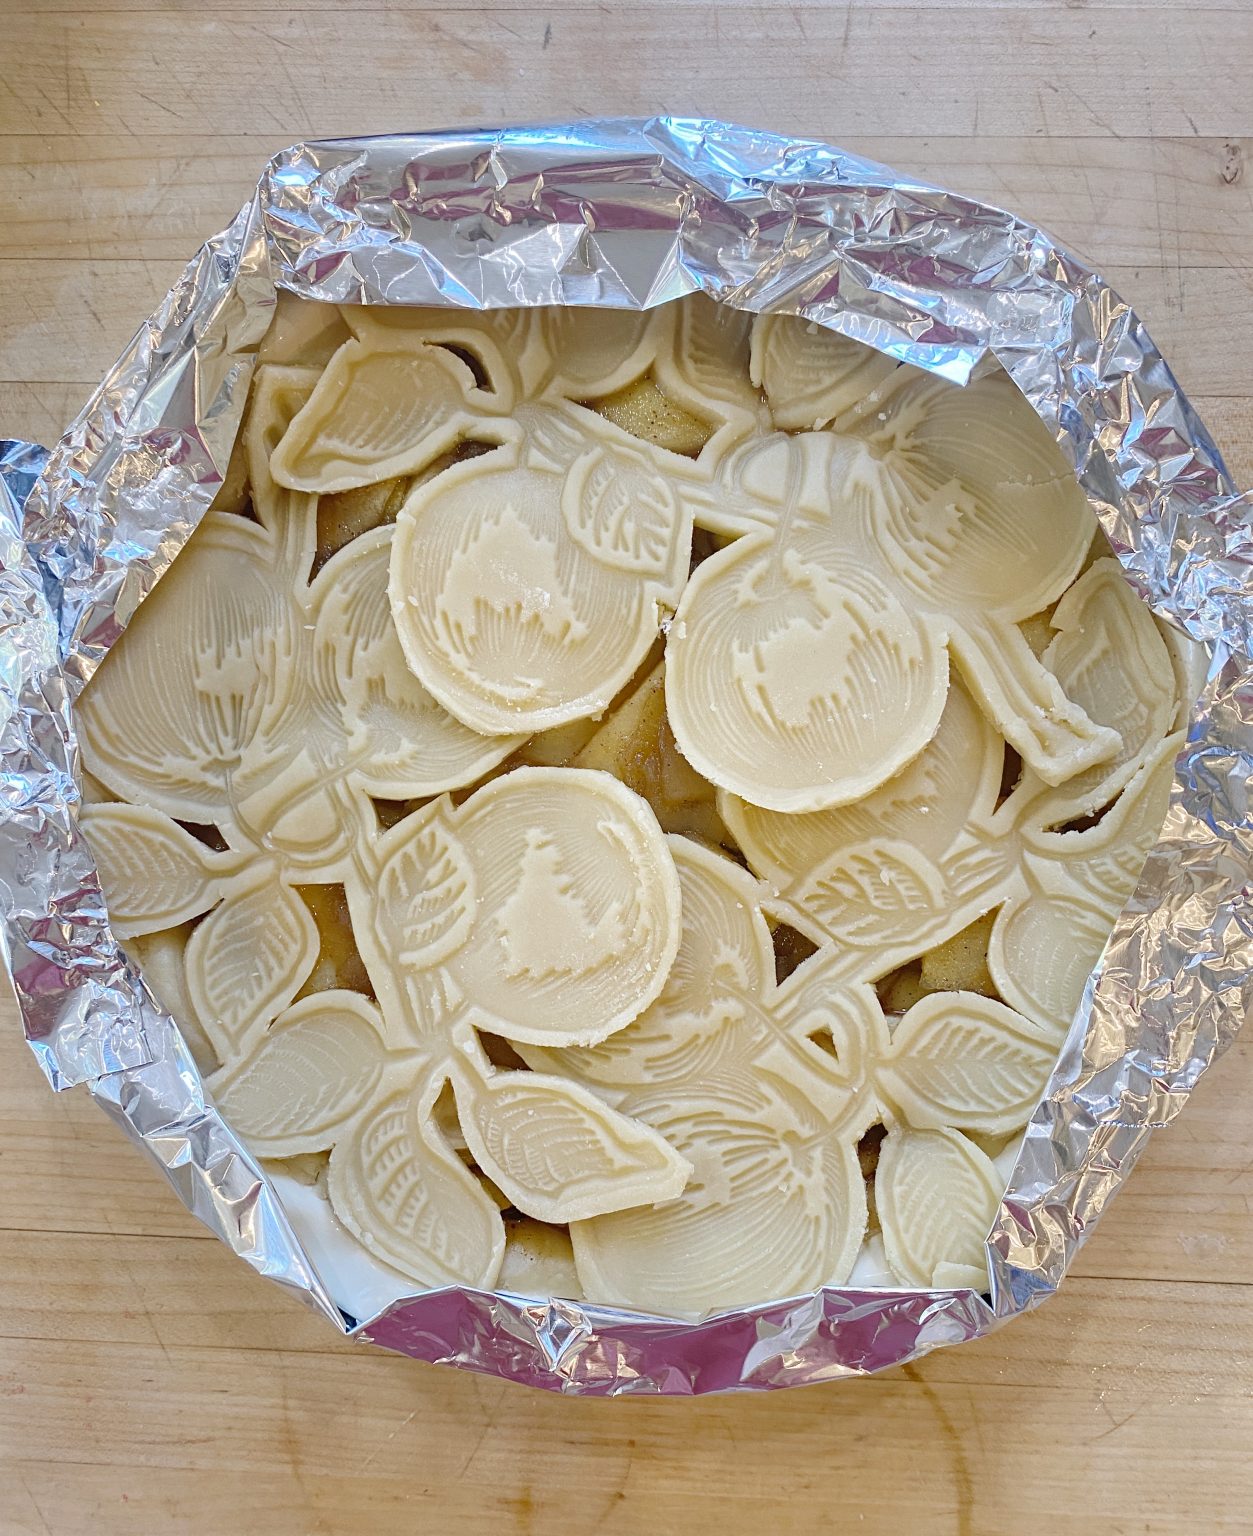
I carefully cut around the stamped area and then moved the stamped dough to a parchment-lined cookie sheet with a spatula. Next, I put them in the refrigerator until I was ready to decorate the top of the pie.
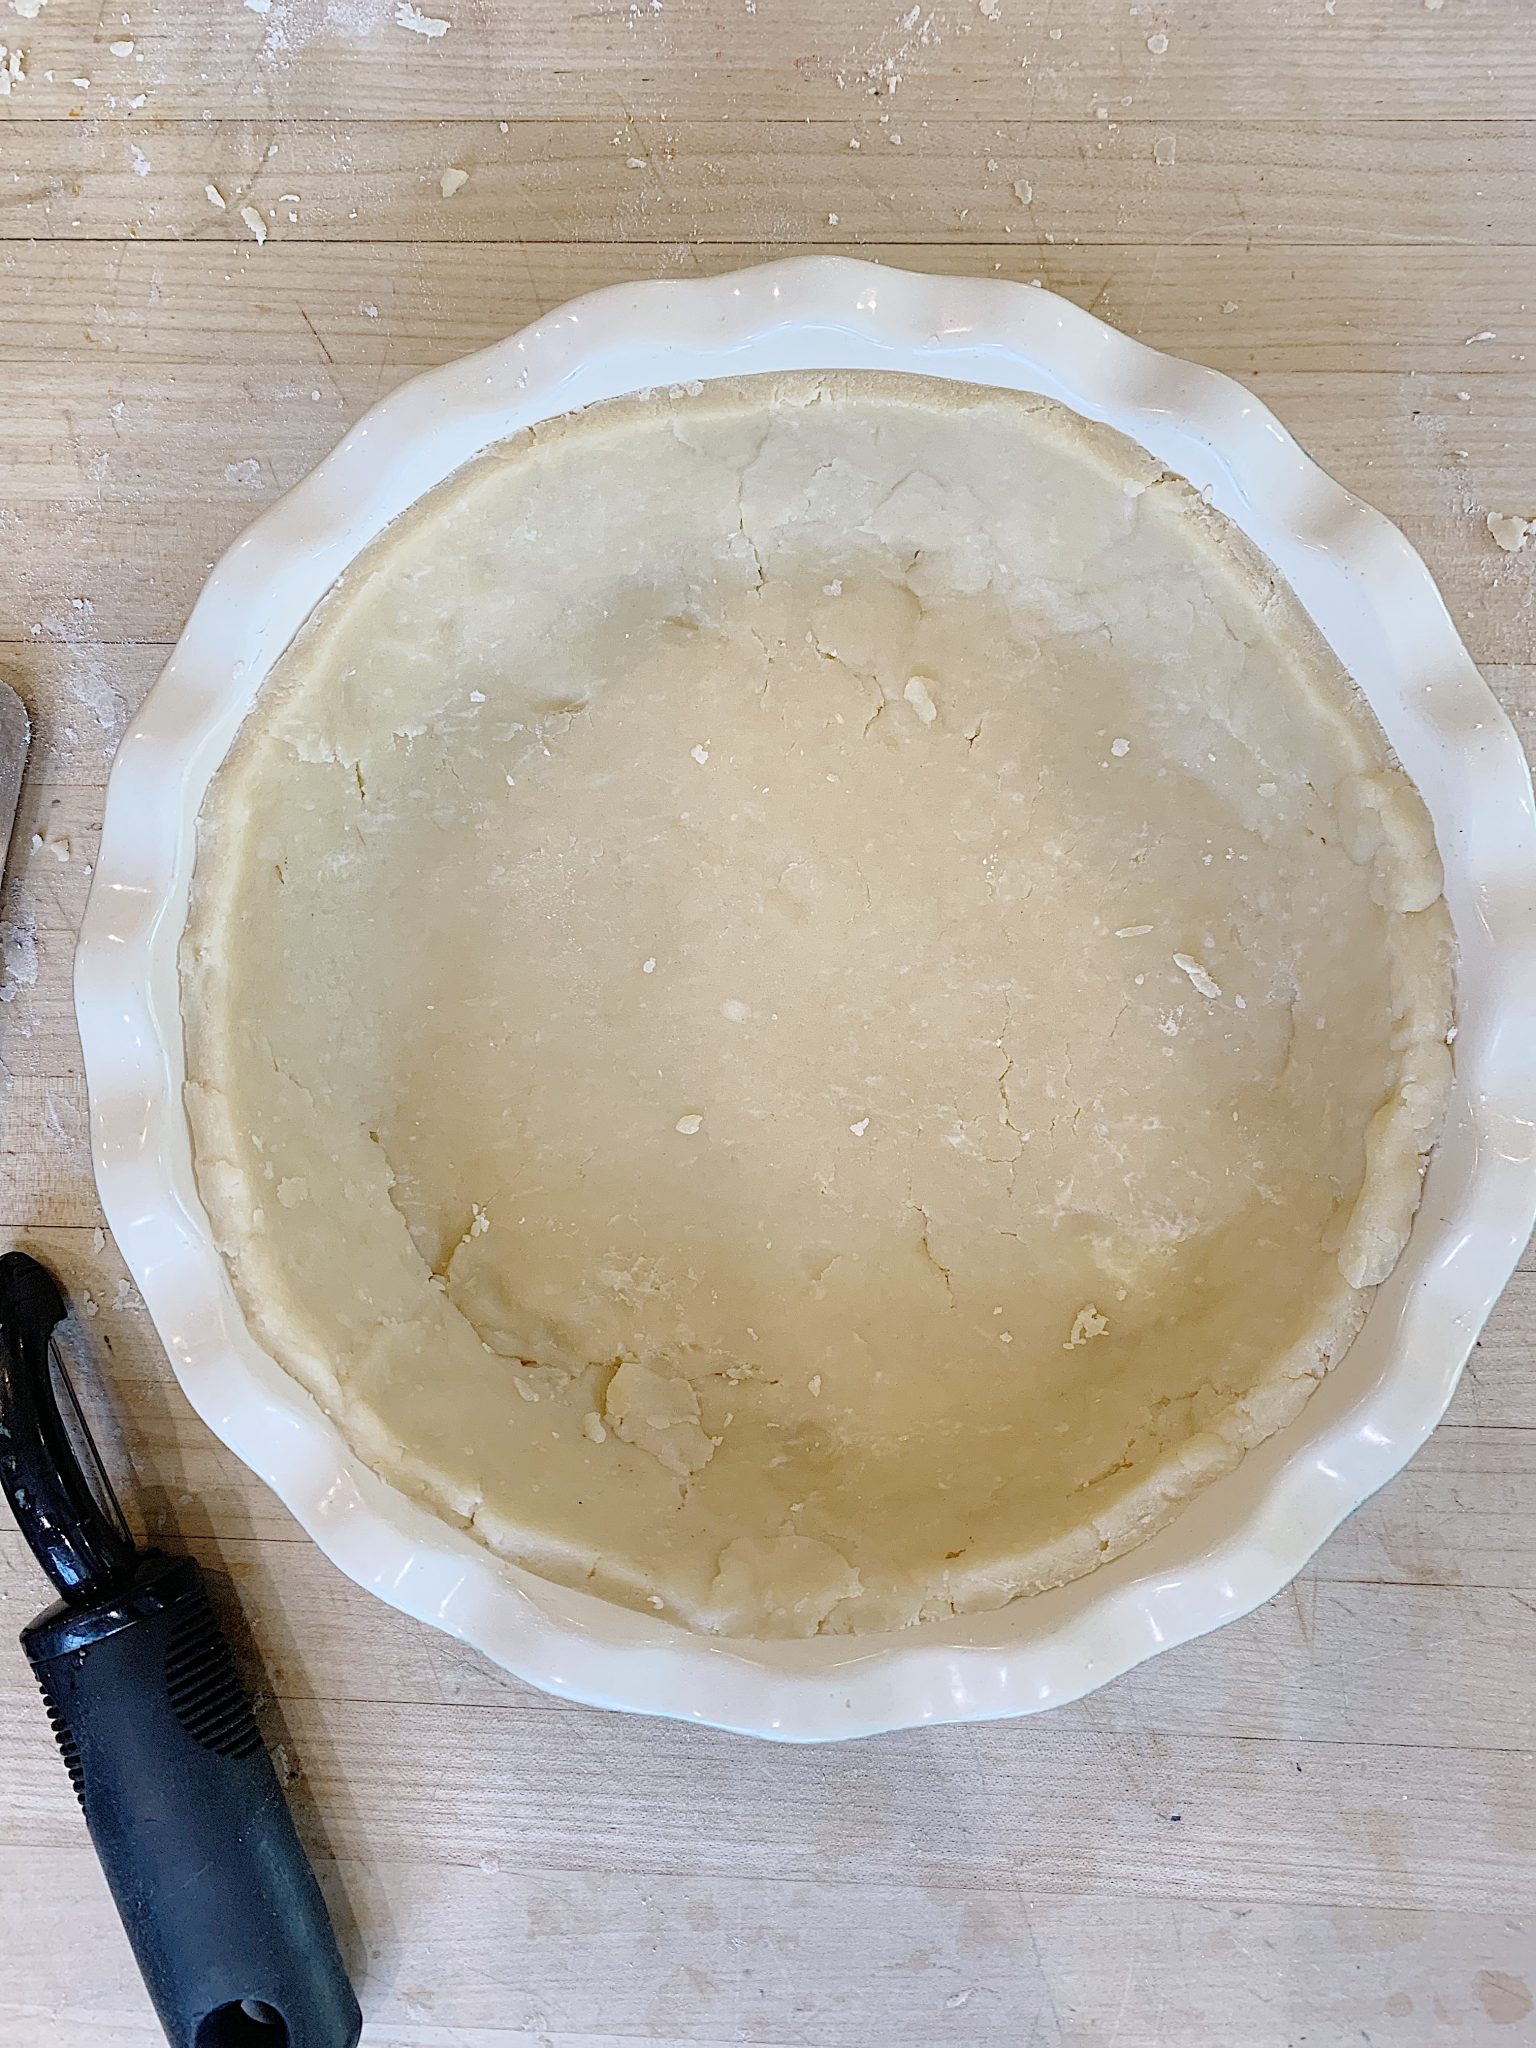
The next step was easy as I rolled out more pie crust for the pie pan. I trimmed the top of the pie crust so that the decorative stamped dough would cover the pie topping.
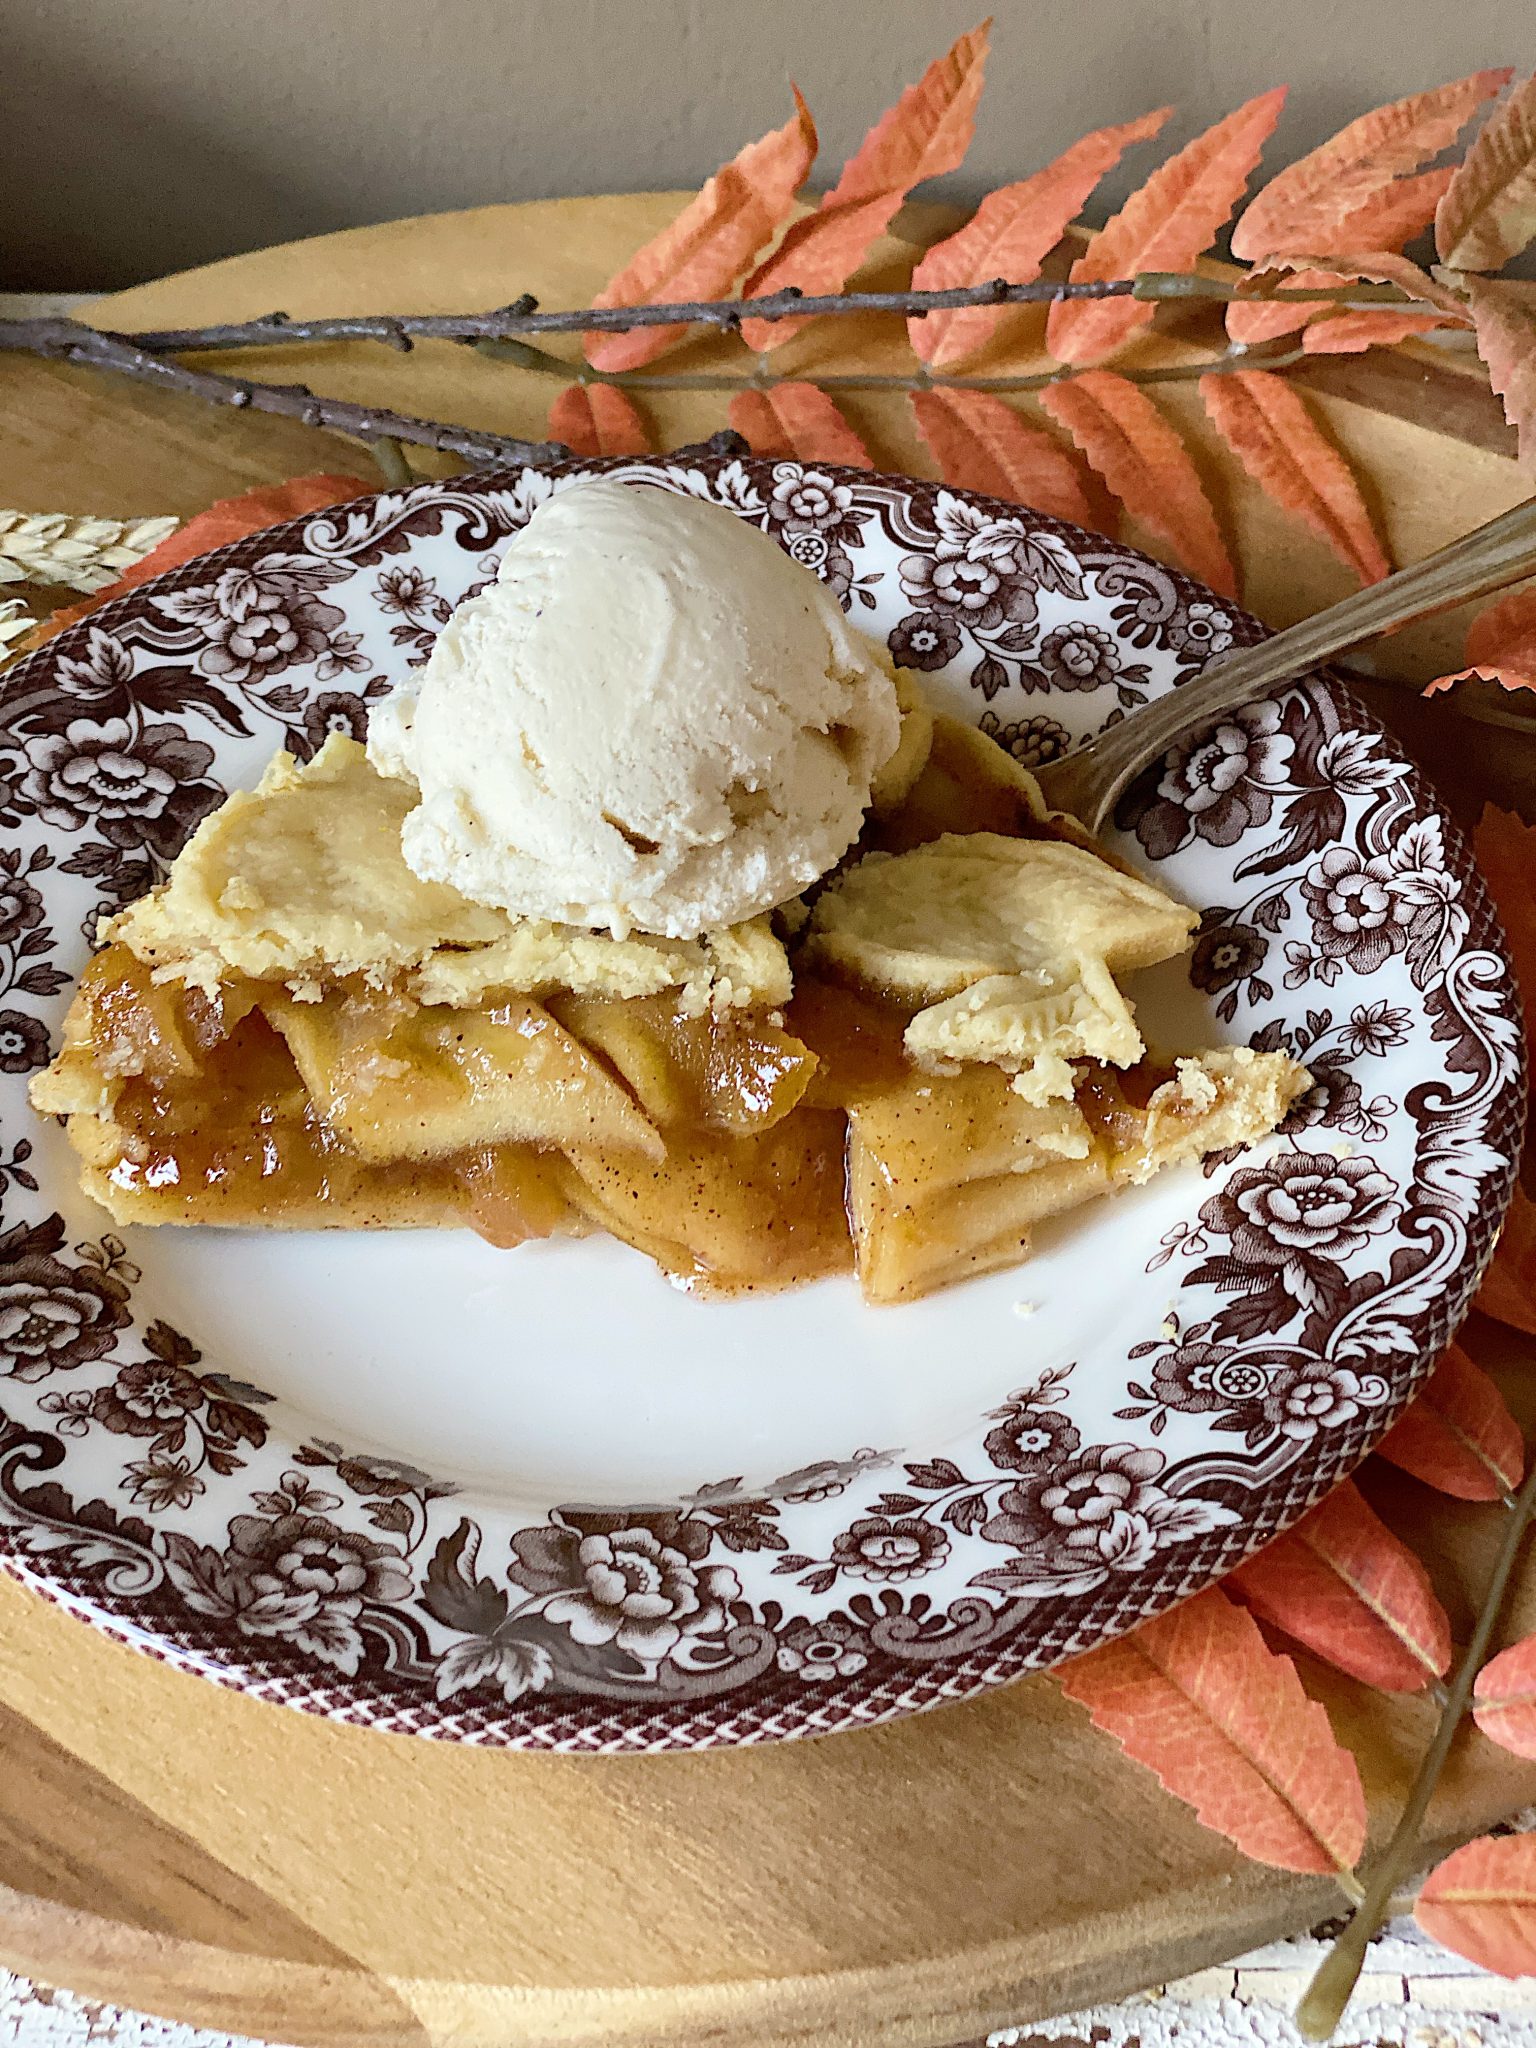
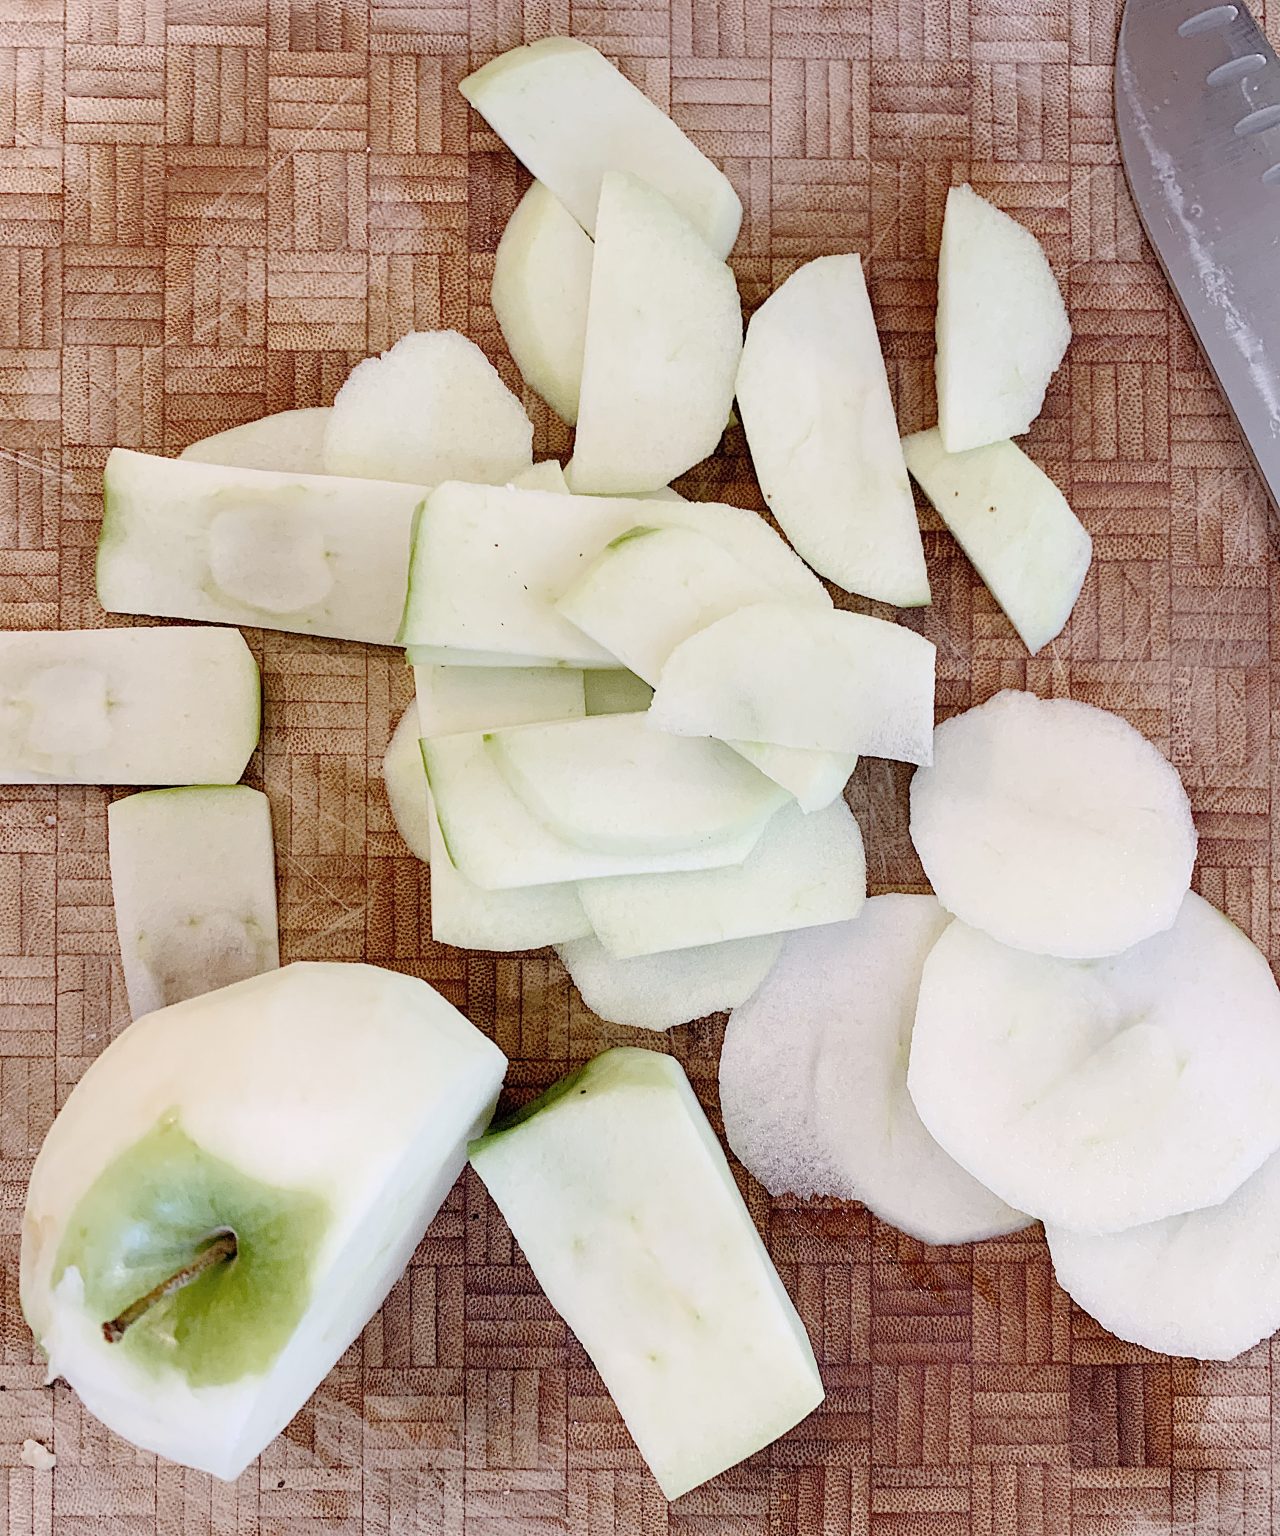
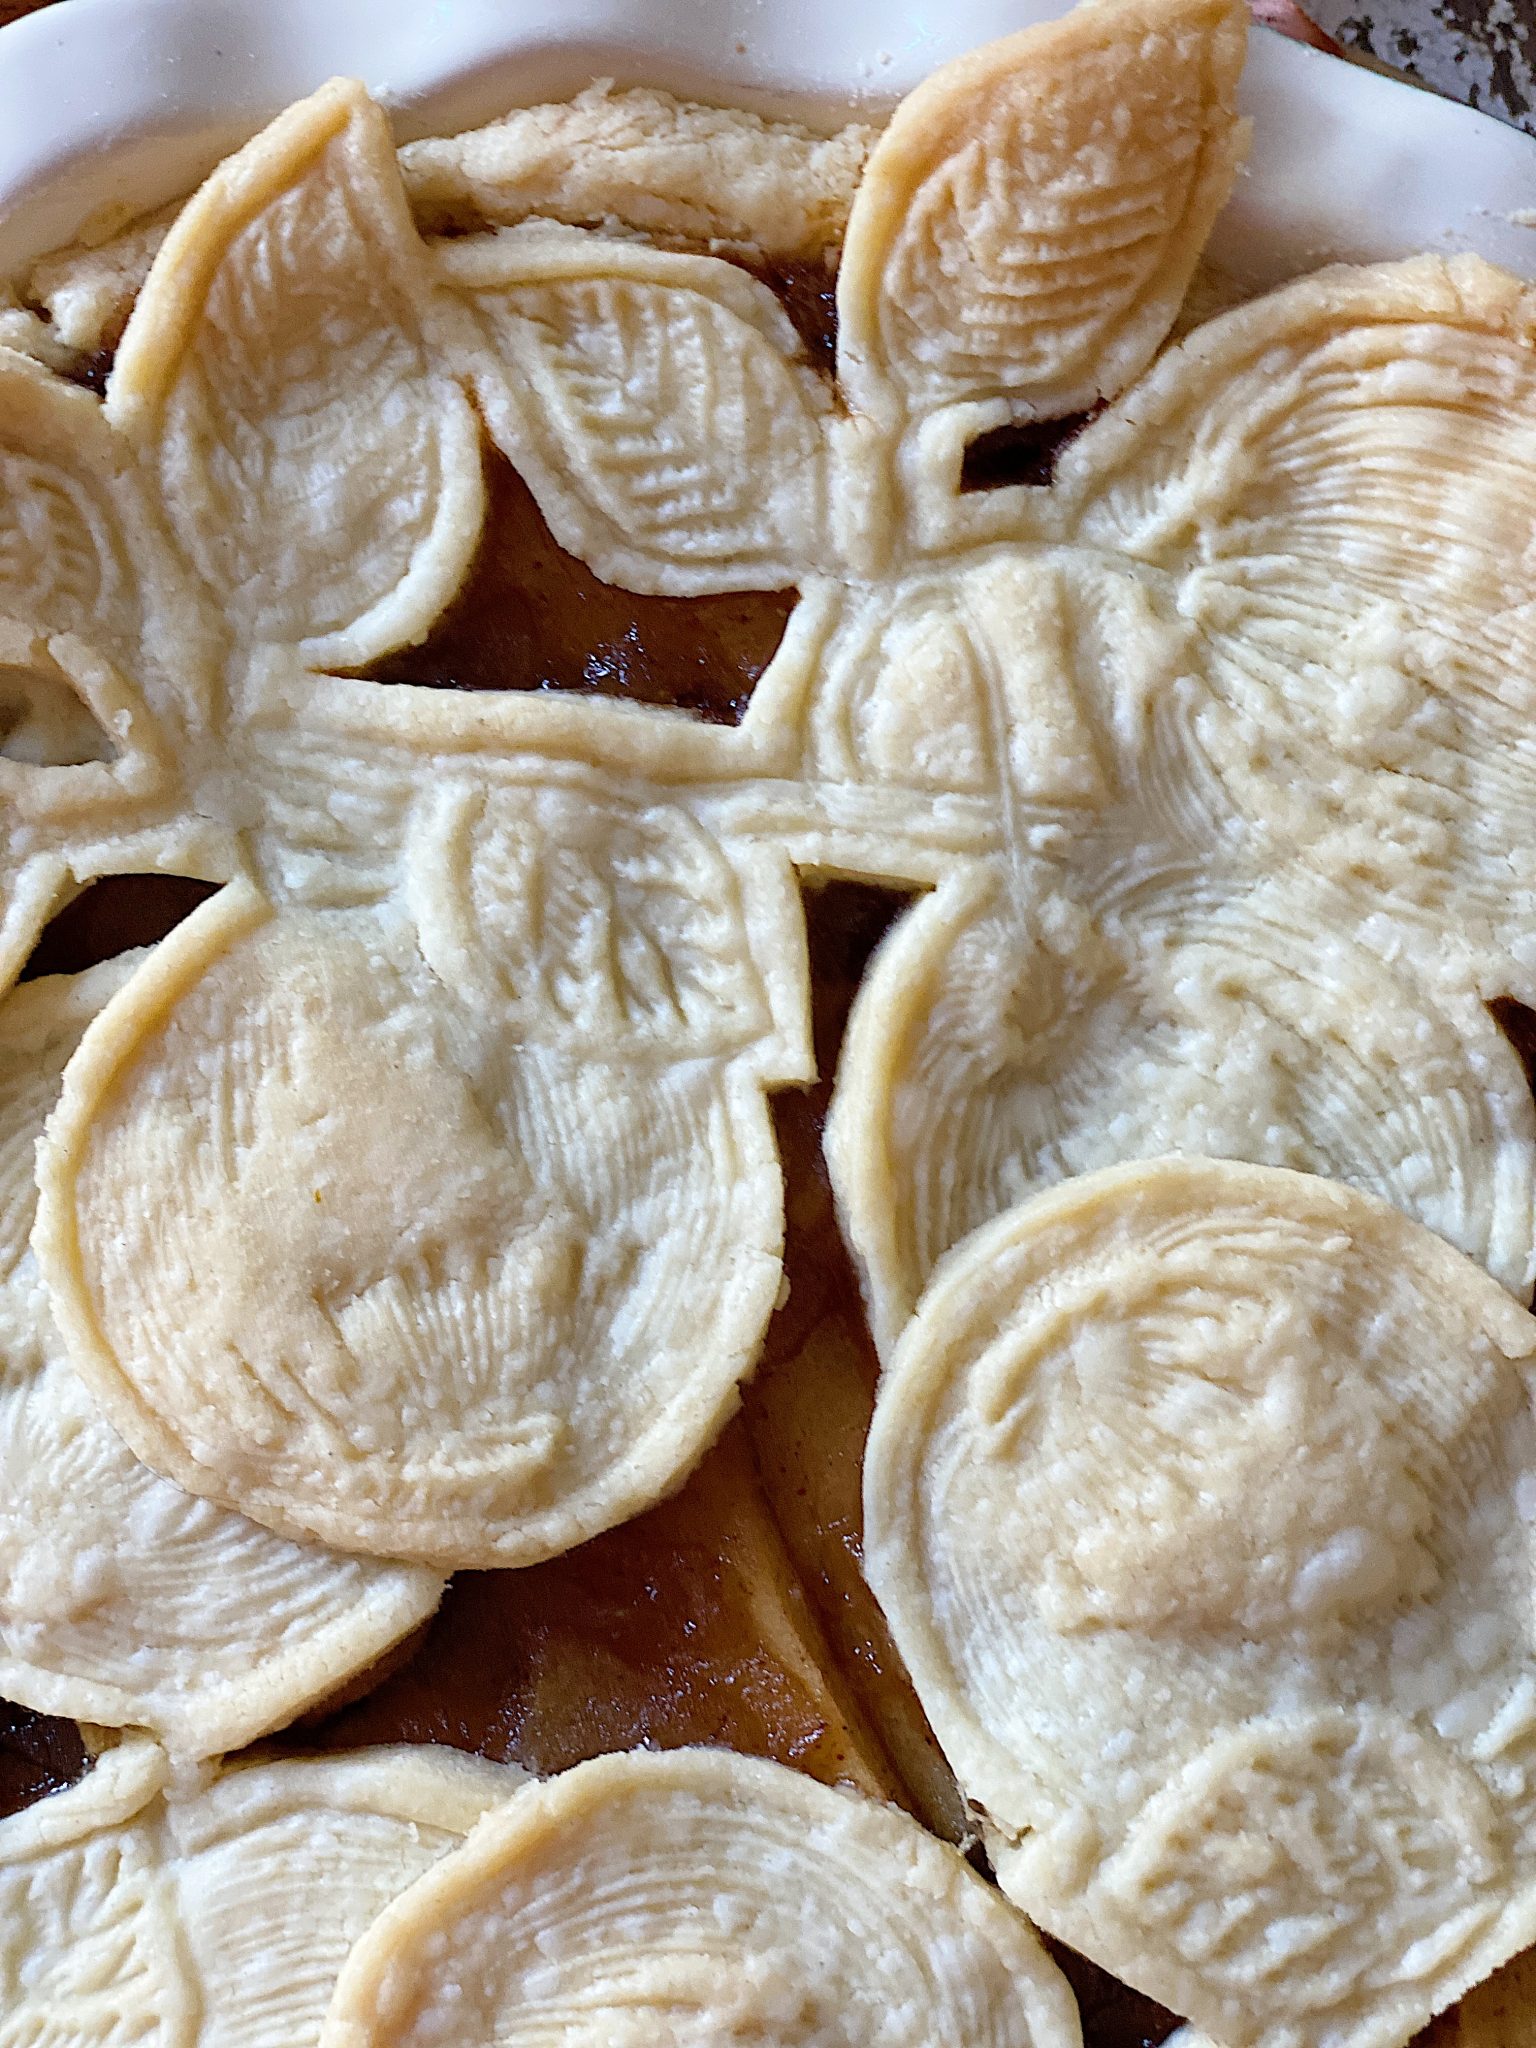
I sliced the apples thinly on purpose so that the pie filling would lie flat to highlight the decorative pie crust.
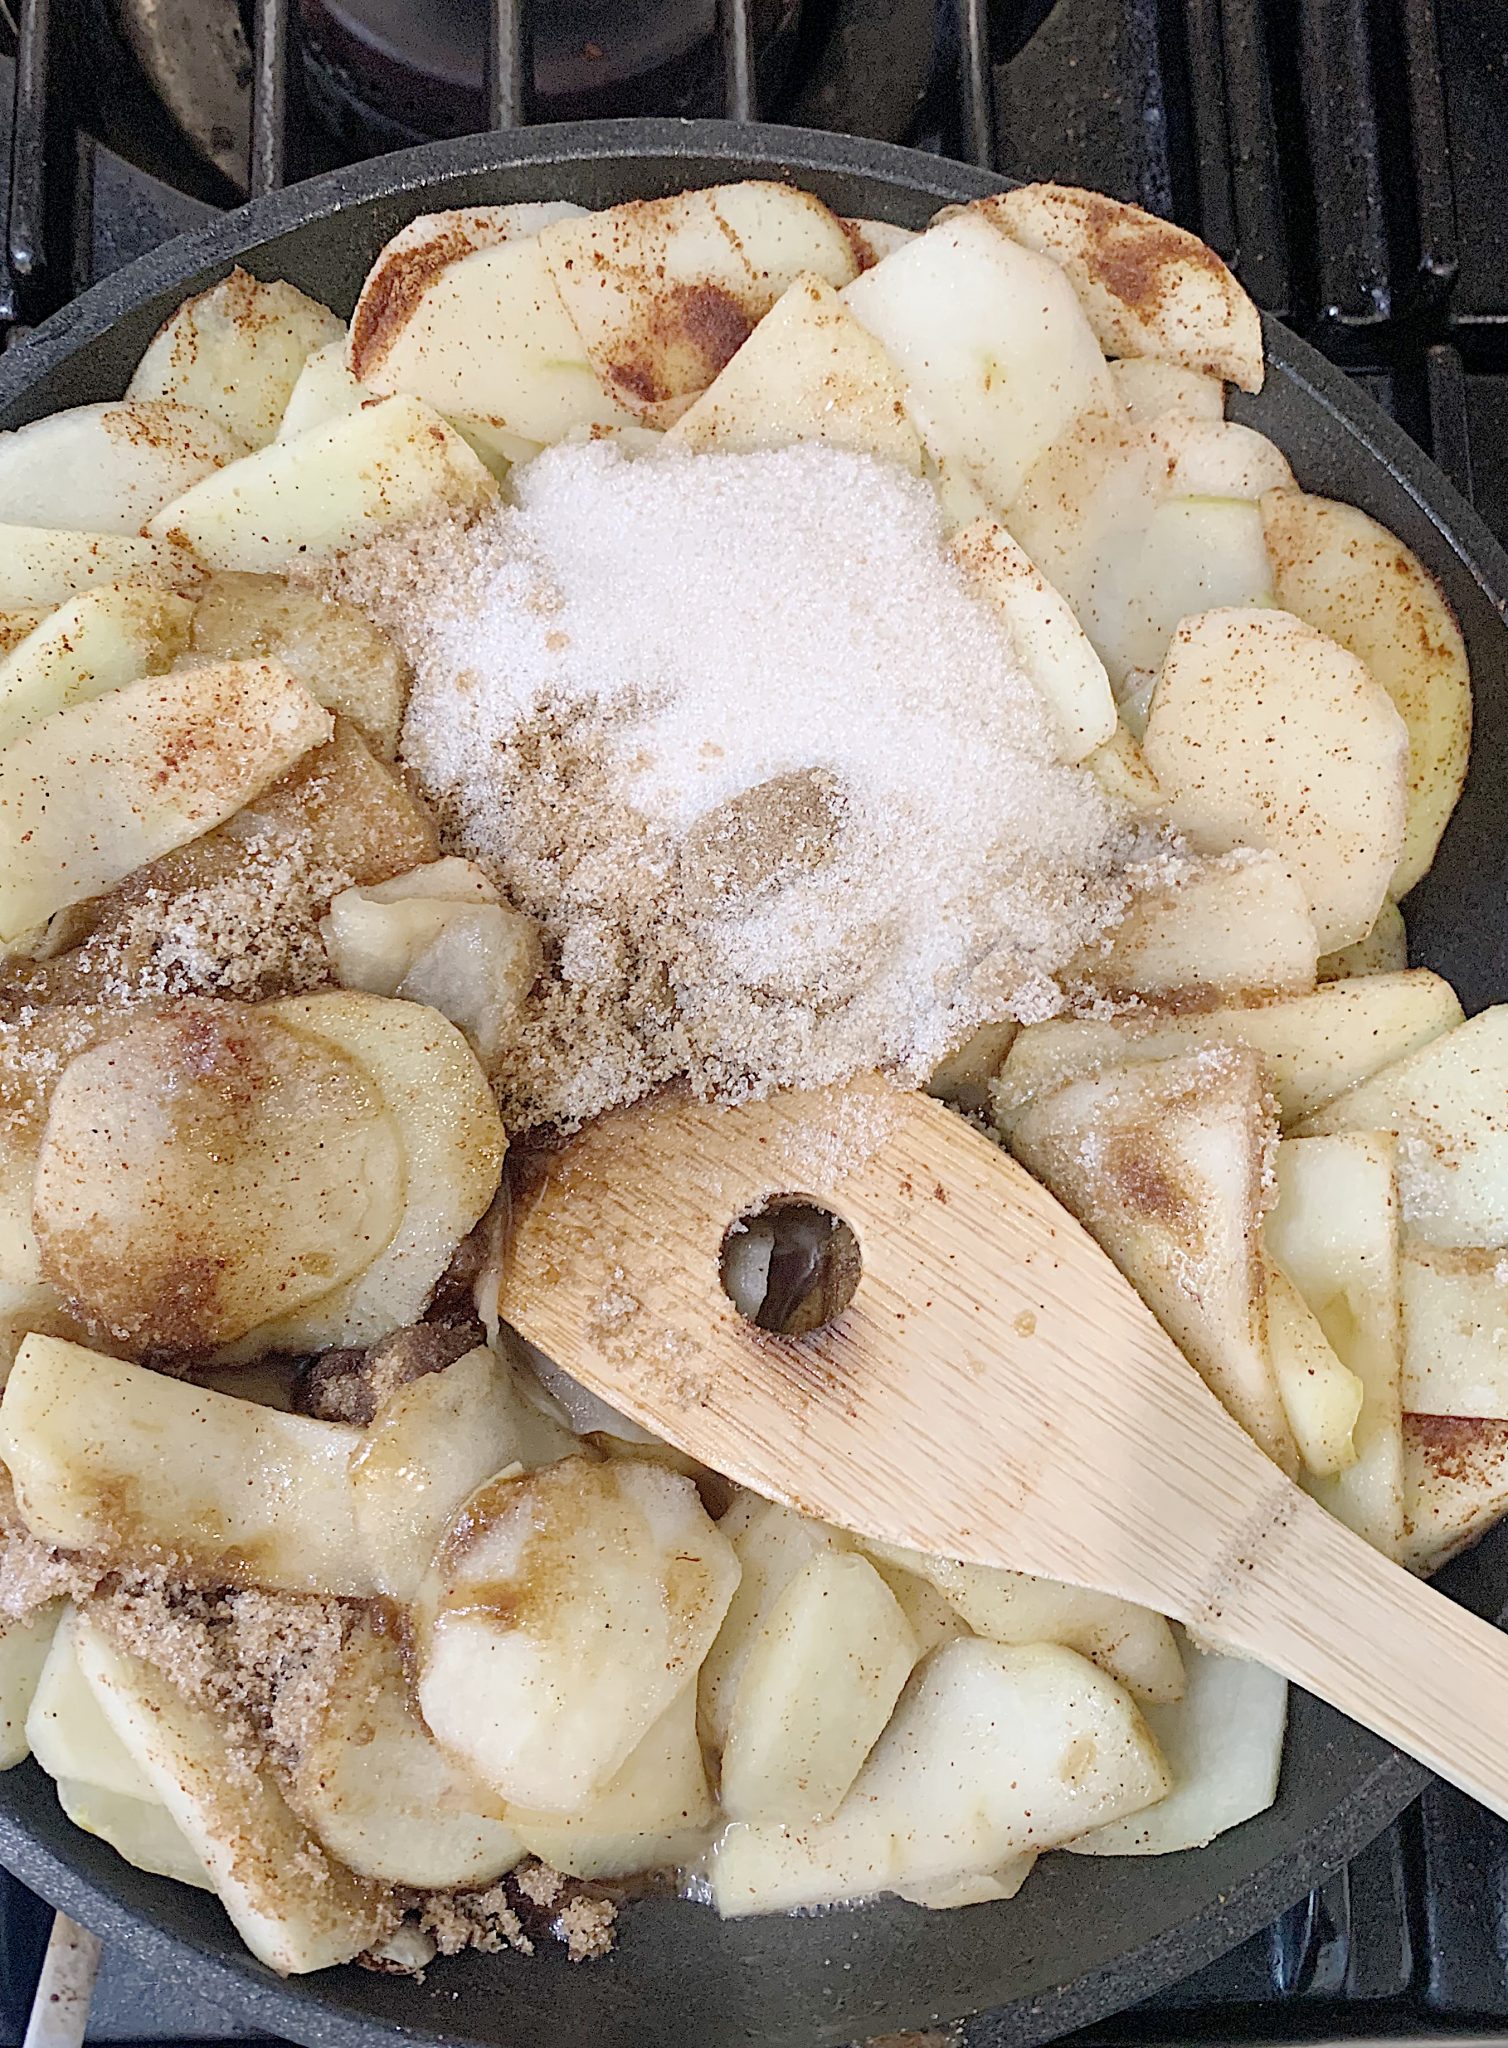
Next, I added the apples to a warm saute pan with butter and sauteed them quickly before adding the cinnamon and nutmeg, followed by the sugars. Oh my gosh, my kitchen always smells so incredible at this point!
When I pulled the decorative pie crusts out of the refrigerator they were so easy to move as the cool air firmed up the pie crust! I added the filling to the dough-lined pie pan, making sure the filling was flat and even.
Warm Apple Pie
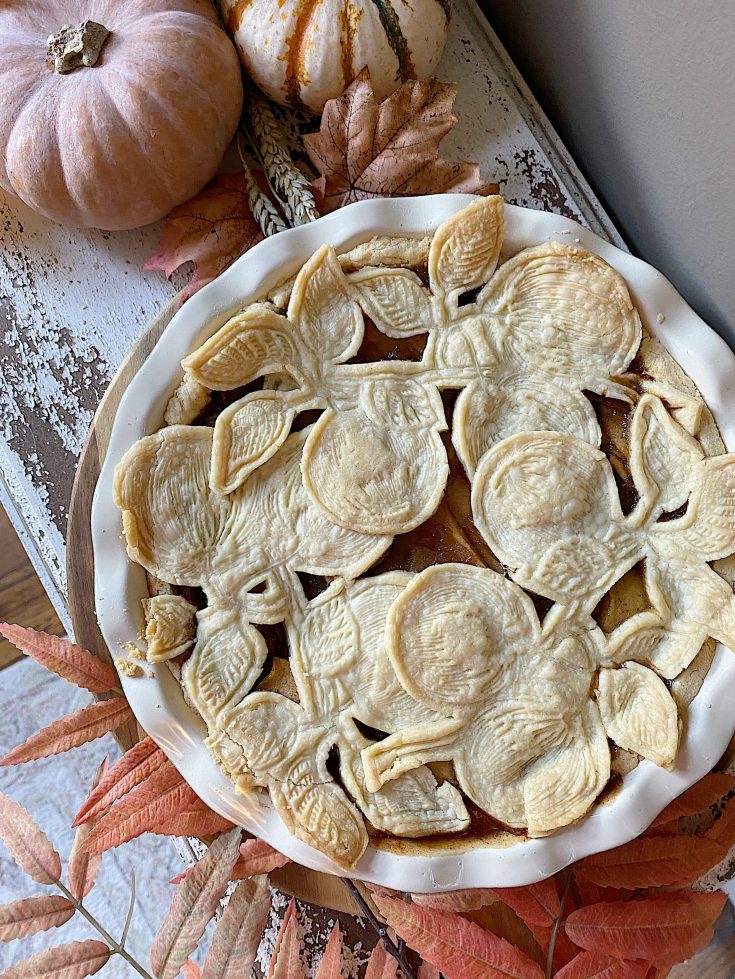
This apple pie is not only delicious but it looks amazing. The top crust was made from stamps from Iron Orchid Design.
Ingredients
- Pie Crust:
- 6 cups all-purpose flour
- 1 1/2 teaspoon salt
- 4 sticks unsalted butter
- 10 tablespoons margarine
- 8 - 10 tablespoons cold water
- Apple Pie Filling
- 6 - 7 cups granny smith apples, peeled, cored, and sliced (feel free to combine types of apples)
- 3 tablespoons butter
- 1/2 cup sugar
- 1/2 cup brown sugar
- 1 1/2 tsp. cinnamon
- 1/2 tsp. nutmeg
- 1 tablespoons cornstarch
Instructions
- In a large bowl, sift the flour and salt.
- Cut the chilled butter and margarine into 1-tablespoon pieces and add to the flour mixture. Use a pastry cutter to mix the flour and shortening together.
- Work the dough until pieces of butter are about the size of large peas. Add the ice water little by little until the dough just barely begins to hold together. The dough is ready when you pinch the dough and it holds together in your fingers. Be careful not to add too much water.
- Wrap and chill for at least 1 hour.
- To make the pie crust with a Food Processor, add flour and salt into the machine. Cut the chilled butter and margarine into 1-tablespoon pieces and add to the flour mixture. Process a few seconds until the dough resembles large peas. Add the water, one tablespoon at a time, processing very briefly. The whole process would take 20 to 30 seconds.
- To make the pie crust for the bottom of the pie pan and pastry cutouts:
- If pastry has been chilled for a long time, let it sit at room
temperature for at least 15 minutes before rolling. - Lightly flour a pastry board, marble counter, or kitchen
counter. Divide the pastry in half. Pat each piece of pastry into a flat round. - Lightly flour the rolling pin. Roll pastry in one direction only, turning pastry continually to prevent it from sticking to the surface. Place in pie pan.
- Repeat with the next ball of dough, rolling the pastry out into a large round. Cut pastry into desired shapes with cookie cutter, Iron Orchid form or other cutter.
- Refrigerate the cut pastry until ready to assemble for baking.
- Prepare the apples
- Preheat oven to 350 degrees.
- Melt 3TBL butter in a frying pan. Add apples and cook 3 -4 minutes.
- Add the cinnamon and nutmeg.
- Add sugar and cornstarch a cook three minutes longer. Spoon mixture into prepared crust and top with flower-shaped crusts.
- Bake for approximately 25 - 35 minutes (depending on your oven. Enjoy!
A couple of quick tips for pie-making. I have been making pies for years. And years. And years. Here are some tried and true tips:
- Use an adjustable rolling pin to roll out your dough. An adjustable rolling pins helps ensure that your pie crust is even without any lumps or bumps. Lumps and bumps prevent a pie crust from baking evenly. An even pie crust is also prettier, so if you are doing cutouts or lattice, an even pie crust is critically important.
- I always put my pie pan onto a cookie sheet to bake. The cookie sheet makes it easier to put into and remove from the oven and is handy in case of seepage.
- Crimp foil around the edge of your pie to prevent the delicate edges from burning. I remove the foil about half way through the bake so that the edges brown, but don’t burn.
- In case you are new to baking, you use pie weights only when you are par baking, fancy for partially cooking. You par bake a pie crust when the filling requires a shorter bake than the pie crust needs. For this apple pie, the crust is not par baked. The raw dough is placed into the pie dish, filled with the apple filling and baked.
- When using a decorative crust, slice the apples thinly, rather than cubing or chopping the apples. Slicing the apples ensures that the decorative crust will lie flat and not get distorted by a lumpy filling.
- I always err on the early side of any baking recipe. You can always add time, but once overcooked, you can’t take time away. For this pie, I set the timer for 20 minutes, then added another 10 and then another 5.
If you are enjoying my blog, you can sign up to receive my blog updates here.
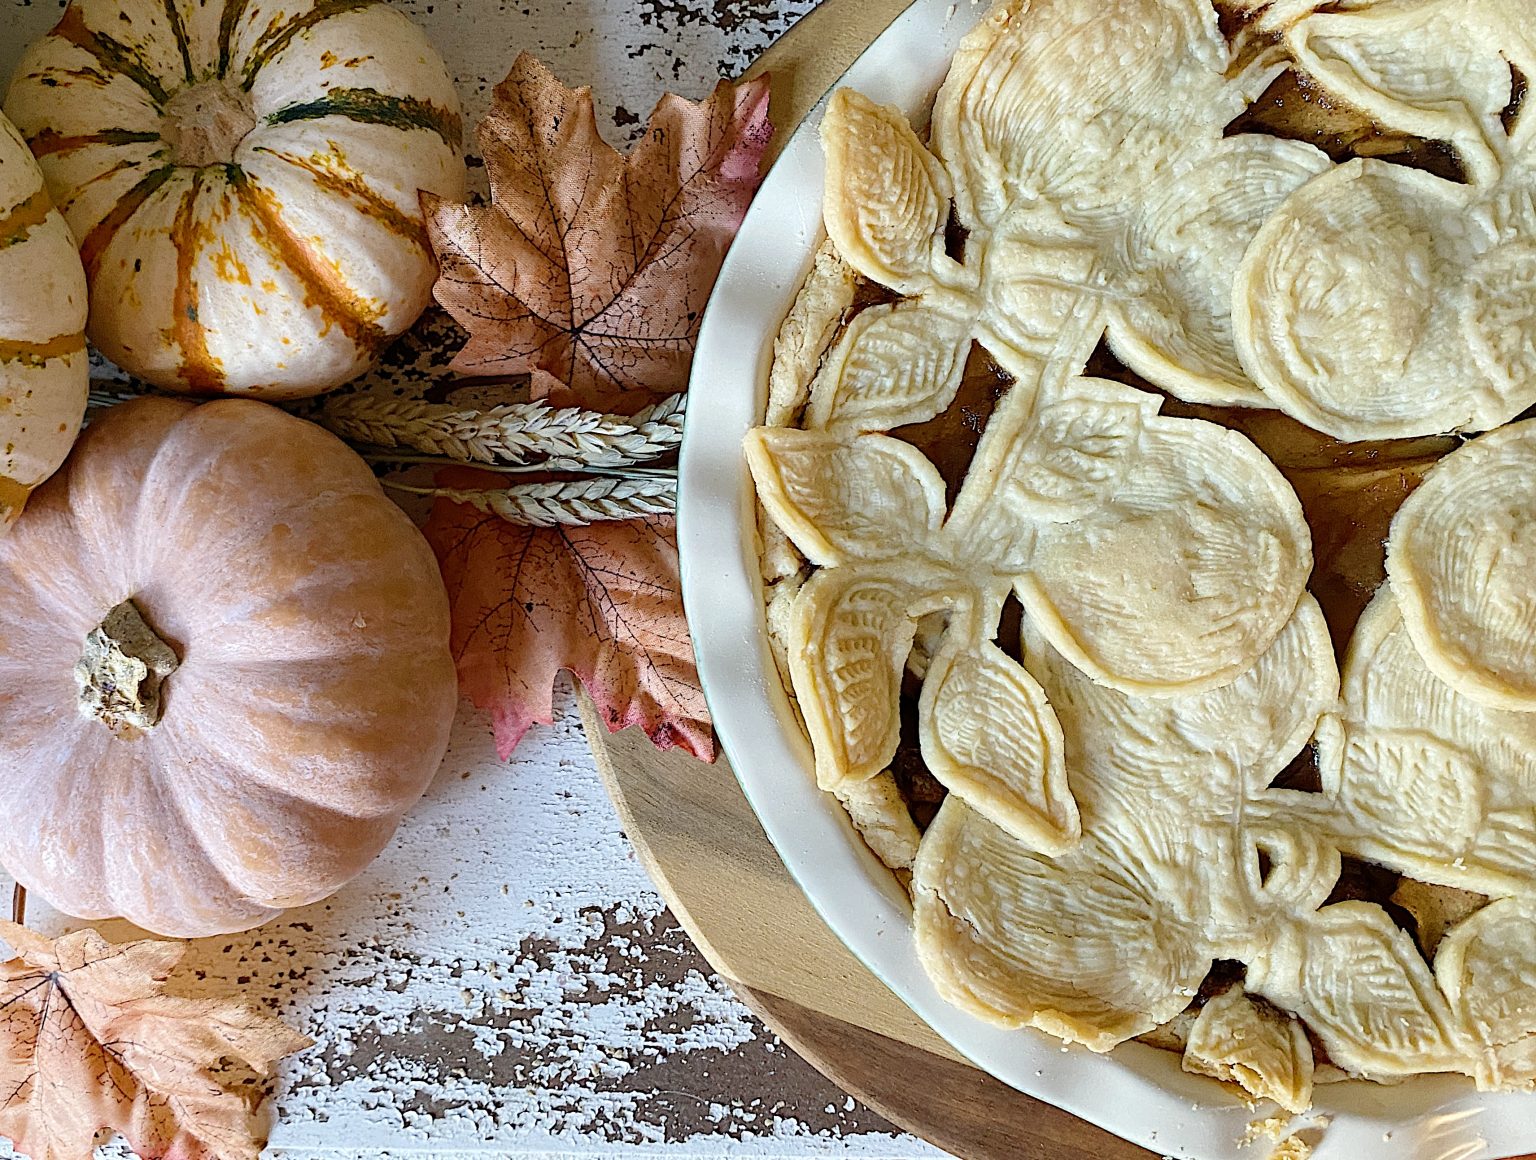
.Here is a close-up of the top pie crust. These apples and leaves look amazing.
Everything you need to make this beautiful Warm Apple Pie A La Mode!


Pin the image below to your decor boards on Pinterest (just click the Pin button in the top left corner). You can also follow along with me on Pinterest!

For more real-time updates, follow me on Instagram @My100YearOldHome


This warm apple pie recipe sounds divine! I can’t wait to try it out this weekend. Your tips on using fresh apples and the homemade crust will definitely make a difference. Thanks for sharing such a delicious treat that brings back memories!
This warm apple pie recipe sounds absolutely delicious! I love that it’s a family tradition and has such a rich history behind it. I can’t wait to try it out this weekend! Thank you for sharing! 🍏🥧
This warm apple pie recipe looks absolutely delicious! I can’t wait to try it out in my own kitchen. The tips you shared about using fresh apples and the homemade crust made my mouth water. Thank you for sharing such a wonderful recipe!
This warm apple pie recipe sounds absolutely delicious! I love that it has been passed down through generations. I can’t wait to try it for our family gathering this weekend – there’s nothing better than a homemade pie! Thank you for sharing such a beautiful tradition!
This warm apple pie recipe looks absolutely delightful! I can almost smell the cinnamon and buttery crust just reading through the post. Can’t wait to try it out for my family this weekend – it sounds like a perfect way to bring some nostalgia to our kitchen! Thank you for sharing this gem!
This warm apple pie recipe looks absolutely delicious! I can’t wait to try it out in my own kitchen. Thank you for sharing such a cherished family recipe! 🍏🥧
This warm apple pie recipe sounds absolutely delicious! I can already imagine the lovely aroma filling the kitchen. Can’t wait to try it out for my next family gathering. Thanks for sharing this classic recipe!
This apple pie recipe brings back so many wonderful memories! I can’t wait to try it out this weekend. There’s nothing like the smell of a warm apple pie filling the house. Thank you for sharing such a delightful recipe! 🍏🥧
This warm apple pie recipe looks incredible! I can almost smell it baking just by reading your post. I love that you shared your family’s history with this recipe—there’s something so special about a dish that has been passed down through generations. I can’t wait to try making it myself!
This warm apple pie recipe sounds amazing! I can almost smell the cinnamon and apples just reading the post. I can’t wait to try it during the fall season with my family. Thanks for sharing such a comforting recipe!