Kitchen Refresh & Repurpose Project, Part 2
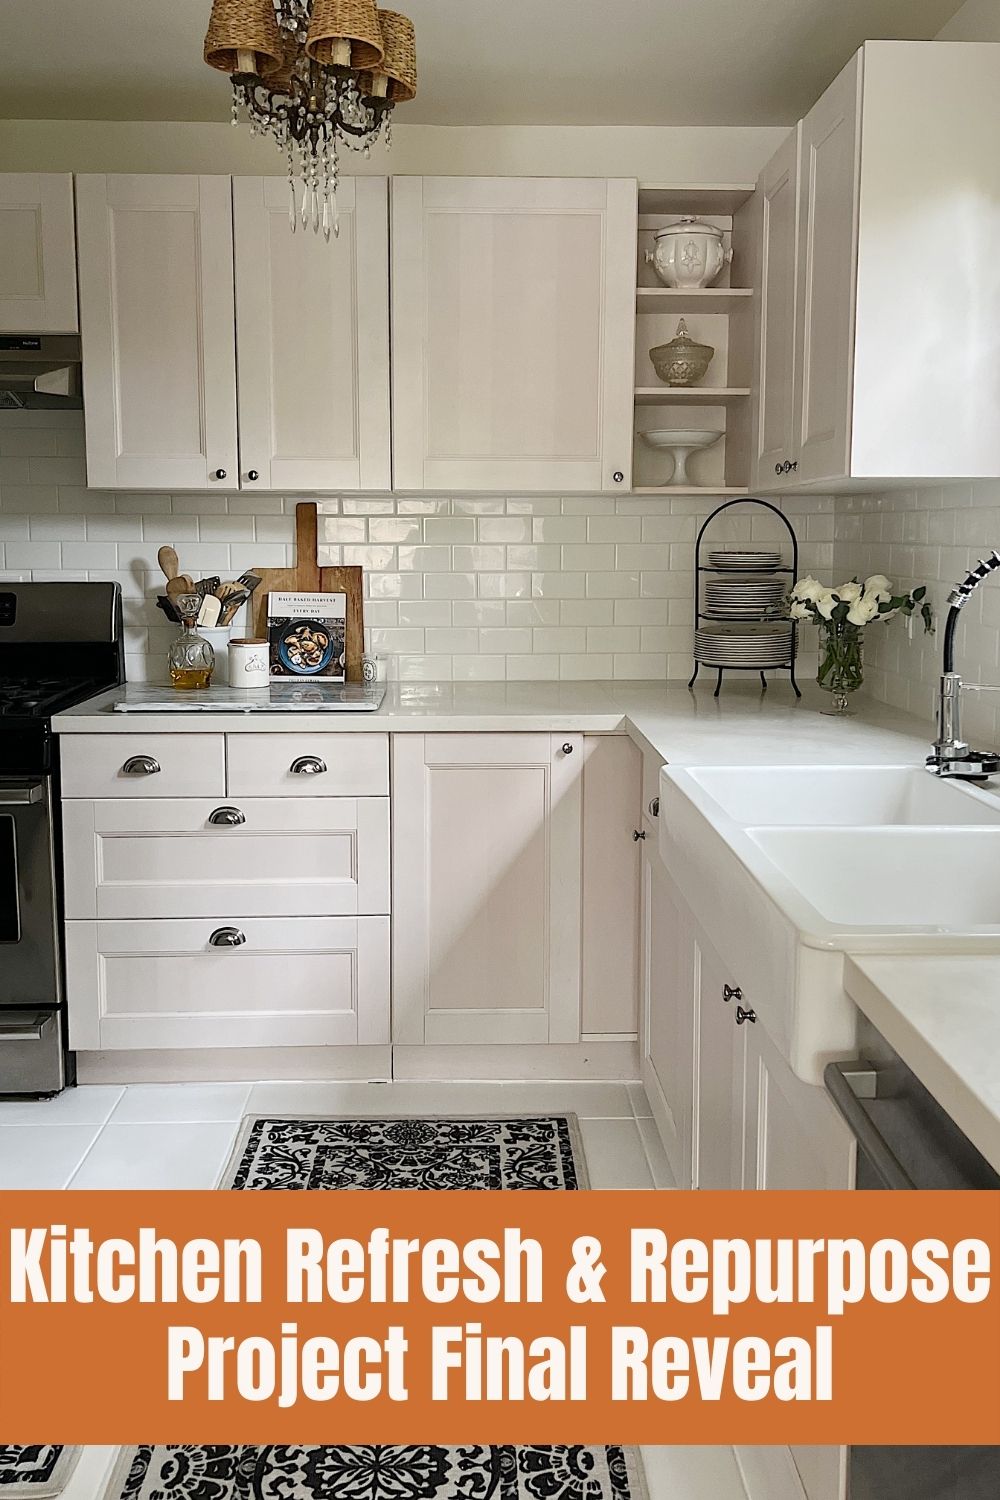
Today is the second part of our Kitchen Refresh & Repurpose Project. I cannot believe that this is even the same kitchen!
If you haven’t already seen it, be sure to check out my previous post about my Kitchen Refresh & Repurpose Project, Part 1. Today, I am sharing the final details and the full reveal! You are not going to believe how a little creative thinking and a lot of “we can make this work” paved the way for this wonderful kitchen to come to life.

Part 1 included all of the details about how we hatched this plan, the before photos, and the in-process photos. Today, I am sharing the last few details, the tile, paint, styling, and all of the after photos so that you can see each area of the kitchen.
Subway Tile Backsplash
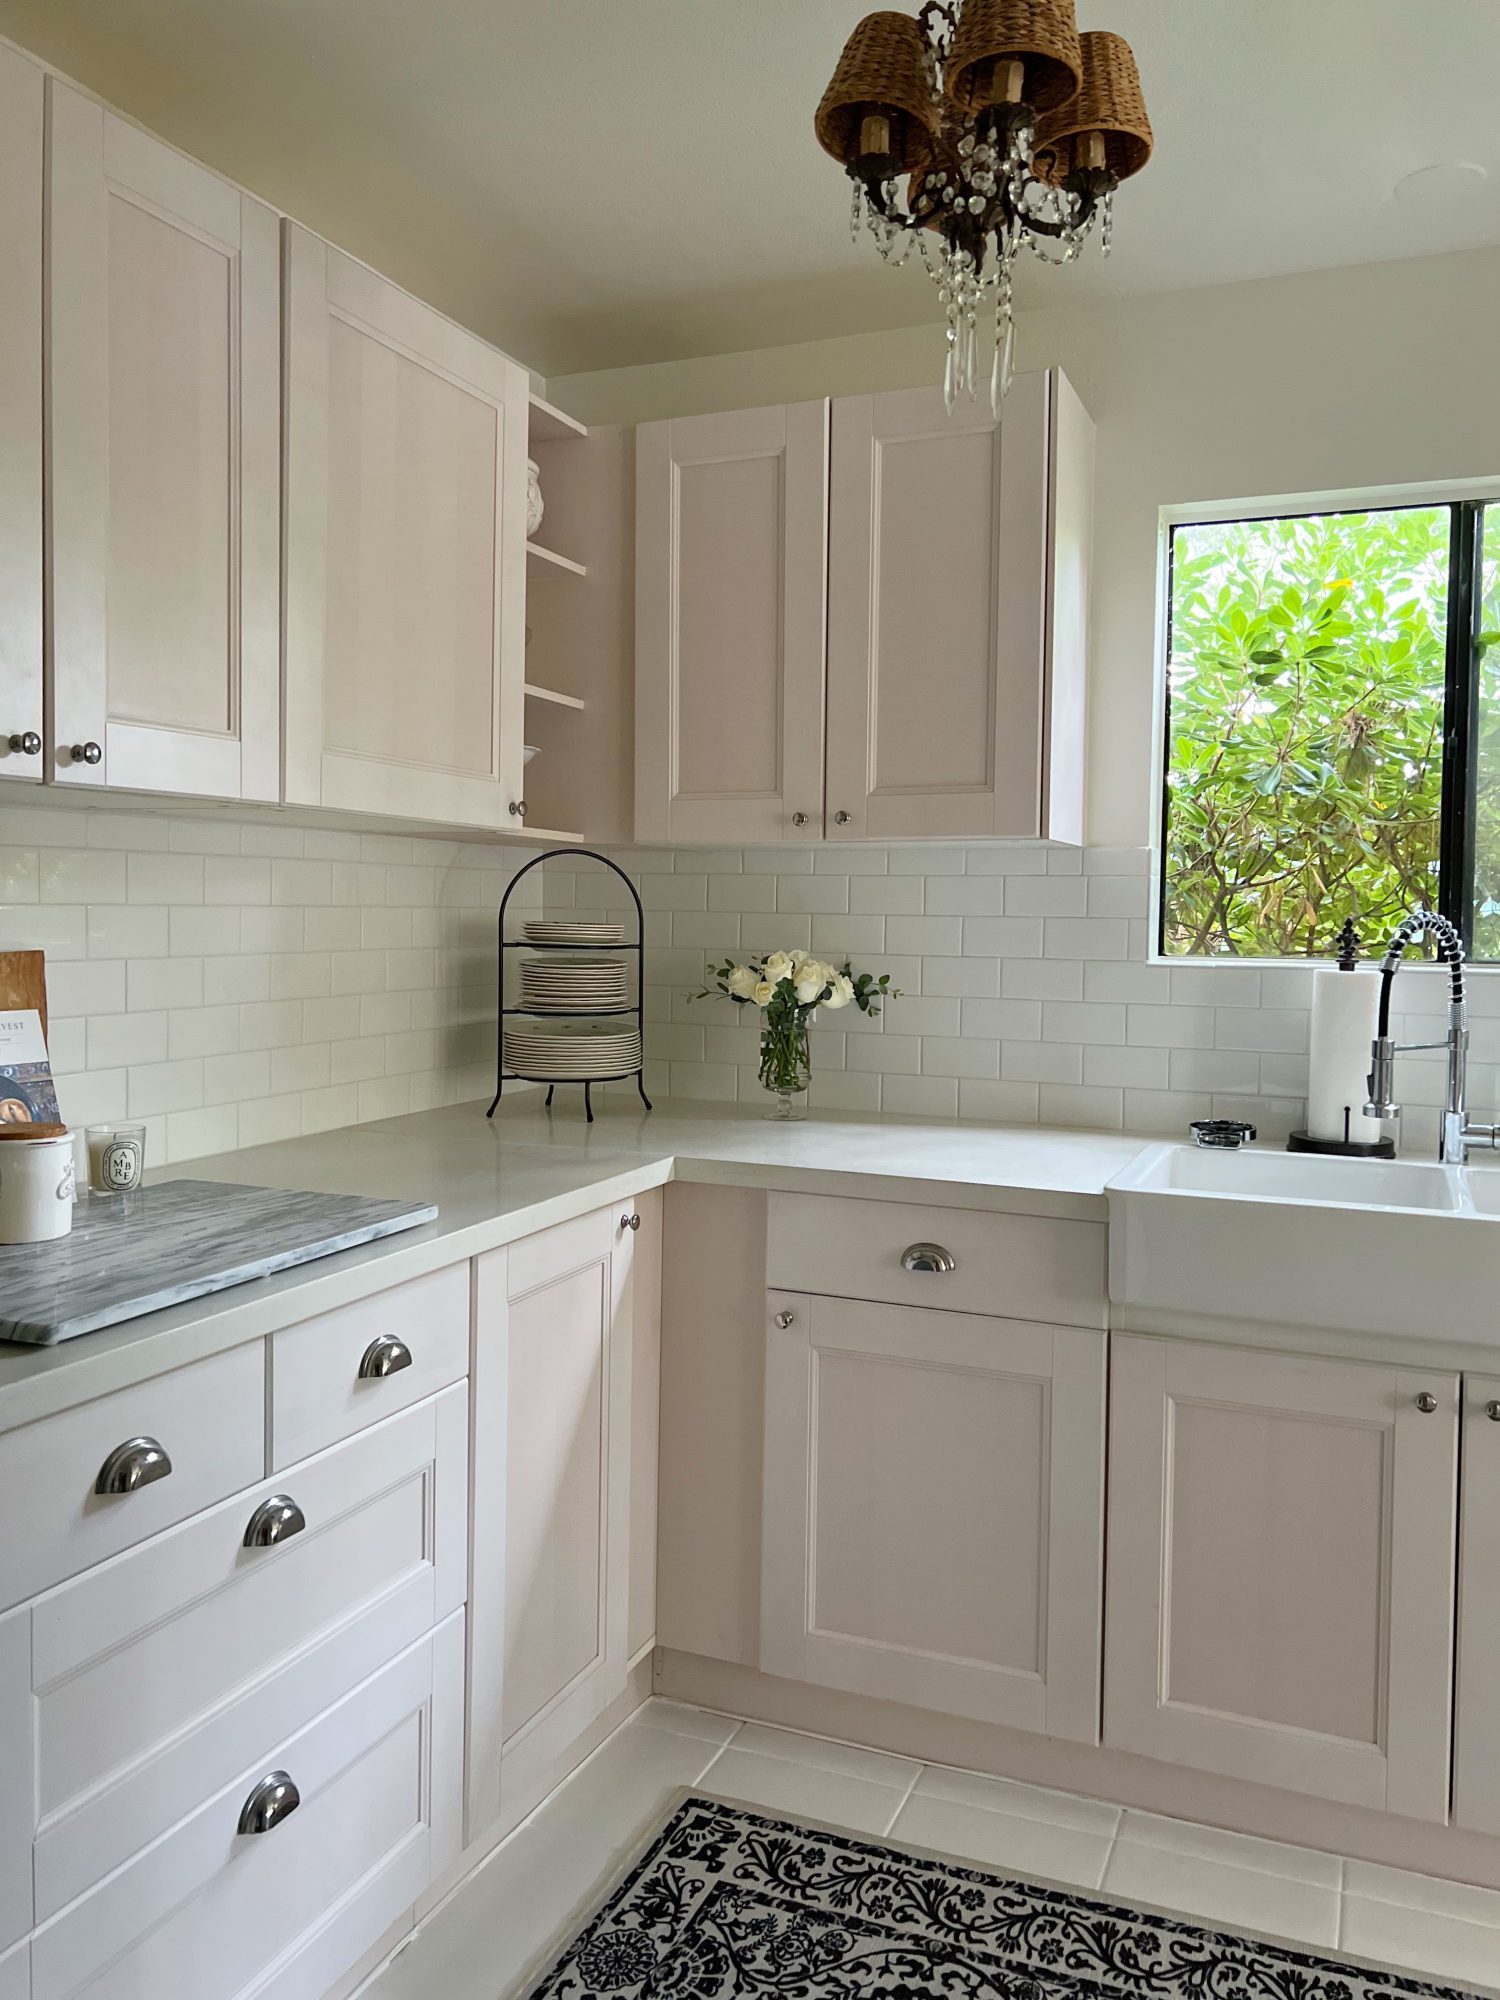
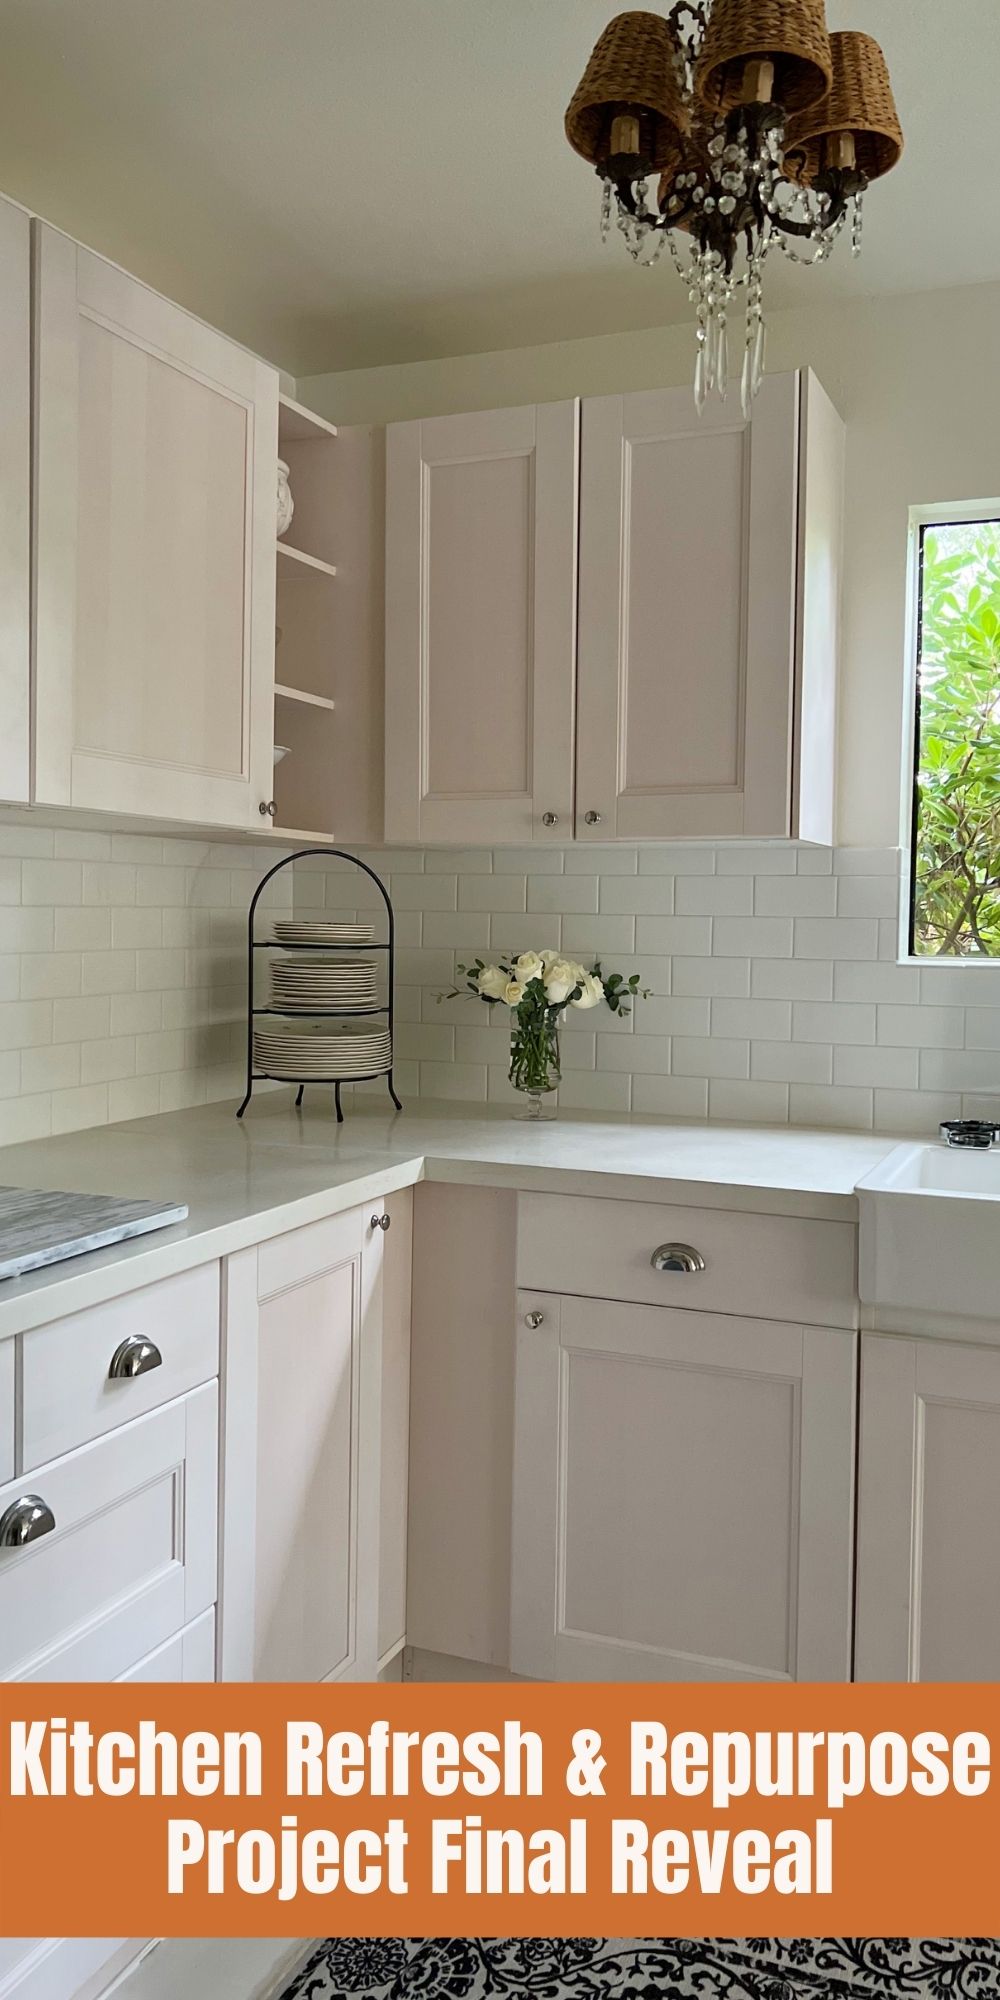
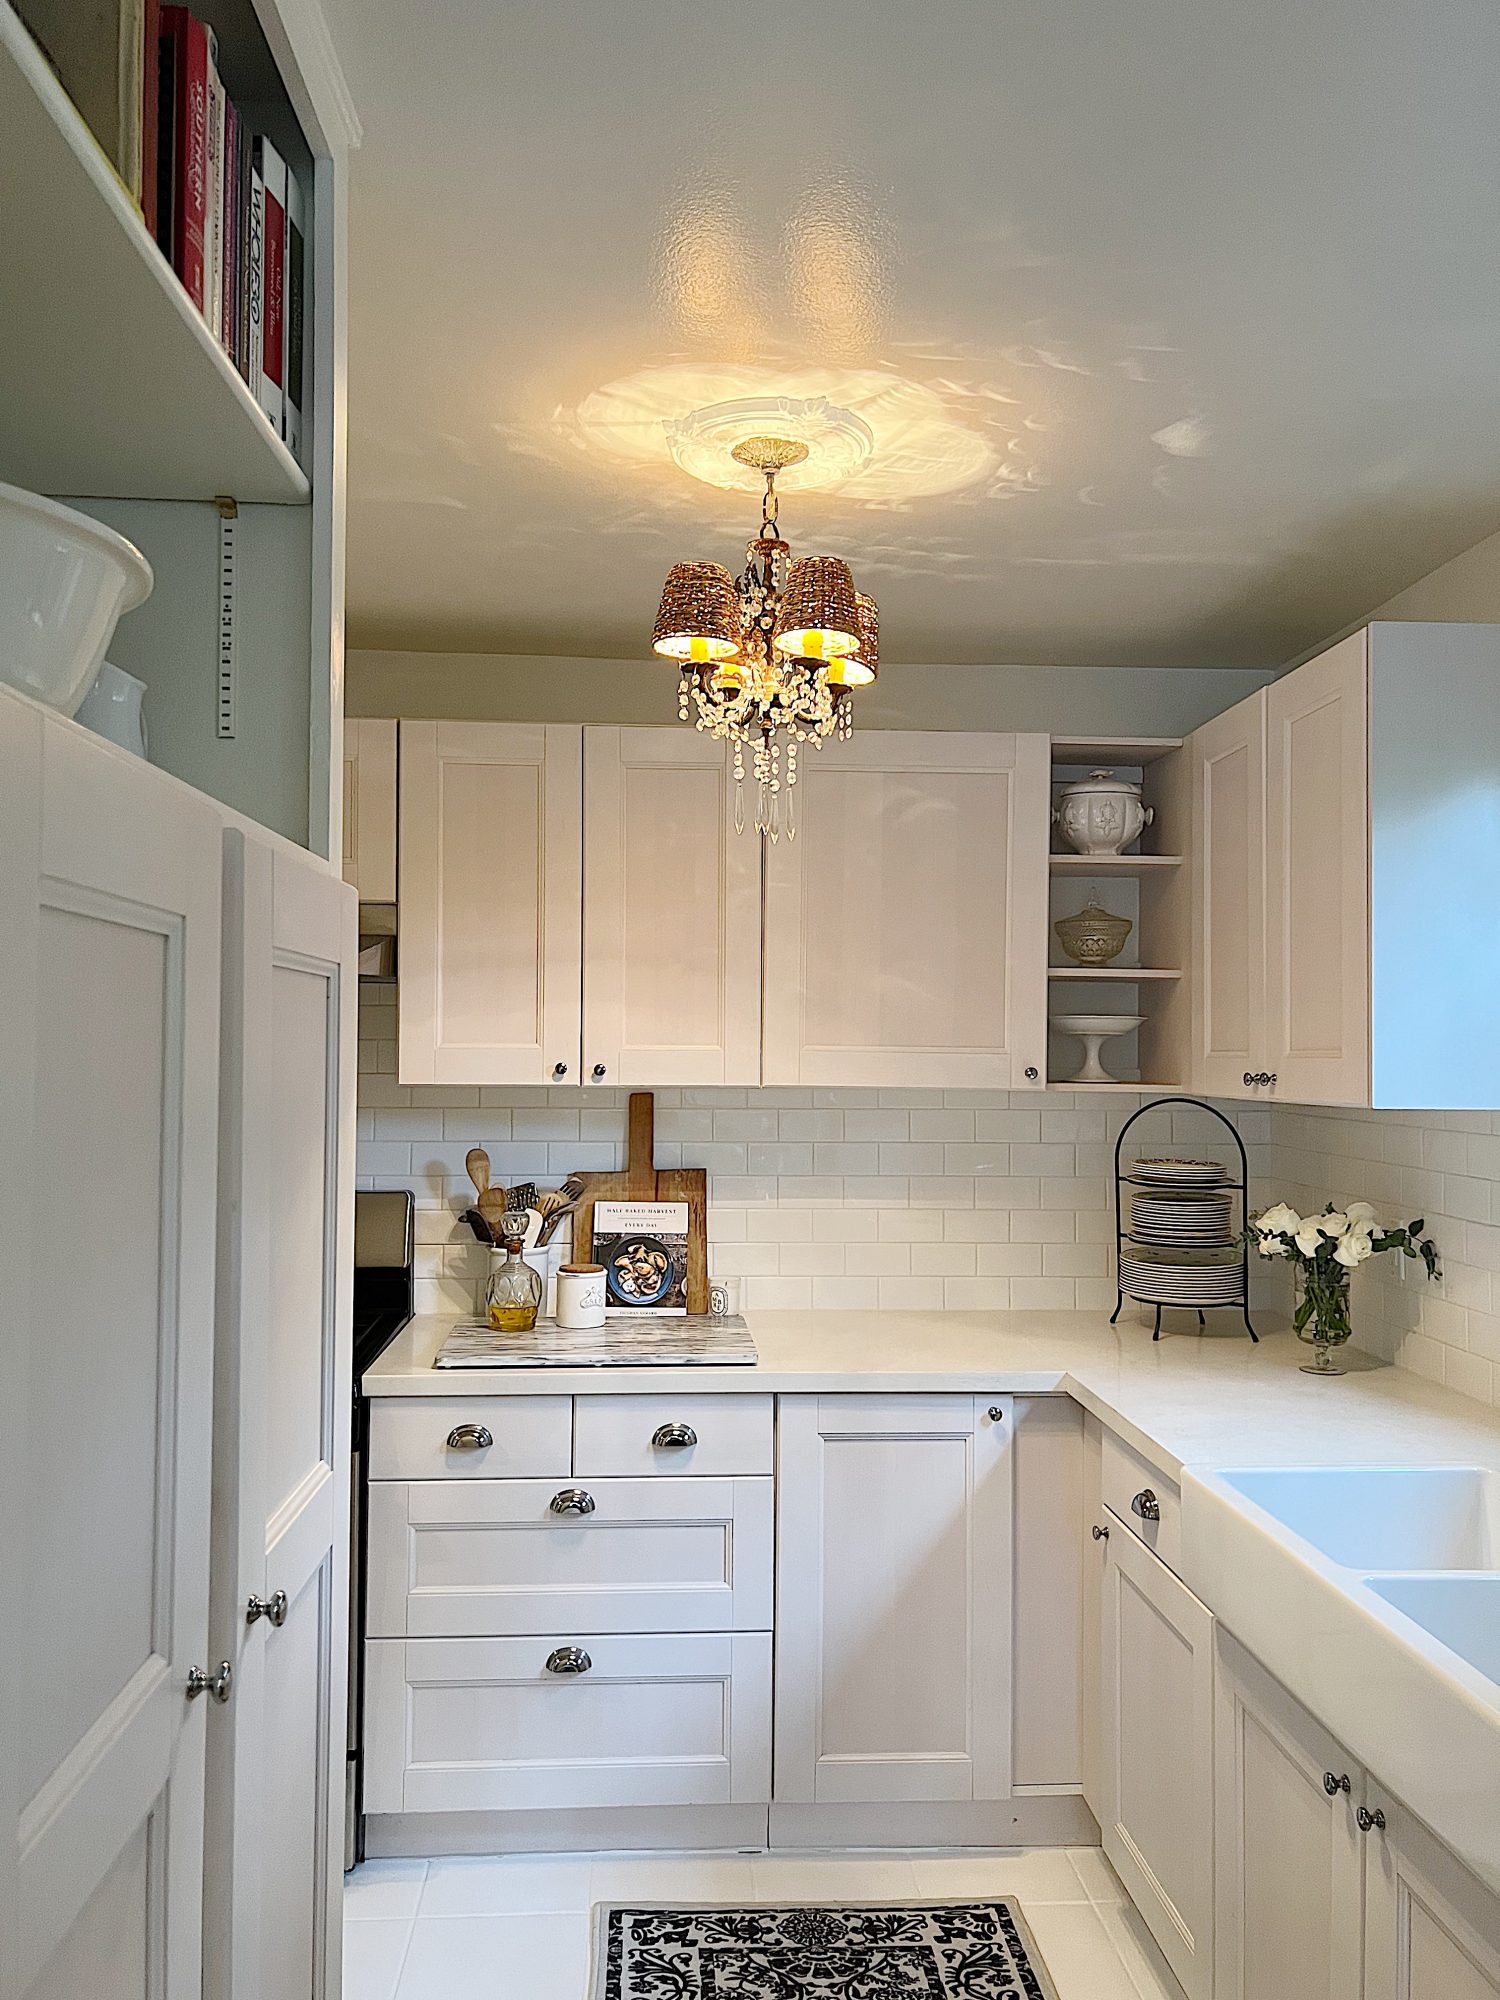
Maryliz decided on white subway tile for the backsplash due to its classic sensibility. It’s been around forever, it will be around forever, it’s timeless. To make cleanup next to the stove easy and as an added layer of heat protection for the wall next to the new stove, Maryliz also had the wall tiled with the subway tile. Doesn’t it look incredible?
Paint
Once all of the cabinets, countertops, and appliances were installed and the subway tile was added, we needed to paint.
The ceiling and the small amount of wall space left needed a clean and bright coat of paint. I went with my go-to color, Swiss Coffee. It really is incredible how a coat of paint makes such an immense difference!
How to Paint a Tile Floor

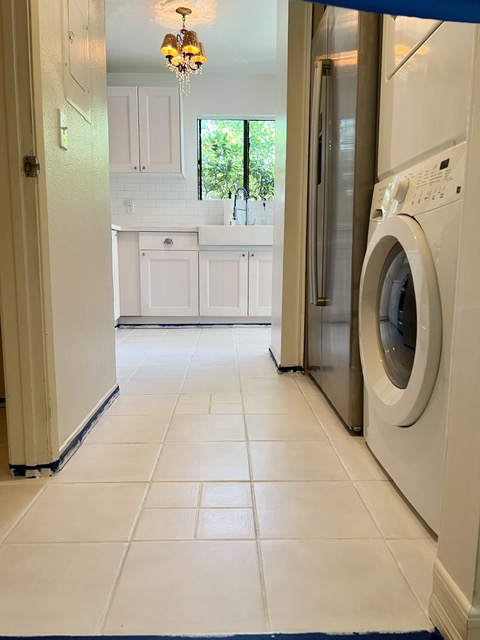

The last detail was the pink-ish floor tile. It was really dated and had five decorative tiles that had a green design. The pink and green tile was definitely not part of this gorgeous new kitchen space concept.
Replacing the flooring was not within our budget, so we decided to try something new and paint it. The internet has a ton of articles about how to successfully paint floor tile.
We cleaned, sanded, cleaned again, and then had the floor primed and then painted with two coats of paint. We used MonoBond High Adhesion Primer in white and then two coats of Life Deck Color Seal Floor & Deck paint in white base.
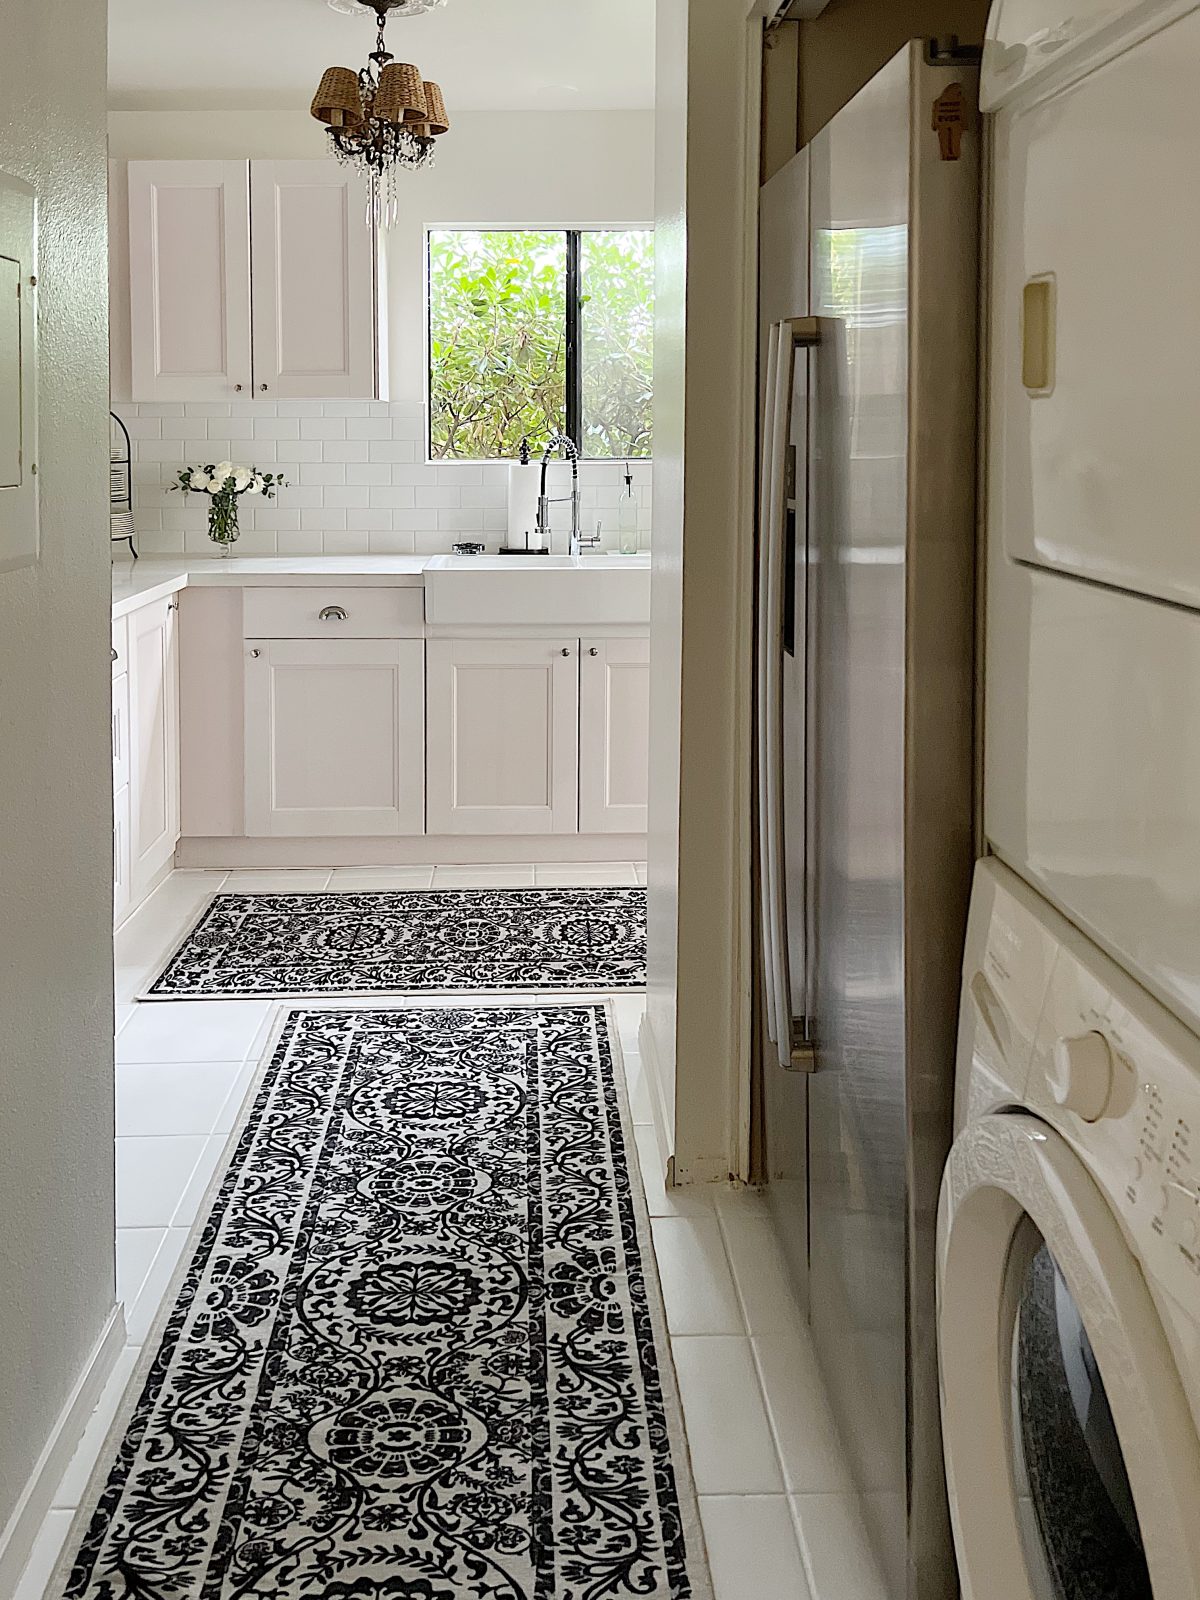
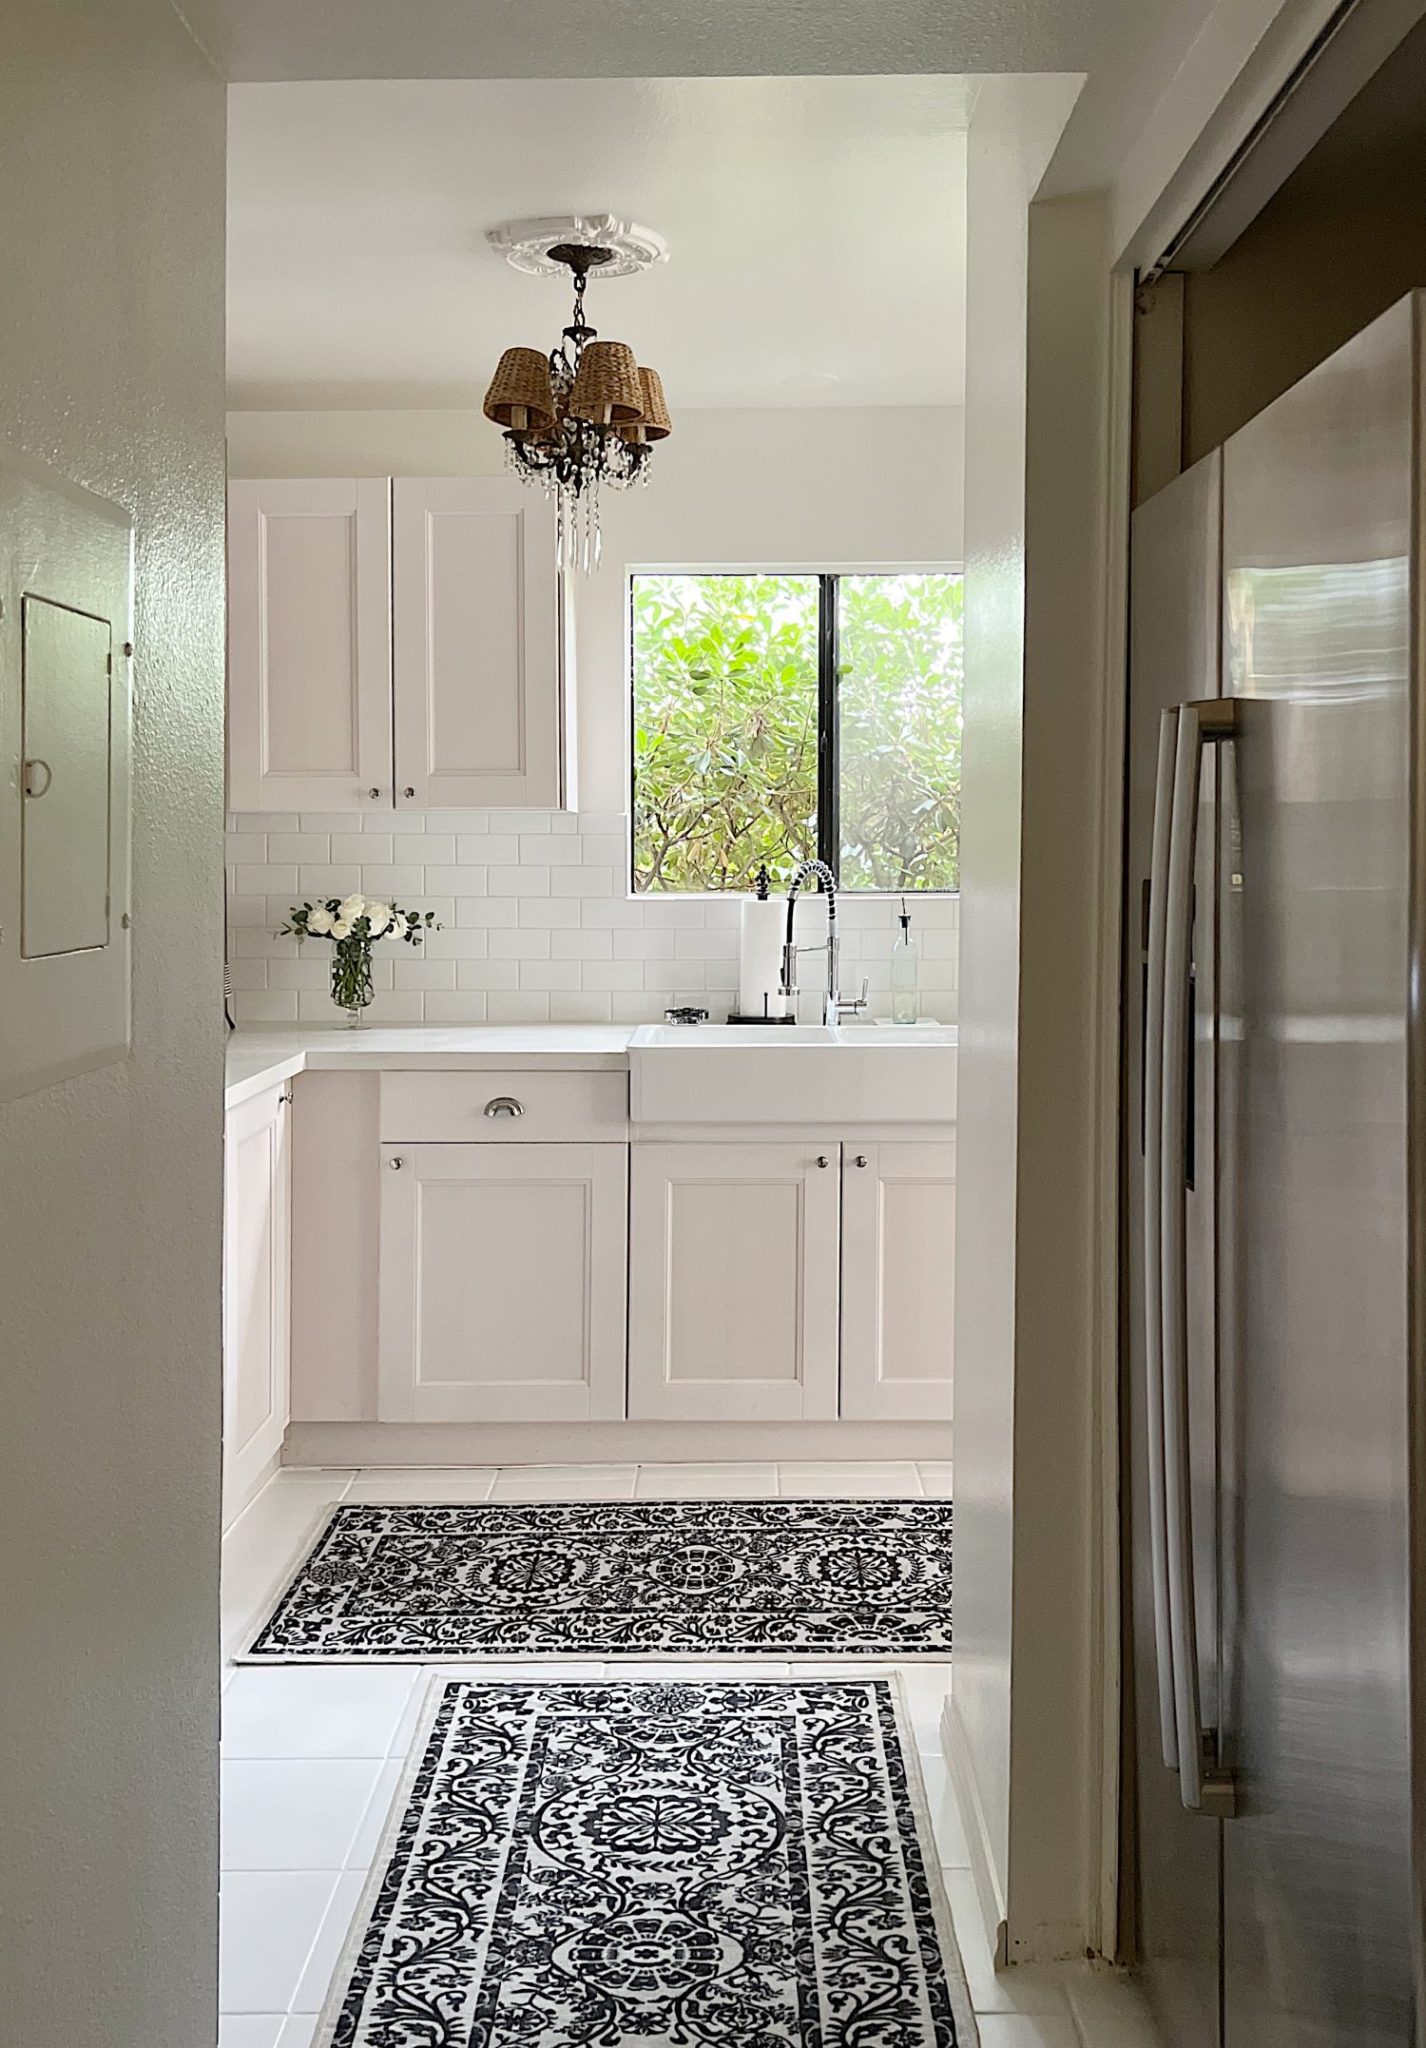
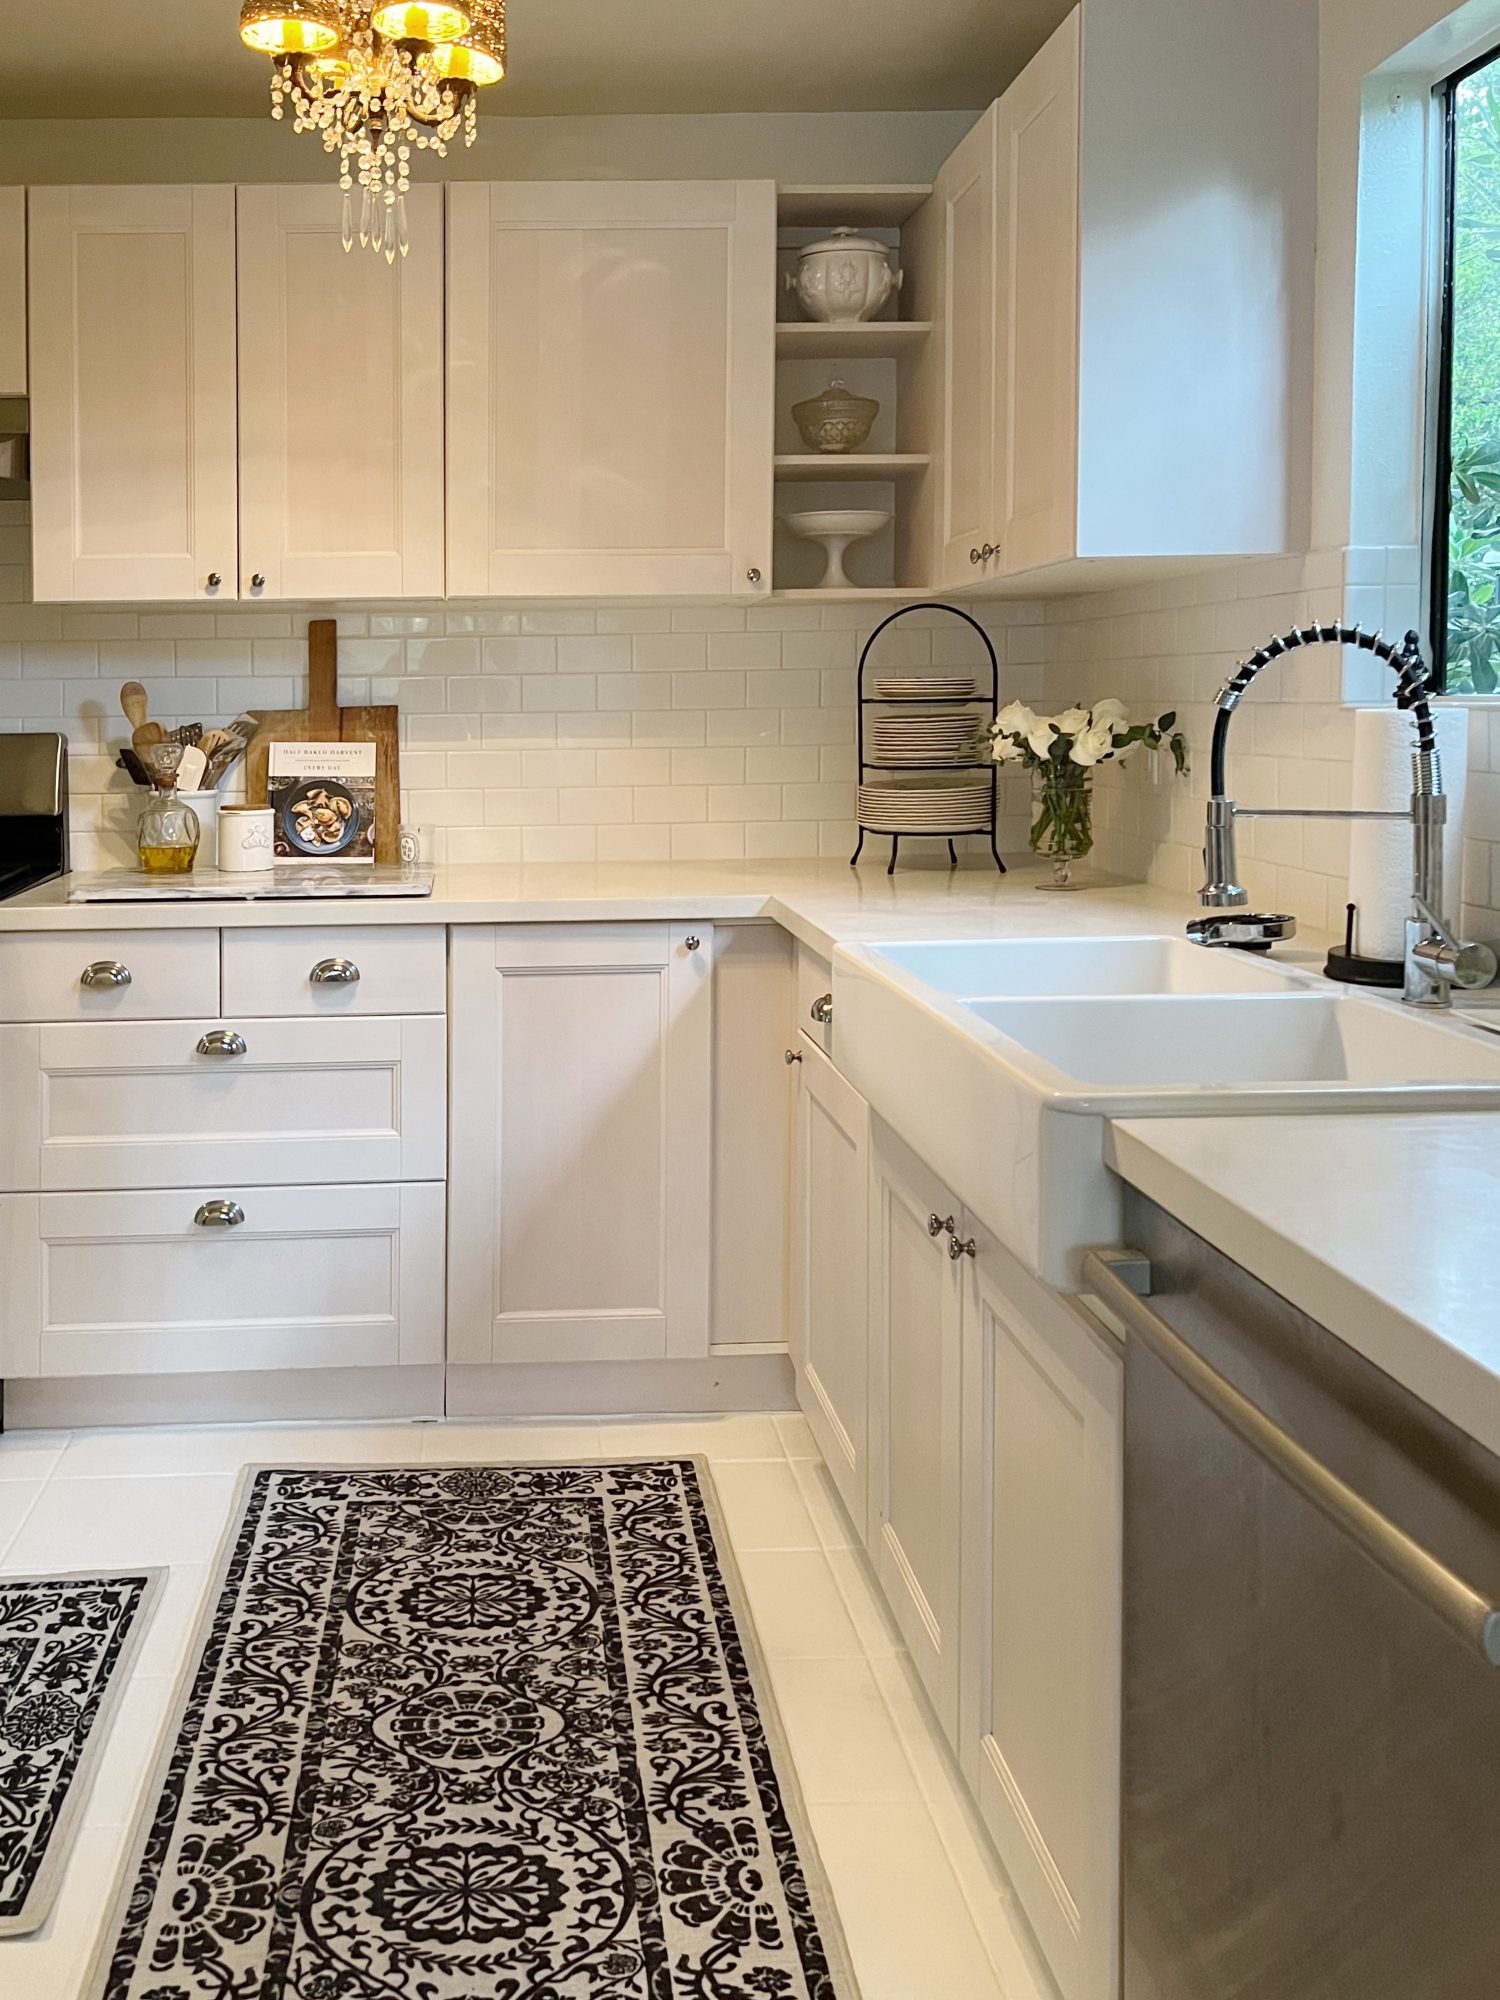
Once the floor tile was completely dry, we added the Ruggable runners. We chose the Delphina Black and White runners that are 2.5’x7′. We bought two, one to go in each direction in the kitchen. Now you really only see the edges of the painted tile.
Styling the Counters and Shelves
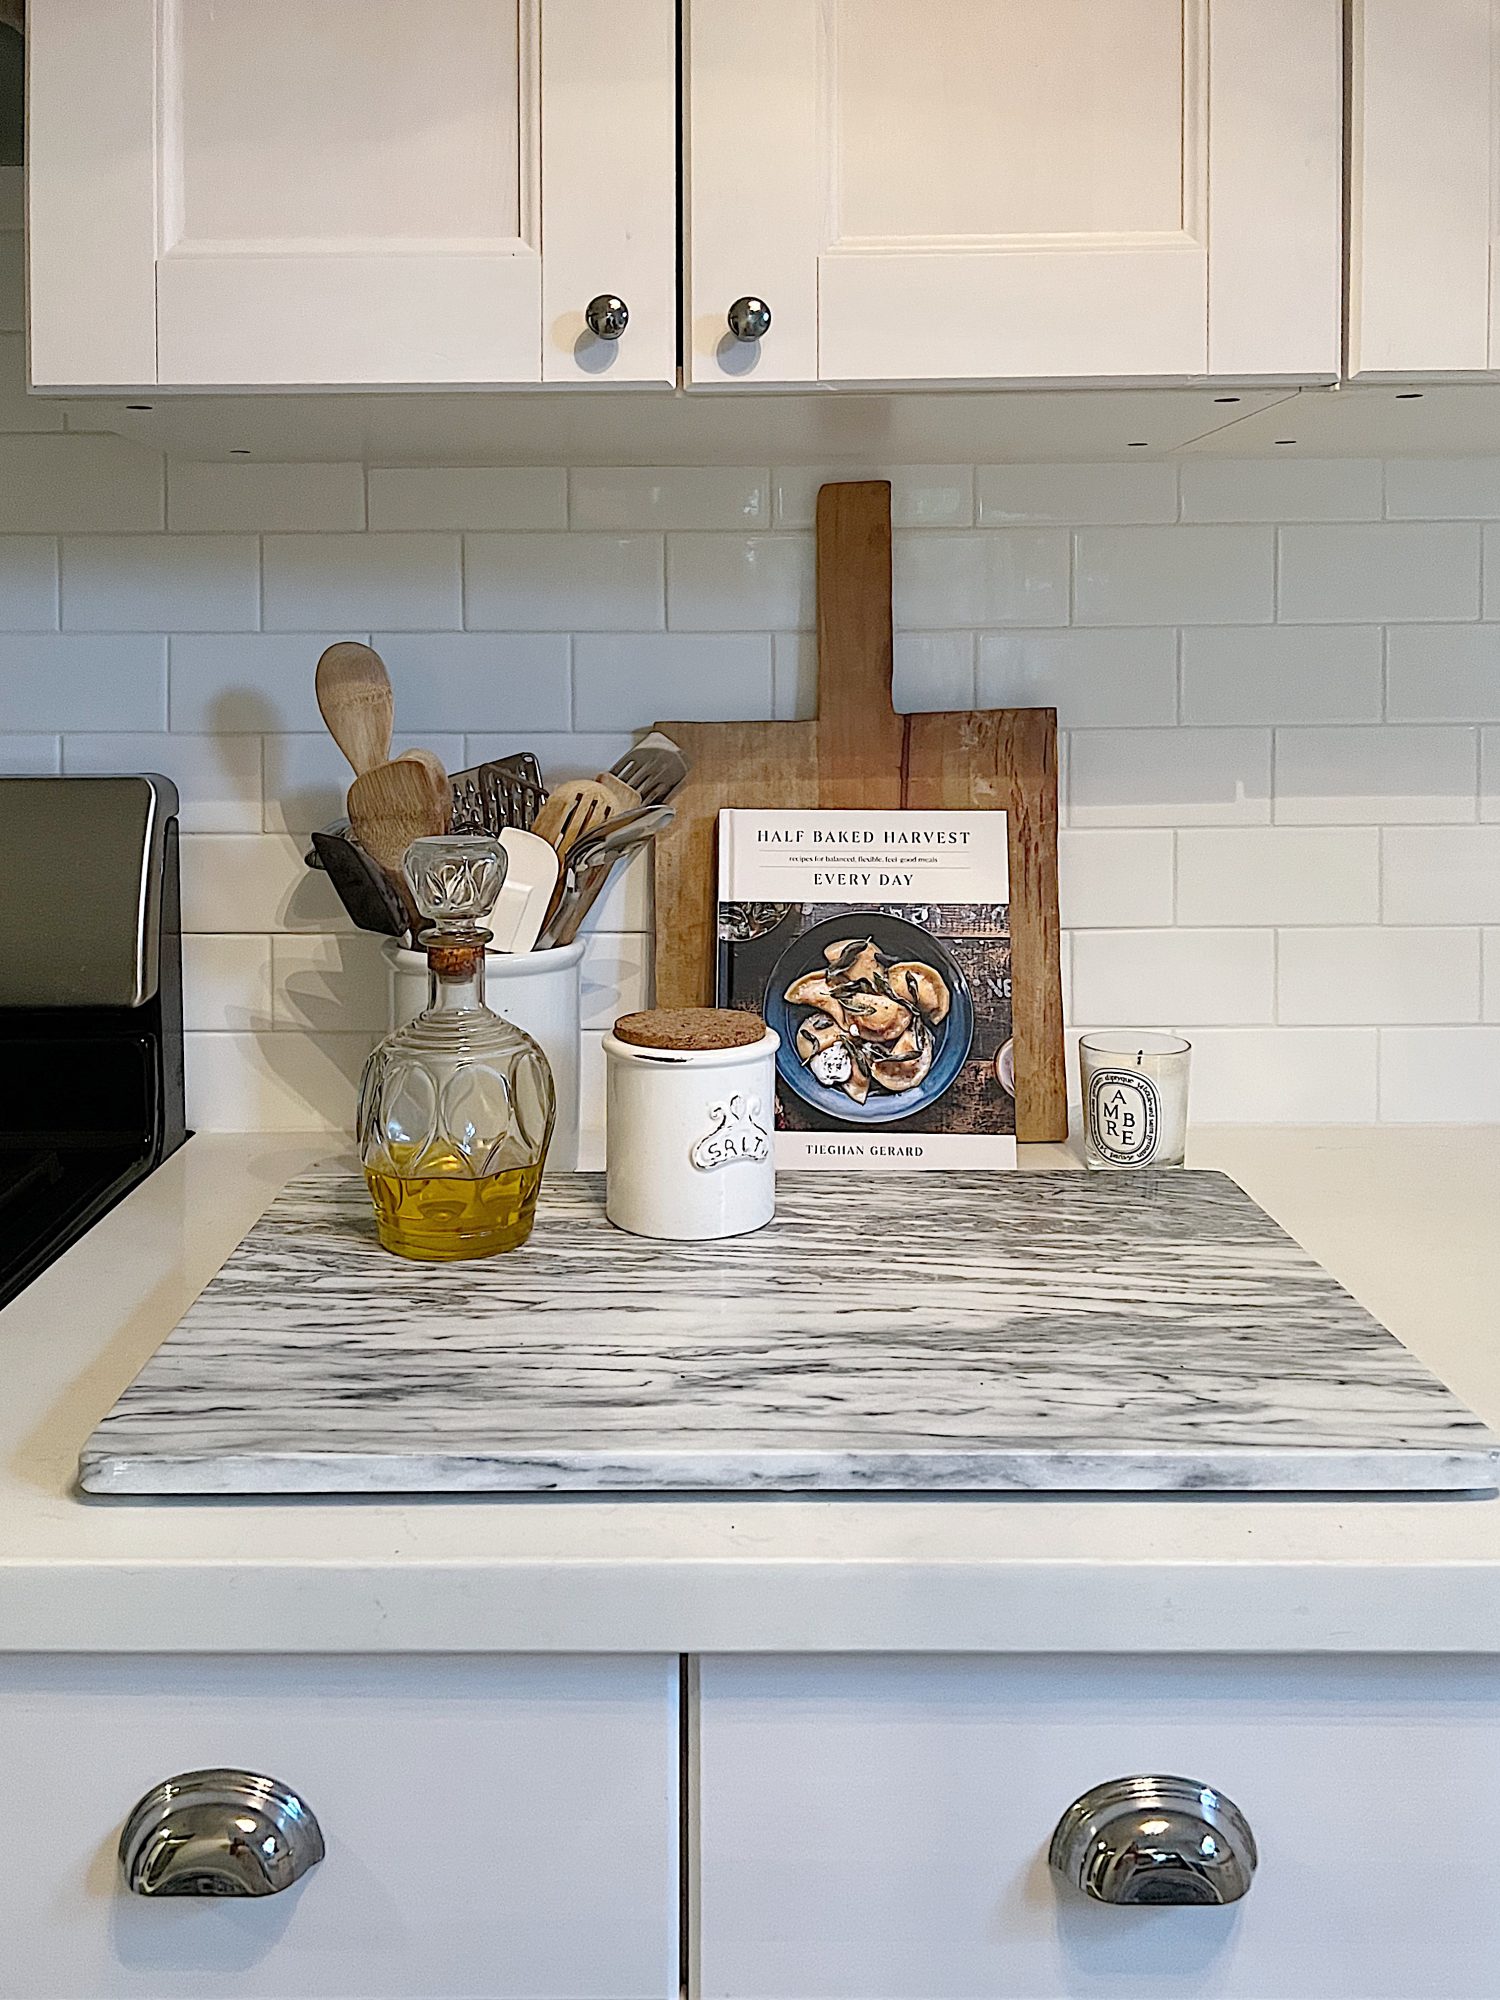
Now for the fun part! With a new clean, white palette to work with, it was really fun to choose what to put out on the counters and how to style the shelves. With the black and white Ruggable runners, we could choose any color we wanted to style with.
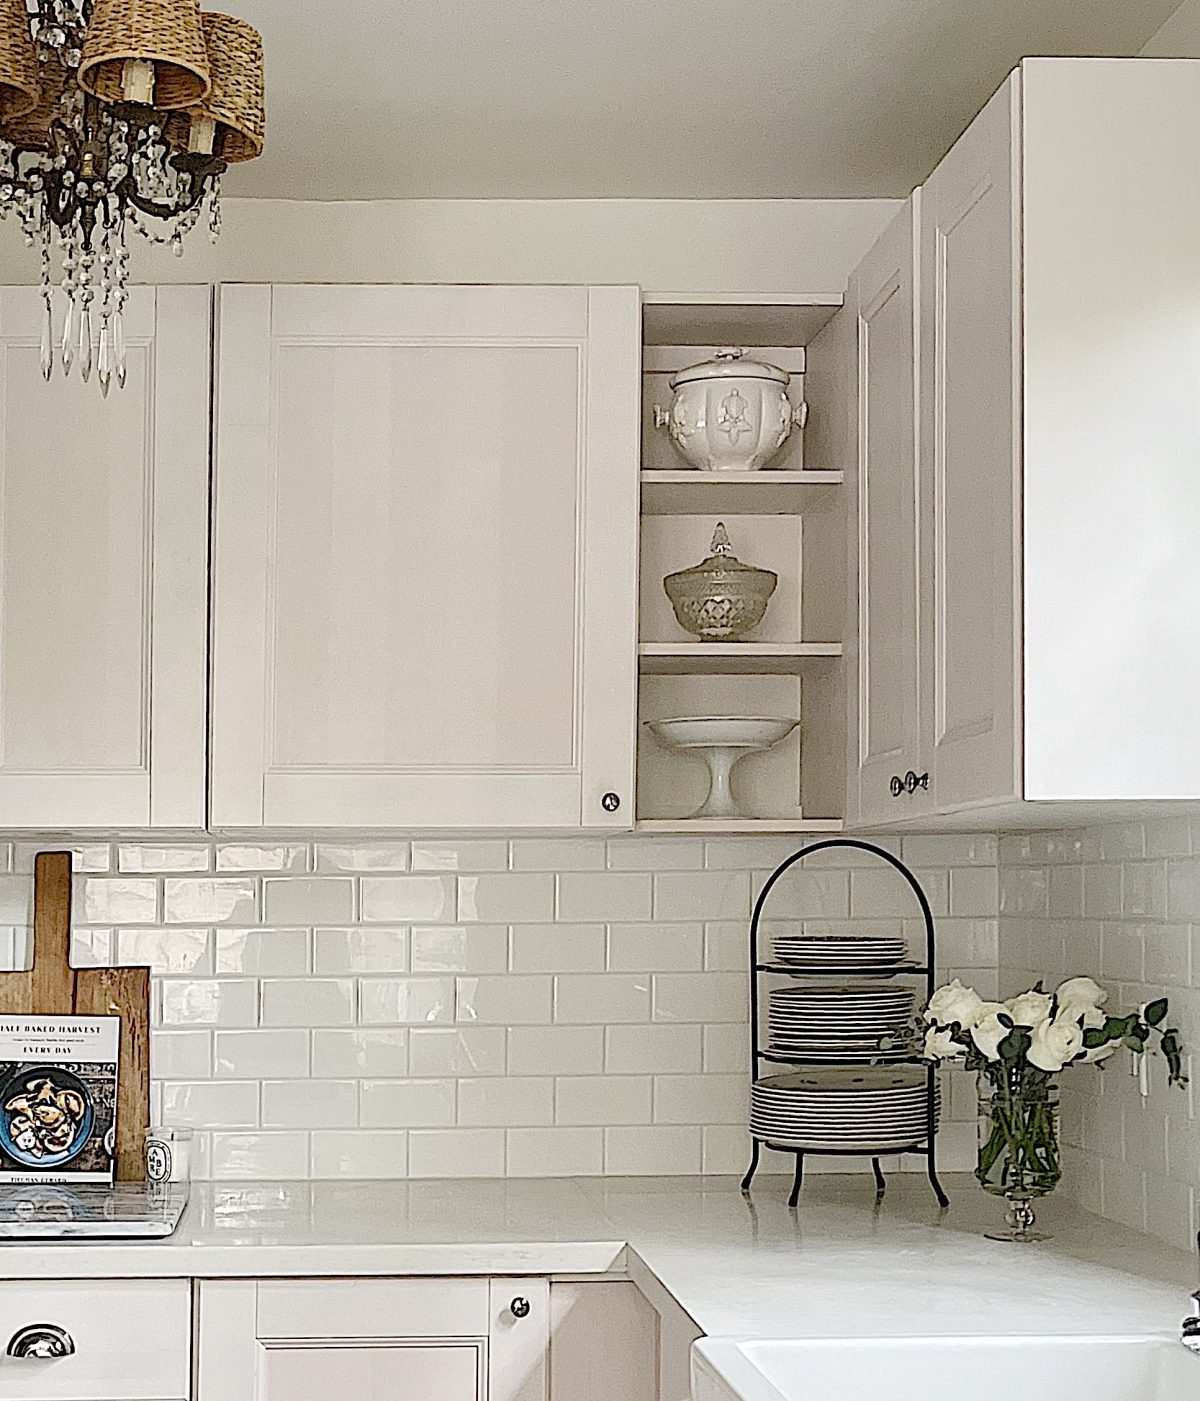
When I first saw the plates on the counter in the plate rack, I was a bit surprised. And then Maryliz explained, at 5′ tall, getting plates out of a cabinet is difficult and heavy. Being almost 6′ tall, this was new information to me, but it makes sense!
Maryliz is often shopping with me at the vintage flea markets, so she has accumulated a lot of treasures too. All of the items on the small shelves next to the upper cabinets are flea market finds.

The shelves over the pantry also hold white ironstone bowls and pitchers found at flea markets. These shelves were created because the pantry doors didn’t fit the existing space and I think it looks absolutely perfect!
Why This Project Was Successful
Our situation was unique, for sure, but, there were a number of things that we did to ensure the success of the project:
- We worked with a handyman who was flexible and understood our vision and overall plan.
- With each task we measured, measured, measured, and then measured again. And then we measured a couple more times just in case.
- We were realistic about how the cabinets would fit together and created a plan beforehand about the tricky areas.
- We had a backup plan for countertops in case they broke during removal (thank goodness they popped right out, unscathed!)
- Costs were managed carefully by choosing subway tile that is both timeless and inexpensive, got the gorgeous farmhouse sink at IKEA and the faucet and glass rinser from Amazon.
- Each morning, Maryliz met with the handyman to go over progress from the day before, and any potential issues that might arise for the day and worked through solutions before construction started. This was probably one of the most important things we did. We headed off any potential drama by closely managing the vision/plan.
- I am happy to report that there were no surprises/gotchas and the project came in right at budget!

If you are enjoying my blog, you can sign up to receive my blog updates here.
.Watch My Amazon Live
Click here to watch any of my Amazon Live shows. All shows are recorded.
I thought you might like this one!

This post may contain affiliate links, which means a small commission is earned if you make a purchase via the link. The price you pay will be the same whether you use the affiliate link or go directly to the vendor’s website using a non-affiliate link.
Are you inspired to refresh your kitchen? There are so many incredible items available on Amazon that will make a huge difference in your kitchen!


Pin the image below to your boards on Pinterest (just click the Pin button in the top left corner). Follow me on Pinterest too!
For more real-time updates, follow me on Instagram @My100YearOldHome


Hats off to you!!
Those floors look absolutely amazing! The before and after picture really shows how much brighter you were able to make the room.
Also really dig the rugs and the style it brings to the all-white flooring!
I’m curious as you didn’t address it, but how did you use your existing countertops? Did they need to be cut to fit the different configuration? We’re they enough to do the job? You mentioned giving her more counterspace as well. Thanks it’s looks great and is so nice to reuse instead of throwing it out.
Hi Jan – The countertops were the trickiest part of this repurpose/reuse project. The Ventura kitchen did not have a corner and miraculously, we had just enough countertop to install in the condo with one tiny little seam at the back of the corner. The contractor was immensely patient with this part of the process.
Super Impressive! Repurposed and Reused at a whole new level. Beautiful!
I know Maryliz has been happy dancing about this! Amazing!!! It looks beautiful, magazine worthy! I never knew you could paint tile. I enjoyed seeing this makeover so much! Thank you!
Nice, with the exception of the lighting fixture, the shades, the crystals hanging down, too much, too many styles (not sure what the style is) competing with each other! my eye goes to ceiling instead of taking in how nice everything else is.
i don’t know the ‘rules’ of a ceiling medallion, but that fixture and then the addition of the medallion do not look like they compliment each other.
with all the money saved, maybe she could get a new fixture?!
Jan, I agree..HOW were the same countertops used? Also the light fixture and medallion need to do!
Hi Nadine – the countertops were the trickiest part. There had not been a corner in the Ventura kitchen, so we had to get creative. There is a small seam at the back of the corner that you can’t even see, unless you are looking for it. Miraculously, we had just enough countertop to make it work!
Fantastic idea and for someone you know. The kitchen refresh is beautiful. I liked the comment about height…I’m only 5’2″ so tall cupboards are a bit of an issue too. Lol.
It all looks beautiful …what a transformation…I have to agree with the other Mary about the light though really not a fan of it…..distracts from the beautiful clean lines of the overall room…
Well done, ladies! Beautiful!
What a fantastic job and transformation! I especially love the open shelving in the corner where the slim cabinet door used to be. Beautiful!
Thank you Cindy for reaching out. Isn’t that little shelving space amazing? It was a happy accident. There wasn’t a cabinet that fit, so we made shelves instead. I love that it looks intentional, even though it was a fix!
I’m interested in the countertop plate holder. I would love to free up some cabinet space while displaying pretty plates. I searched and didn’t find anything similar that would hold up to a 10 1/2 plate. Do you have a link for the one shown? Thank you!
Hi Deborah, here is the link (https://amzn.to/3lEsxvd) to the plate rack in Maryliz’s kitchen. I took a look at the dimension you provided and I think it will fit! Let me know if you get it and how your style yours!
It’s such a pleasure to be able to see your blogs again. Thanks for everything
Wow…what a huge difference. I love it all and I love how you used some of the existing things to keep within budget. Painting the floor and adding those rugs, genius! With the wave of your magic wand and endless talent, you’ve given her a beautiful cottage kitchen. I’m sure she is thrilled. Great job!
Who makes the “swiss coffee” paint? Would appreciate knowing. Really enjoy your blog, thank you for doing it!
Hi Karen – You can get swiss coffee paint made at most paint stores. I got mine from Benjamin Moore!
I bet Maryliz is beside herself with joy in her new, amazing kitchen. Great job.
Oh yes, she is. As am I!
Leslie