How to Plan for a Dinner Party with Friends
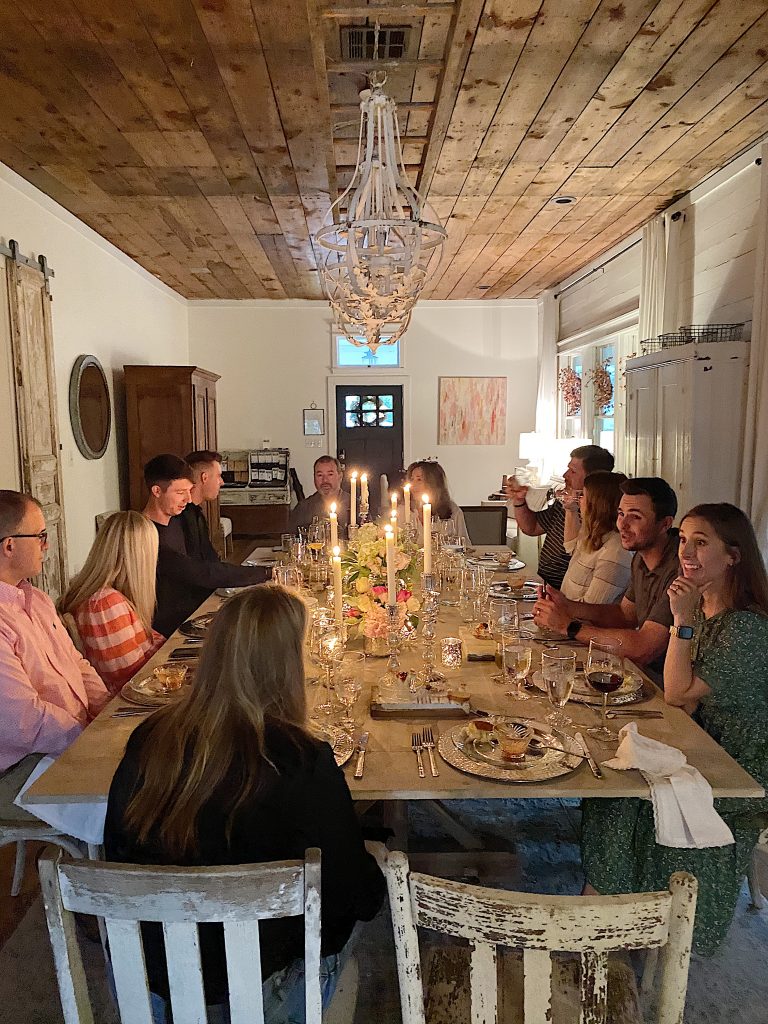
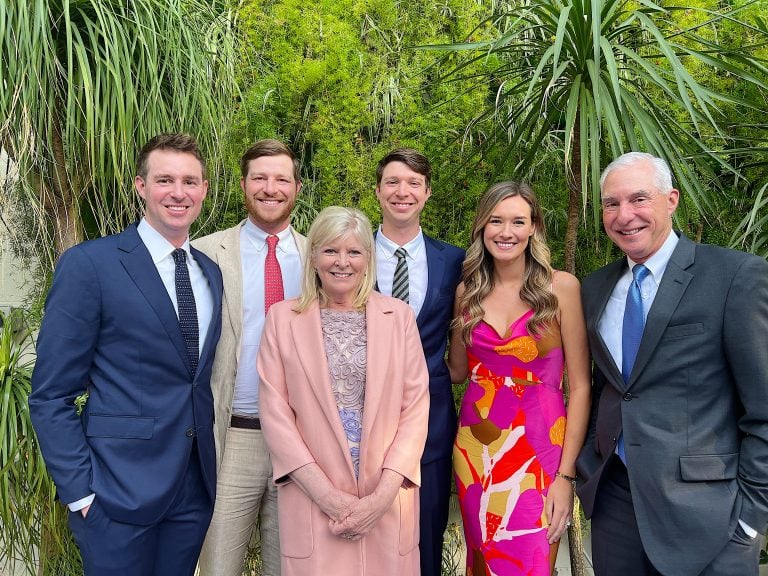
Last weekend I hosted twelve very dear friends and family members for a dinner party. I loved every minute of it and am very excited to share with all of you how to plan for a dinner party.
You can do this. I promise!
I know what you are thinking. “It is too much work to plan for a dinner party with friends!”. But it is not that hard. You just need to be organized and make sure you have all of the tableware that you need. Be sure to plan a menu that tastes amazing but isn’t too hard and invite fun people.
That’s it.
Most people, when they plan for a dinner with friends, invite about six people over and serve a nice easy dinner. I know this because I have entertained like this a gazillion times. I love it!
But this past weekend was different.
While I was remodeling our Waco home, I met so many amazing people. There was a small group of friends that I got to know dearly and they helped me more than I could ever imagine. I had always intended to create a very special dinner for my friends but then the lockdown happened and I didn’t visit Waco for over a year.
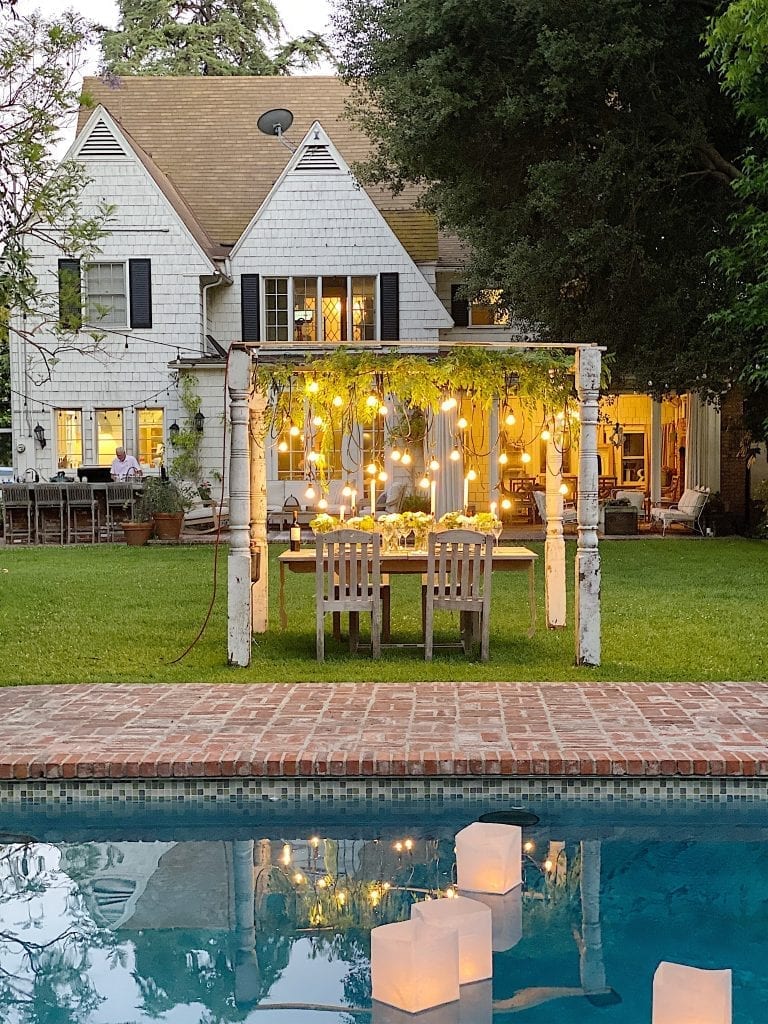
Finally, this past weekend I treated twelve of my friends and family to a seven course dinner. It was magical!
How to Plan a Dinner Party
The Wood Table Top
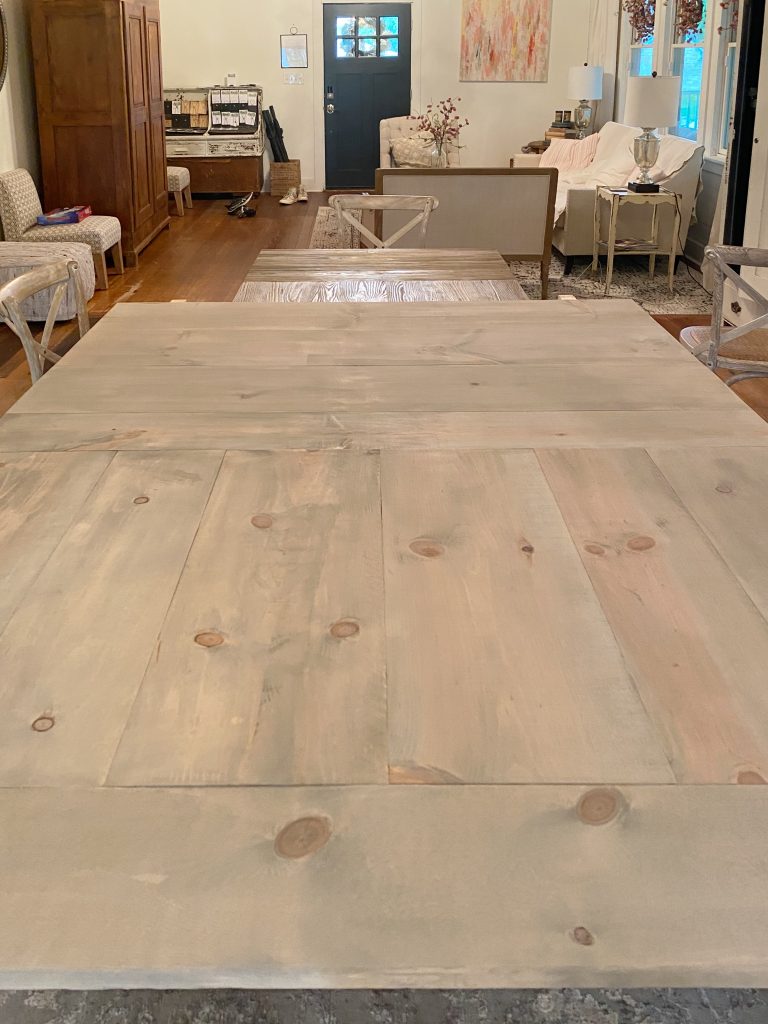
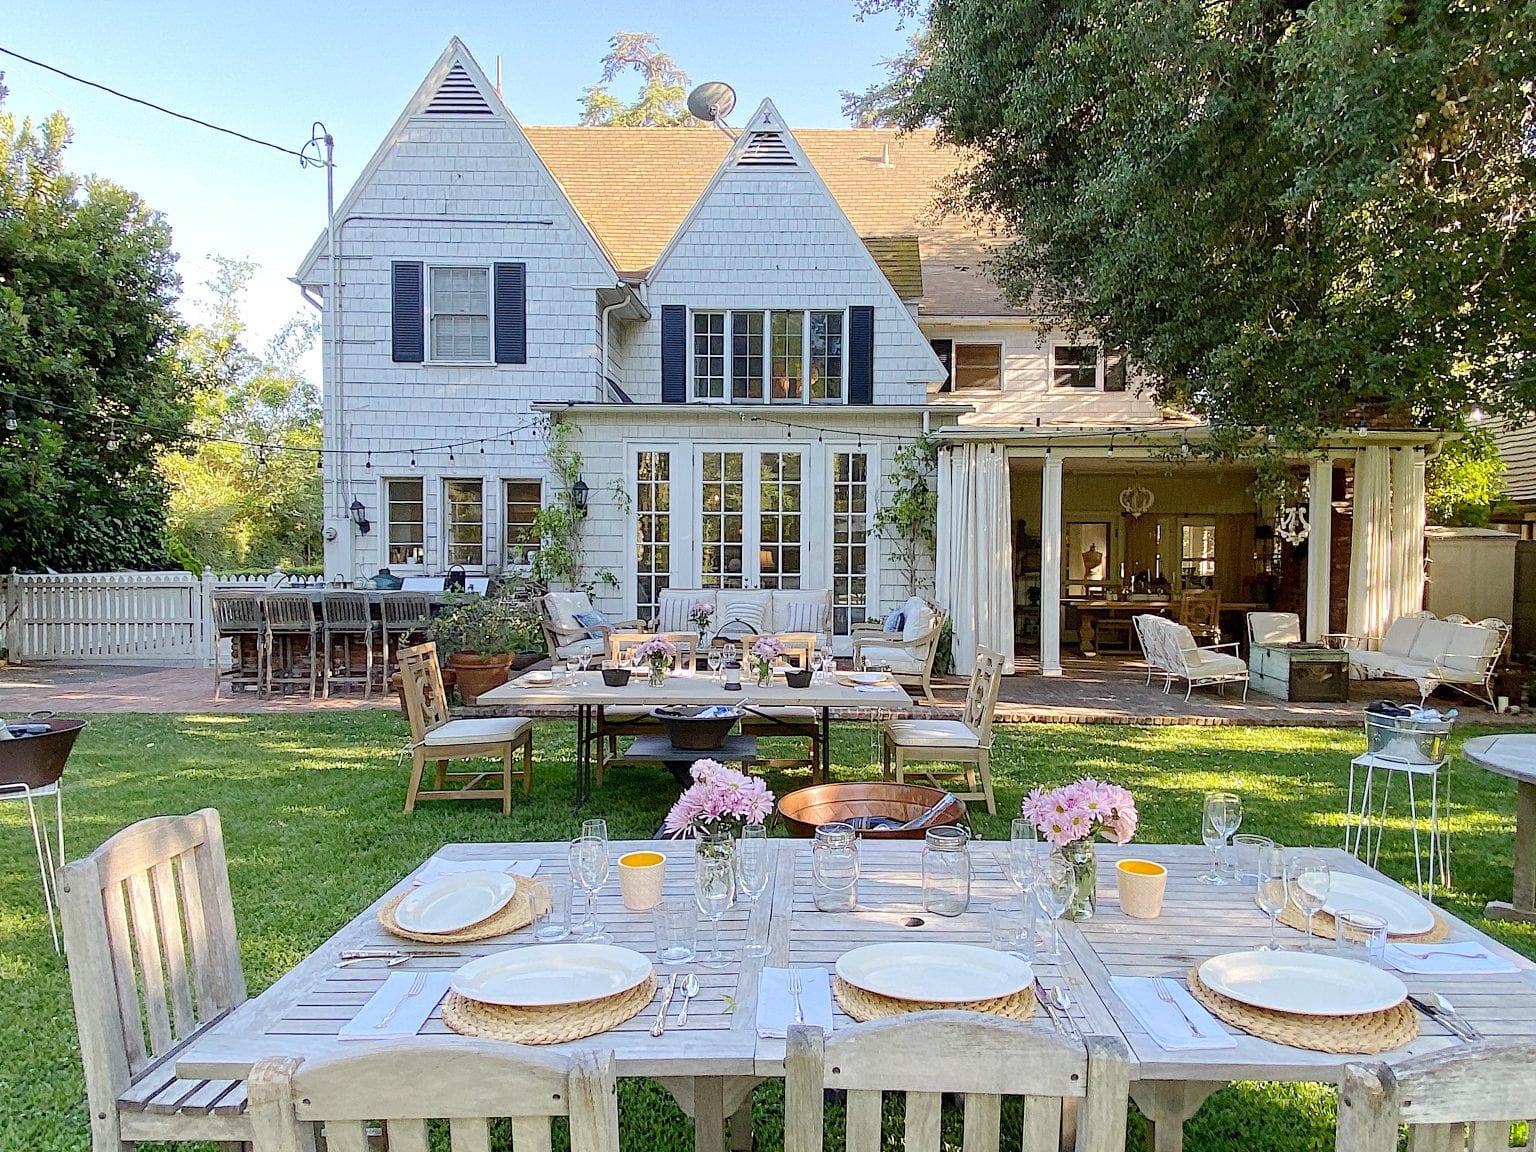
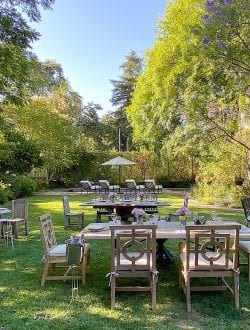
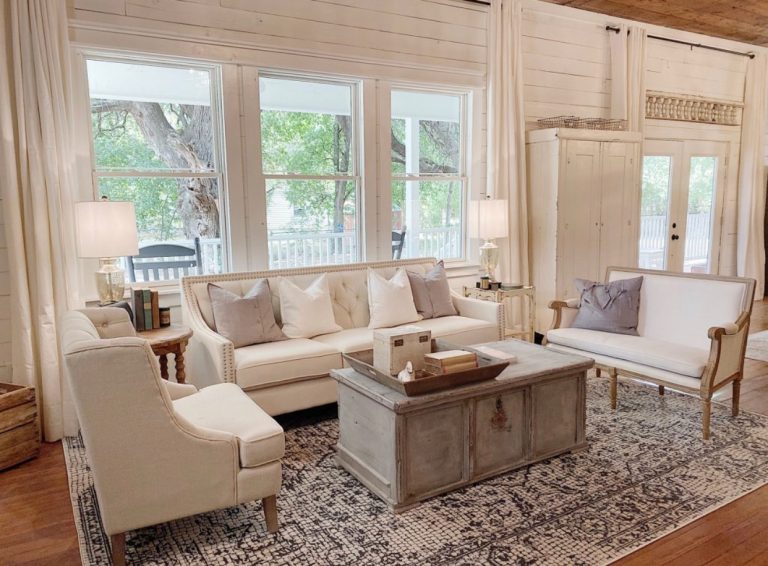
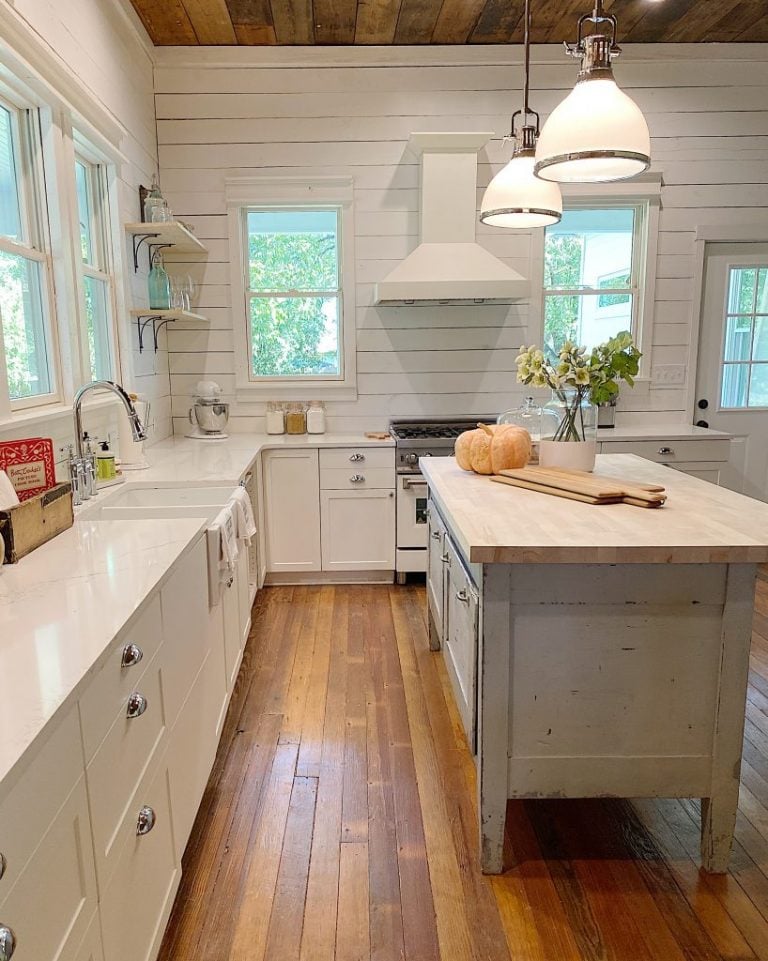
When you are planning for a dinner party with friends you need to decide where to hold the dinner. You probably know that I love to find creative places for dinner but the dining room is a great spot to!
The first issue I had to solve was finding a place where I could sit all twelve of us together at the same table. I thought about trying to put our dining room and porch table side by side but that wasn’t ideal.
Do you remember when I made wood table tops at home for our plastic folding tables?
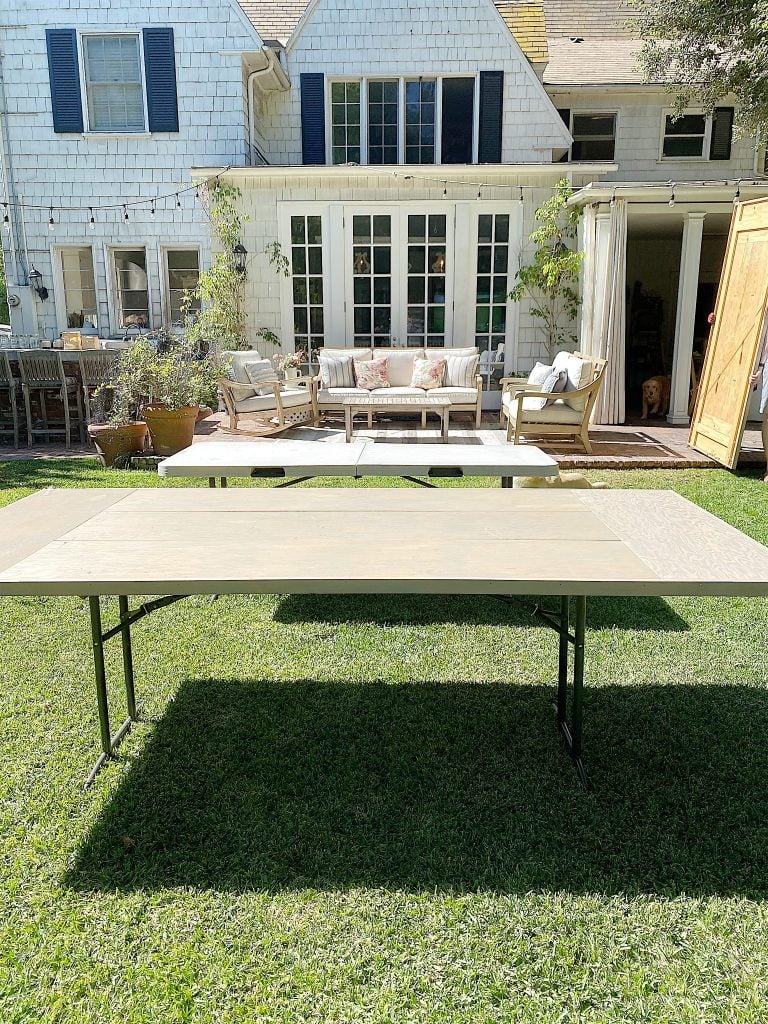
Here is one of the wood table tops I made that sit on top of our folded plastic tables. Click to read the entire blog post How to Make My Wood Table Tops.
My table tops were in Southern California and the dinner party was, of course, in Waco. Hmmm.
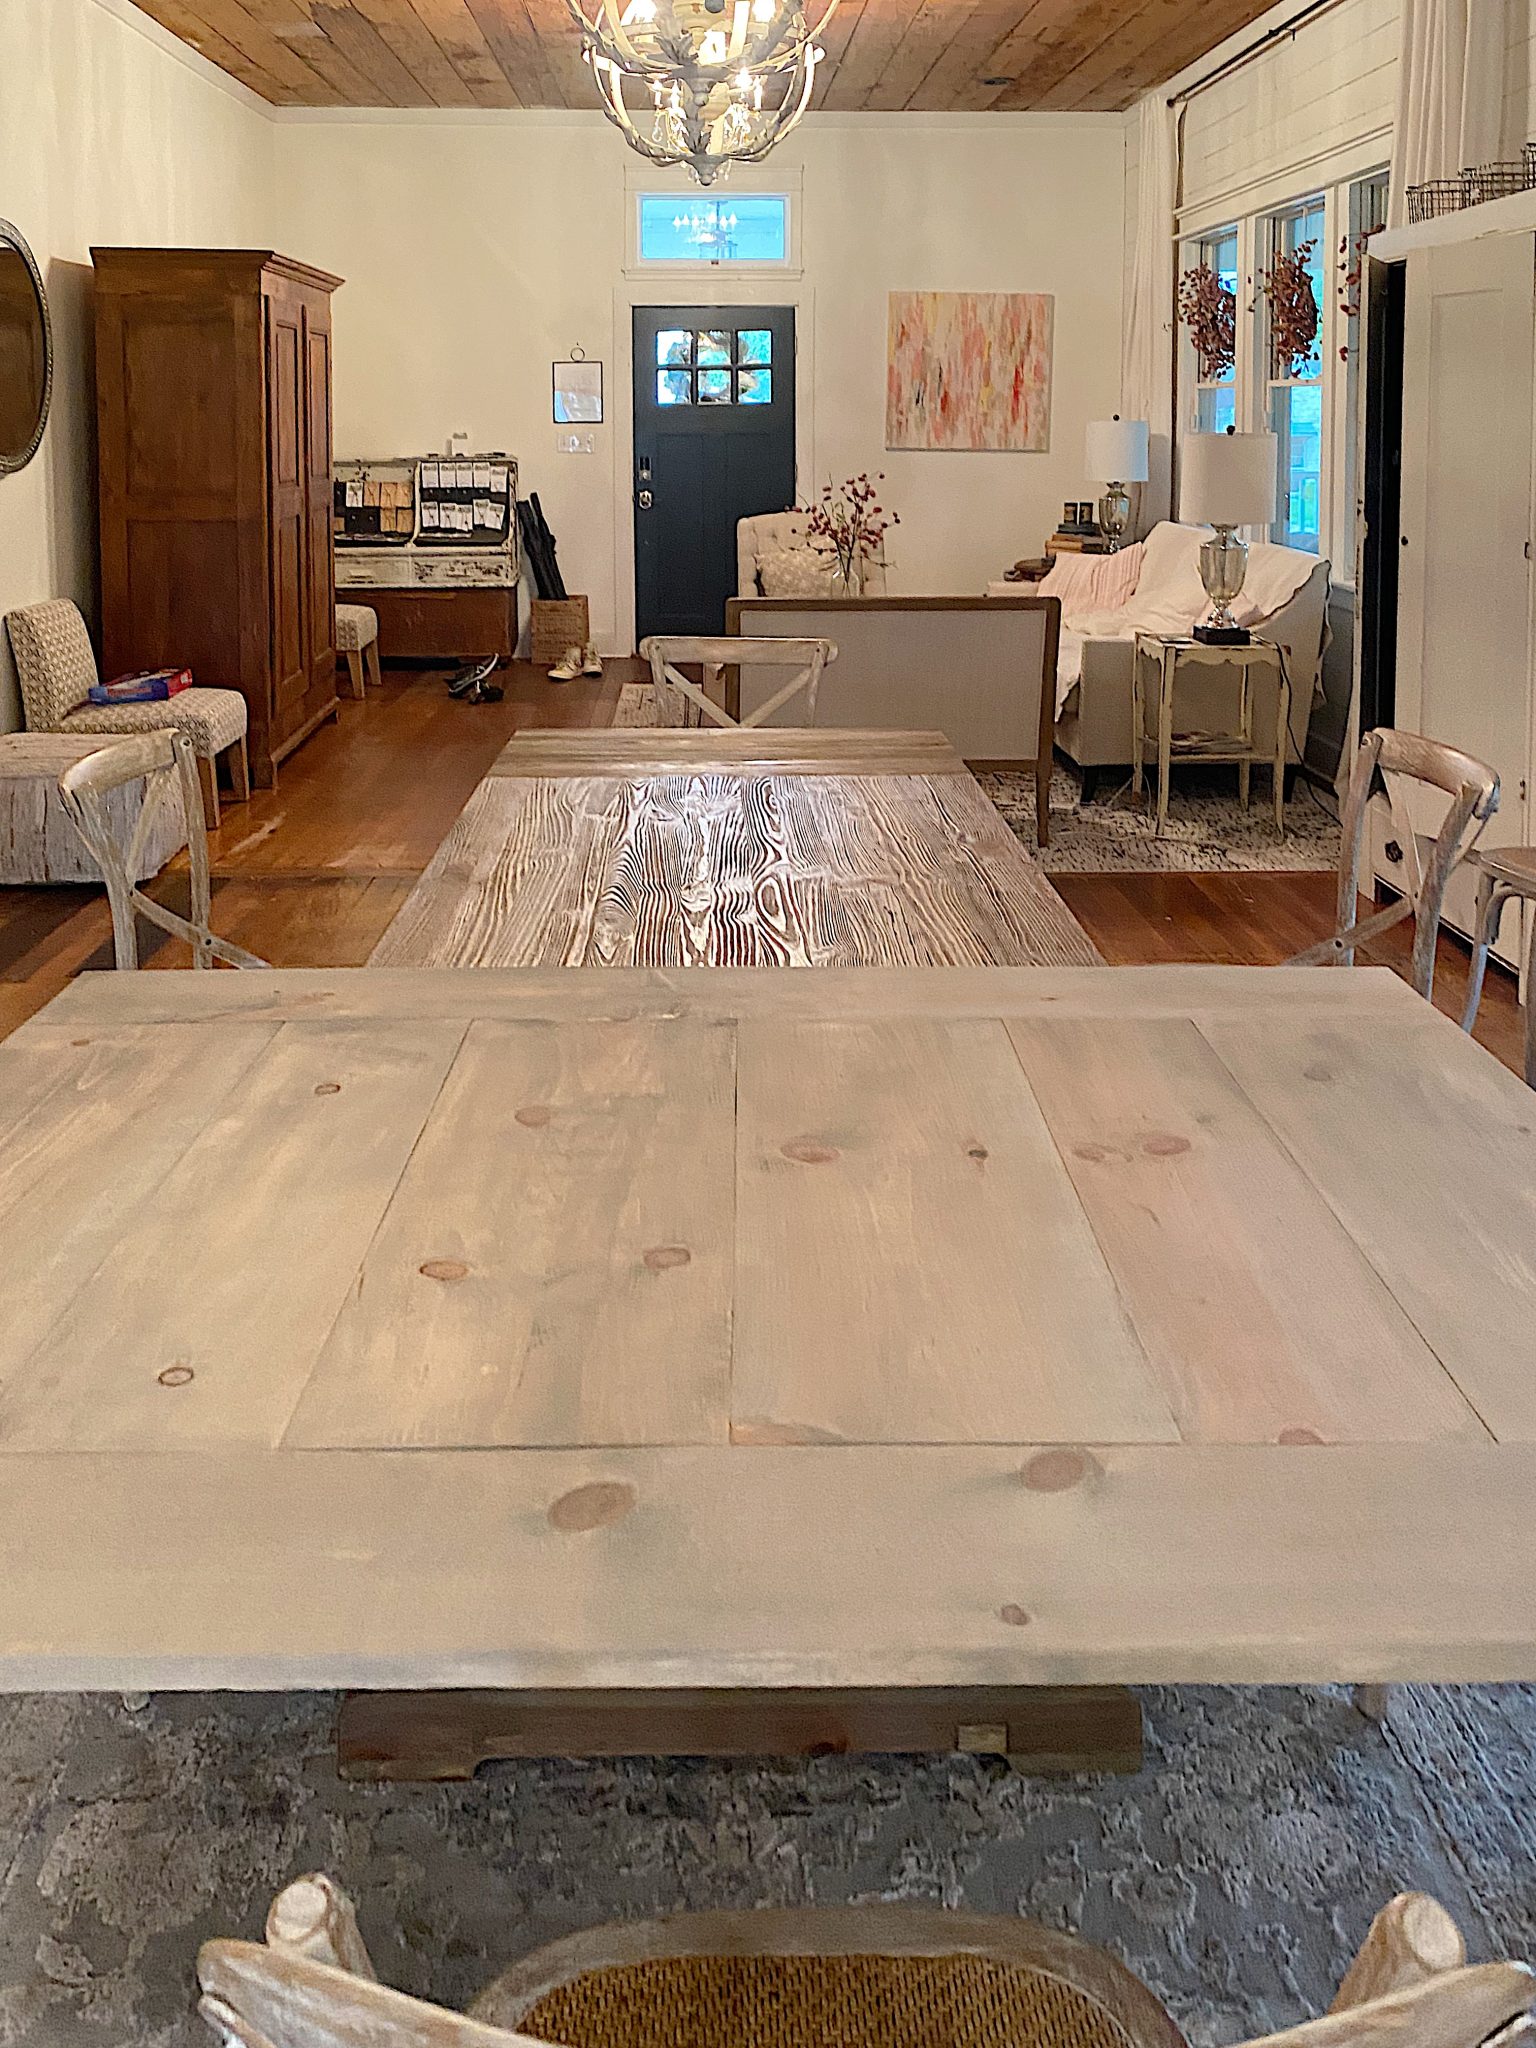
But then my dear friend KariAnne from Thistlewood Farms came to the rescue. She insisted that her husband Denny could make table tops for our Waco dining room table. How amazing is that?
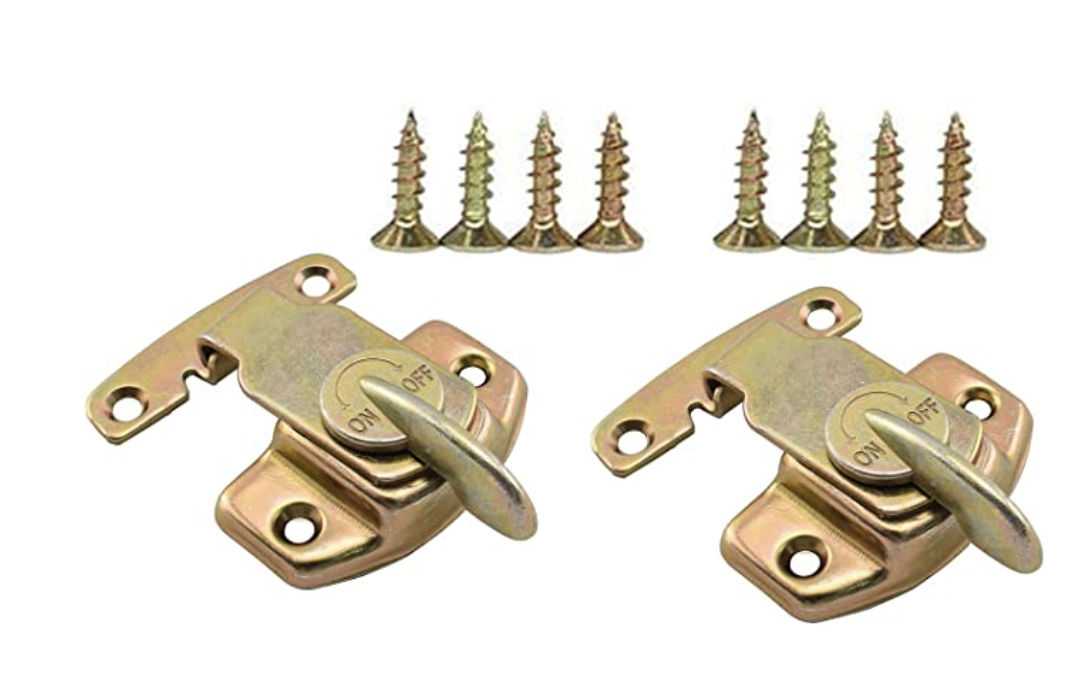
Of course Denny improved upon my design They are in three sections and they have latches on each section so they hold together really well.
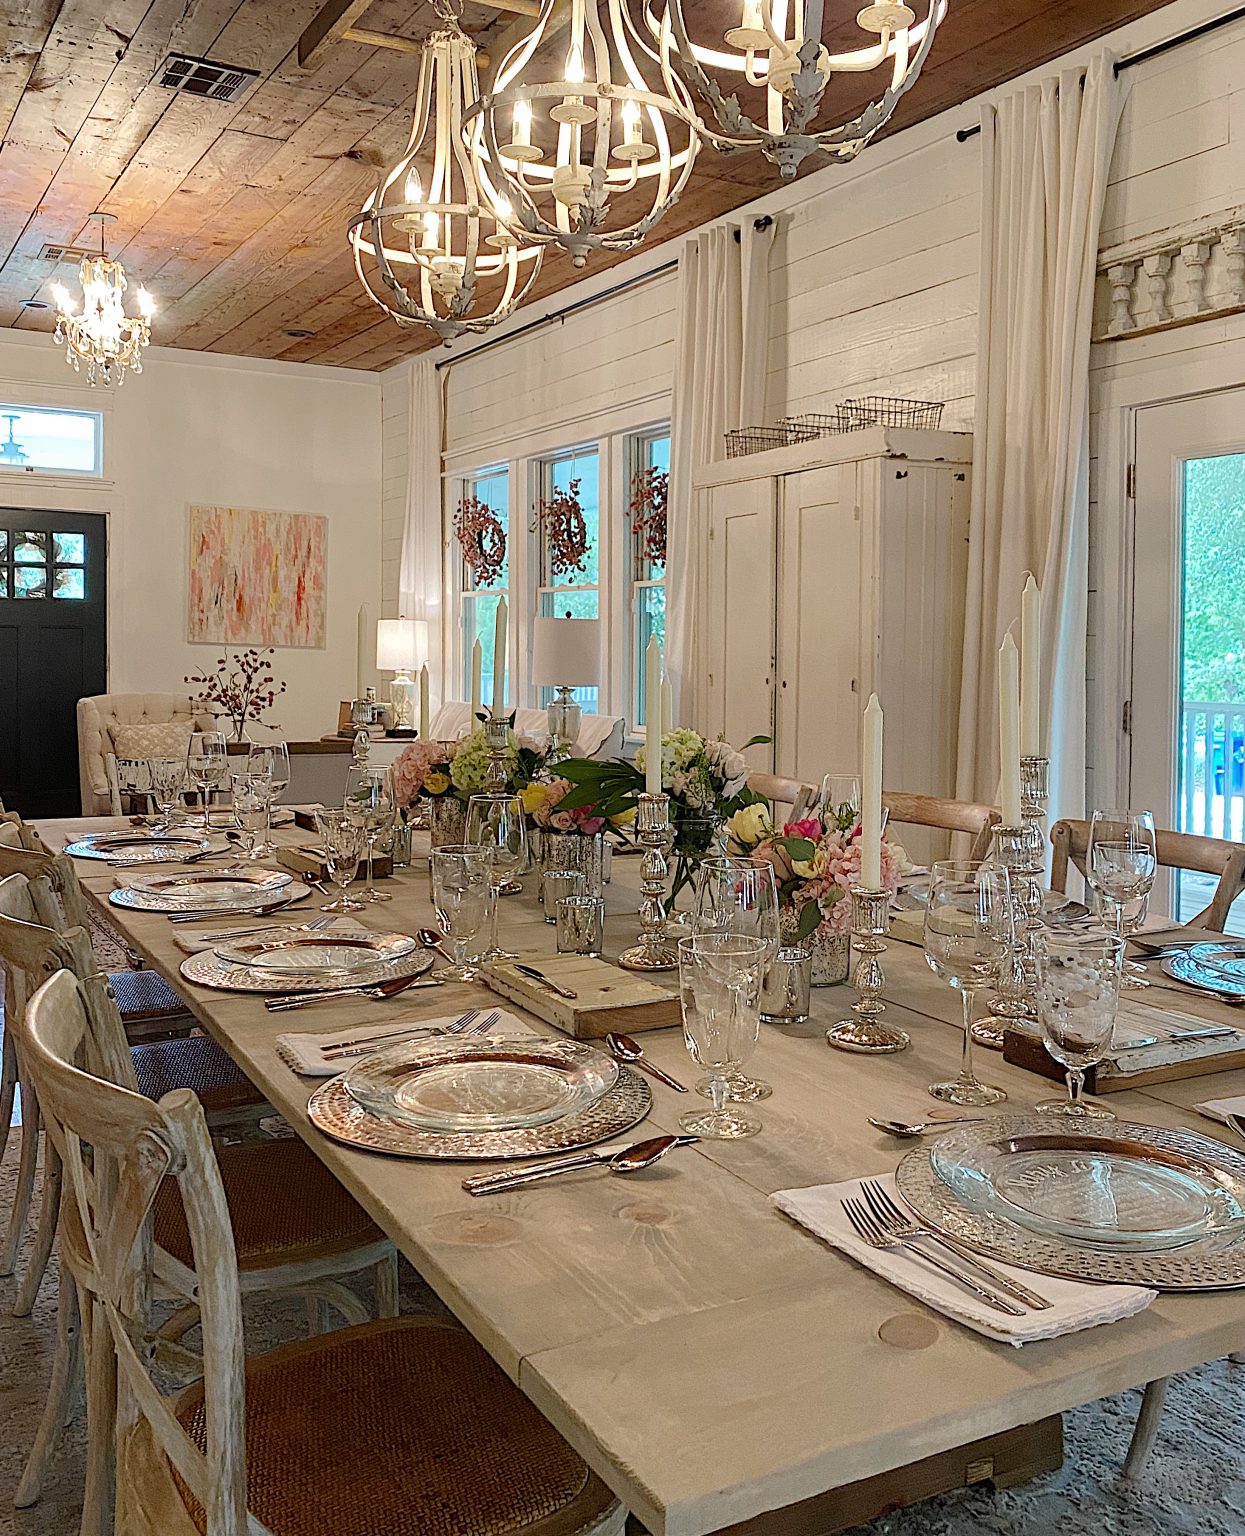
Let me show you the table tops. Here is our existing dining room table. It is wonderful and sits eight comfortably.
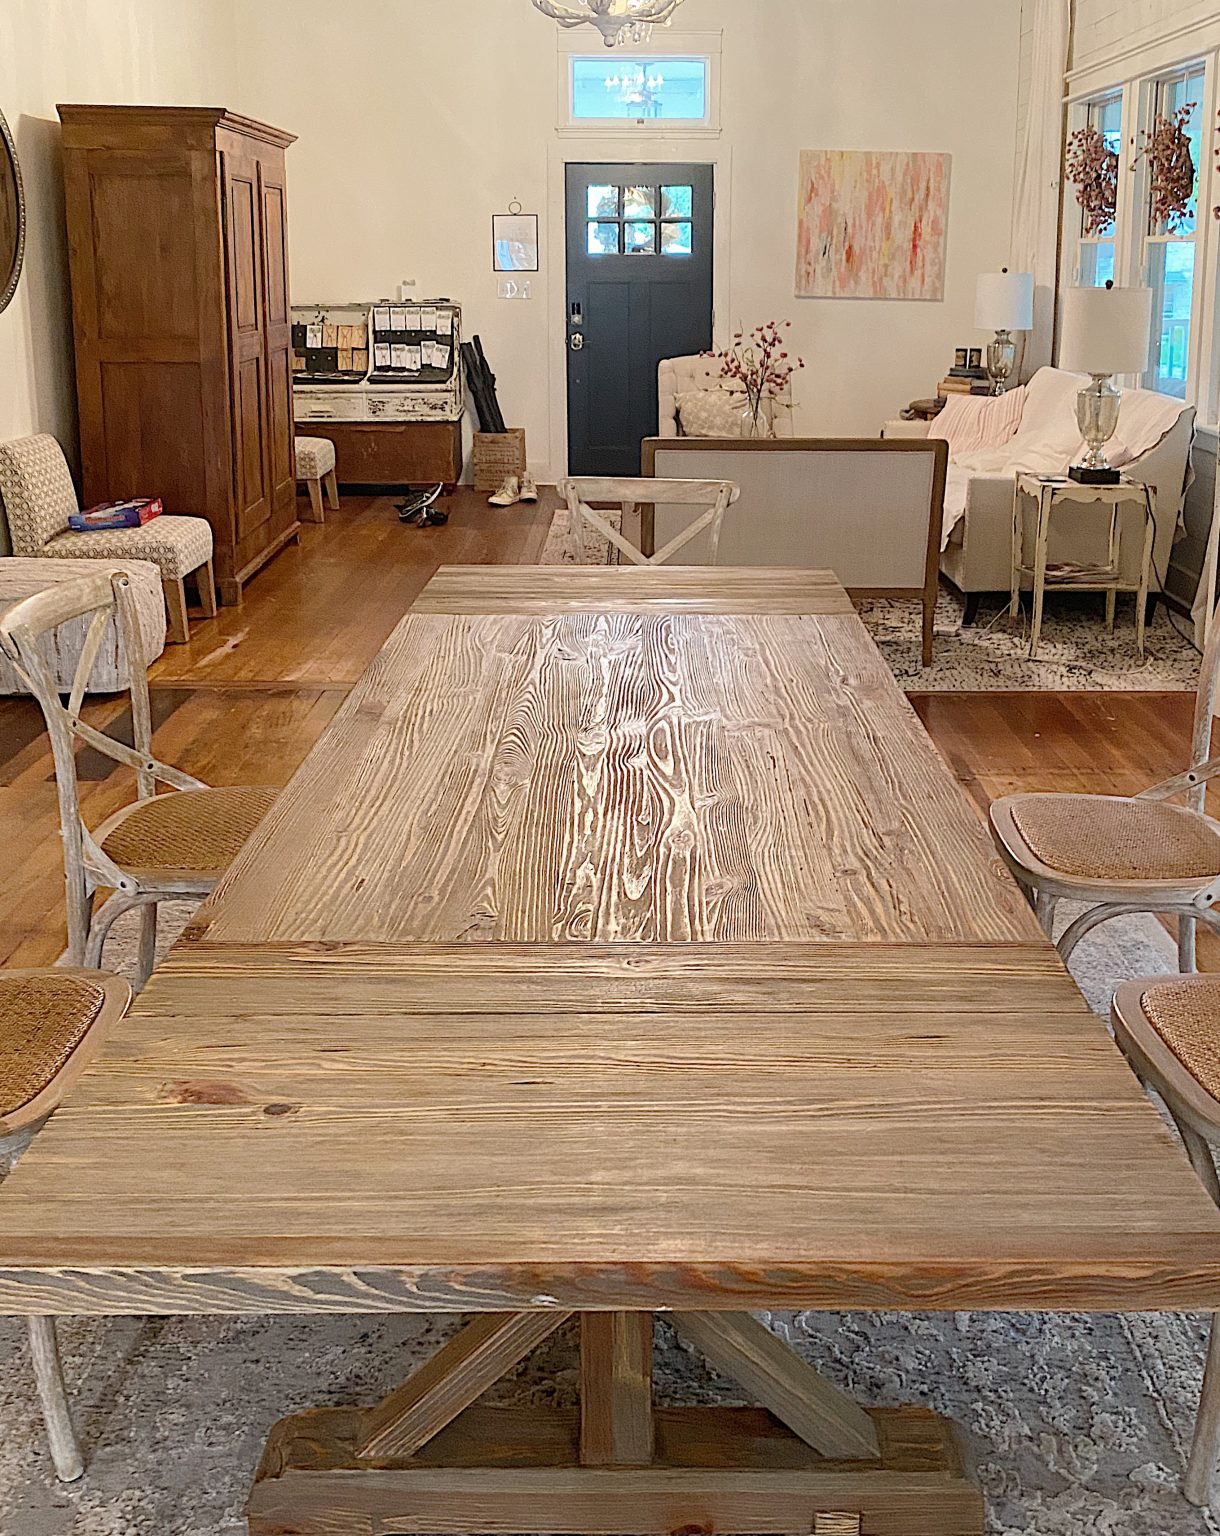
Here is the table with the first section of the table top on top.
Next I added the middle section.

And next I added the end section.
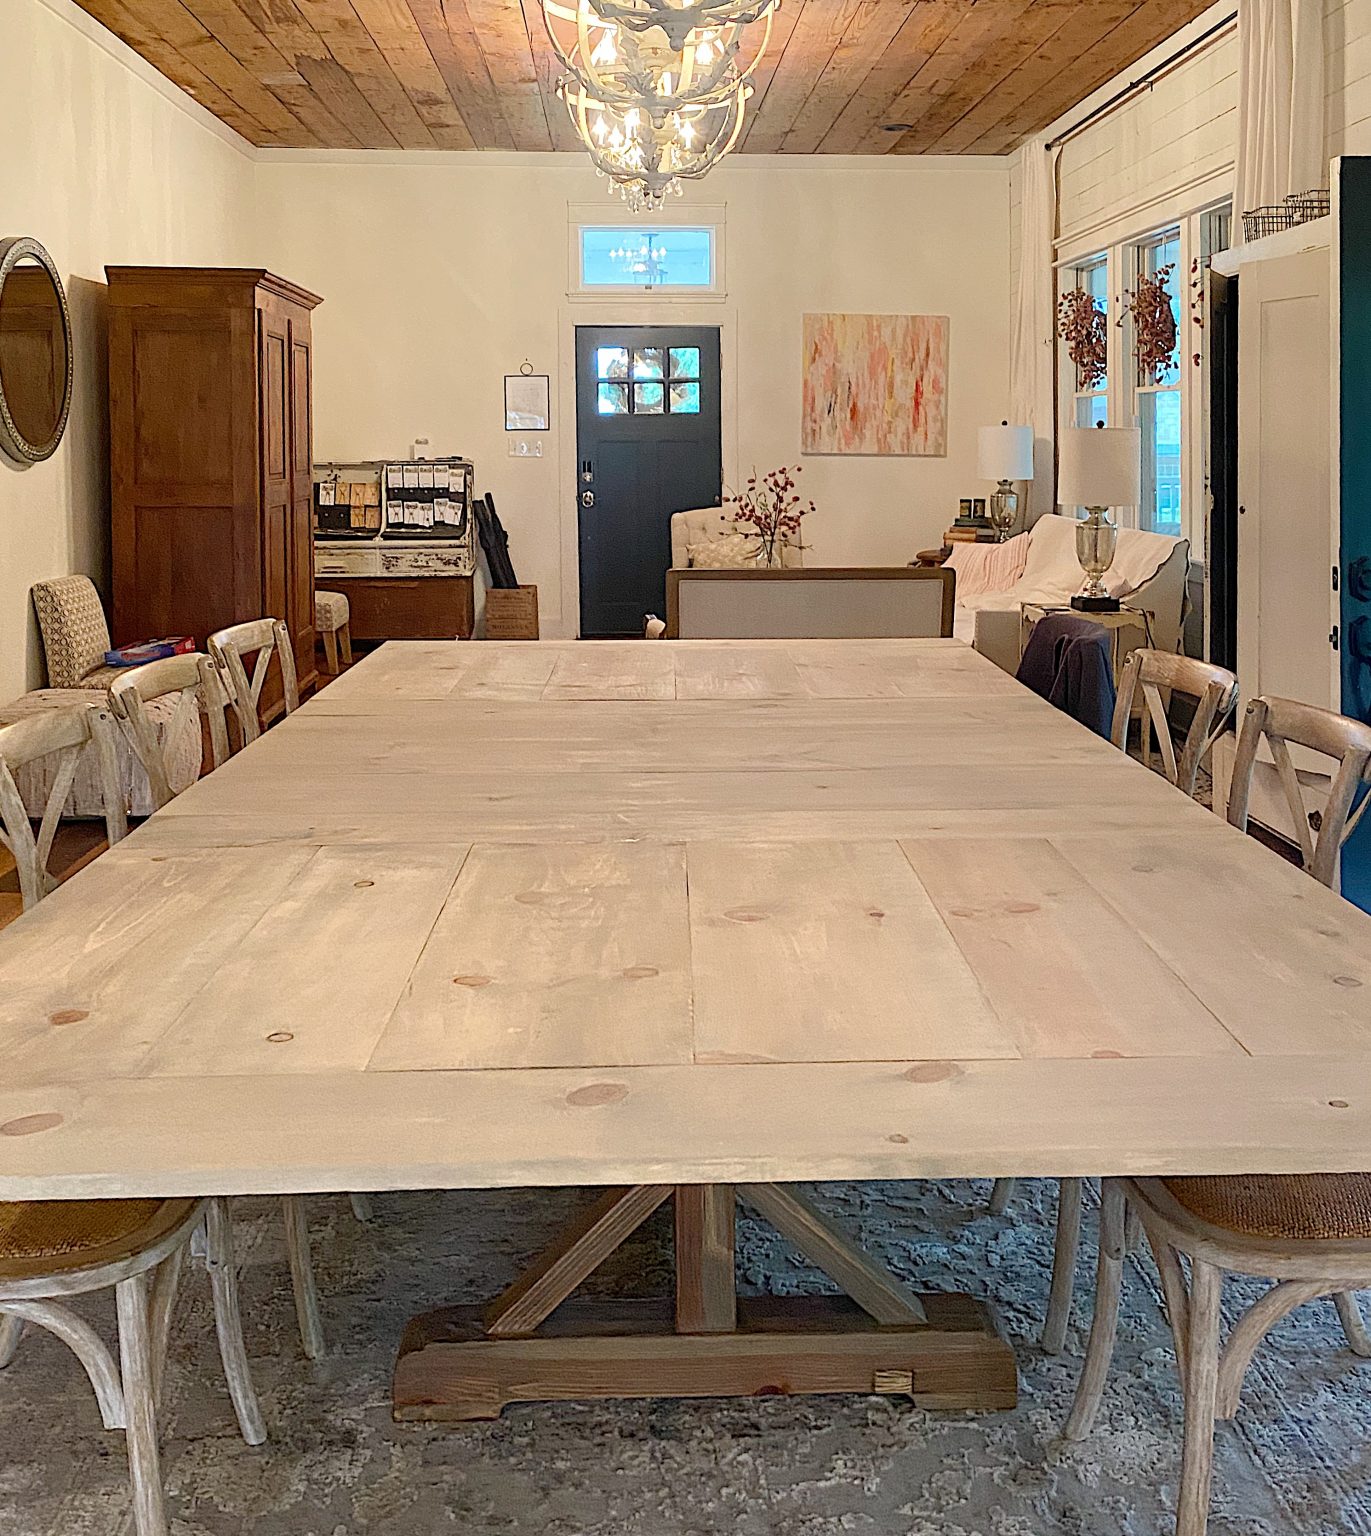
Doesn’t this look amazing? I am so grateful to both Denny and KariAnne for creating this amazing wood table top!
If you are enjoying my blog, you can sign up to receive my blog updates here.
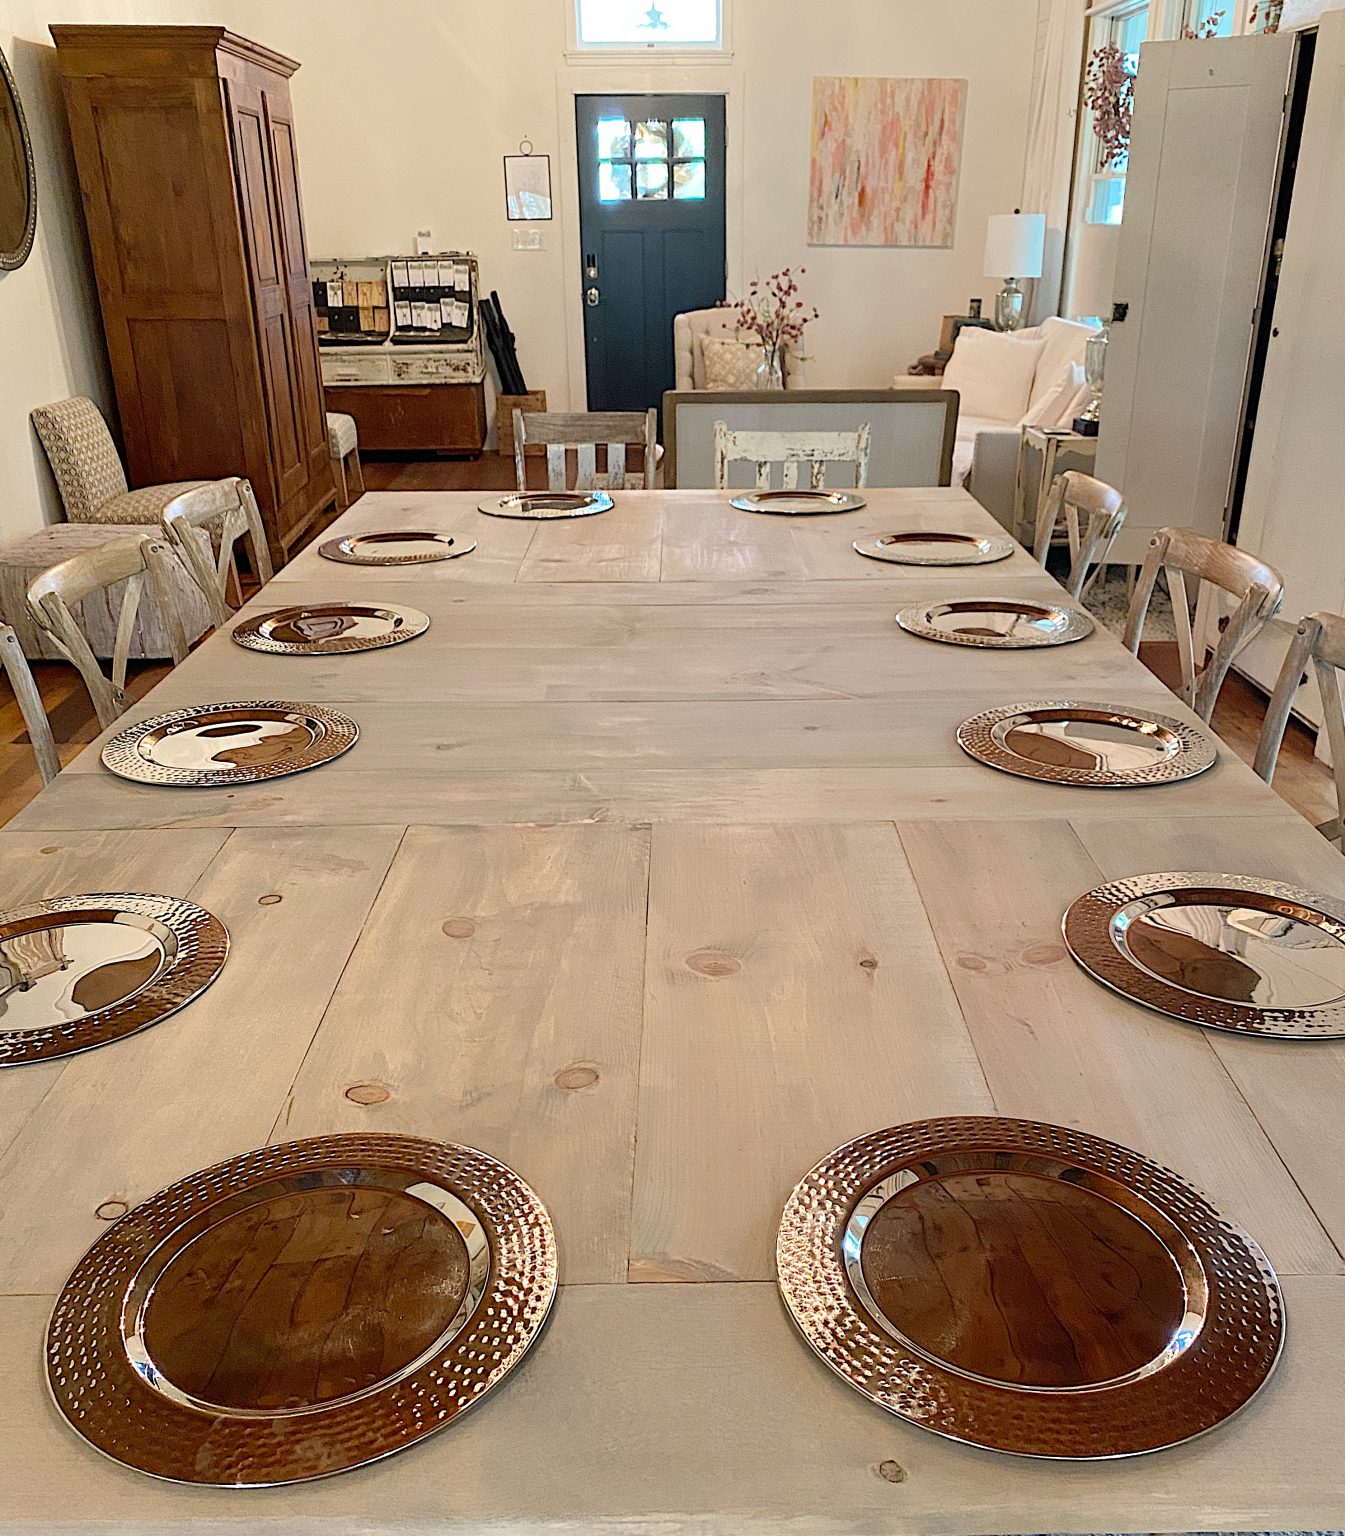
.The Table Setting
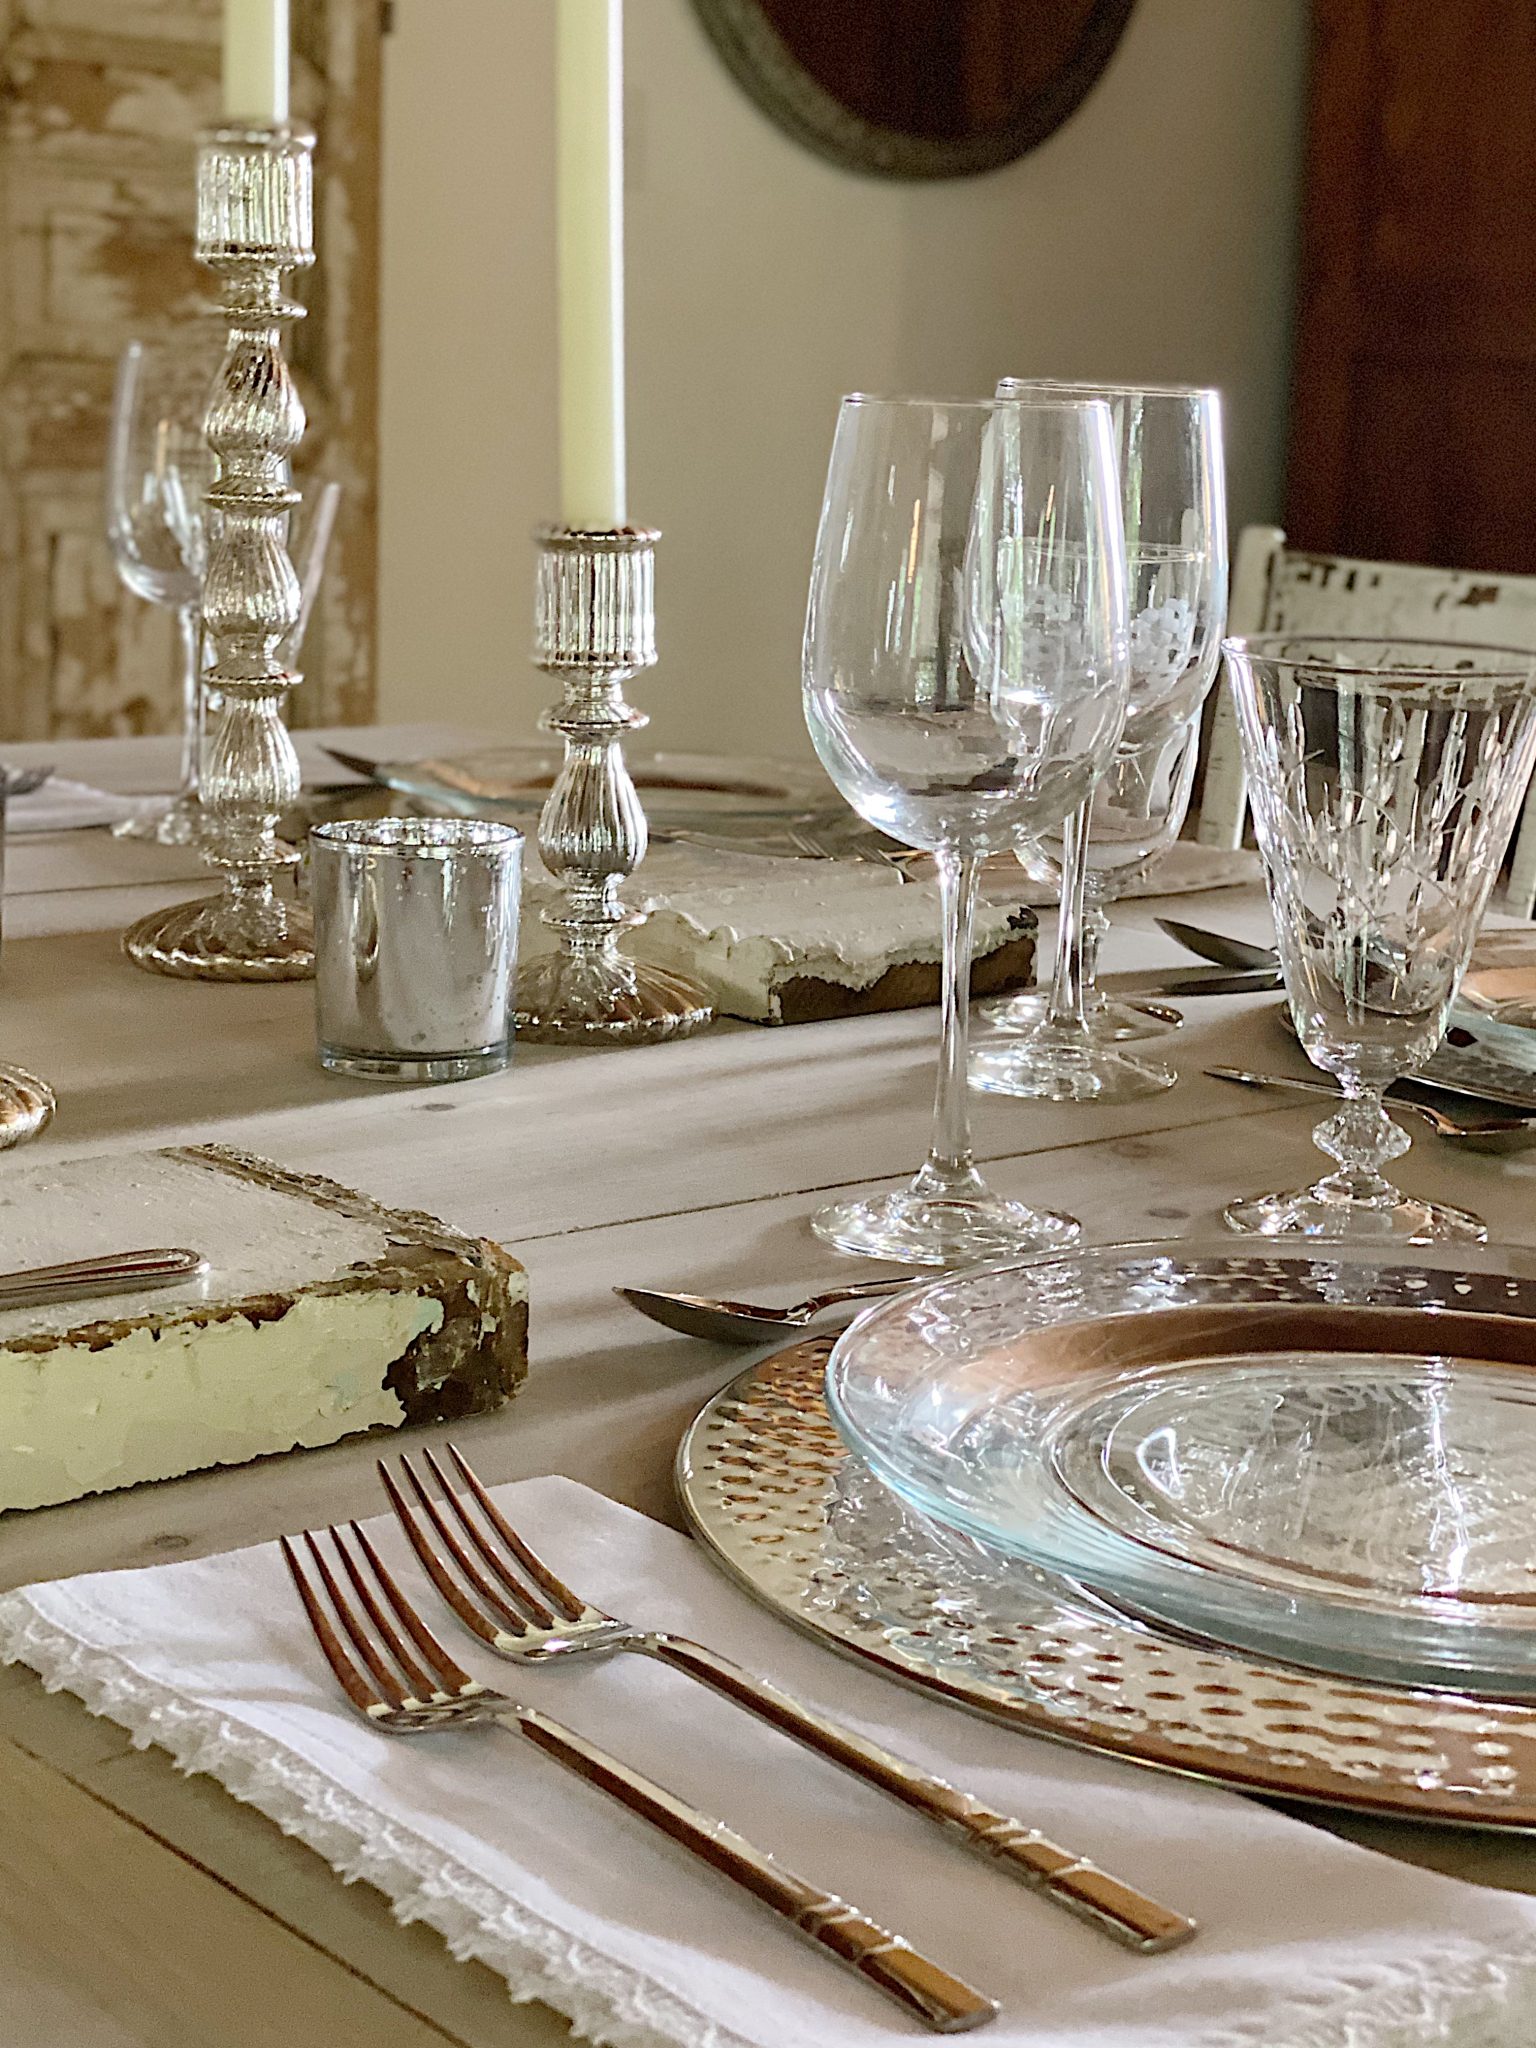
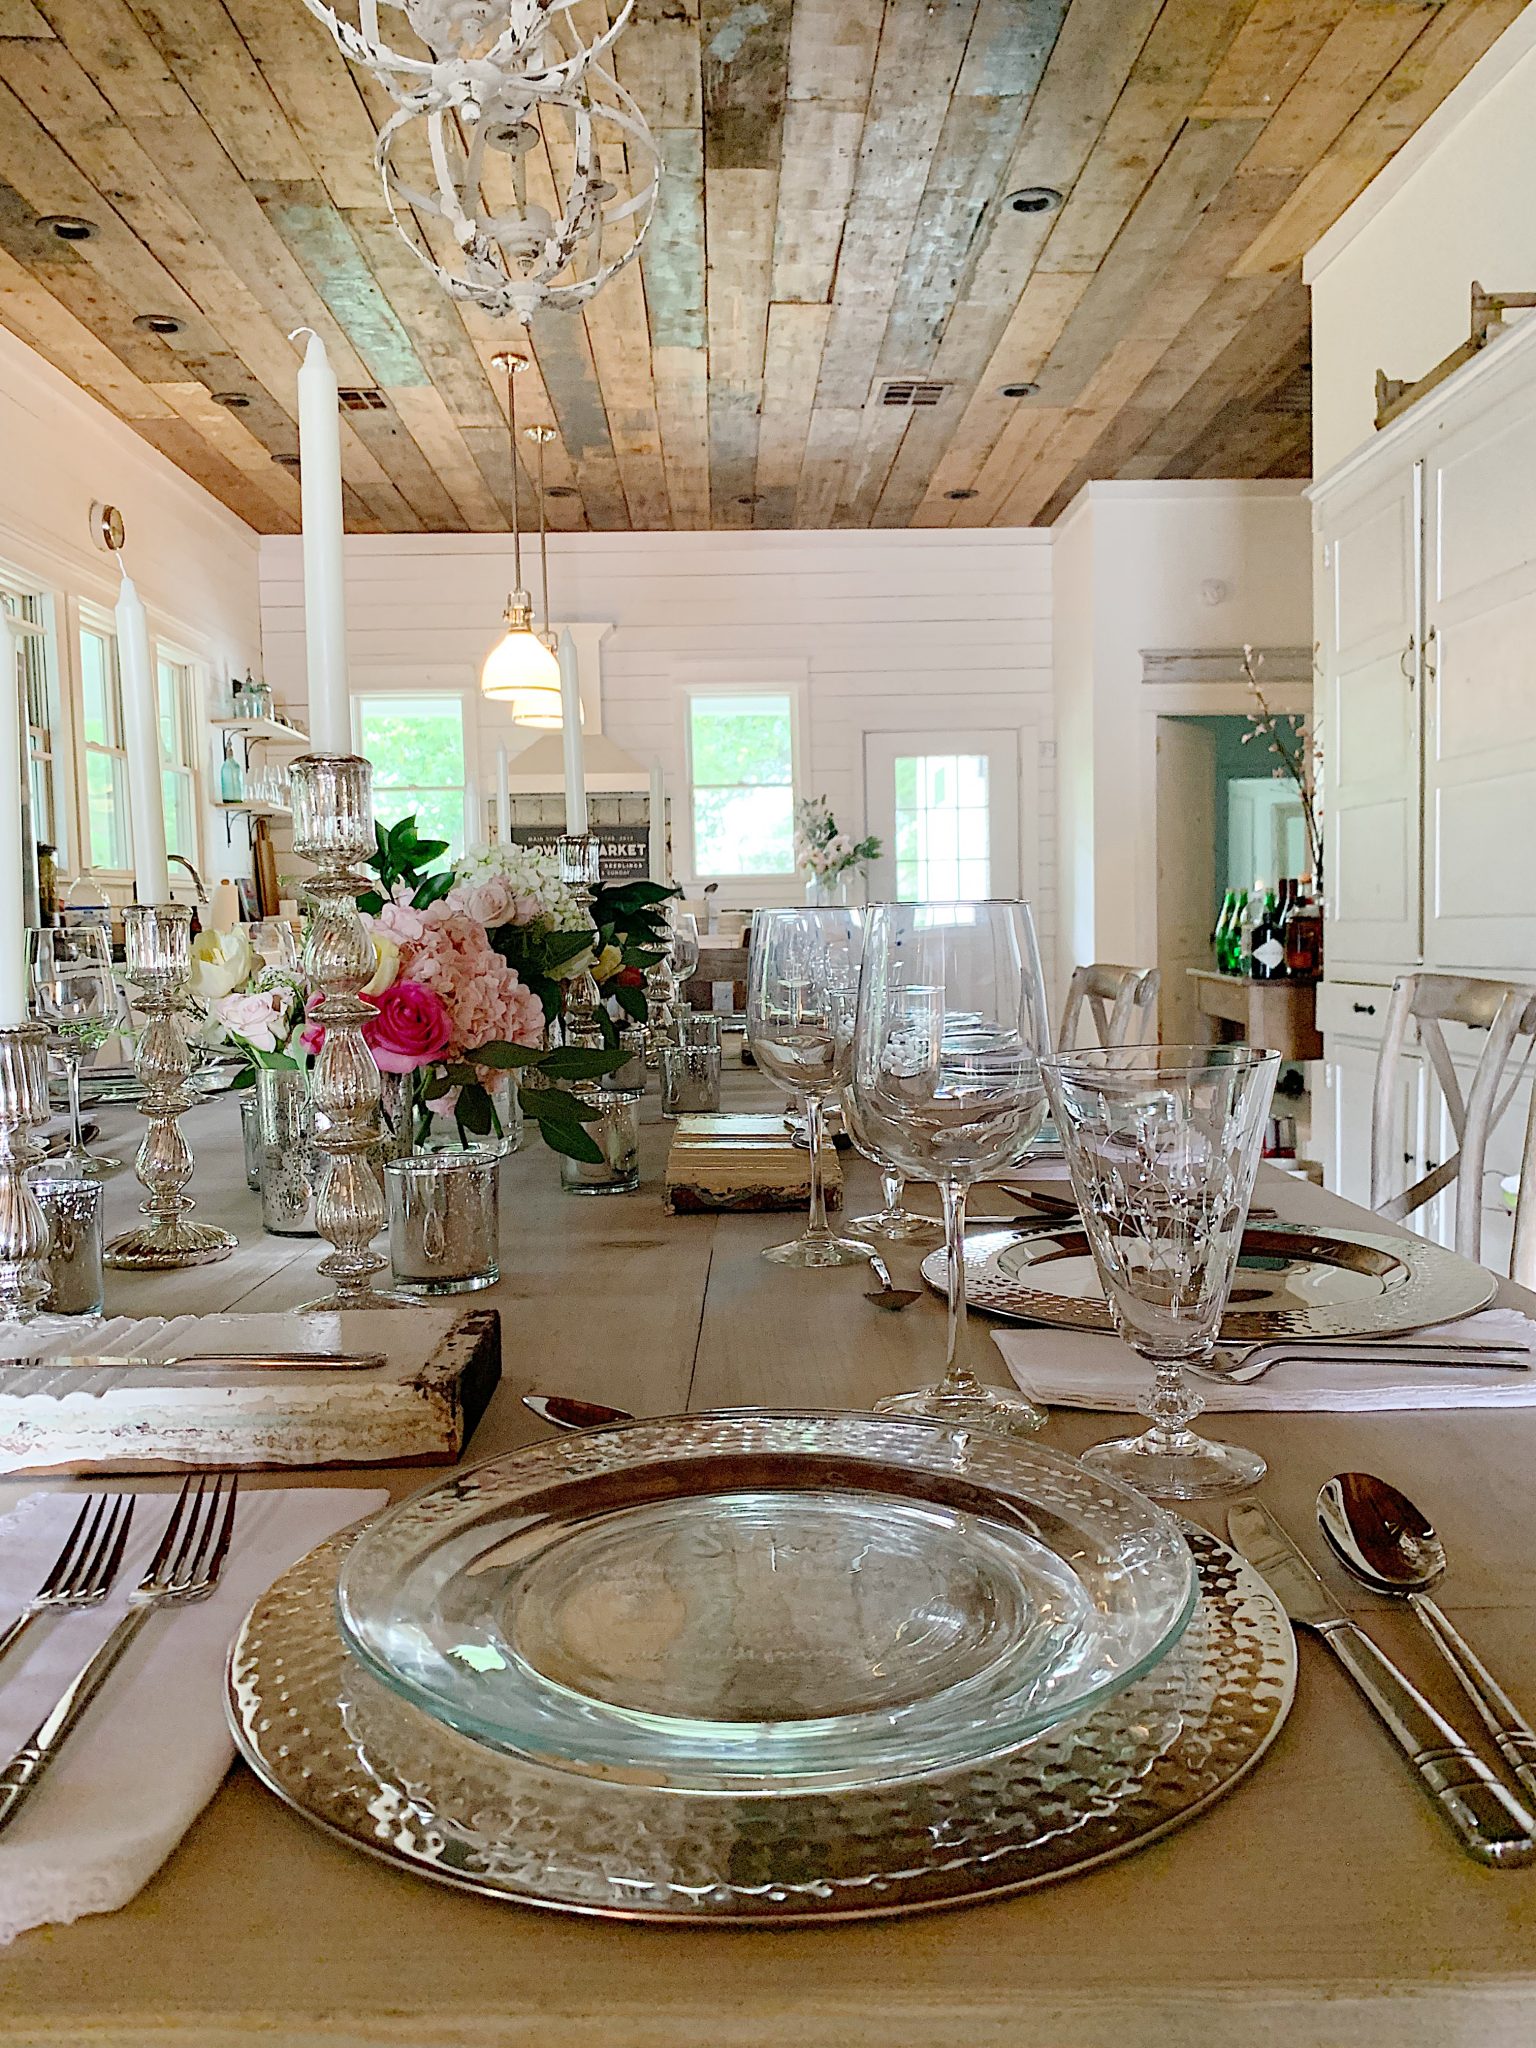
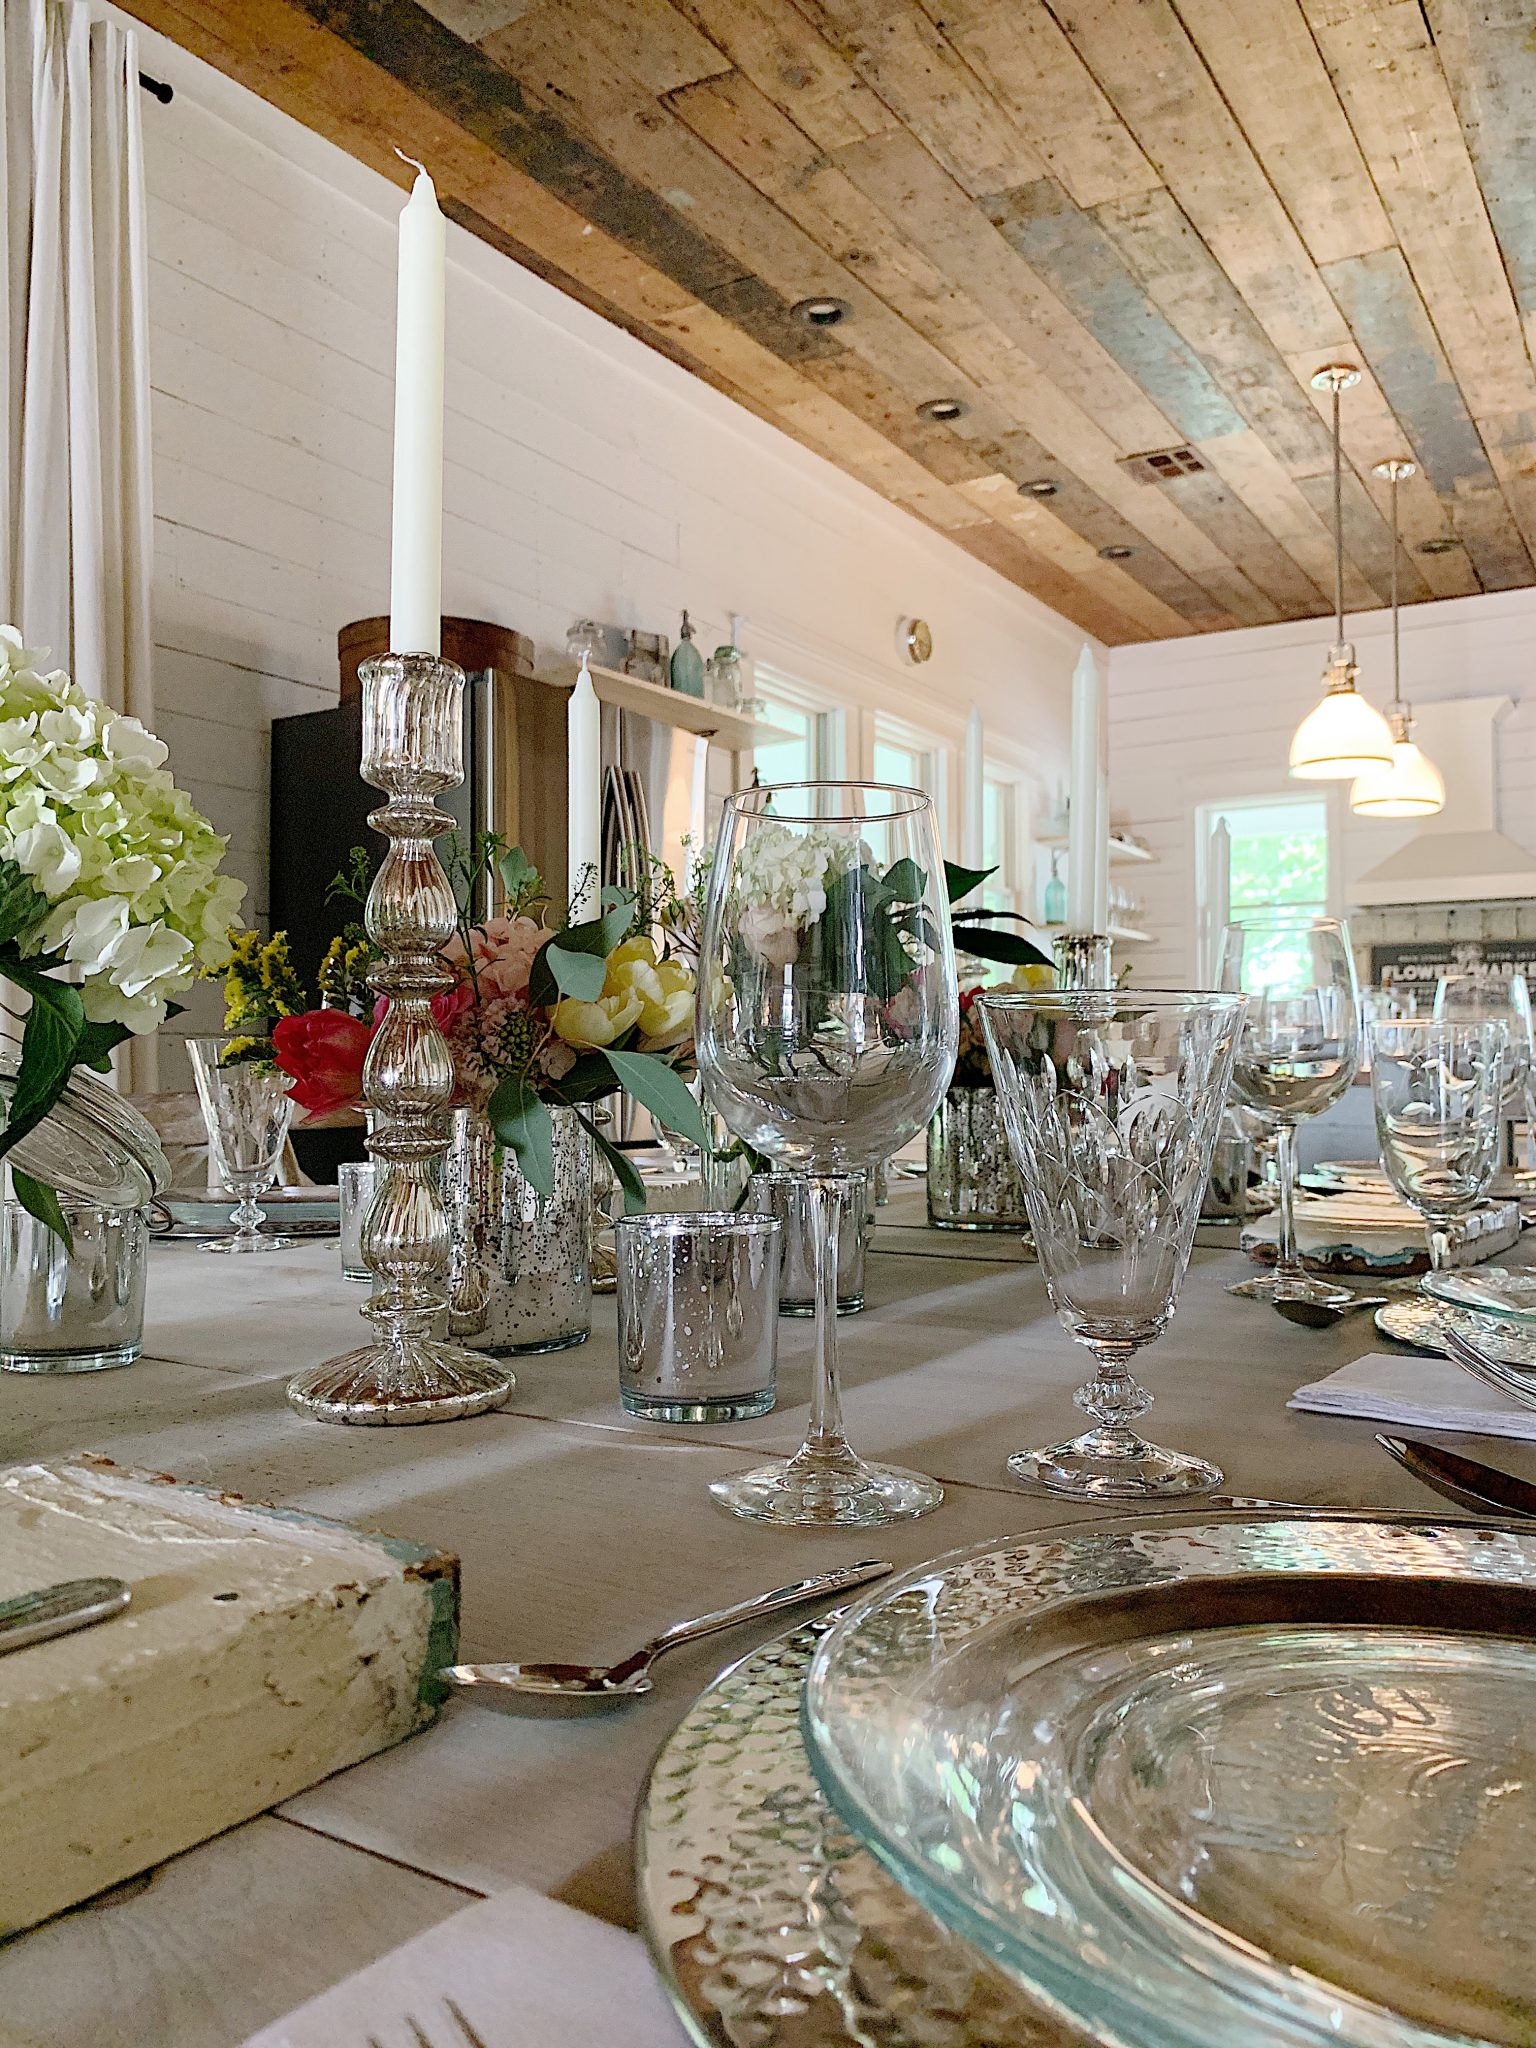
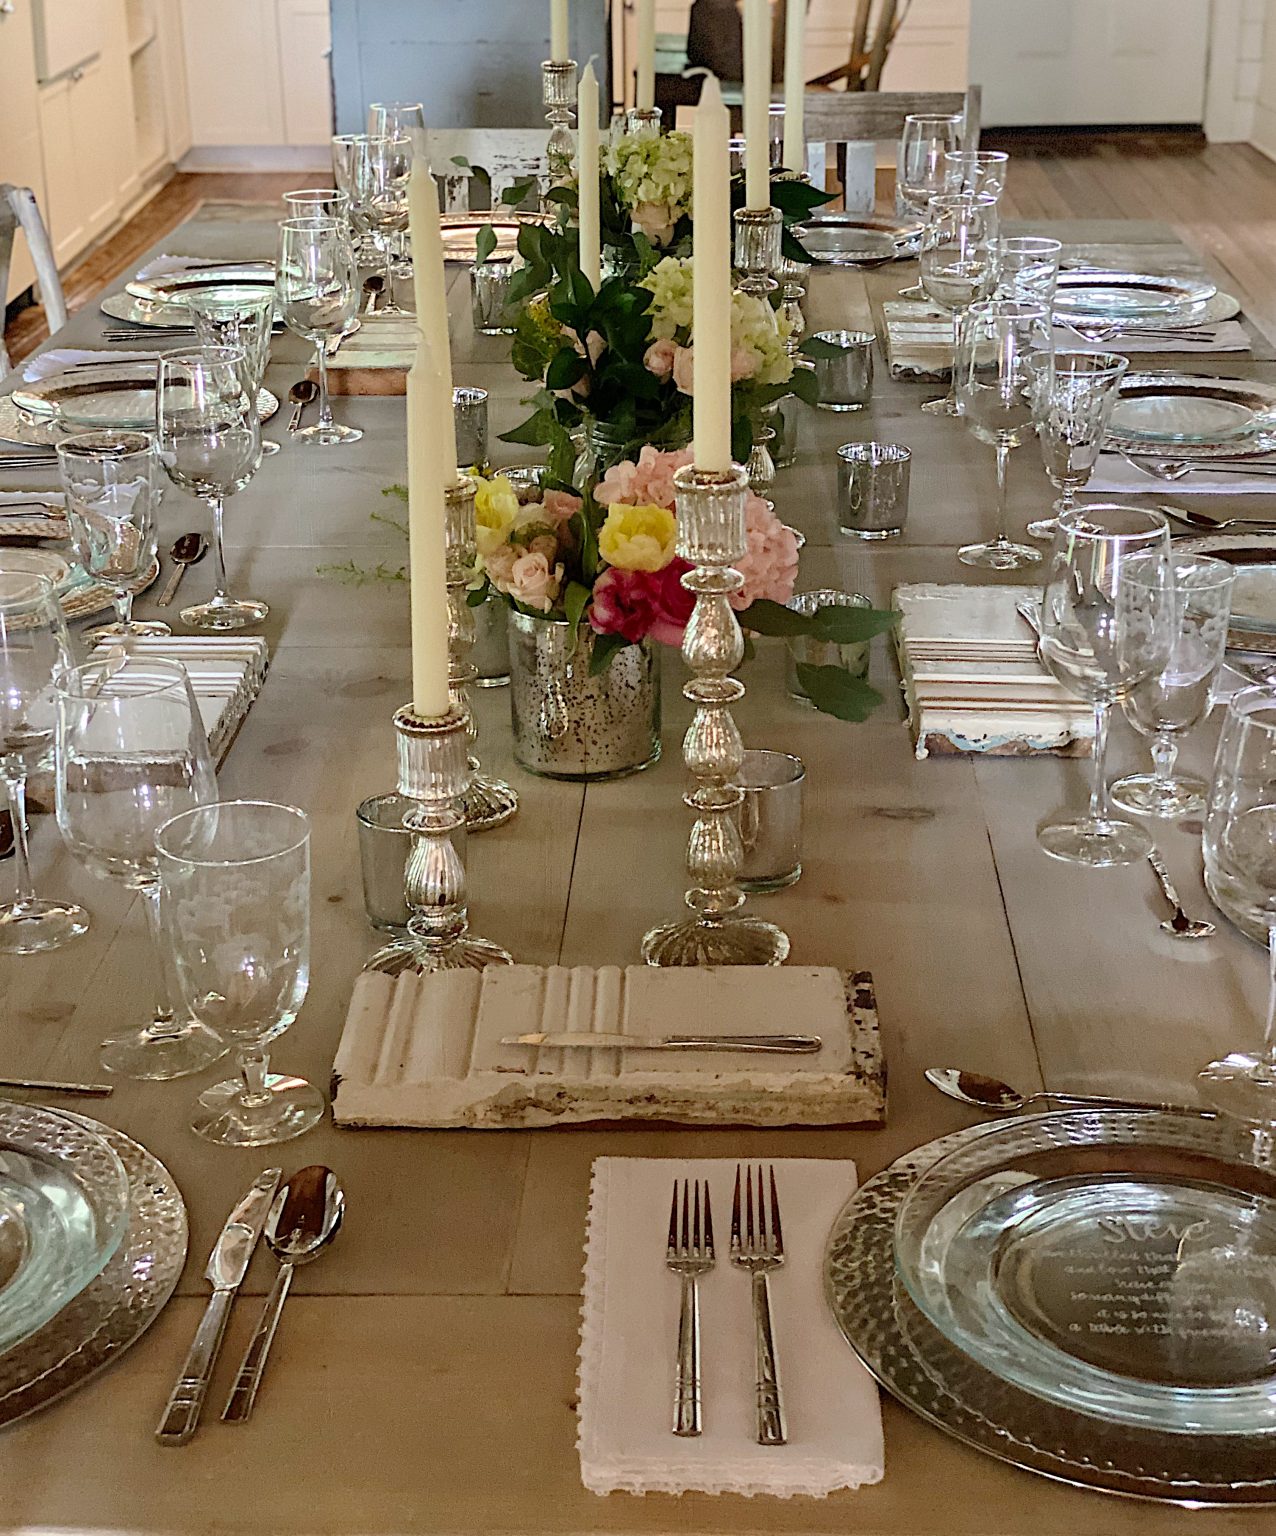
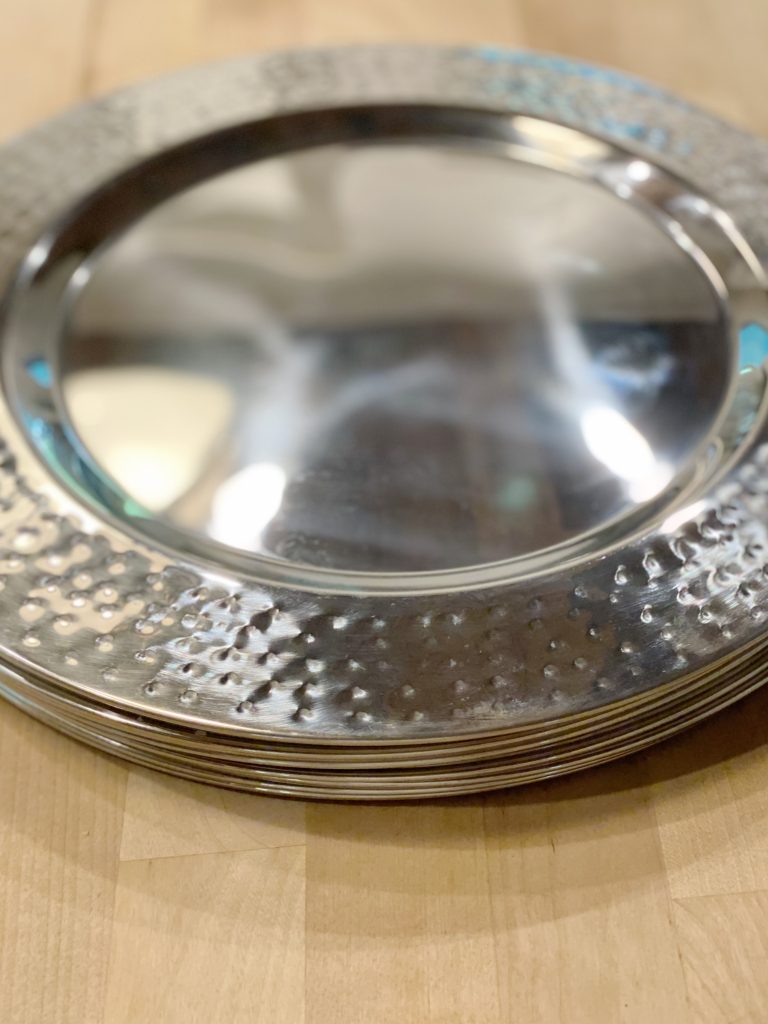
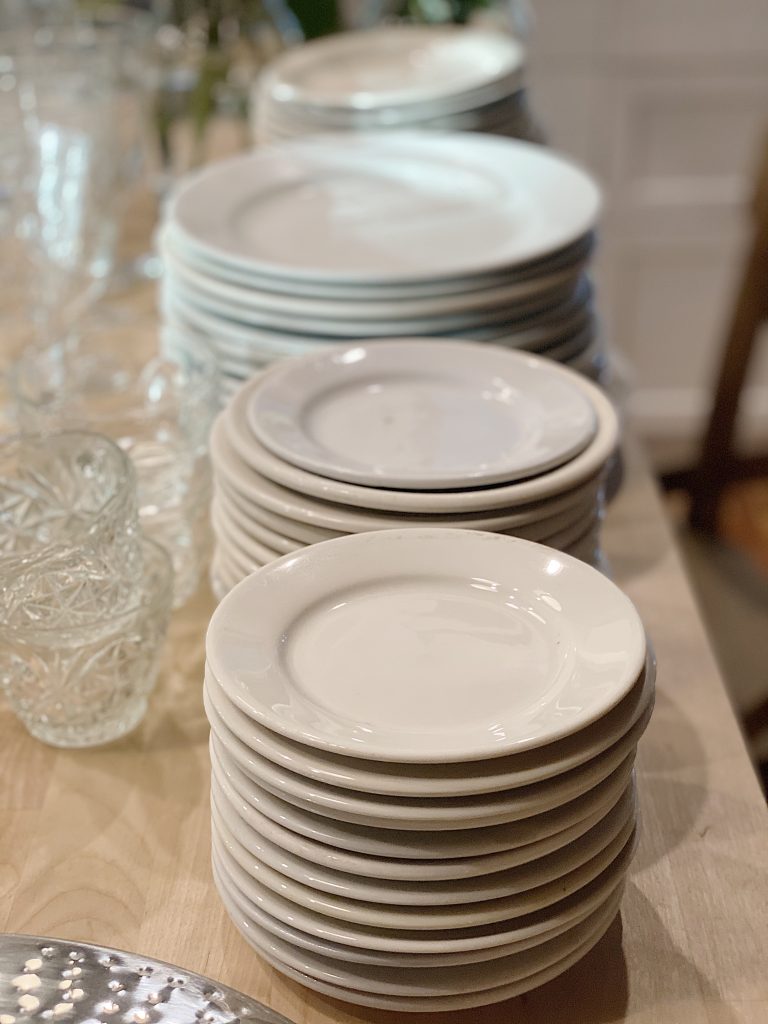
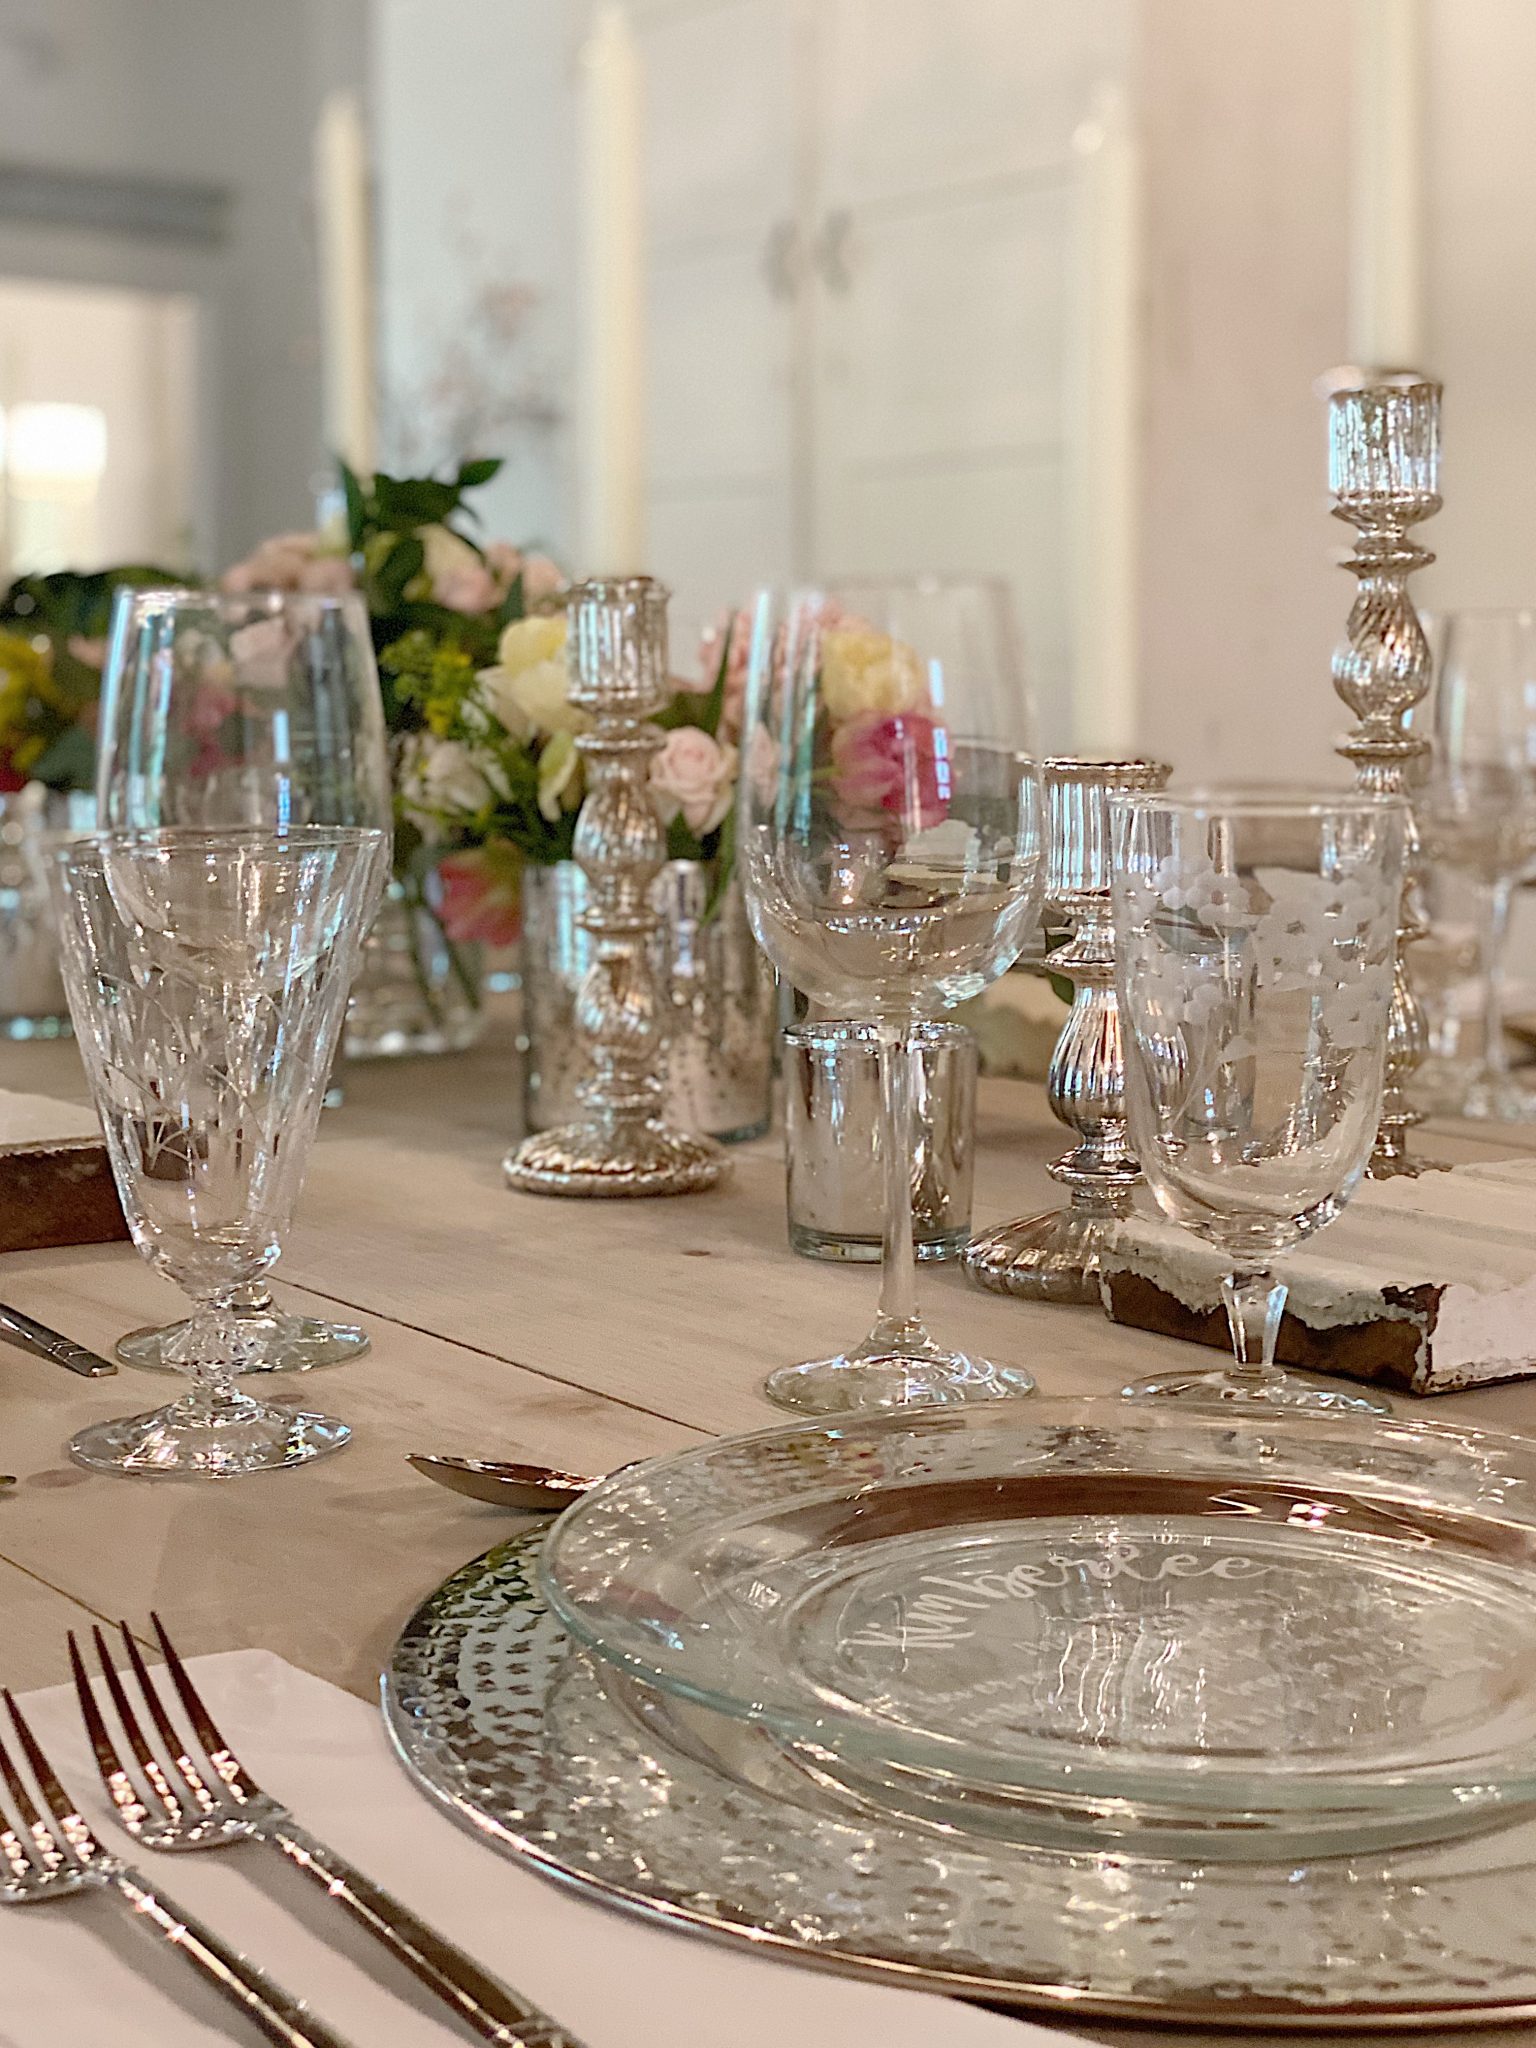
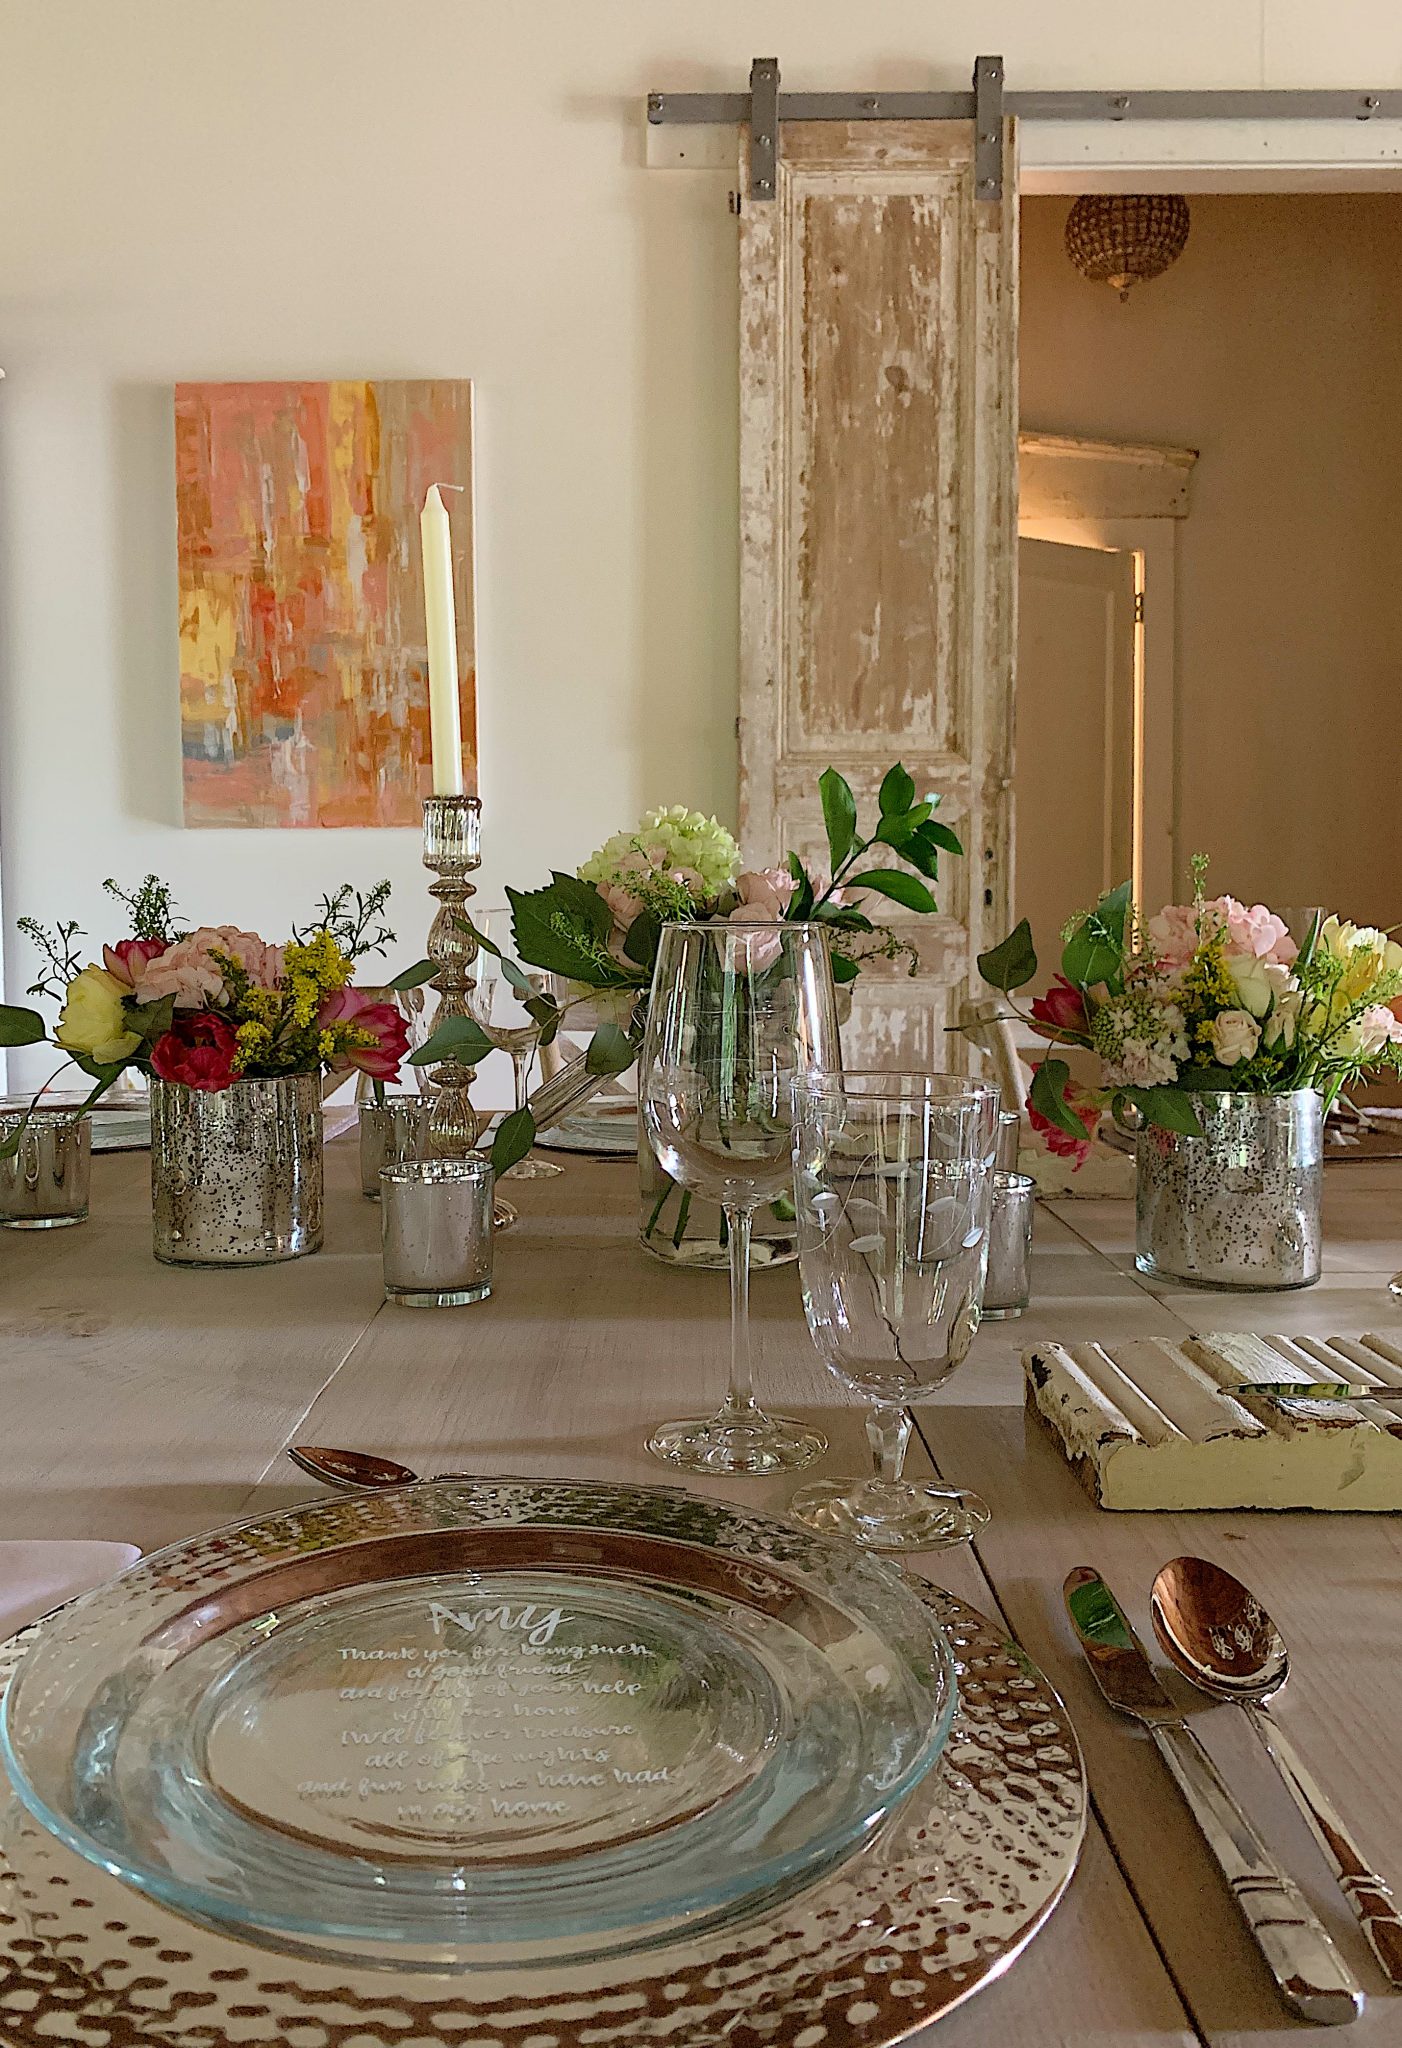
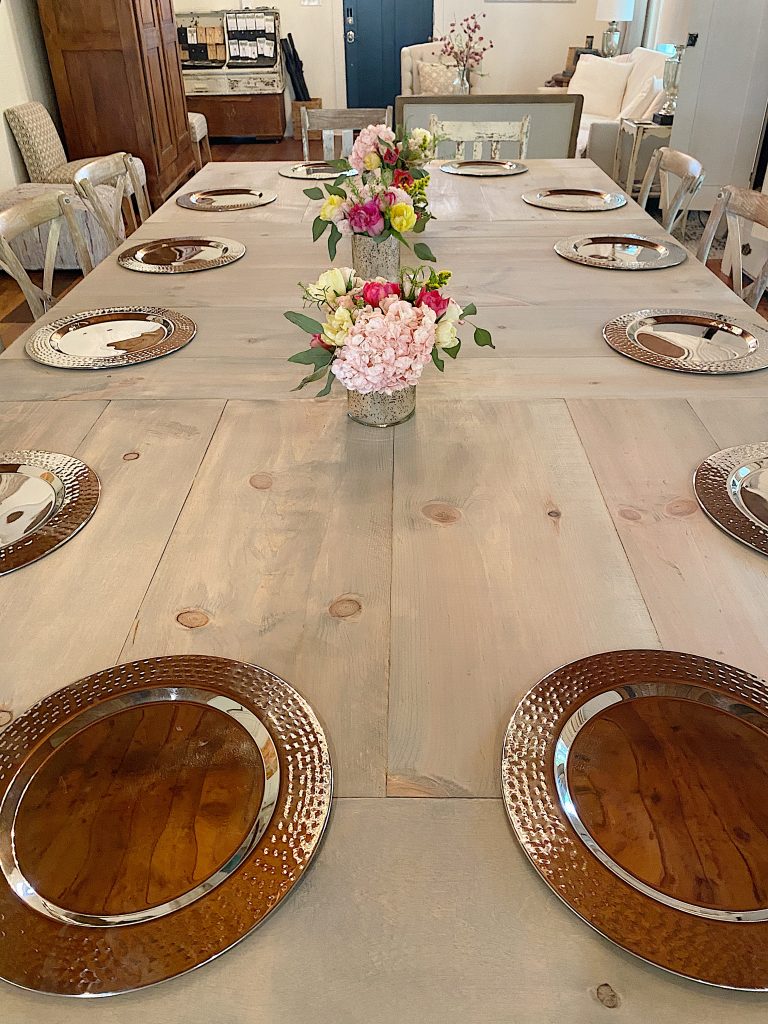
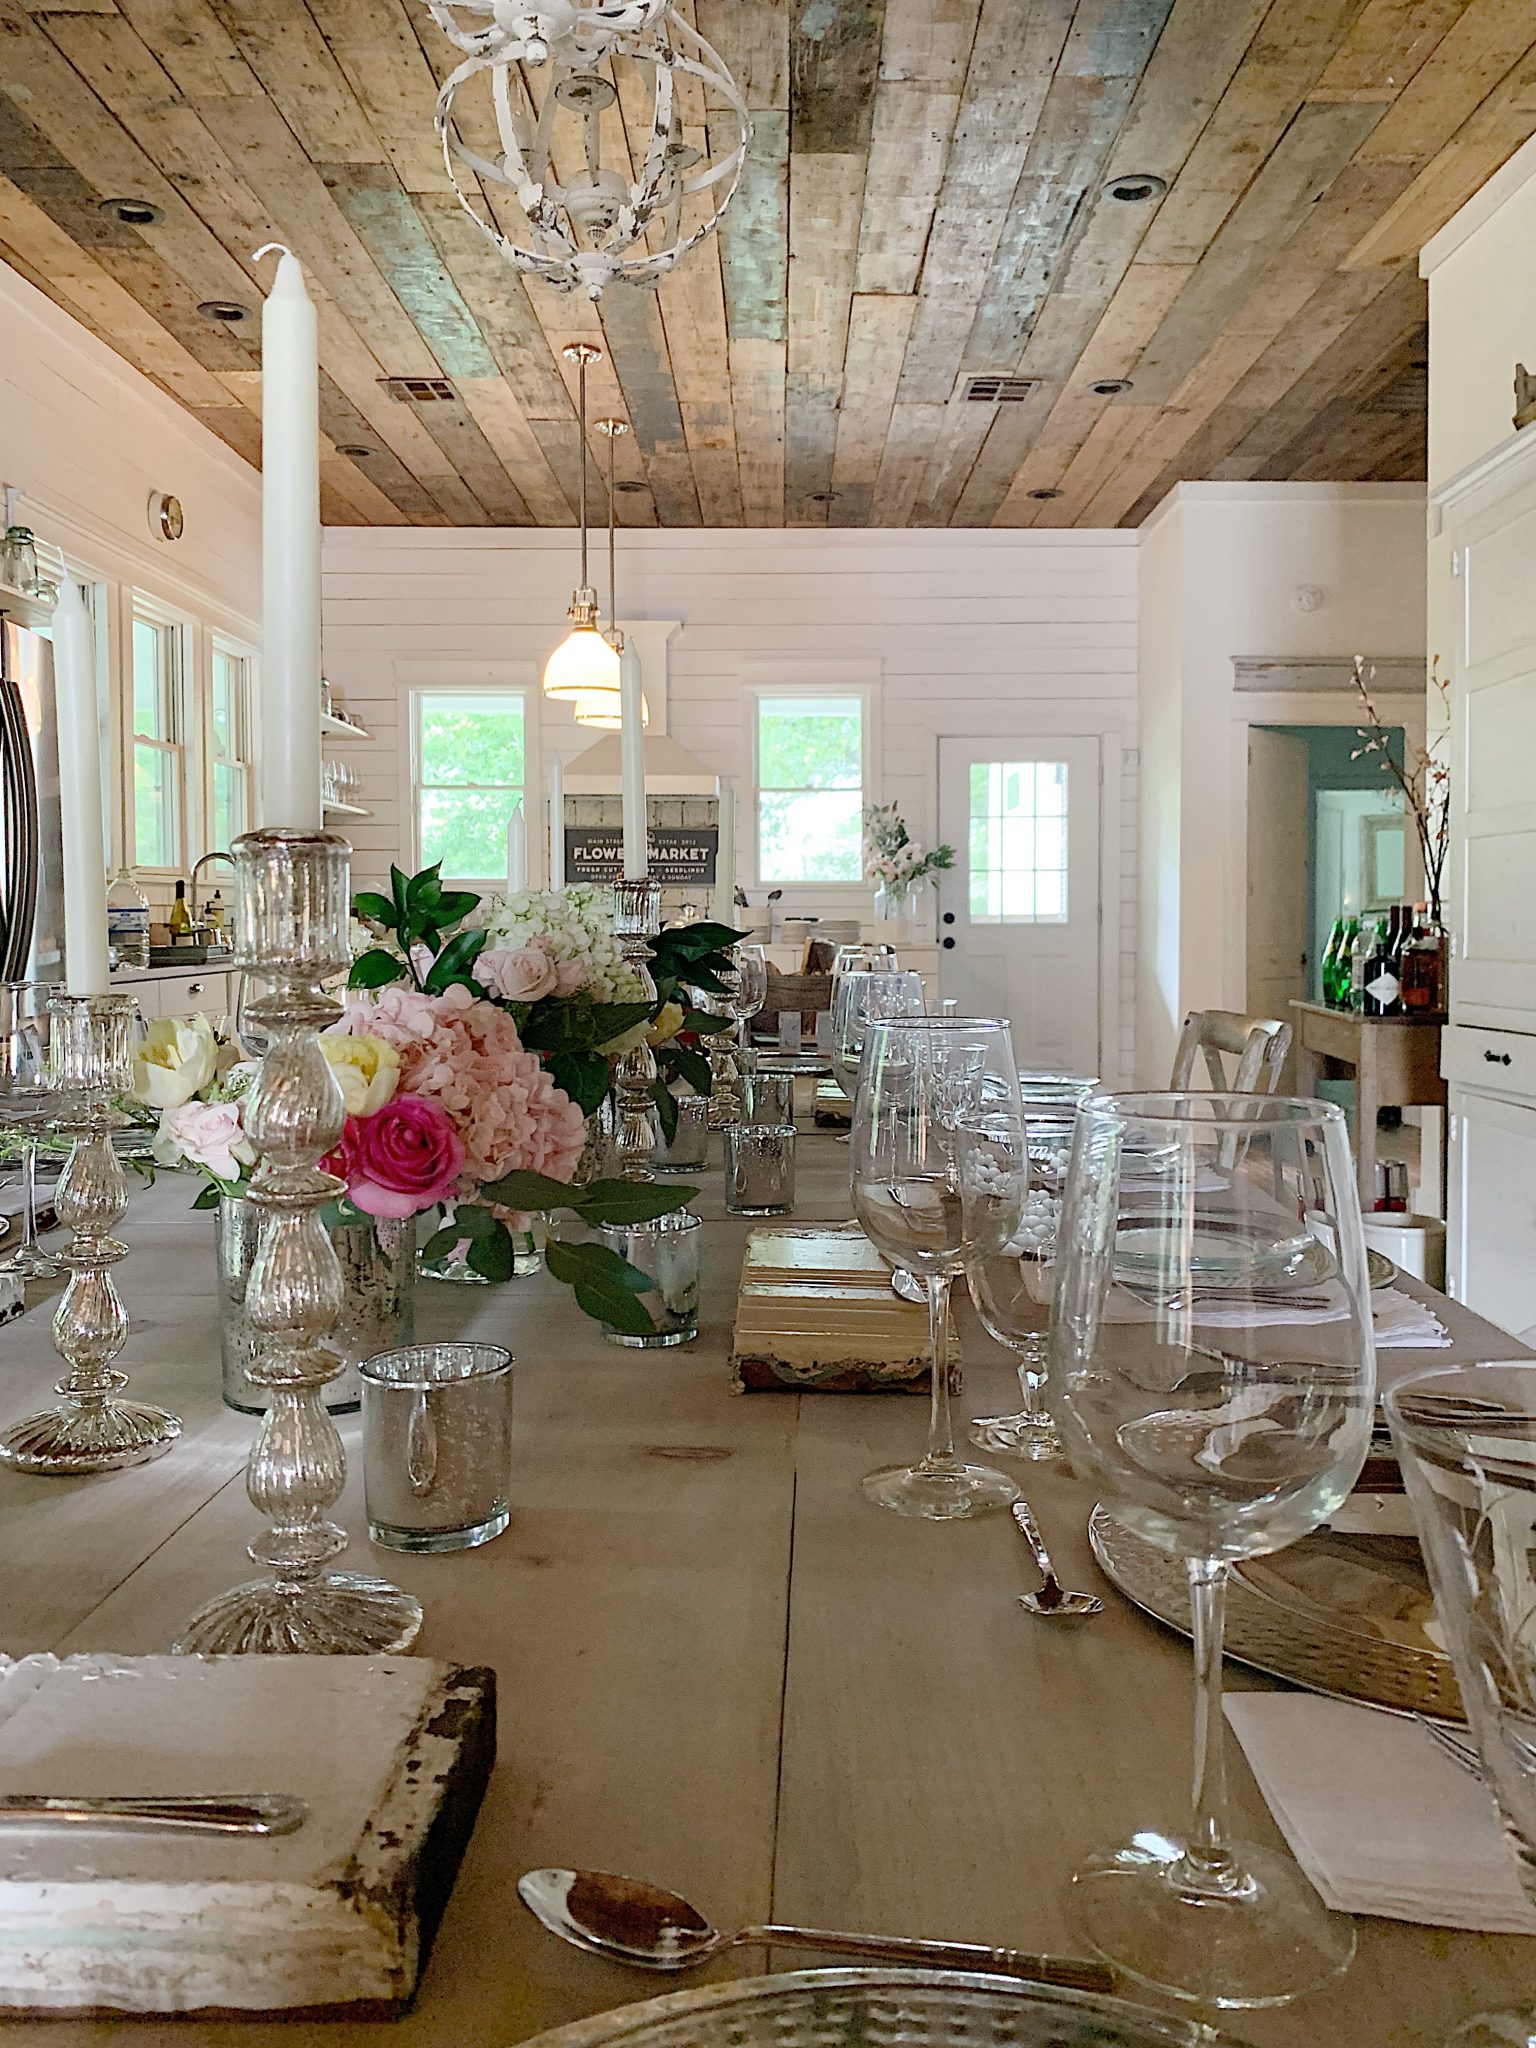
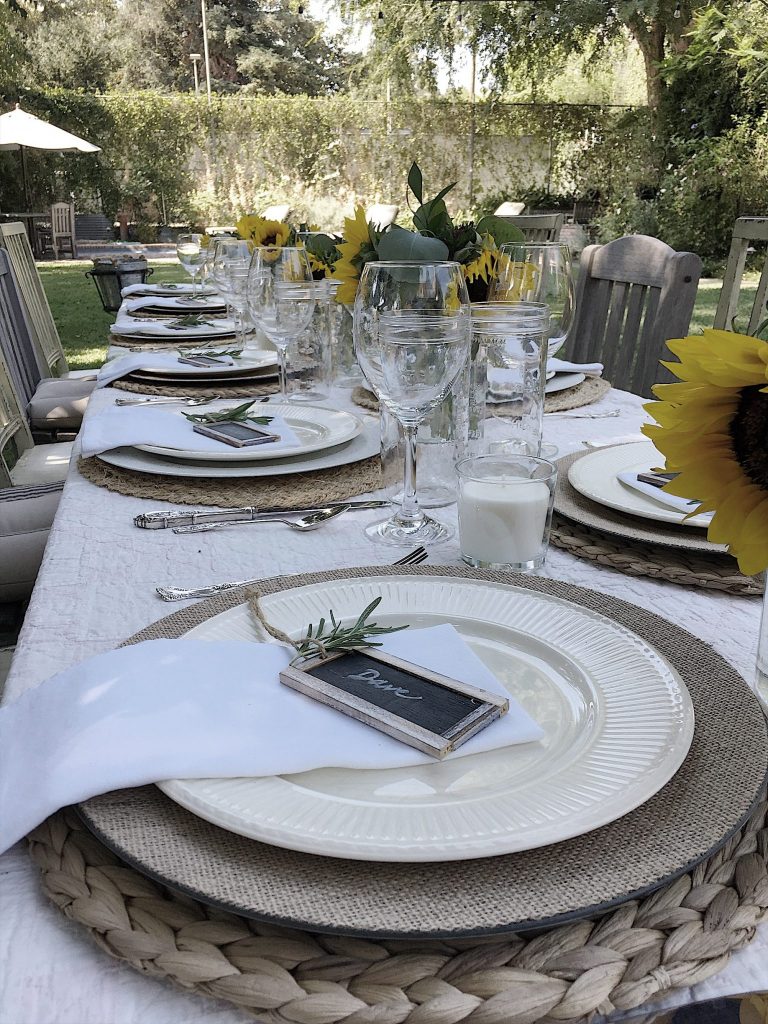
I know you will be surprised, but this table was the perfect combination of vintage and new items. Here is everything we used for the 7-course meal.
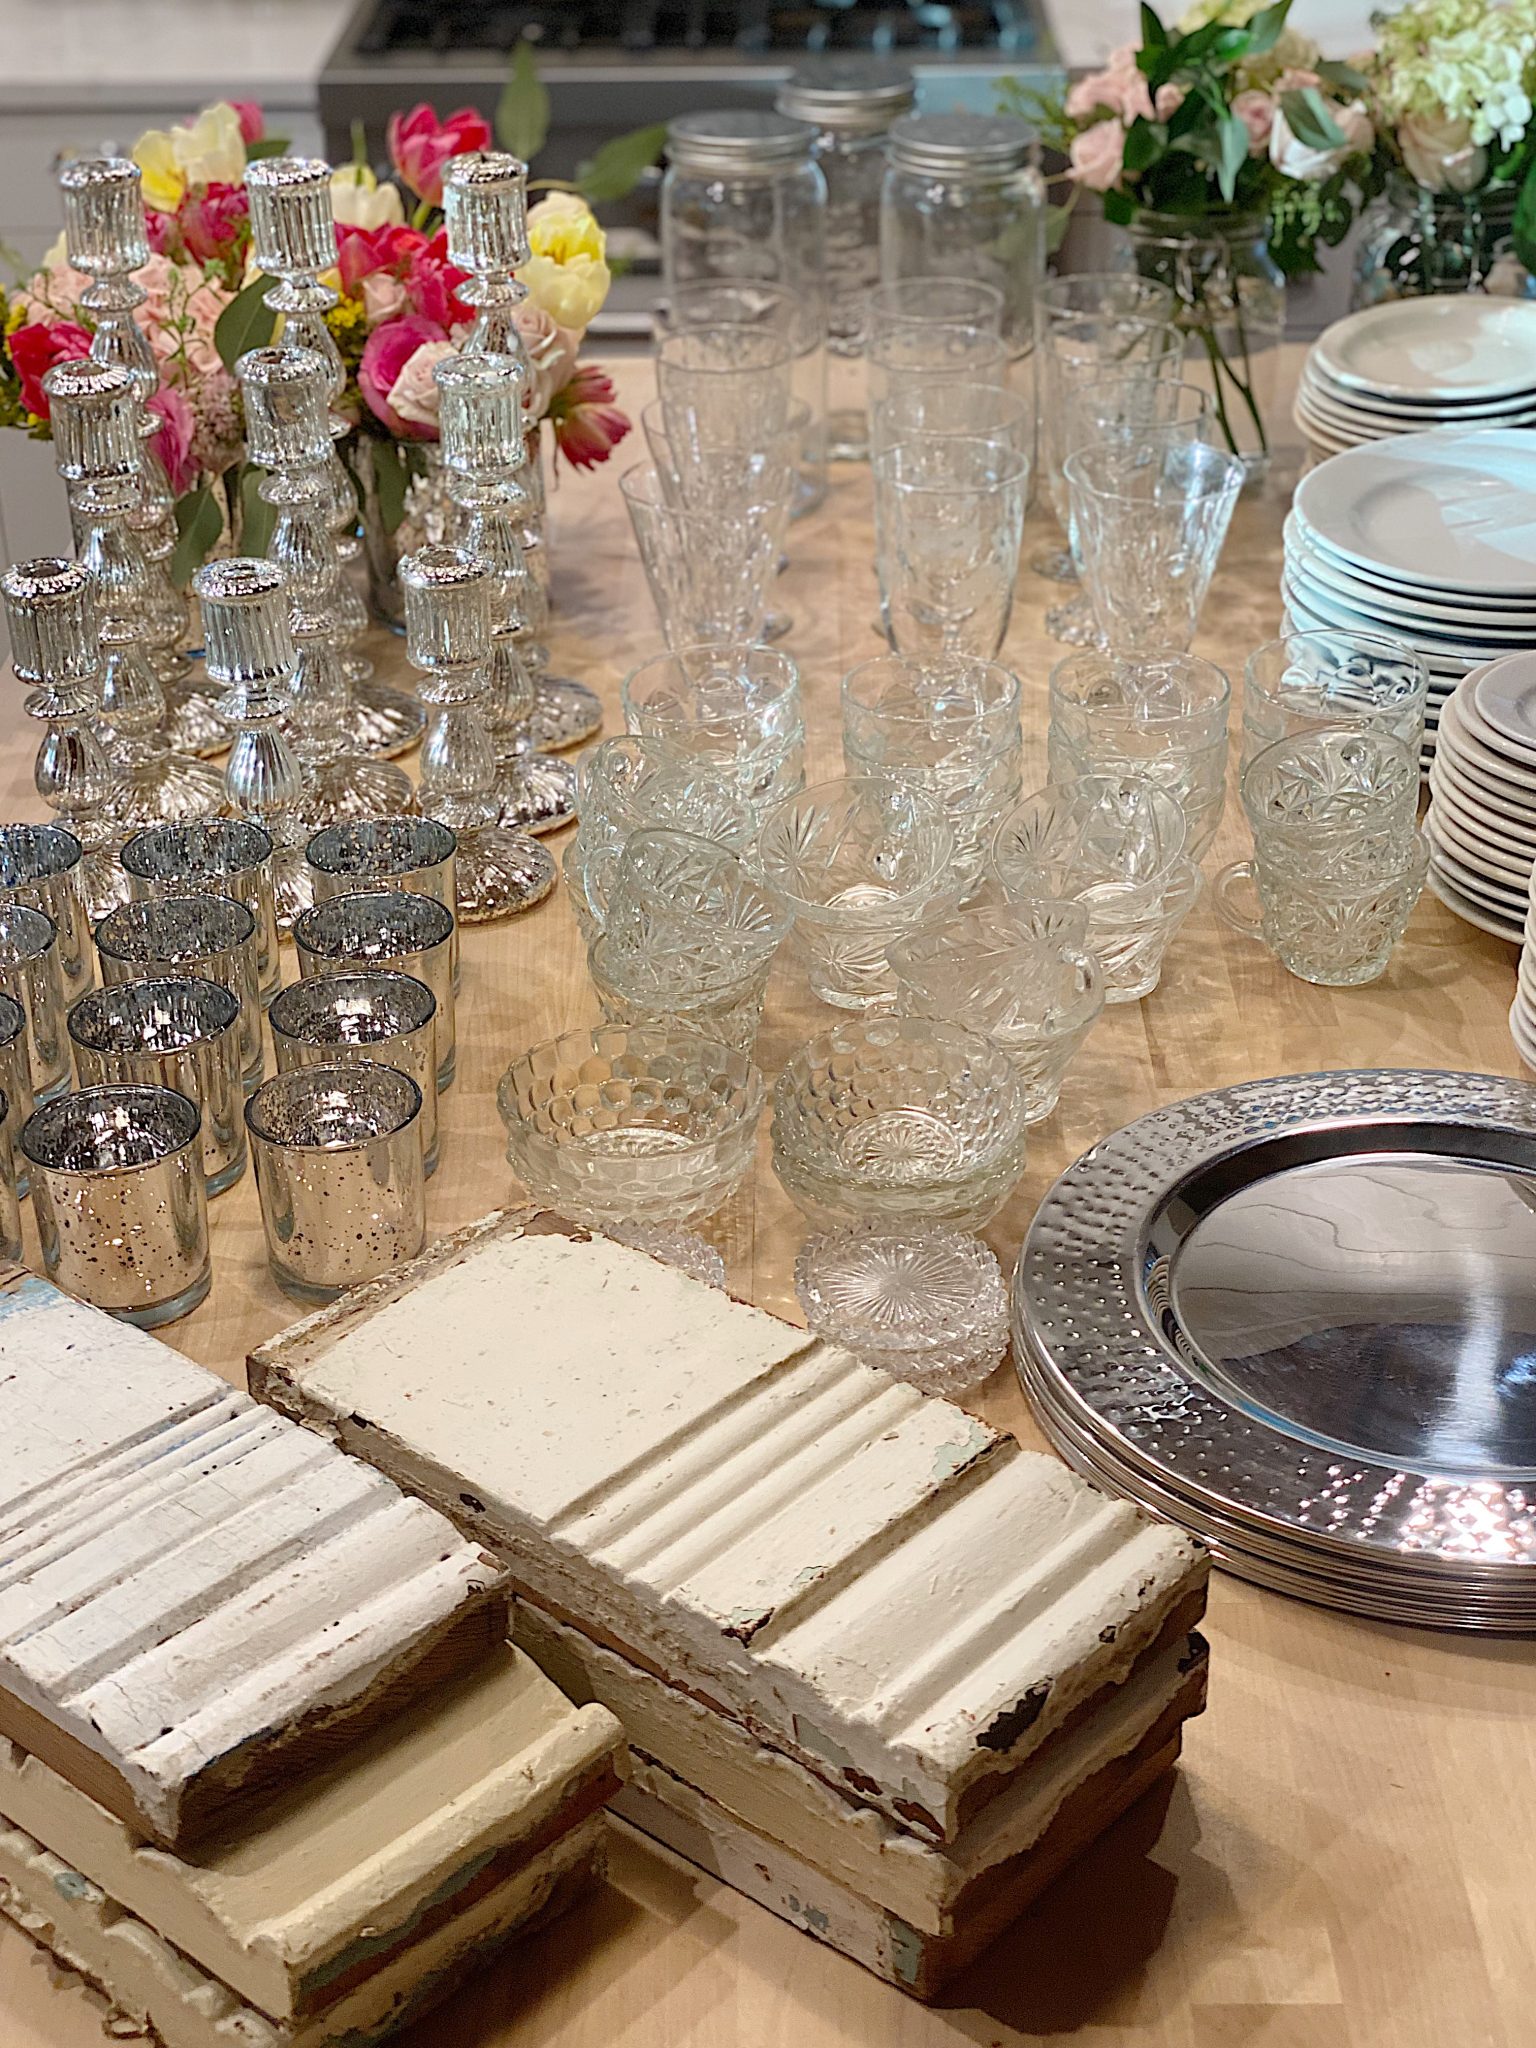
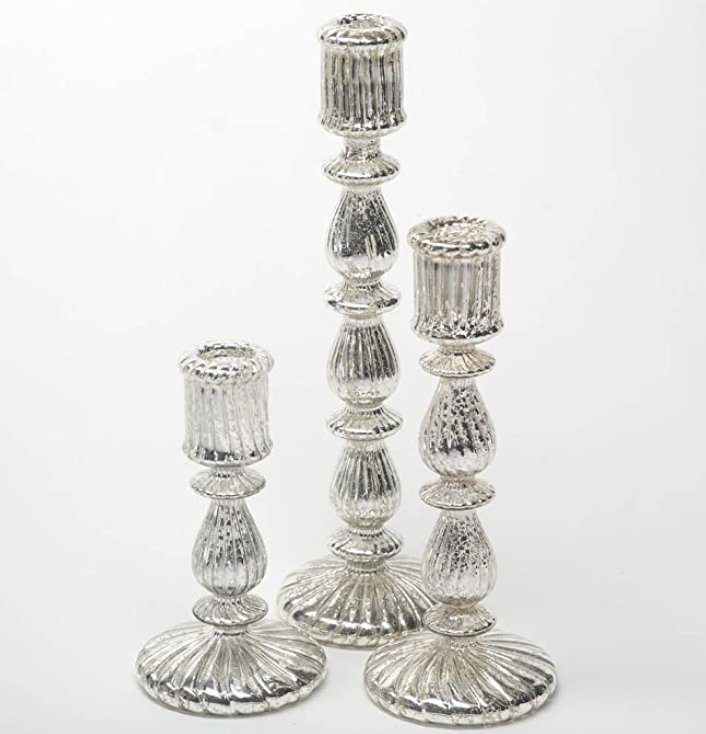
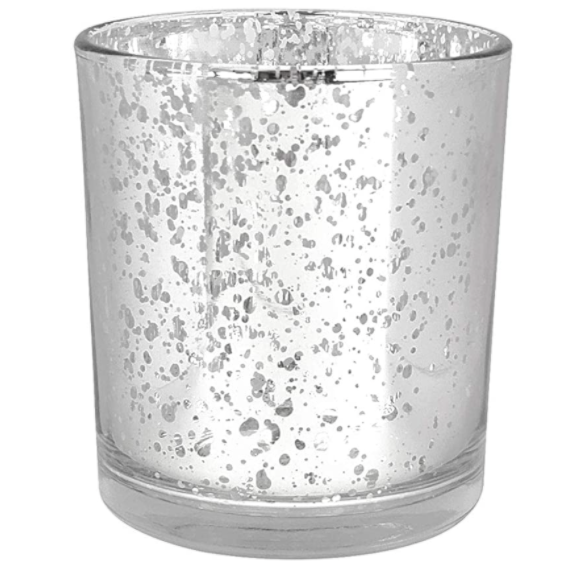
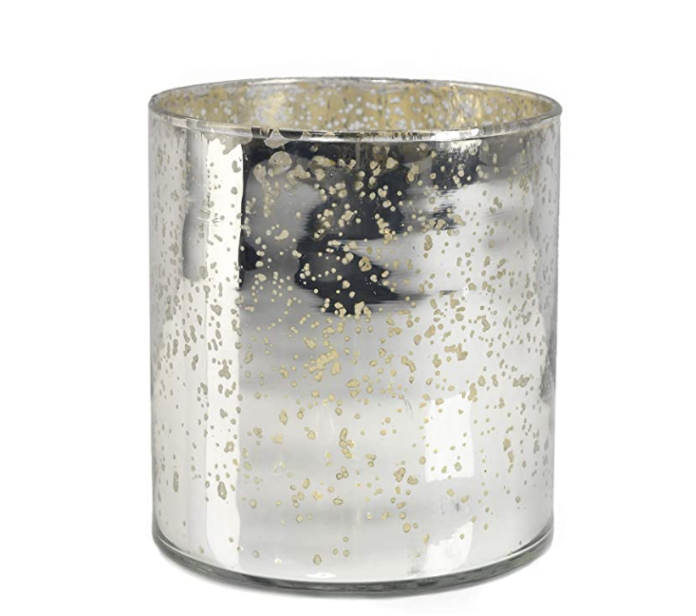
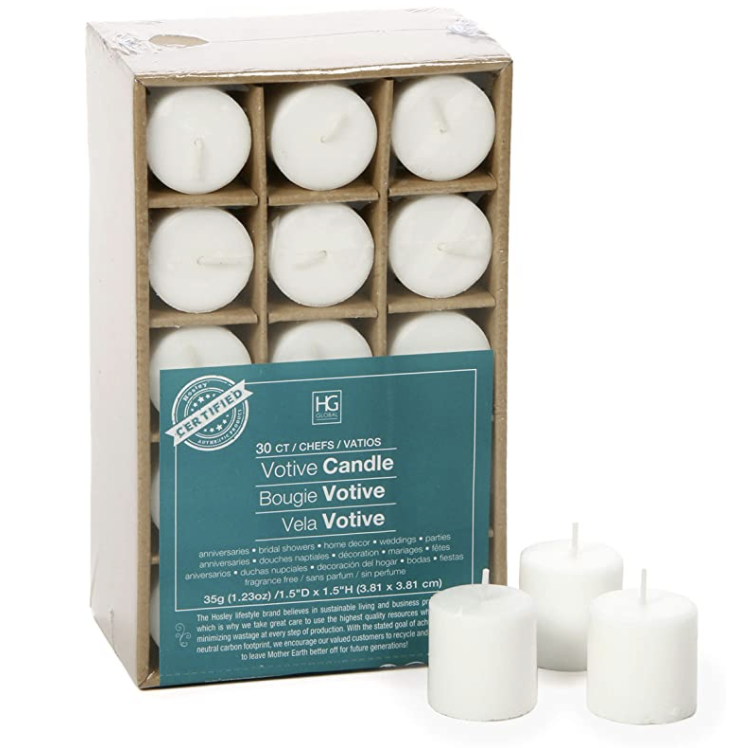
I bought the napkins, stainless chargers, mercury glass vases, candles, mercury glass votives and mercury glass candlesticks. They are all linked at the end of this post and are very affordable.

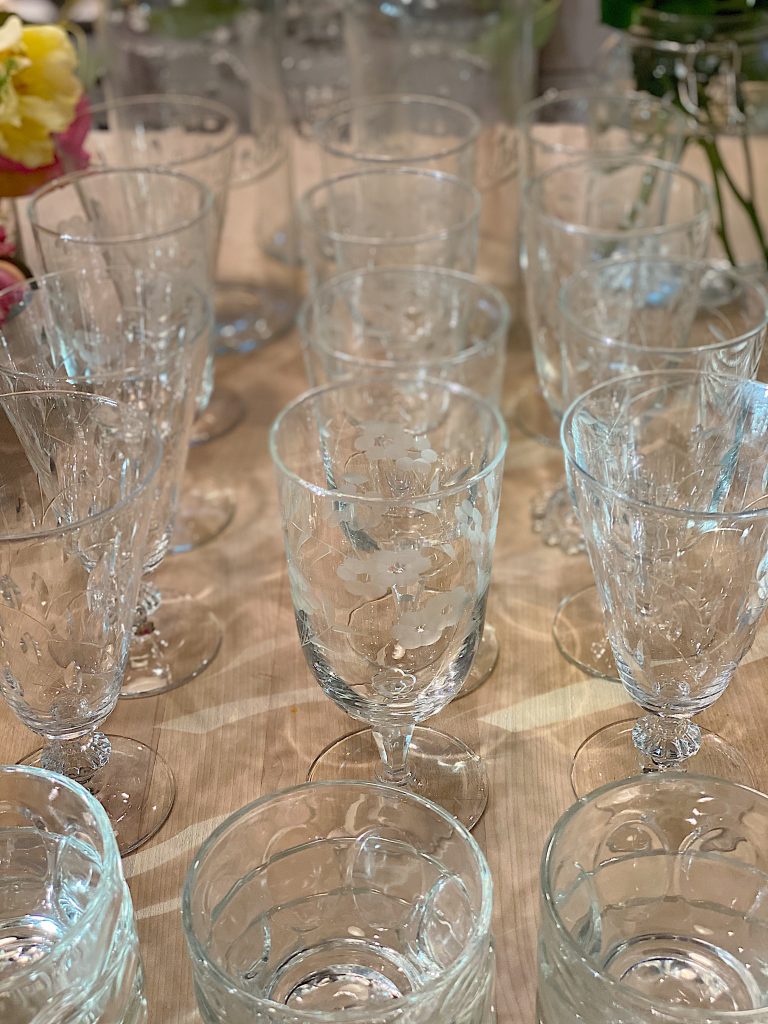
I also found some vintage items which include the etched footed glasses, the ironstone plates (three sets of 12), glass bowls, and the wood moulding pieces. I bought a lot of this in Round Top and payed a few dollars for each. My favorite etched footed crystal glasses cost between $.99 and $4.00 each.
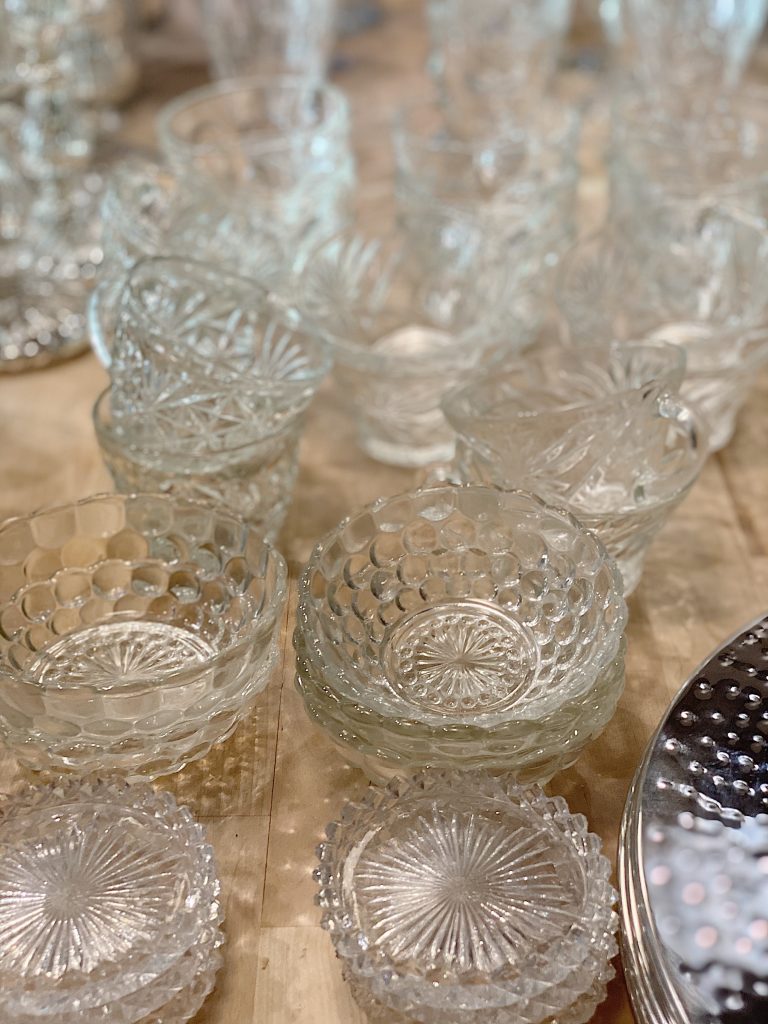

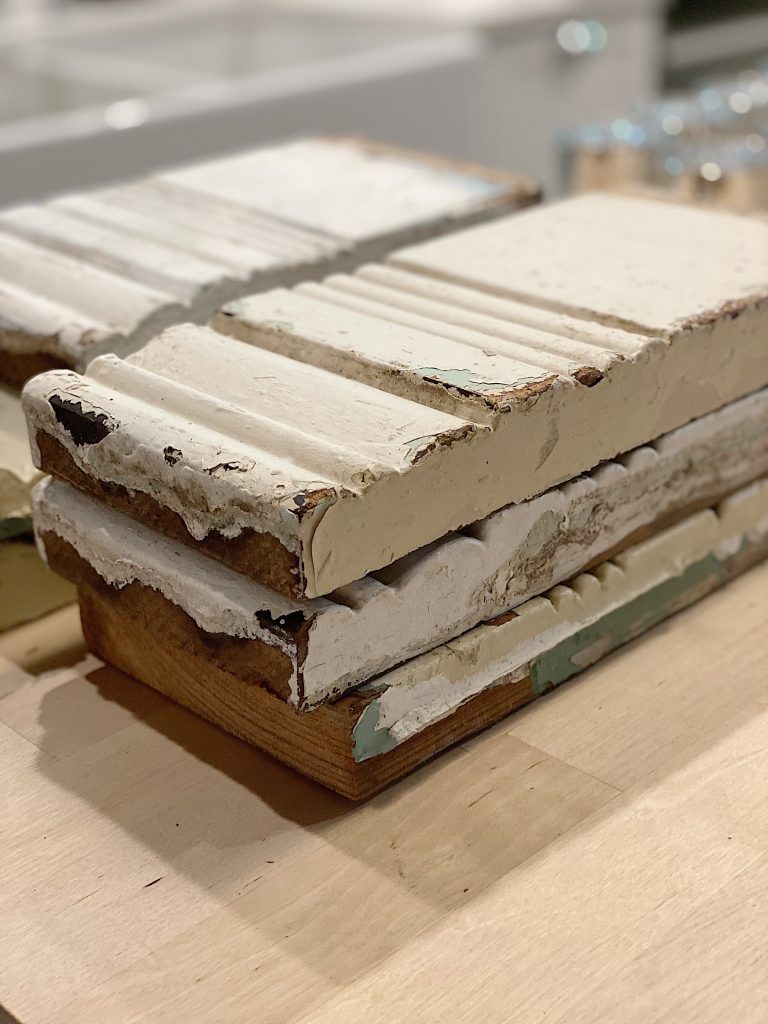
We used the wood moulding pieces and small bowls for the first course, which was the Nibbles. You will see more about those in tomorrow’s blog post when I share the menu and recipes.
I absolutely love how well the new and vintage pieces looked on our table.
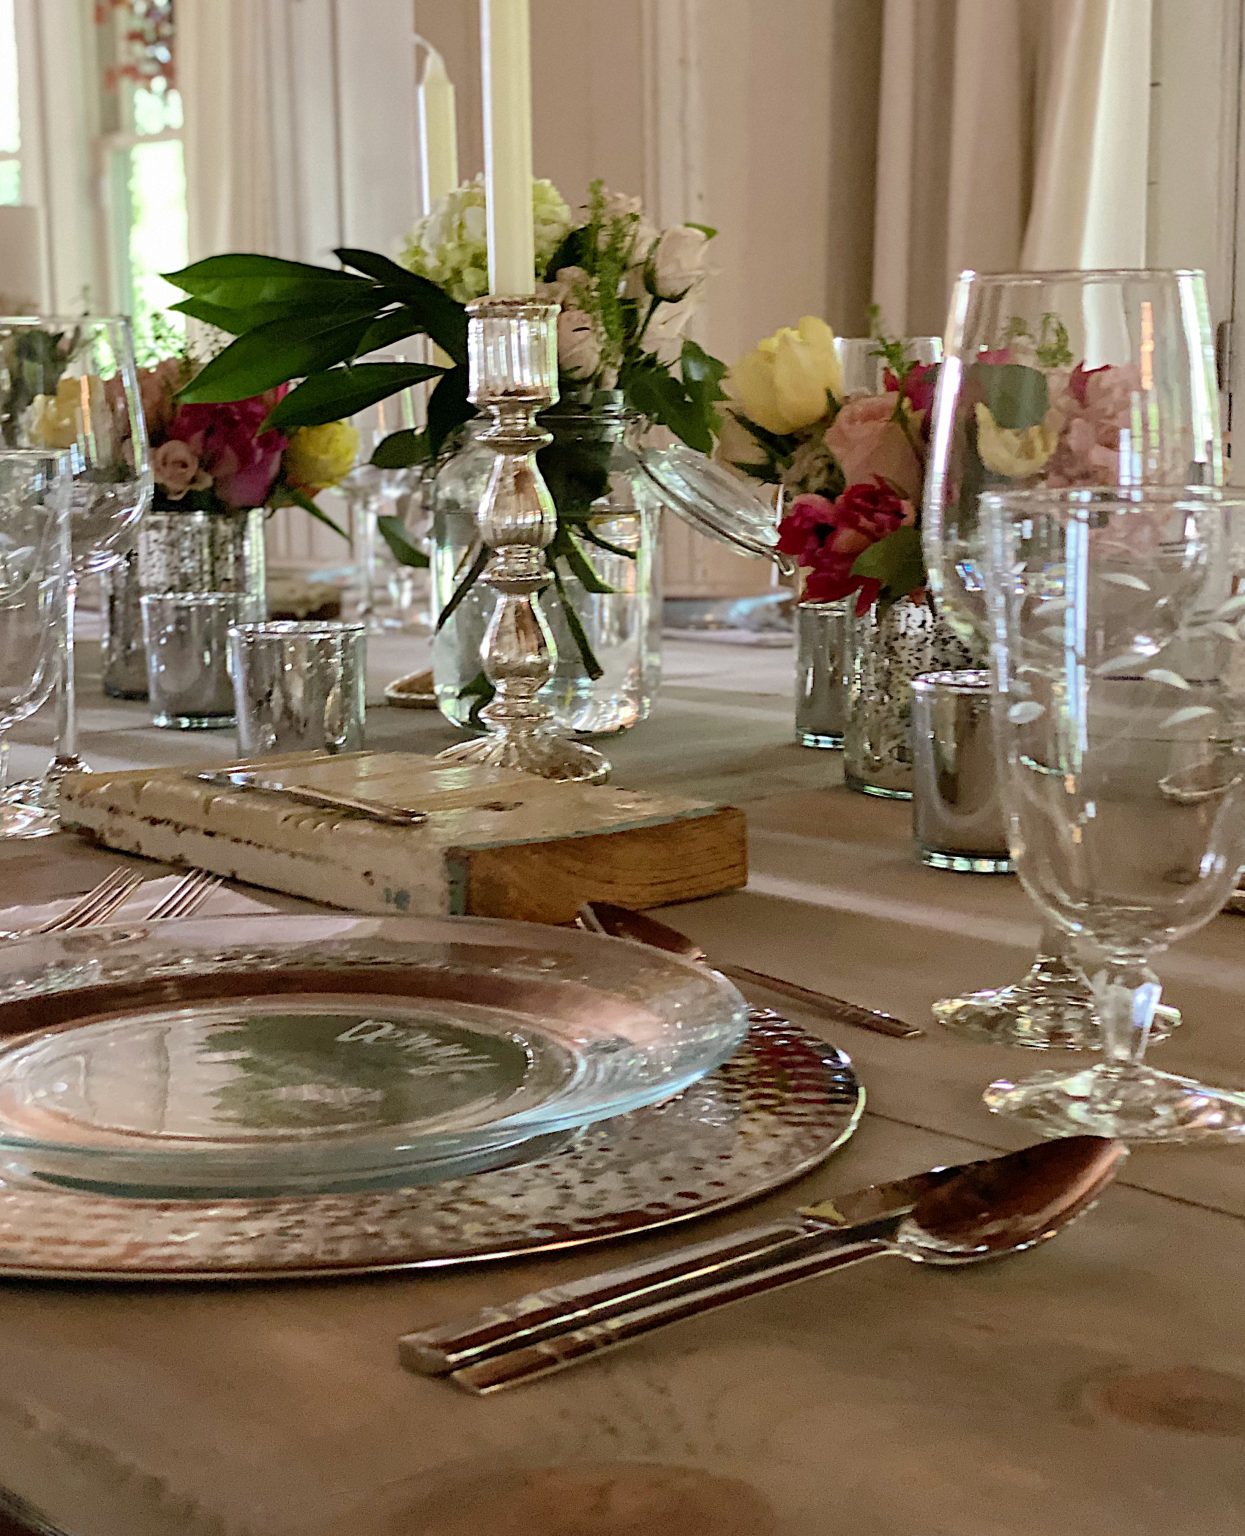
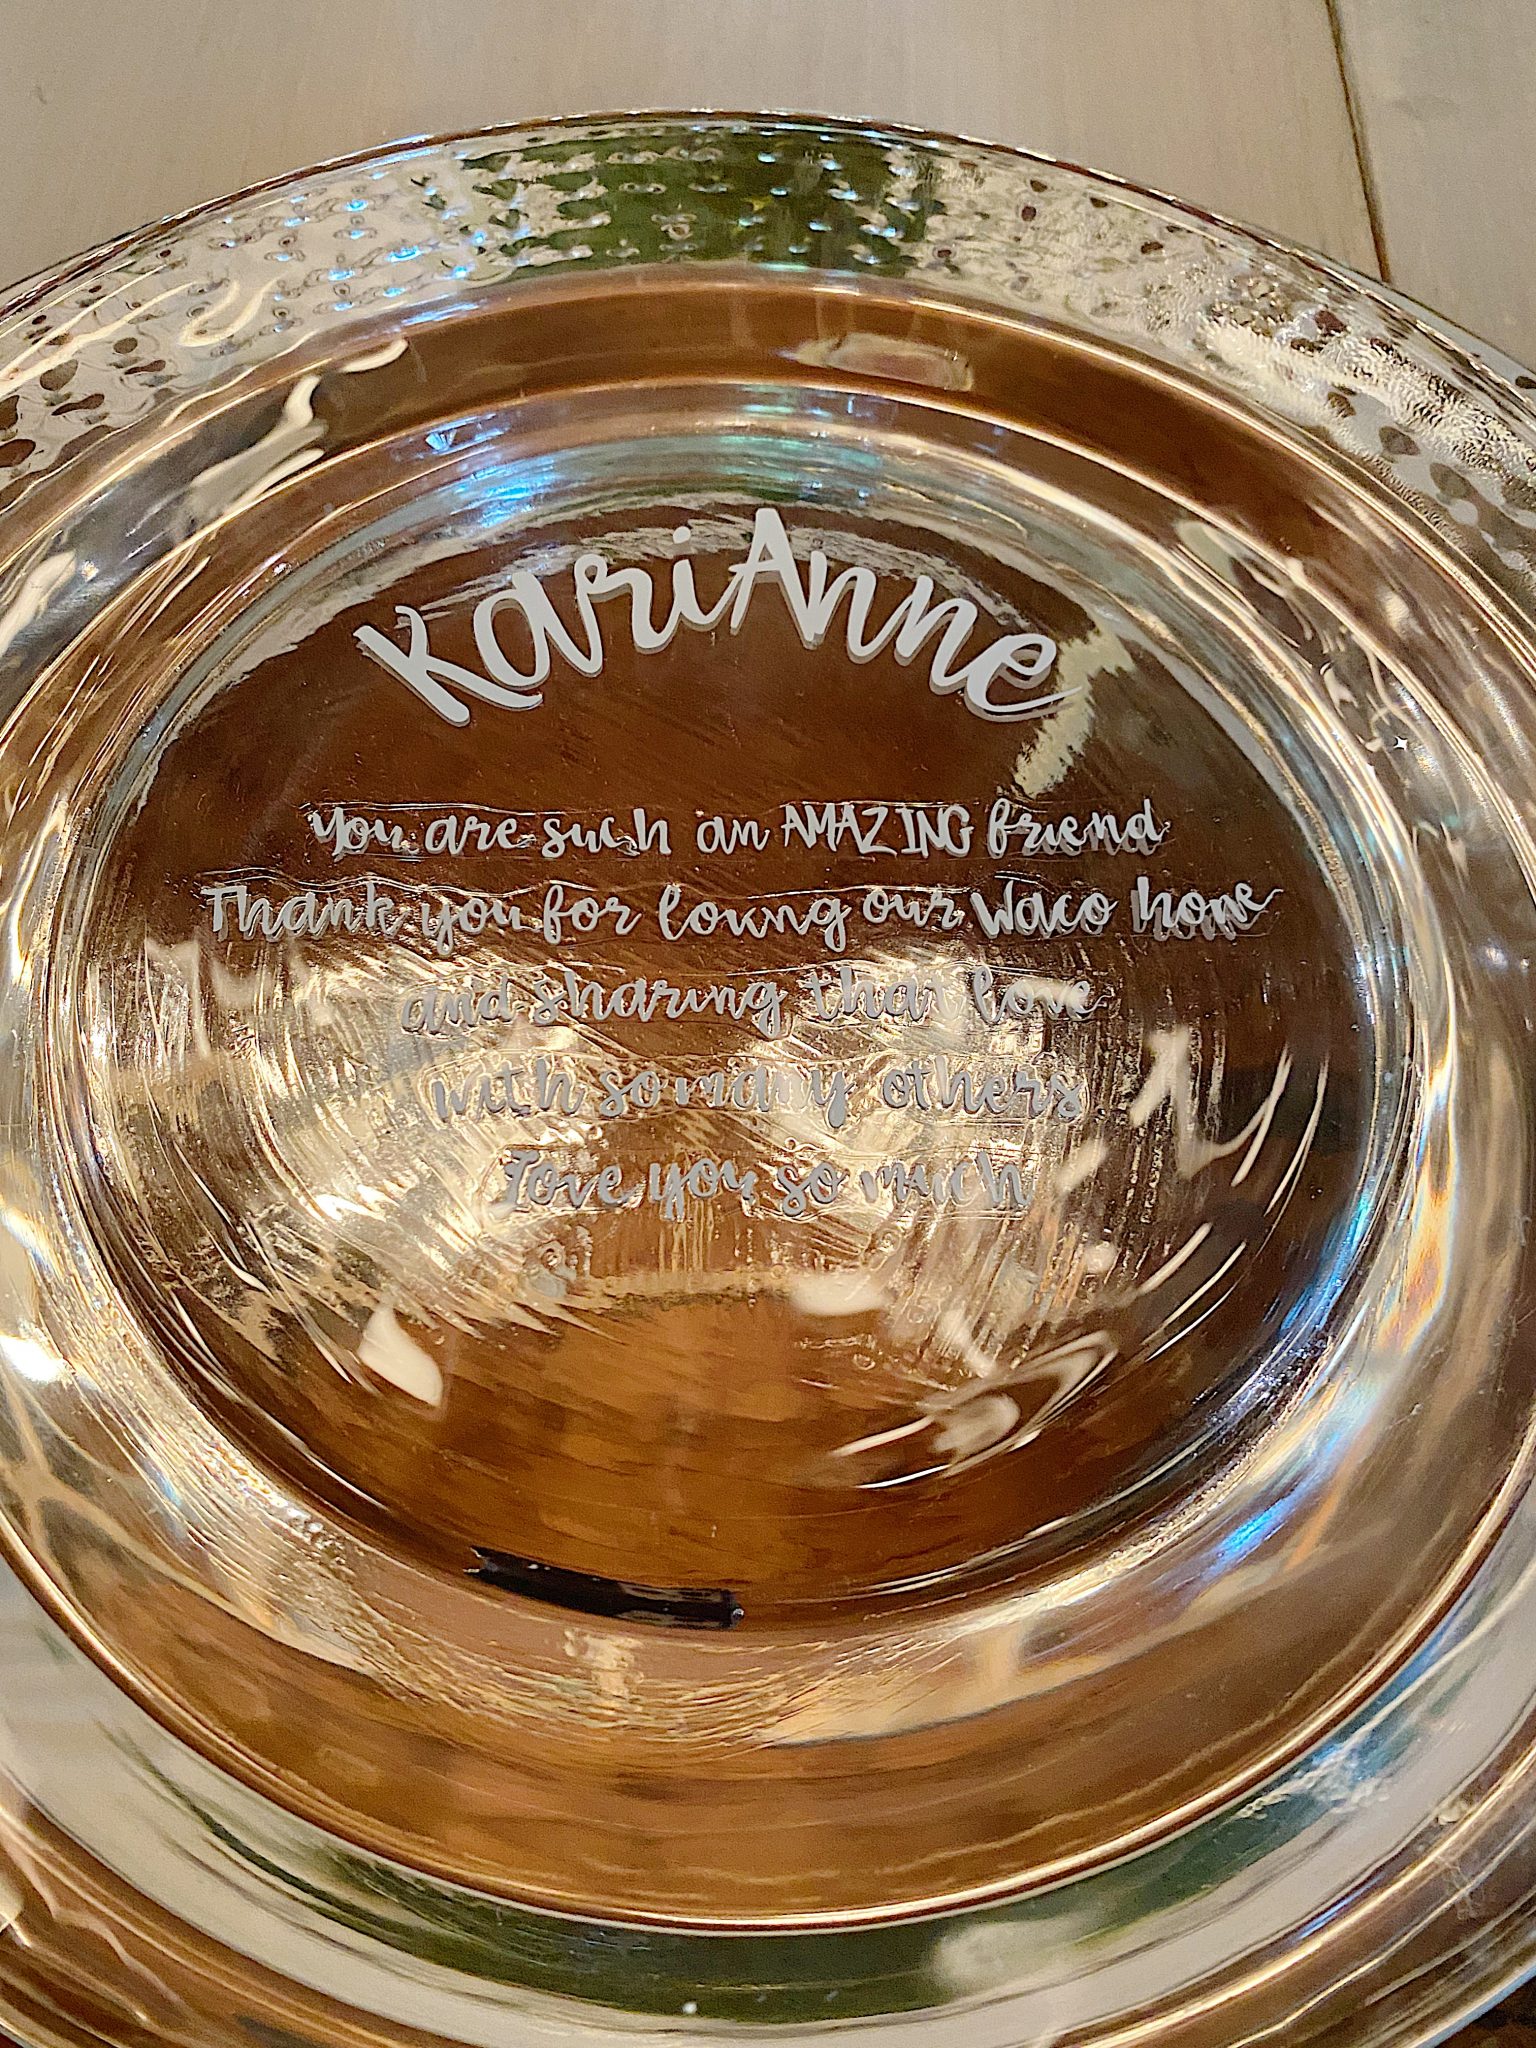
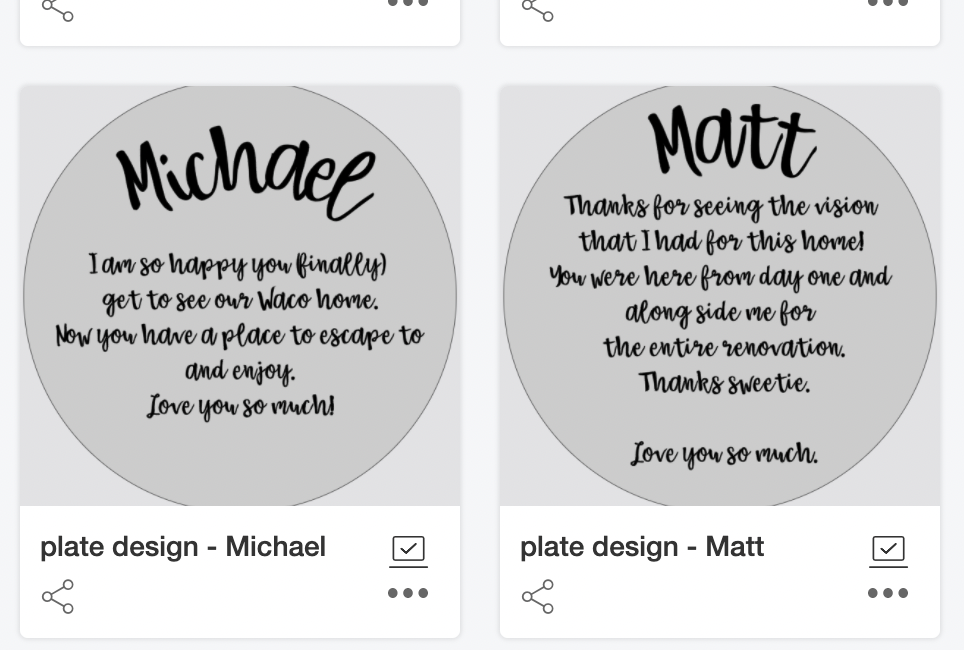
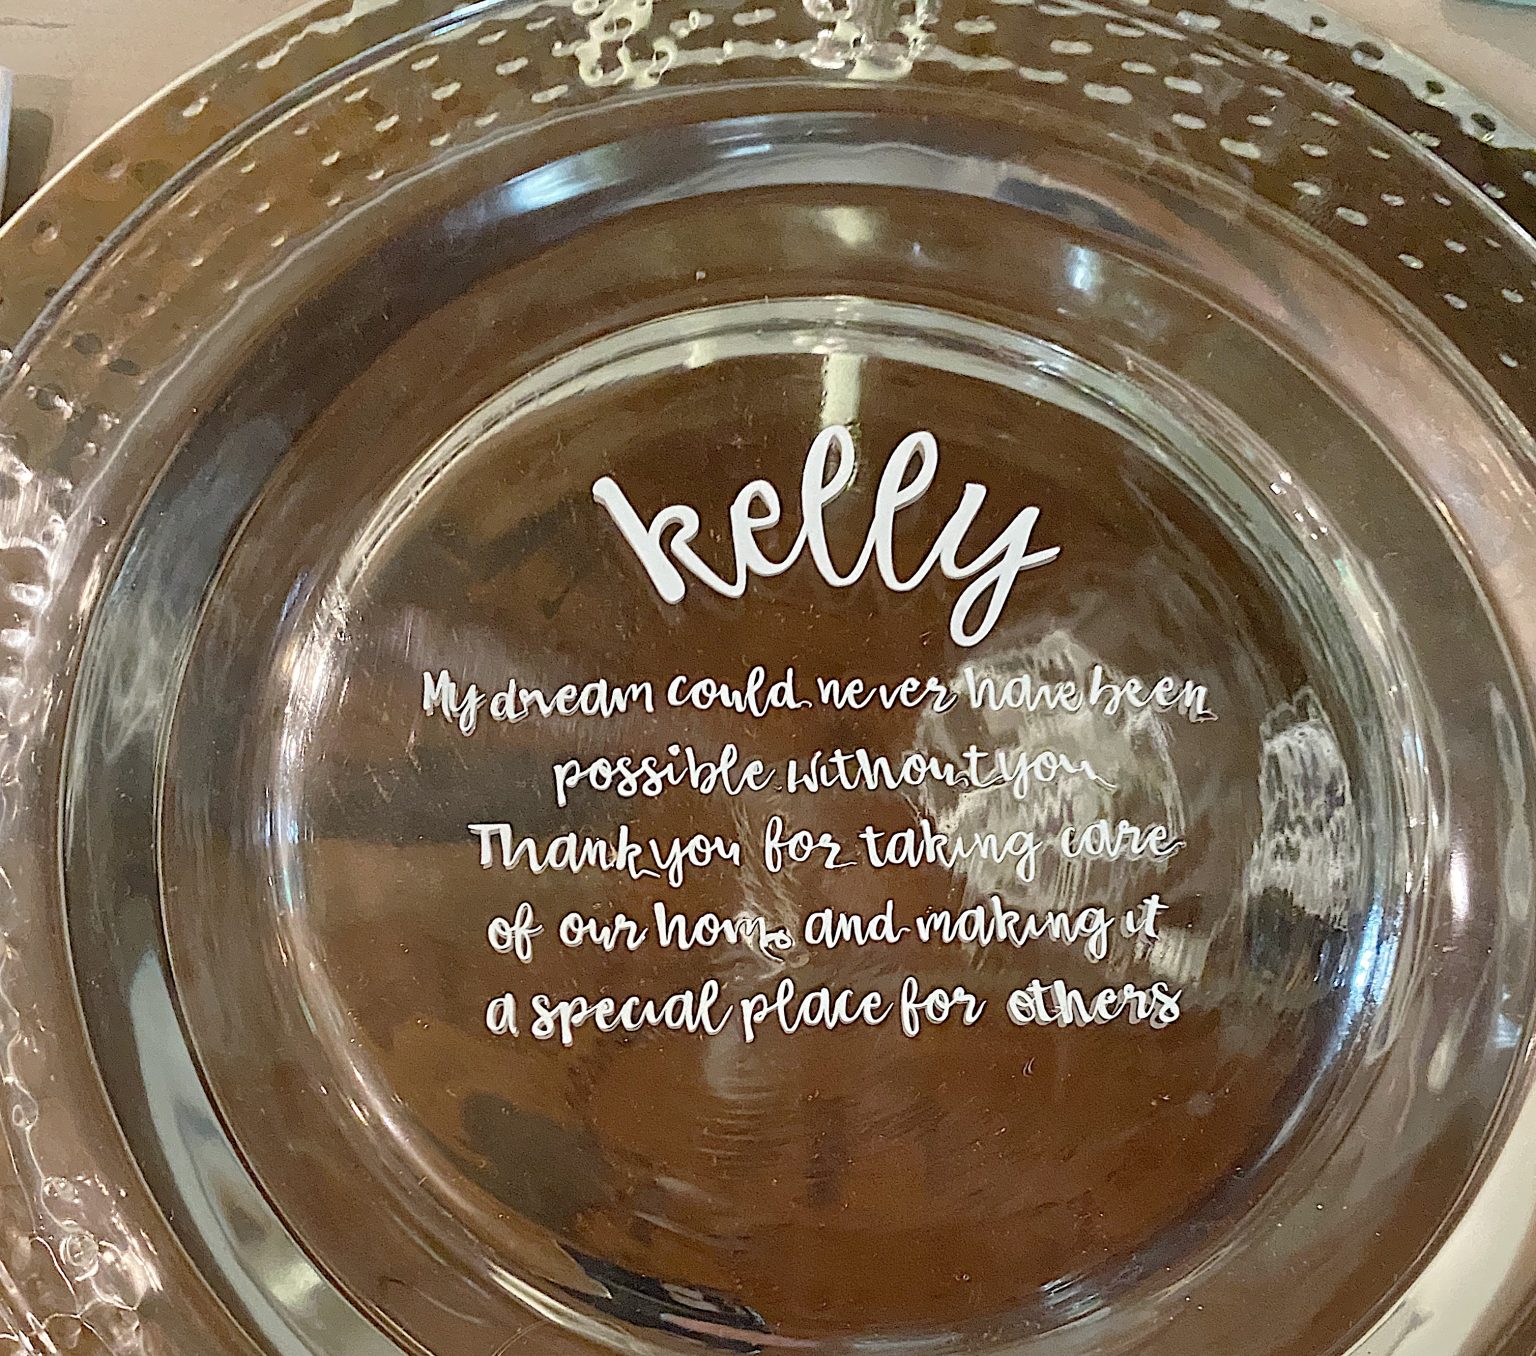
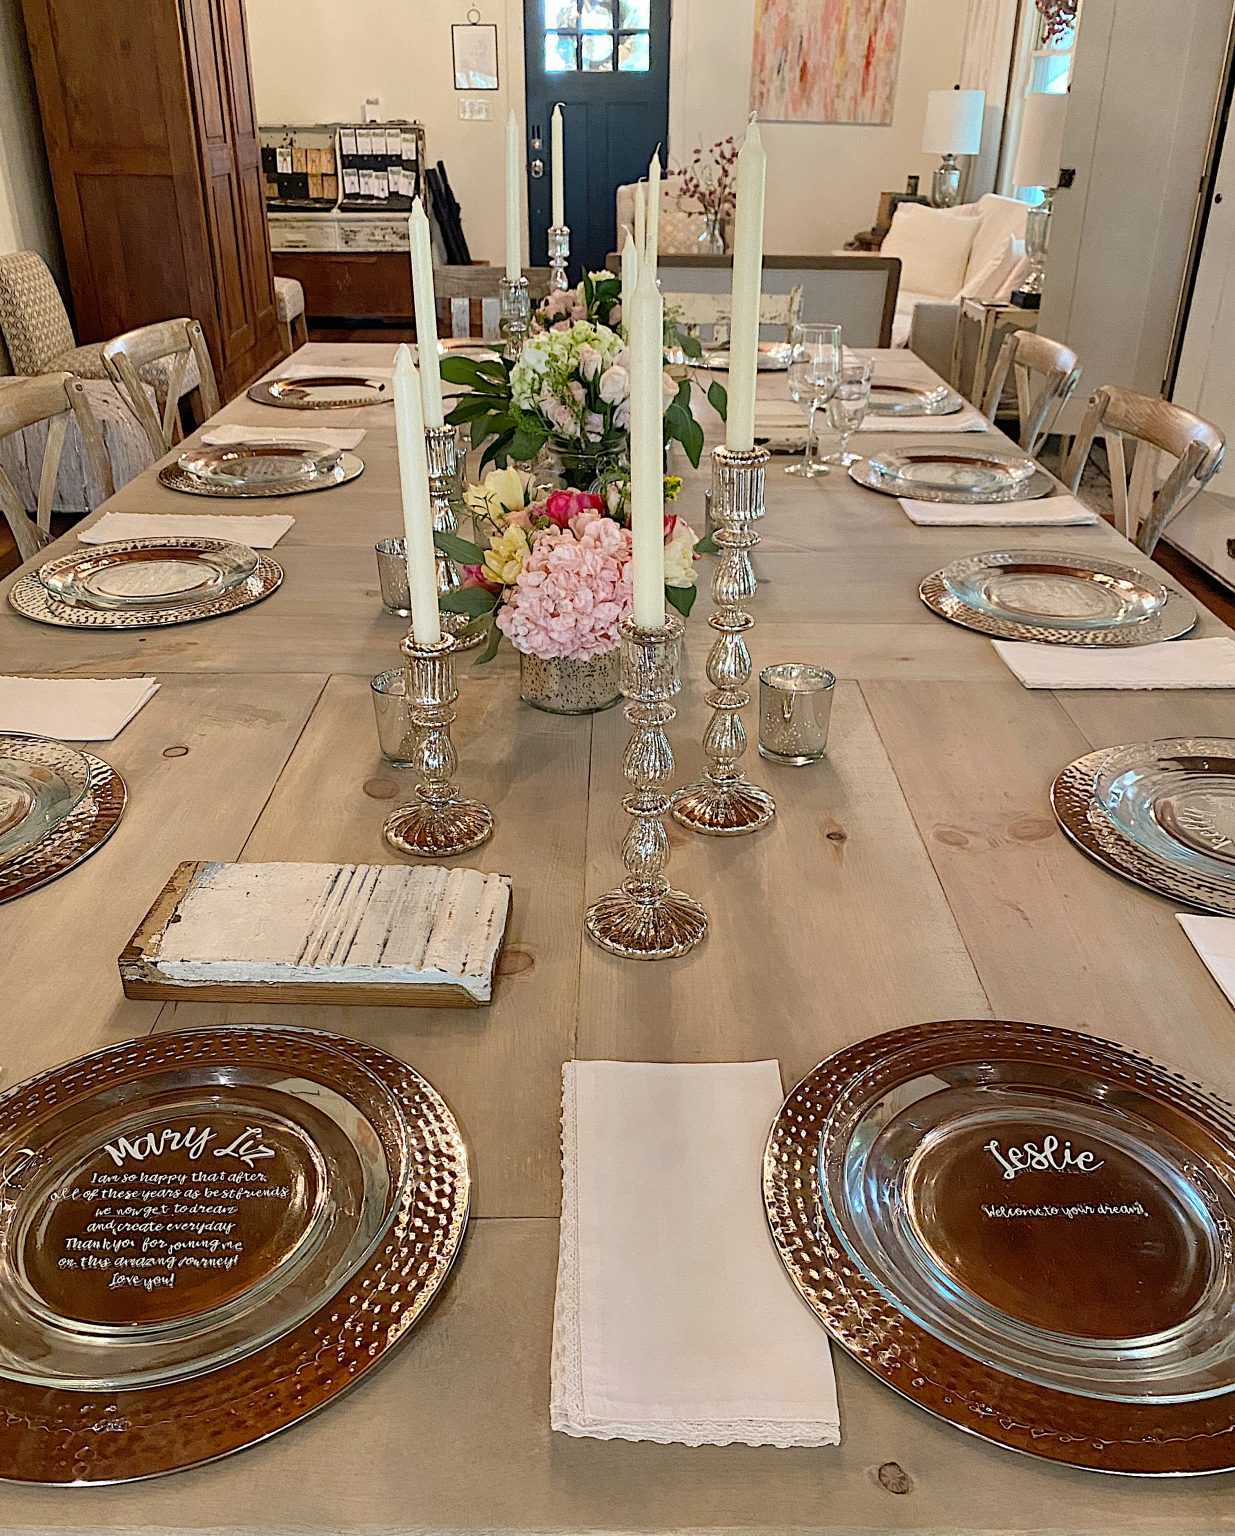
The Personalized Plates
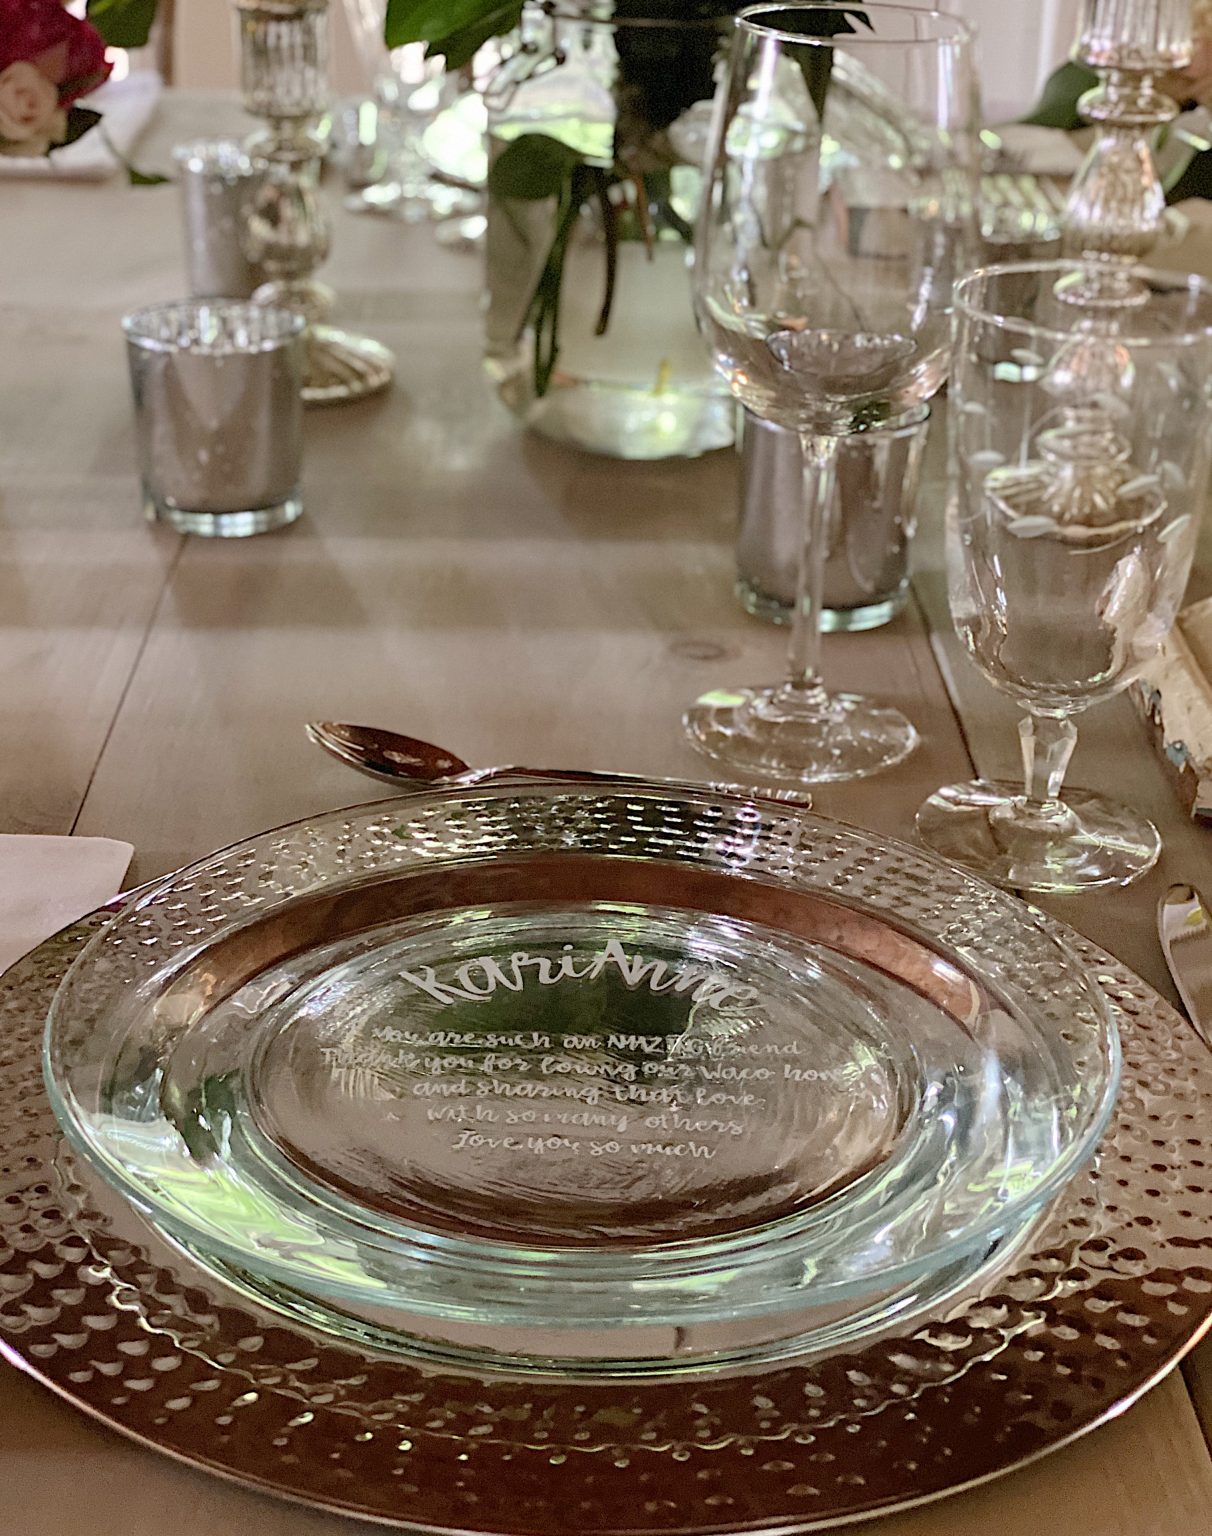
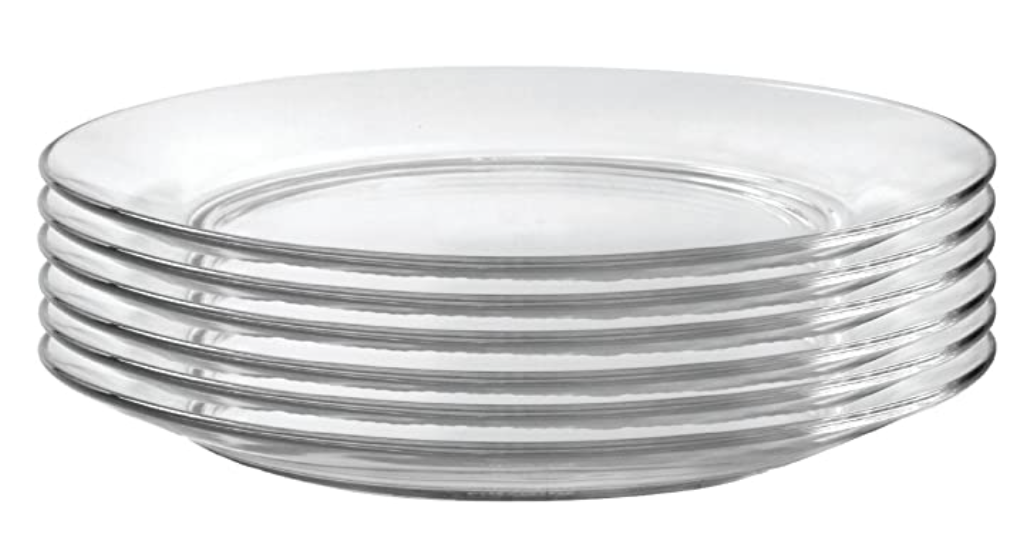
I made glass plates with a personalized message for each of my guests. Since we were serving seven courses, we needed a plate to set the small plates on for each course. A glass plate was perfect.
I made these plates because I really wanted to let each of my guests know how much I appreciated all of their help. I thought this might be a fun idea and I really do love how they came out
The plates also served as place cards and each guest took their plates home when with them!
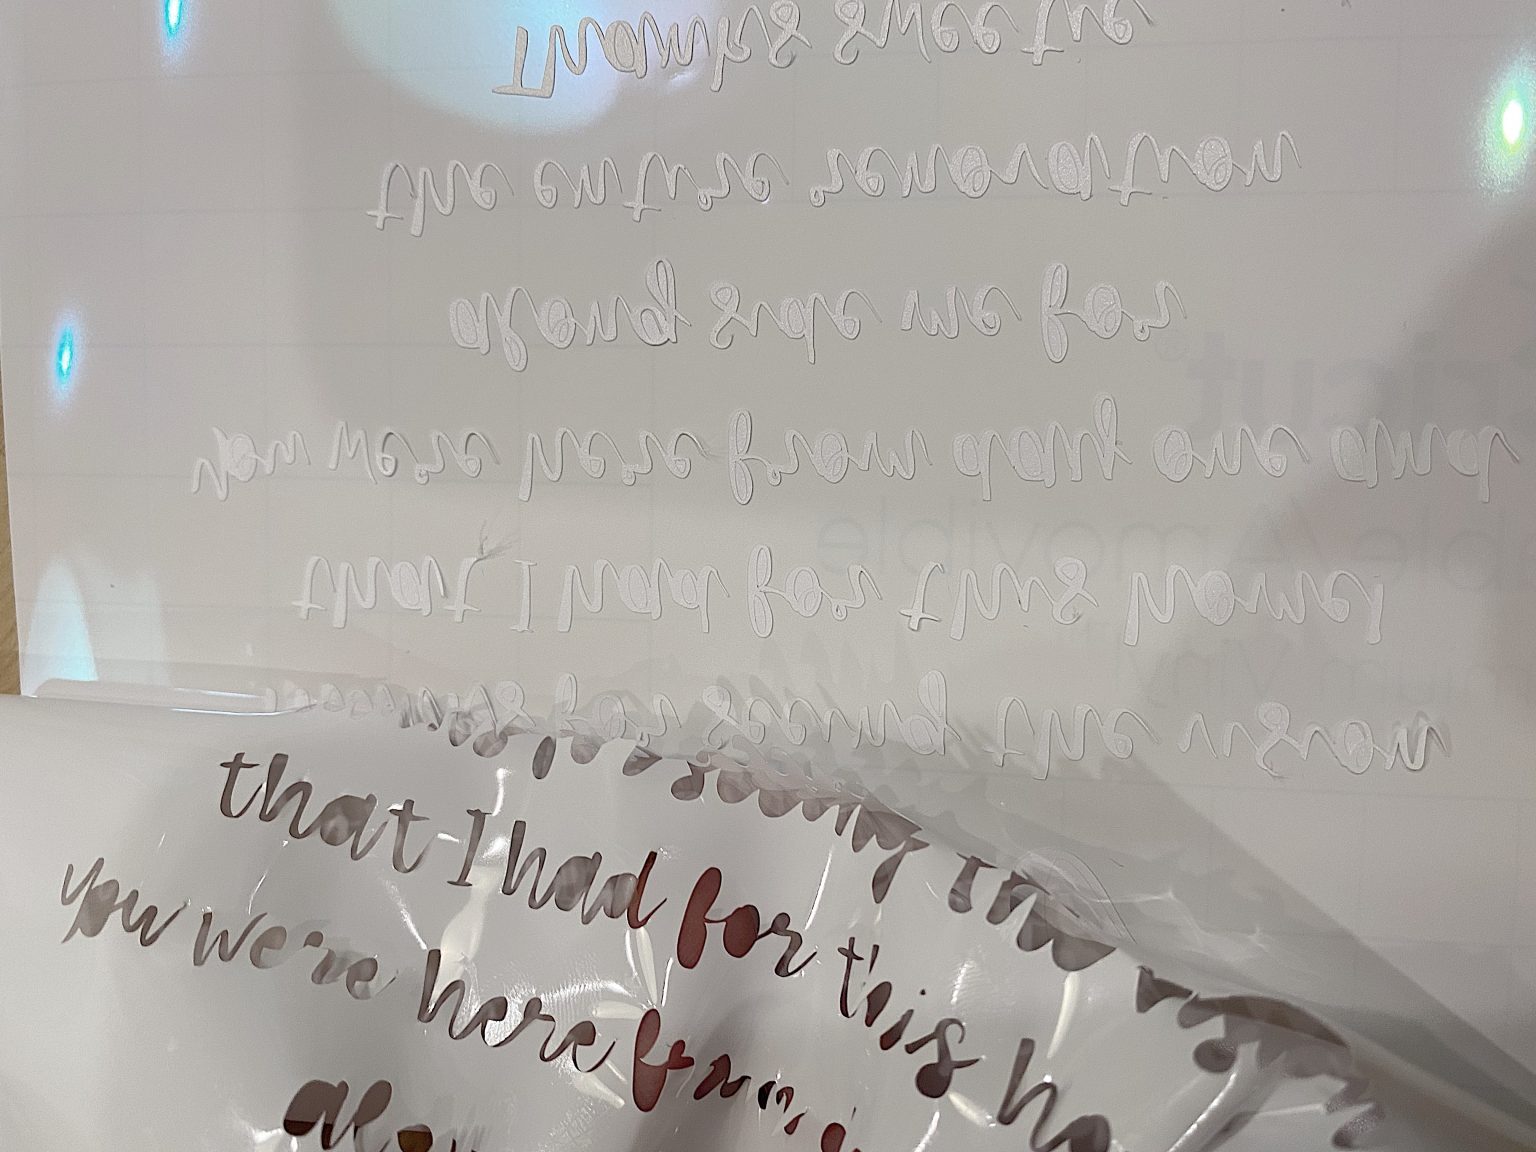
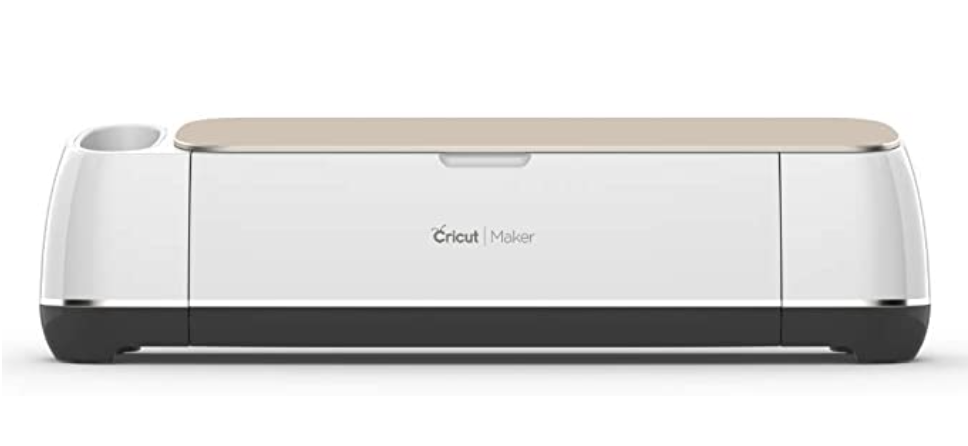
I made the messages of the plates with my Cricut machine. I designed the names and messages in Cricut Design Space and then mirrored the image. I cut them out of Permanent Vinyl on the Cricut machine.
I do need to be honest that I really struggled with the “weeding” process. This is when you pull off the letters from the vinyl. I think it’s because the letters were very small and perhaps I am not as skilled as I should be when it comes to working with permanent vinyl.
Once I cut the vinyl, and attached the letters to the Transfer Tape, I placed the letters on the bottom of the plate. I did this because I wanted to protect the letters (if they were on top I don’t think they would have lasted long). Once they were adhered to the plate I brushed the bottom of the plate with Mod Podge and let it dry.
It did take me a really long time to make these. But it was so worth it.
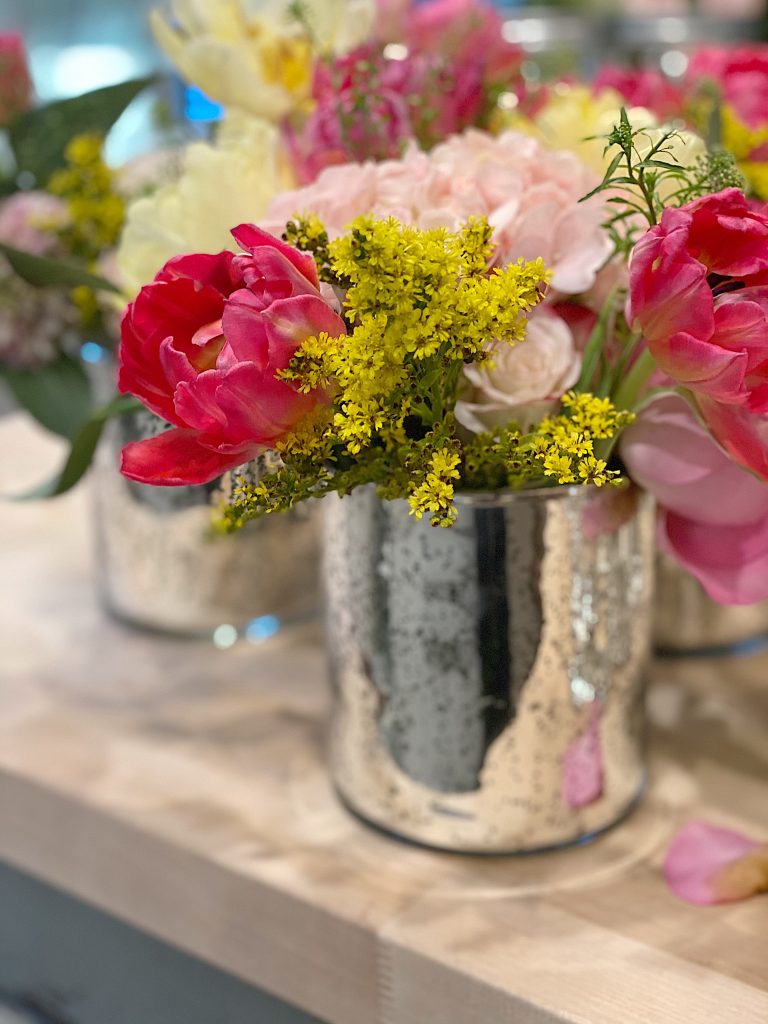
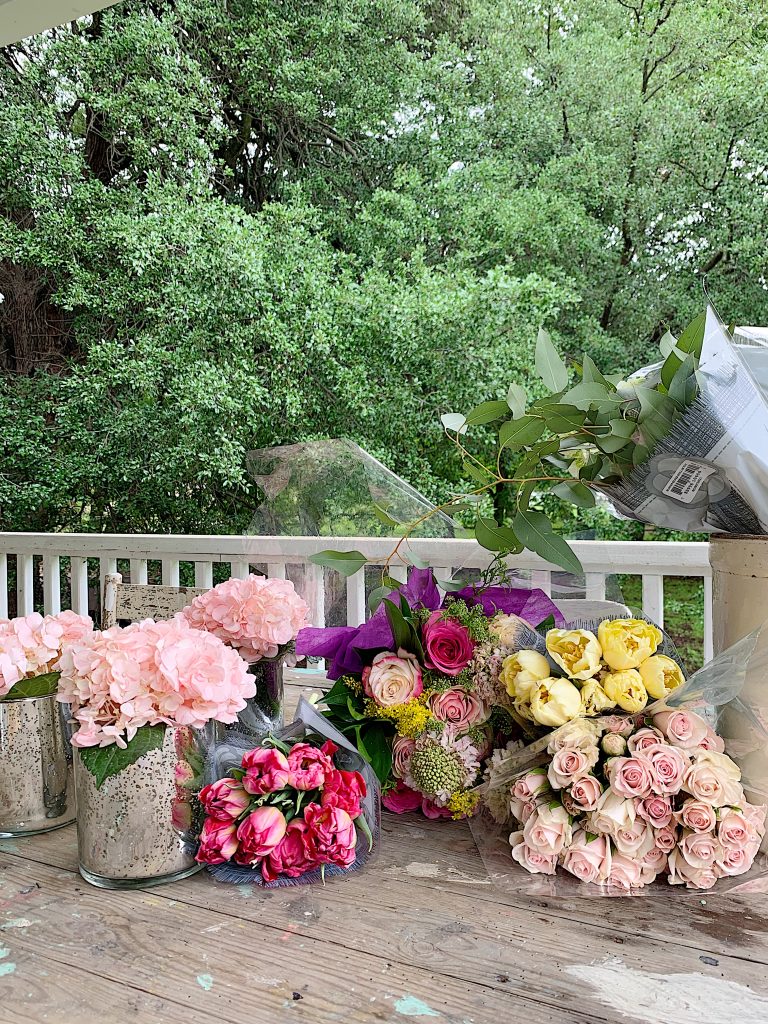
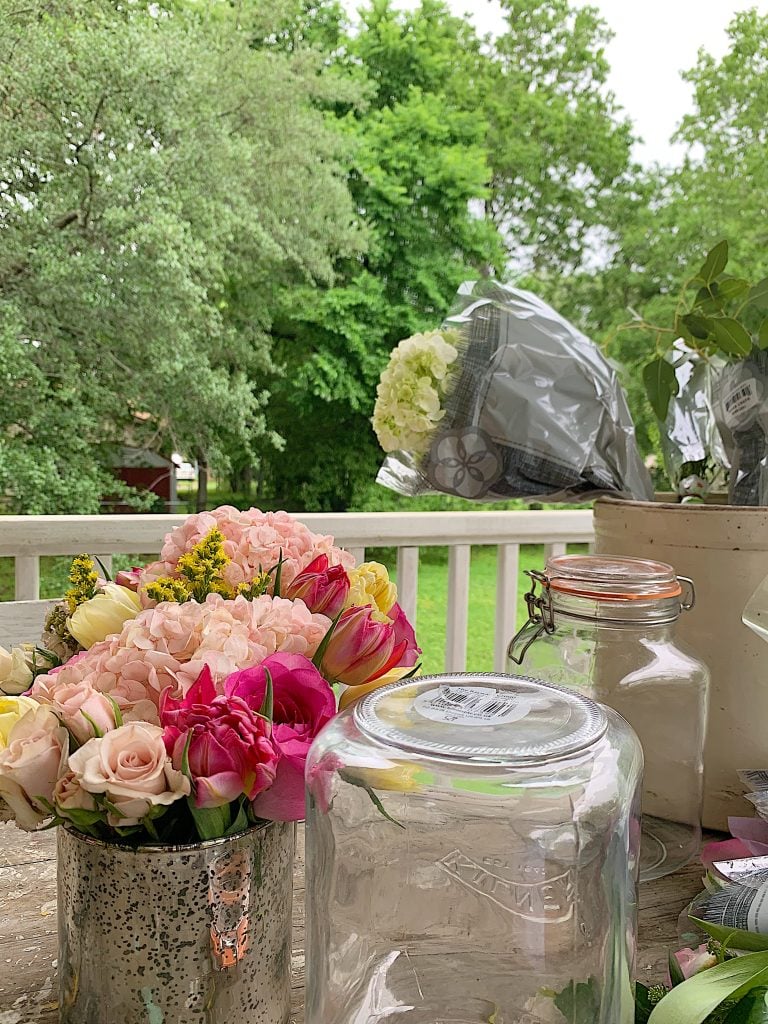
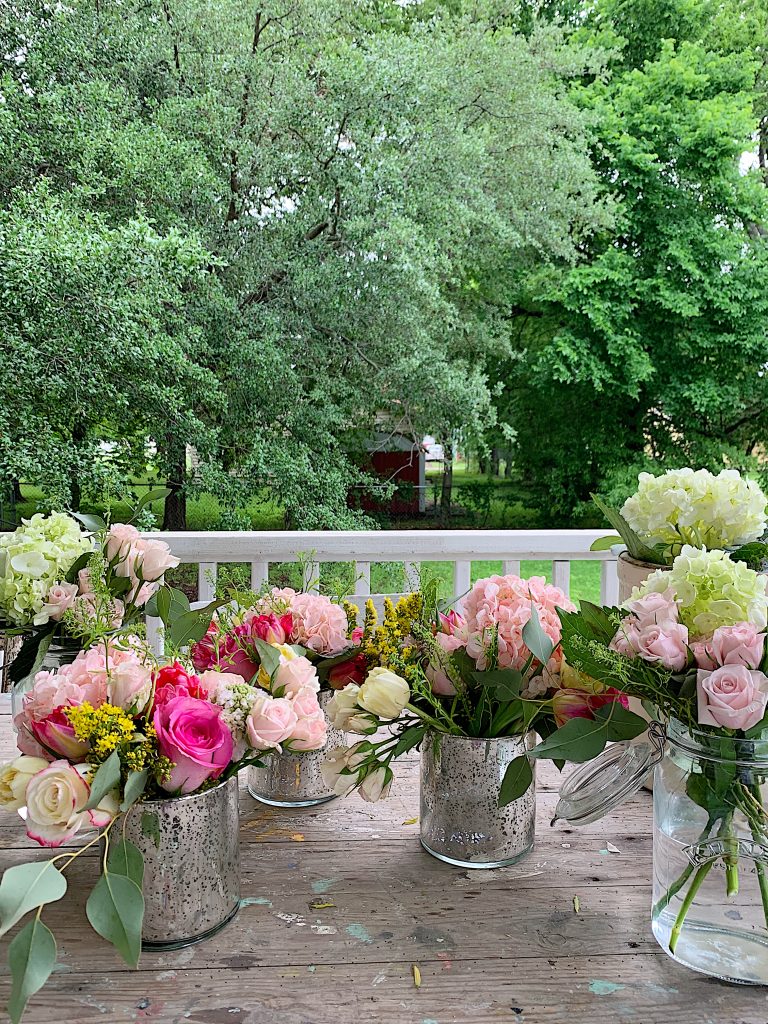
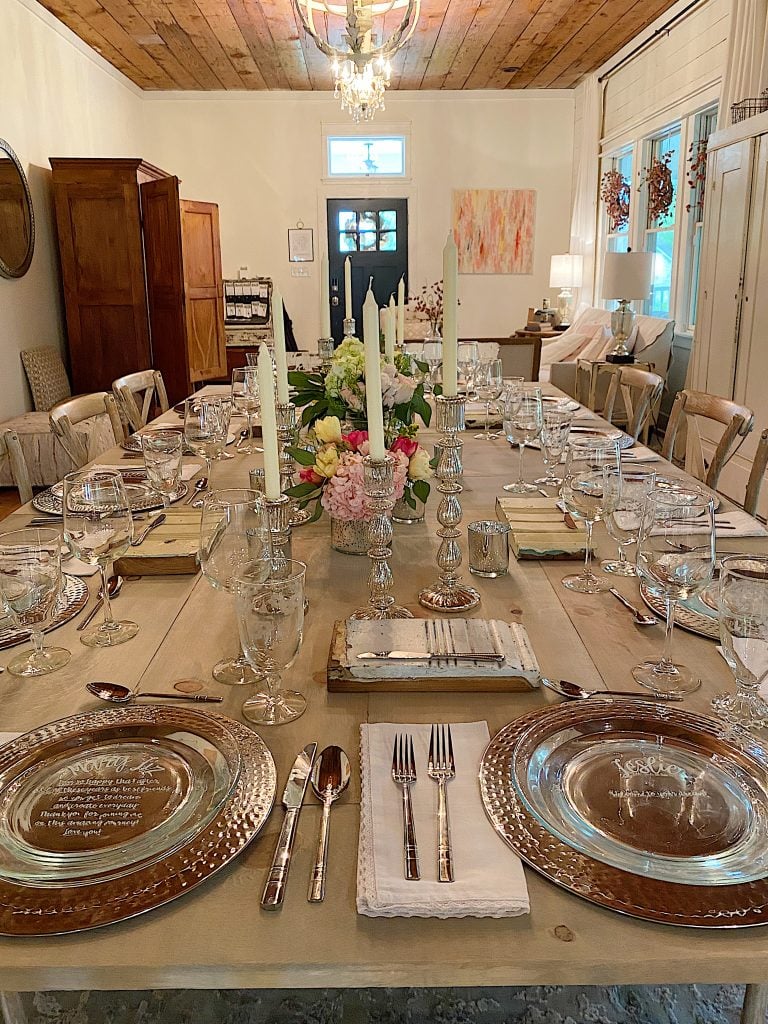
Arranging the Flowers
We bought the flowers at the local grocery store in Waco and the selection was pretty great. We used the mercury glass vases and some mason jars and arranged the flowers on the porch. We ended up with five arrangements.
You an do this. There is no secret to arranging flowers. Just don’t forget to buy some greenery and if you want to keep it really simple, just buy the same color of flowers.
Setting the Table
I think setting the table is my favorite part of getting ready for the dinner party. I took some photos of how I set the table.
When you entertain, you can include as many of these steps as you want.

#1 – The Wood Table Top 
#2 – Adding the chargers #3 – Flower Centerpieces #4 – Candlesticks/Votives 
#5 – Clear Plates/Candles 
#6 – Napkins/Wood Pieces #7 – Silverware #8 – Dinner guests


The Menu
For the complete menu and recipes just go to The Best Dinner Party Recipes.
I shared everything about this party with you, with hopes that you will use some of the ideas for your own dinner party. You don’t need to do it all, just pick a few of these ideas and run with it.
Entertaining and sharing magical moments with friends is a wonderful way to have fun. I hope this post has encouraged you to give it a try.
Be sure and read my blog post on Tuesday for every single recipe from this party!
Links to the Items Shown in This Post

Mercury Glass Candlesticks (Set of 3) 
Mercury Glass Vase 
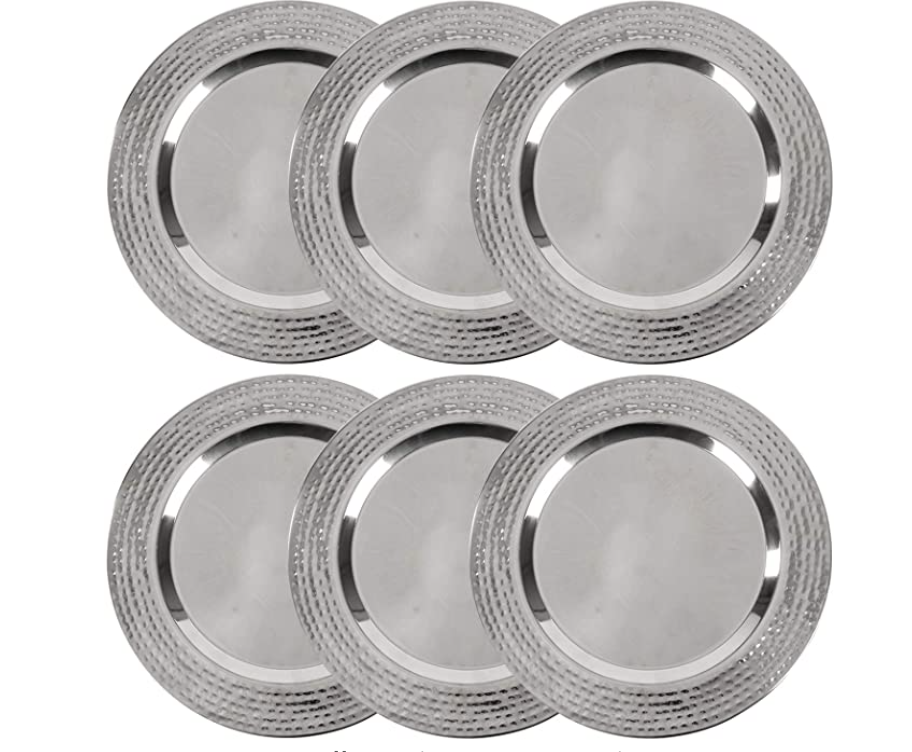
Stainless Charger Plate 13″ (Set of 6) 
Mercury Glass Votives (Set of 12) 
Lace Edged Linen Napkins (Set of 12) 
11″ Glass Plates (Set of 6) 
Black Aprons (2) 
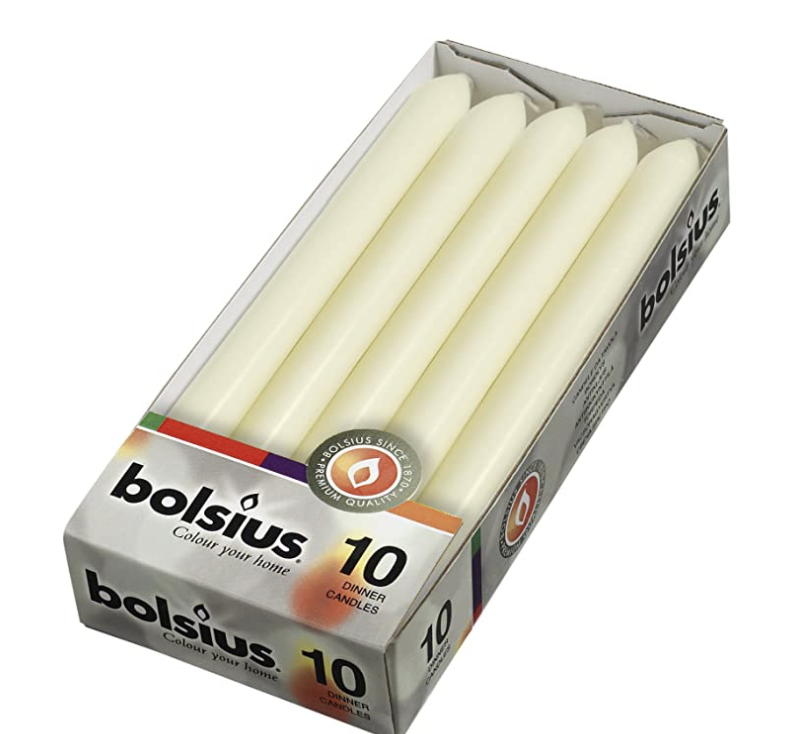
Dripless Taper Candles (Set of 10) 
USB Re-Chargeable Lighter 
Table Latches 
Cricut Maker 
Votive Candles (Set of 30)


Similar Posts
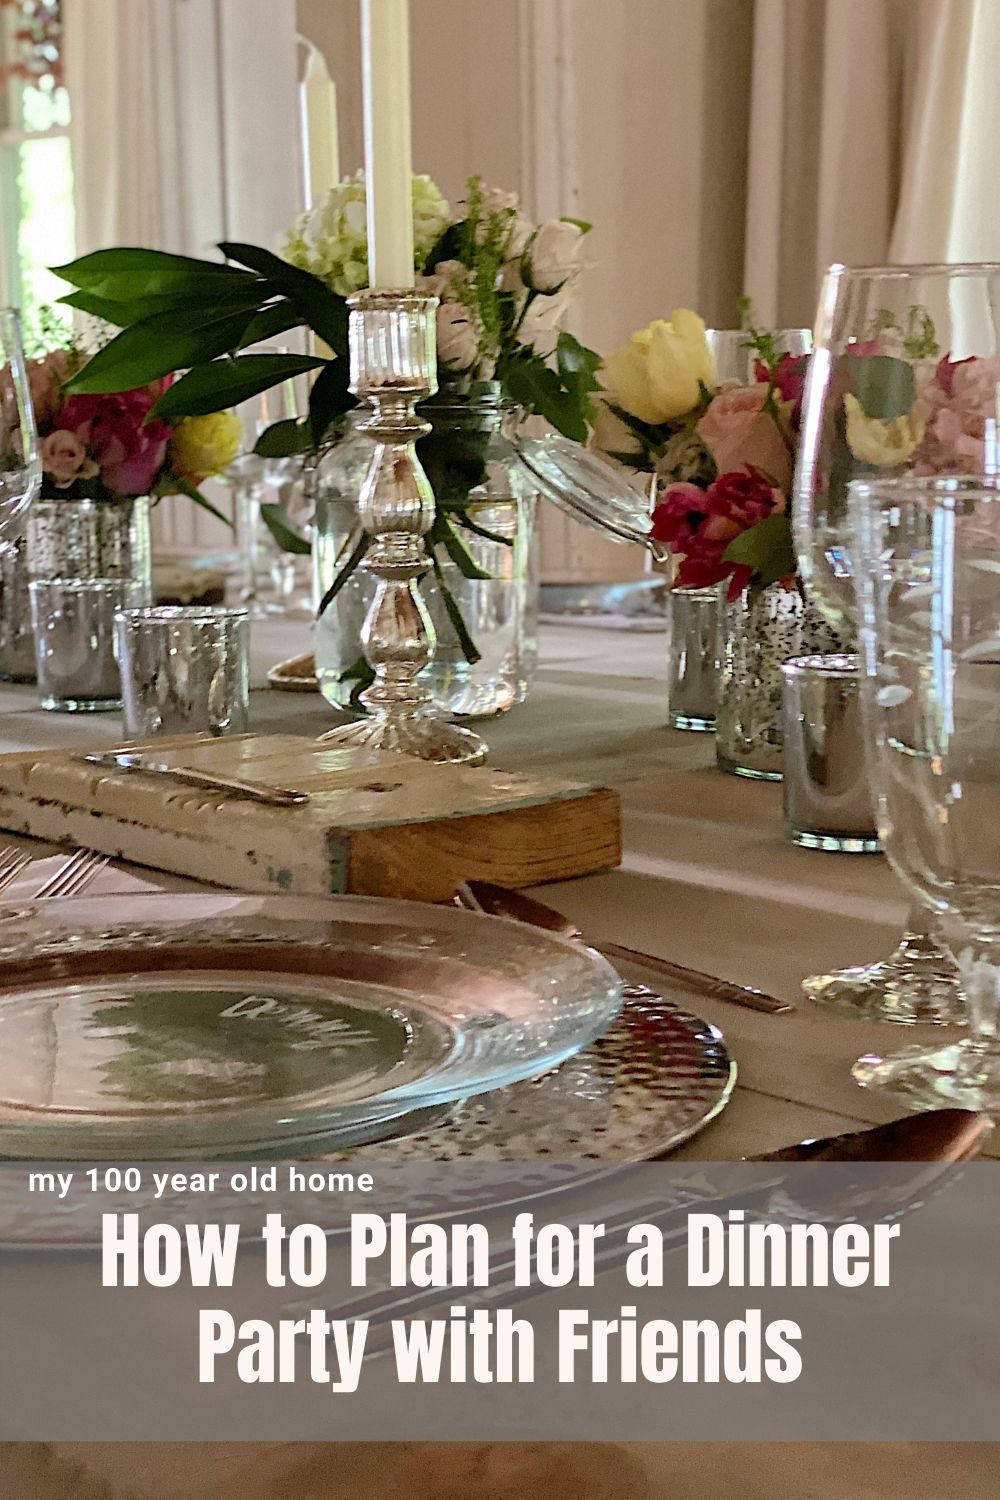
Pin the image below to your decor boards on Pinterest (just click the Pin button in the top left corner). You can also follow along with me on Pinterest!
For more real-time updates, follow me on Instagram @My100YearOldHome

The entire tablescape looks amaZing. The Vintage Moulding pieces are so unique. Did you make them? Purchase them? Would love more info!
I did not make the moulding pieces. I found them at an antique store for $4 each!
So much fun! Everything was beautiful and came together to make a lovely dinner party for your friends. I’m sure they enjoyed every minute, I know I would have if I had been present.
Thank you so much Debra. It was truly magical and I loved every minute of it!
Just beautiful! You really know how to show appreciation to your friends! I’m sure they greatly appreciate you as well!
Thank you so much Maureen! It was such an amazing evening all the way around!
Looks lovely Leslie. Thank you for letting us peek behind the curtain of your entertaining process. Like you, I love it too. Can’t wait to see the menu. Have a great day. XO- MaryJo
Thank you so much MaryJo. Menu and recipes tomorrow so stay tuned! Have a great day!
Lovely as always! Which size vase did you use? When I click on the link for the votives it takes me to the smaller of the two vases by that company?
Hi Patty – I just checked the links, it should work for you. Refresh your screen and click and let me know if you get to the votives. They are so pretty, you will love them!
Fantastic ideas! I can’t wait for summer to try some of your even more ambitious entertaining ideas…Maybe not for hundreds, but definitely on your kind of scale! I have looked but I can’t see where you have a book out yet?
Thank you so much Cyndy for your kind words. No book, just follow the blog!
Your work always inspires me & awakens my artistic talents, Thankyou for sharing, Leslie……….just one query, what did you use the ..Moulding for ? Looking forward to your recipes …Jeni
Thank you so much Jeni for the kind words. The moulding was used for the nibbles course. Check back tomorrow for all of the details on each course and the recipes!
Love the simplicity of this yet so elegant!!
Thank you so much Debbie!
What a beautiful dinner party! I love the table tops. I have some folding tables that are crying out for some wooden tops like these. One question—how do you fasten them to the table they sit on? I have visions of someone leaning too hard on one side—what a memorable dinner party THAT would be!
Thank you for asking Kellie. The tabletops sit on top of the table and aren’t fastened to it, however, they are fastened to each other with table locks (https://amzn.to/3xLxIyh) underneath the tabletop which snug the pieces together and prevent any tipping or coming apart.
Looks Fabulous Leslie! So much inspiration here! I’m starting to plan my son’s engagement party now that we can all gather again! I’m planning on having his fiance’s large family over (she’s one of eight children) …. so fun! Susan
Oh my gosh, what a wonderful event to plan! I am so happy you have the inspiration to get you started!
These table tops have me intrigued! I love the idea of being able to seat 12 people around the table on an as-needed basis, and not having a huge table in the room all the time! One question: When these locks are applied onto the underside of the table tops, don’t they need spacing somehow so that they don’t rest on the actual top of the table underneath? The sections themselves, and the locks to keep them in place are such a great idea, but I can’t understand how the underside works to make them stable. I think a whole post by you or KariAnne (maybe her husband?!) would be great! Can you tell I’m enjoying this series?!? What a great hostess you must be!
I am so happy that you are enjoying all of the posts about the Waco Dinner with Friends! We put the locks on the outer edges of the tabletop (the extension area). The table tops are larger than the existing table so there is space in the margins around the existing table for the locks at the seams. Just like leaves in a table. I have made these tabletops before and the full instructions are on the blog (https://my100yearoldhome.com/how-to-make-my-wood-table-tops/) The tabletops in the blog post were not as large as the one for Waco table, so I didn’t use the locks. Let me know if this info helps or hinders 😉