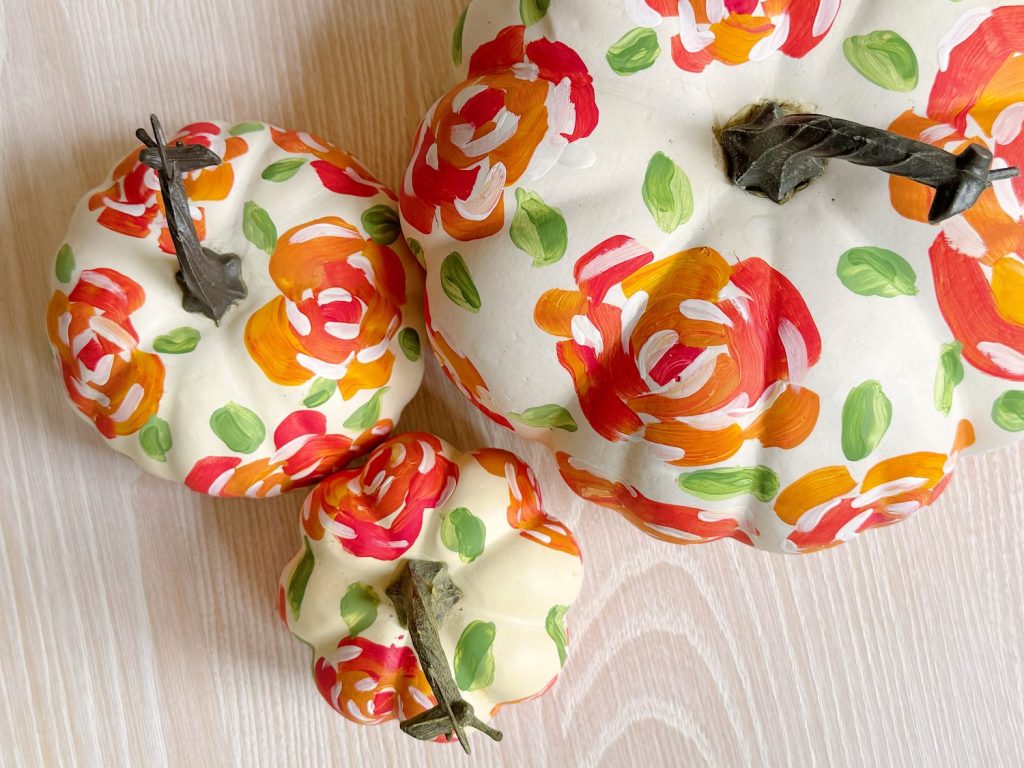
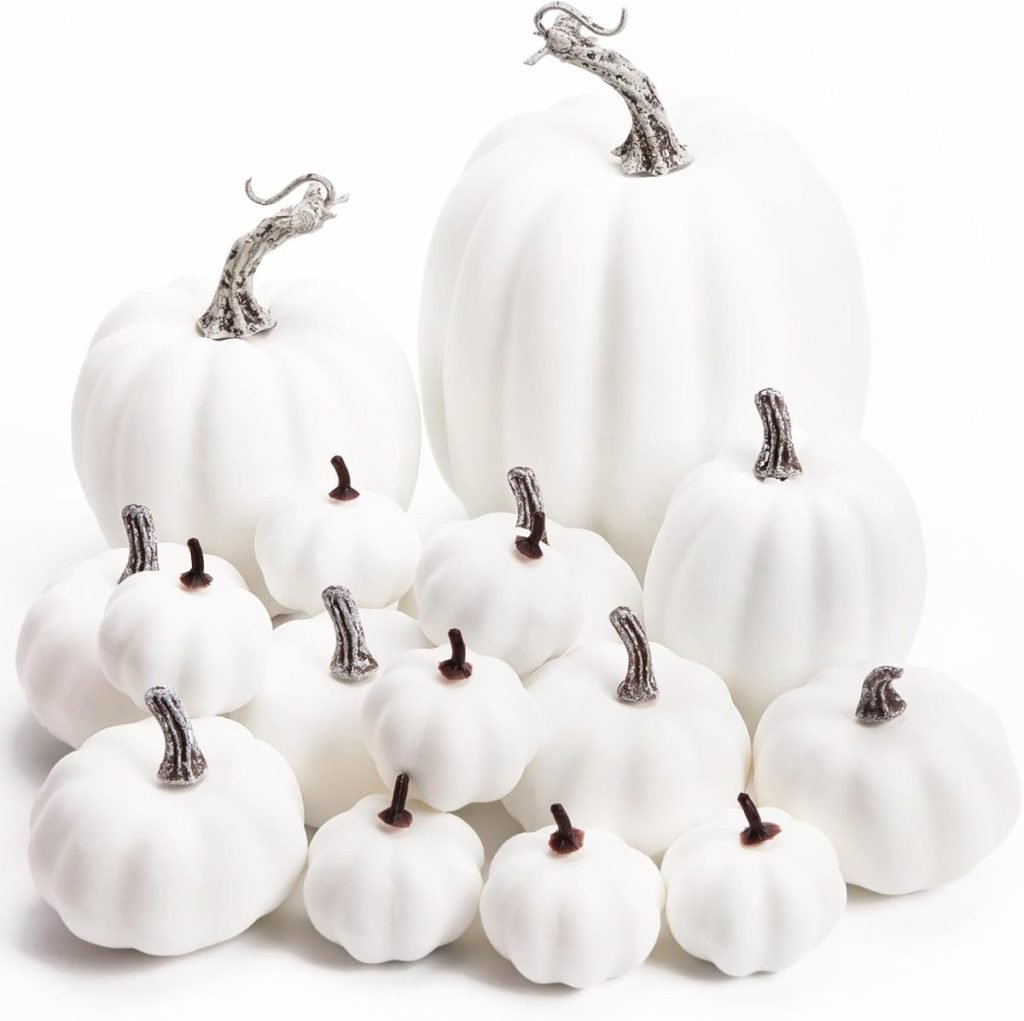
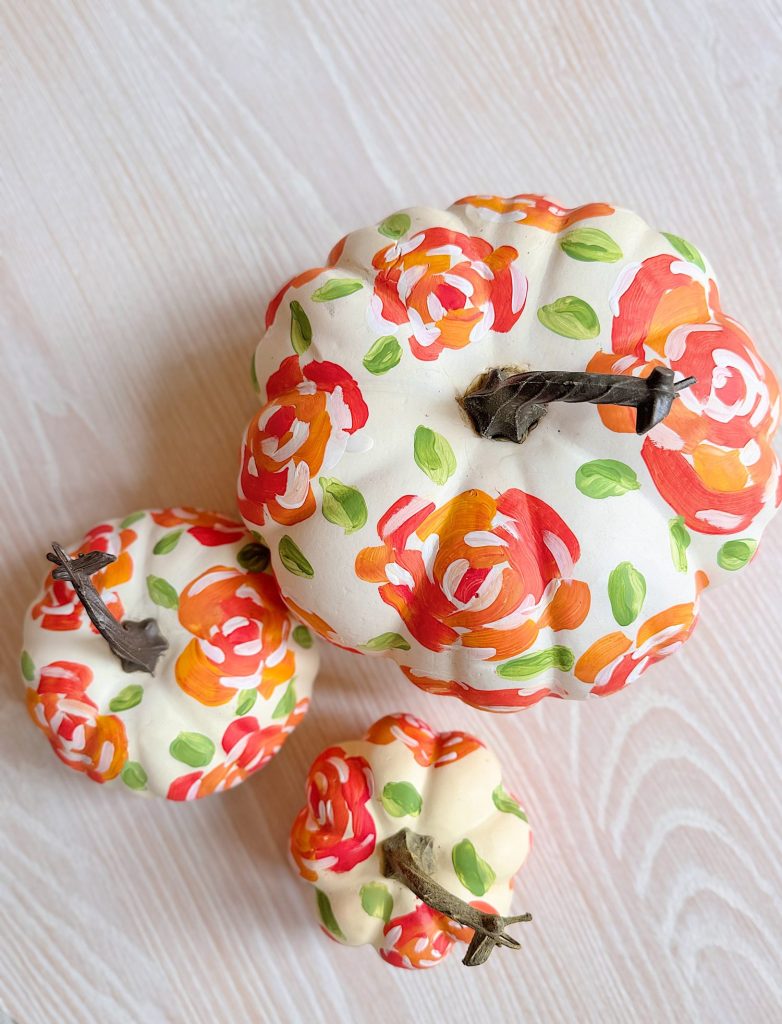
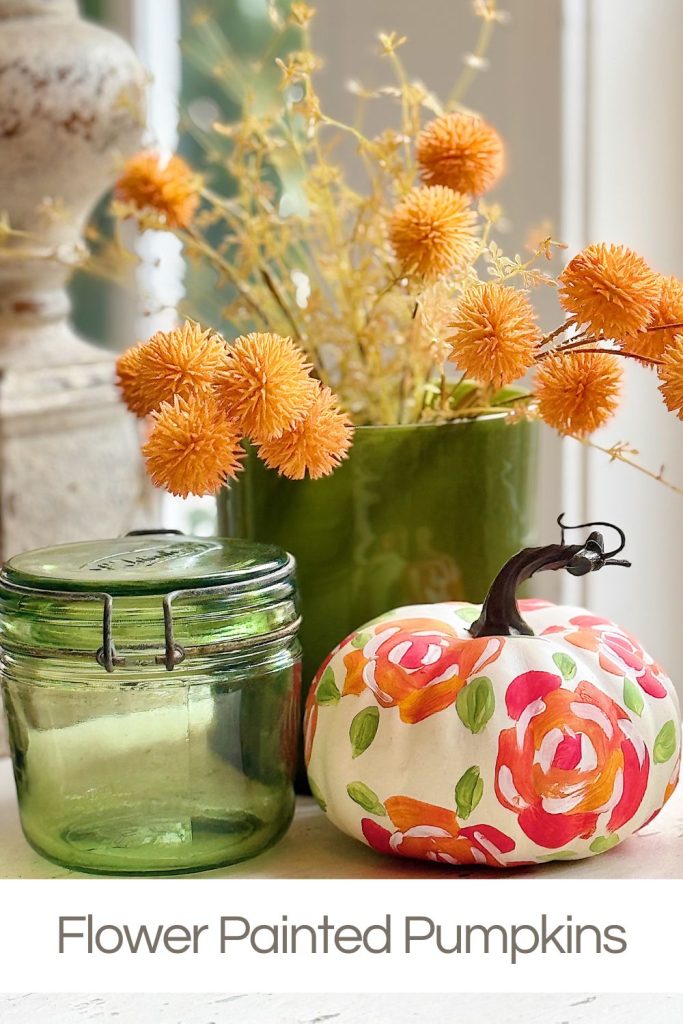
Flower Painted Pumpkins
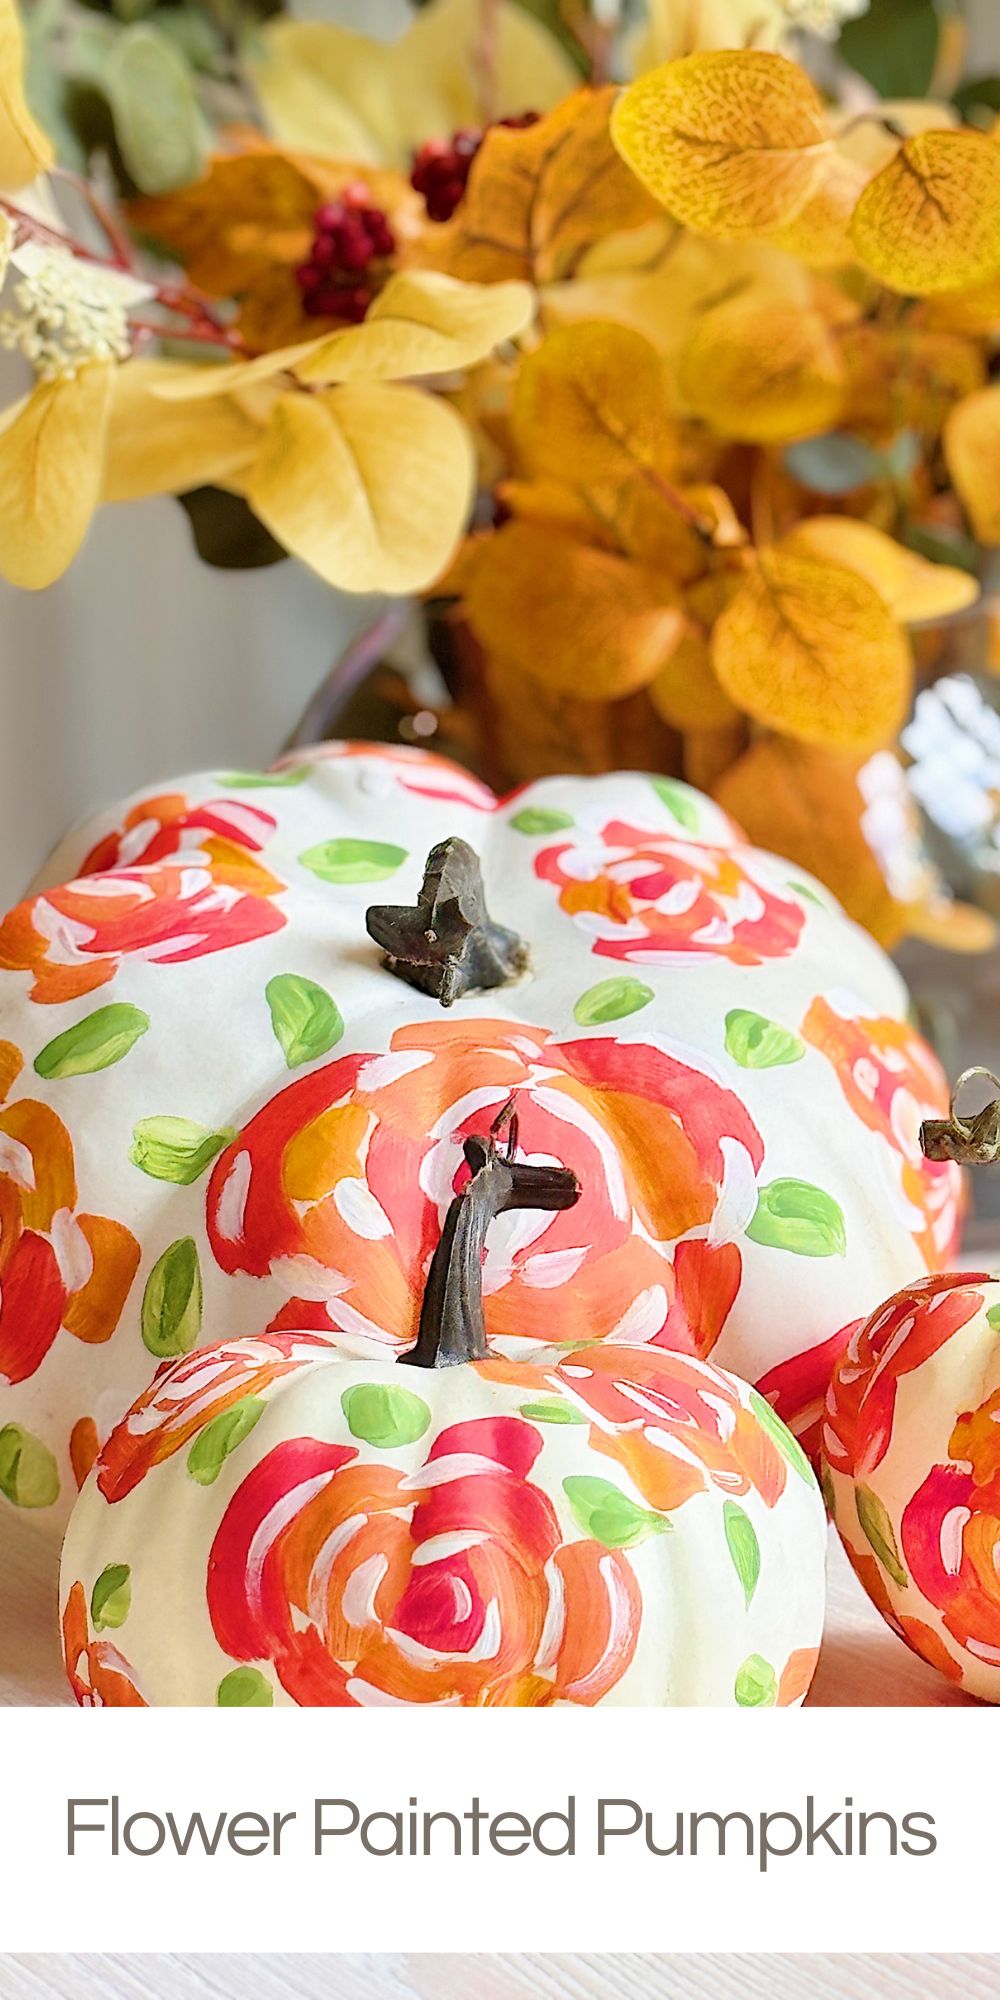
Every fall, I try to come up with a new pumpkin craft to add a special touch to our seasonal decor. So I decorated some old pumpkins and created rose painted pumpkins.
This year, I knew I wanted to create something bright and fun, and continue with my fascination with painted abstract roses.
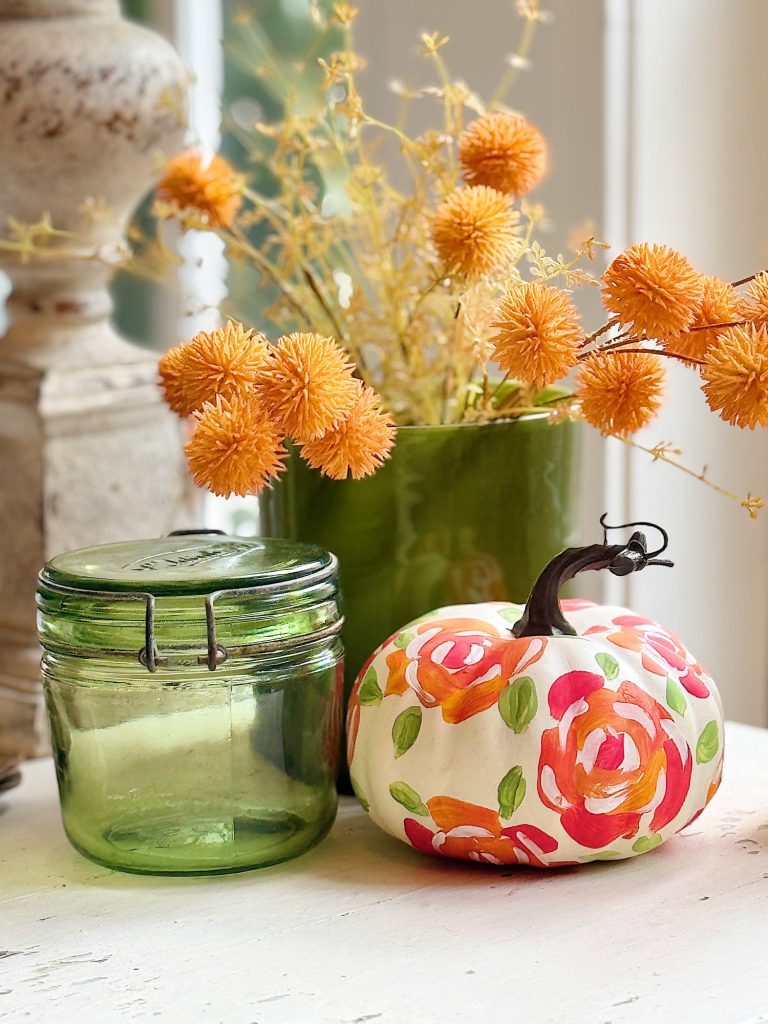

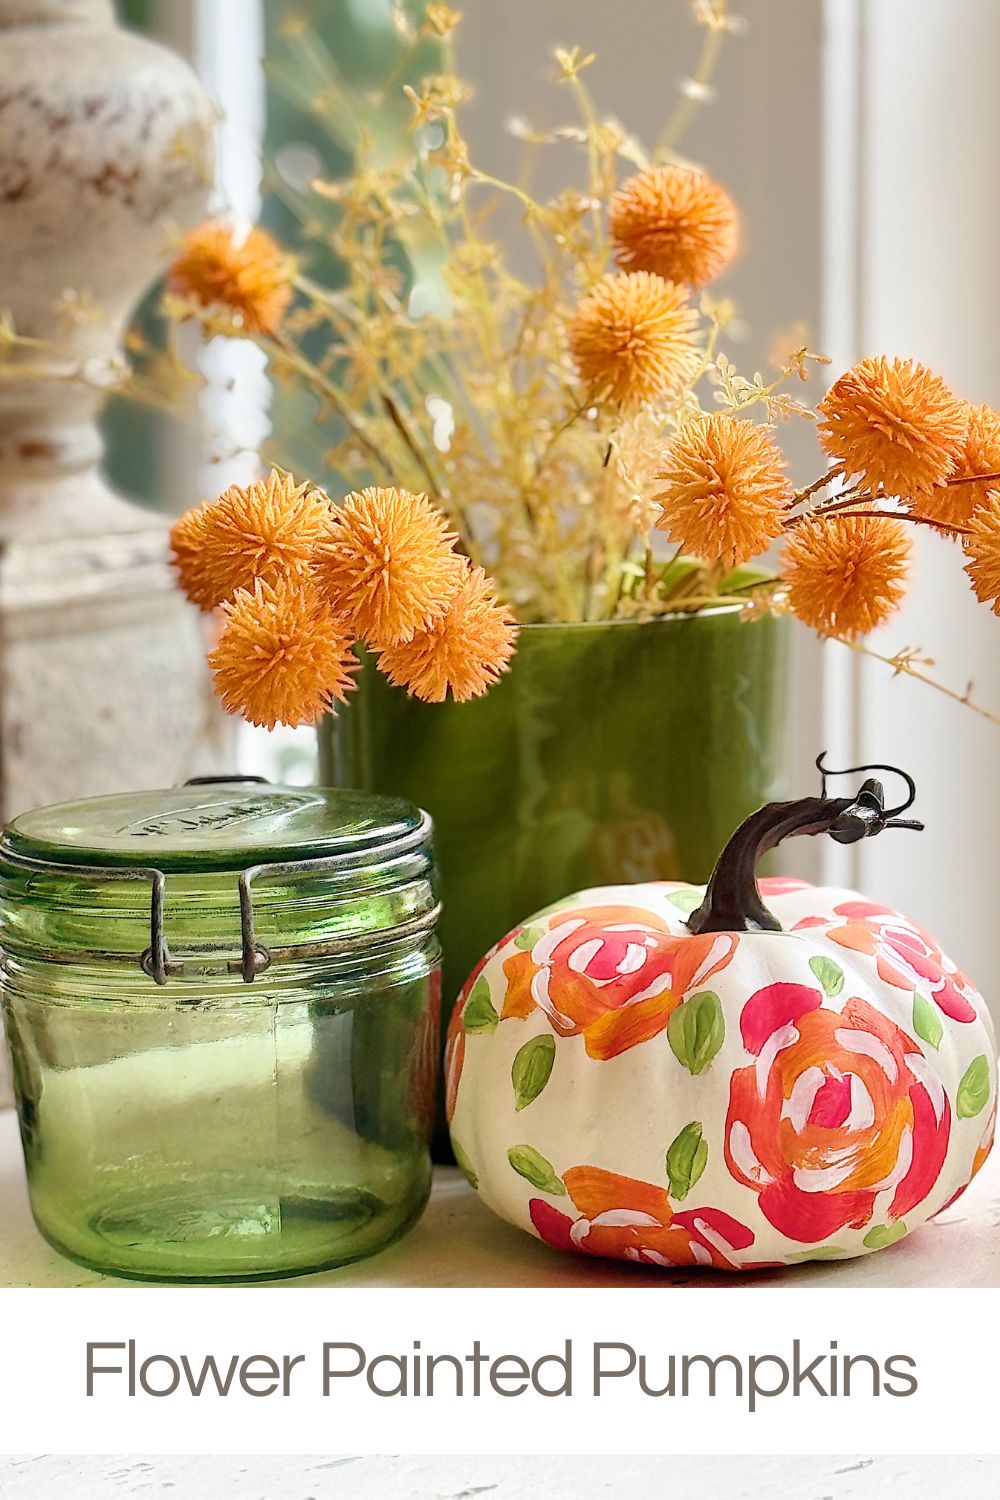
Flower Painted Pumpkins
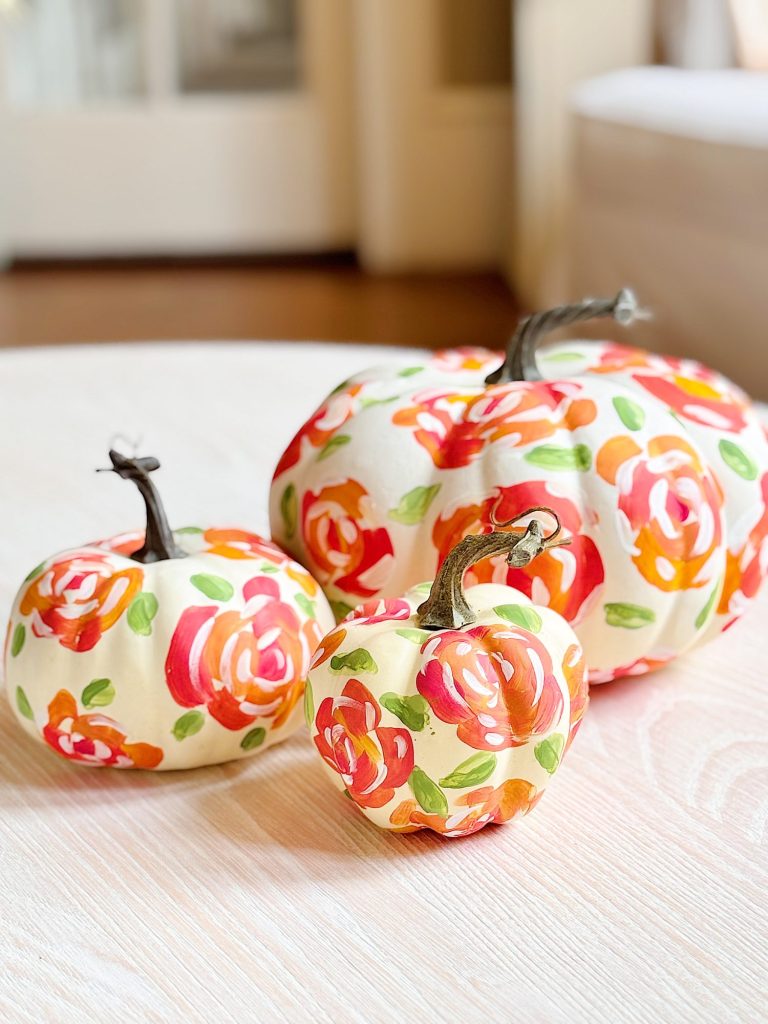
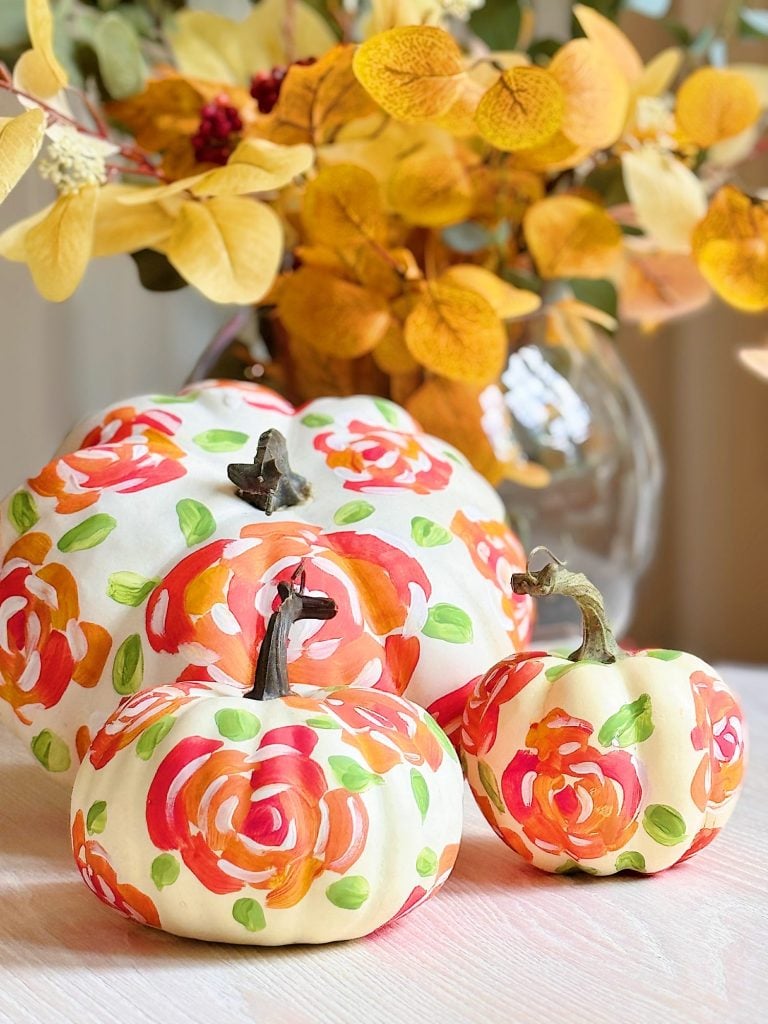
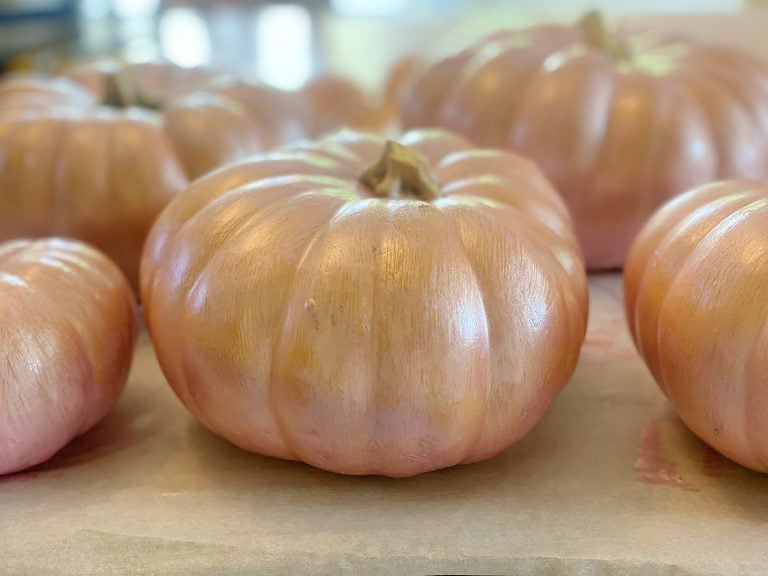
I pulled out my paints and brushes and got to work on these Flower Painted Pumpkins. Using the same technique as my rose-painted pumpkins, but this time with tan, sage green, gold, and orange, I created a collection that feels both elegant and perfectly seasonal.
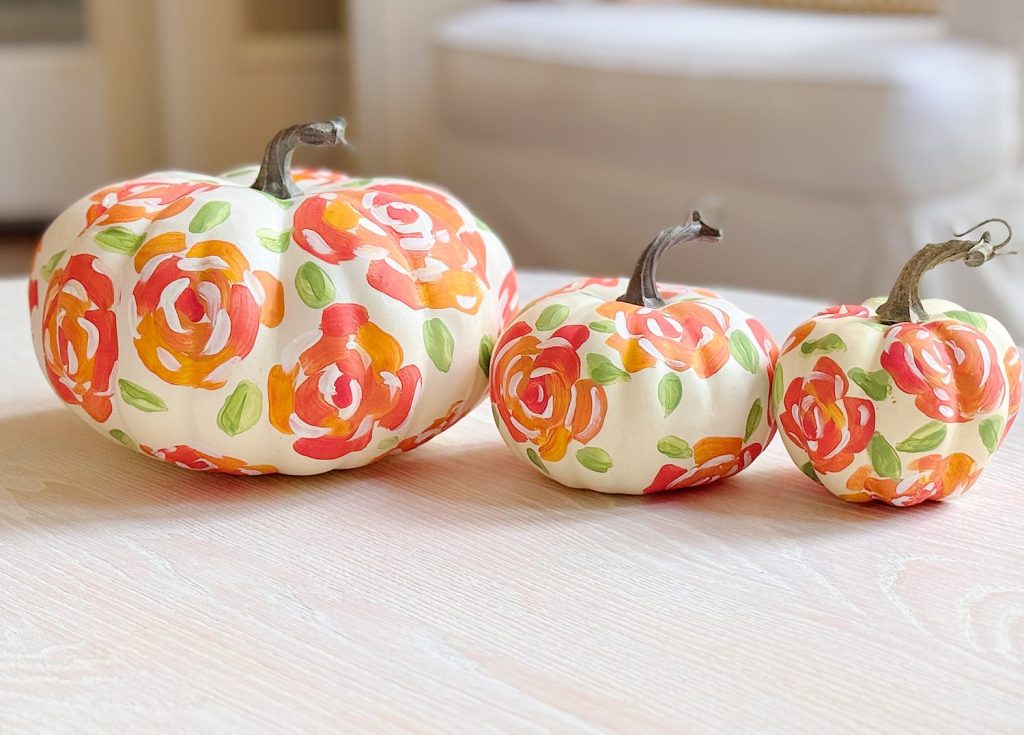
The colors blend beautifully with my fall decor, and the pumpkins themselves turned out so stunning that I can’t stop smiling every time I walk past them.
Why I Love Painted Pumpkins
Pumpkin painting has become one of my favorite fall traditions. While carving pumpkins will always have its charm, painted pumpkins last longer, don’t make a mess, and offer endless creative opportunities.
I especially love painting floral designs on pumpkins. There’s something whimsical about mixing the textures of fall with the timeless beauty of flowers. Flowers soften the pumpkins’ bold shapes, and the brushstrokes bring in a touch of artistry that makes them look custom and unique.
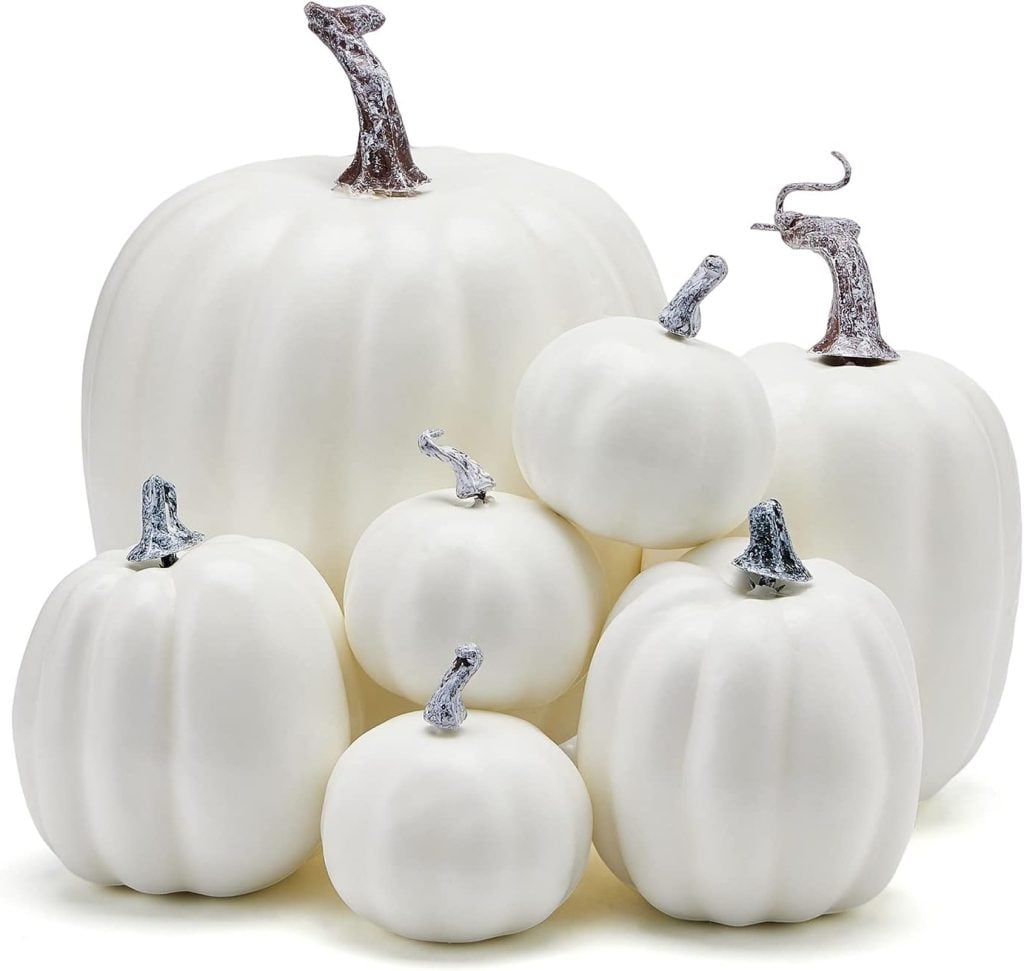
And because these are painted, you can save them year after year if you start with faux pumpkins, or enjoy them throughout the season if you use real ones.
Supplies You’ll Need
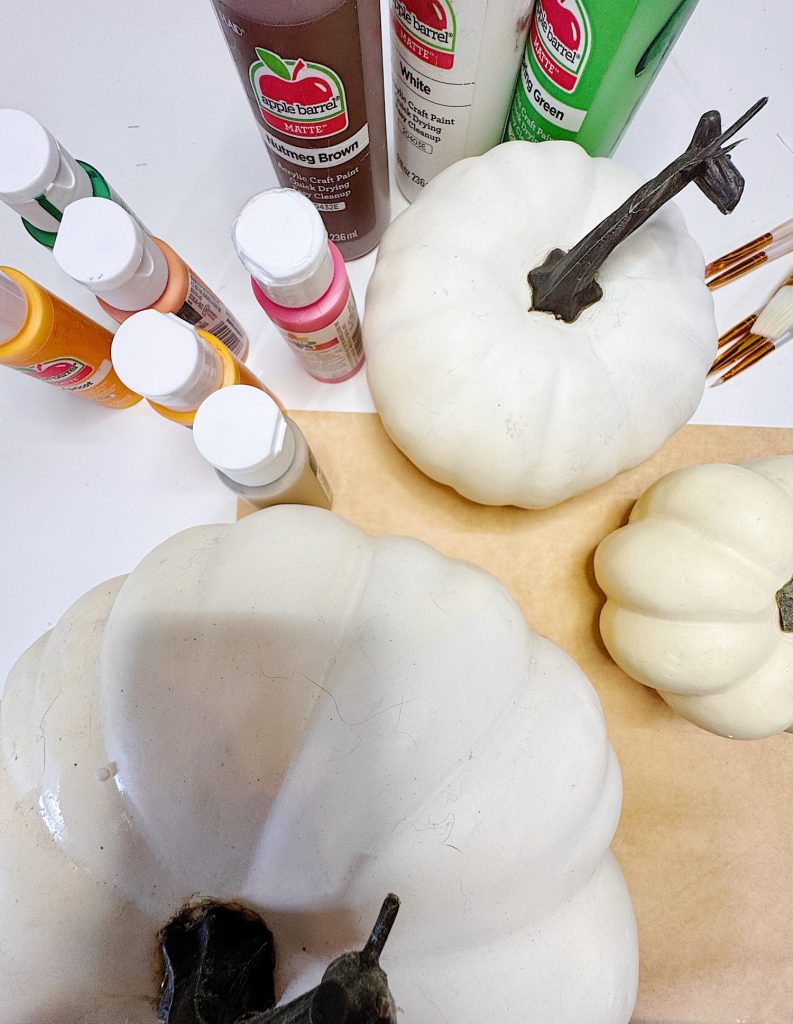
Here’s what I used to create this year’s Flower Painted Pumpkins:
- Faux pumpkins (though you can use real ones if you prefer)
- Acrylic paint in tan, sage green, orange, red, gold, and white
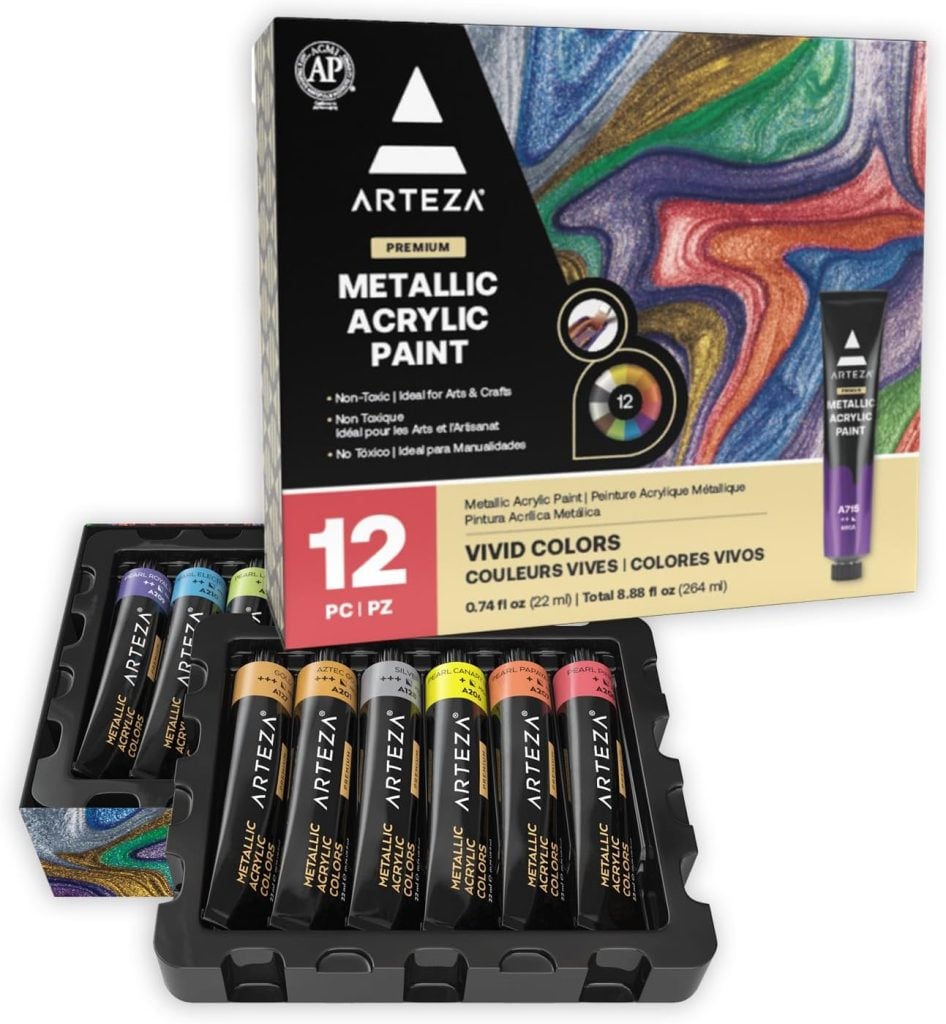
- Metallic acrylic paint in gold (for highlighting if desired)
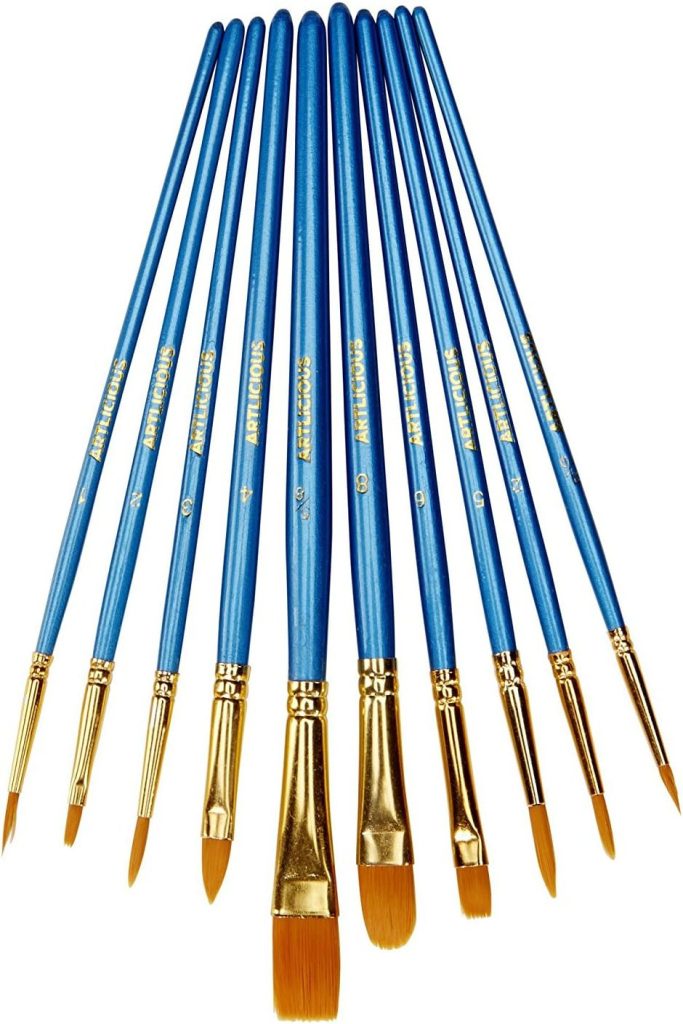
- Paintbrushes in a variety of sizes (flat and round)
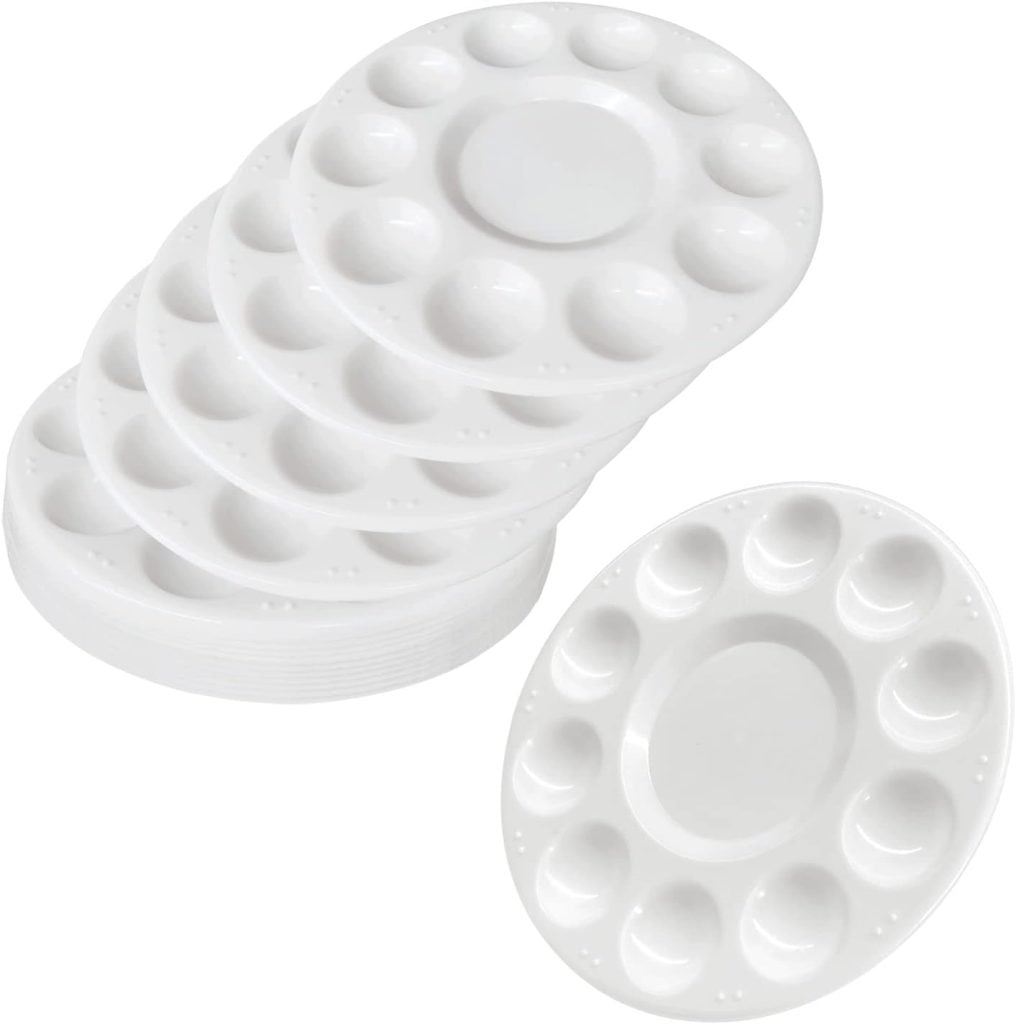
- Palette for mixing paints
- Paper towels and water cup for cleaning brushes
On this blog, I may sometimes use affiliate links, which means a small commission is earned if you purchase via the link. The price will be the same whether you use the affiliate link or go directly to the vendor’s website using a non-affiliate link.
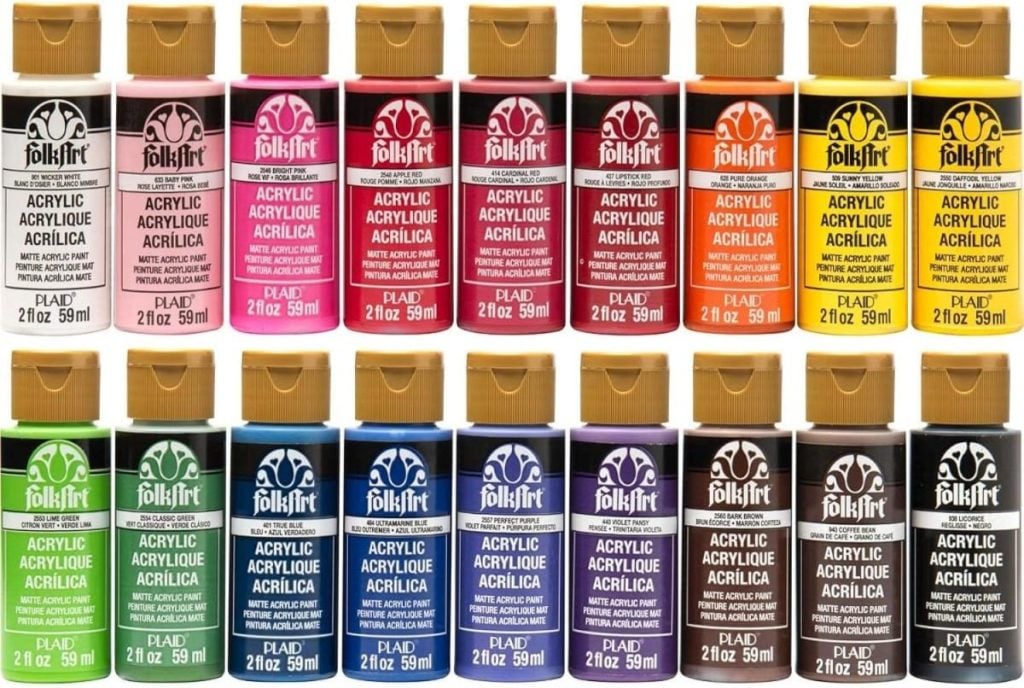
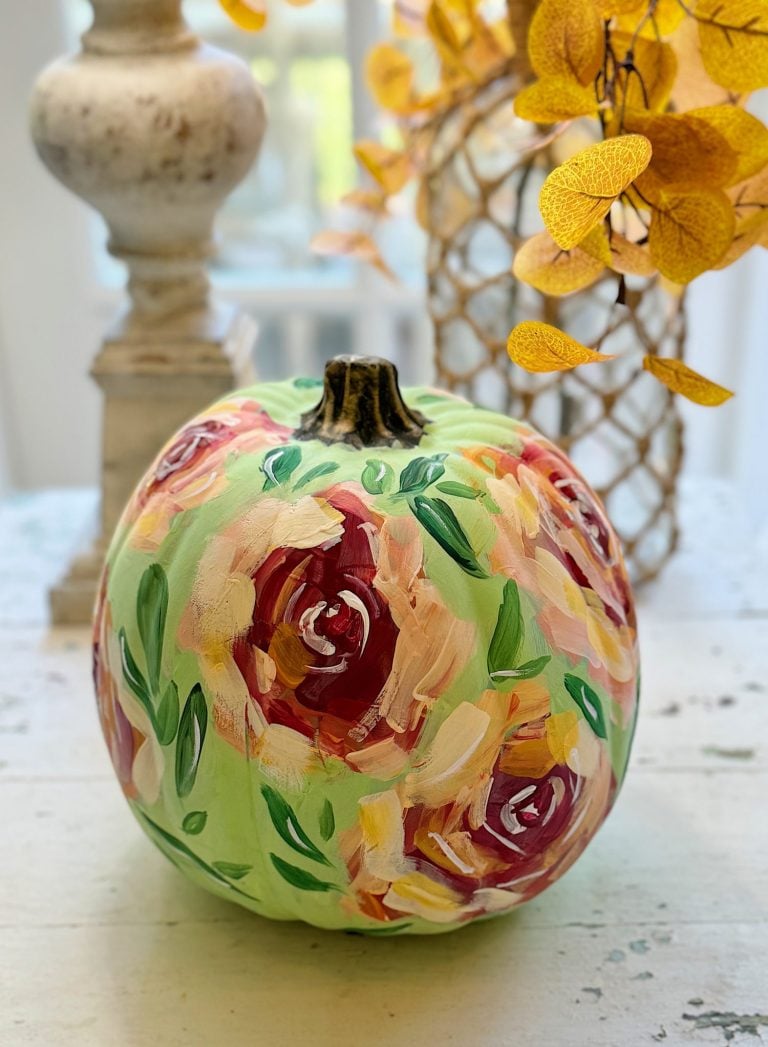
This is the same process I used in last year’s rose-painted pumpkin craft, but this time the rest of my fall decor inspired the palette. Instead of brights or pastels, I leaned into neutrals, muted greens, warm tans, and rich orange with metallic gold accents.
Step-by-Step: How to Paint Flower Pumpkins
Step 1: Prep Your Pumpkins
Start with clean pumpkins. If you’re using faux pumpkins, wipe them down to remove dust. If you’re using real pumpkins, give them a rinse and dry them thoroughly.
Step 2: Base Coat (Optional)
If your pumpkin is a bold orange and you want a softer base, you can paint it first with a coat of tan or cream acrylic paint. This gives you a more neutral canvas and helps the flower colors pop.
Step 3: Paint the Flowers
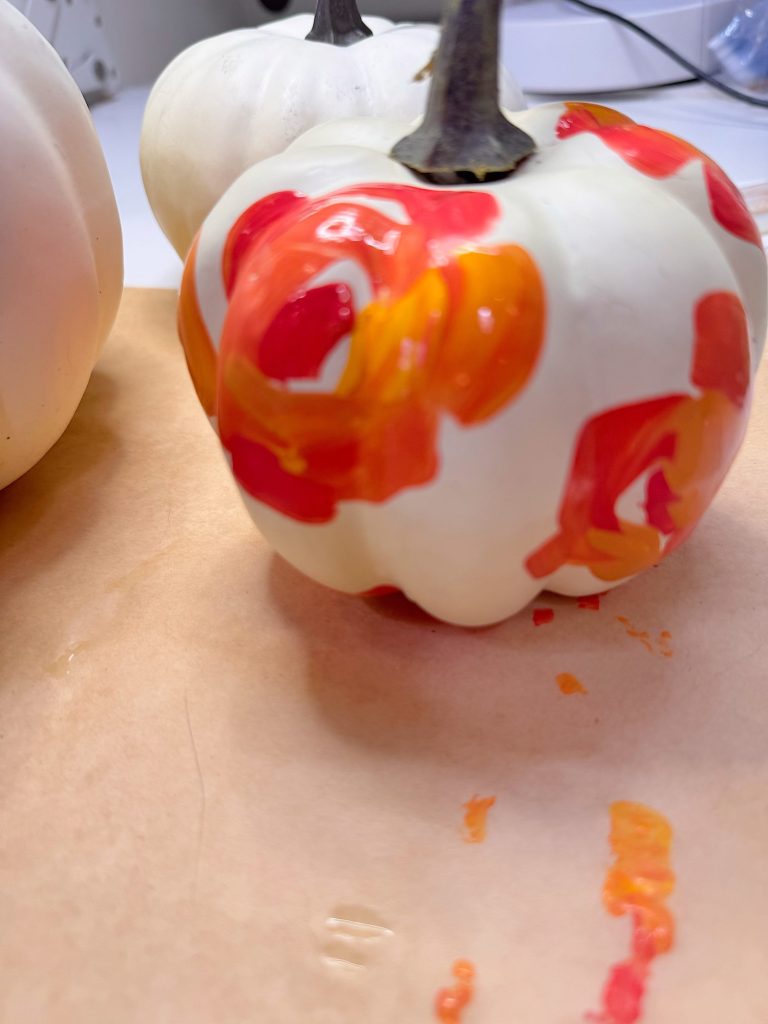
Using a round brush, begin by painting loose circular shapes to create the flowers. Don’t worry about making them perfect—abstract florals look best when they’re free and organic.
For this collection, I used a mix of tan, cream, and soft orange as the flower base colors. Each flower started with a swirl of color, layered with brushstrokes that mimic petals.
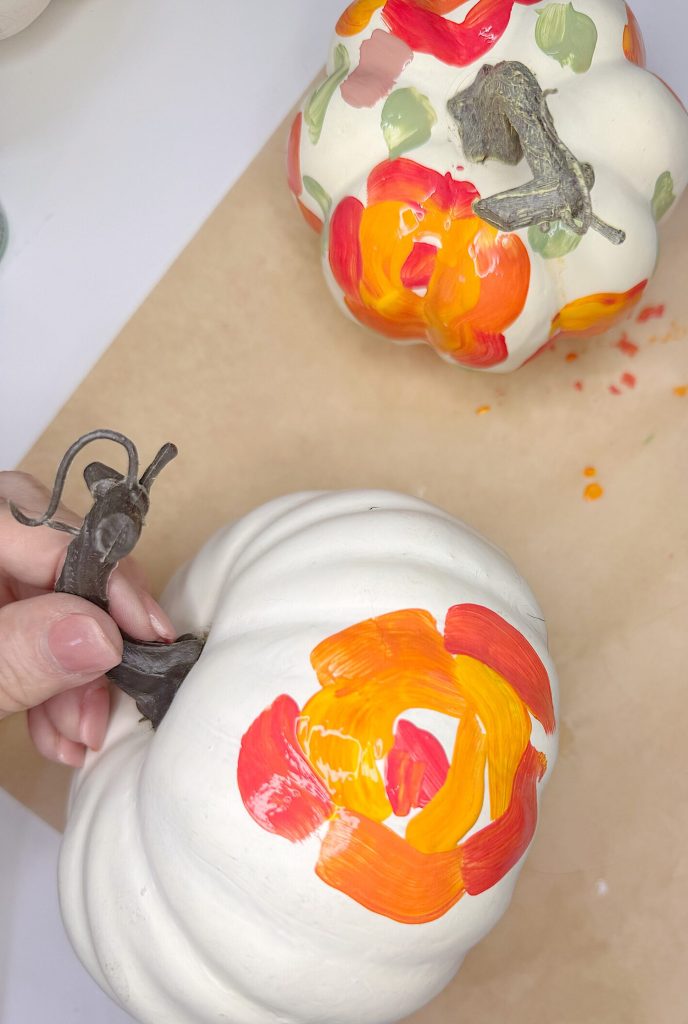
Step 4: Add Leaves and Background
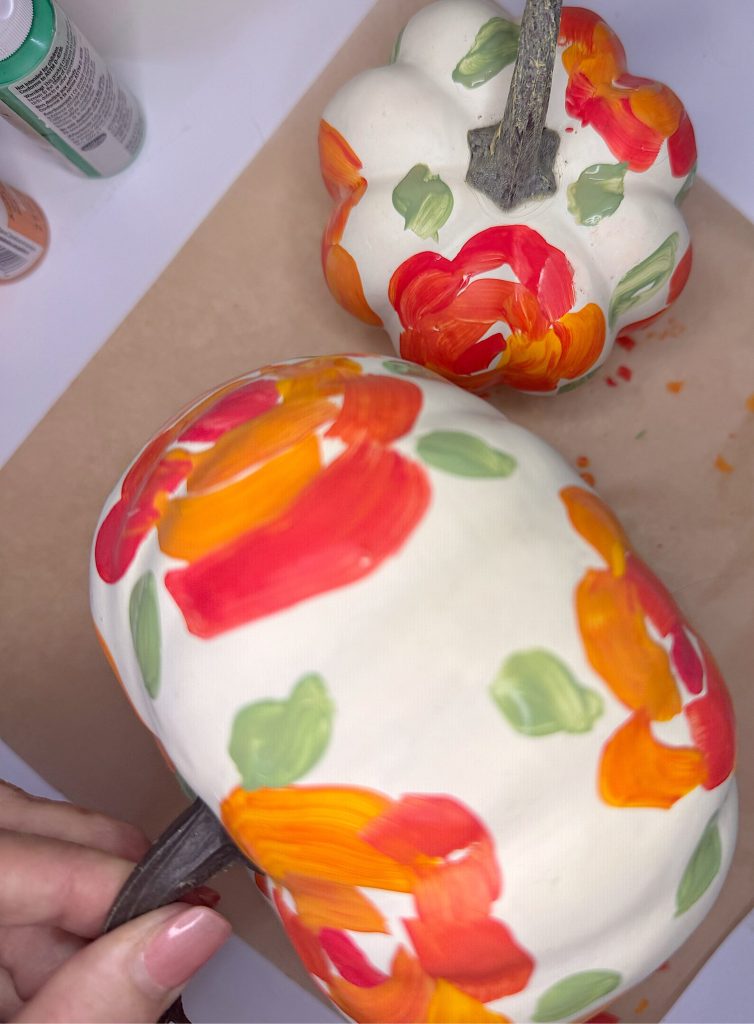
Once the flowers were dry, I added sage green leaves around them, painting in loose, elongated strokes. The green balanced out the warmer tones and gave the pumpkins a natural, garden-inspired look.
I left some negative space so that the tan or cream of the pumpkin could show through, which gave the overall design a lighter, airier feel.
Step 5: Layer and Refine

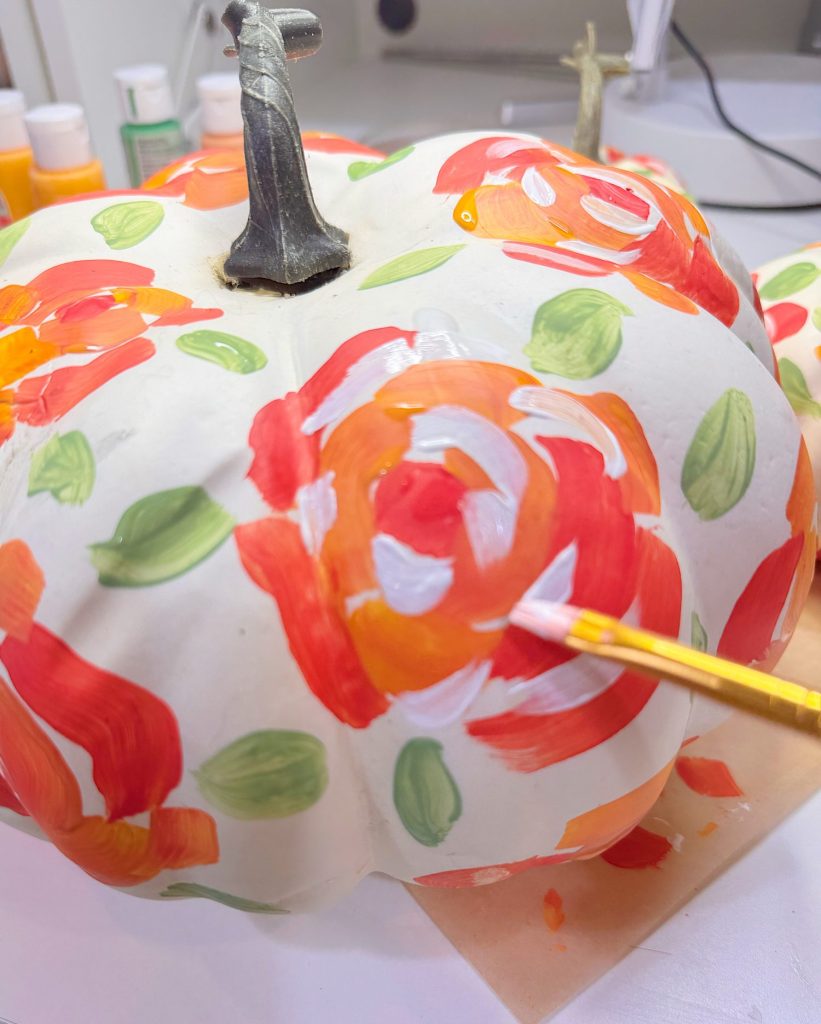
One of the best parts of this project is how forgiving it is. If a flower doesn’t look the way you want it to, just layer on more paint. The overlapping brushstrokes create texture and interest, so don’t overthink it. One way to create depth is to add white highlights.
Why This Color Palette Works
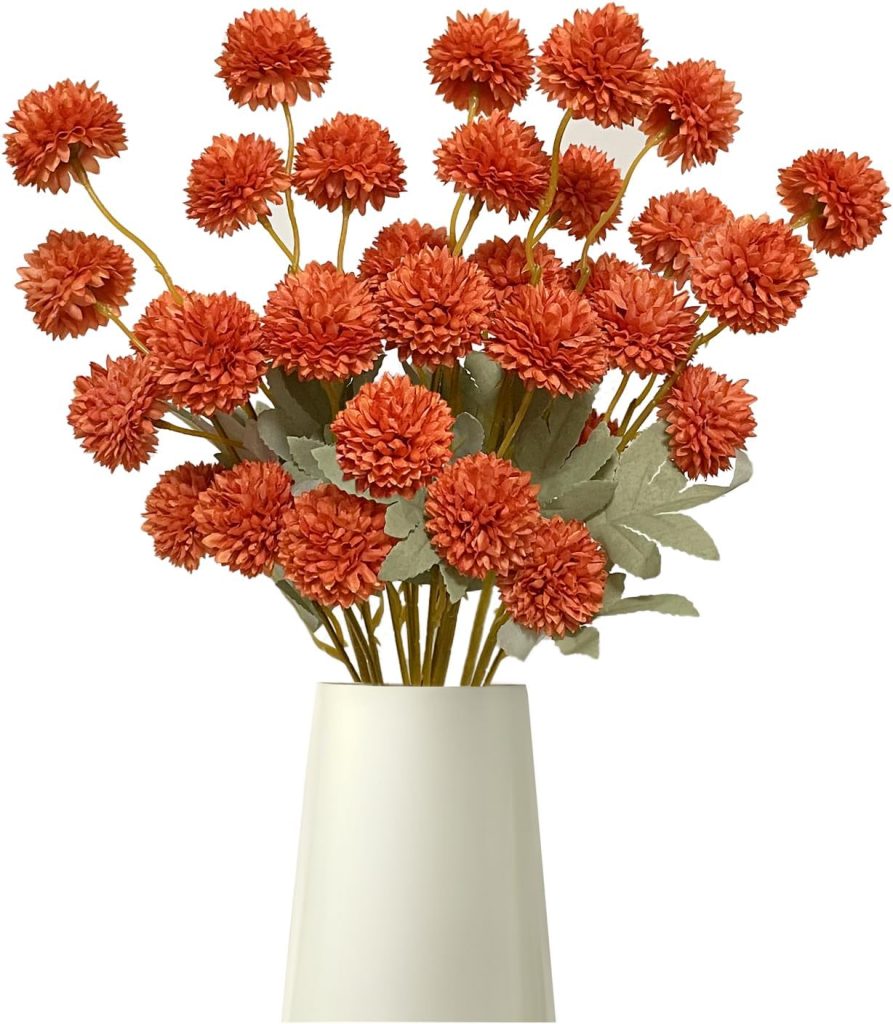
This fall, I’ve been decorating our home with a fun palette: sage green, gold, and orange. These colors are cozy without being overwhelming, and they create a warm, welcoming vibe that blends beautifully with the natural light in our spaces.
The pumpkins tie right into that look. The sage leaves bring in calm, earthy tones. The tan and cream flowers keep things soft and neutral. The orange adds just enough punch of traditional fall color. And the gold highlights tie it all together with elegance.
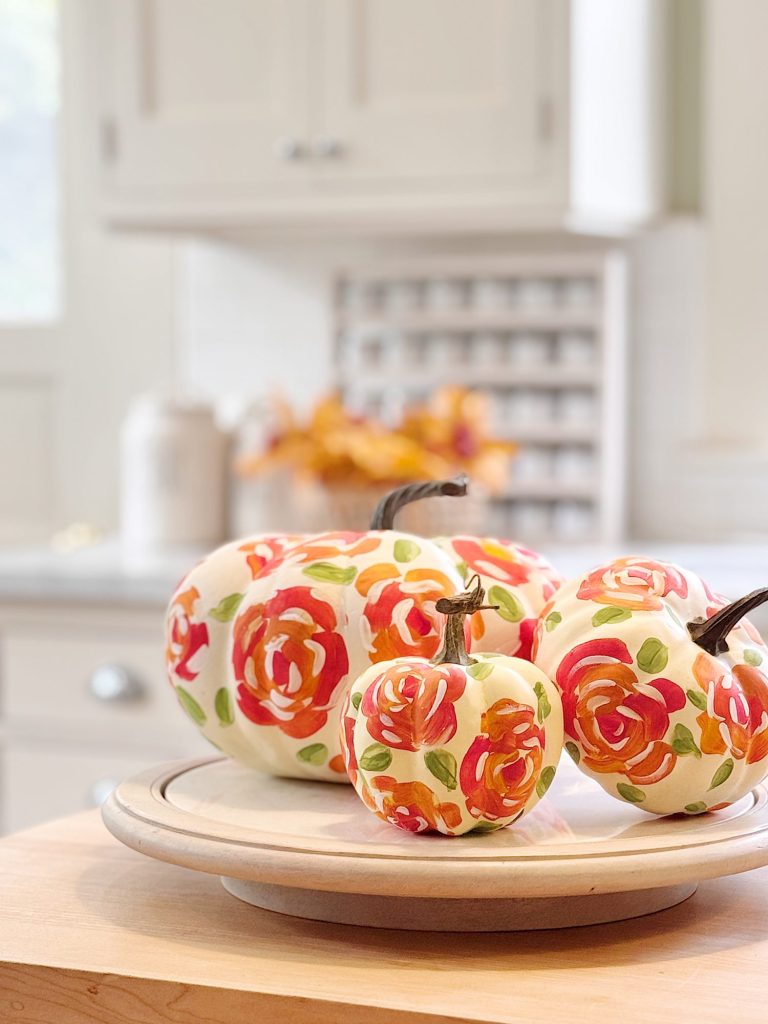
I love how this palette looks in every room, from the dining table to the mantel. The pumpkins feel like an extension of the rest of my decor instead of standing out as too bold or busy.
Styling Flower Painted Pumpkins
There are so many ways to display these pumpkins around your home:
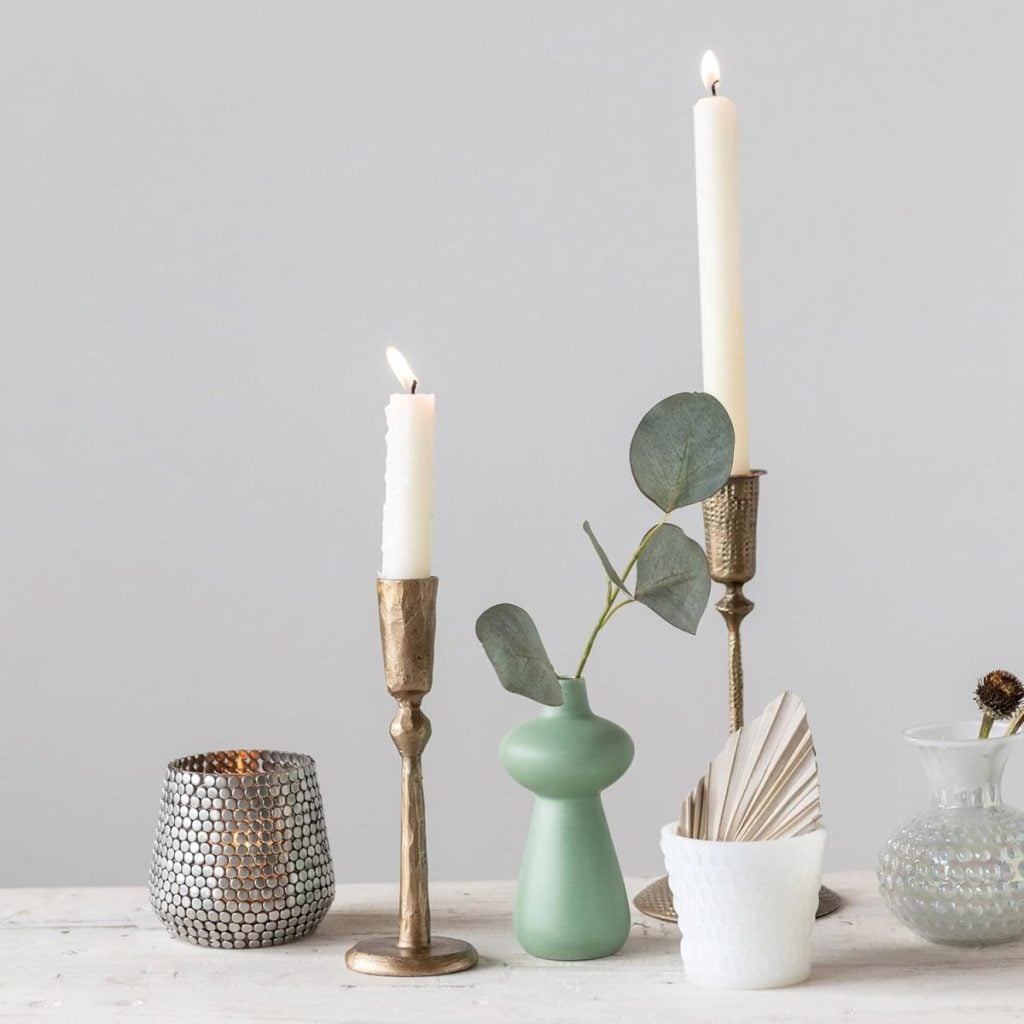
- Dining Table Centerpiece: Cluster several sizes together down the center of your table with eucalyptus and candles for a stunning arrangement.
- Mantel Display: Mix them with neutral vases, candlesticks, and garlands for a cozy fall look.
- Entryway Accent: Place a few painted pumpkins on a console table to greet guests with a warm welcome.
- Kitchen Vignette: Add one or two smaller pumpkins to open shelving or your kitchen island for a subtle seasonal touch.
Because the colors are soft and neutral, the pumpkins blend in seamlessly with other fall pieces and don’t overpower the room.
Tips for Success
- Use Layering: Build up the flowers with multiple layers of paint for dimension.
- Mix Colors: Don’t be afraid to blend paints right on your brush—this creates natural-looking variations in the petals.
- Work in Groups: Paint a few pumpkins at once so your color palette stays consistent across the collection.
- Embrace Imperfection: Abstract flowers are meant to be loose and playful. Don’t try to make them look too realistic!
Final Thoughts
Whether you display them on your dining table, mantel, or entryway, these pumpkins are sure to be a beautiful addition to your fall home.
And the best part? There’s no wrong way to do it. Pick up a brush, choose a palette you love, and paint flowers that make you smile. Before you know it, you’ll have a collection of pumpkins that are as unique and special as your home.
✨ I hope this inspires you to create your own set of Flower Painted Pumpkins this season. Trust me—they’re stunning!
If you enjoy my blog, you can sign up to receive my updates here.
.PB Inspired Fall Decor Finds
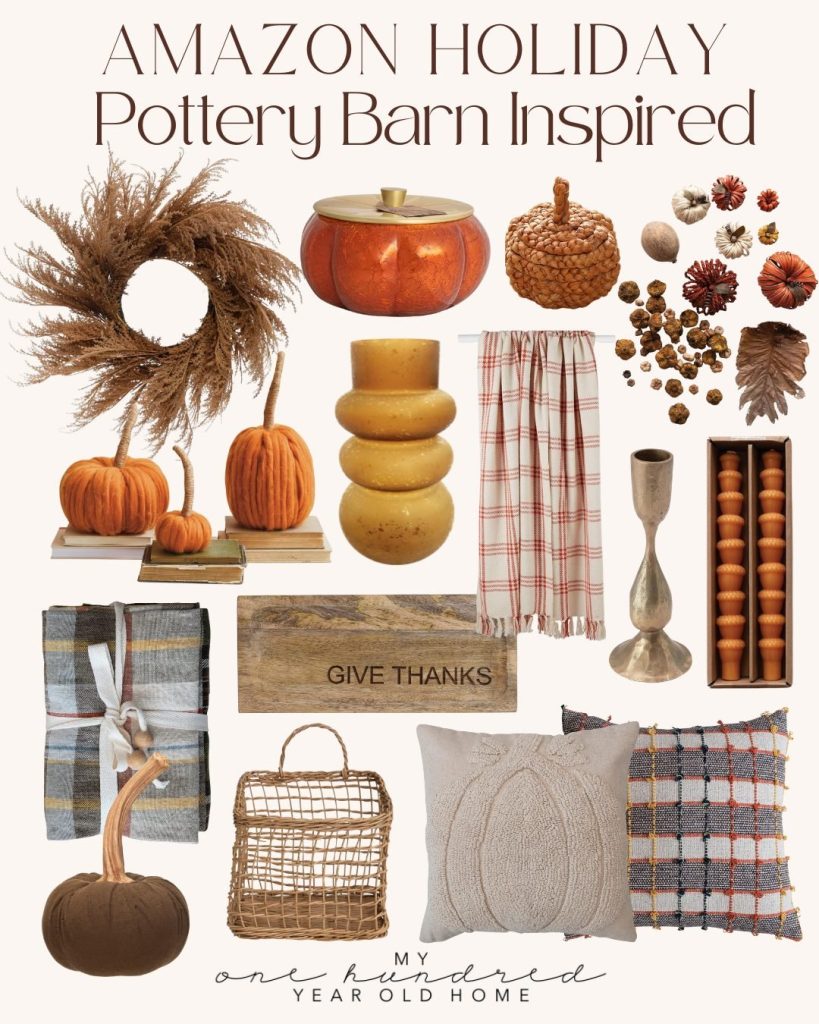
Shop My100YearOldHome Decor By Room with the link below!
Latest Posts
-
Spring Cleaning and Sunday Morning Coffee
I don’t know about you, but every spring I feel this strong pull to refresh something in our home, and this year I started in a place that might surprise you. It’s Spring Cleaning time! The very first room on my spring-cleaning list was our nursery. And yes, I know that sounds a little unexpected,…
-
Best Easter Brunch Egg Dish: Loaded French Onion Frittata
Easter brunch is one of those special meals where the table is complete, the laughter is loud, and the food is nothing short of spectacular. If you want to wow your guests with something savory, cheesy, and unforgettable, let me introduce you to your new Easter brunch hero: a Loaded French Onion Frittata.
-
The Best Spring Pillow DIY – A Handmade Spring
There are certain projects that start as an idea and quietly turn into something you love far more than you expected, and this Spring pillow is exactly that. As part of my A Handmade Spring series, I wanted to create something soft, beautiful, and full of texture, and this pillow checked every box. This pillow…
-
DIY Clay and Metallic Foil Easter Eggs
With Easter just around the corner this week, I decided to create something special and truly unique for my spring décor … handmade clay and metallic foil Easter eggs. These little works of art are soft, pastel, and subtly shimmery, and they’re a beautiful way to add a handmade touch to your Easter celebrations. While…


My Recent Instagram Posts

You can pin the image below to your boards on Pinterest (click the Pin button in the top left corner) or follow me on Pinterest!
For more real-time updates, follow me on Instagram @My100YearOldHome
These pumpkins really are very lovely! Thank you
These are great ideas with lovely idea
Oh, these rose-painted pumpkins are gorgeous! I love how you’re always trying new pumpkin crafts each fall. Using old pumpkins is a great idea too, perfect for giving them a fresh, seasonal makeover. I’m definitely inspired to try this myself!
CapCut provides smooth performance and useful features. CapCut templates help users achieve professional results with ease.
Futbol Libre TV ofrece contenido enfocado en el fútbol nacional e internacional. Fútbol Libre y Futbollibre permiten a los usuarios mantenerse informados sobre competiciones, horarios y noticias del deporte más popular.