How to Decorate Wood Charger Plates
I love the idea of decorating wood charger plates. You can customize them with paint, stain, or decoupaged napkins to match your plates!
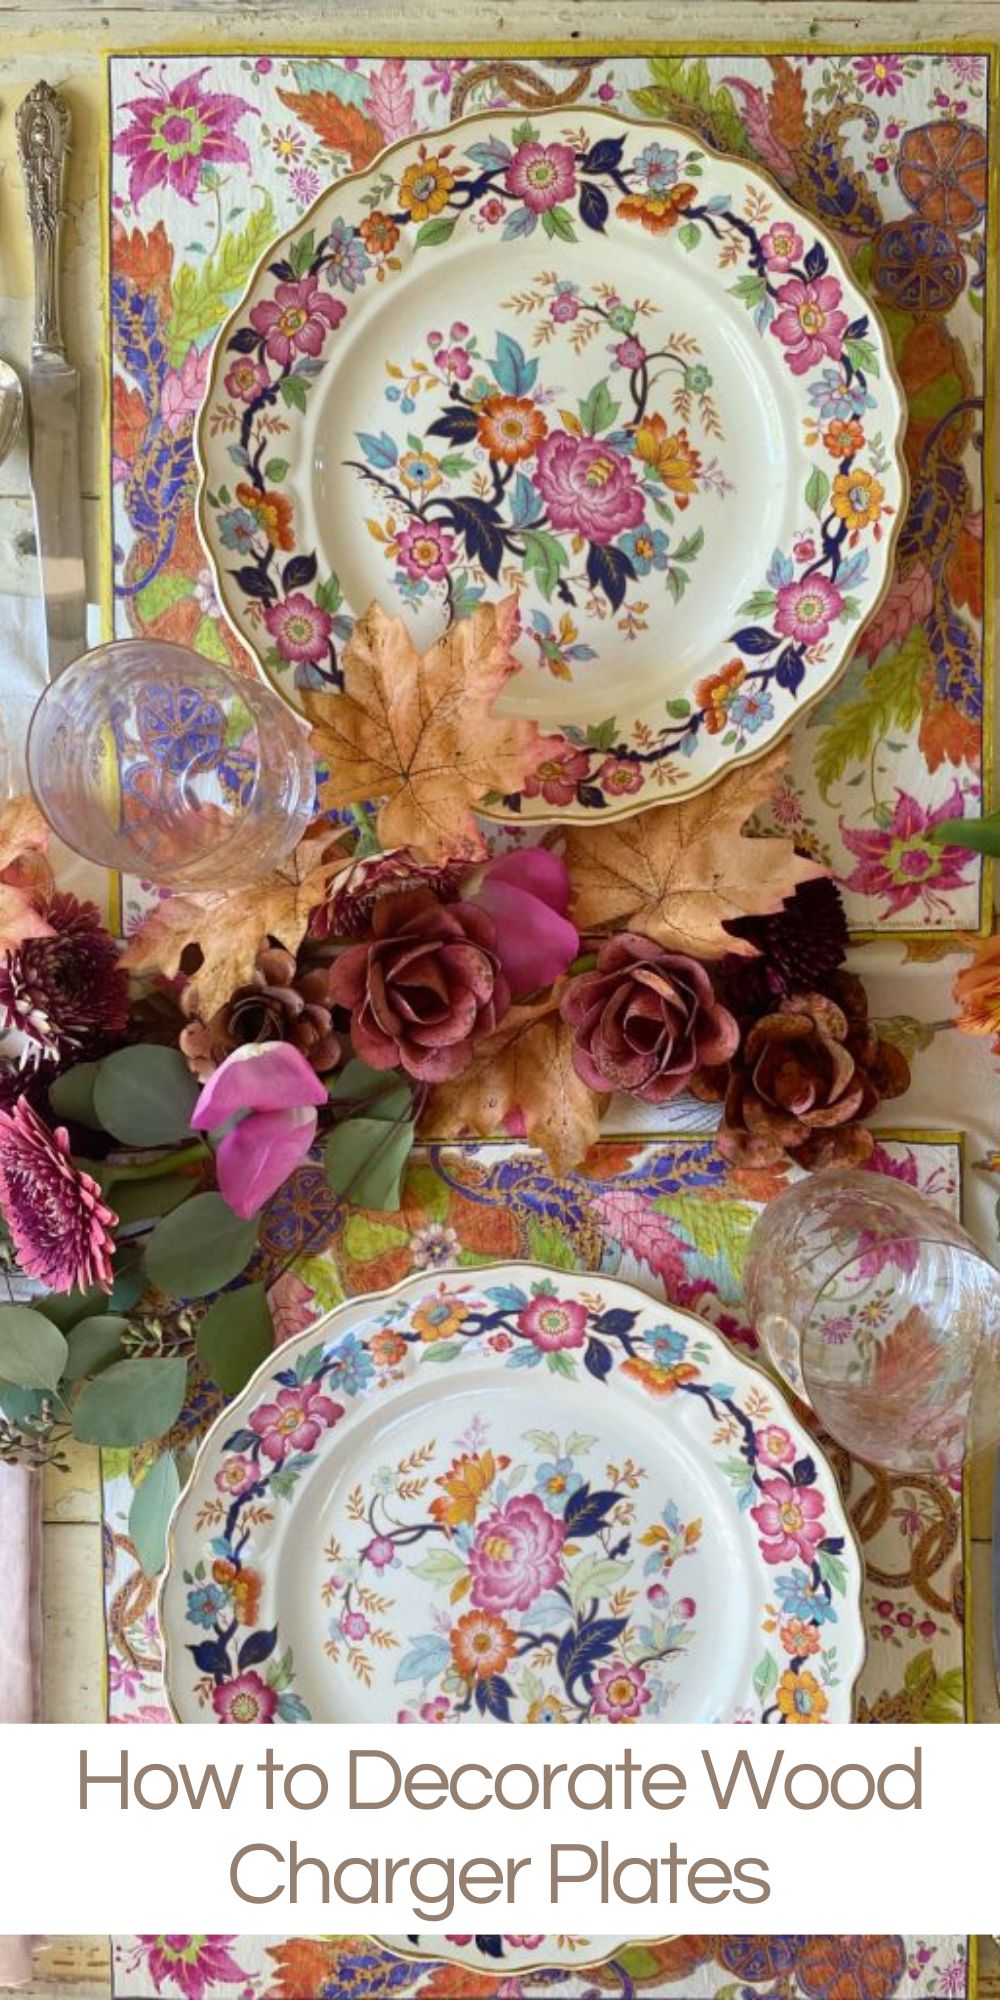
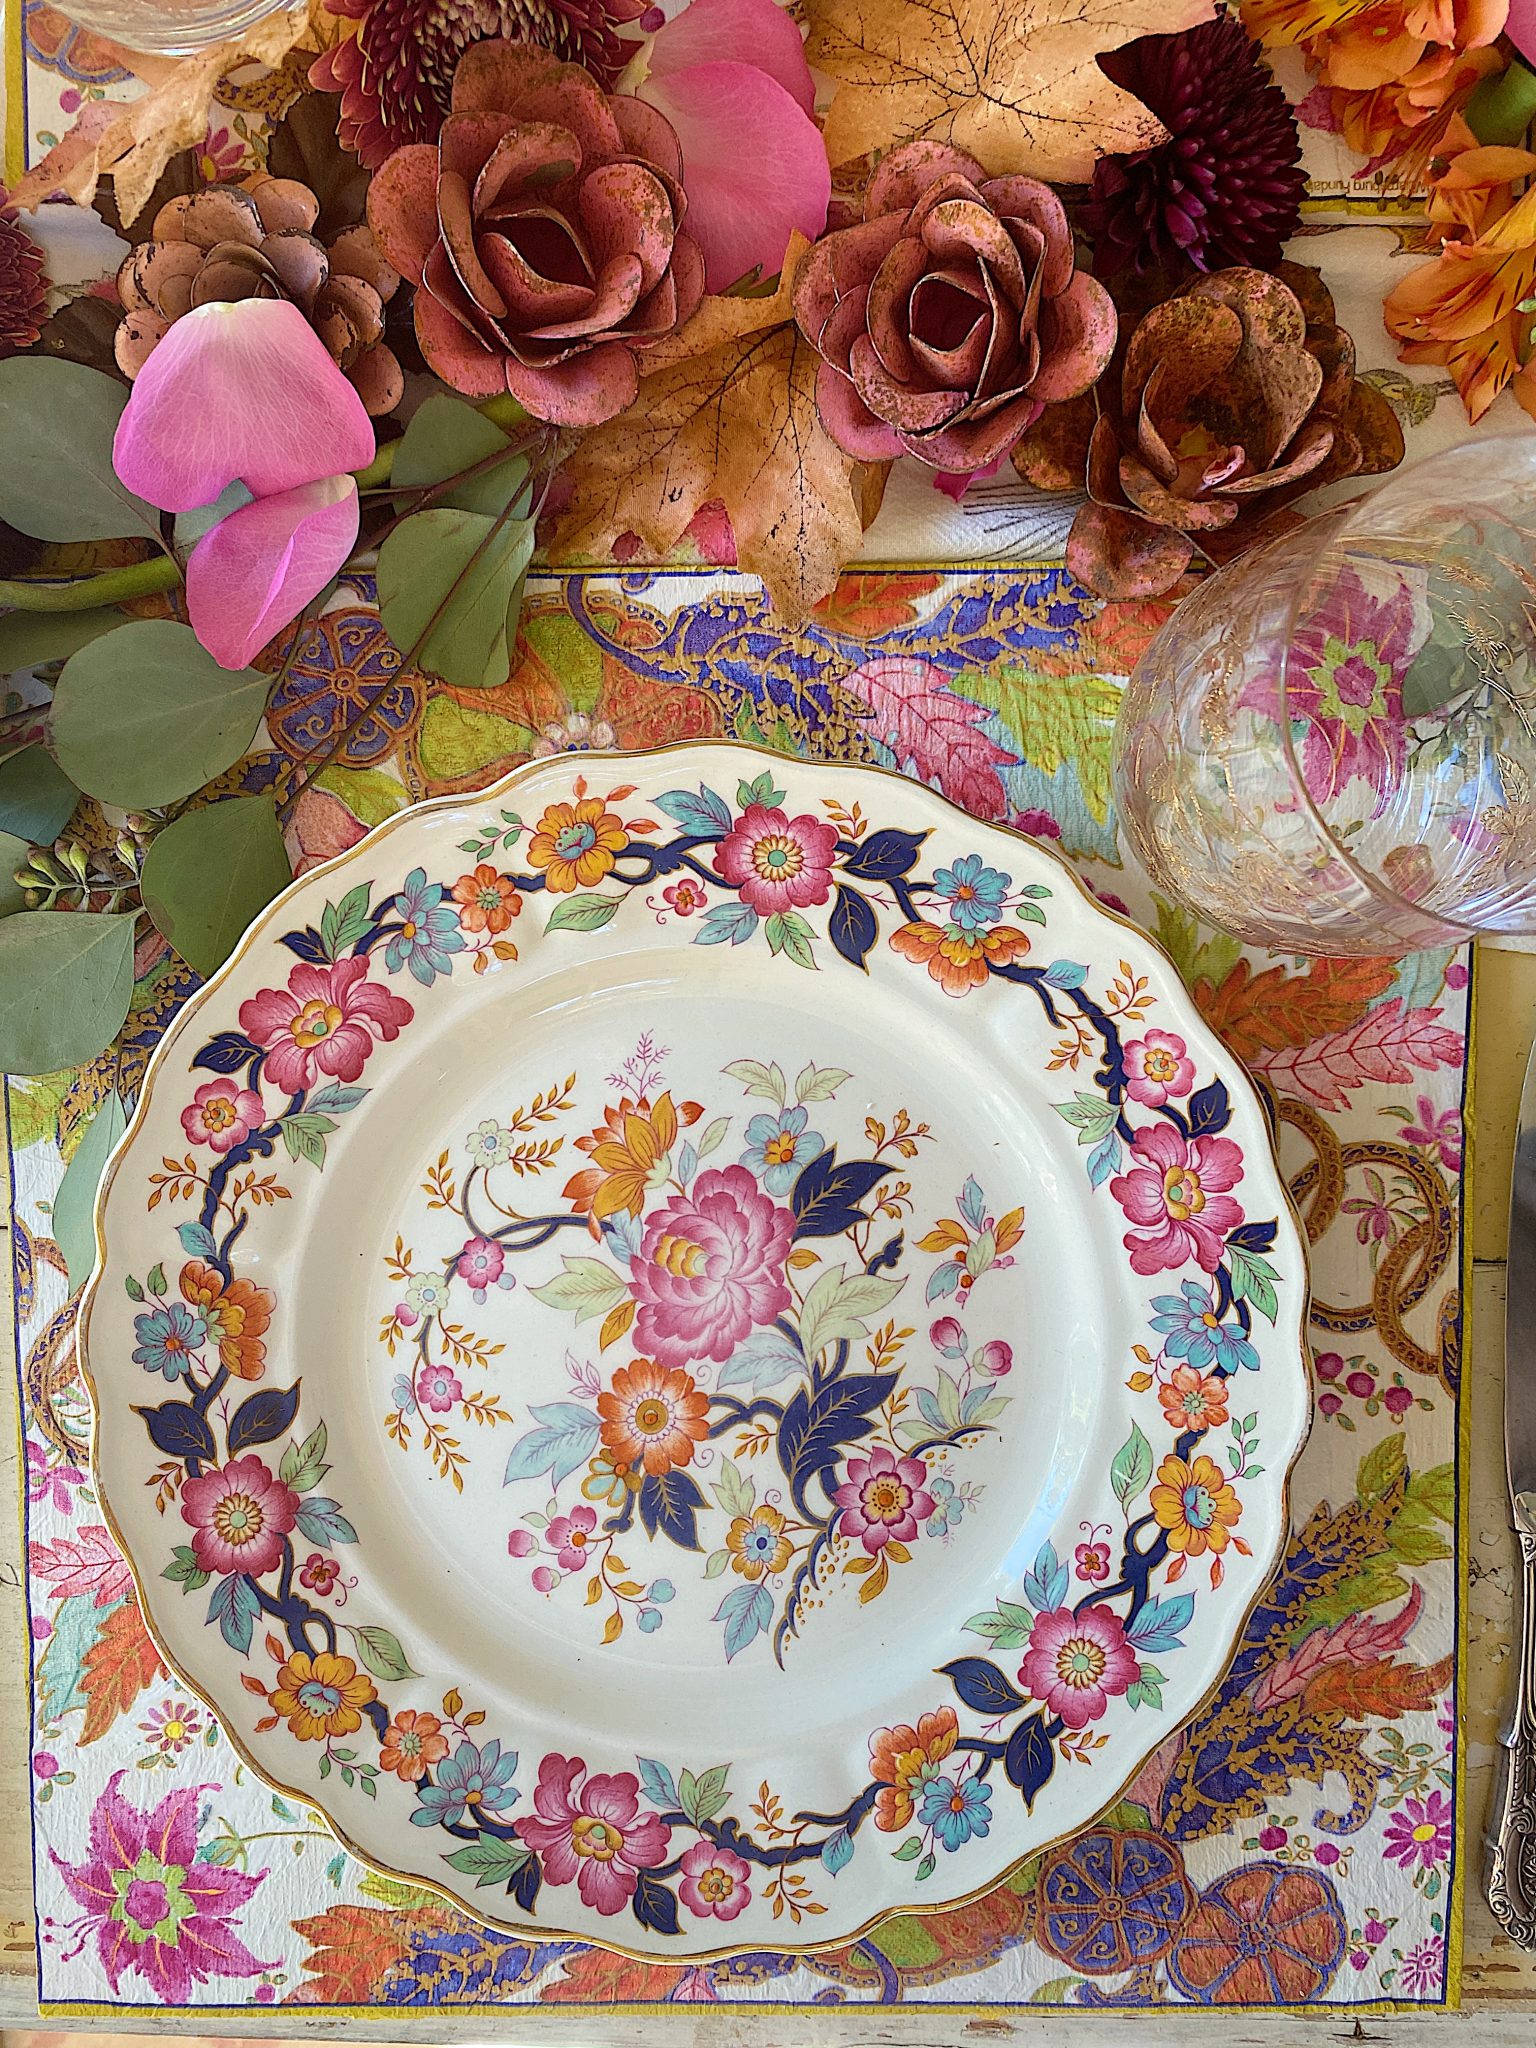
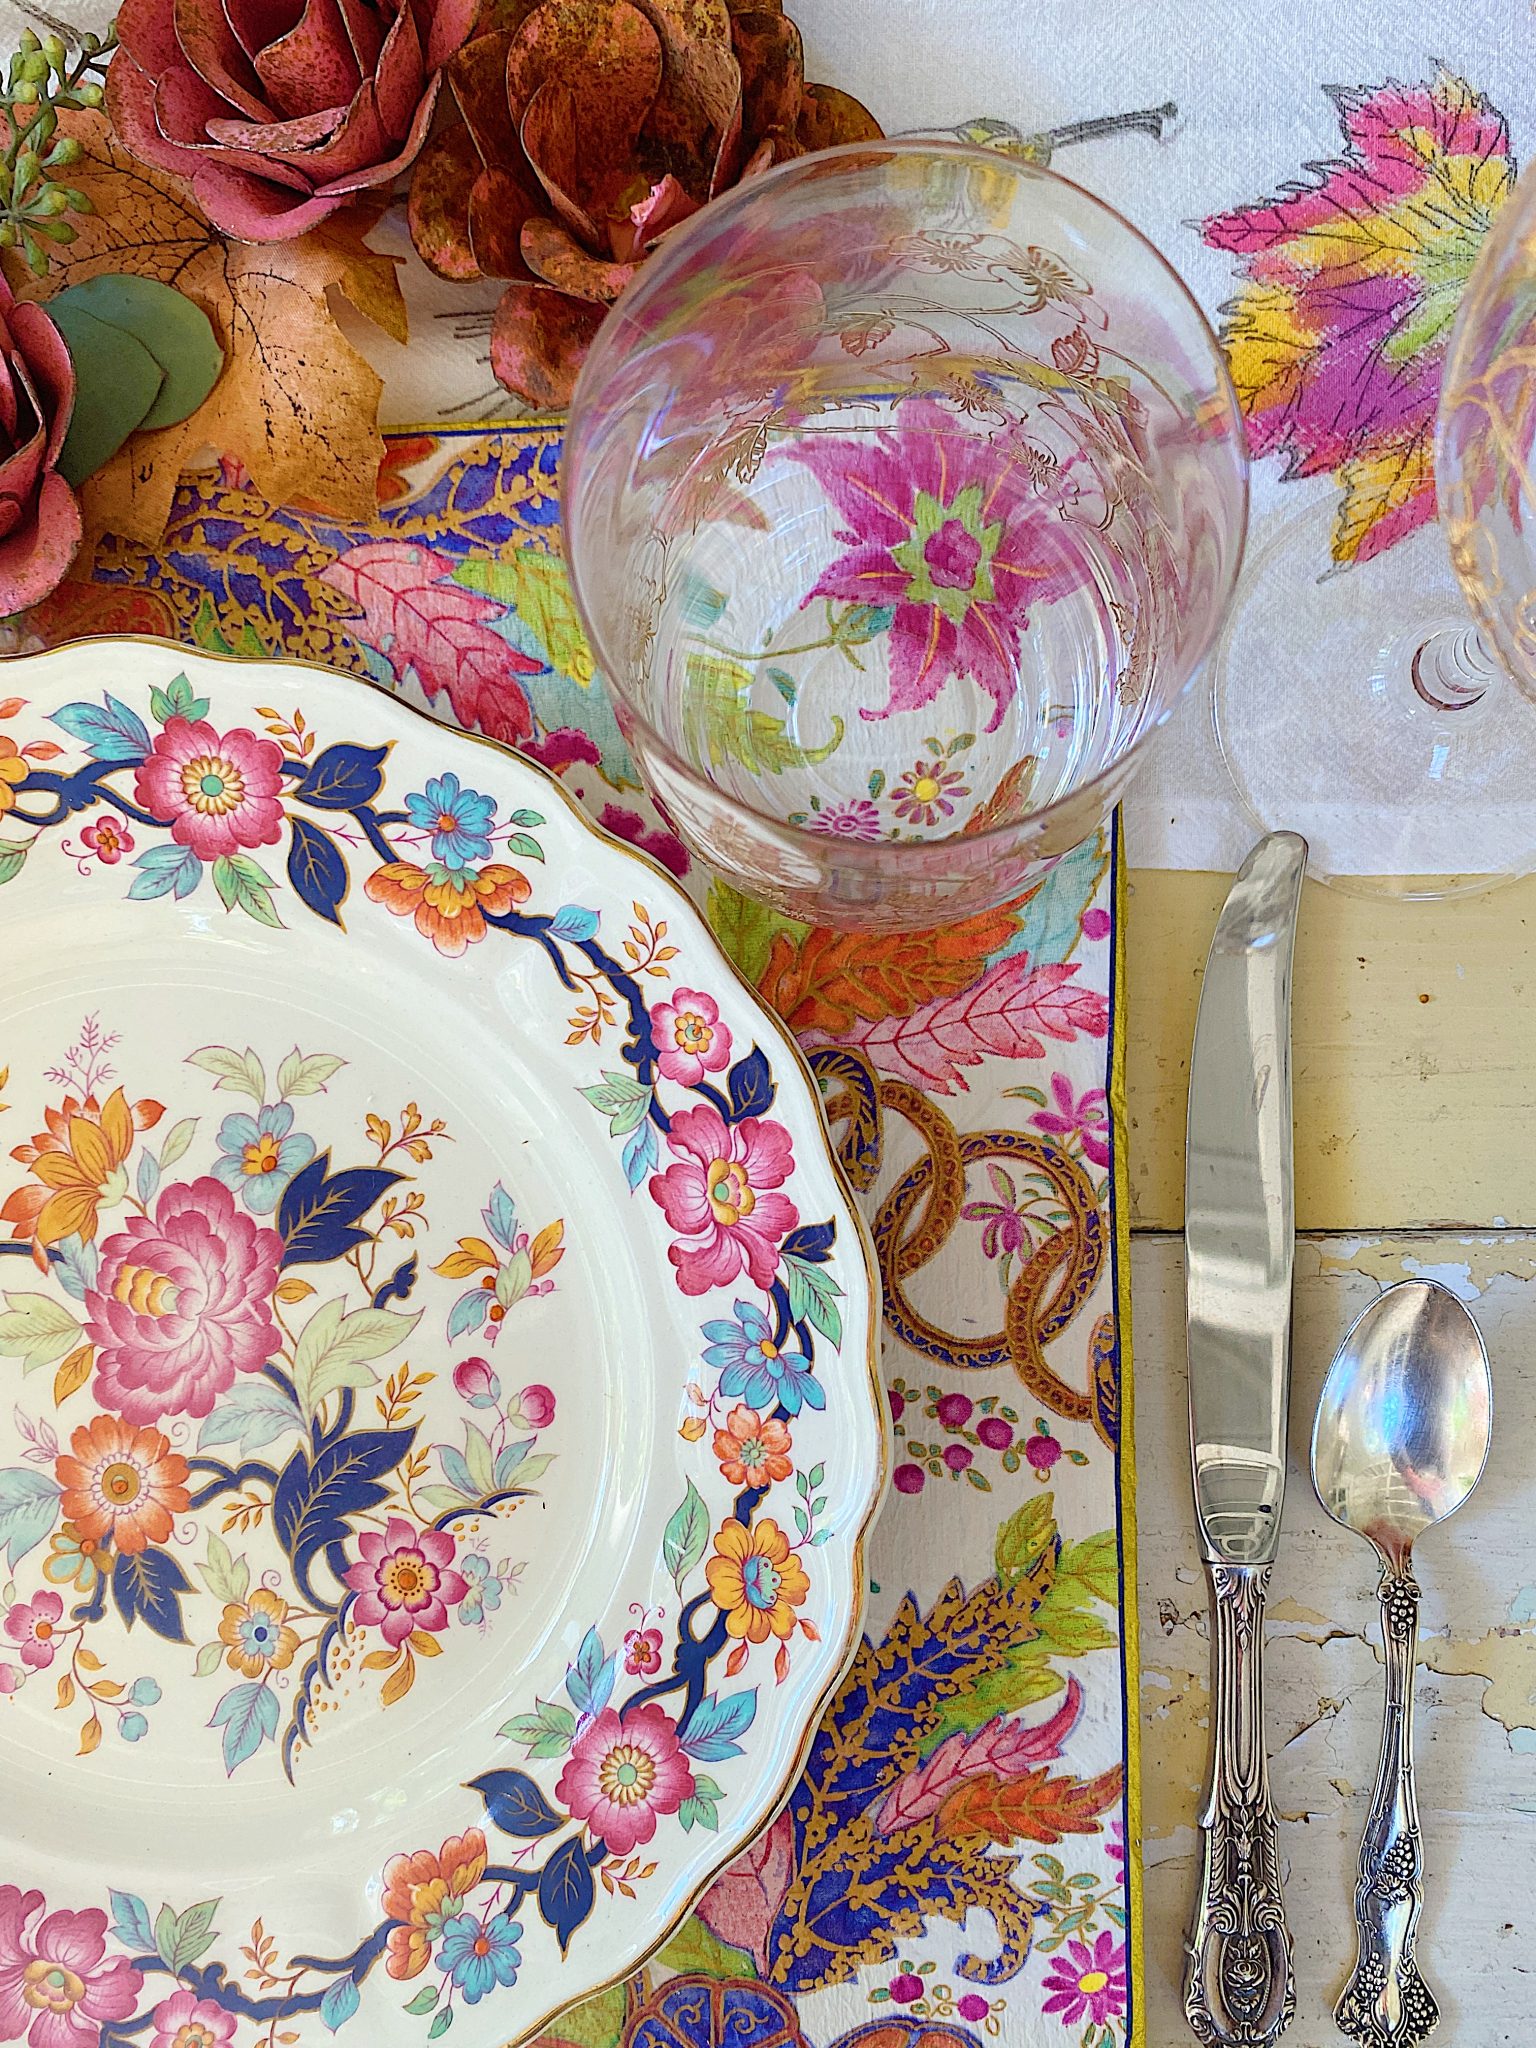
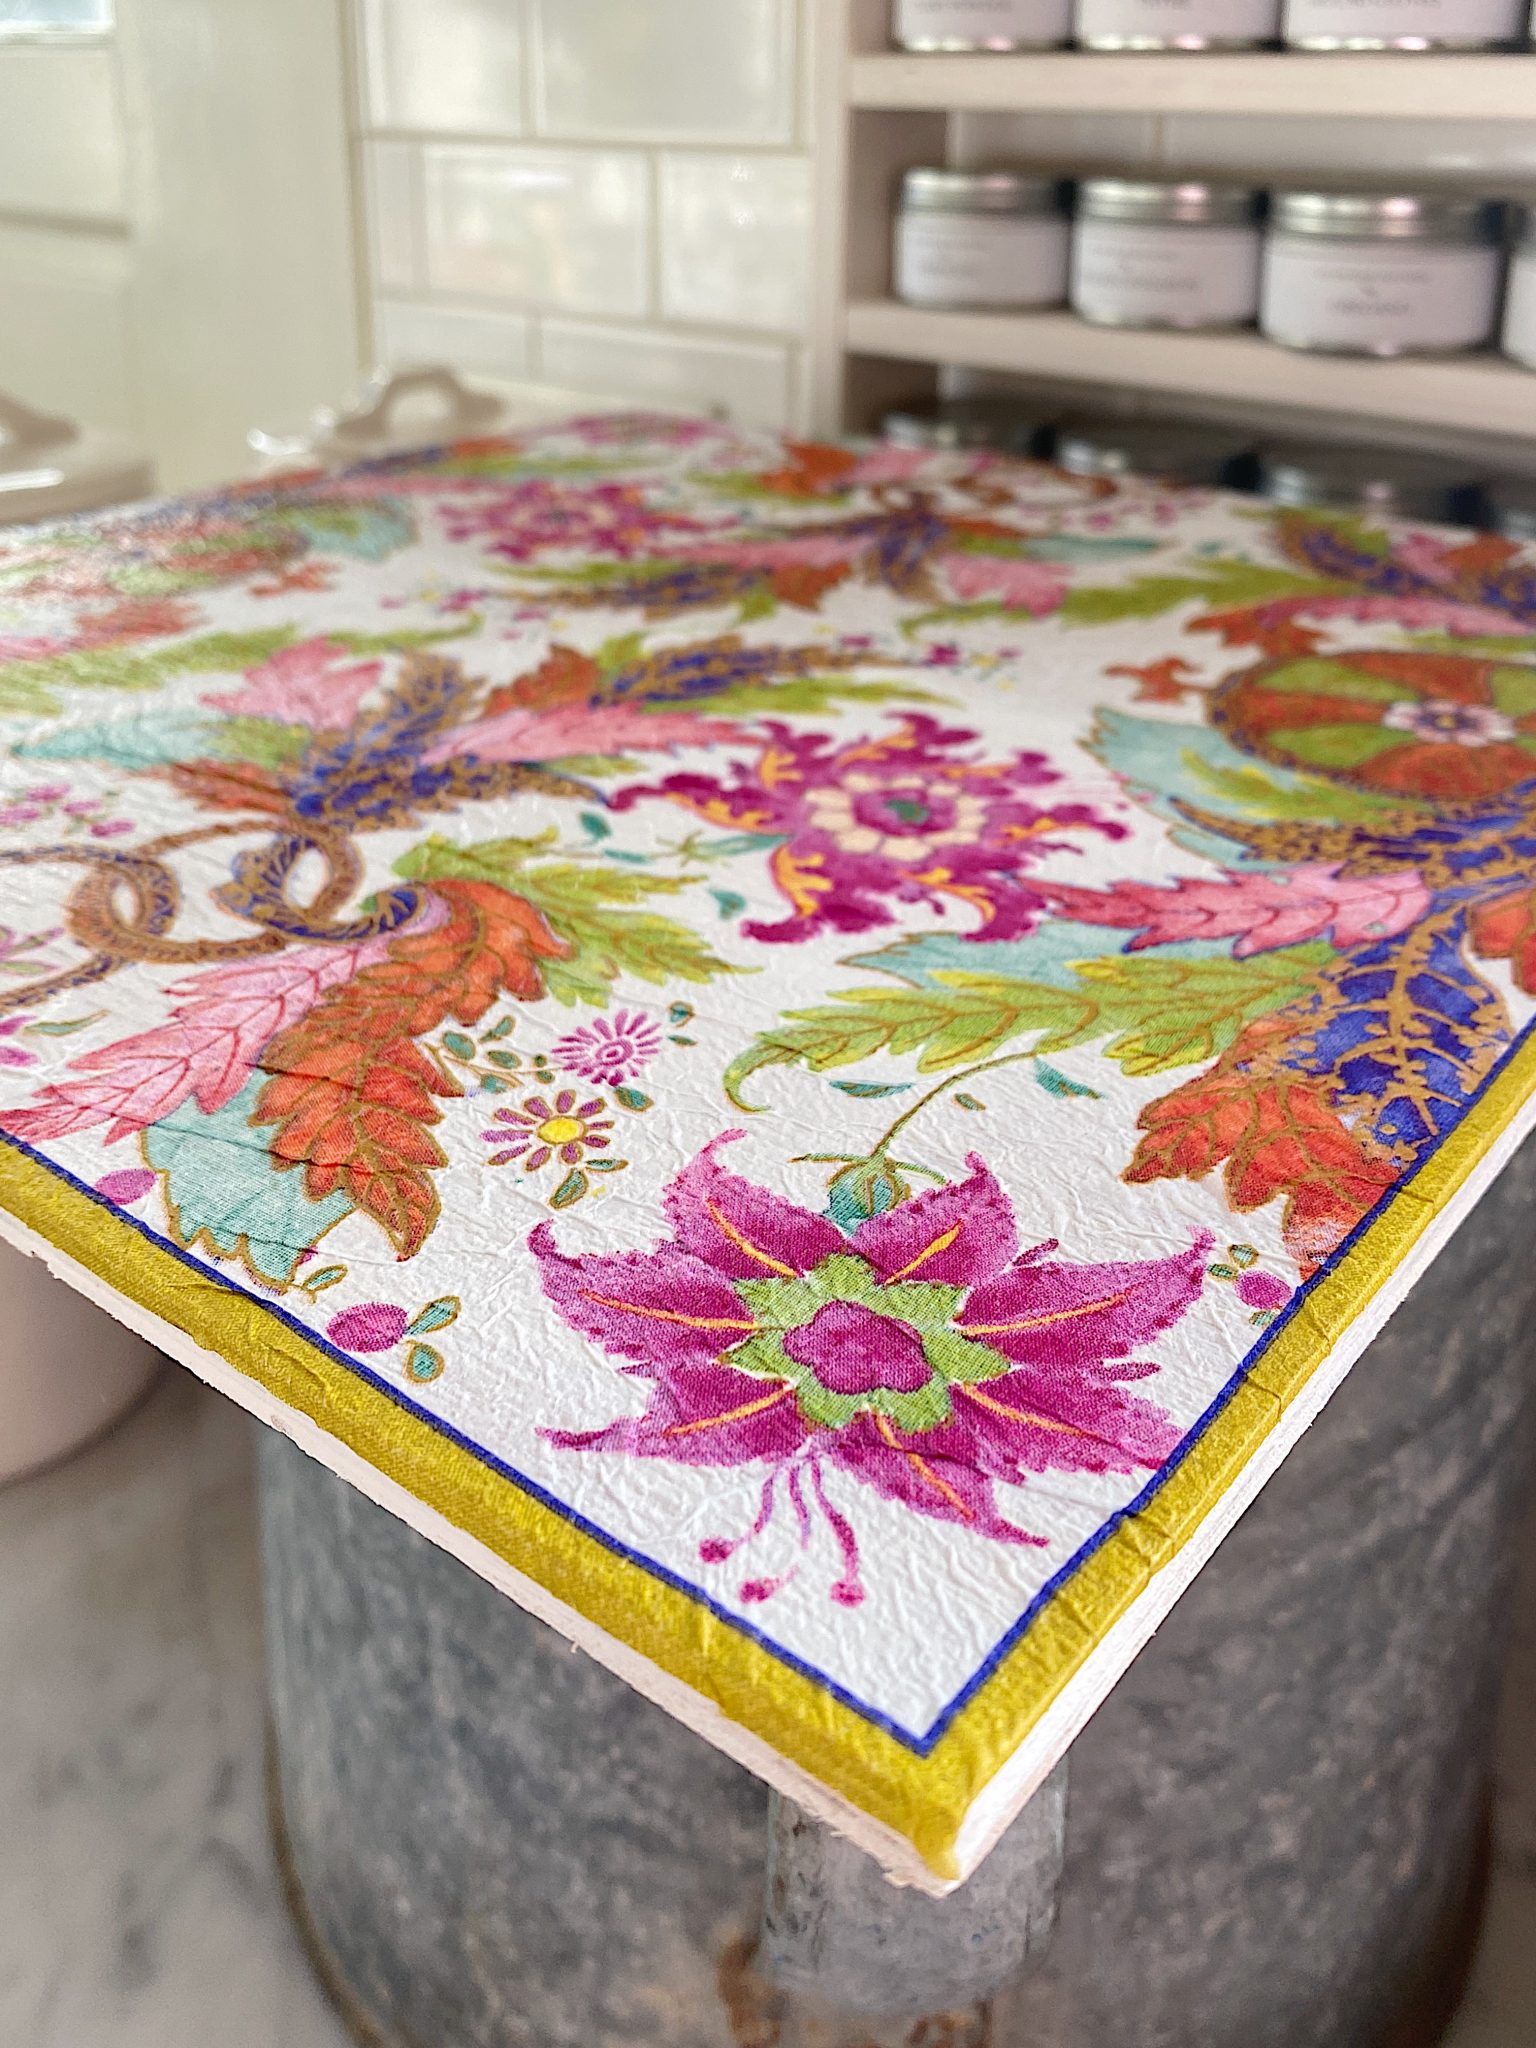
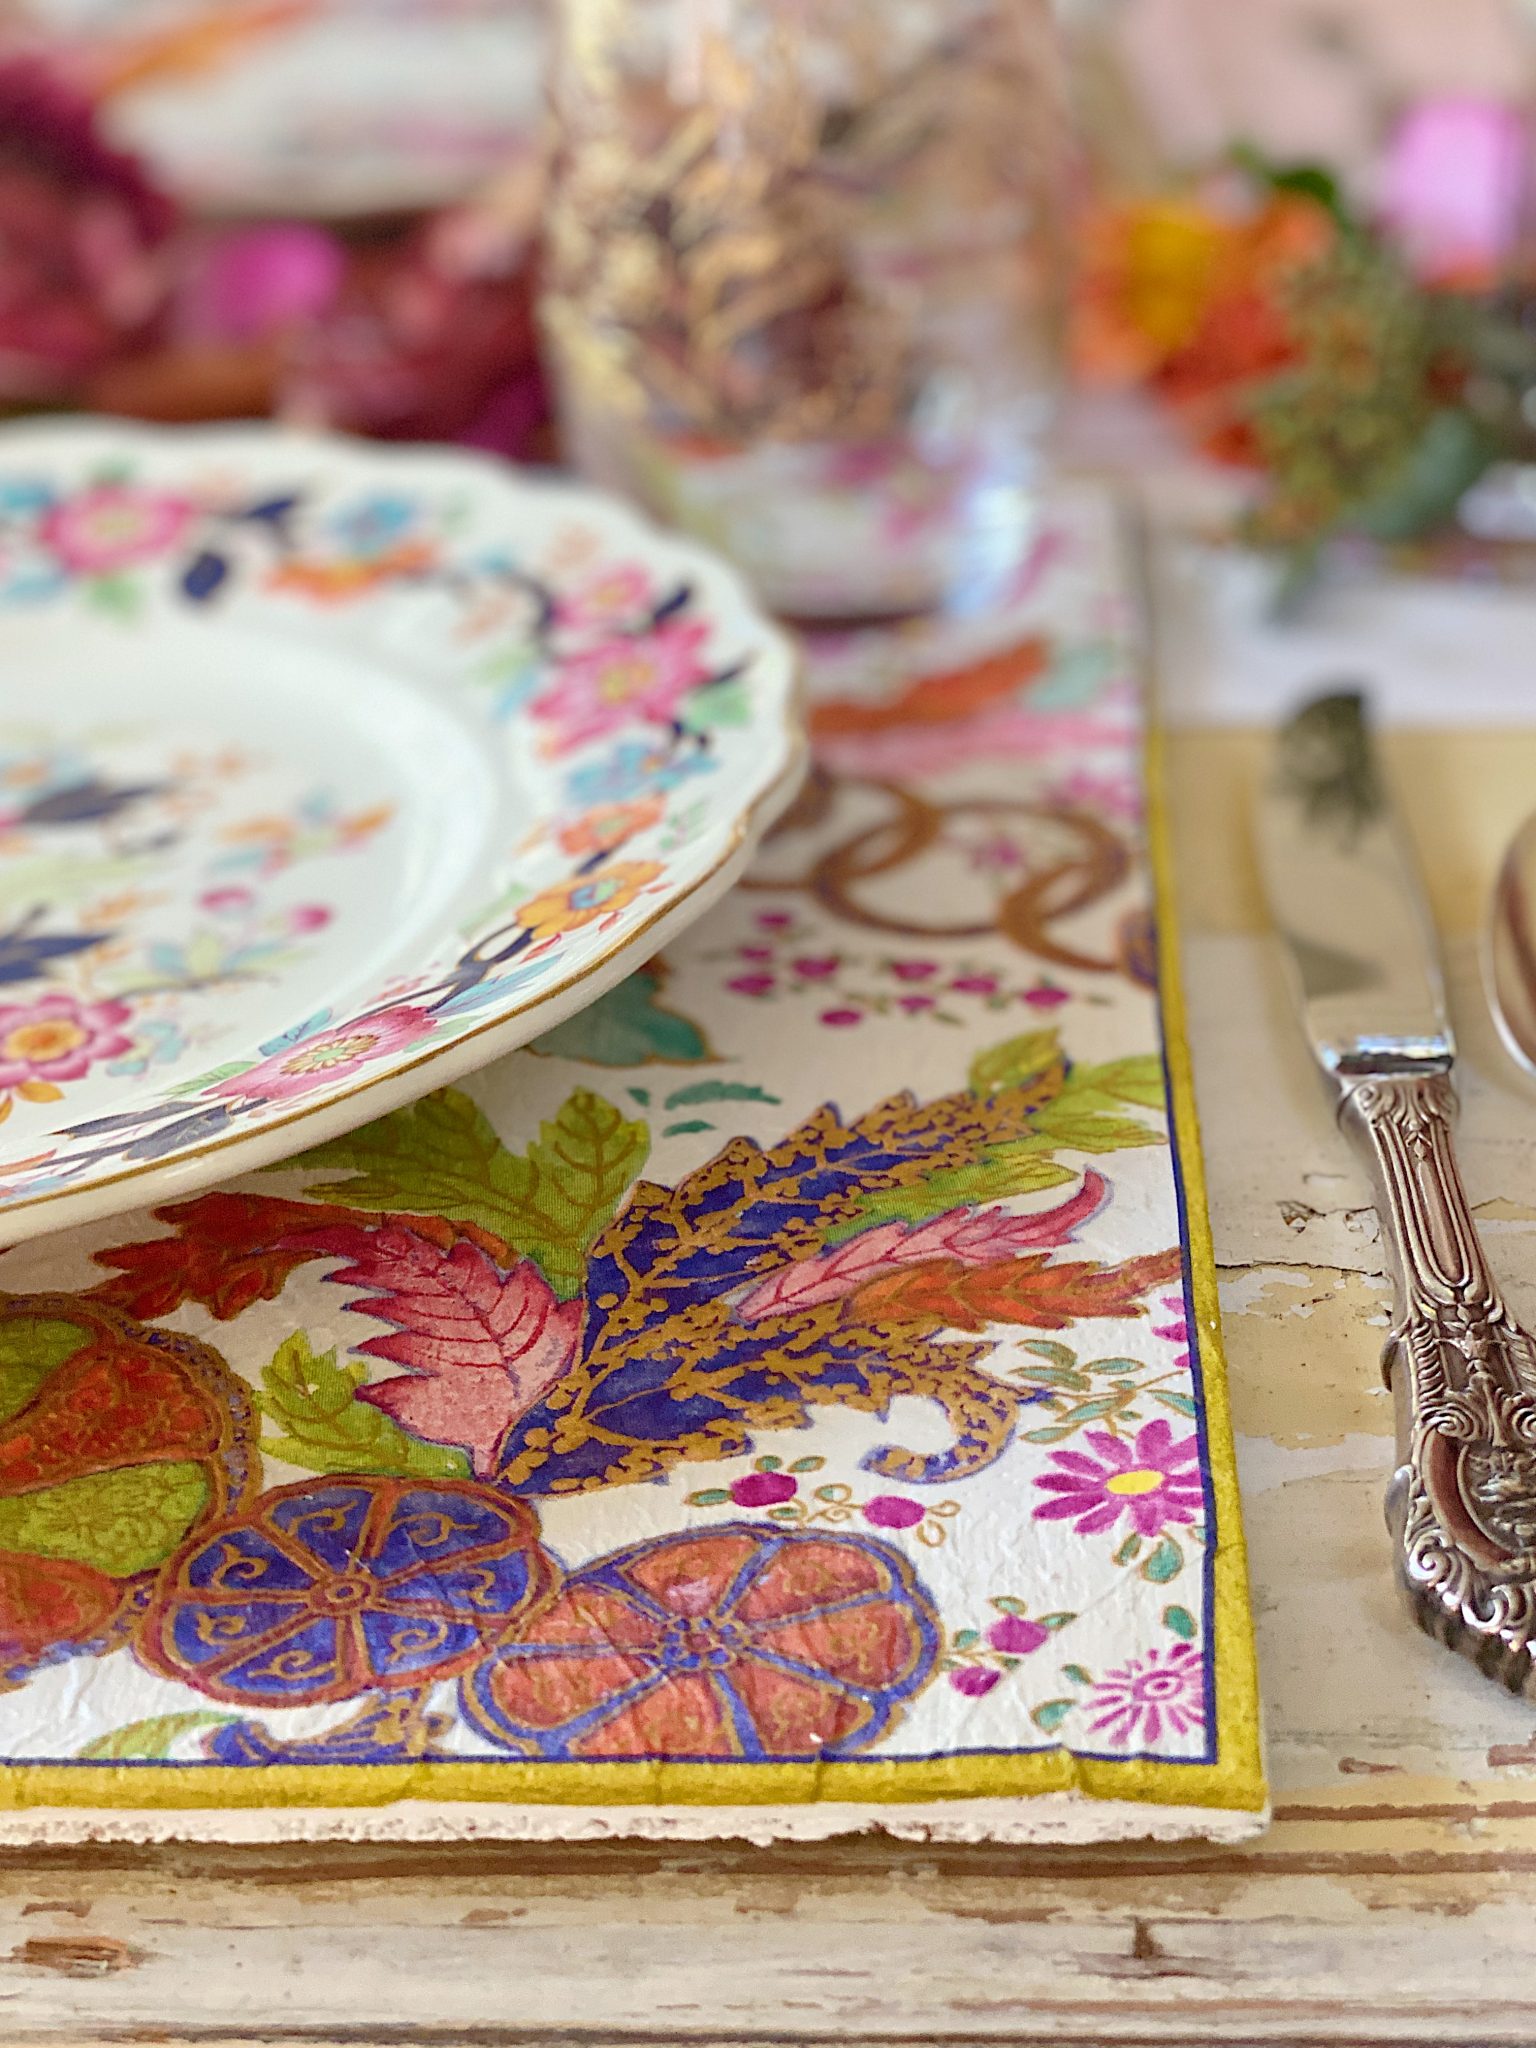
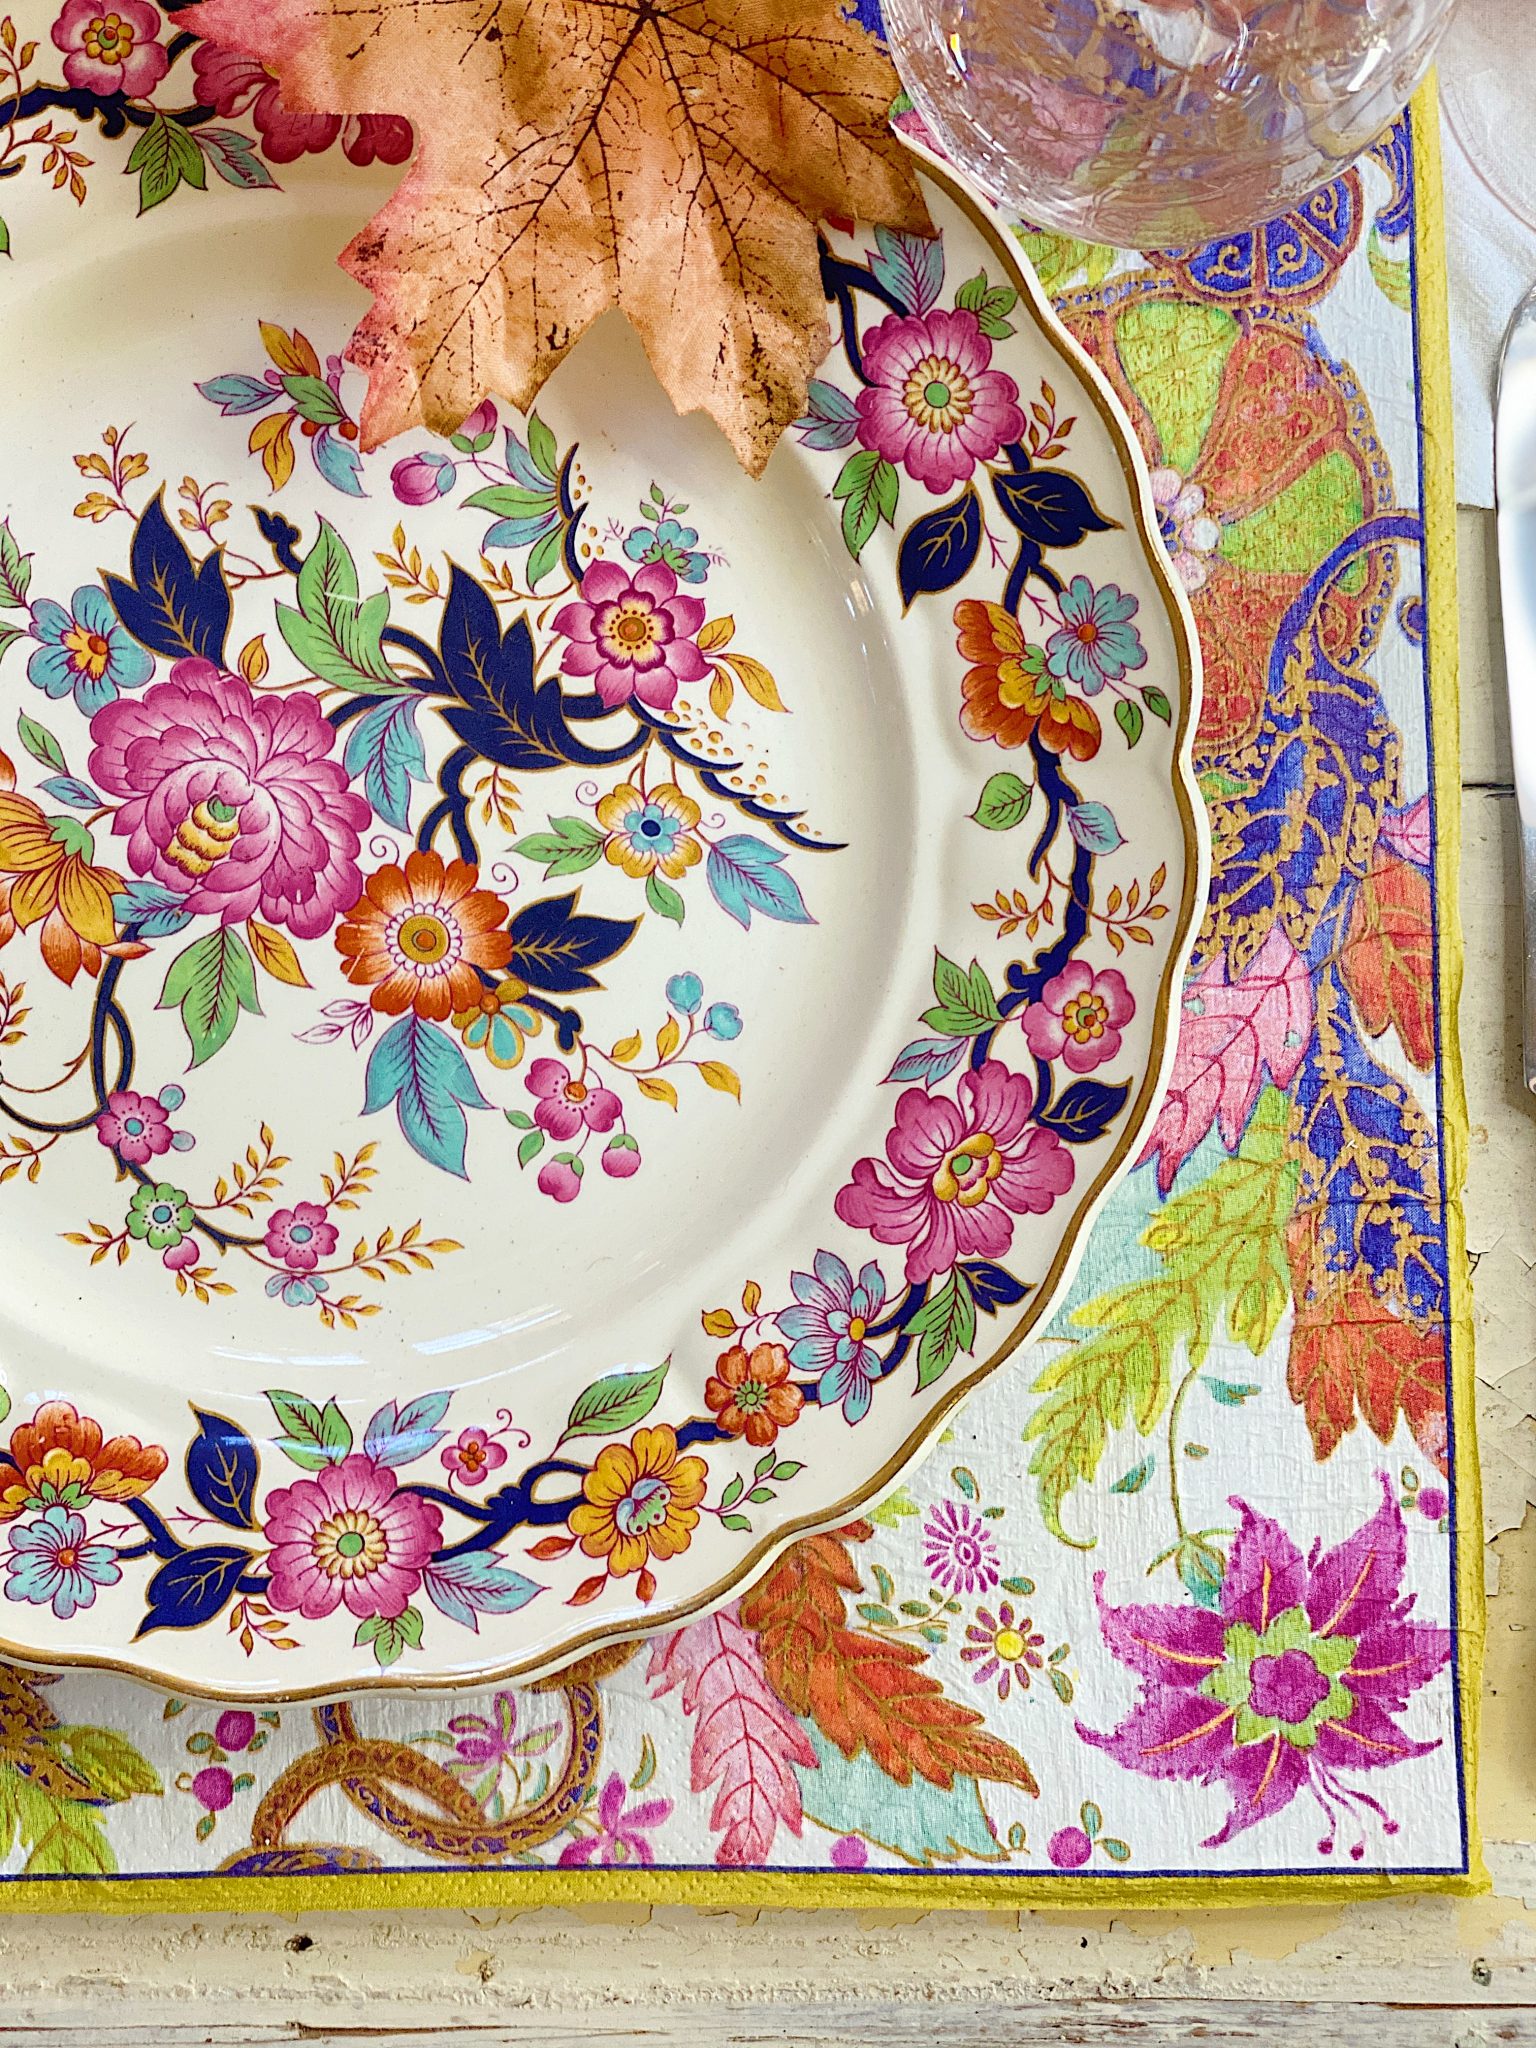
I have just taken mixing and matching to a whole new level! It’s an inexpensive and eco-friendly alternative to buying them; you can customize them with whatever you want. I glued napkins on top of a piece of wood, and these came out great!

Wood Charger Plates
I always get asked how I come up with my craft ideas.
I wish I had a single answer, but my ideas usually come from all over. Take this project, for example.
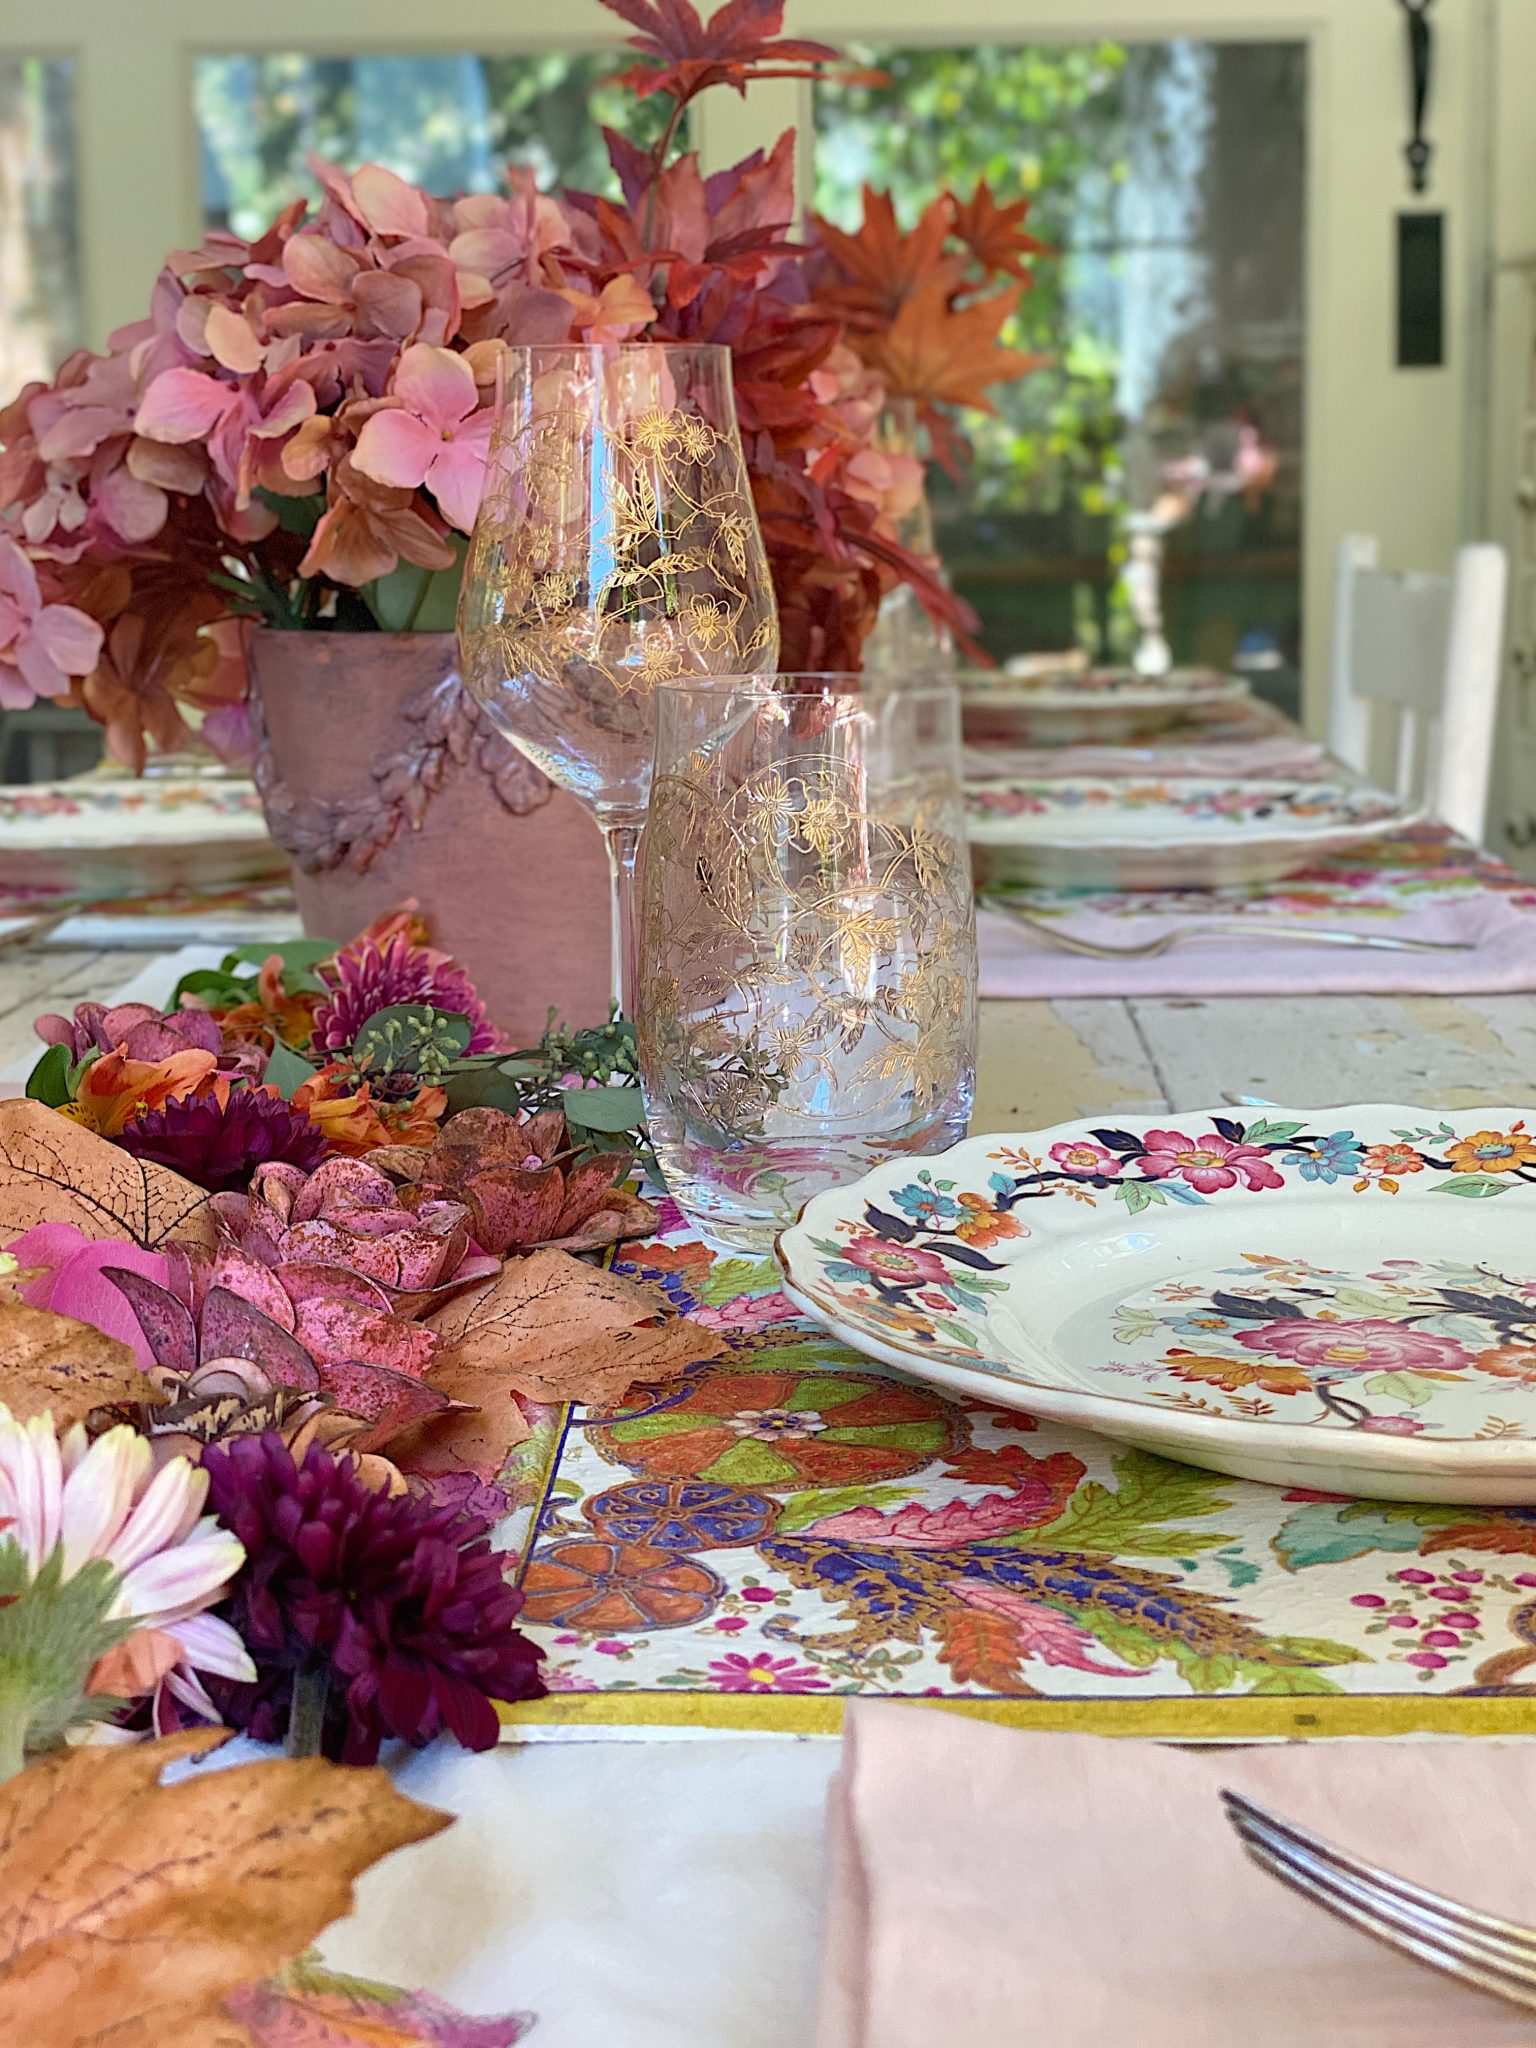
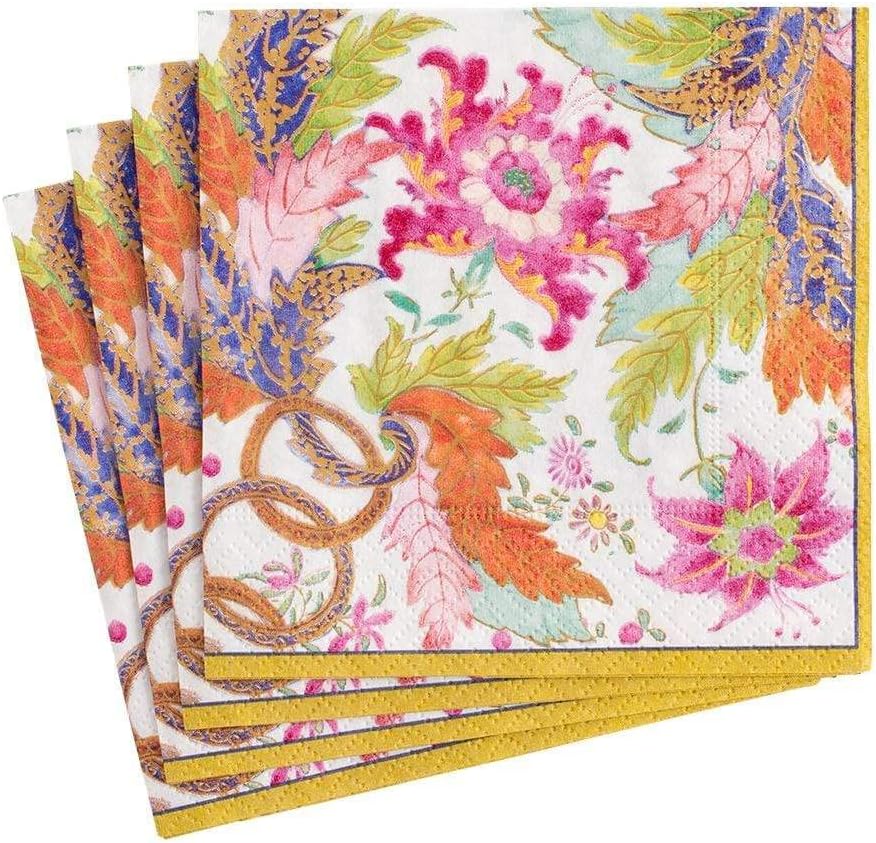
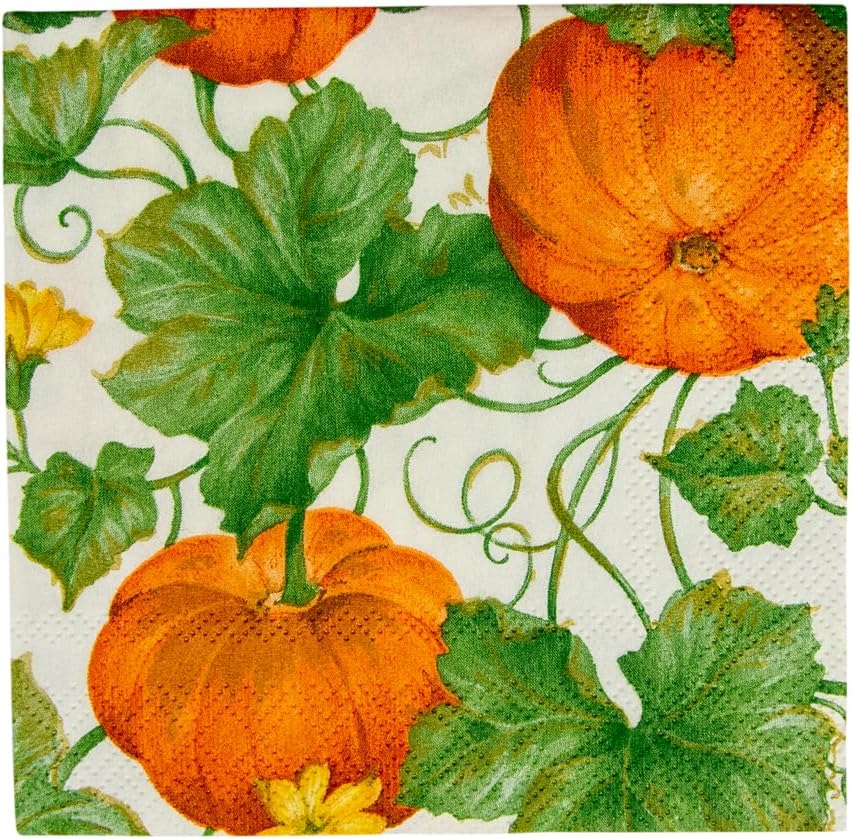
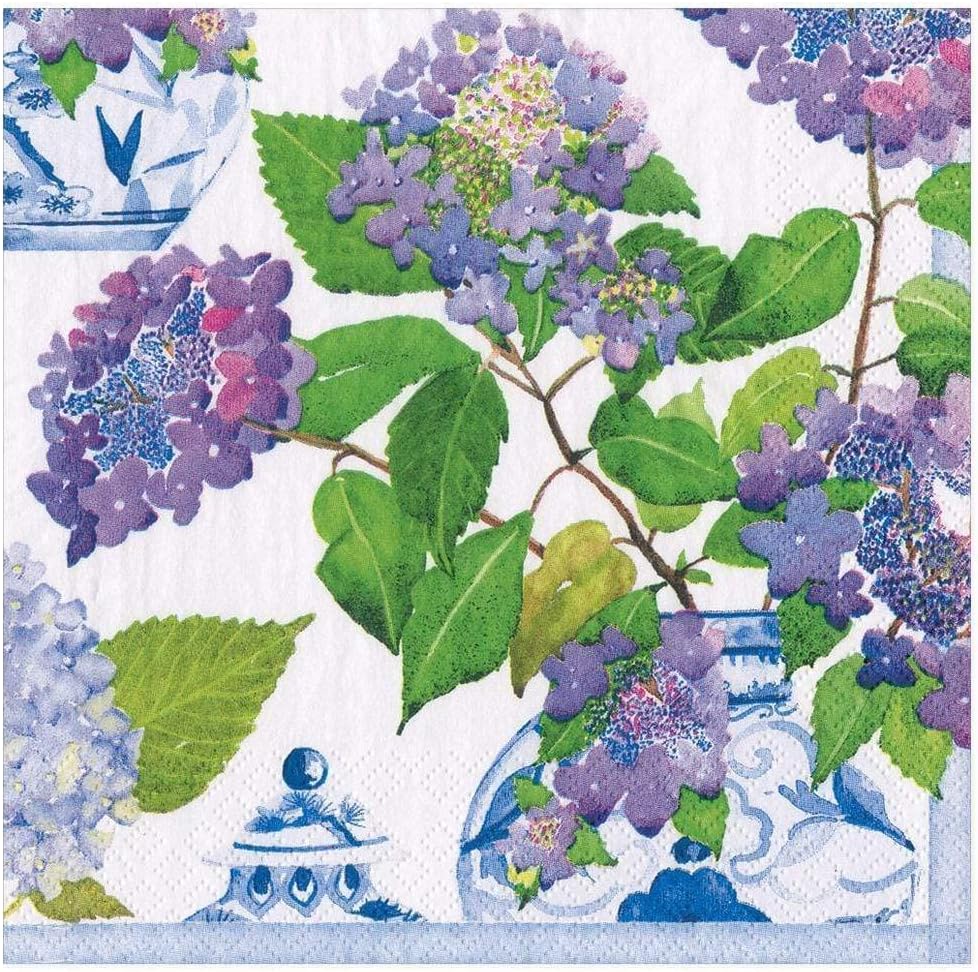
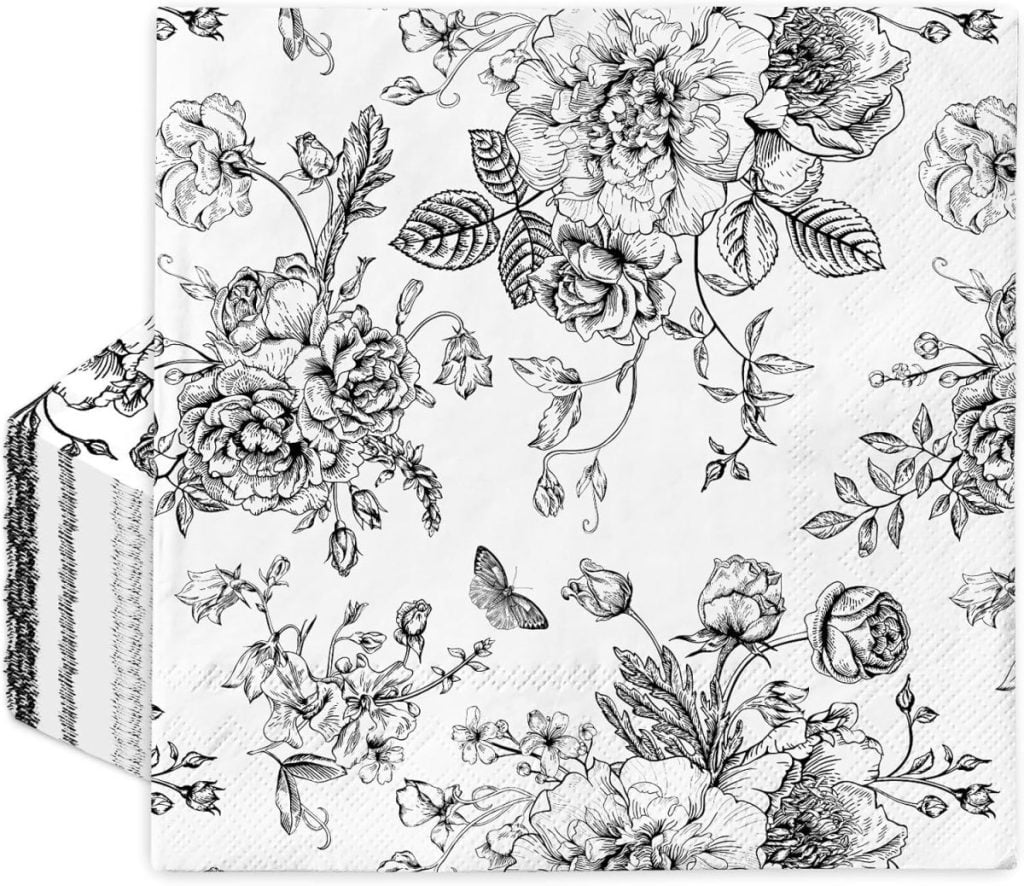
I was looking for cocktail napkins online when I saw these dinner napkins. I liked the colors and ordered them. It never occurred to me that they matched my new dinner plates perfectly.
Or the table runner I made a few years ago.
When I opened the box and saw the napkins, I realized how perfectly they matched my plates. The only problem was that I don’t typically use paper napkins with my nice china plates.
I opened one of the napkins and set the plate on top. I instantly knew what I wanted to make.
A charger plate!
I just had to figure out how.
Fortunately, that was the easy part.
I may sometimes use affiliate links on this blog, which means a small commission is earned if you purchase via the link. The price will be the same whether you use the affiliate link or go directly to the vendor’s website using a non-affiliate link.


What Exactly is a Charger Plate
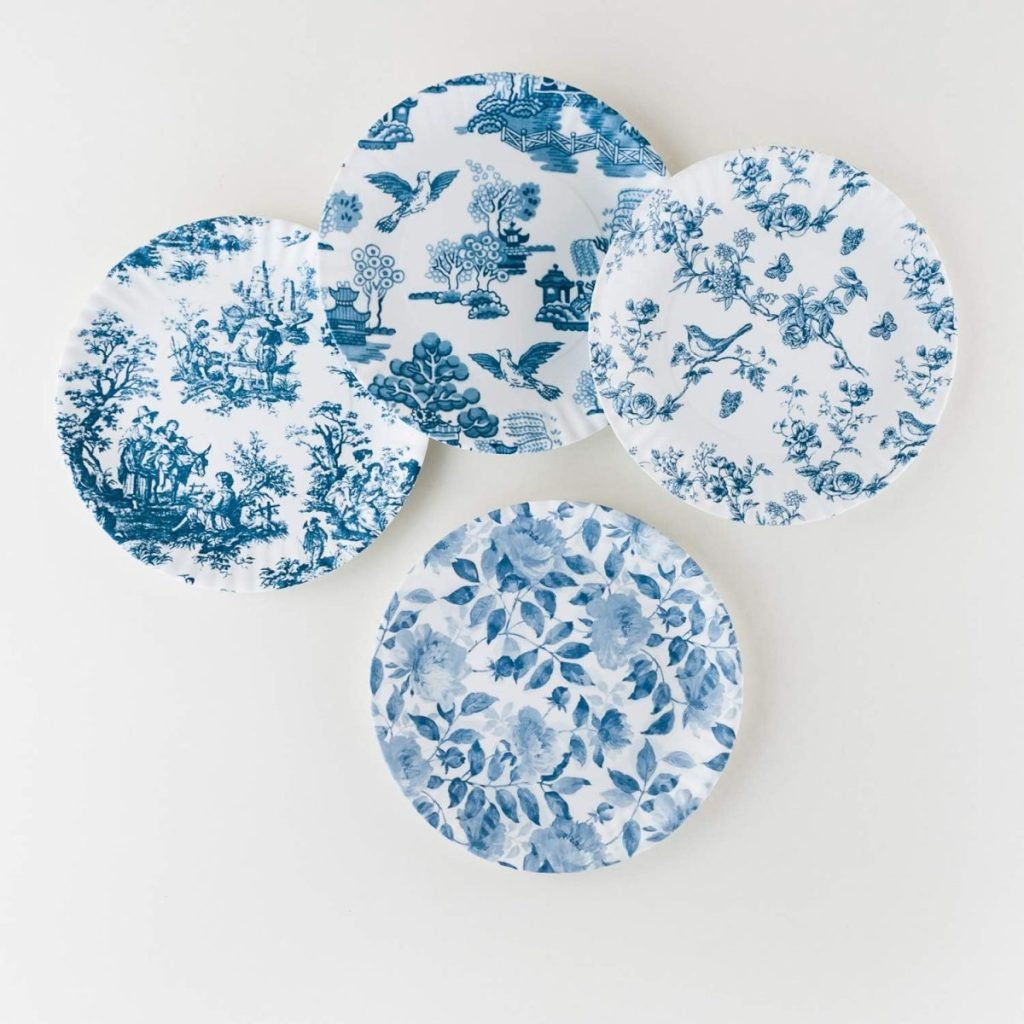
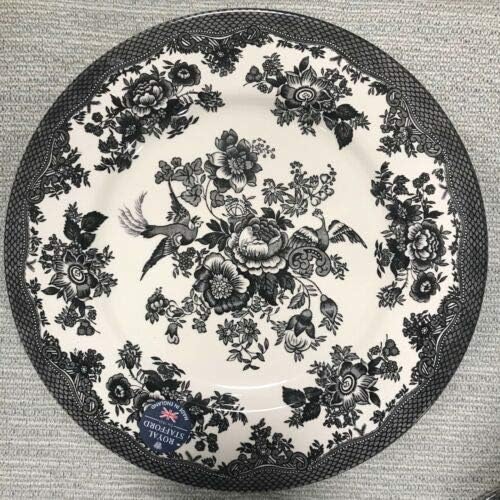
What is a charger plate, you may ask? A charger plate is a decorative plate placed on top of the tablecloth or placemat. The dinner plate is placed on top of the charger. If you’ve been following me for a while, you have probably noticed that I love mixing and matching plates. A charger plate is a perfect backdrop for setting a beautiful table with layered plates!

If you enjoy my blog, you can sign up to receive my updates here.
.Doesn’t this look amazing on my table?

How to Make a Napkin-Covered Wood Charger Plate
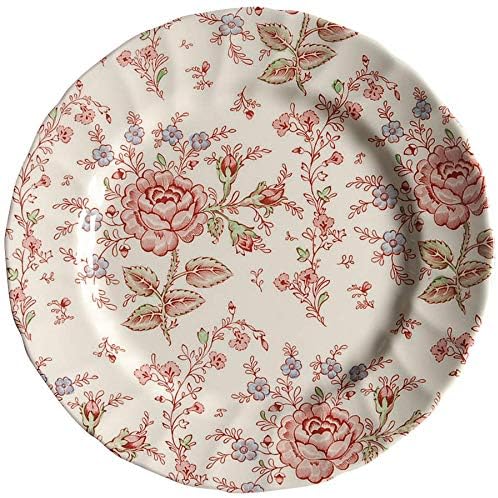
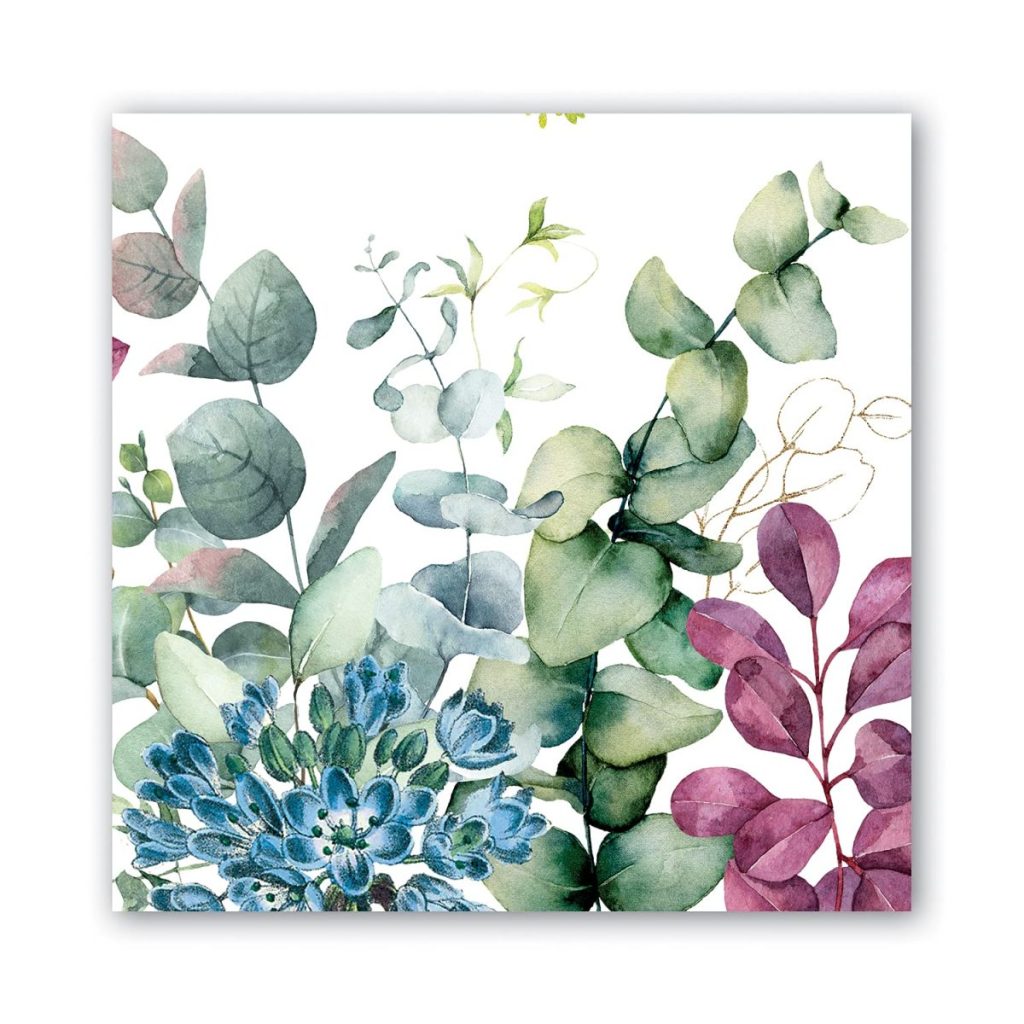
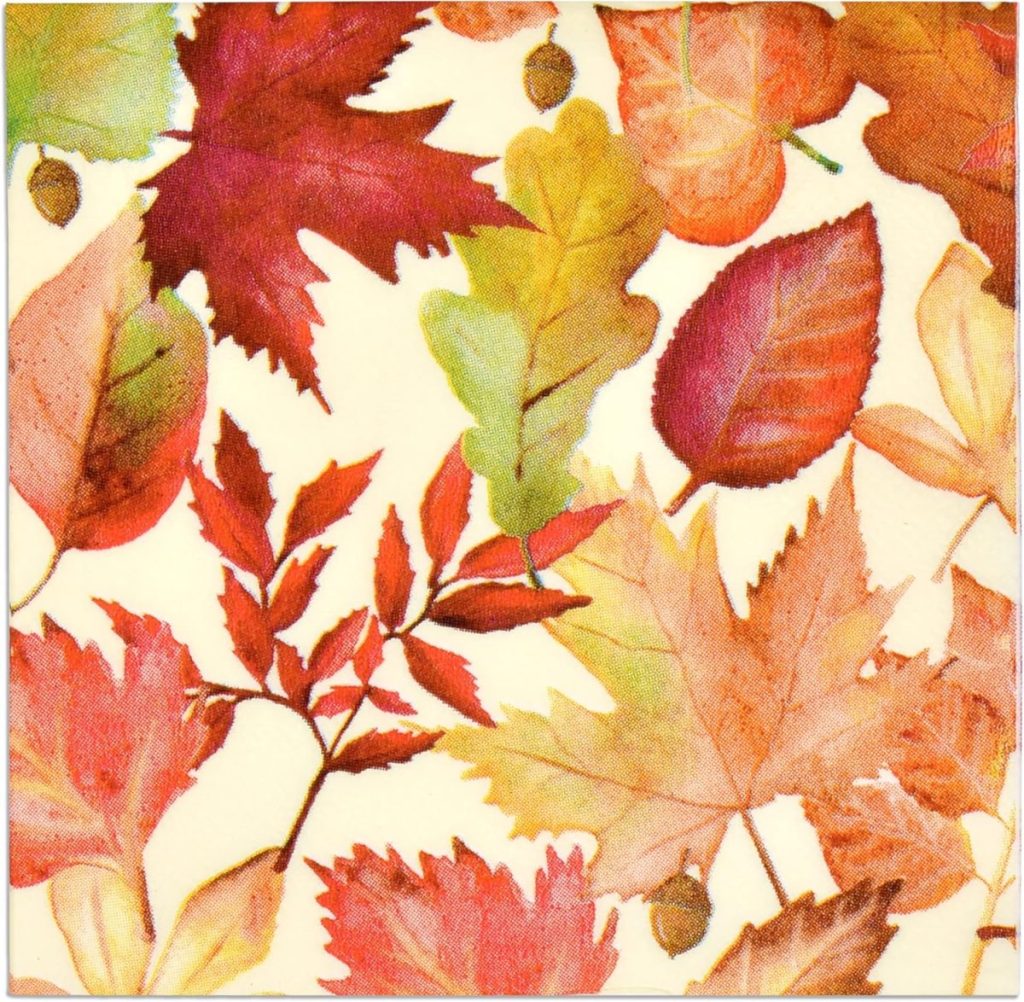
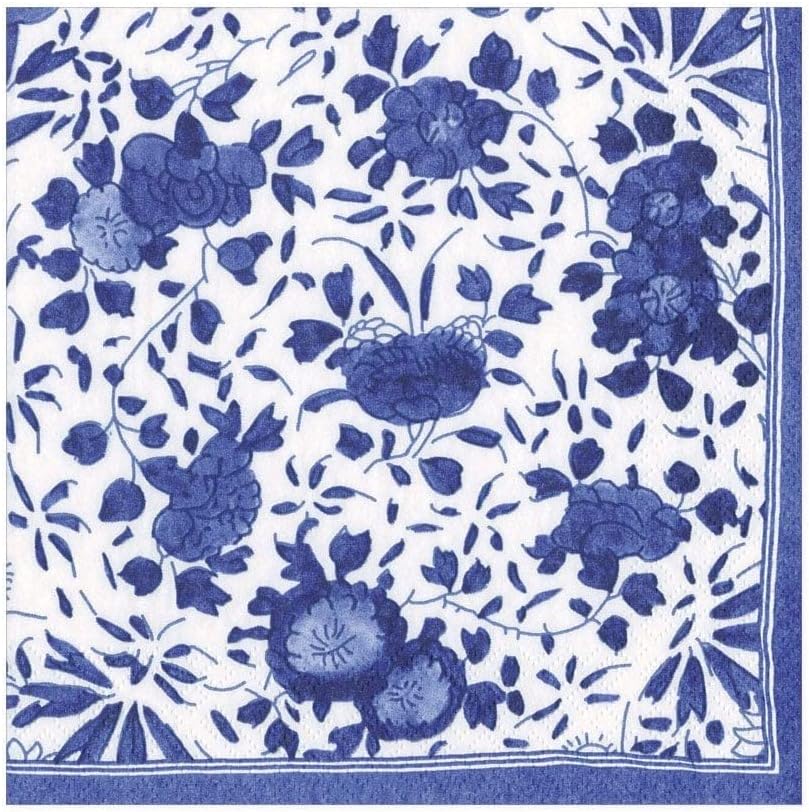
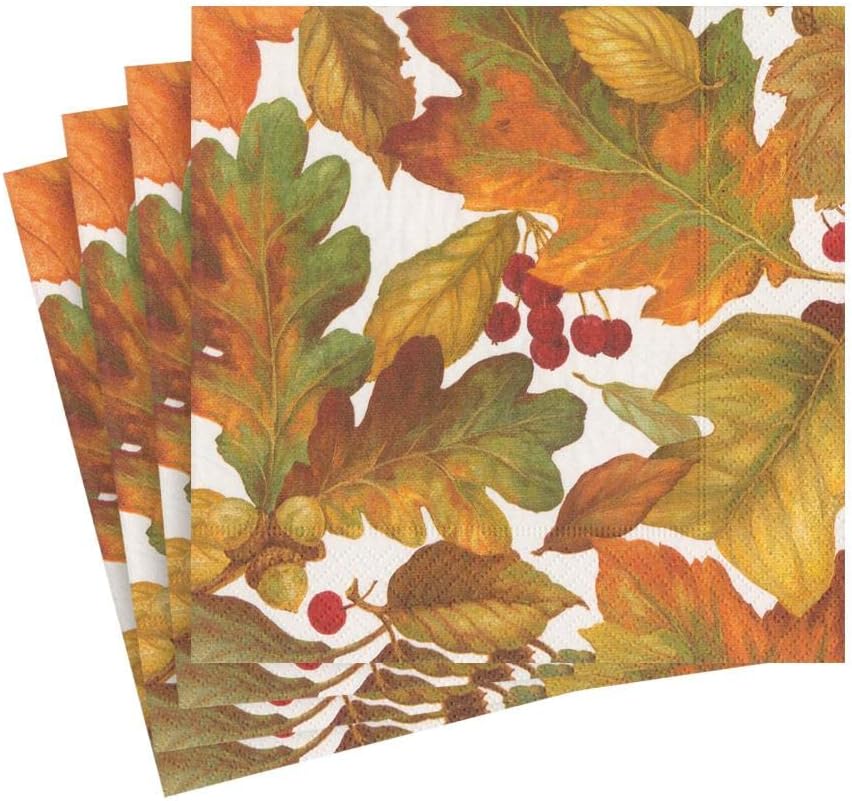
There are so many decorative napkins available, and I thought a charger with a pretty pattern would be the perfect choice.
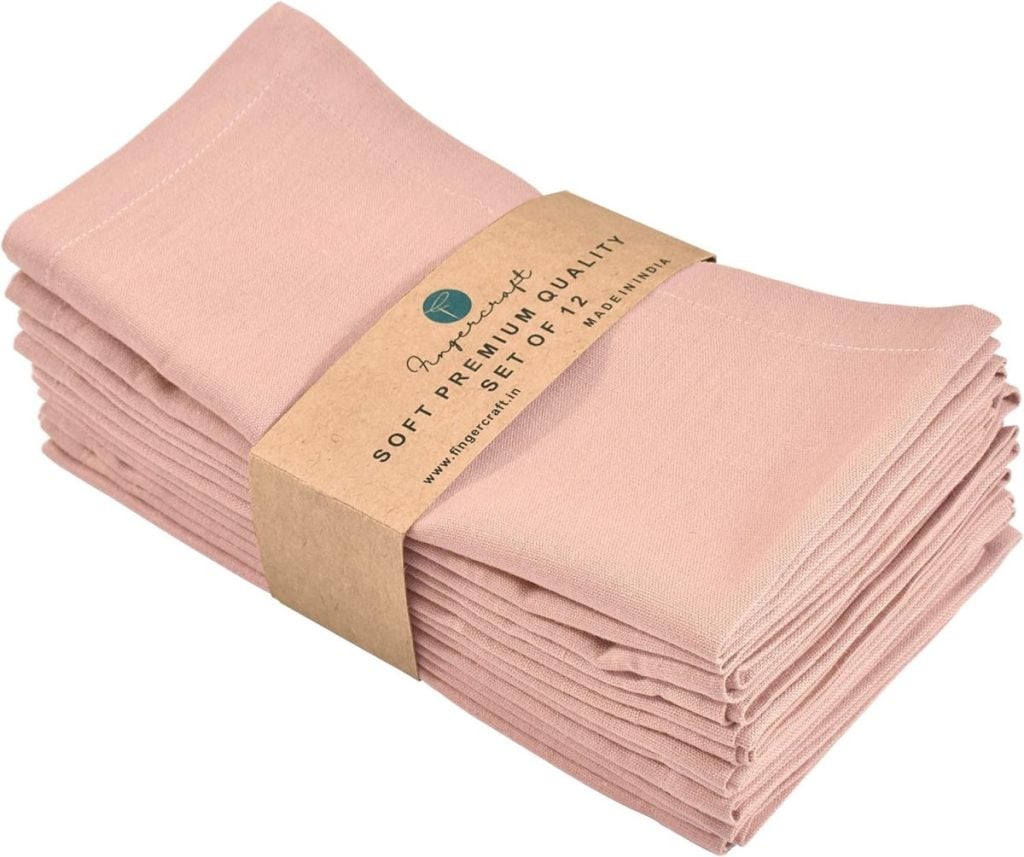
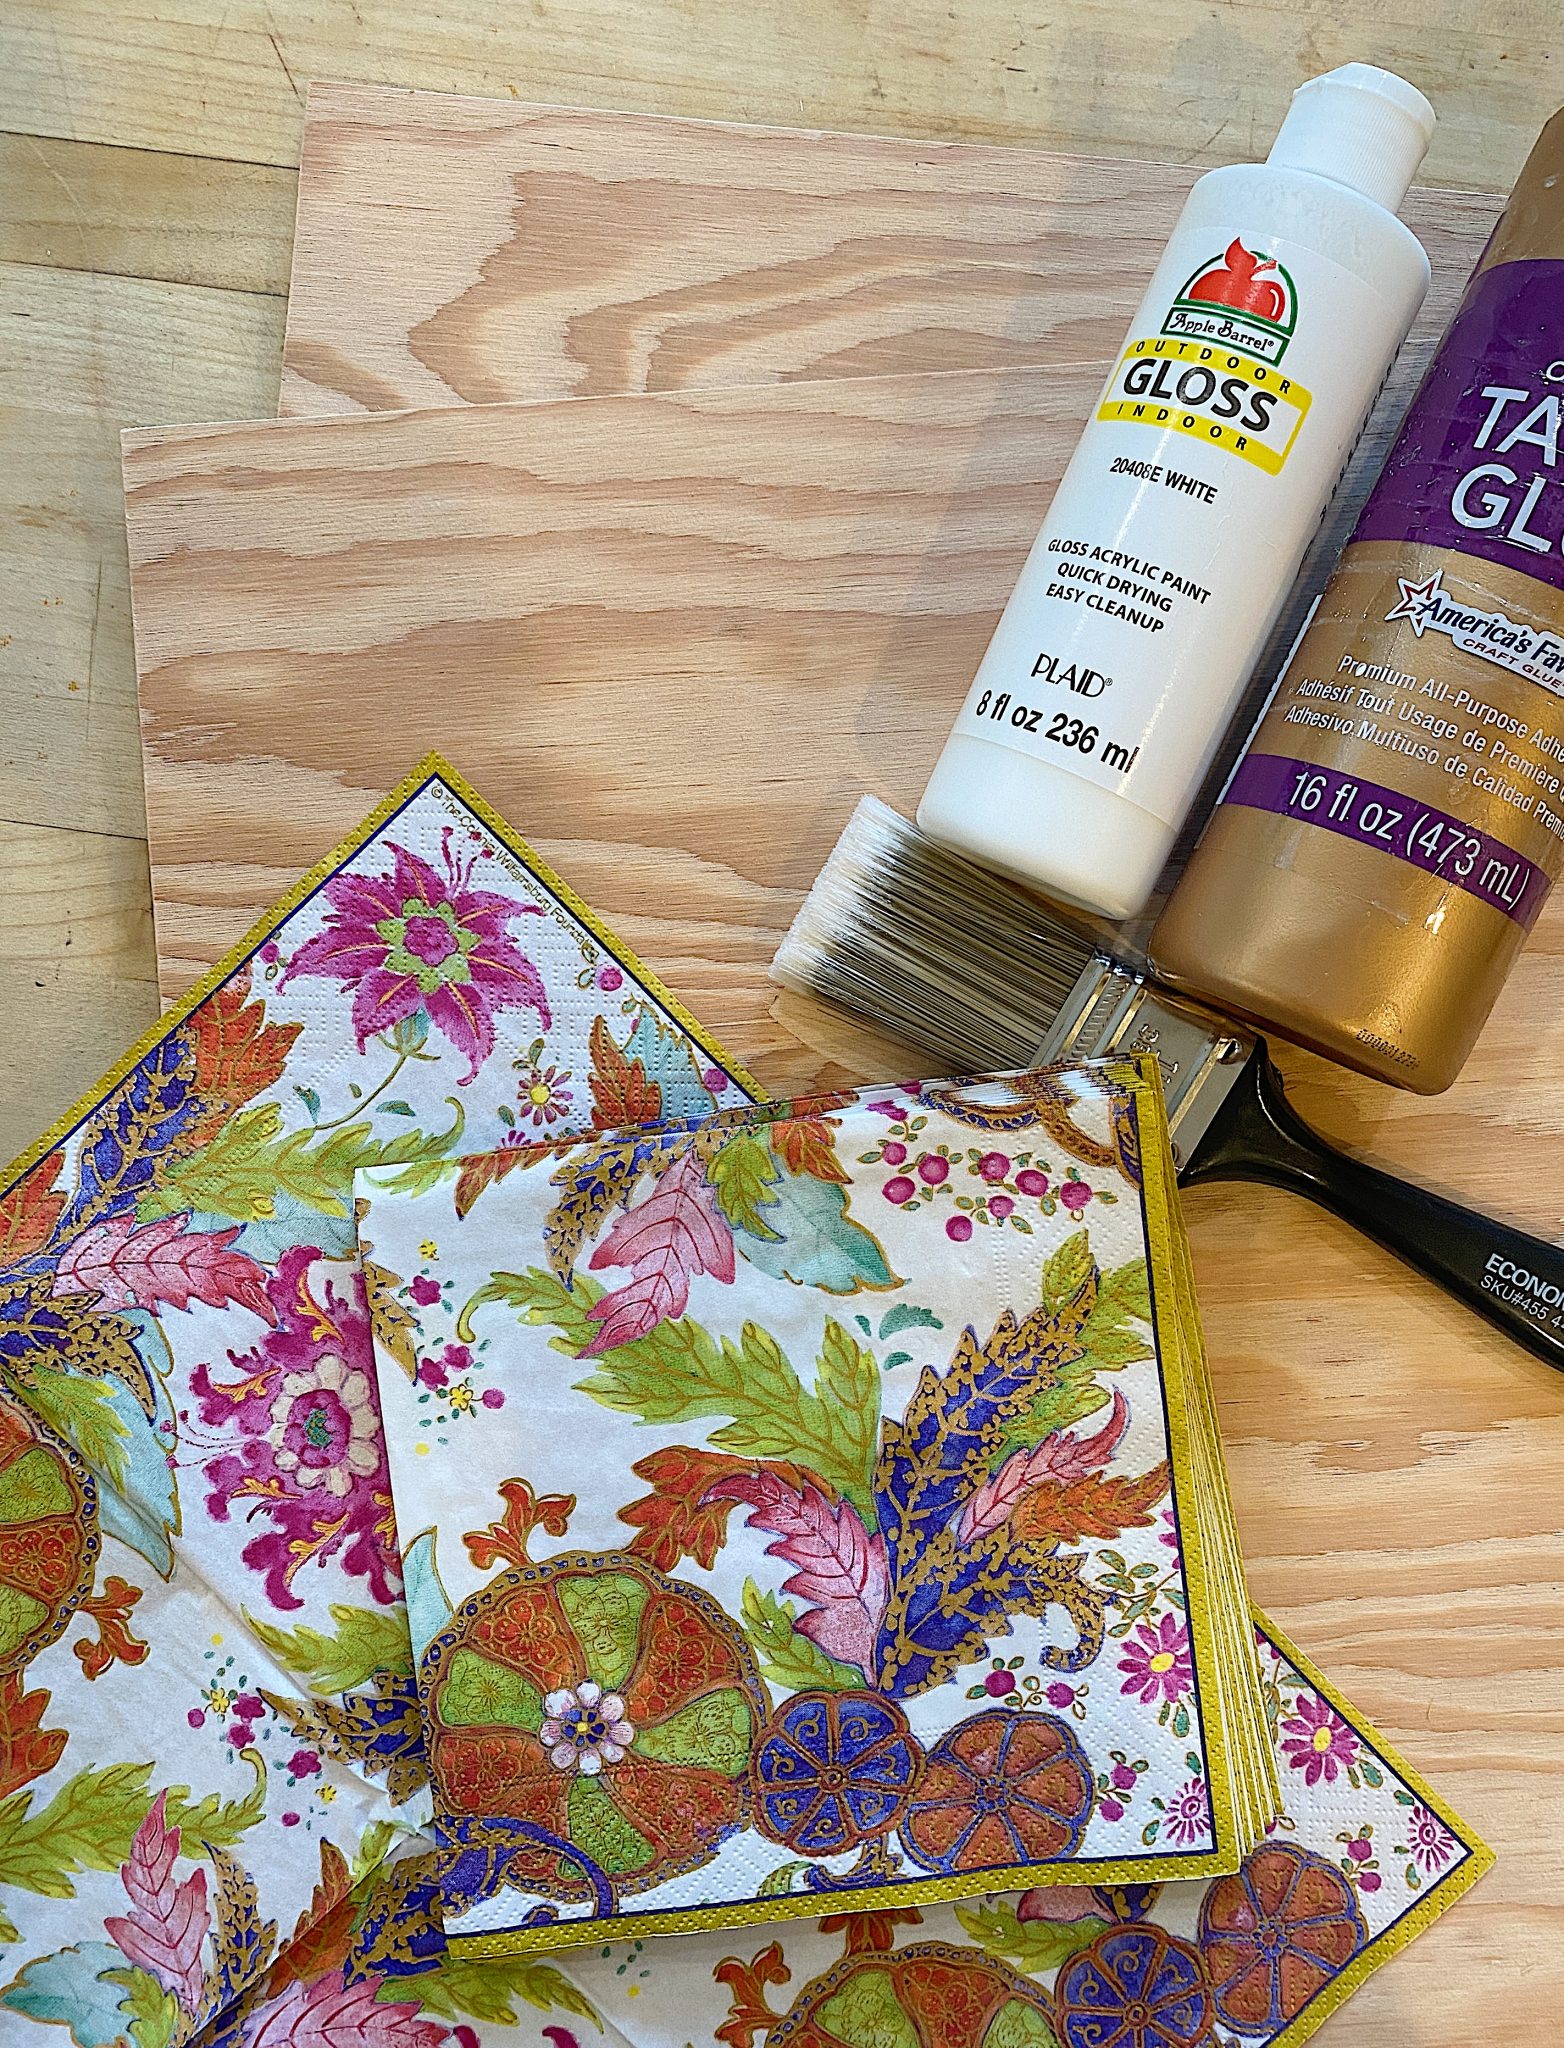
Materials You Need to Make Eight Chargers
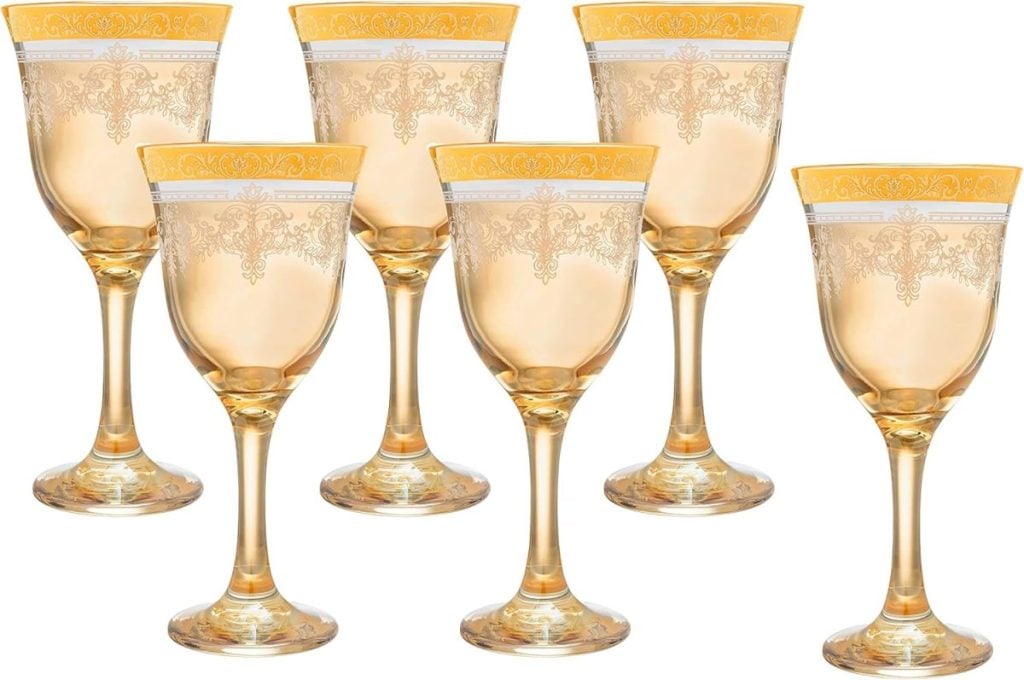
One package of decorative paper napkins (with a continuous print on all sides). You need a minimum size of 12″.
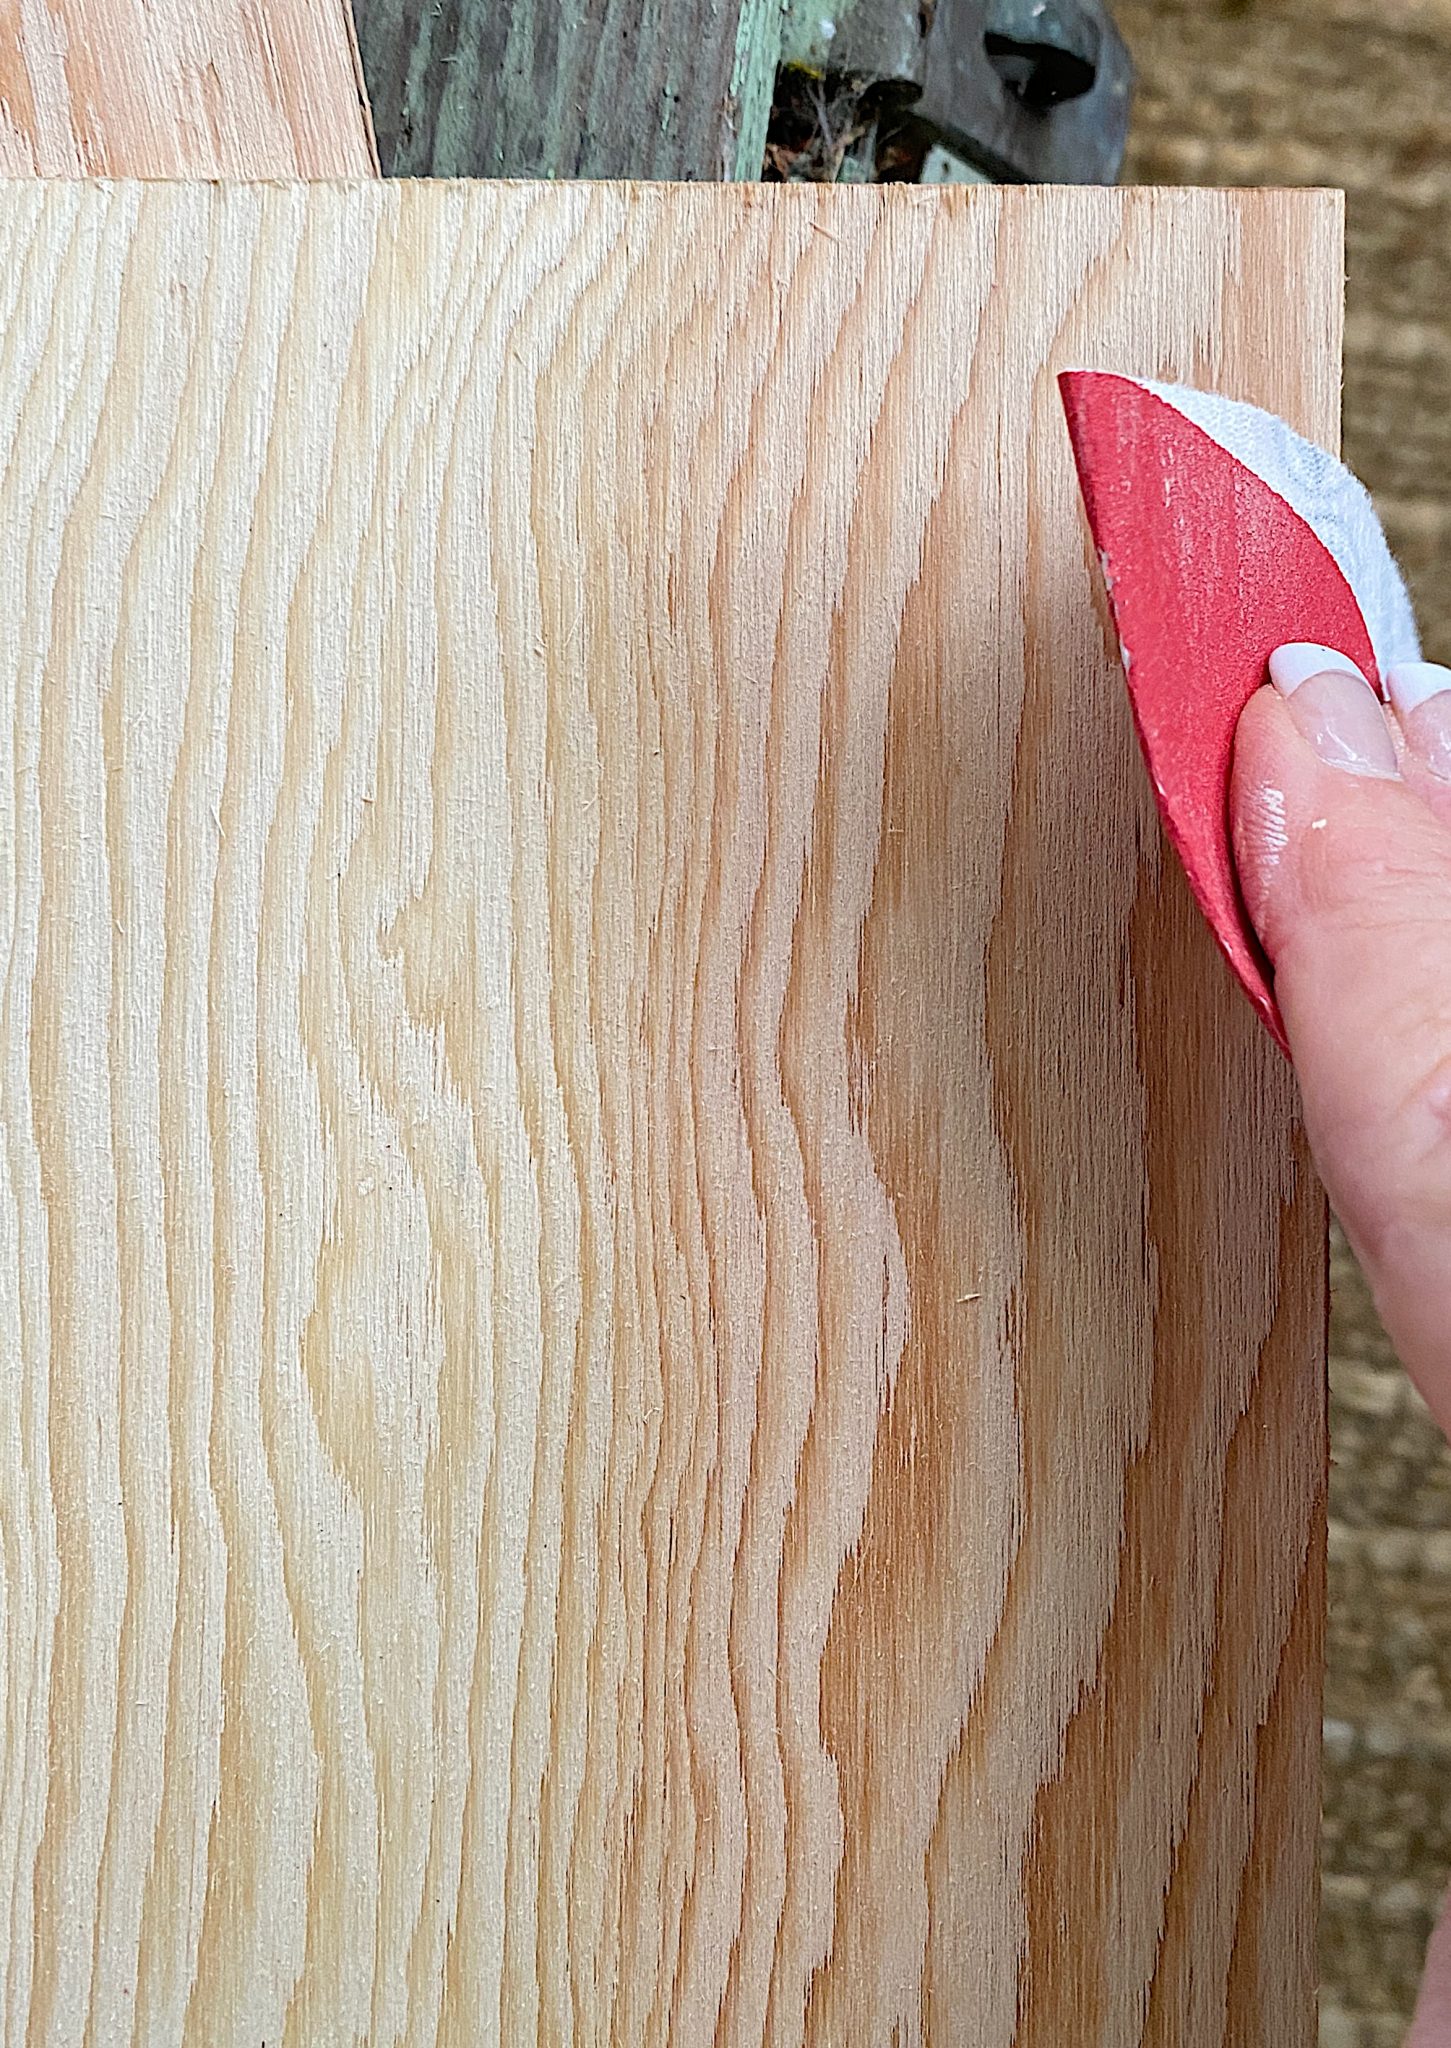
Cut 1/4″ thick plywood board to the size of the napkin. Cut as many square boards as you need. I cut them 13″ square to fit this napkin. (You could also use cork for this.)
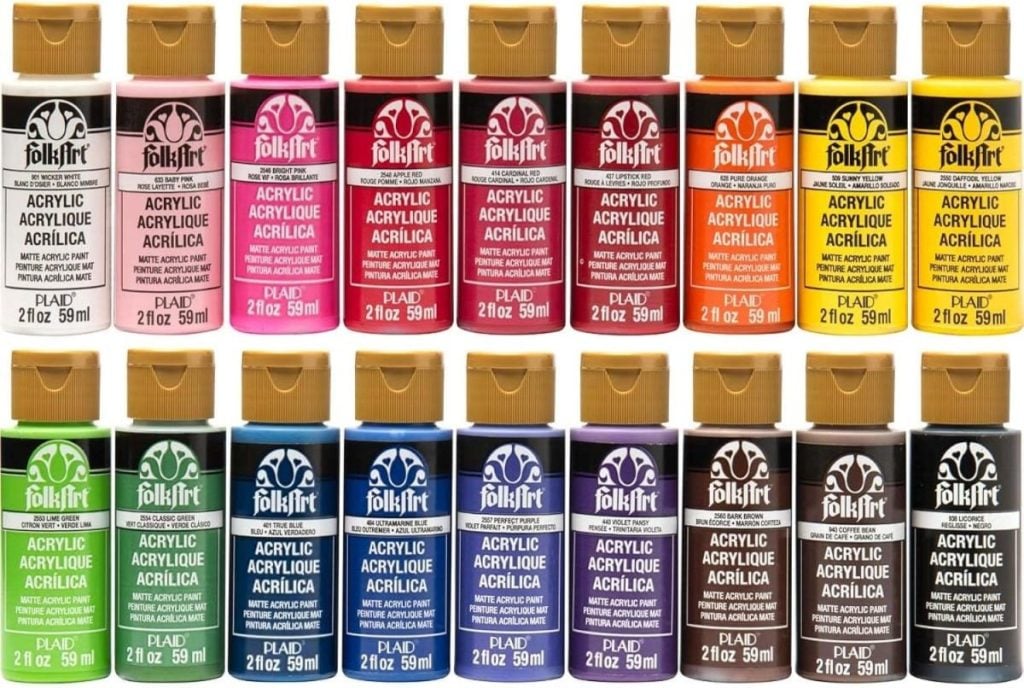
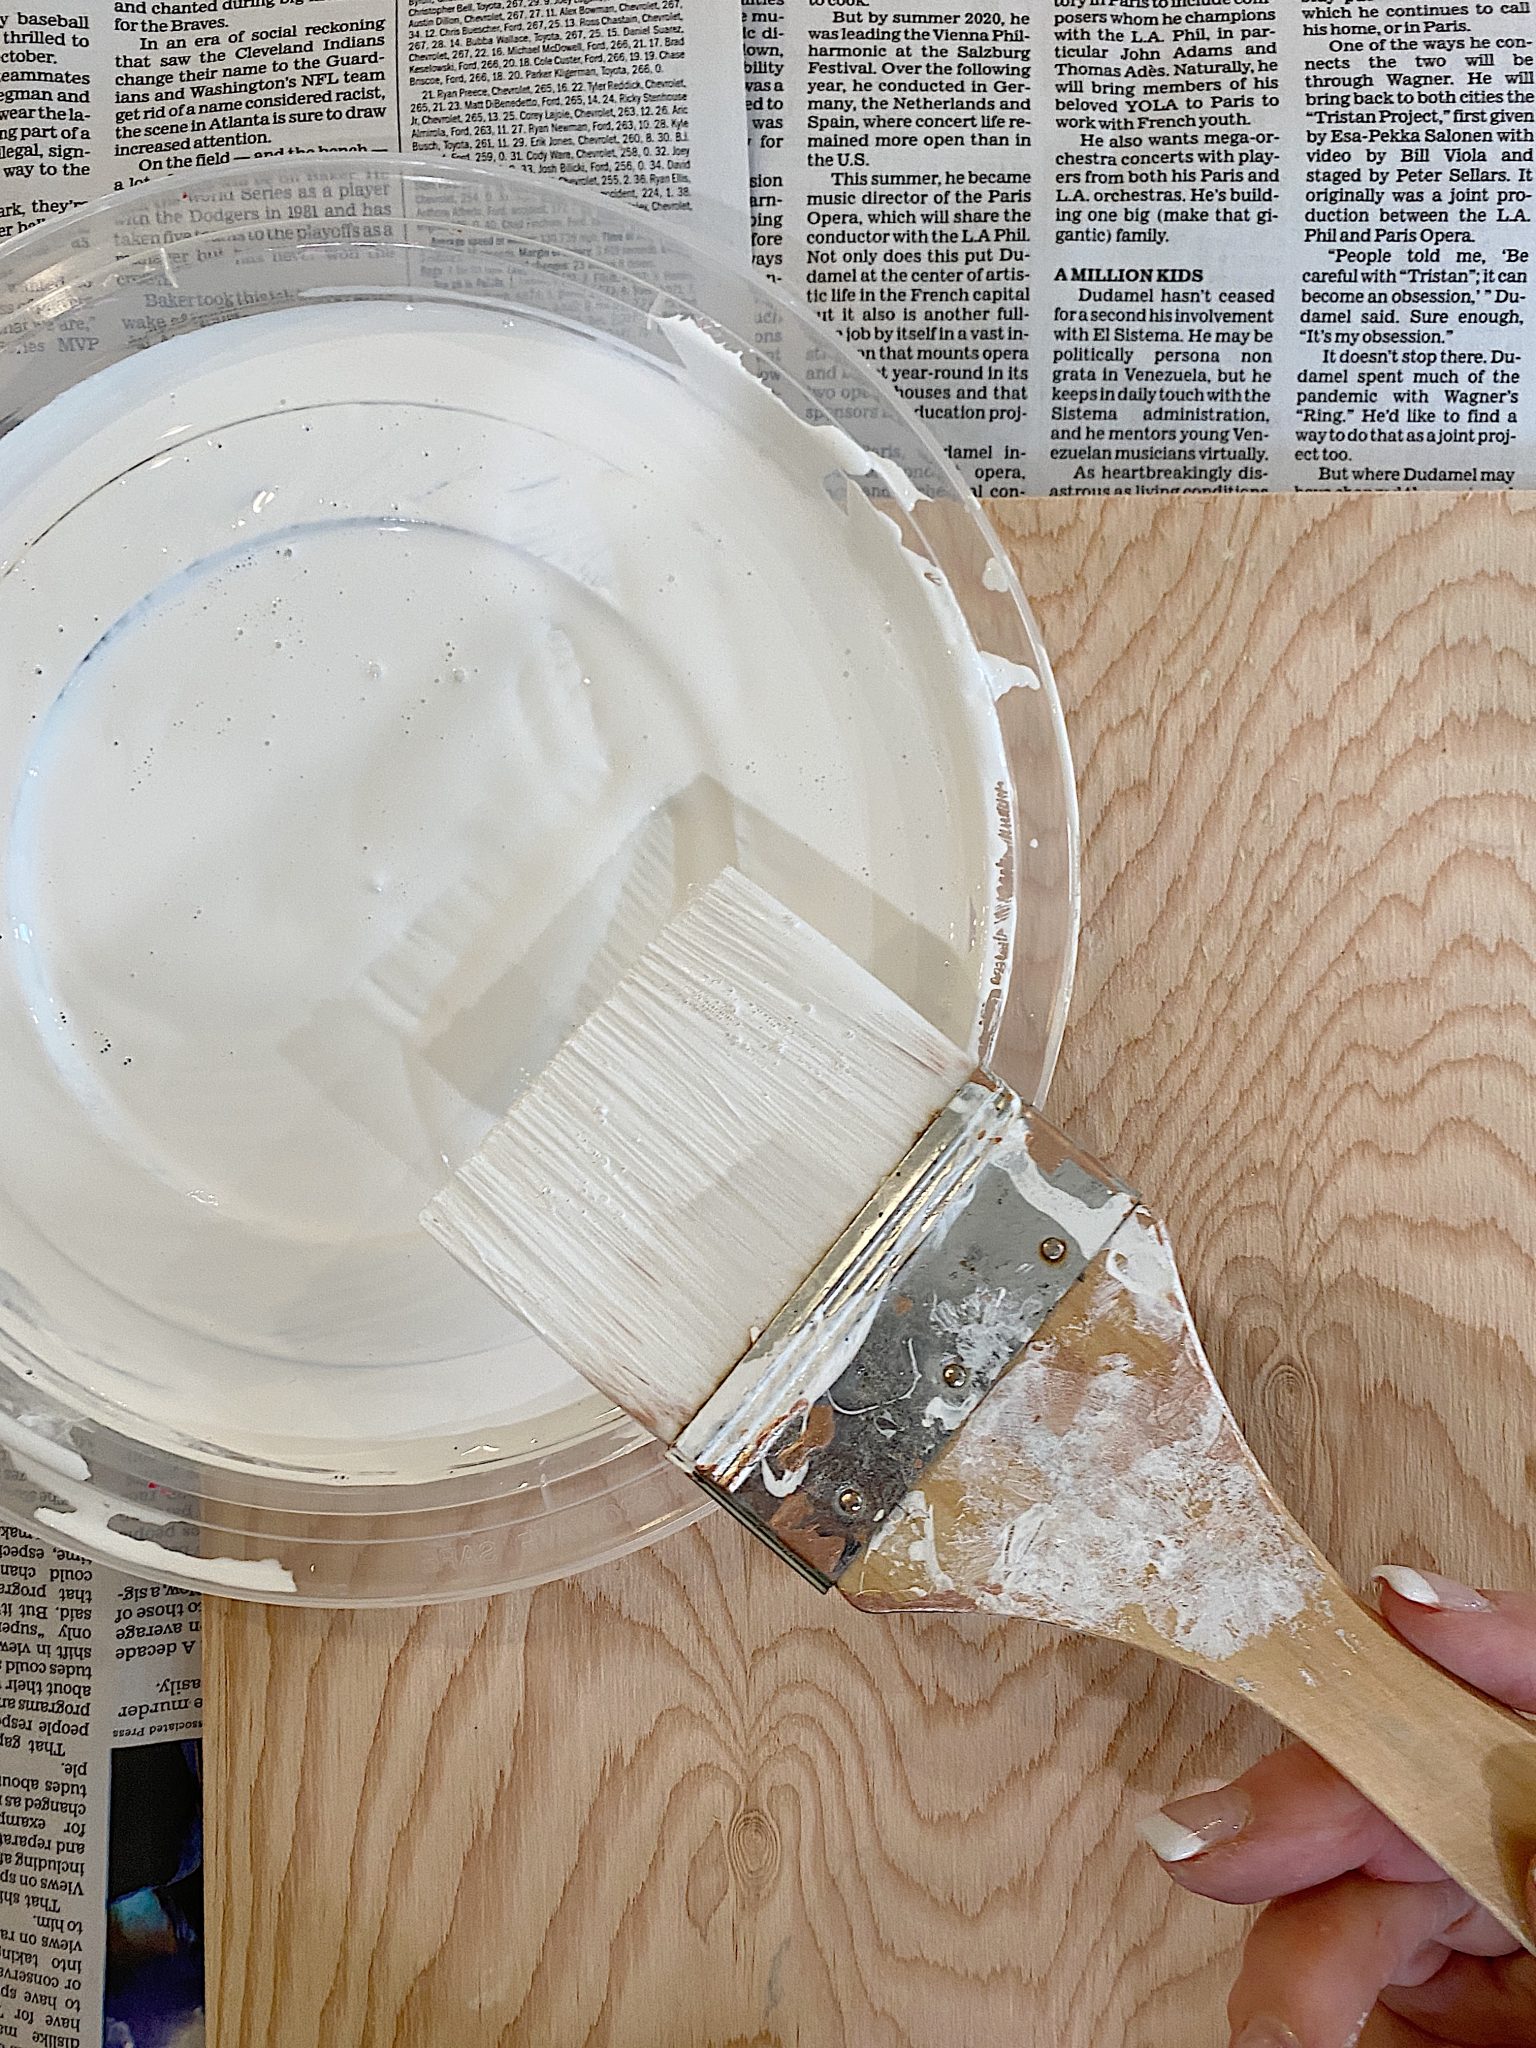
White acrylic paint
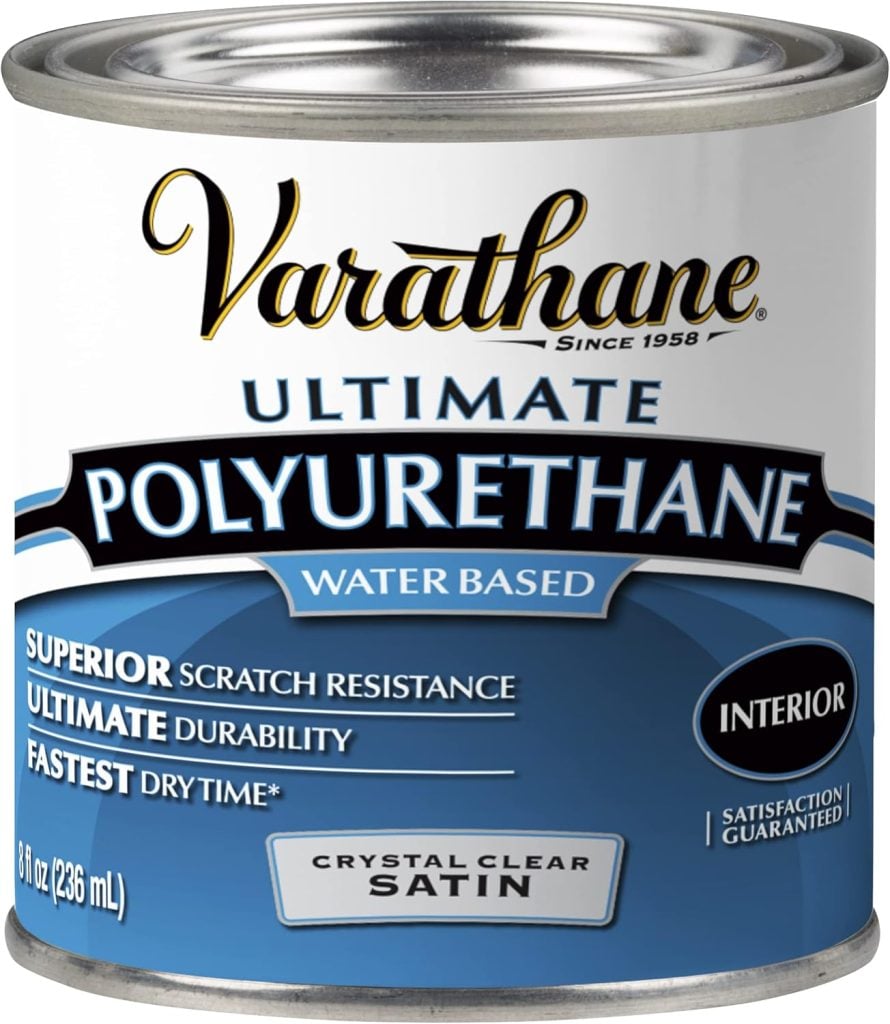
Water Based Varathane Polyurethane, Satin Finish

Step-By-Step DIY
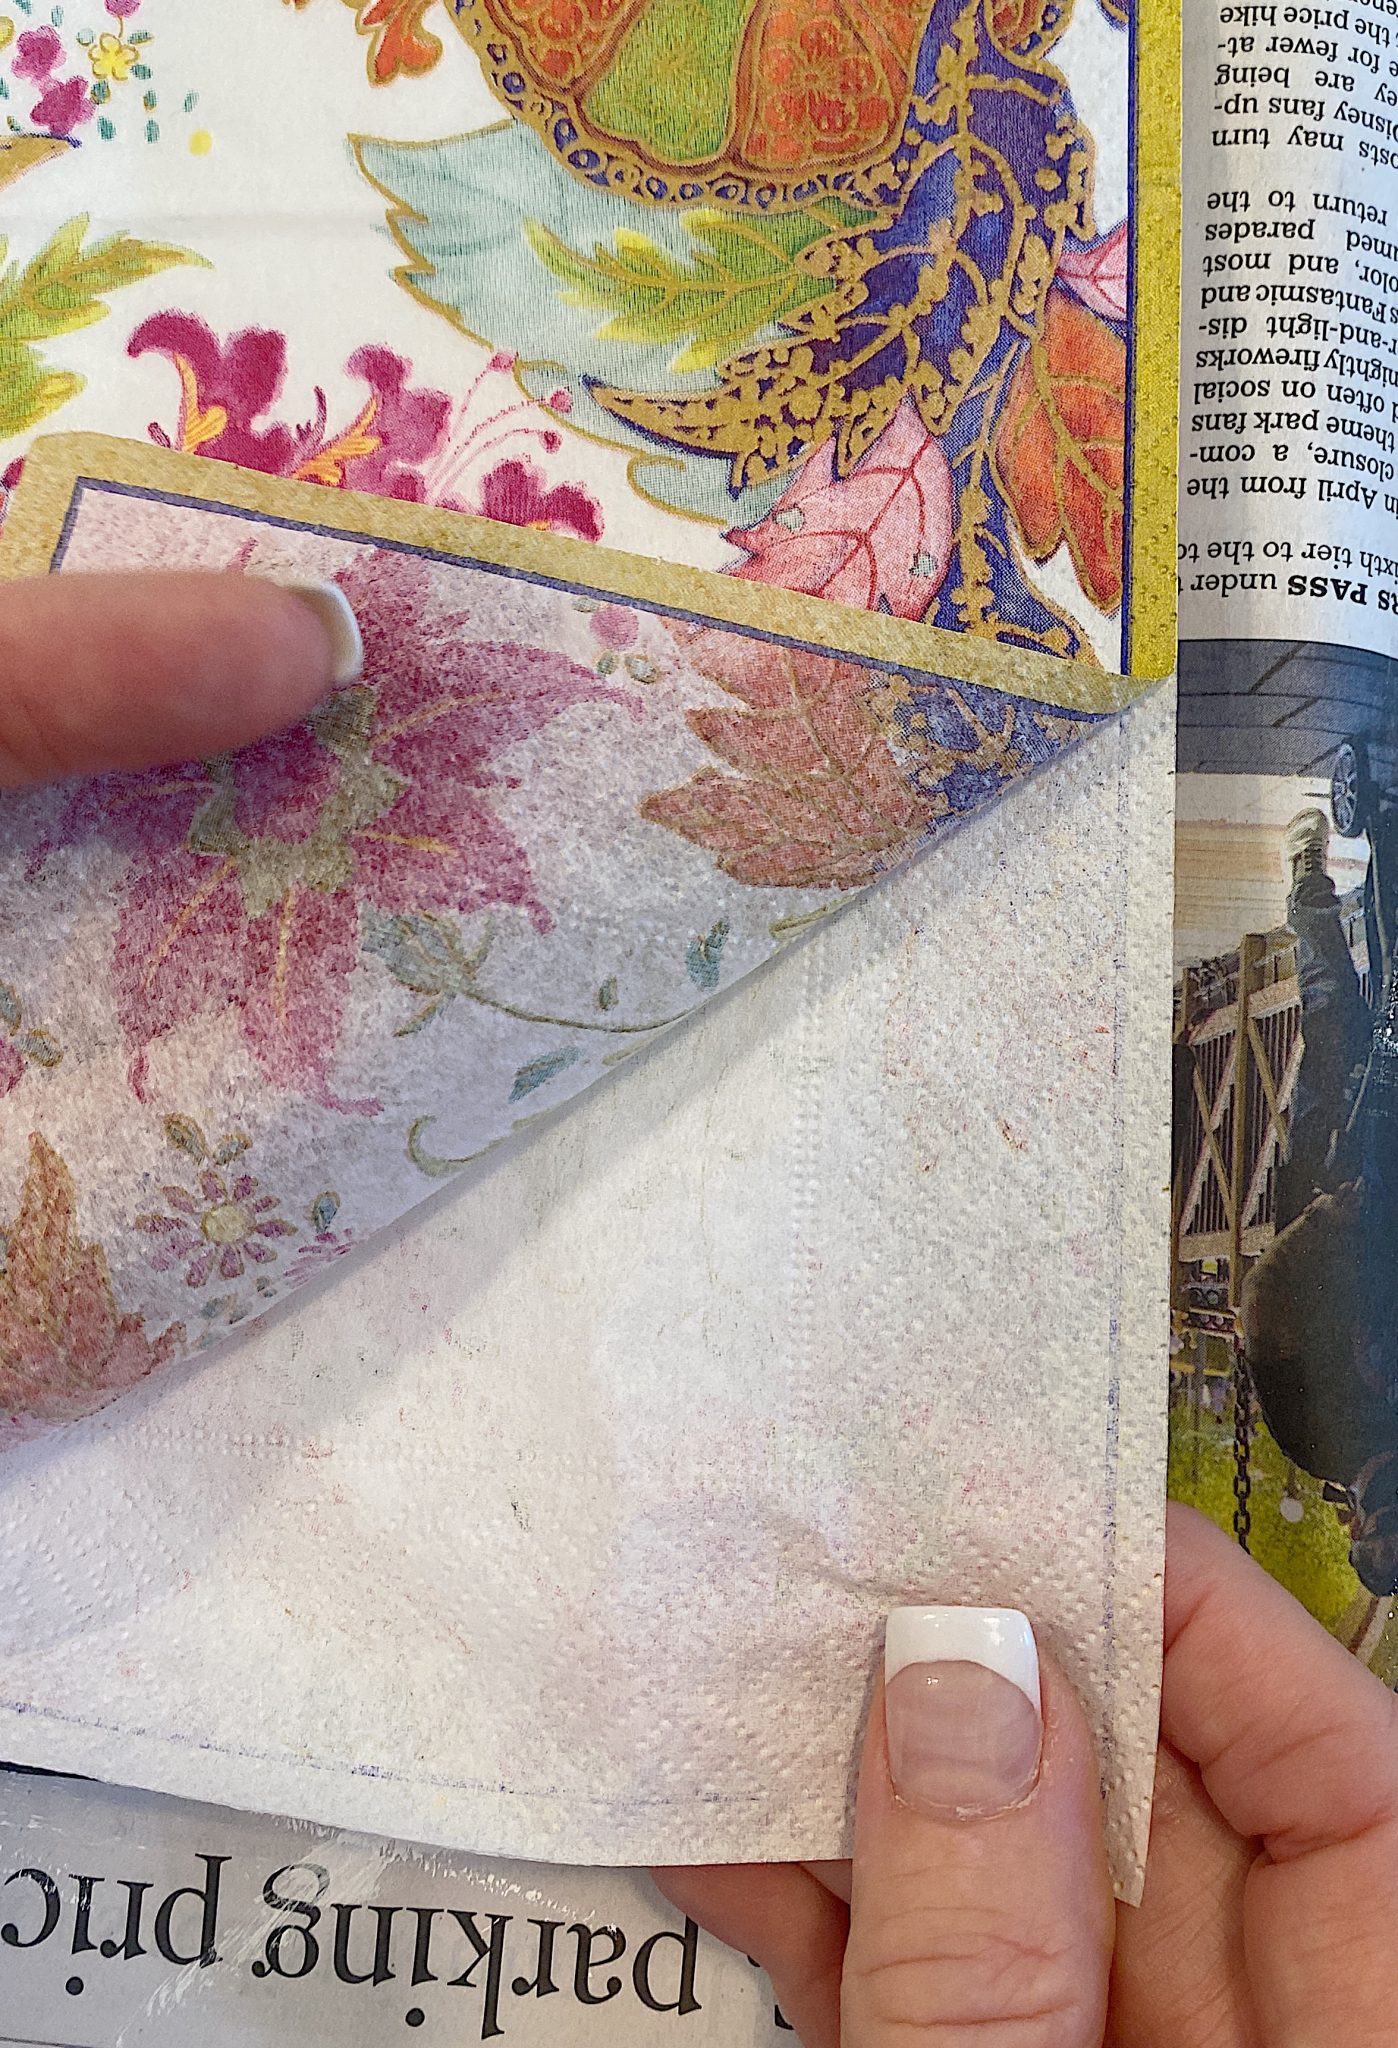
- one – Carefully peel the backing off of the napkin.
- two – If needed, sand the sides and edges of the plywood board.
- three – Mix up some white acrylic paint and paint the top and sides of the wood charger.
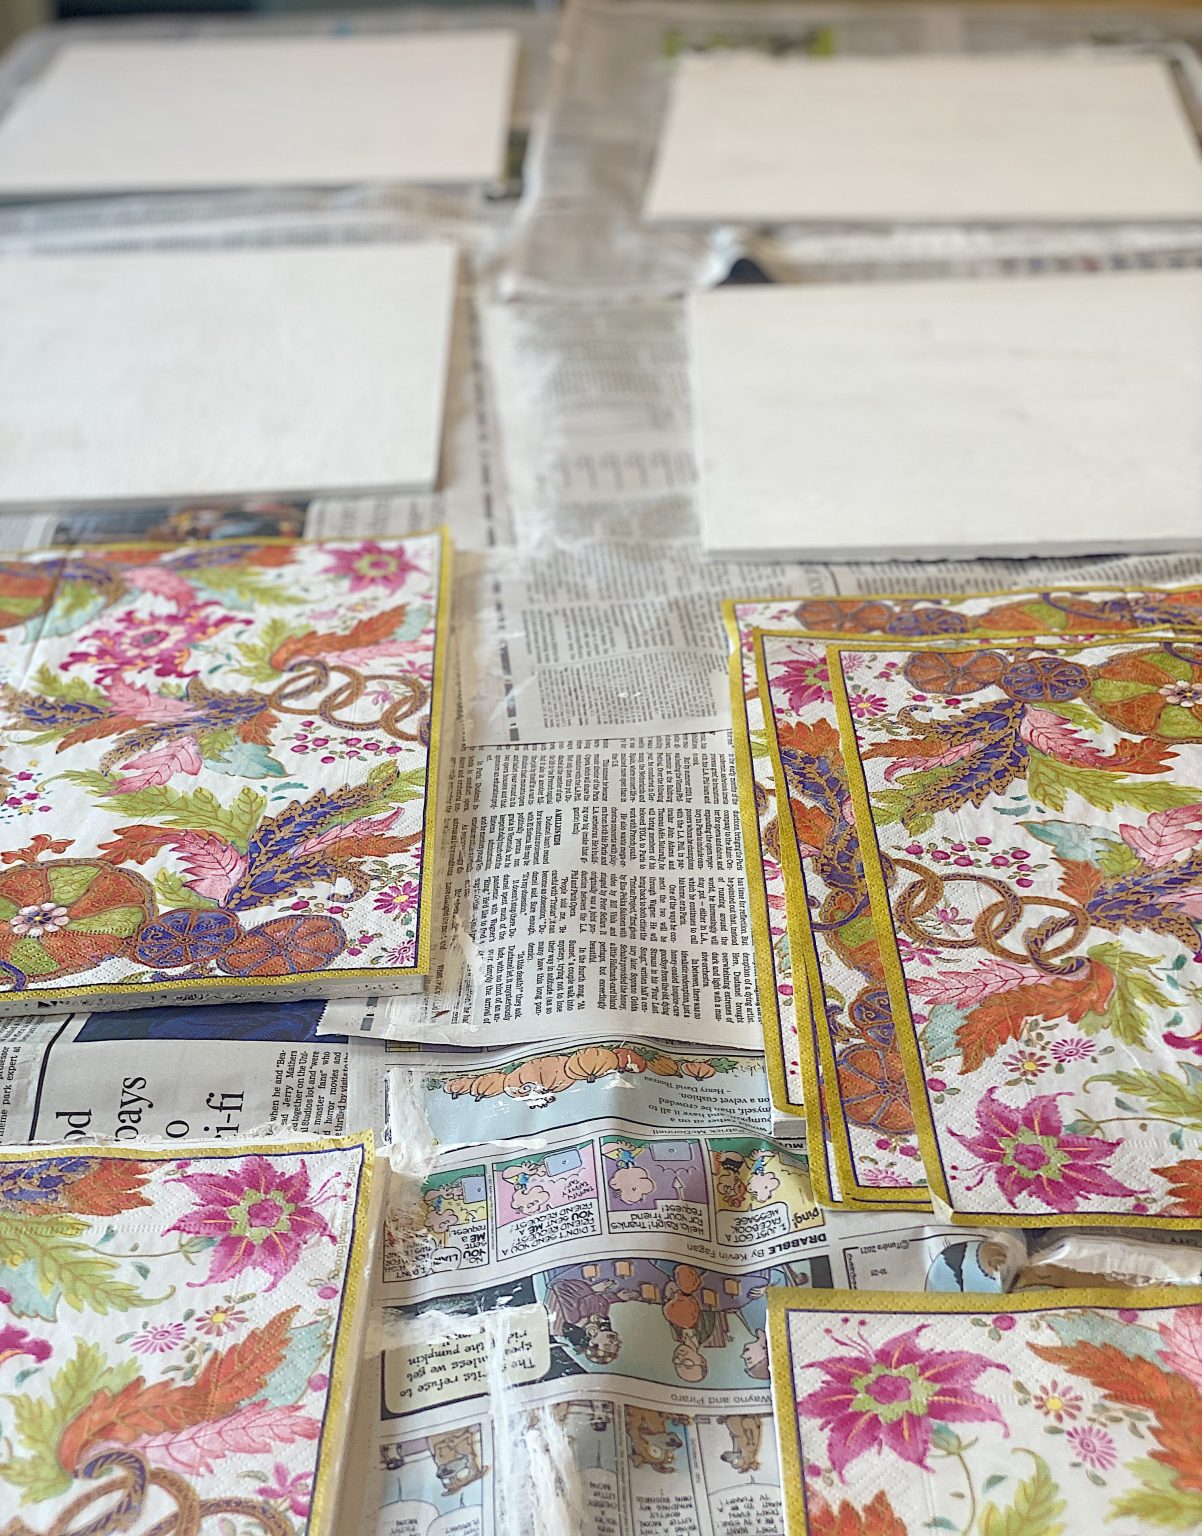
- four – Let the boards dry, and then place the napkins on top of each of the boards.
- five – Glue the napkin on top of the painted board. Let dry.
- six – Cover the top and side of the napkin with Polyurethane. Let dry.
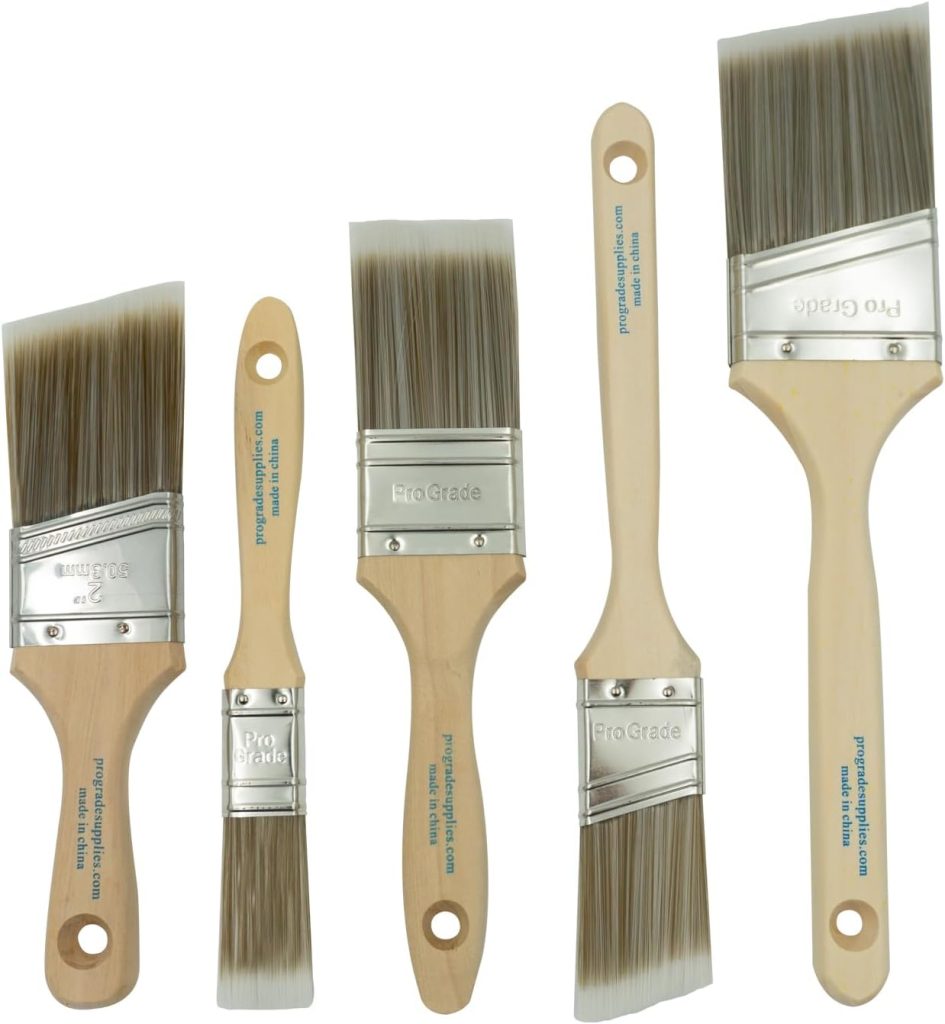
It is essential to know that I figured out how to glue the napkins on the boards, as it will save you a lot of angst. You can’t put the glue on the board and place the napkin on top. It will never work as the napkin is too thin. I put a tiny glue dot in all four corners with my brush and gently laid the napkin on top. I flattened out the napkin and made sure it was in place. Then, I painted the glue on top of the napkin and covered it. (This will glue the napkin to the board, I promise! If the glue is too thick, just thin it with water. And don’t press too hard, as you don’t want the napkin to rip.
Can you imagine what you can make with so many gorgeous paper napkins for sale?
The best part about entertaining is having a fantastic table to serve your delicious food. One crucial aspect of creating a beautiful table is the chargers—they set the tone for the rest of the event!
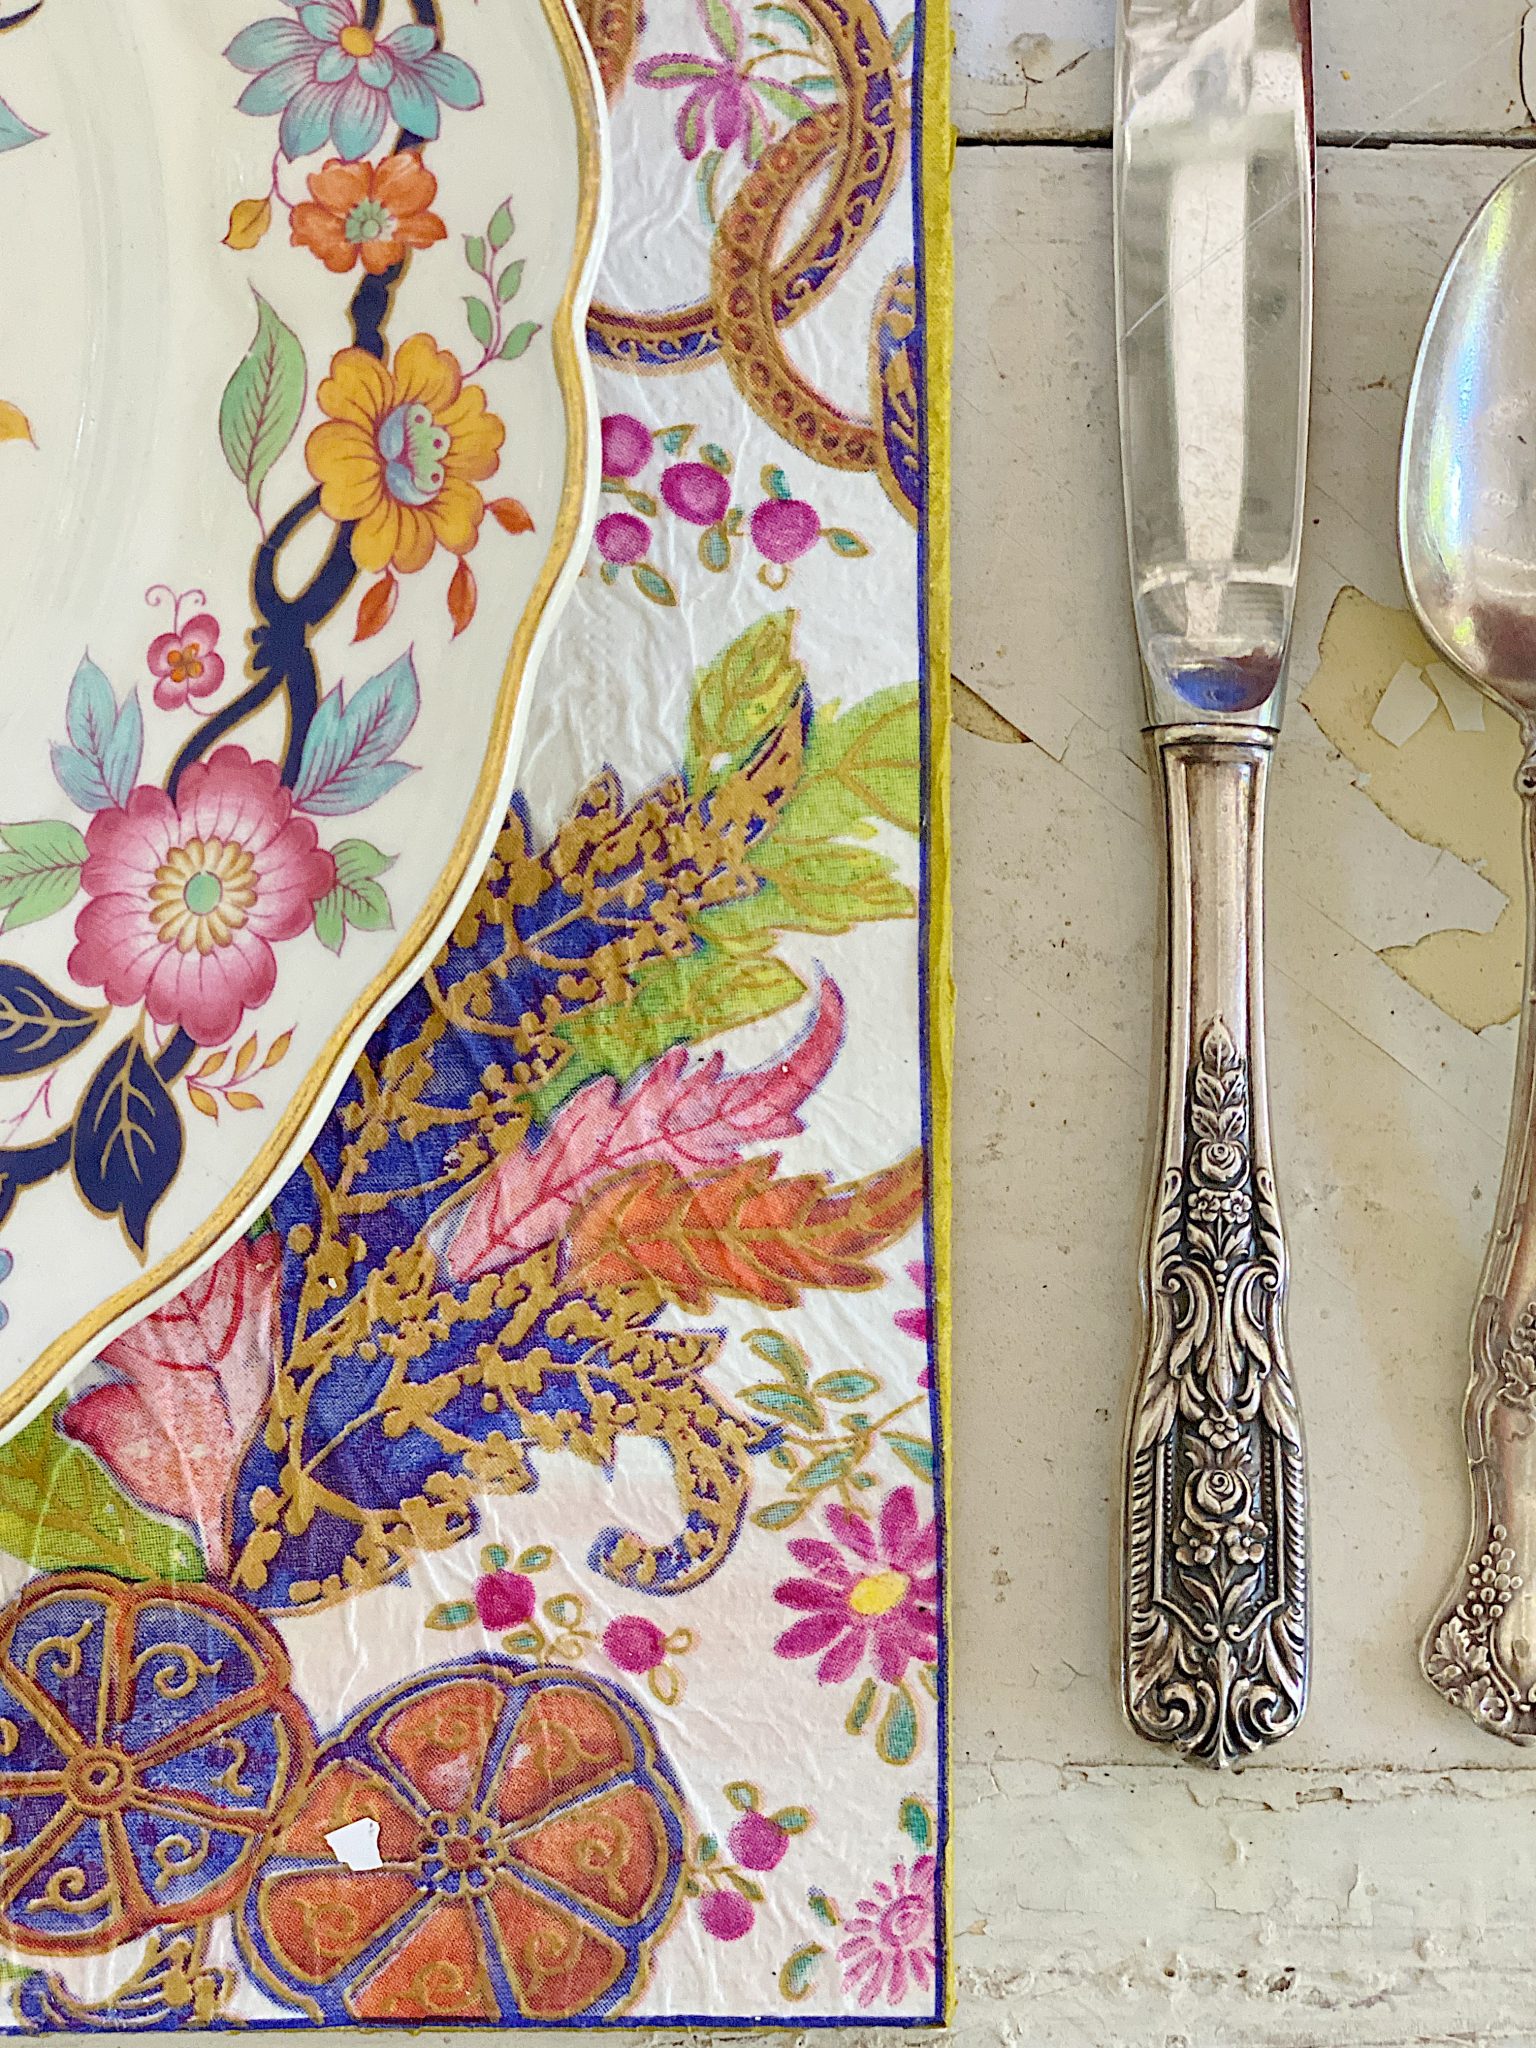
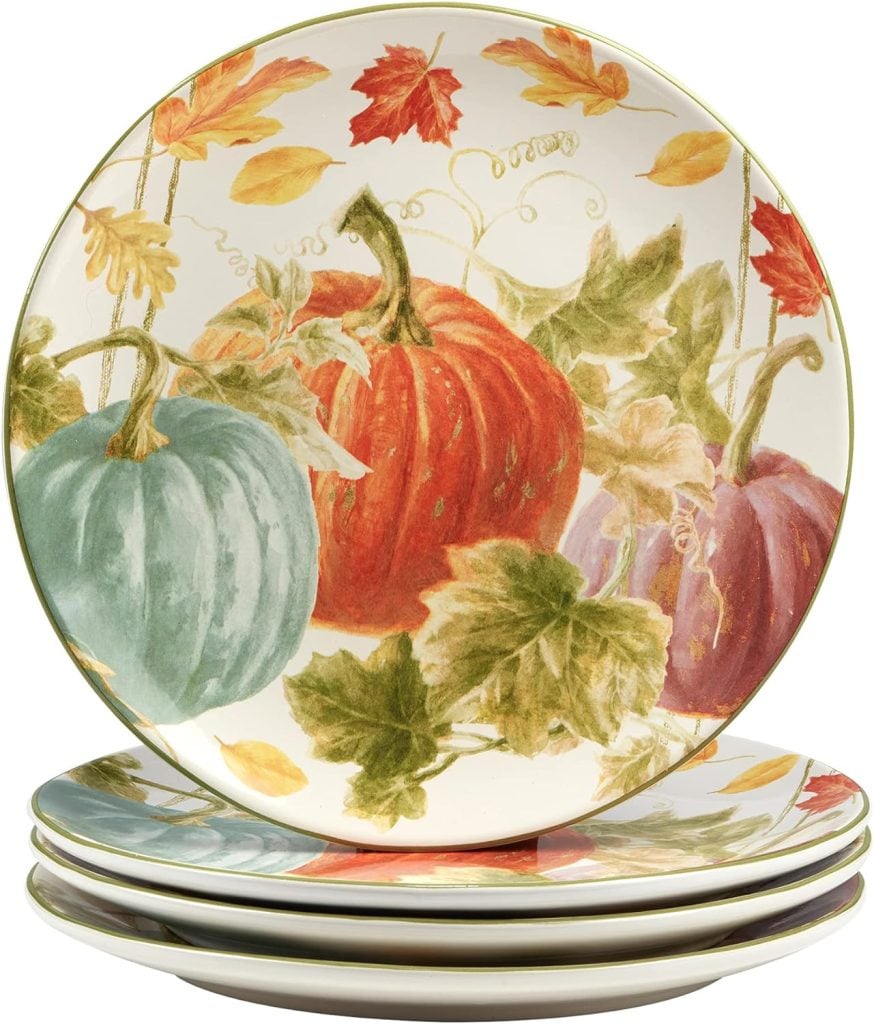
How great would these look together? Make the charger match your plate! Plates are on the left, and napkins are on the right.
Halloween Decor Favorites
You can pin the image below to your decor boards on Pinterest (just click the Pin button in the top left corner) or follow me on Pinterest!

For more real-time updates, follow me on Instagram @My100YearOldHome


Oh my goodness! This is amazing. I love the plate on the charger, they look so beautiful together. Hugs to you.
Thank you so much Renae!
Oh my goodness, so amazing! I love this idea 💡! Now I just need time, have to get busy. Thank you so much, again, for such wonderful lovely inspirations….
Thank YOU!
Leslie, I have been following your blog for over a year, (+/-…?) and THIS is one of my favorite DIY projects, yet! I love that you provided a couple of options, wood or cork, and that it is so simple BUT the end result is soooo amazing! I agree , chargers add a whole other dimension to a beautifully decorated table. You are correct – the possibilities here are endless! Thank you for this and all of your other fabulous inspirational projects and ideas!
I am so happy to hear that, thank you!
Love these !
I am so glad you do!
I love a layered look on a special occasion table. The square chargers give the layered look plus they show that the hostesses take an extra special care to make the table special. It’s a compliment to the guest.
I agree! Thanks!
These chargers are beyond gorgeous, Lesley!!! I am charged about making them, but I have a question. I will be making mine from corkboard and when I clicked on the Amazon corkboard squares you suggested I saw that they were 12″x12″. I believe that you said you cut your plywood 13″x13″ for the 12″x12″ napkins. Will the 12″x12″ corkboard squares work?
You could use modge podge. Its the perfect consistency instead of glue.
Great idea!
I’m wondering if the 12×12 napkins will work on the 12×12 corkboard since Lesley said she cut her plyboard 13×13.
You cut the wood or cork to your napkin size….or cut the napkin to fit. It won’t be a one size fits all kind of project. I can’t wait to make these!
Let me know how it goes!
This is really a great idea and they look nice…except I could not live with the raw wood edge showing on the bottom. Maybe the smaller lighter cork board would keep that from happening? The napkins are perfect for your colors this year, and also these colors look nice with the rug you added to the dining room this year.
Yes you could try that! Thank you so much!
I agree I also wondered if the unfinished plywood on the bottom would bother me (Unless I read her instructions incorrectly, I felt like that was left raw)
I think simply sanding and painting the underside of the wooden board would solve the problem.
Otherwise, I think this is a fantastic project!
Love, love, love this. I think I am going to have to try it.
Thank you!
What a beautiful napkin! Goes so perfect with your plate! This is a great idea to add big impact to your table! Thanks for sharing!!
These are gorgeous! Where did you get your dish set? I love it!
This is genius!
Thanks Sandra!
Such a beautiful idea! Really love the pattern! Can you share the plate pattern?
These are amazing! Love this idea.
Thank you!
Leslie…This is so creative and you made such pretty Chargers. I love all the flowers and colors on the lovely napkins. How large of a piece of plywood did you have to buy? I know you said it was 1/4″ thick. Did you cut each Charger yourself or did the lumberyard cut each one for you? Thank you for sharing…………Leslie F.
How absolutely PERFECT!! This could be styled so many ways. One question – how can you know for sure when ordering off Amazon and such if the napkin is a continuous pattern or not? I’ve submitted questions to the sellers, but I’m not sure they know what I am asking. An unfolded napkin picture would be so helpful in this case.
Hi Leslie! I’ve been following you on IG for awhile now and have used many of your ideas in my own home, and I’ve ordered the paper napkins for this project! Every time you highlight a project or place setting using these fall dishes, I swoon. Please please please tell us the pattern/maker or where you got them. The colors are so perfect for an updated autumnal look!
Thank you,
Nancy
Such a good idea and so pretty!
I have saved this post for over a year. I am finally near completion with intentions of making 14 chargers for our Thanksgiving table. I have followed your directions to a T and have been excited at the process, but am so disappointed after applying the glue to two – so many wrinkles!! What can I do?