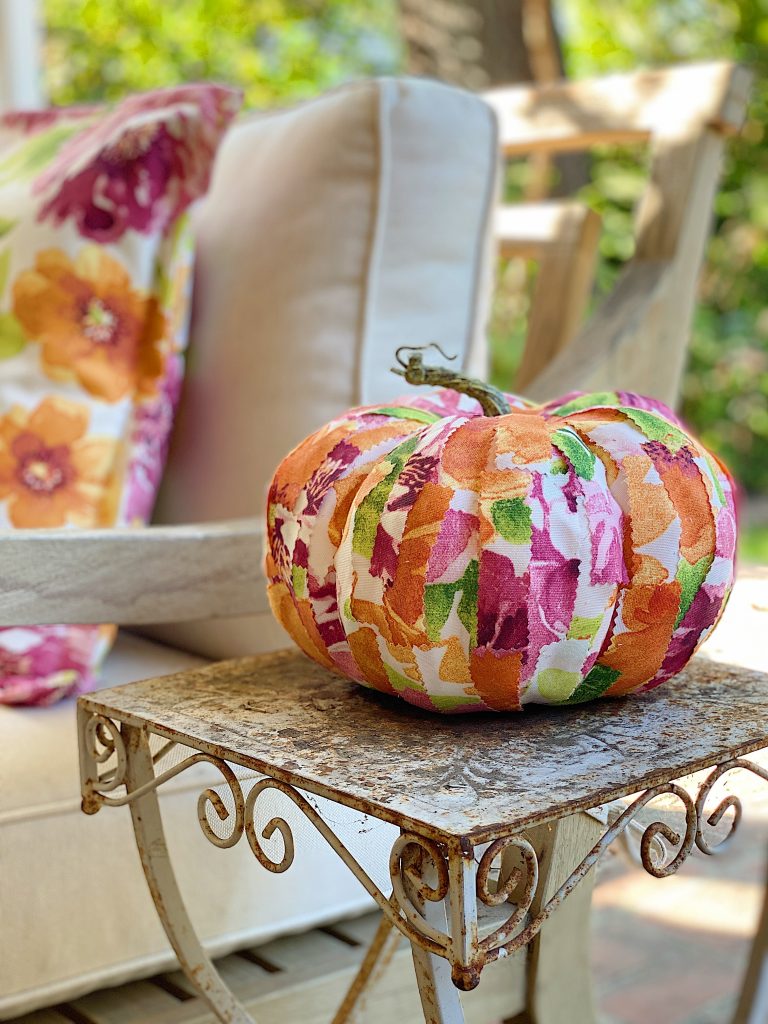
Fall Pumpkin Decor and Pumpkin Pillow
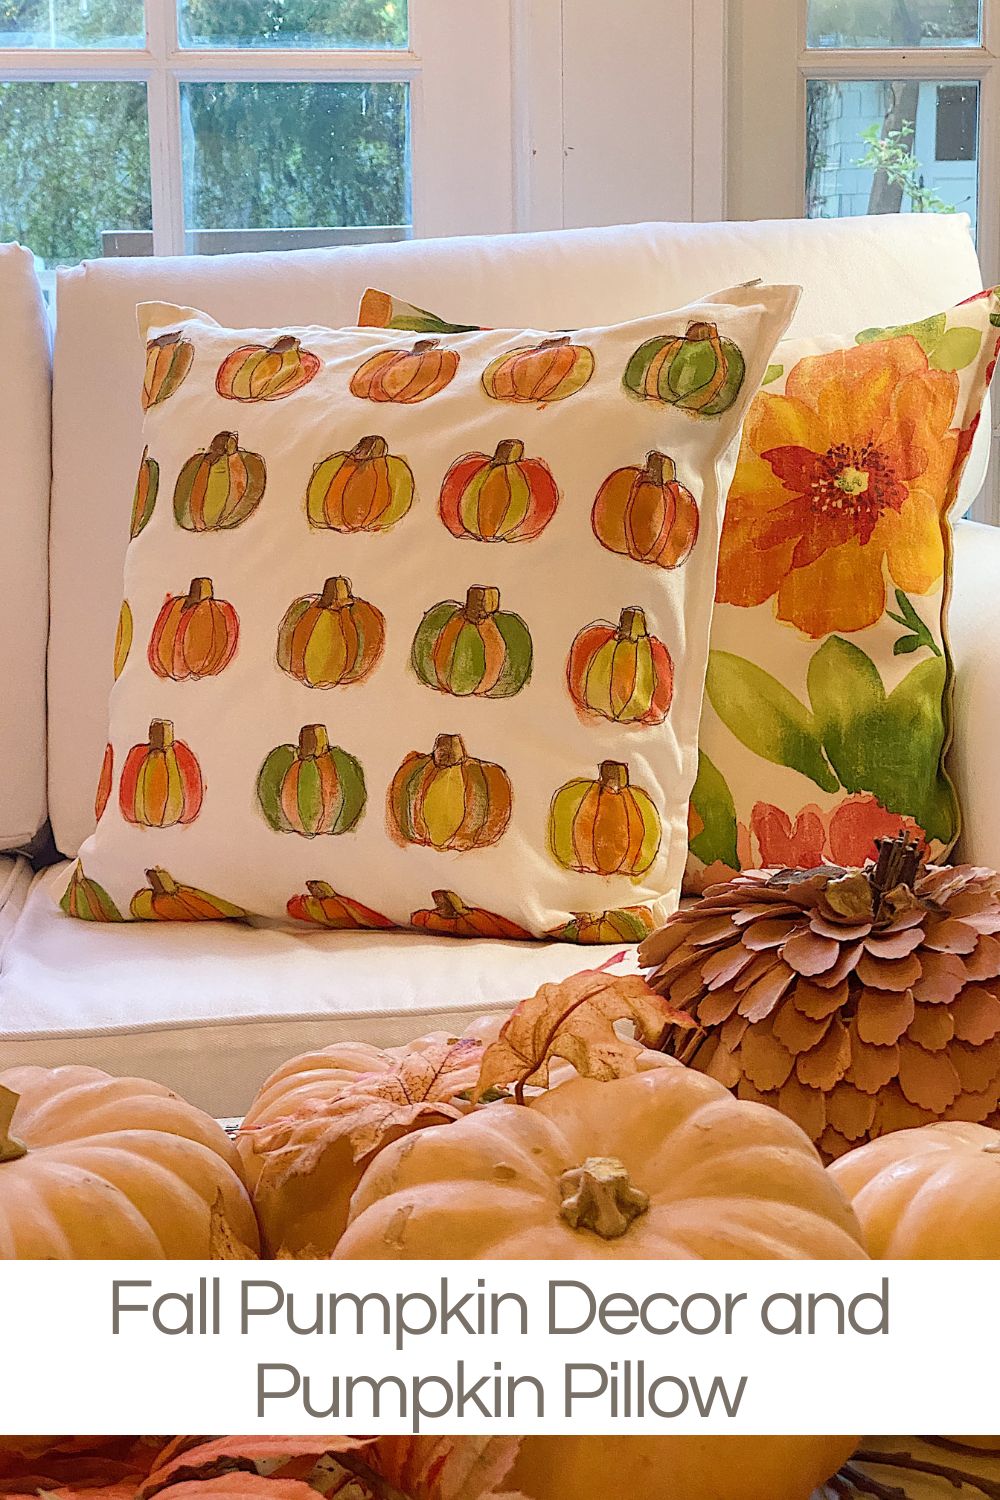

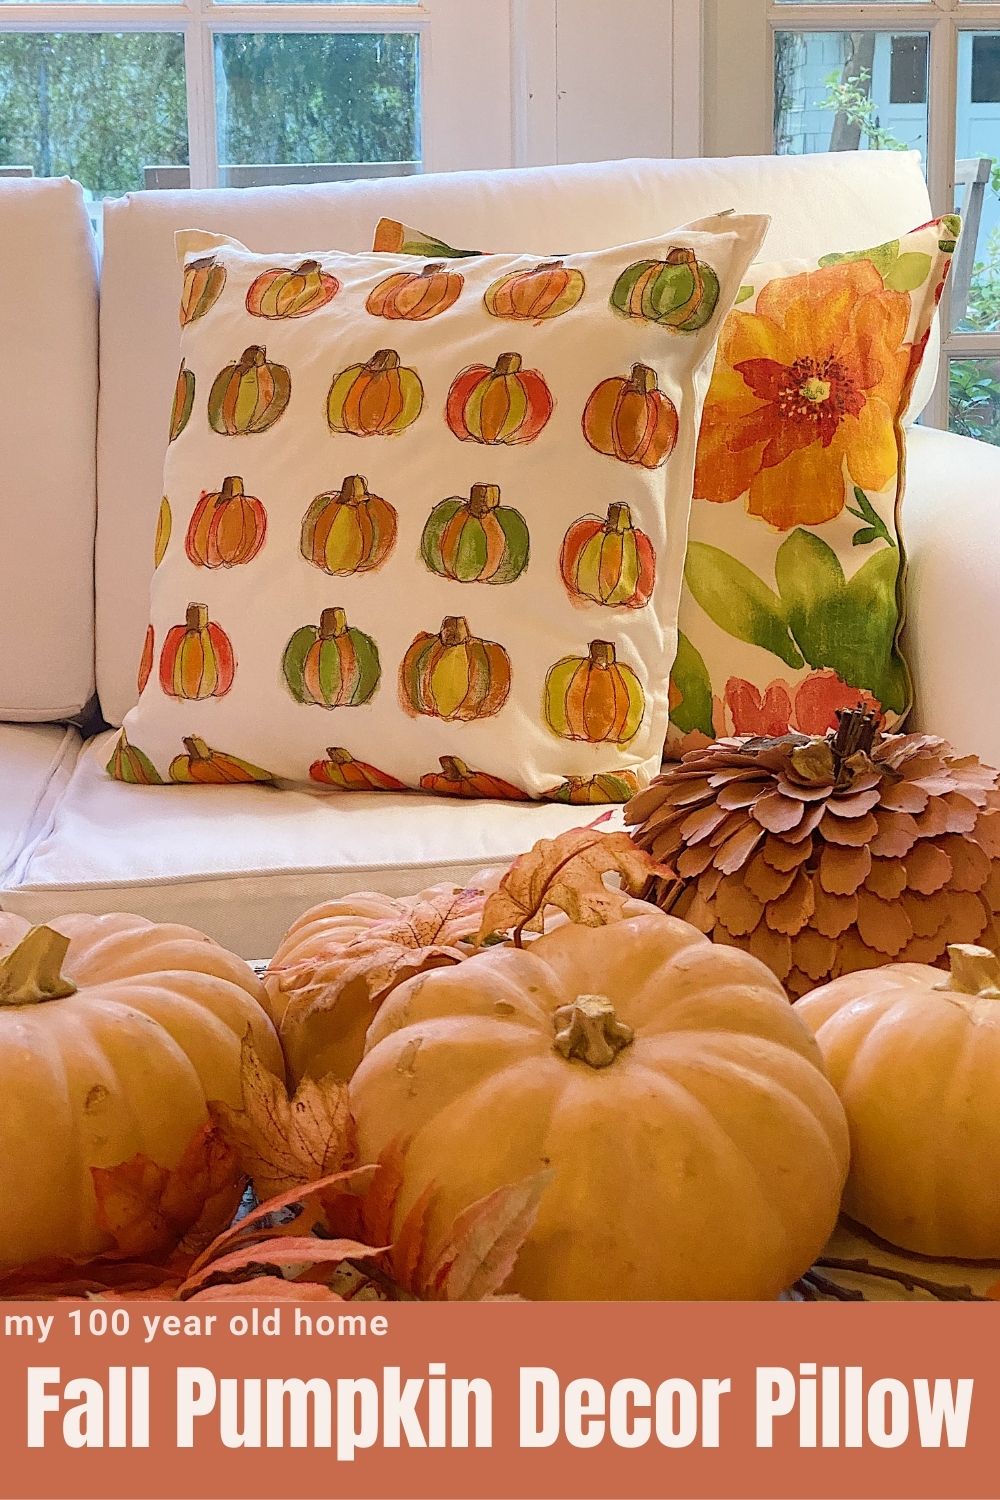
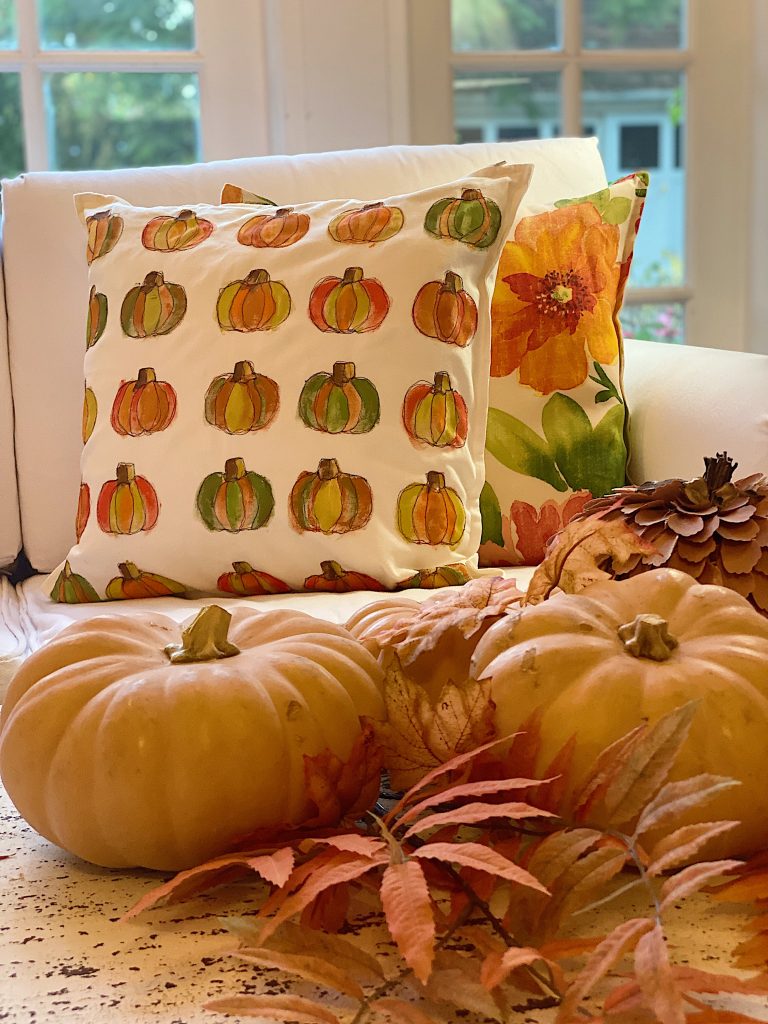
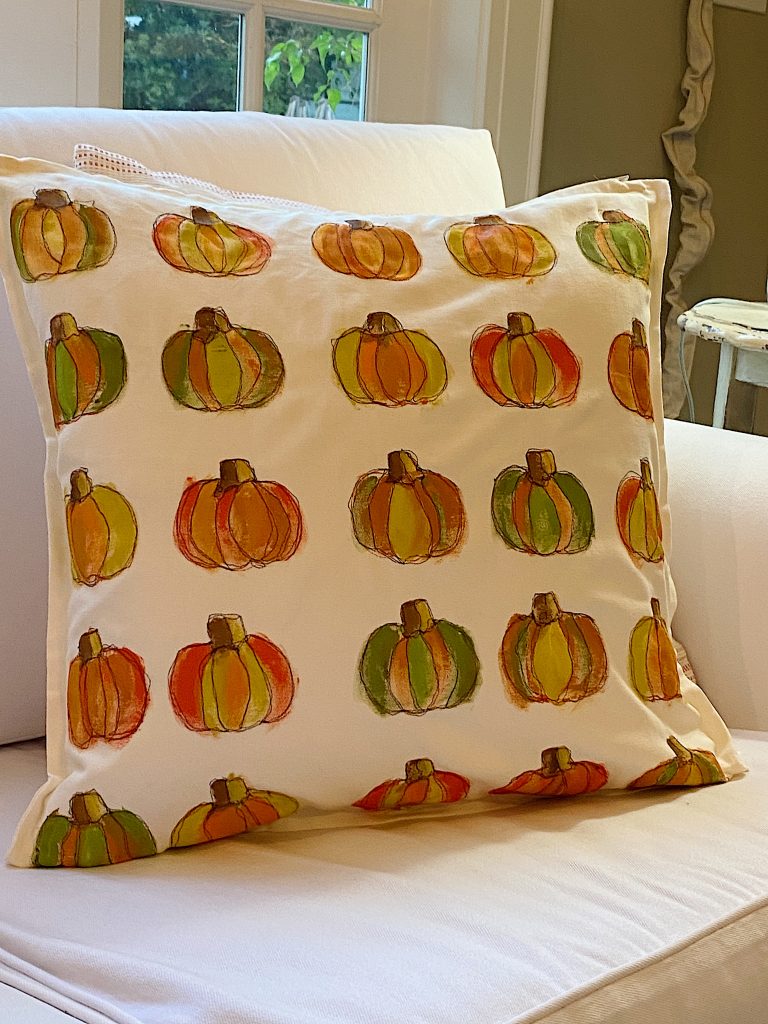
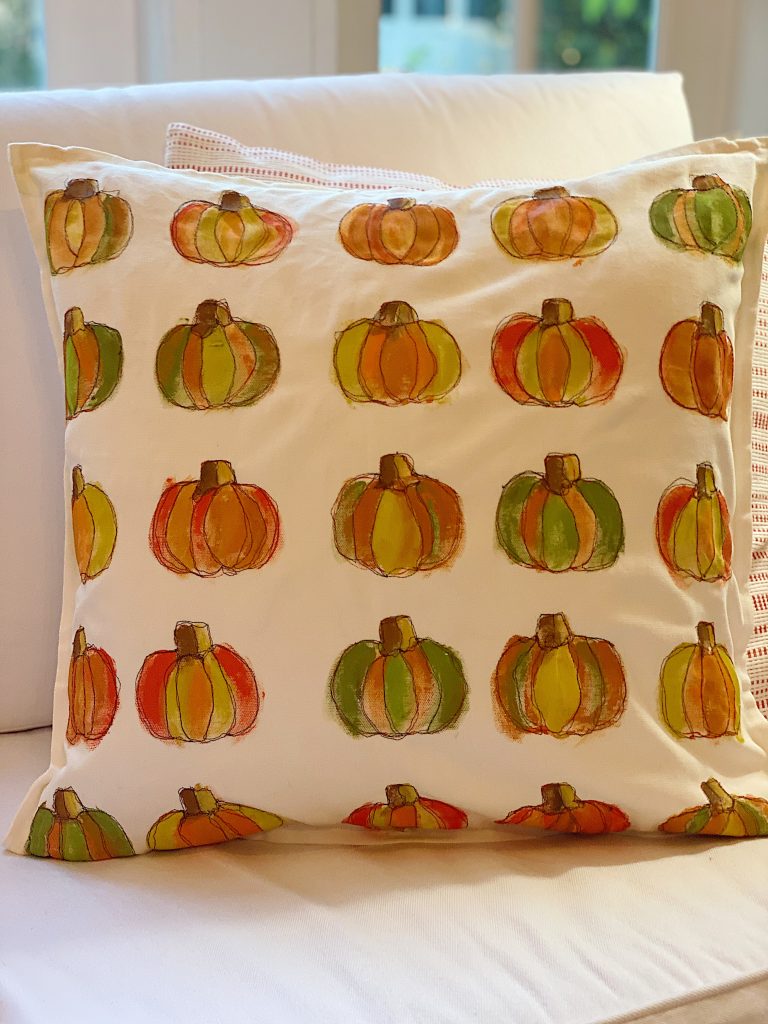
I love this pumpkin pillow and it’s now one of my favorite fall pumpkin decor items. Who knew I could have so much fun making pumpkin crafts?
Pumpkins announce the arrival of fall, warm and spicey lattes, and adorable trick-or-treaters. Pumpkins also are great decor items and this pumpkin pillow is just so much fun, both to make and to add to your decor! I have made a lot of stitched pillows ( see below) but I want to share a secret. If you aren’t a sewer, just grab a thin permanent marker and draw your own feature lines.

Halloween Pumpkin Decor
You all know I love to make pillow covers. I think pillow covers are such an easy and inexpensive way to change up a room. For holidays, it is especially fun to add pillow covers to a room, and boom, the room is instantly festive!
Fall is almost officially here, and I love the change in seasons and all of the fall colors. Here in Southern California, the days are cooling down a bit, which is a huge relief.
I am welcoming fall and the cooler temperatures by cooking soups, like my family’s favorite corn chowder, which is a Halloween tradition. I have also been baking bread like sourdough banana bread. Cooking and making all the things that my family enjoys help make our home feel cozy and warm.
We live in a neighborhood that gets a lot of trick-or-treaters. Literally hundreds and hundreds of trick-or-treaters. You might be shocked to know that I typically buy nearly one thousand pieces of candy each year. And, I usually run out!
It is so much fun to see all of the costumes and the cute little ones. It has been so much fun to watch the neighborhood children grow over the years. Soon, there will be neighborhood grandchildren knocking on our door saying “Trick or Treat.” There is always a treat offered and for our family and friends, we have an open-door policy. On Halloween, I put a big pot of the aforementioned corn chowder on the stove, make loads of cornbread, and a huge salad. It is a tradition for many of our friends to stop in for dinner or just a bite while on their trick-or-treating route.
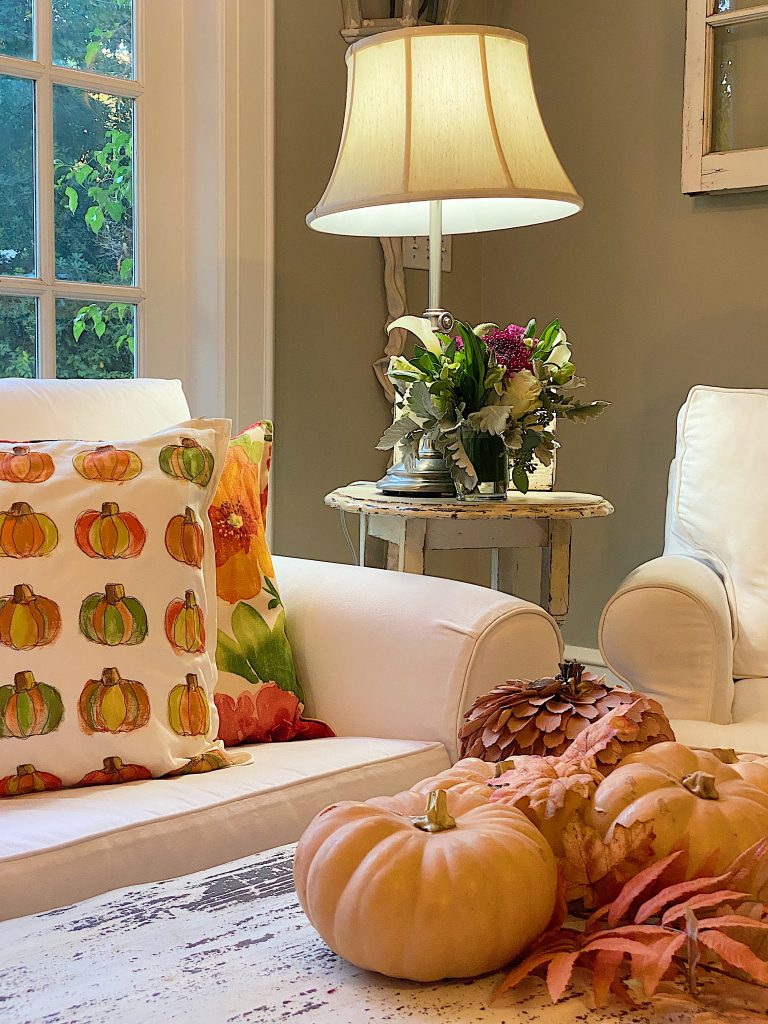
In the past, I haven’t generally decorated specifically for Halloween. I’m more of a fall decor kind of gal. This year, I thought it would be fun to create some fun pumpkin decor. Of course, I thought to start by making a pumpkin pillow.
Stitch Motion Embroidery
What is Free Motion Stitch Embroidery?
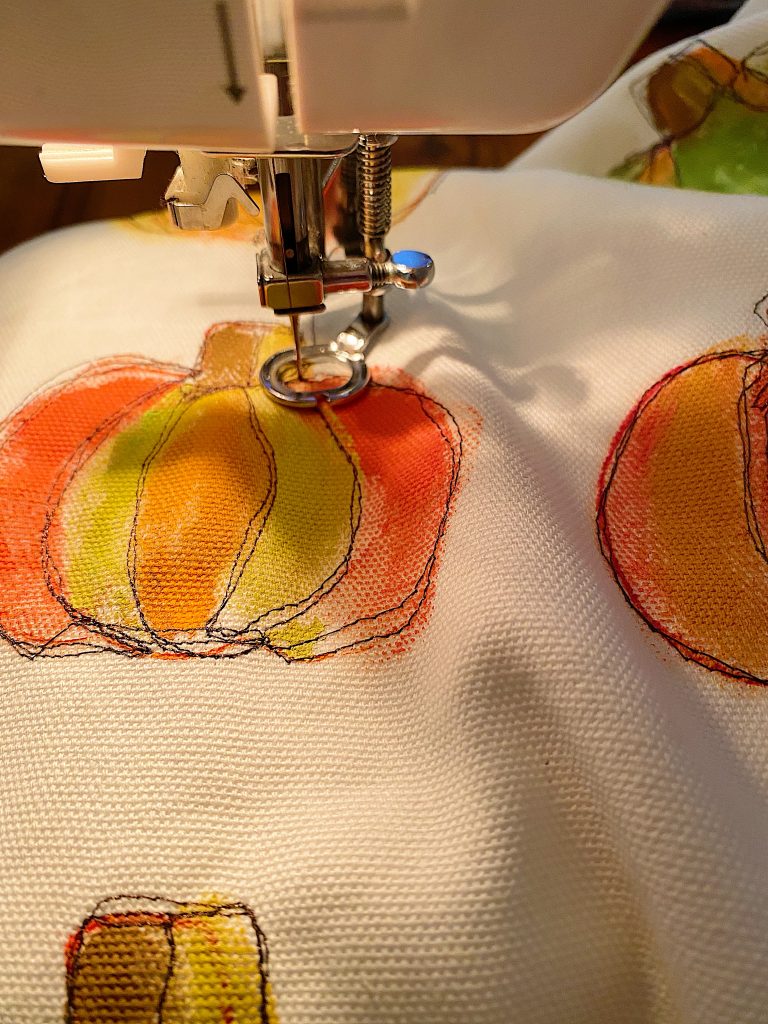
Free motion machine embroidery is very different from regular sewing. By using a special quilting foot and lowering the feed dogs on your machine, you feed the fabric wherever you want to stitch. It’s so much fun because you can move the material in any direction while sewing it on your machine.
A lot of free-motion embroidery is done slowly and perfectly. I love it when it is more free and outside of the lines. Can I just say how much fun this was to make?
I keep some plain cotton pillow covers around the craft room so that whenever I am inspired to make a new pillow cover, I can. For years I have bought plain pillow covers from both IKEA and Amazon because the prices are so reasonable, and I love that I can make pillow covers any time I am inspired! I get pillow inserts from Amazon. The ones I use are four (4) hypoallergenic pillow inserts for twenty-five dollars. Such a great deal!
What You Need to Make a Free Motion Embroidery Pillow
20×20 Pillow Cover (You can also use the Gurli 20″ cover from Ikea)
Pumpkin Cookie Cutter (I used a 3″ cutter.)
Dark Embroidery thread spool (I used brown)
Parchment paper or cardboard to fit inside the pillow while painting (so the paint won’t seep through)
Free motion quilting foot for your machine (varies by sewing machine brand)


Instructions to Make a Pillow

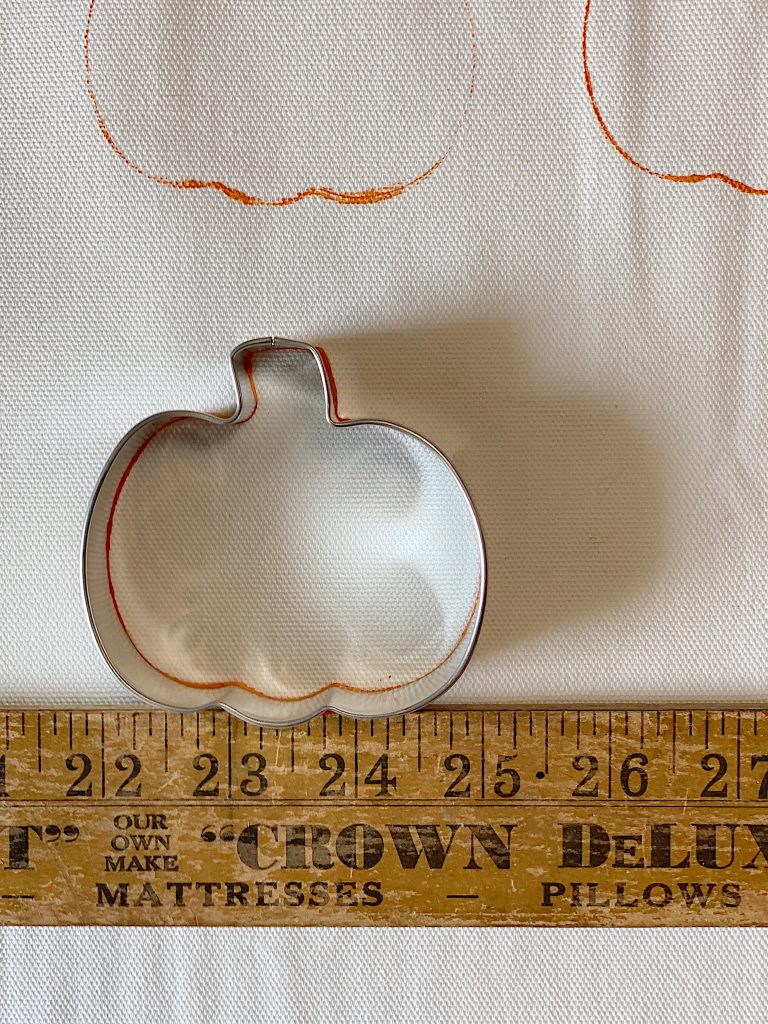
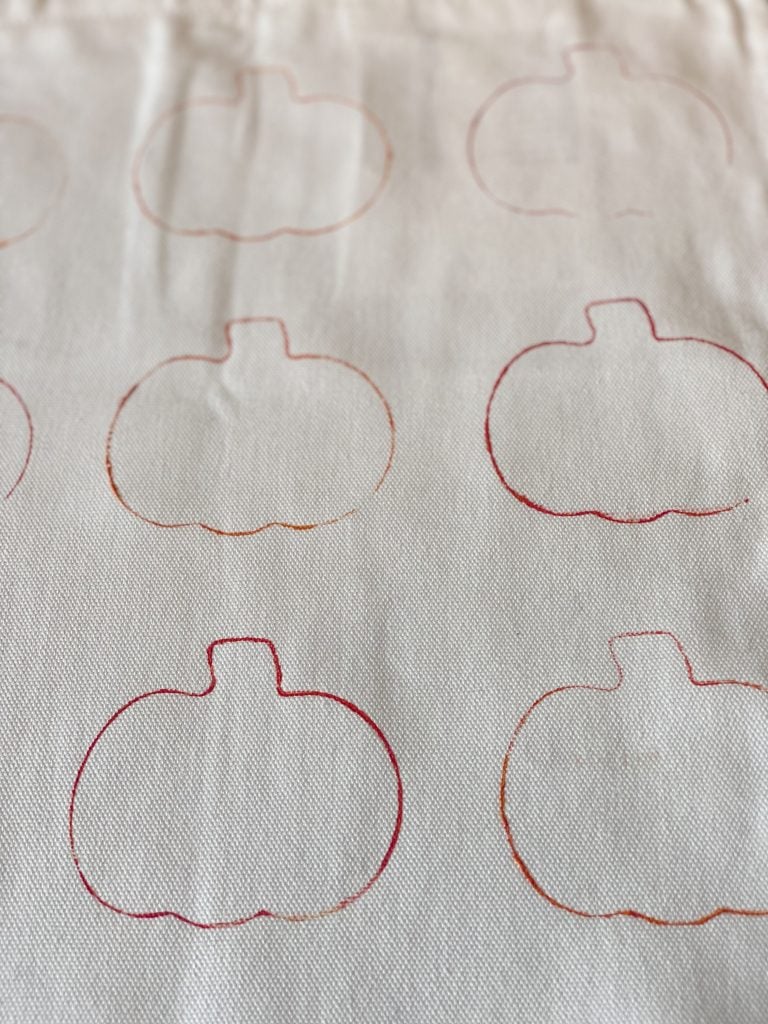
- one – Measure your pillow and the cookie cutter. Determine the layout for the pillow. I used blue markers to help me know where to place the cookie cutter.
- two – Dip the cookie cutter in a flat pile of paint and use it as a stamp to layout the design. I alternated the colors but you can do this any way you want.
- three – Continue stamping the pillow with the cookie cutter until done and then let the design dry.
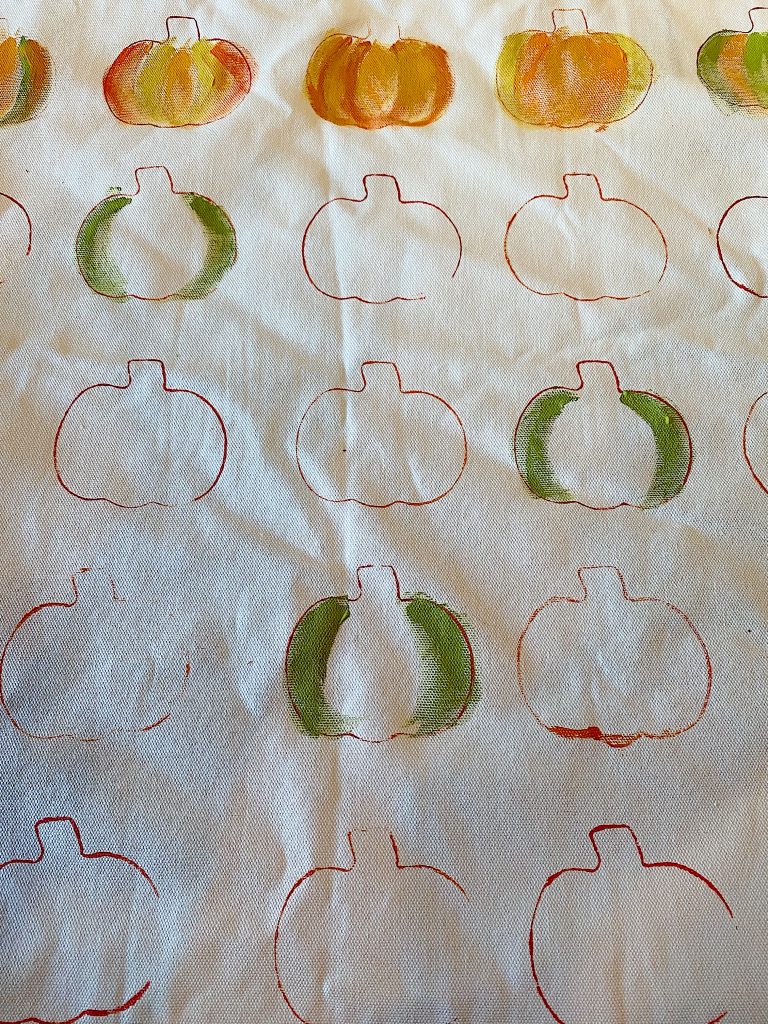
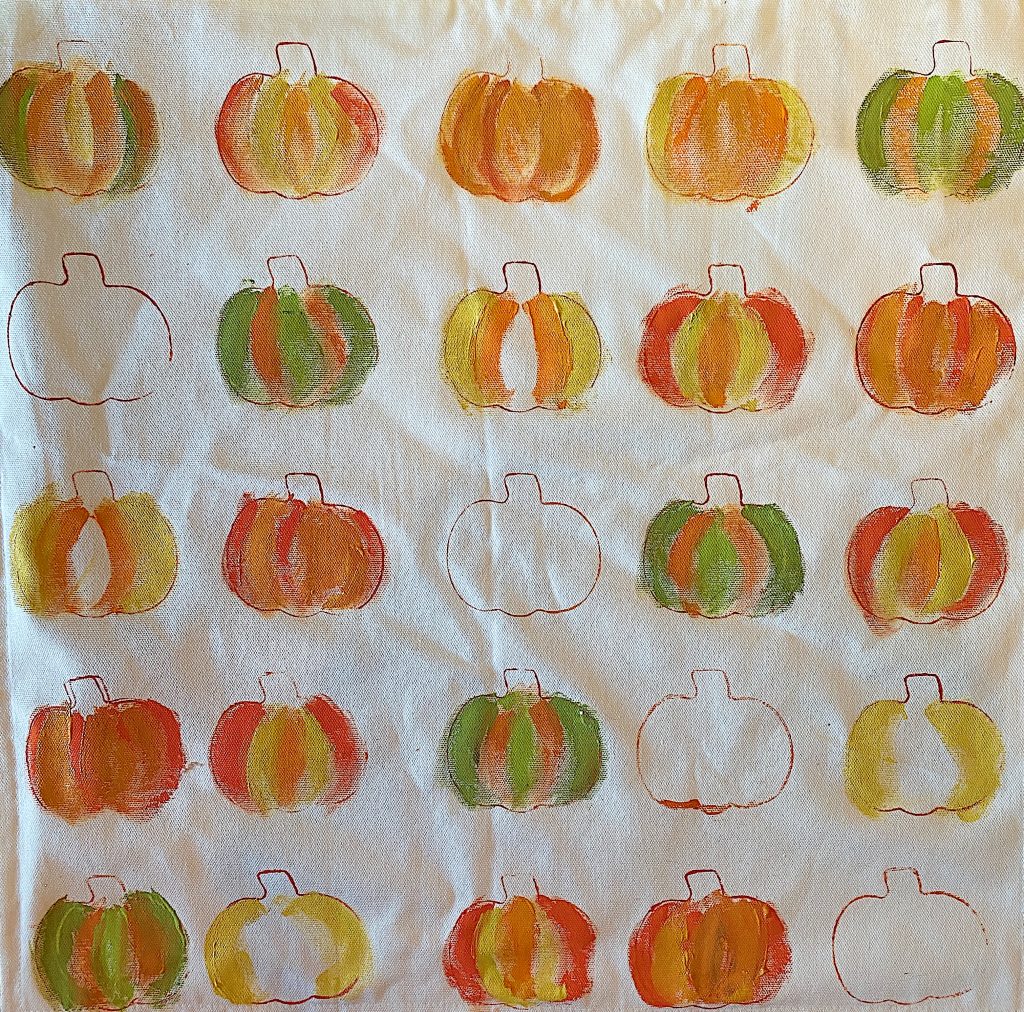
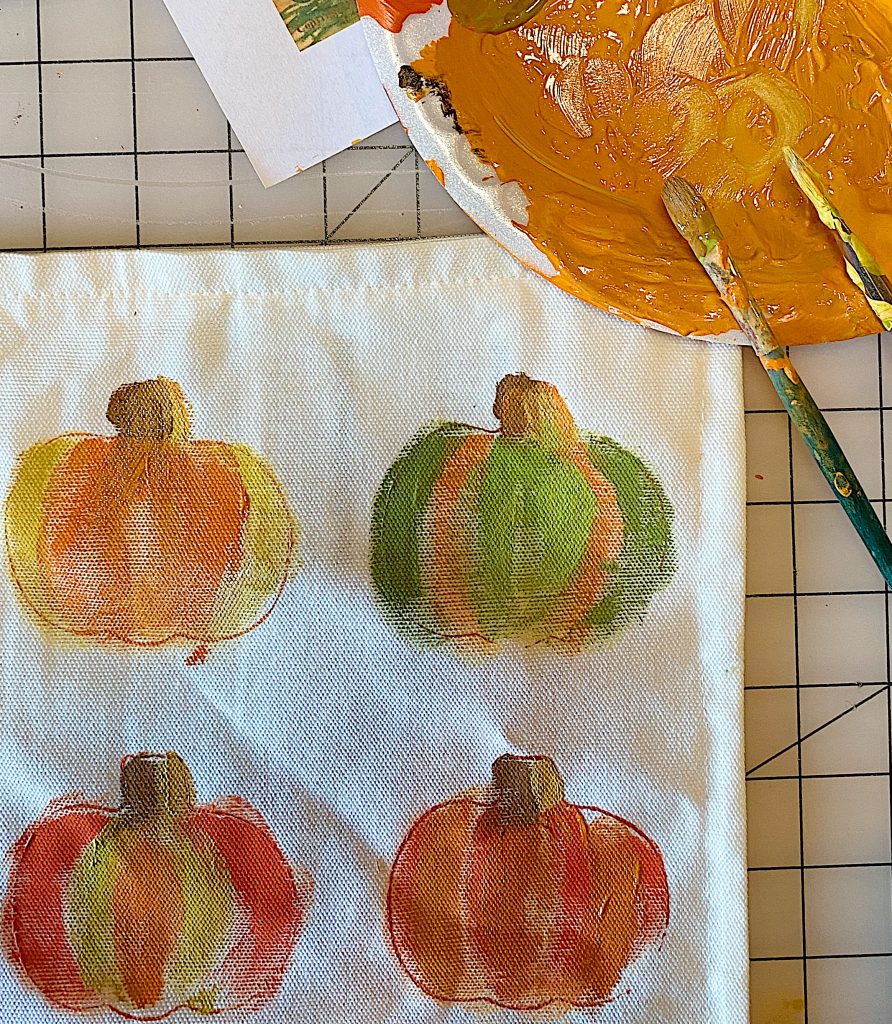
- four – Mix the paint. I mixed up a color palette of oranges, greens, and yellows. Paint the pumpkins showing the different sections of the pumpkin.
- five – I made six different designs and randomly placed them in a differnet place in each row.
- six – Continue painting the pumpkins until done but don’t worry about painting perfectly as the stitching will add detail.
If you are enjoying my blog, you can sign up to receive my blog updates here.
.
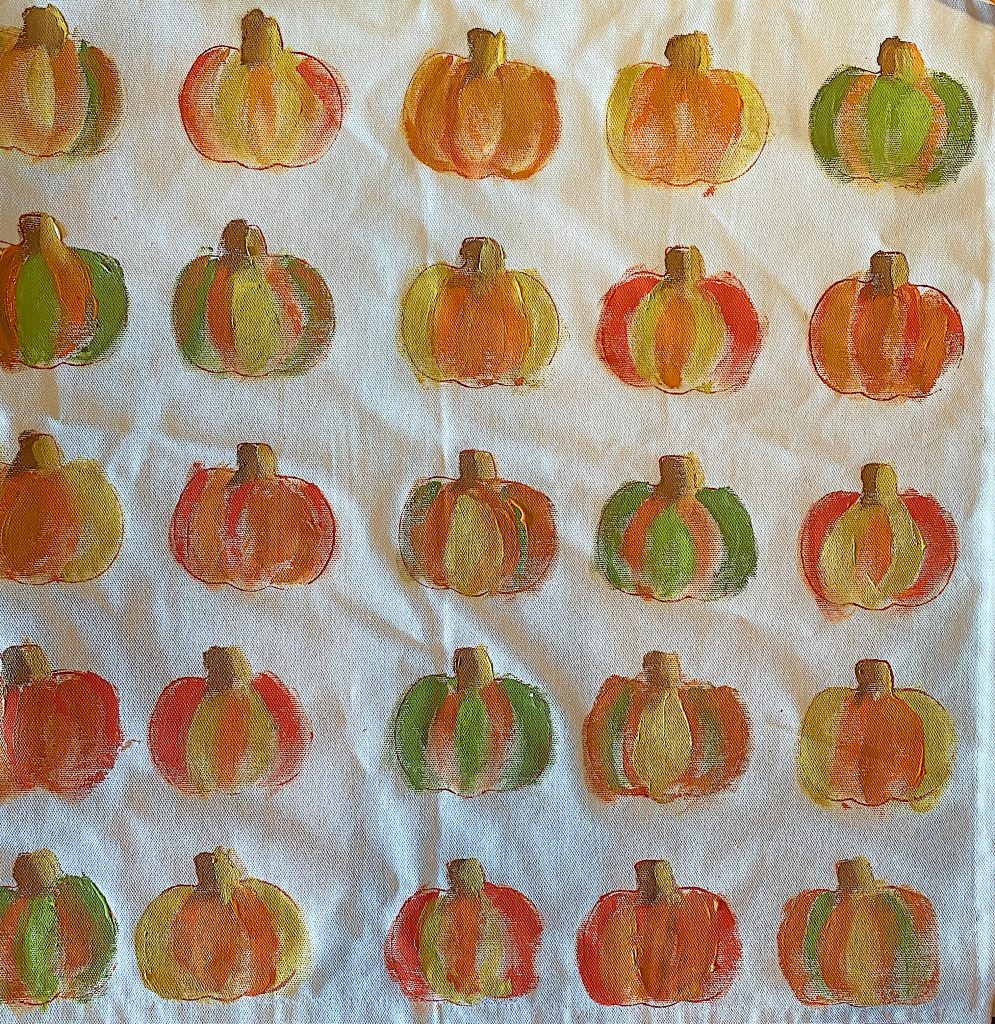
- seven – Paint in the stems. I added a highlight on the stem on the right sie of each one.
- eight – Let the pillow dry.
- nine – Open up the pillow and add the stitch embroidery. Be careful not to sew on the underneath side of the pillow. Begin stitching a very loose pumpkin pattern on top of each pumpkin. It doesn’t have to be exact, just stitch two rounds of stitching on each pumpkin. Since I used an already-made pillow cover, I opened it up and stitched each pumpkin carefully, being sure not to stitch the underside of the pillow cover. It’s not hard, I promise! This is what the sewing machine pressure foot looks like. The difference from regular sewing is that you have to move the fabric which is awesome. You get to move the fabric and stitch in any direction you want! The good thing is that the stitching does not have to be perfect. I like it better if it’s not perfect.
The last step is to iron the pillow to set the paint. Just place a thin cotton cloth on top and iron!


I absolutely love how this turned out. Isn’t it fun?
You can see below that a lot of the pumpkins are very “loose” and not perfectly painted. I love it that way.
Now it’s your turn to make this pillow!


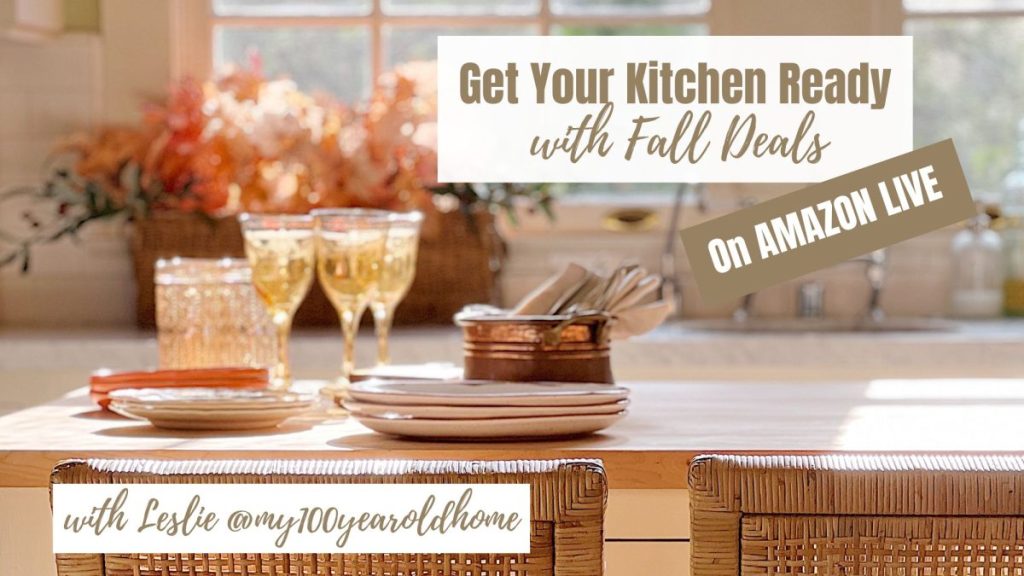
Watch My Amazon Live
Click here to watch any of my Amazon Live shows. All shows are recorded.
Yesterday I shared a new LIVE shoe, Get Your Kitchen Ready with Fall Deals on my Amazon Live Broadcast.

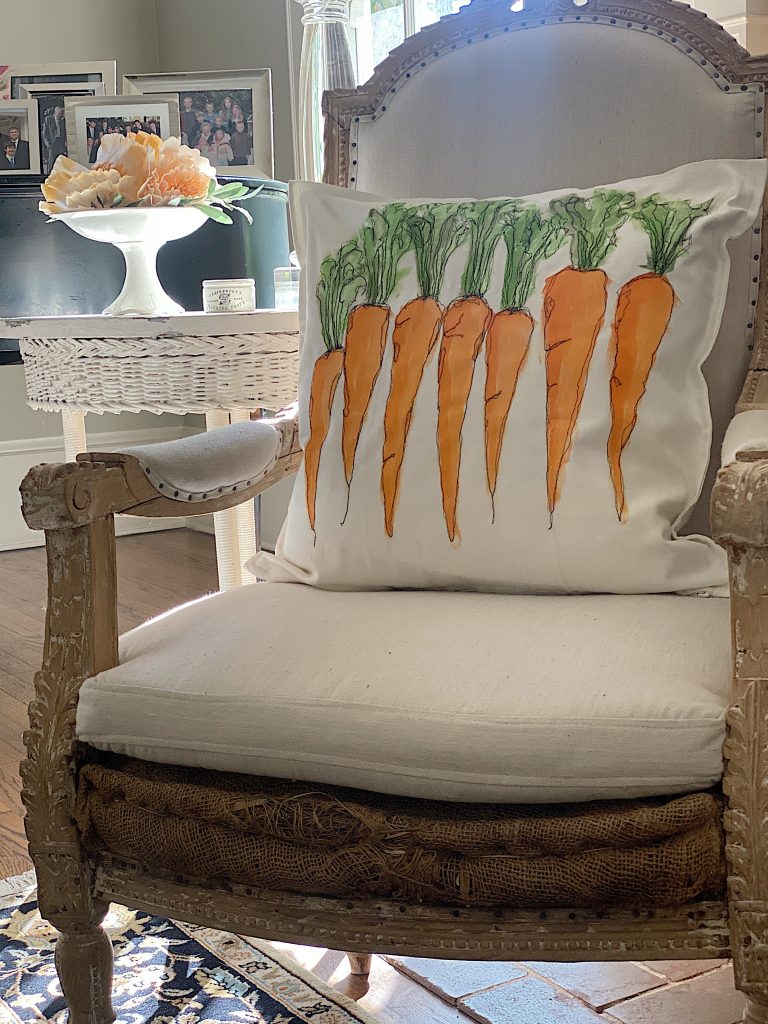
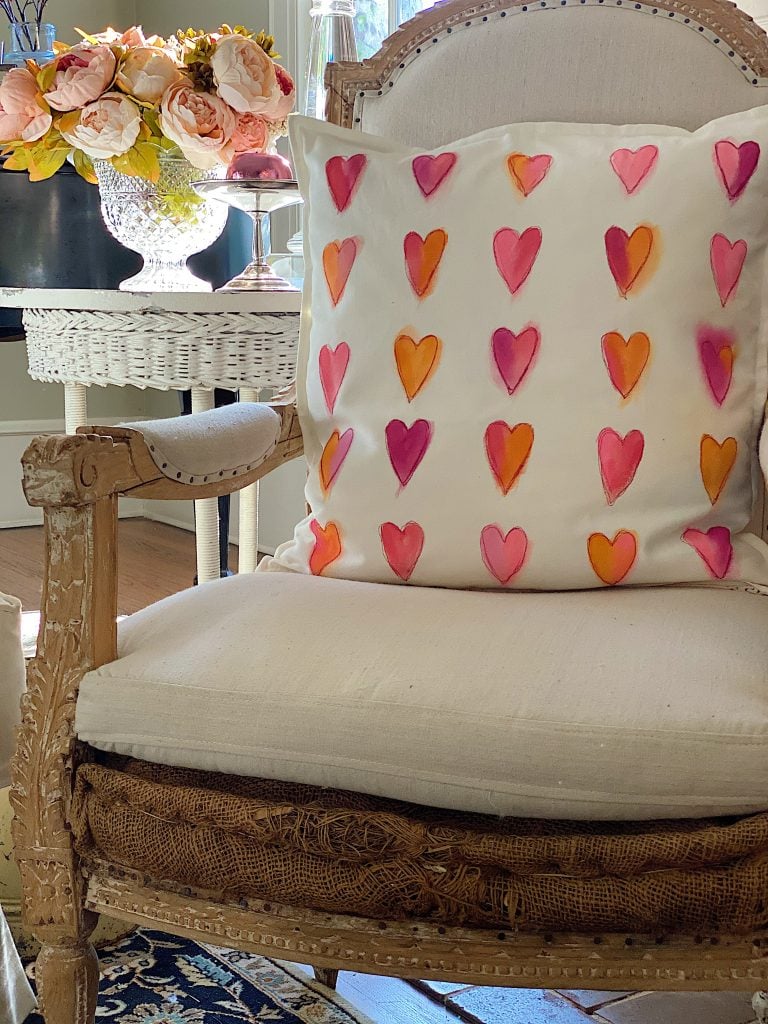
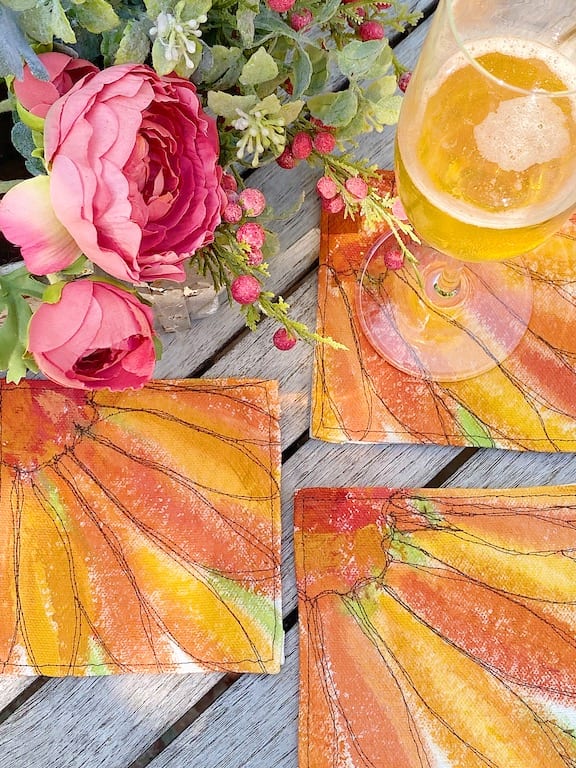
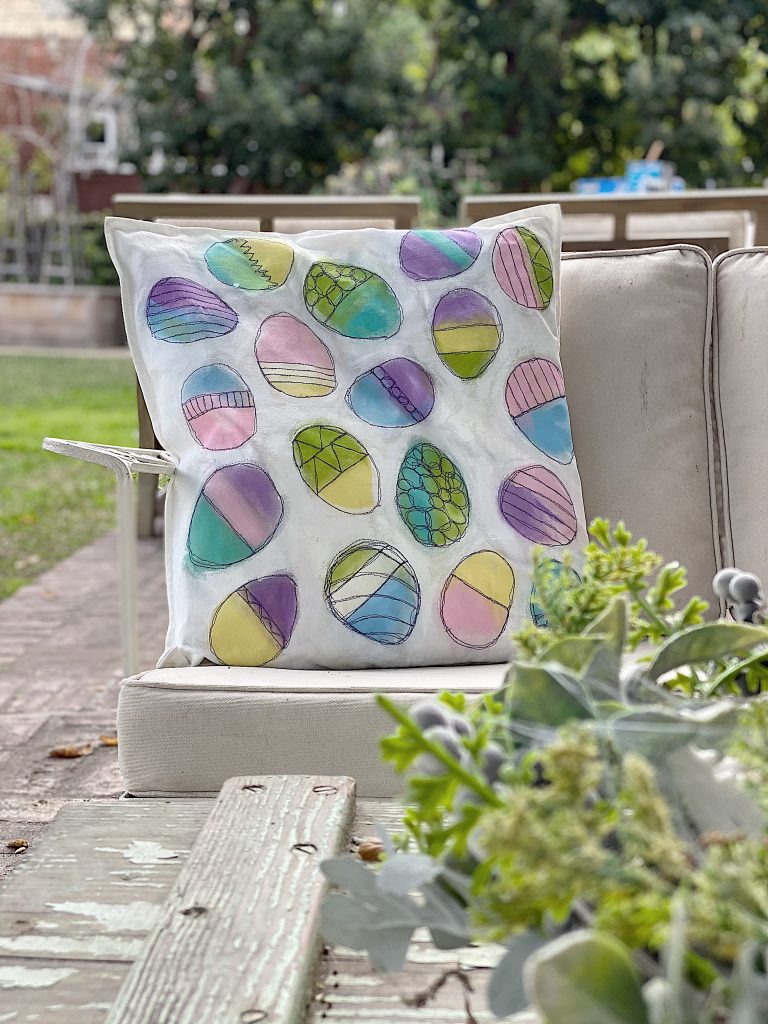
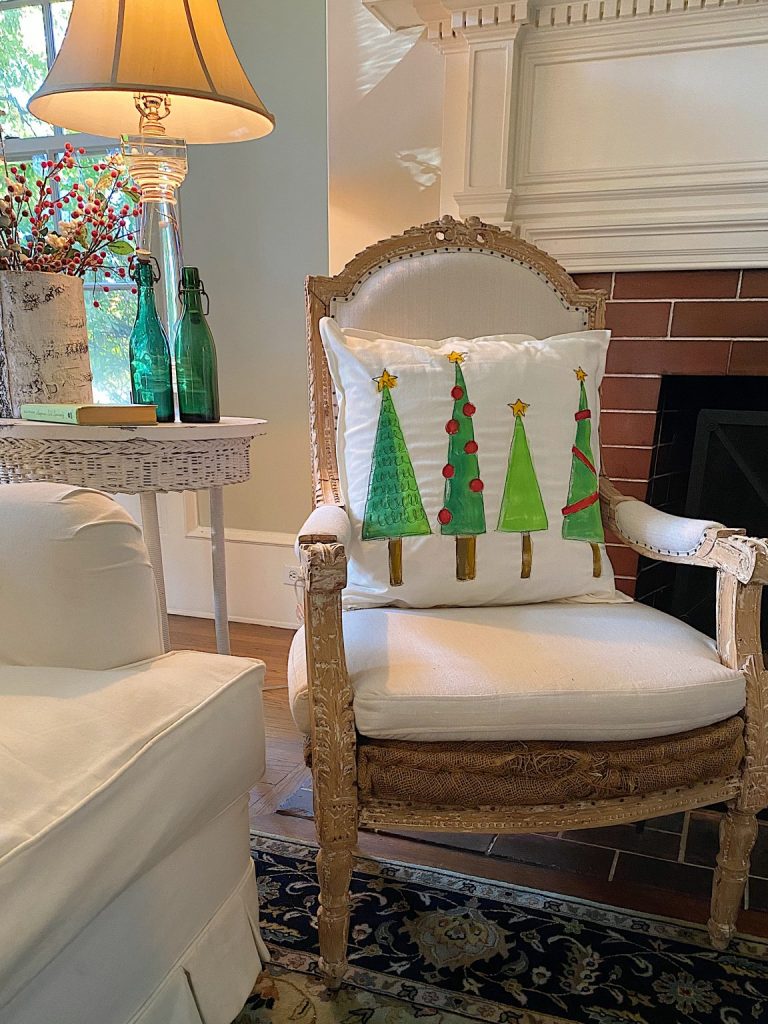
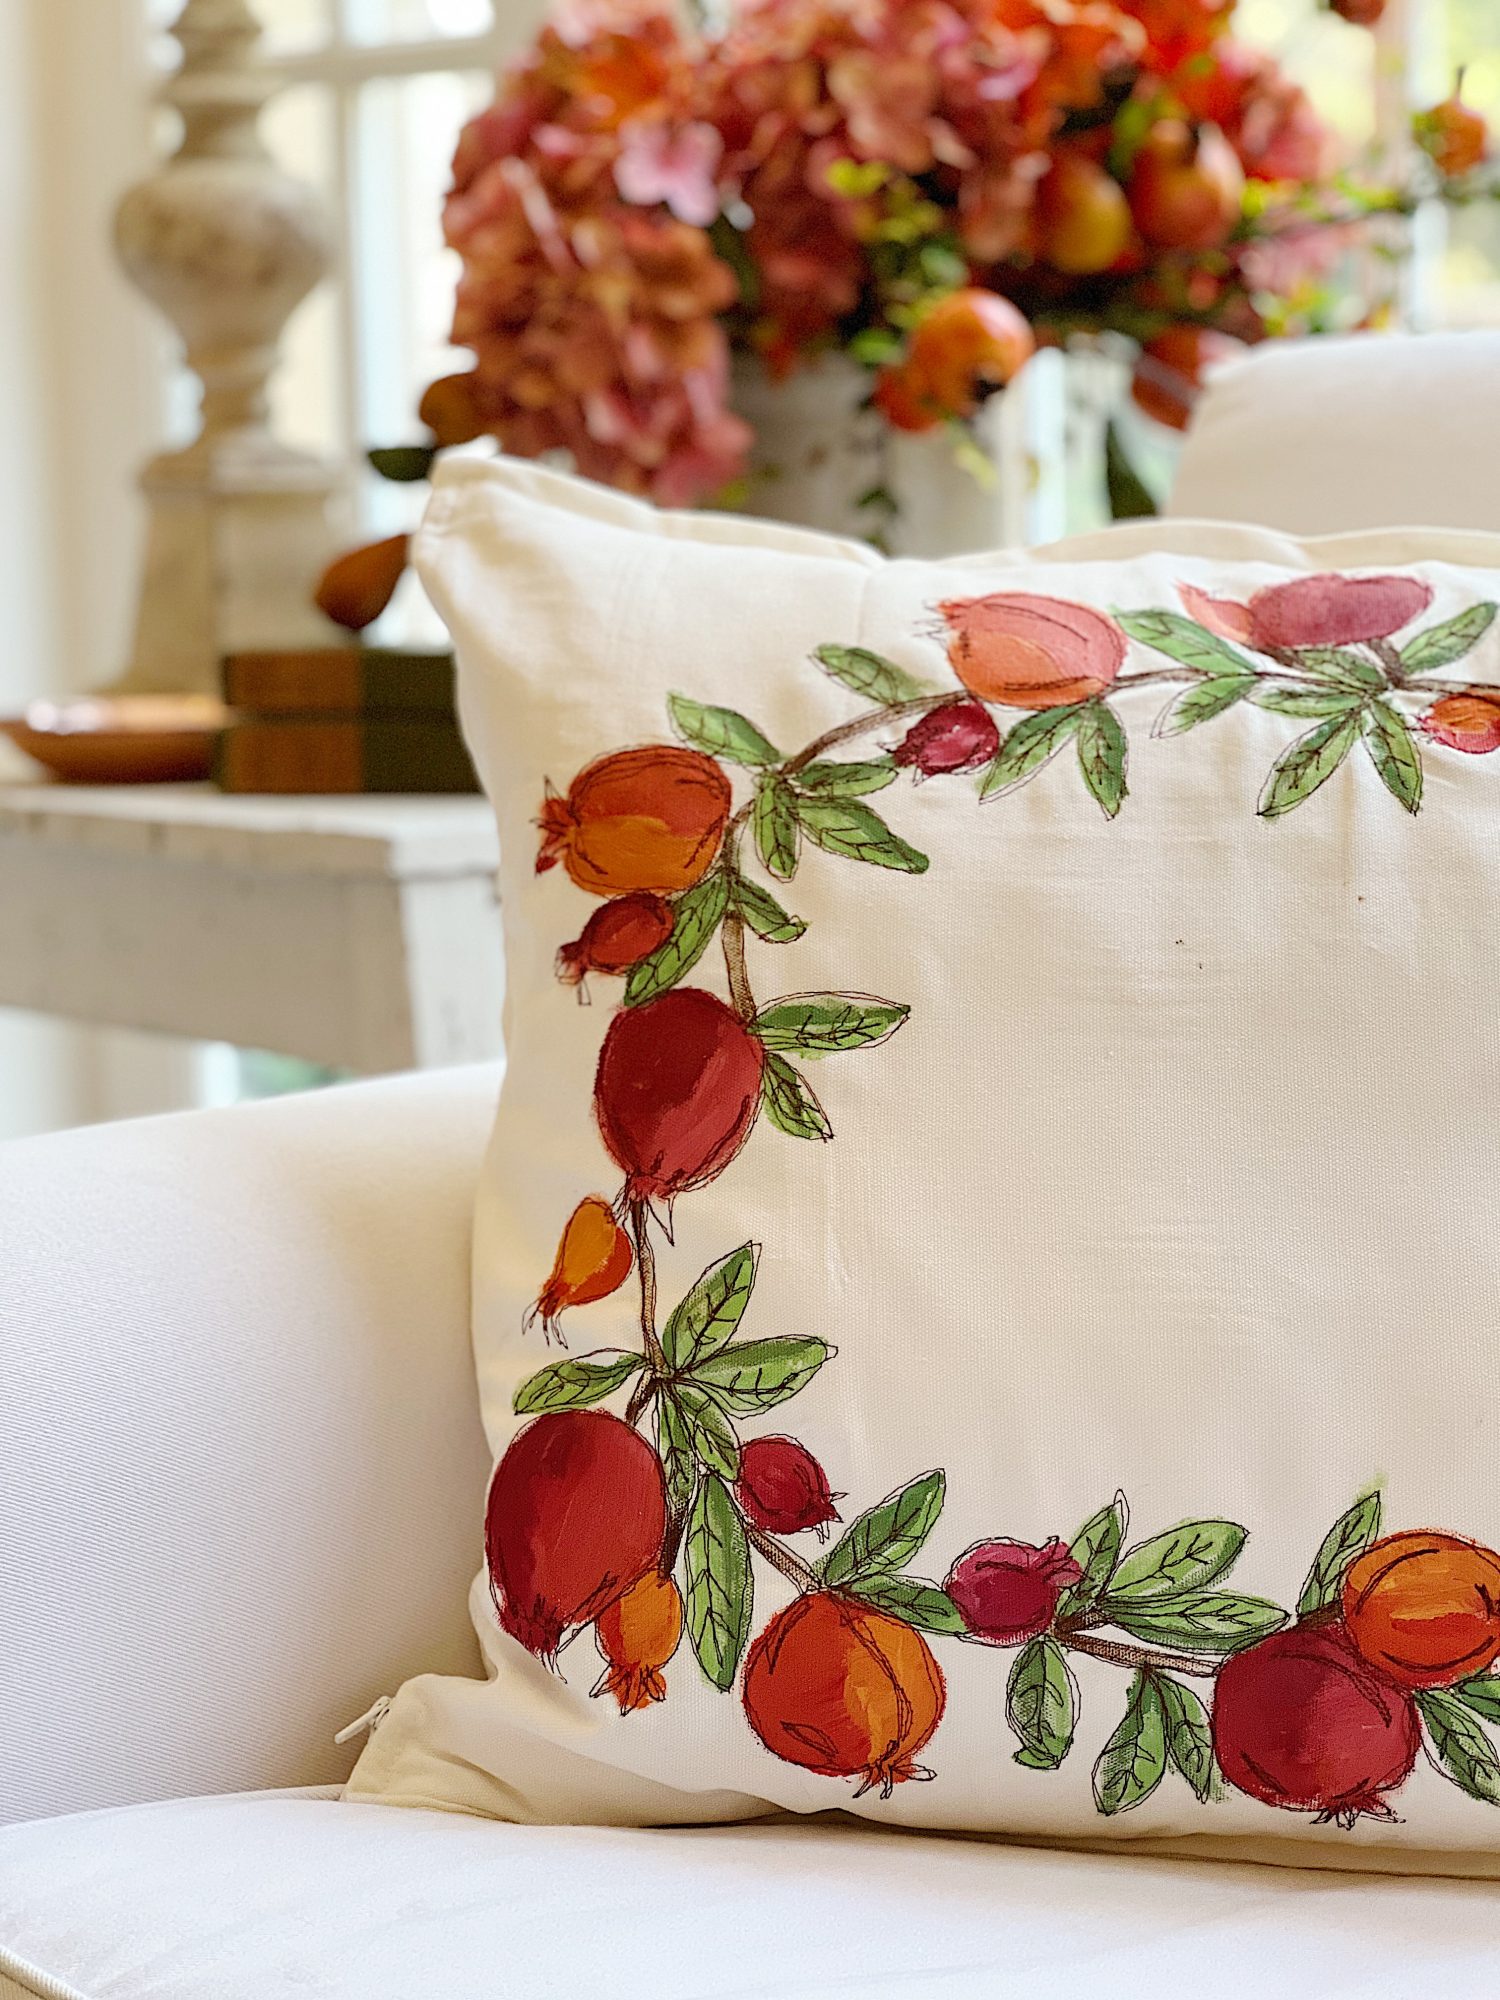
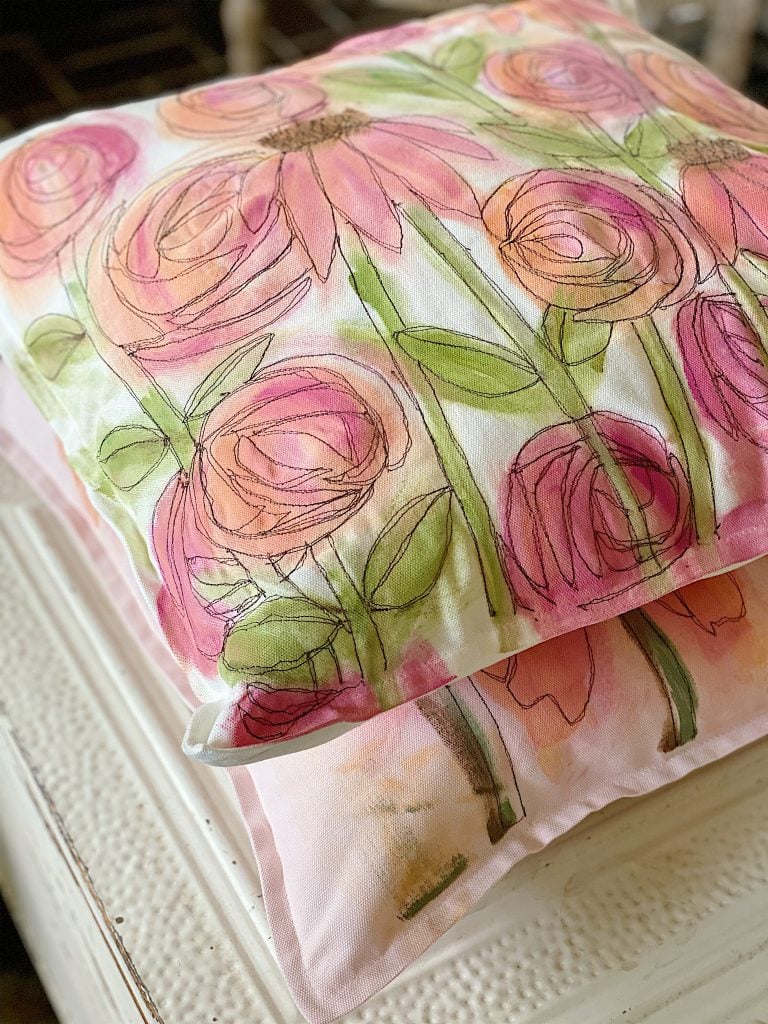
Look at the Stitch Embroidery Projects I Have Made
In the past year or so, I have made quite a few Free Stitch Embroidery projects including pillows, placemats, and coasters.


Pin the image below to your decor boards on Pinterest (just click the Pin button in the top left corner). You can also follow along with me on Pinterest!

For more real-time updates, follow me on Instagram @My100YearOldHome

Love the pumpkin pillow!!!!!
Thanks Renee!
Do you seal the paint by ironing it? If so do you iron directly on the painted side of turn it inside out? Is it then washable? Many thanks.
So Cute! All of your pillows are so cute. Thank you for sharing.
Thank you so much, Rebecca!
Love your Pillow Covers! Can you please tell me the name of the Sewing machine you use, and your embroidery machine? Is there anything else you use for sewing crafts or projects?
Thank you so much!
Michele
Love this pillow 🎃
Thanks!
I love all the pillows you make! As hinted at before…I would buy most of them in a minute:)
Being older with a very large home and yard and various remodeling, decorating, and cooking projects just do not have the energy to craft these. Enjoy seeing your projects though.
I totally understand. I am happy you are enjoying. Thanks for your support, Jillian!
This is the cutest pillow. Thank you for such a neat tutorial! How are you able to free motion stitch with just one side (zipper side) open? Are you slipping it over a free arm sewing machine? Also, same question as Jackie above- does the paint set after ironing – is it washable?
OK! This is the cutest and I’ve loved all of your free arm sewing pillow ideas so I just ordered the presser foot for my machine. Looks like this weekend I’ll be making my pillows.
Did you paint the pillow in the back? I like the colors combo for these two together!
I love all your free motion embroidery pillows. When you iron the pillow, do you turn the cover inside out so you’re not ironing directly on the painted side?
So cute!!
Thanks Theda!
Very cute Leslie.
Thank you Rachel!
I really like the flower pillow that’s picture with the pumpkin pillow . how did you create those flowers?
Love all the pillow . Do u sell them ?
I do not. I am so glad you like them!
Lovely! I’m with you on the Fall vs Halloween decorating, but your pumpkins seem to bridge the gap. Great tip on the marker instead of sewing too – that brings the project into the realm of the possible for me. 🙂 Thanks as always for your wonderful ideas!
Glad to help! Thank you so much Barbara!
Oh, my goodness! How I love this one! You always inspire me! I HAVE to try my hand at it!
I hope you enjoy!
Leslie you just keep in keeping in! I have saved 7 special scatterback pillows from a beloved loveseat that was my husbands grandparents. I tried to take them to Goodwill but they don’t take pillows. I was disappointed but so glad I took time to read your post and now I know what I’m going to do! Love your technique and I’m going to try the fabric marker until I get the time and nerve to use my new sewing machine, five years now waiting to start humming!
KC
Oh good, I am so glad to help! Enjoy!
So cute! Free motion sewing is always my favorite and never fails to put a smile on my face!
Thanks you’re the best!
I think you underestimate your artistic ability! These pillows are beautiful! I especially like the pumpkins and the carrots!
Oh you’re too sweet thank you!
did you make the flower pillow behind the pumpkin pillow? i like the big flowers. where do i find instructions? joyce
I made a very similar one! Search “flower pillow” on my blog and it’ll come up!
Just finished my pumpkin pillows! I LOVE them!!! You made it look easy but I had to learn that perfect is real life. Thank you for showing me how!
Of course! I am glad you love them
I made the pillow!!!!! It was so much fun to paint. It looks fabulous and I’m enjoying its fall look. Thank you so much for sharing!
I am so glad you made it!