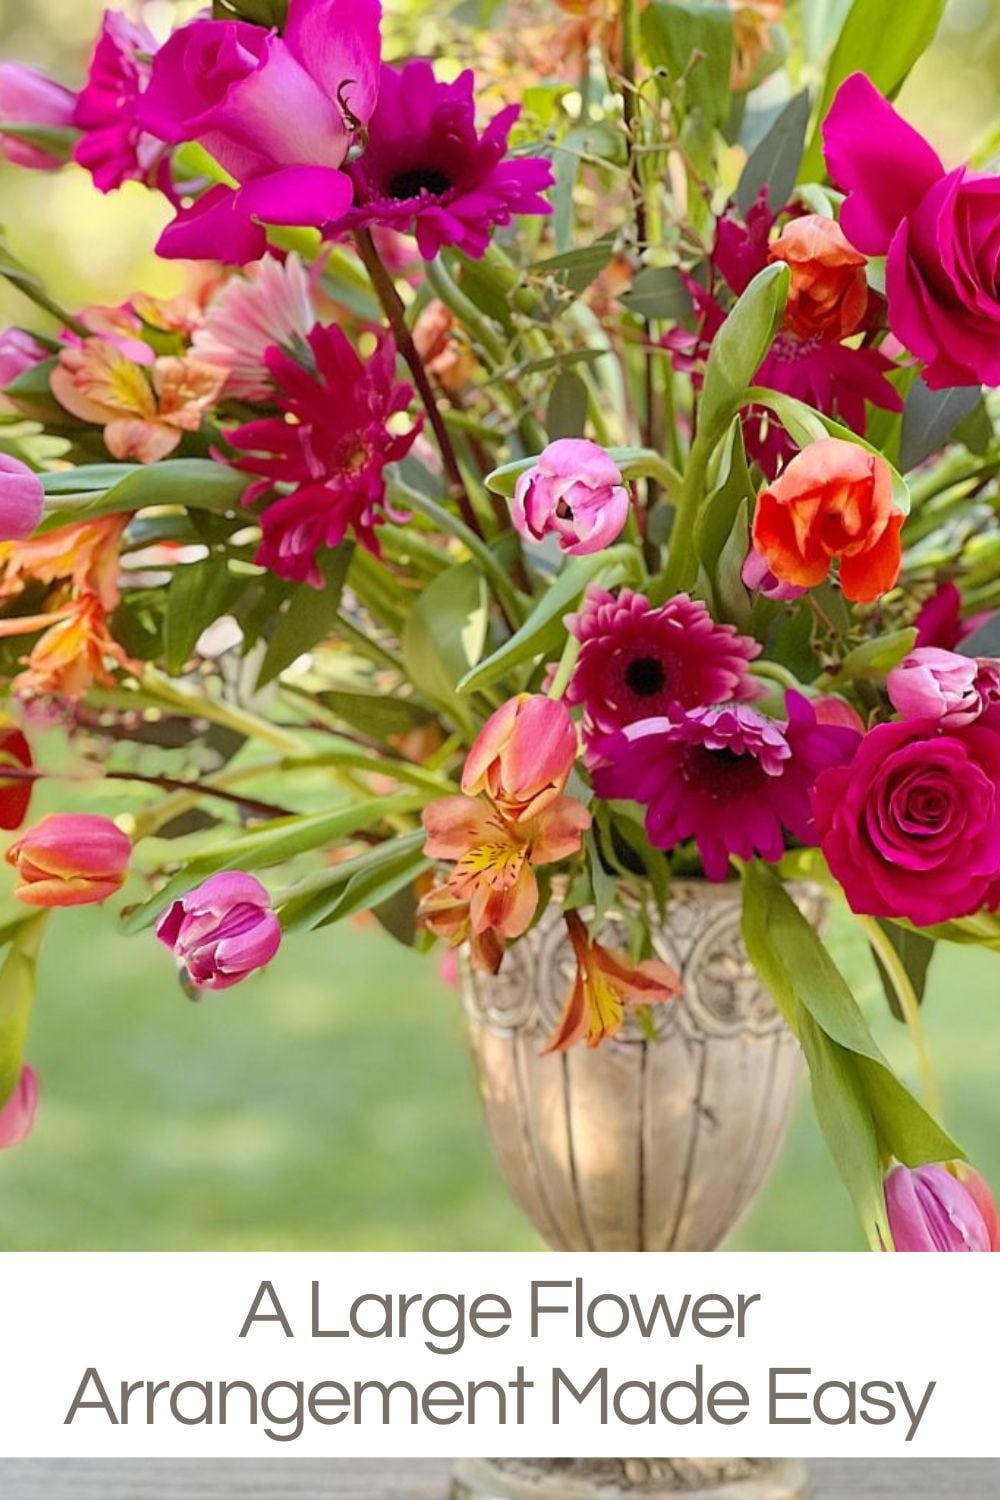
A Large Flower Arrangement Made Easy

A large flower arrangement doesn’t have to be expensive or complex. I will show you how to create one in just a few simple steps.
If you want to spruce up your home décor without spending a fortune, this easy large flower arrangement is perfect! It creates a beautiful display that adds glamour to any space. So, let’s get creative and have fun!


Large flower arrangements have always been impressive to me. Whether I have seen them at an event, a hotel, or a restaurant, they make a huge statement with their presence.
I have always assumed these arrangements were difficult, complicated, and florist-only turf. It would be rude of me to poke around an arrangement to understand how it was created, so I decided to try it and see what I could do on my own.
This post may contain affiliate links, which means a small commission is earned if you purchase via the link. The price will be the same whether you use the affiliate link or go directly to the vendor’s website using a non-affiliate link.
Basics for a Large Flower Arrangement
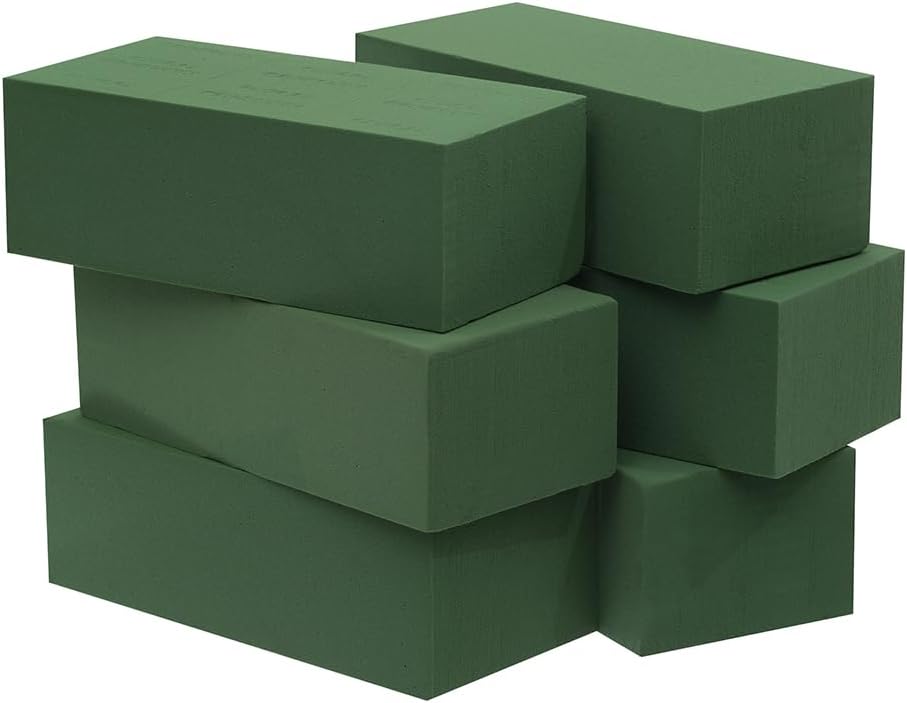
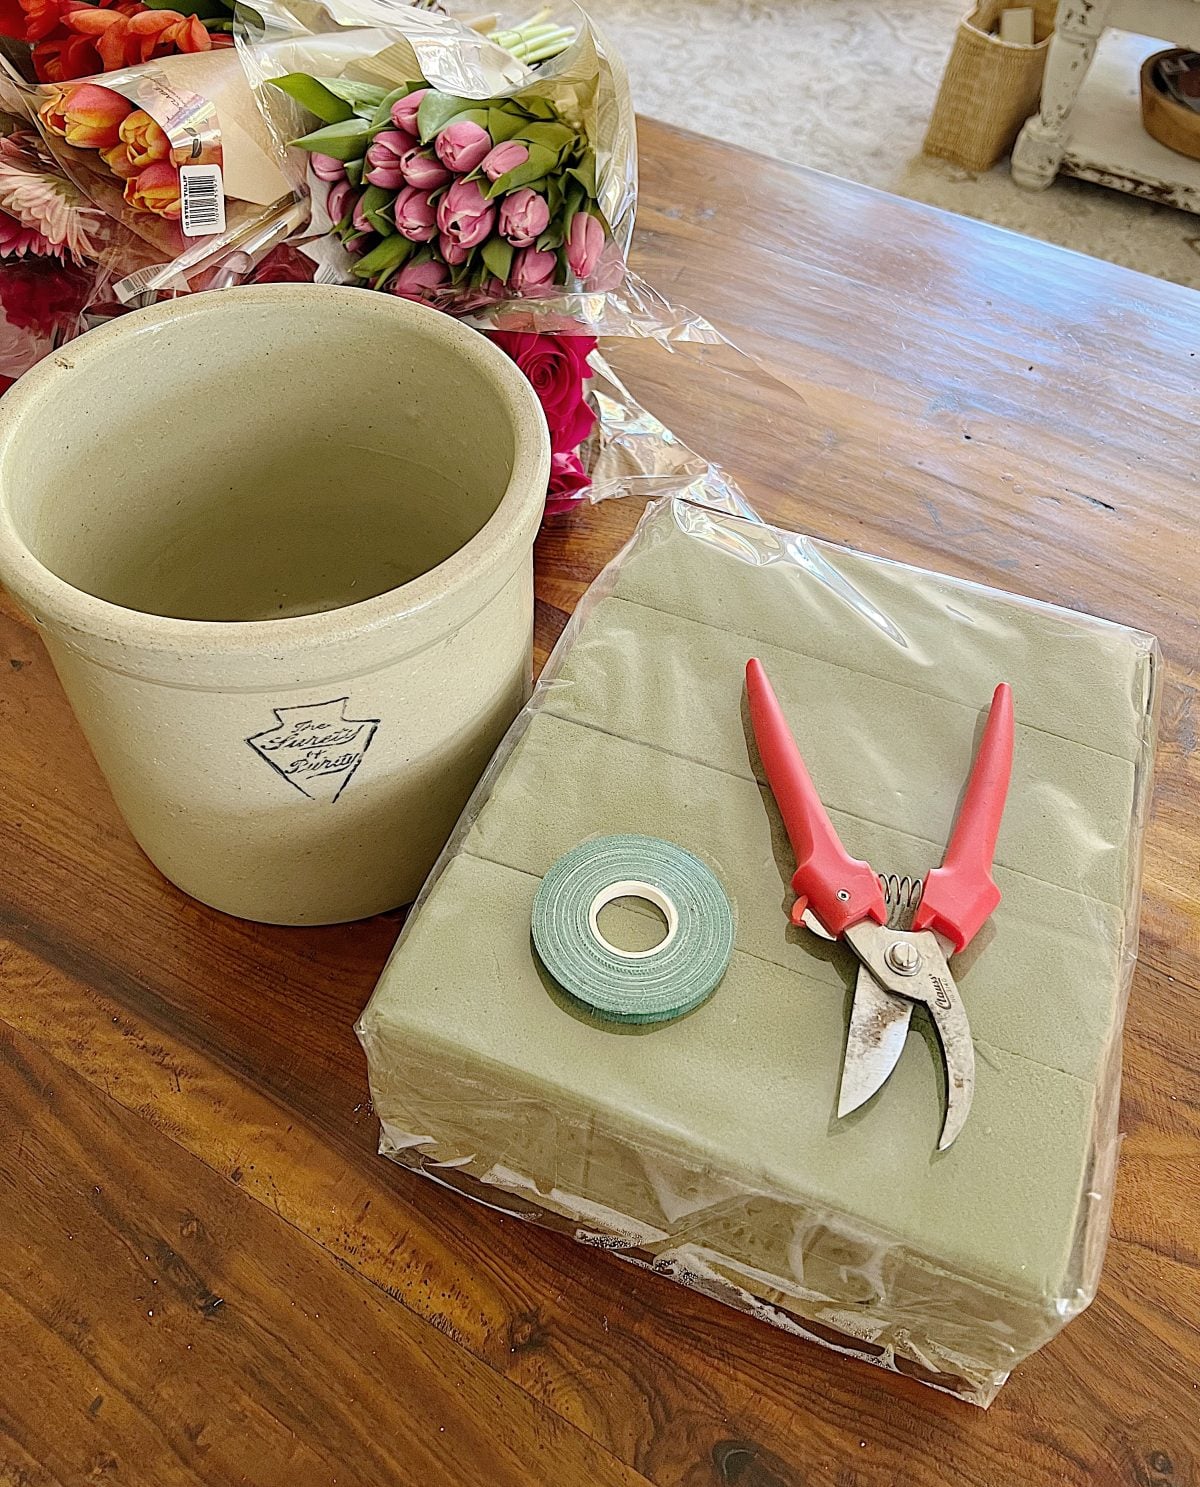
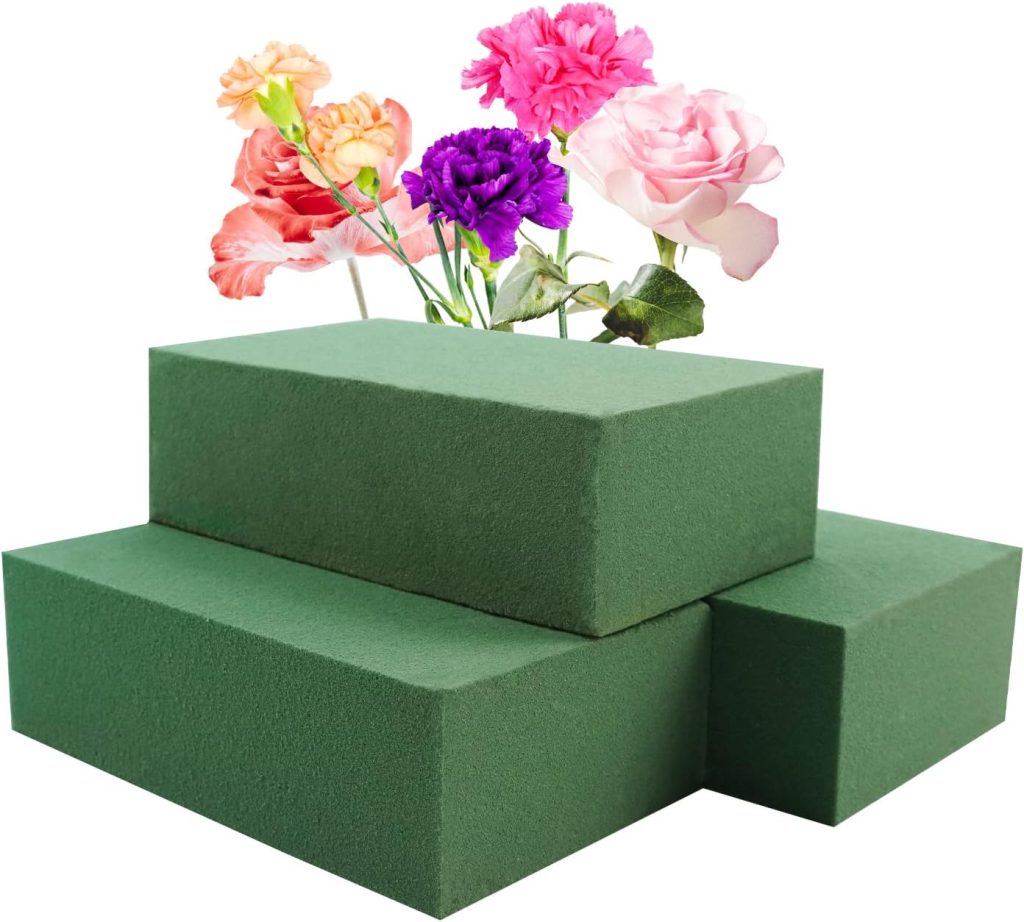
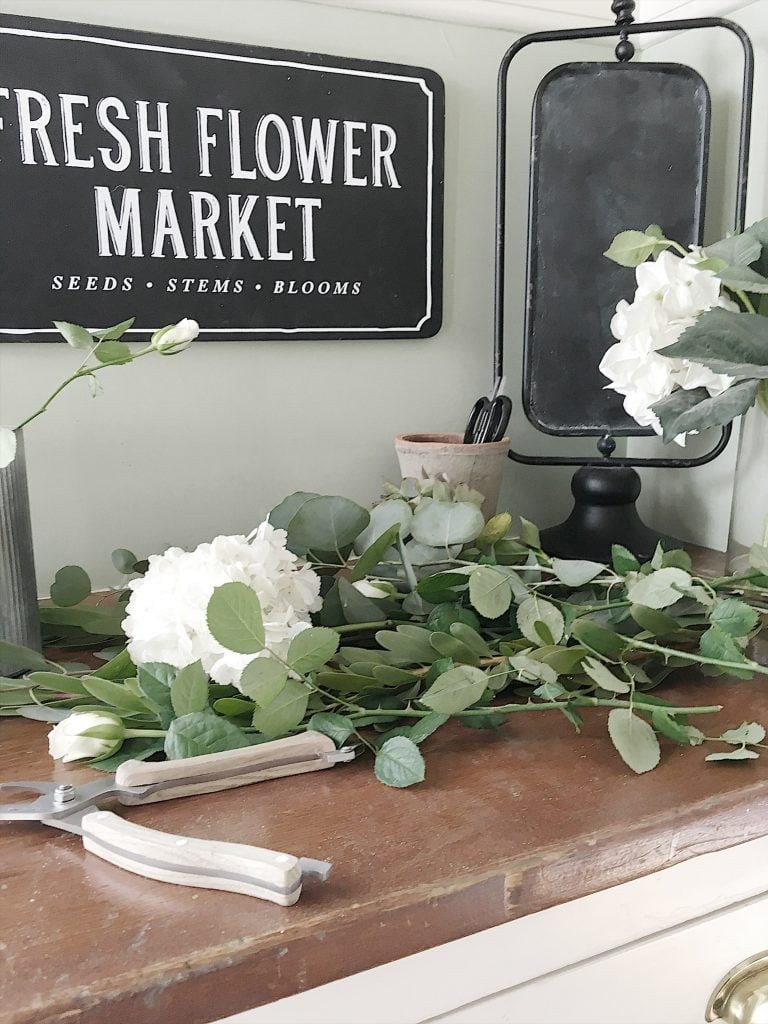
For this project, I wanted to repurpose what I already had and not buy anything new. I keep wet floral foam bricks on hand. I usually use them at the bottom of a vase to help the flowers hold moisture, but for this project, I will use them a little bit differently.
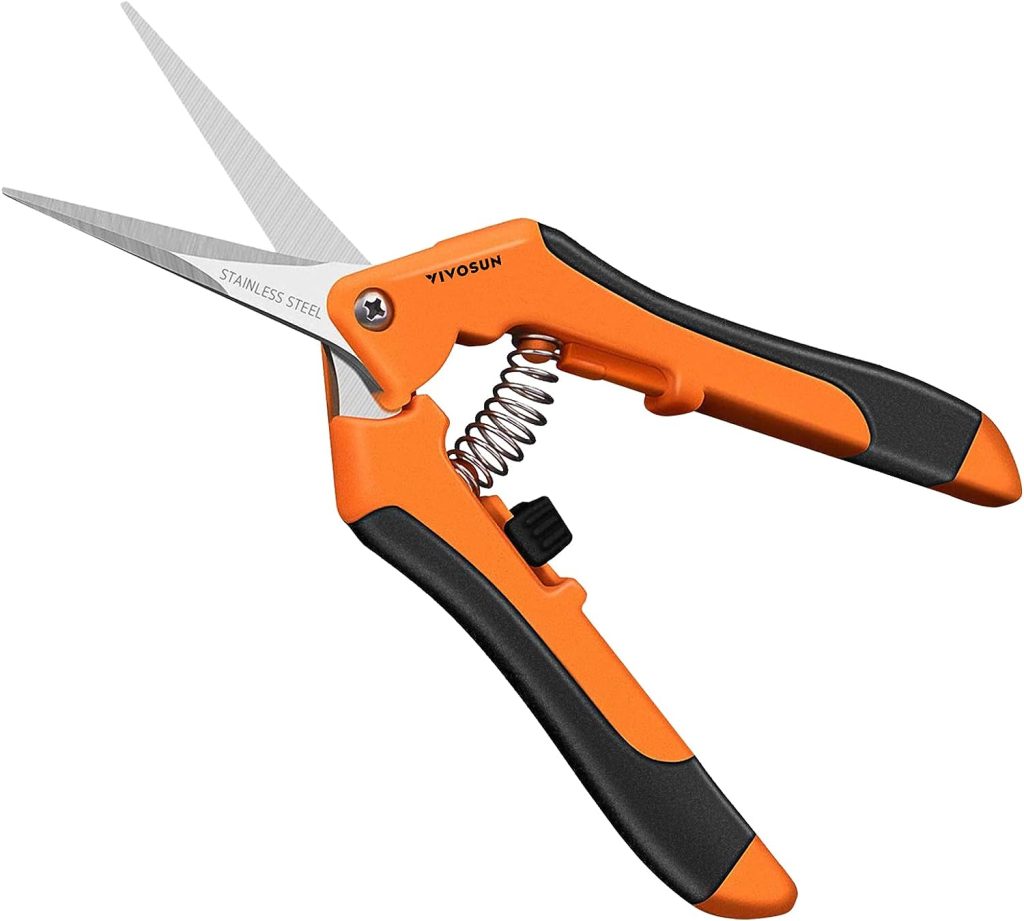
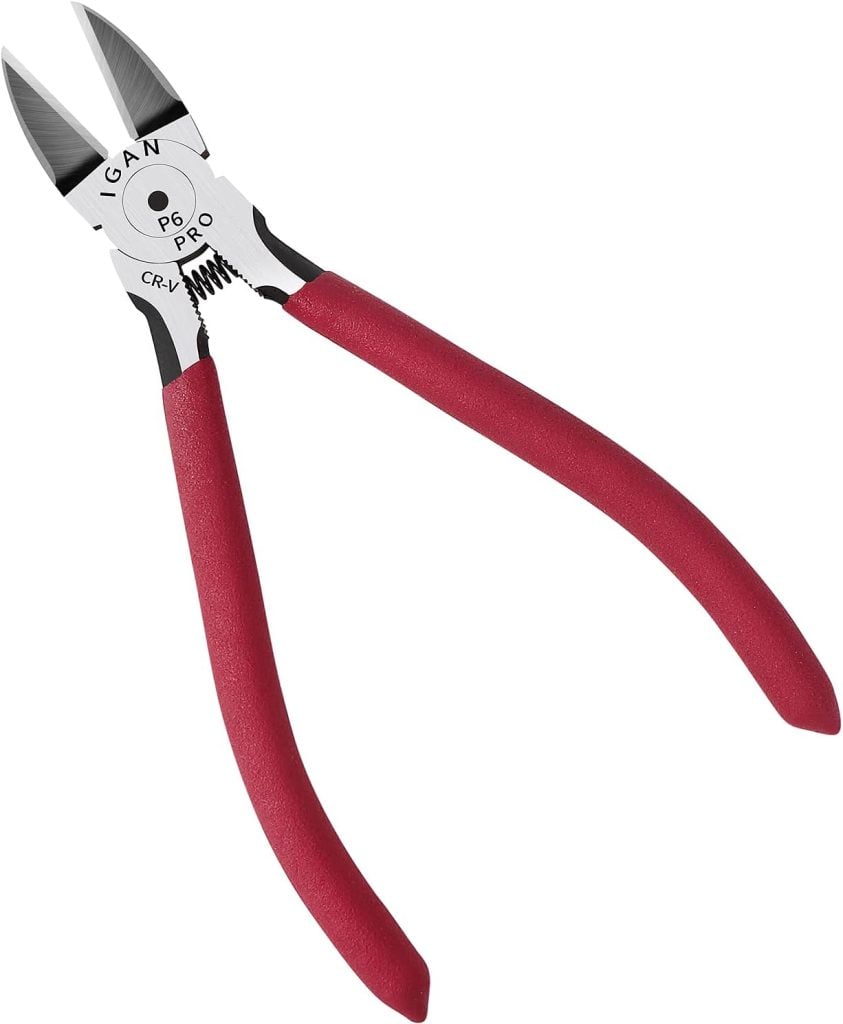
Anytime you work with flowers, you need a good pair of clippers to avoid ruining your scissors. I may or may not know that from personal experience, haha!
How Many Flowers Do You Need to Create This Large Arrangement?
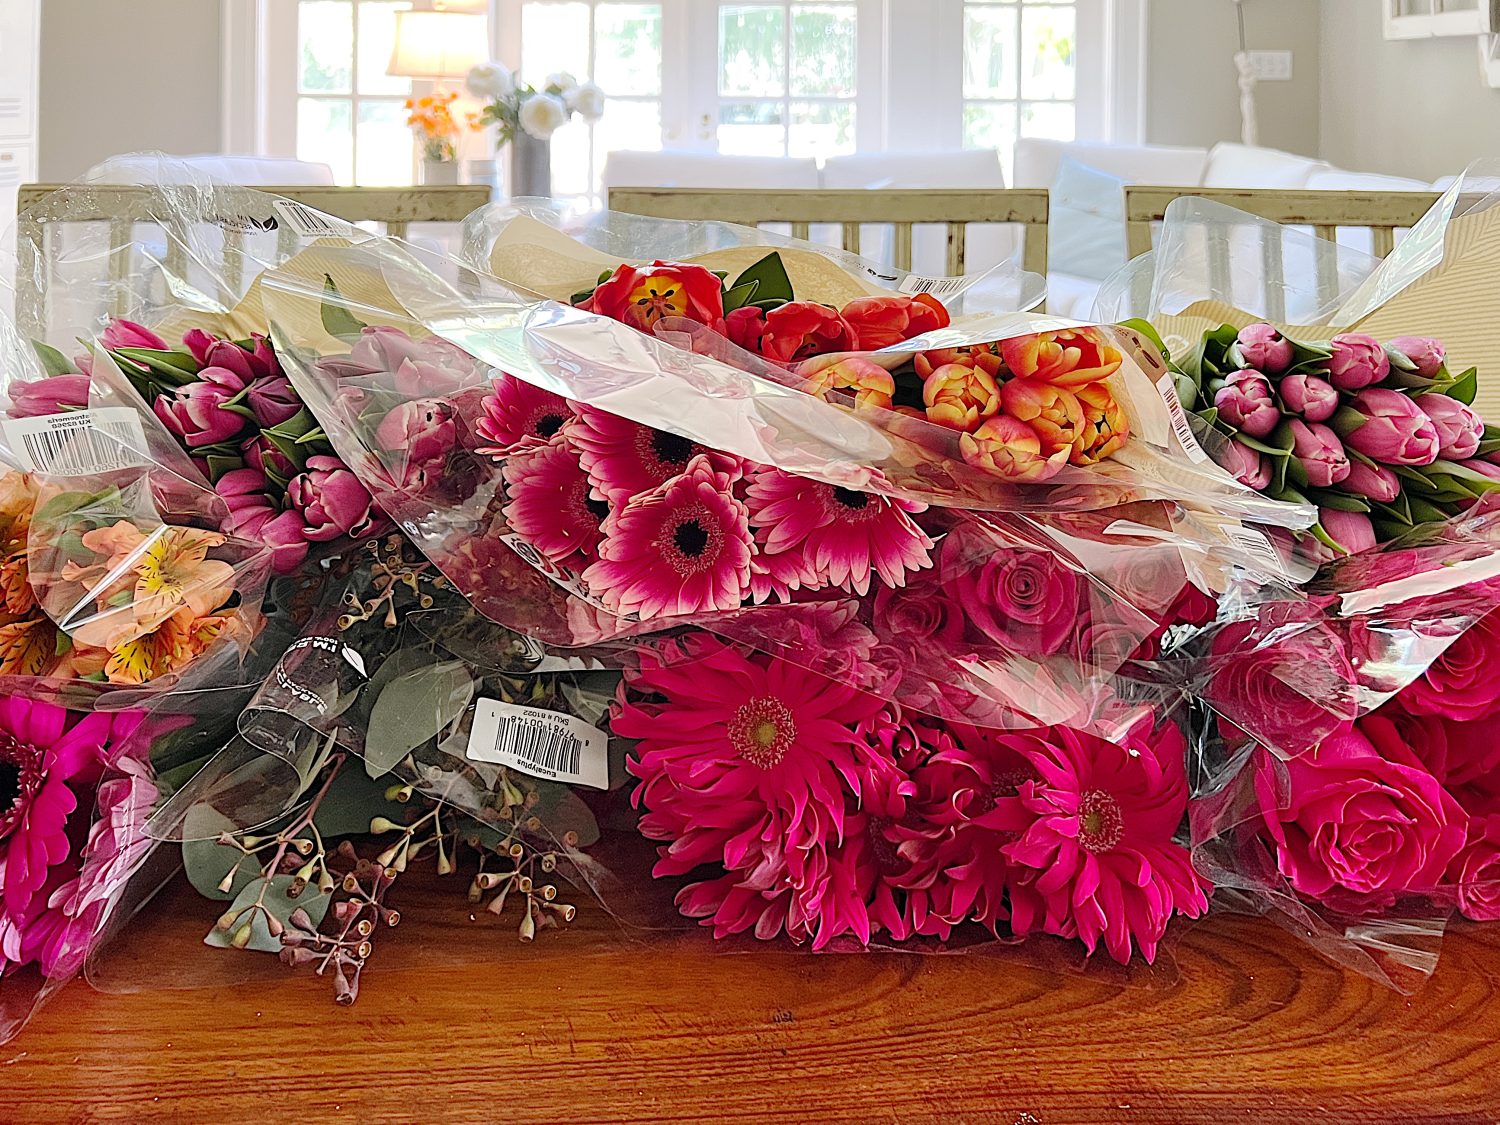
I shopped for flowers at my favorite local grocery market, Trader Joe’s. Their flower selection and prices are incredible. They get a fresh shipment of flowers each morning, so I was there at 8:00 a.m. when they opened.
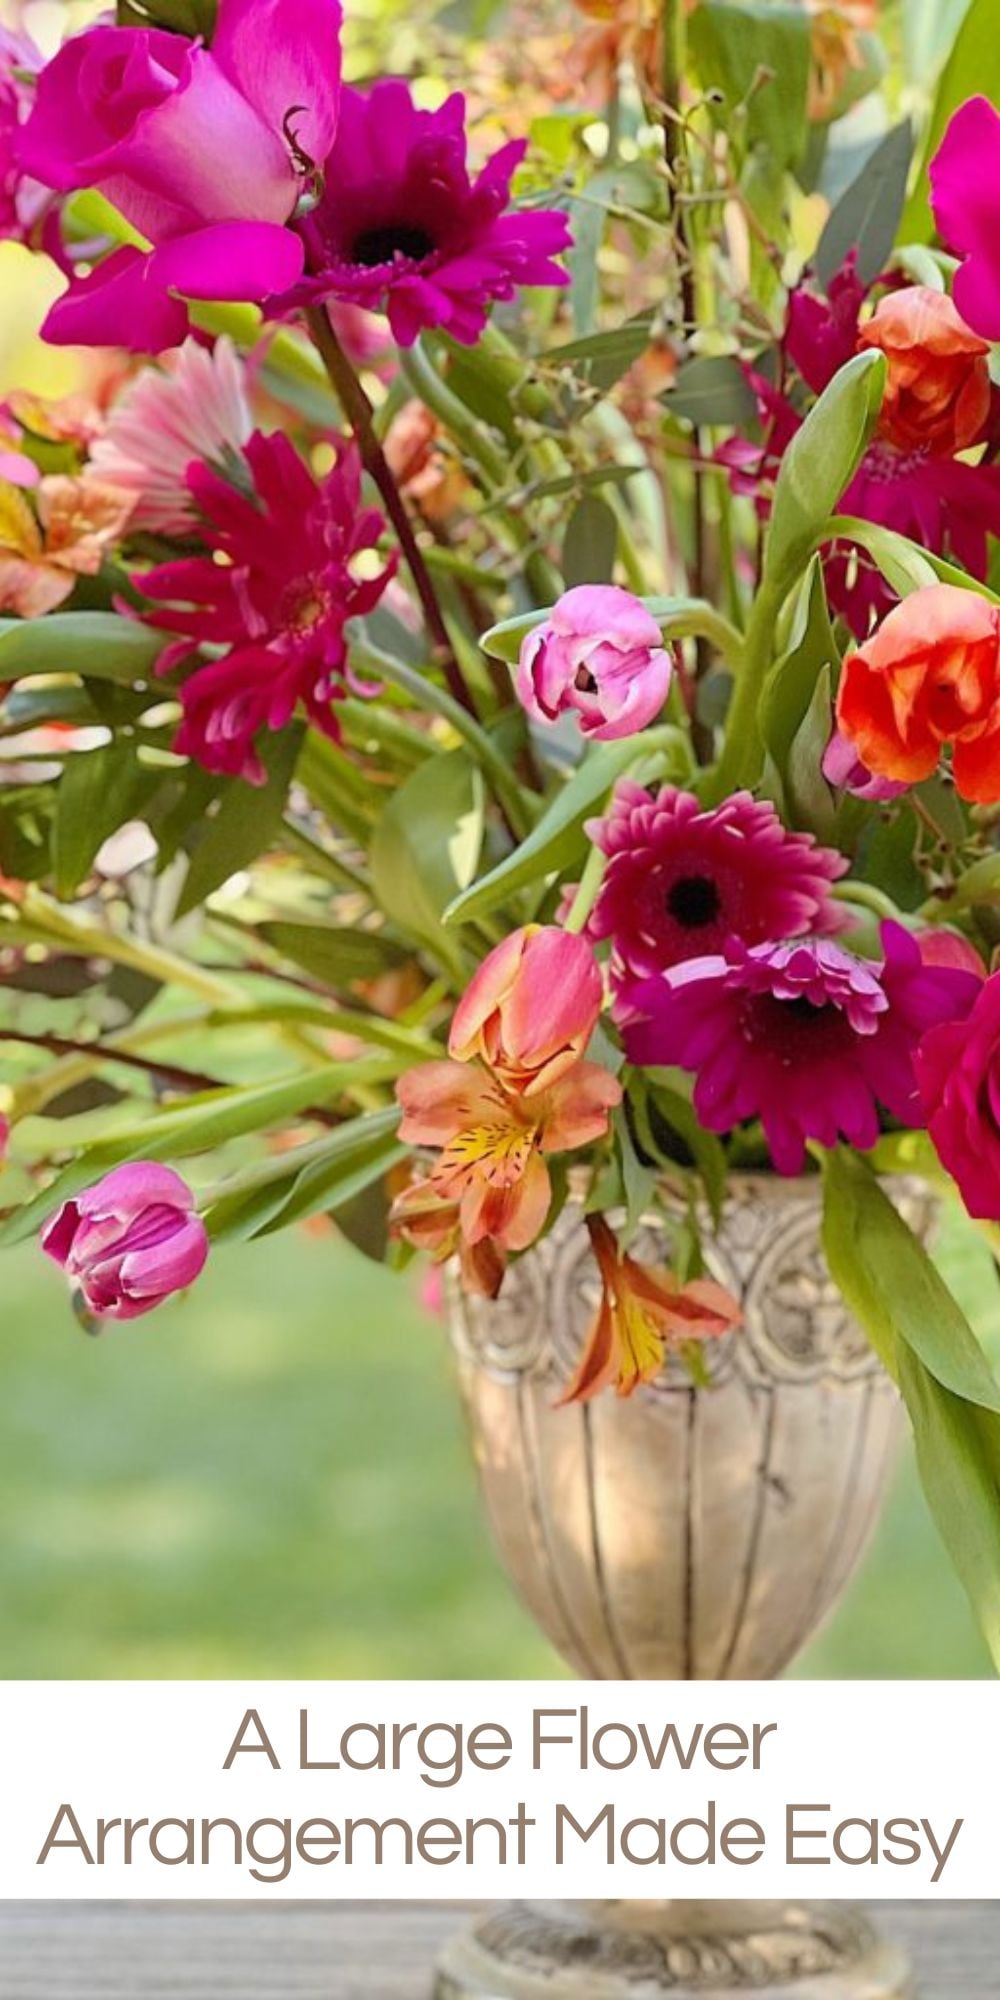
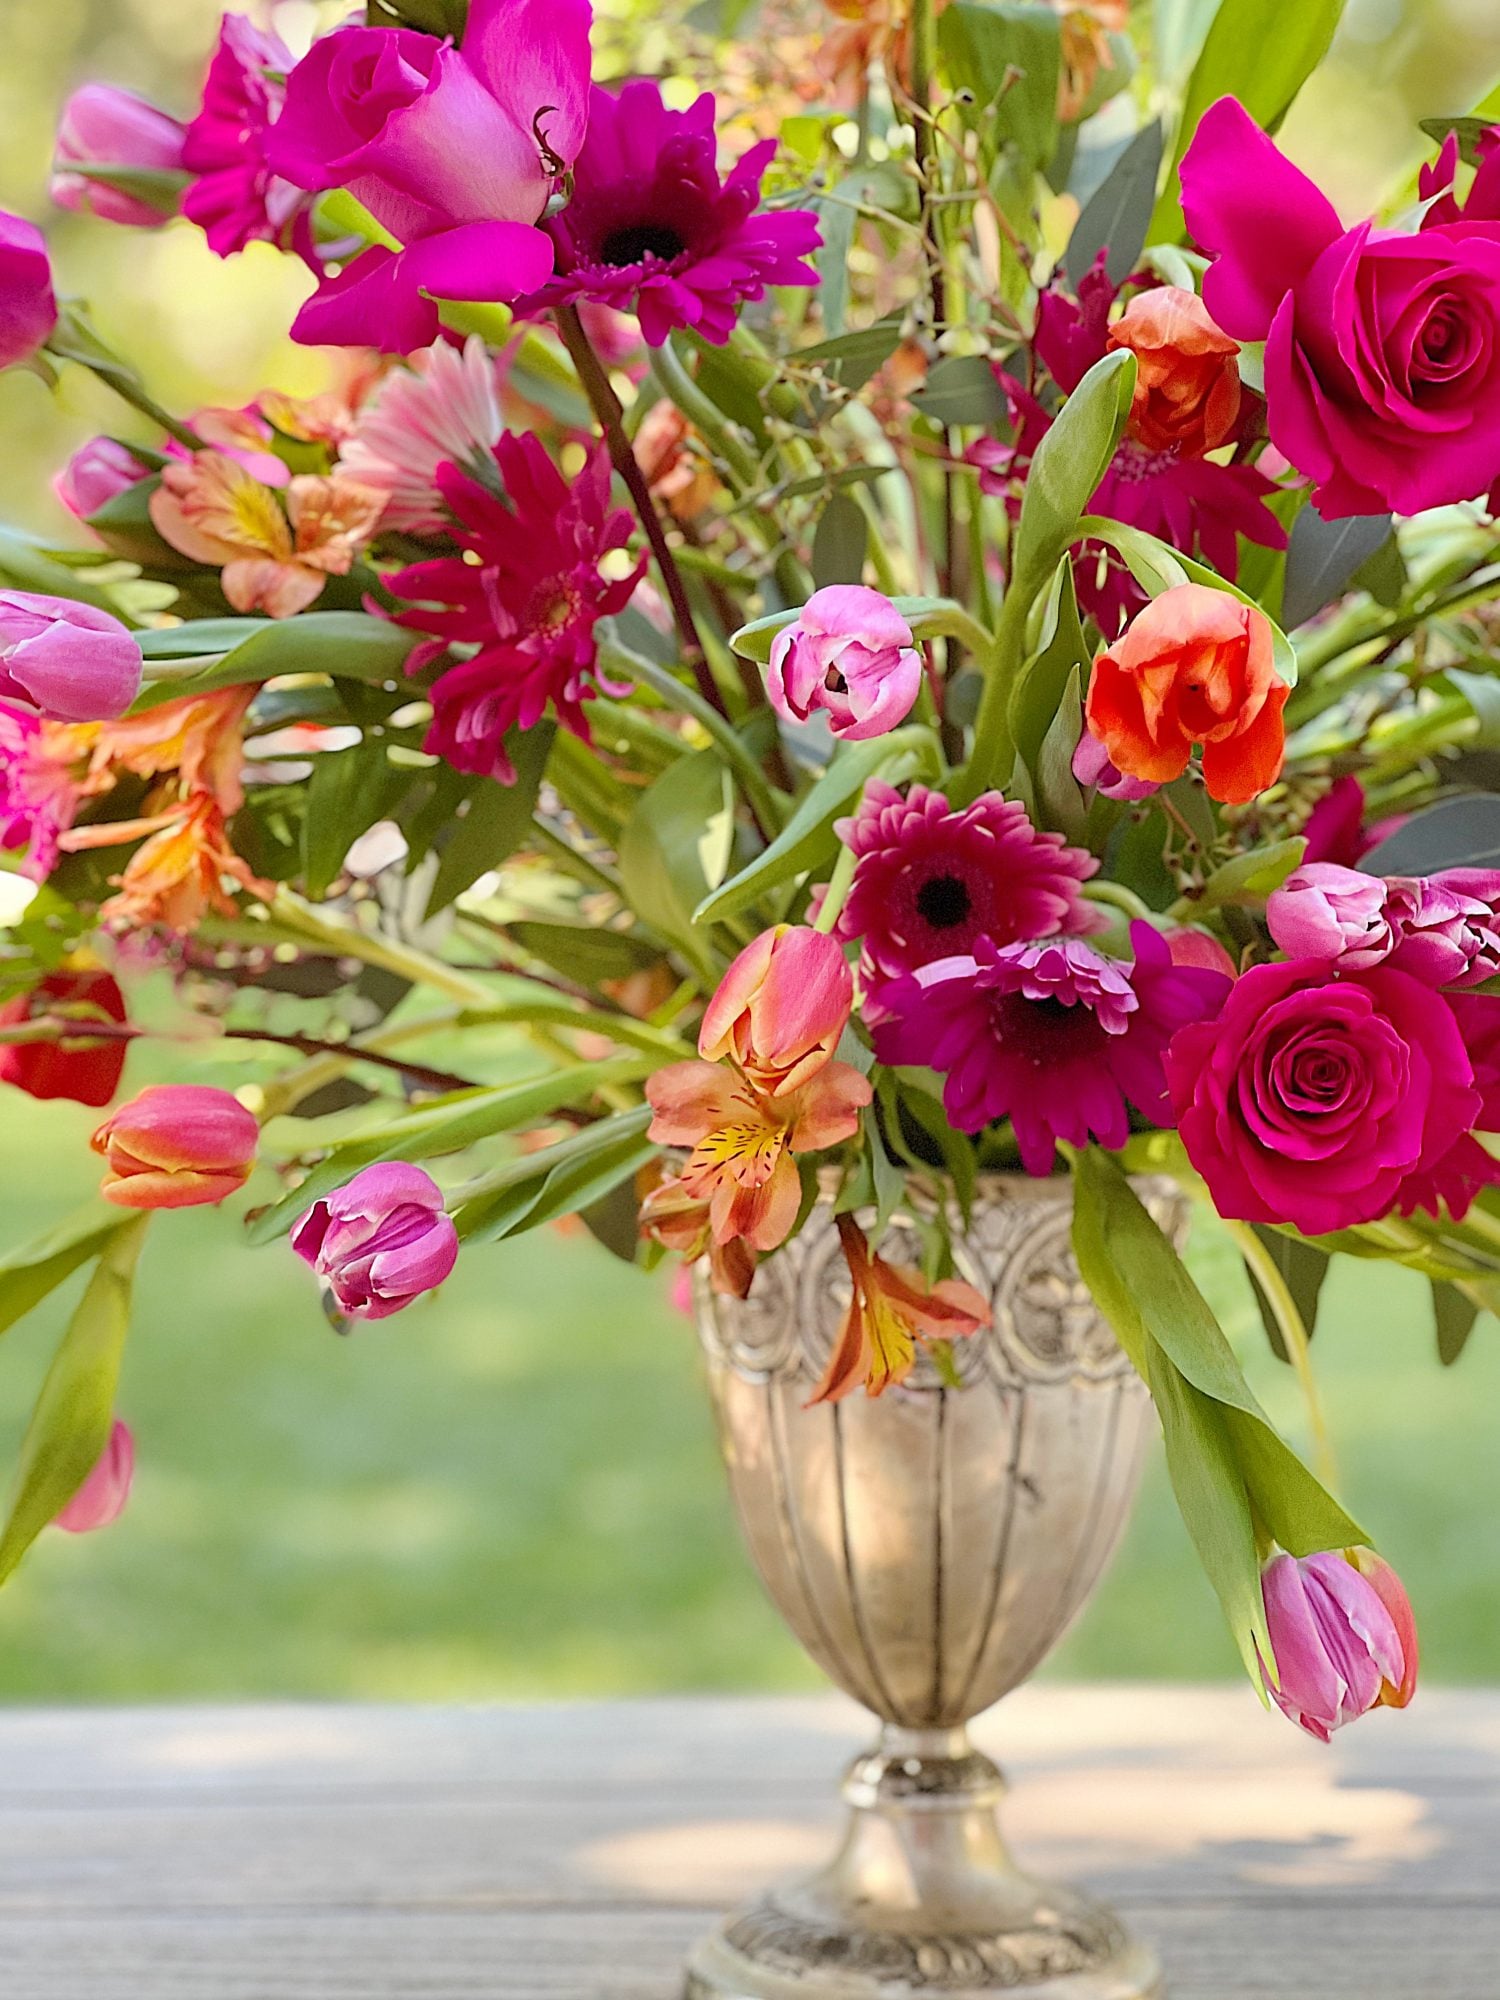
They had some beautiful dark pink roses, so I got two dozen. The roses’ strong stems will create the structure for the arrangement.
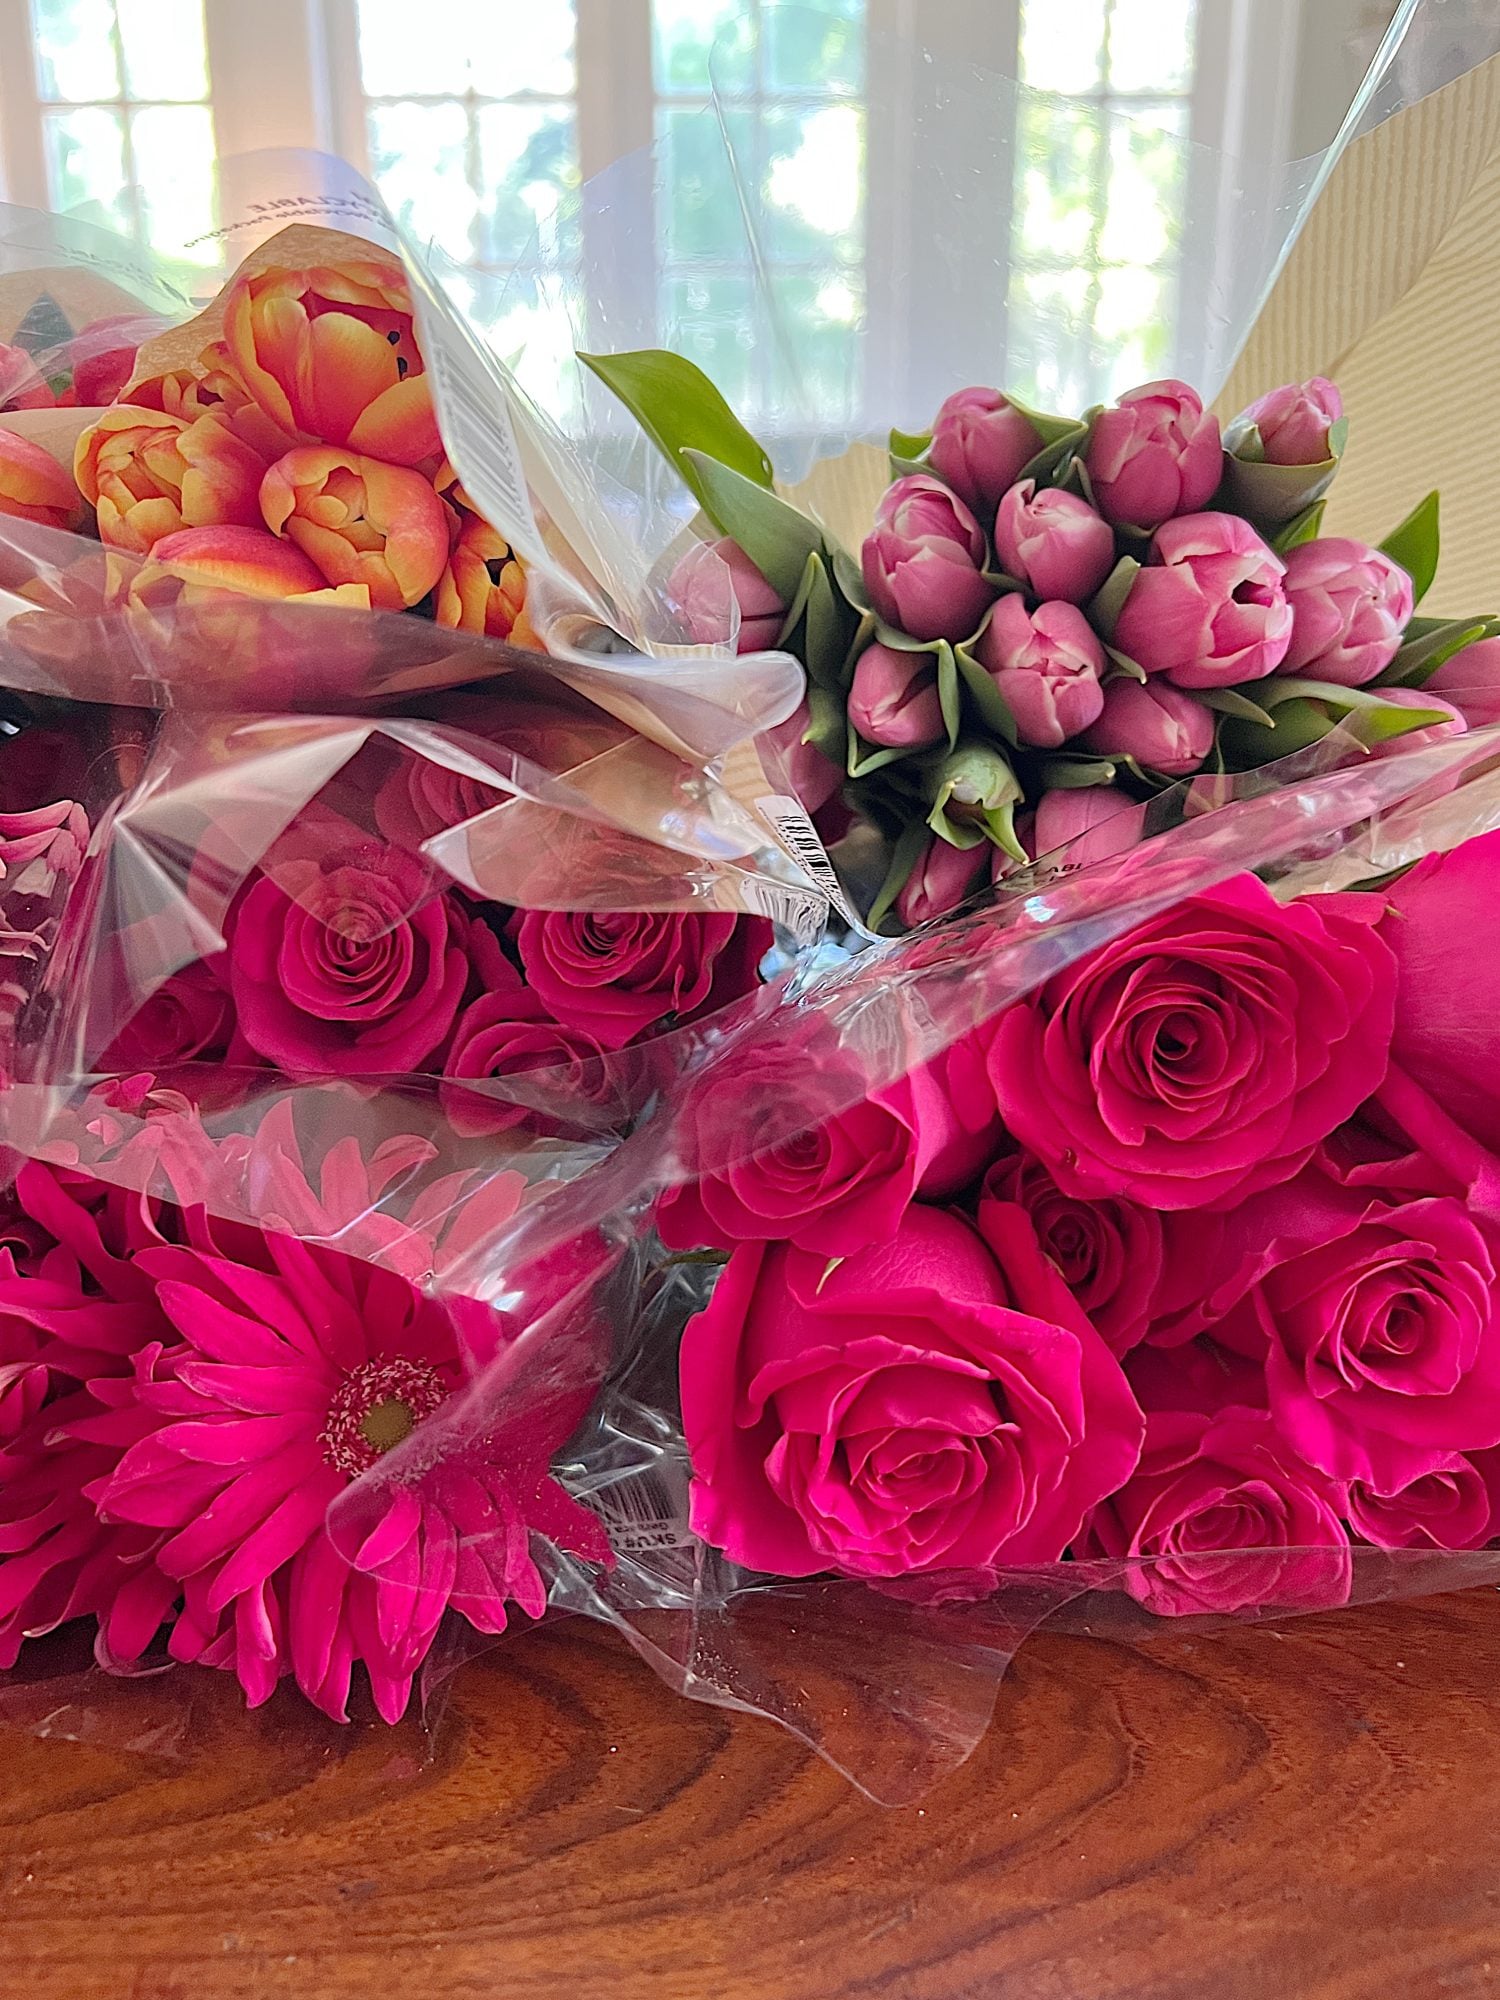
The tulip selection was quite fantastic. They had a rainbow of colors to choose from, so I got pink, darker pink, and orange. Each of the tulip bunches contained 18 tulips, so I got one each of the pink and darker pink tulips and two bunches of the orange tulips. I chose tulips because they have a lovely drapey quality that I thought would be perfect for this large arrangement.
Next, I had to decide on filler flowers. These flowers augment the colors of the arrangement and fill in spaces to create a full arrangement. I chose one bunch (10 stems) of orange alstroemeria and three bunches of gerbera daisies, pink, light pink, and darker pink. Each bunch had ten stems.
I also got two bunches of seeded eucalyptus in case I needed additional filler.
- 2 Dozen Dark Pink Roses
- 1 Bunch (18) Pink Tulips
- 1 Bunch (18) Darker Pink Tulips
- 2 Bunches (36) Orange Tulips
- 1 Bunch (10) Orange Alstroemeria
- 3 Bunches (30) Gerbera Daisies
- 2 Bunches of Seeded Eucalyptus


Tips I Use When Arranging Flowers
Here are a couple of tips that I use for every floral arrangement I make:
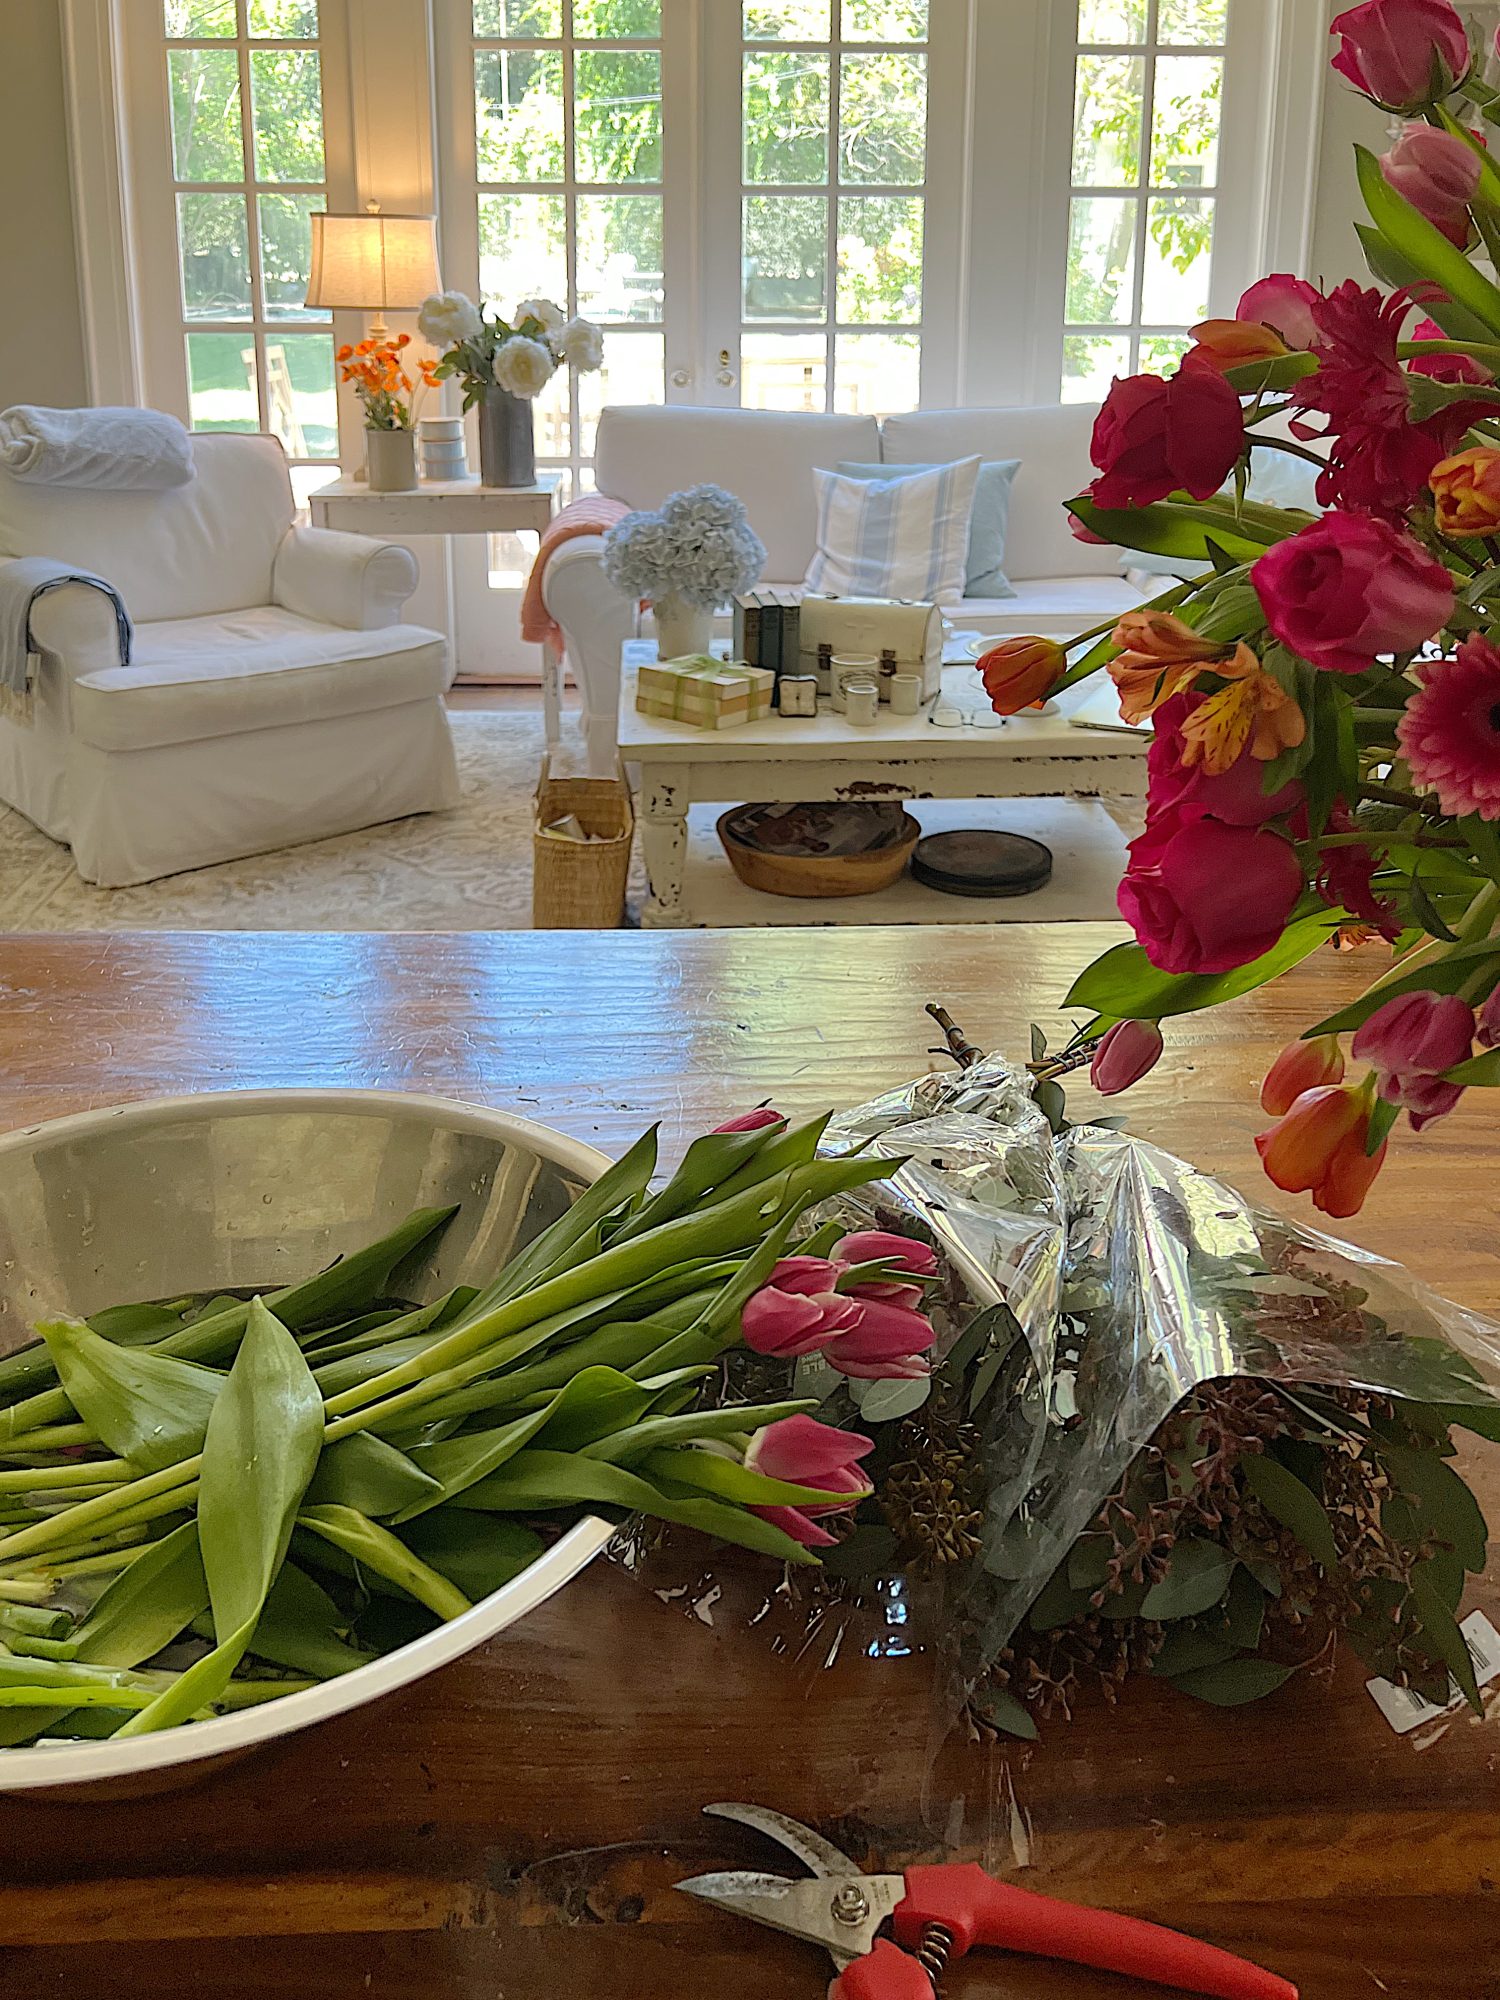
- Always give your stems a fresh snip before arranging them. I read once that you should always cut stems at a 45-degree angle. The reason for this is that it increases the surface area of the stem so that the flower can absorb more water.
- Strip/cut/pull extra leaves. The arrangement concerns the flowers, and leaves tend to clutter it up.
- For roses, I always pull a few of the outer petals. These are known as guard petals. You know the ones I am talking about, as they are a little wilted, maybe even brown and crinkled. This will help your roses stay fresh longer.
What You Need to Make A Large Arrangement
Step-by-Step Instructions
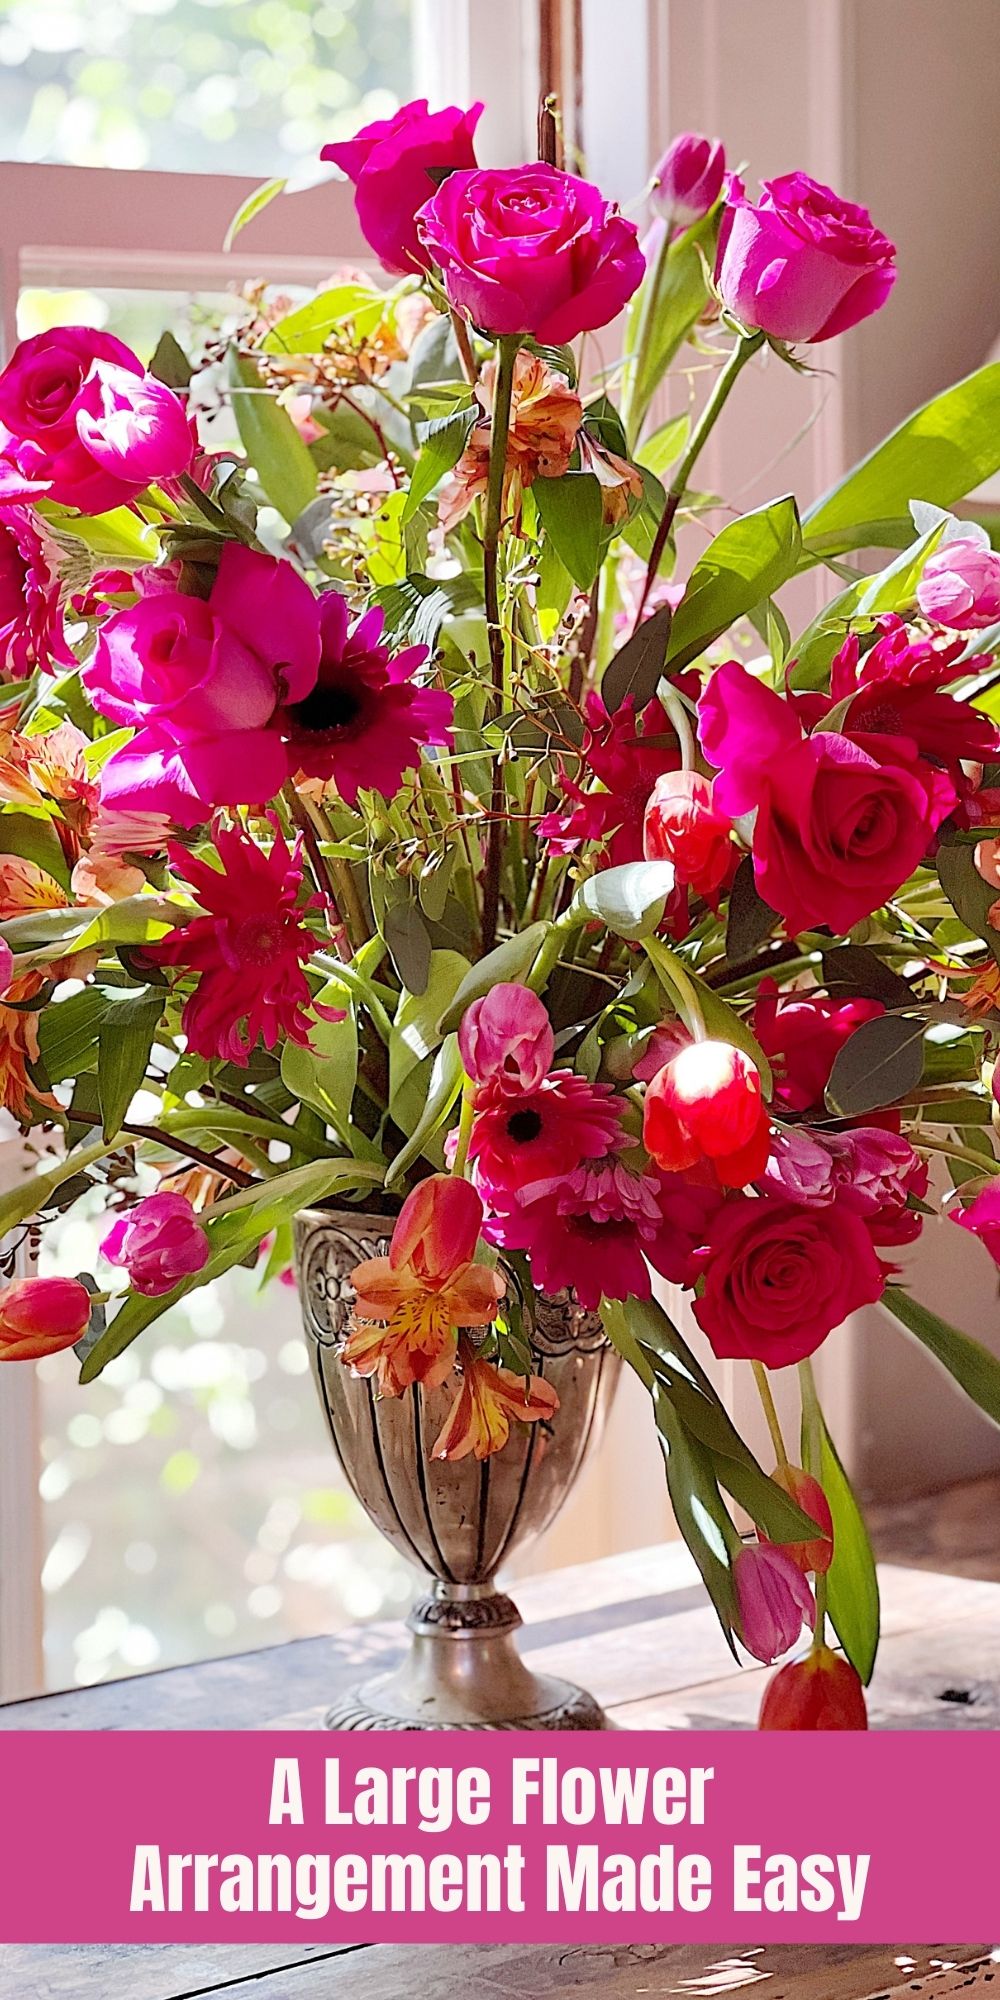
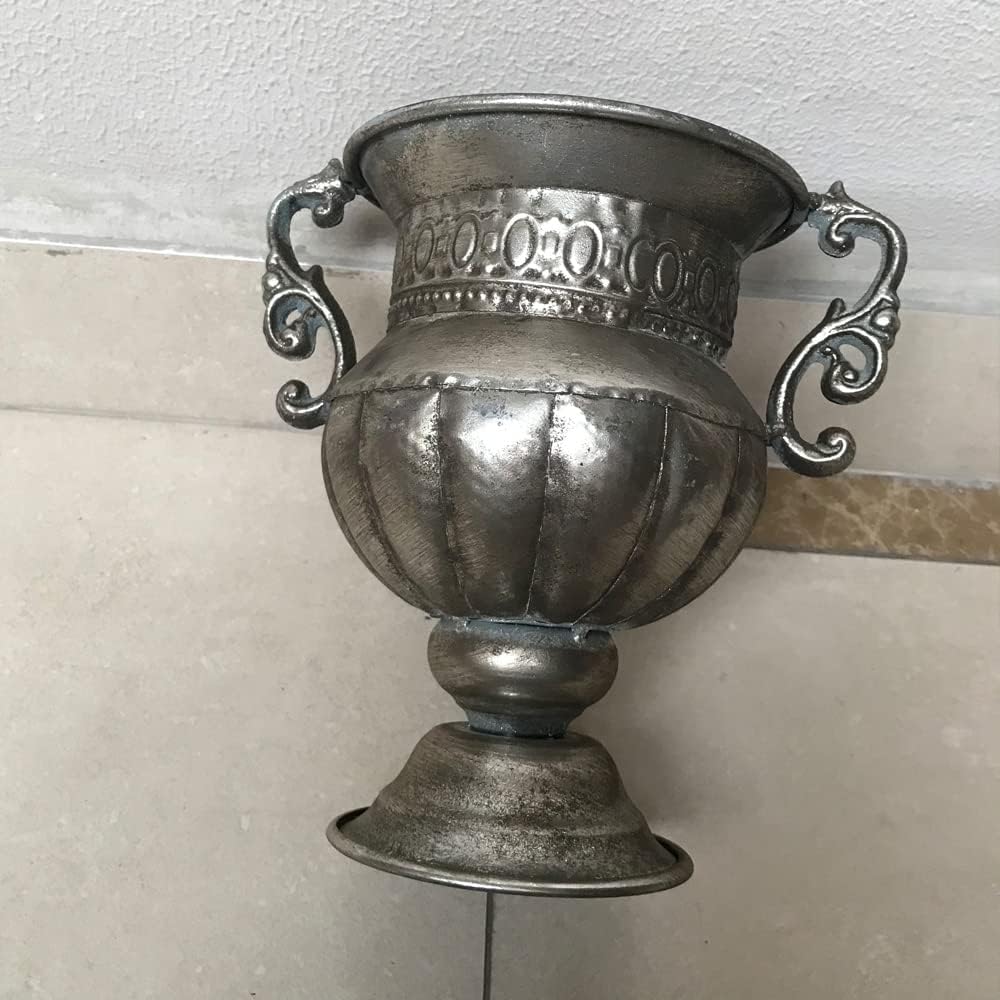
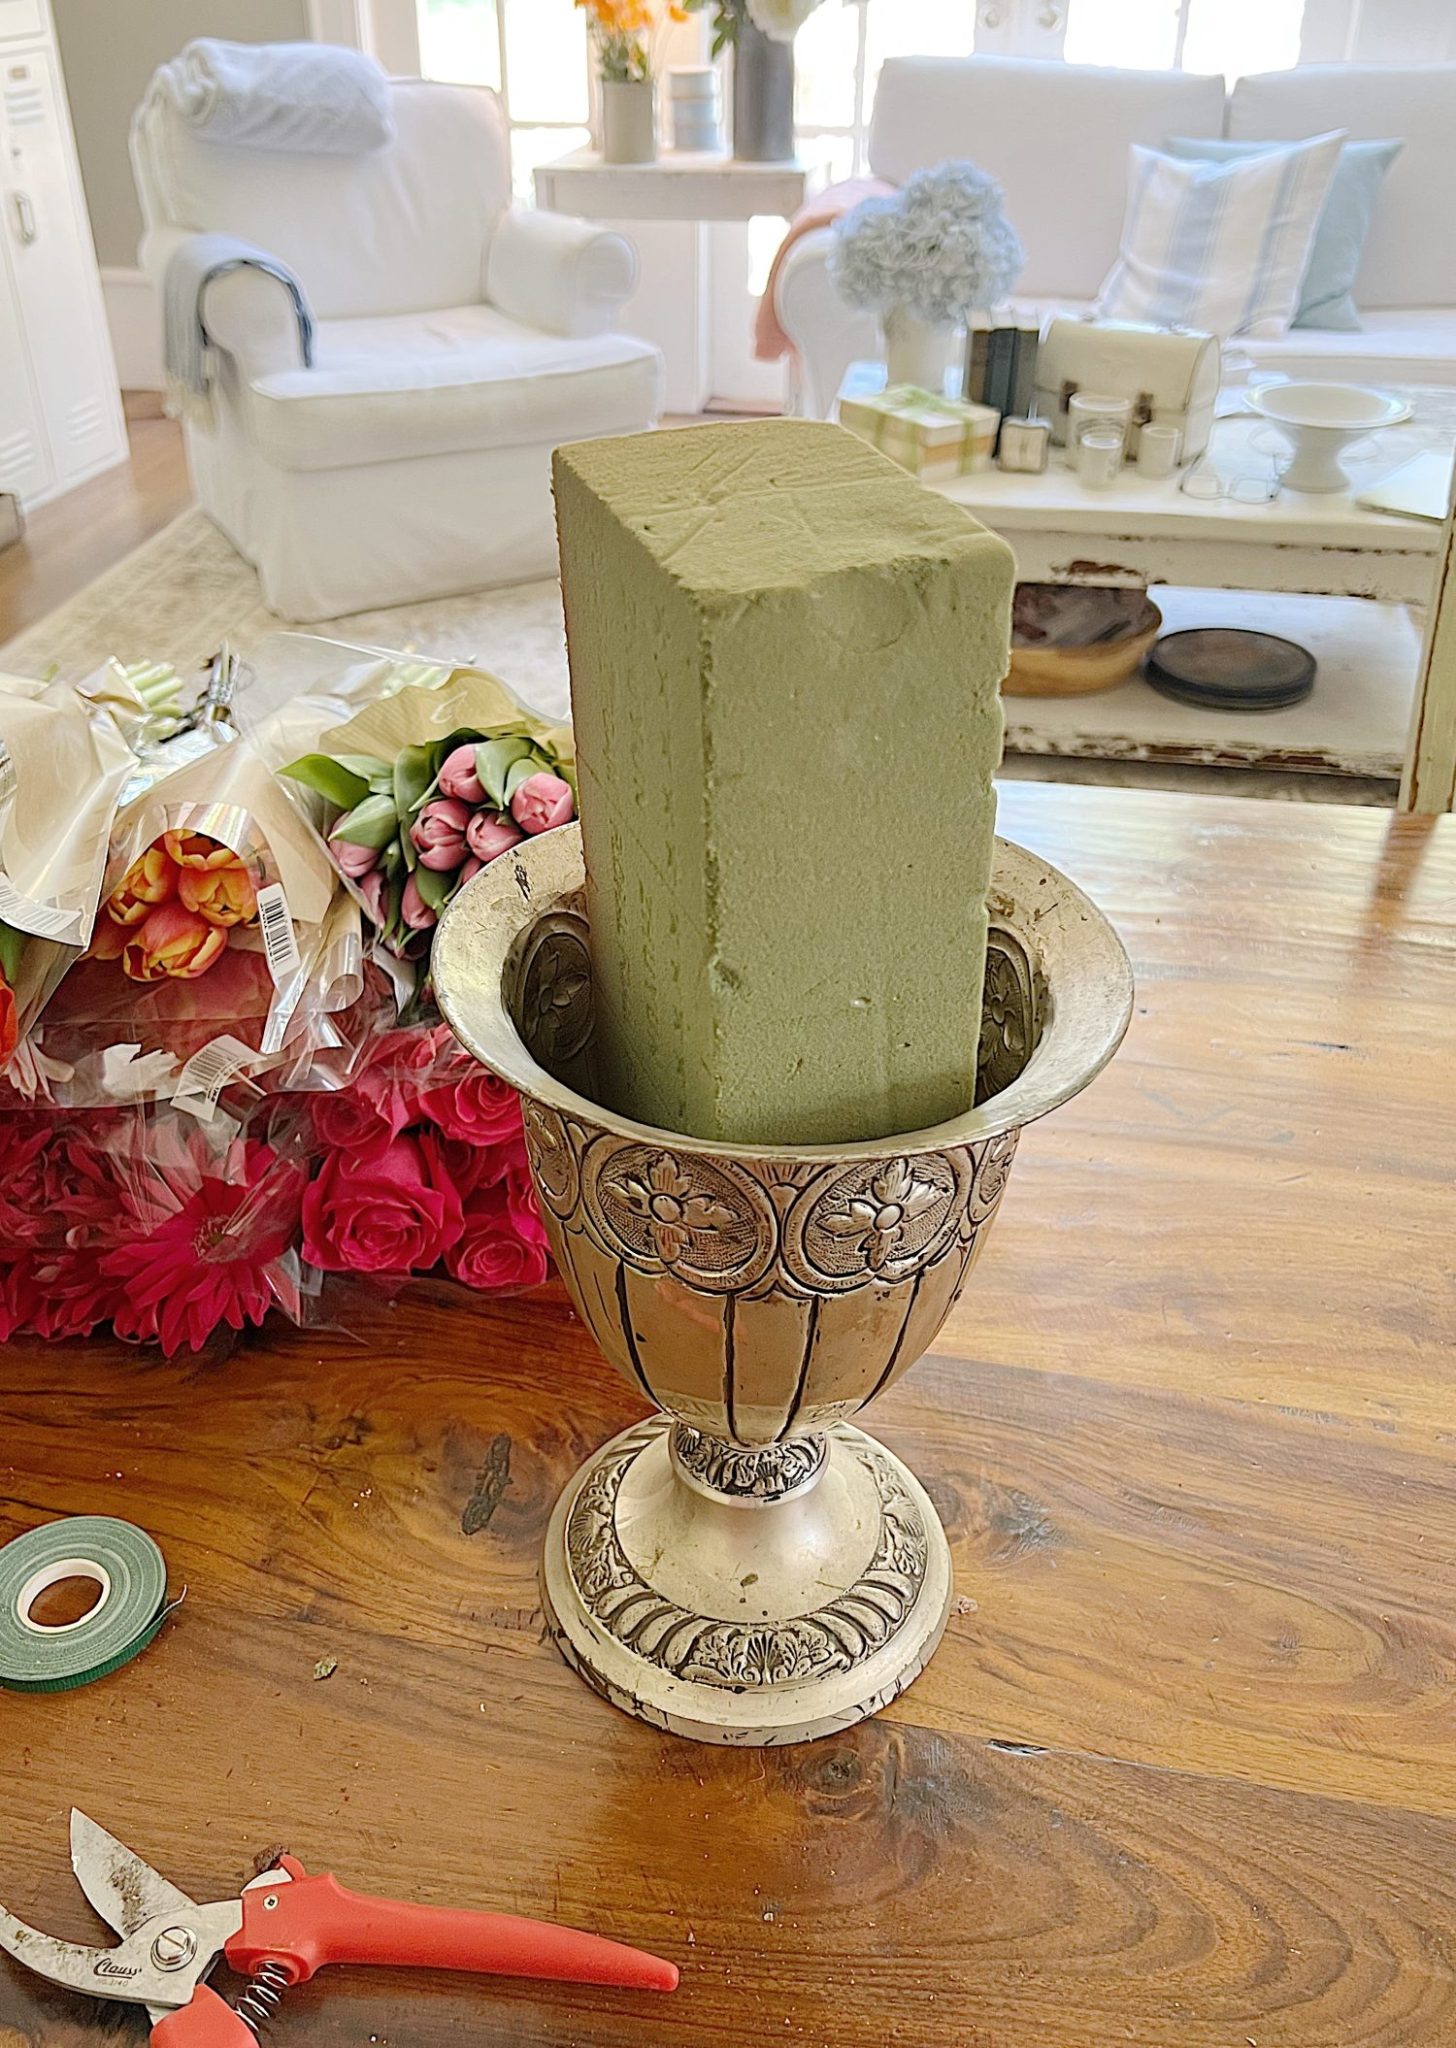
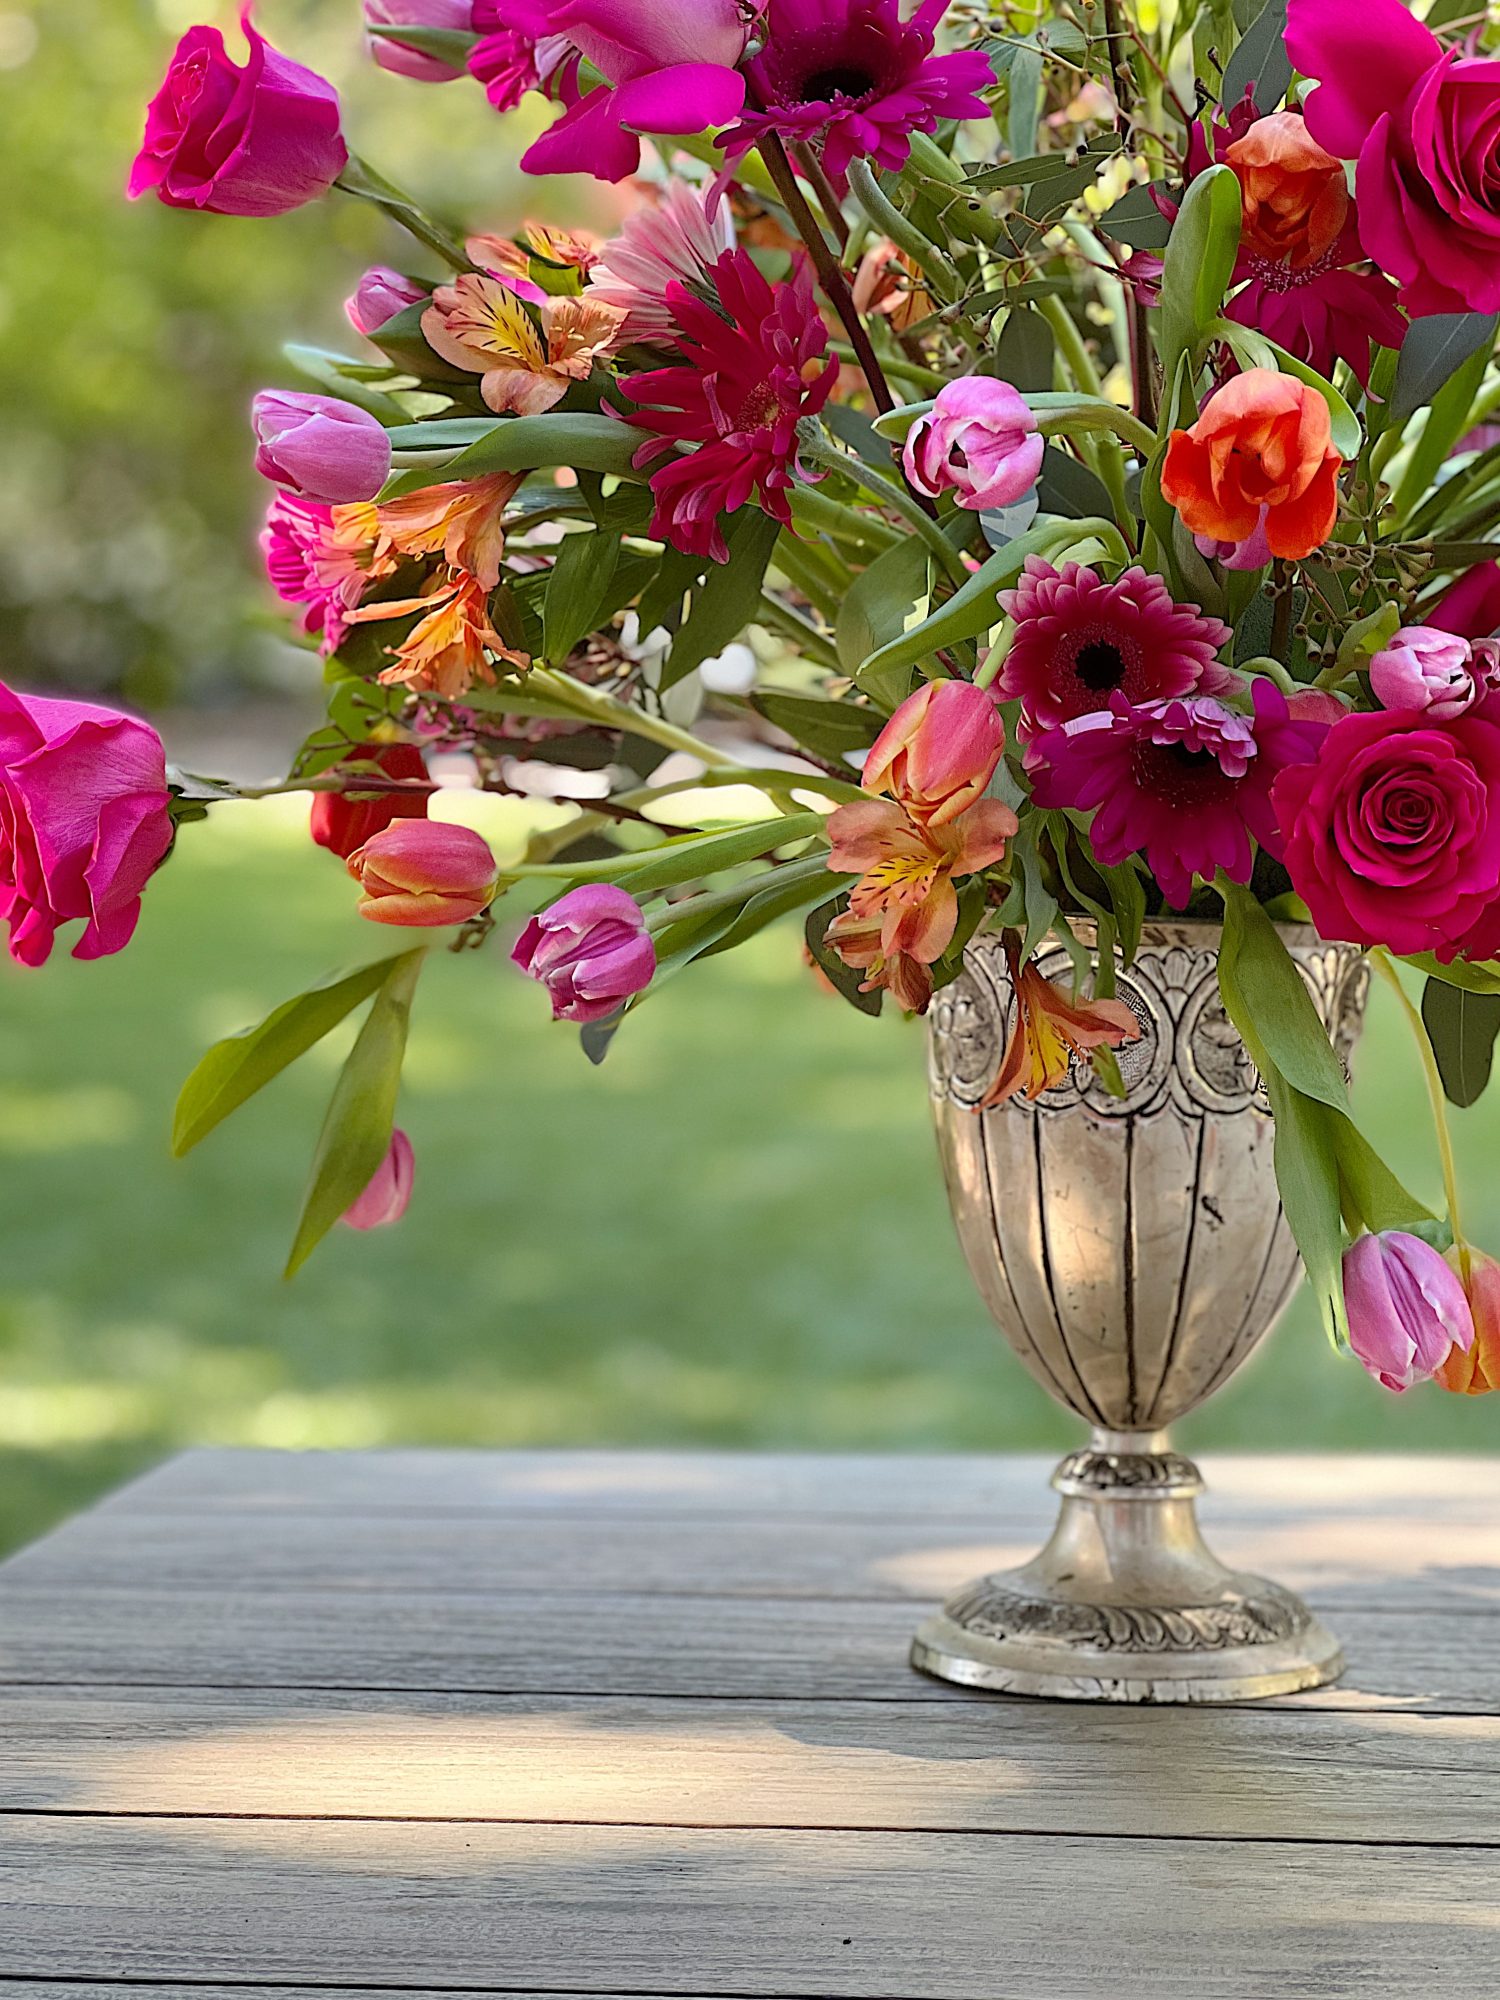
I chose a silver trophy-like vase to make this arrangement in. It was important to use a vessel deep enough to hold the bottom of a floral foam brick securely while also extending out of the vase to create height. I also felt it would sufficiently hold the weight of the arrangement once it was done.
Begin by soaking your floral foam brick so that it holds a good amount of water. Floral foam bricks are really important to keep your arrangement alive longer and help provide structure to it. I used wet floral foam bricks because they absorb water. If you haven’t purchased these before, make sure you get wet or wet/dry. There are also dry foam bricks; those are for artificial flowers.
Once the floral foam brick was good and wet, I popped it into the vase. The brick was a perfect size: a little less than half of it nestled into the bottom of the vase, leaving a little more than half sticking out.
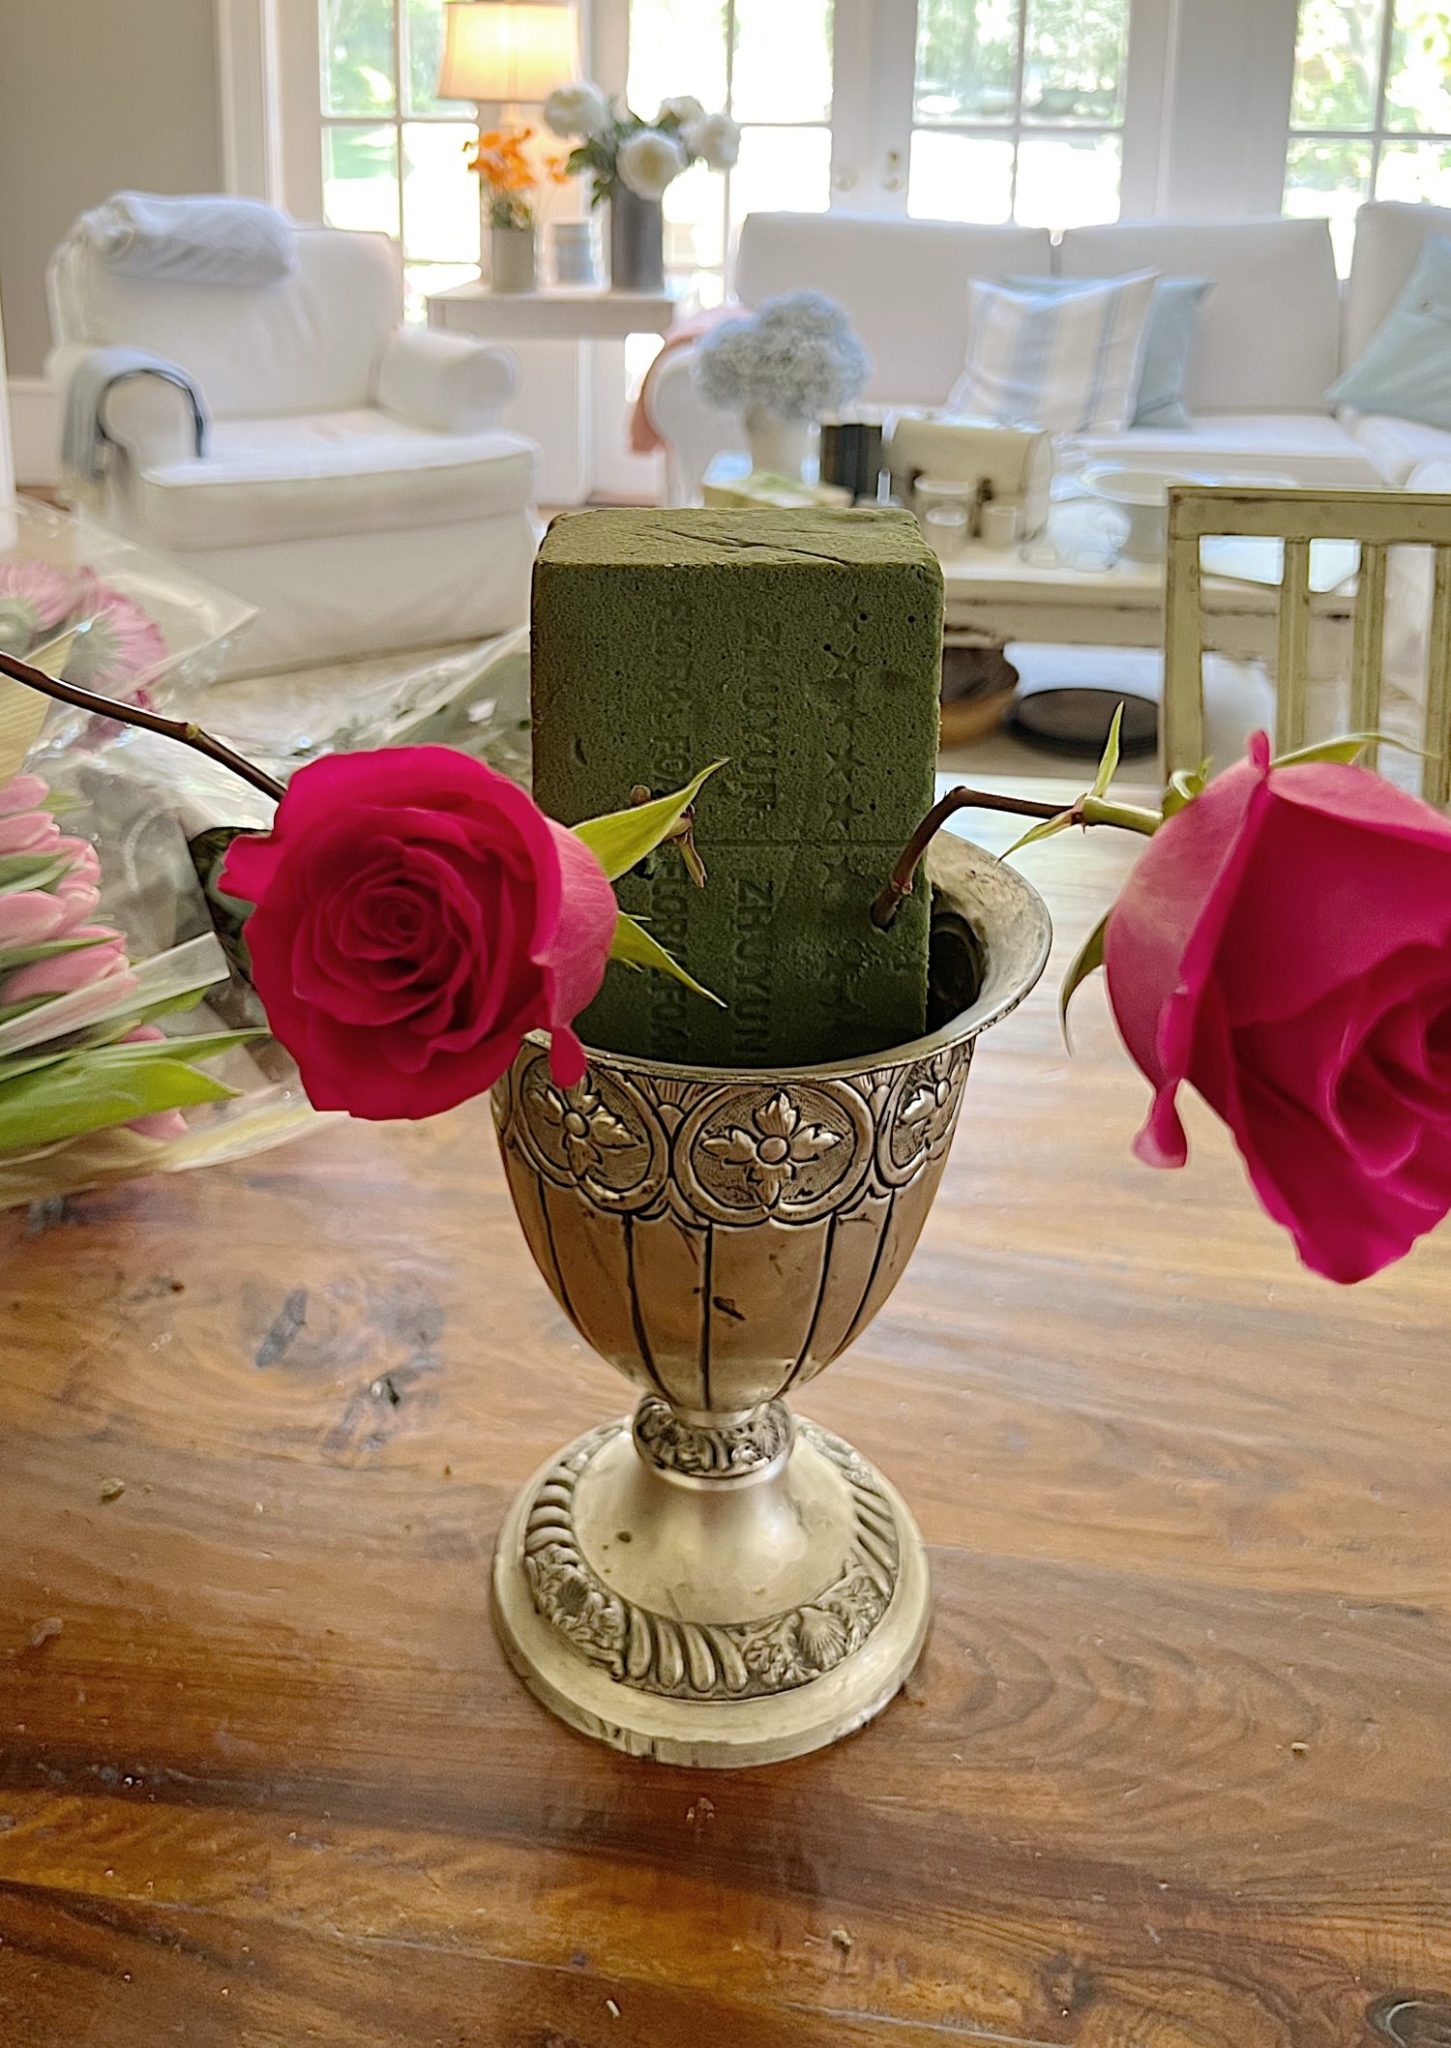

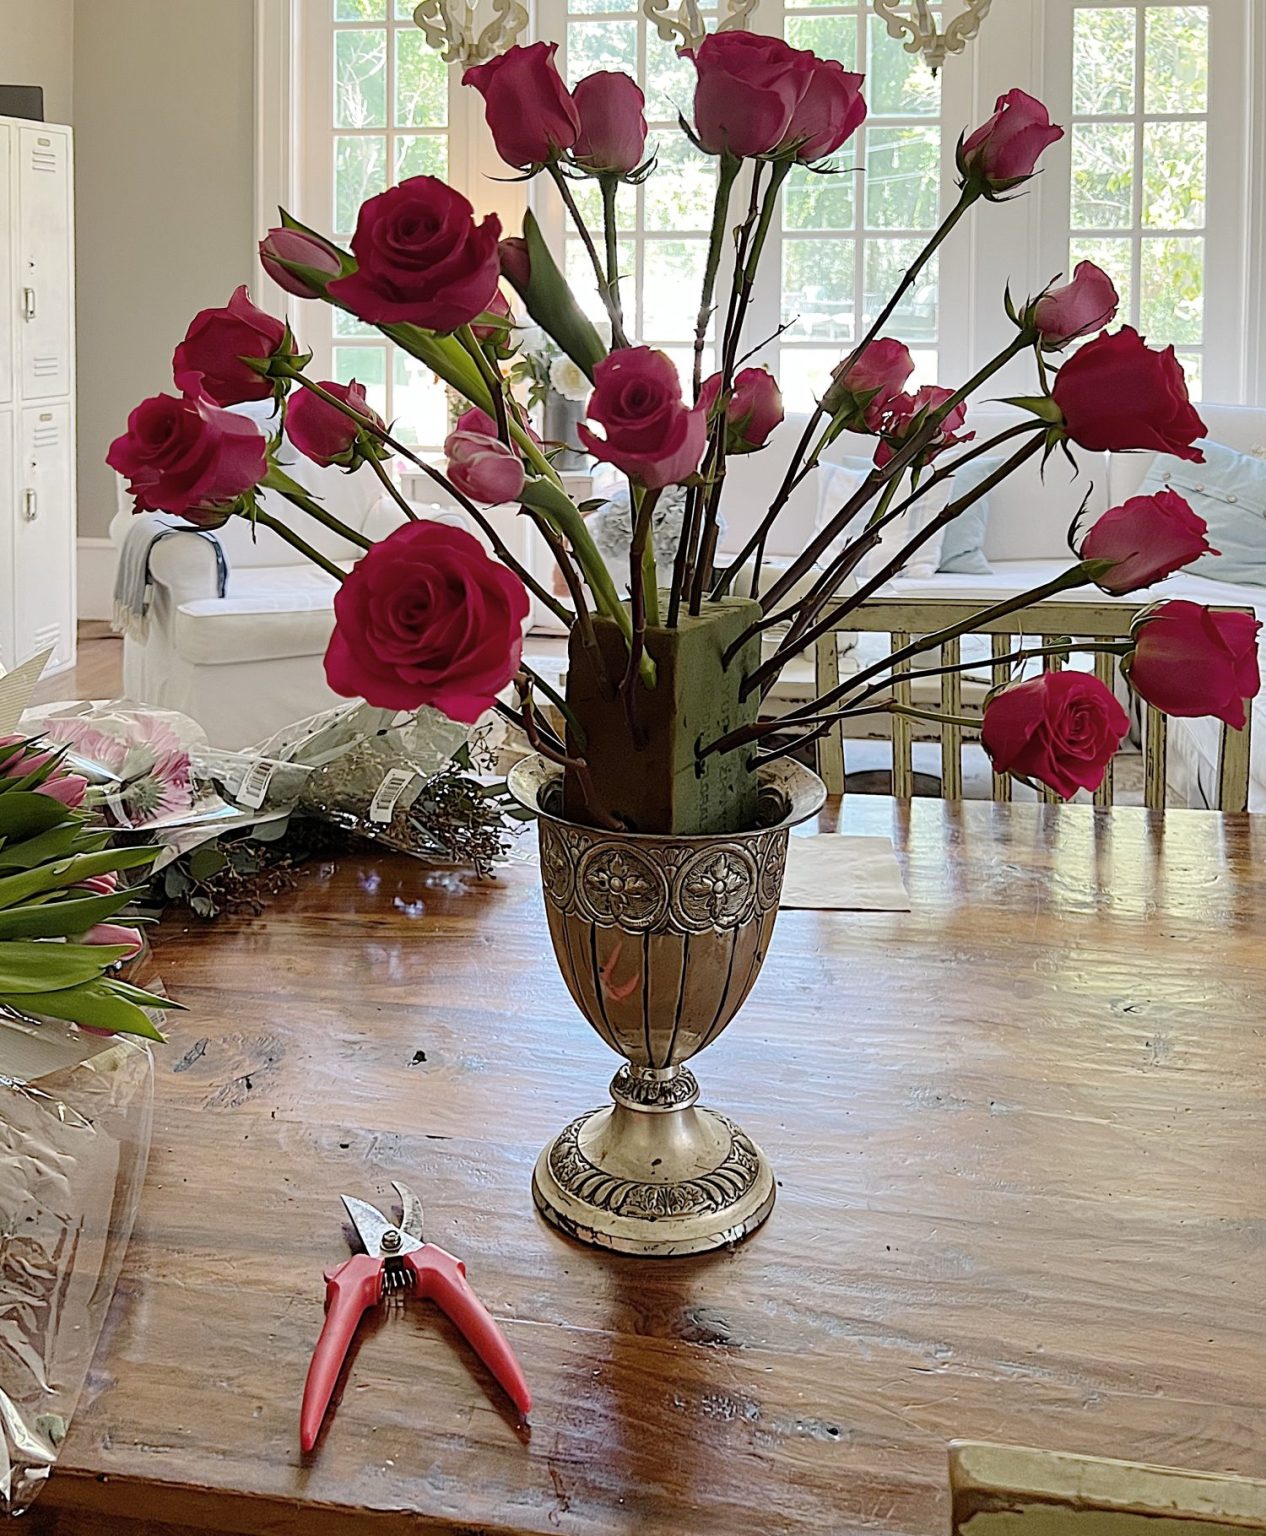
Adding the Roses
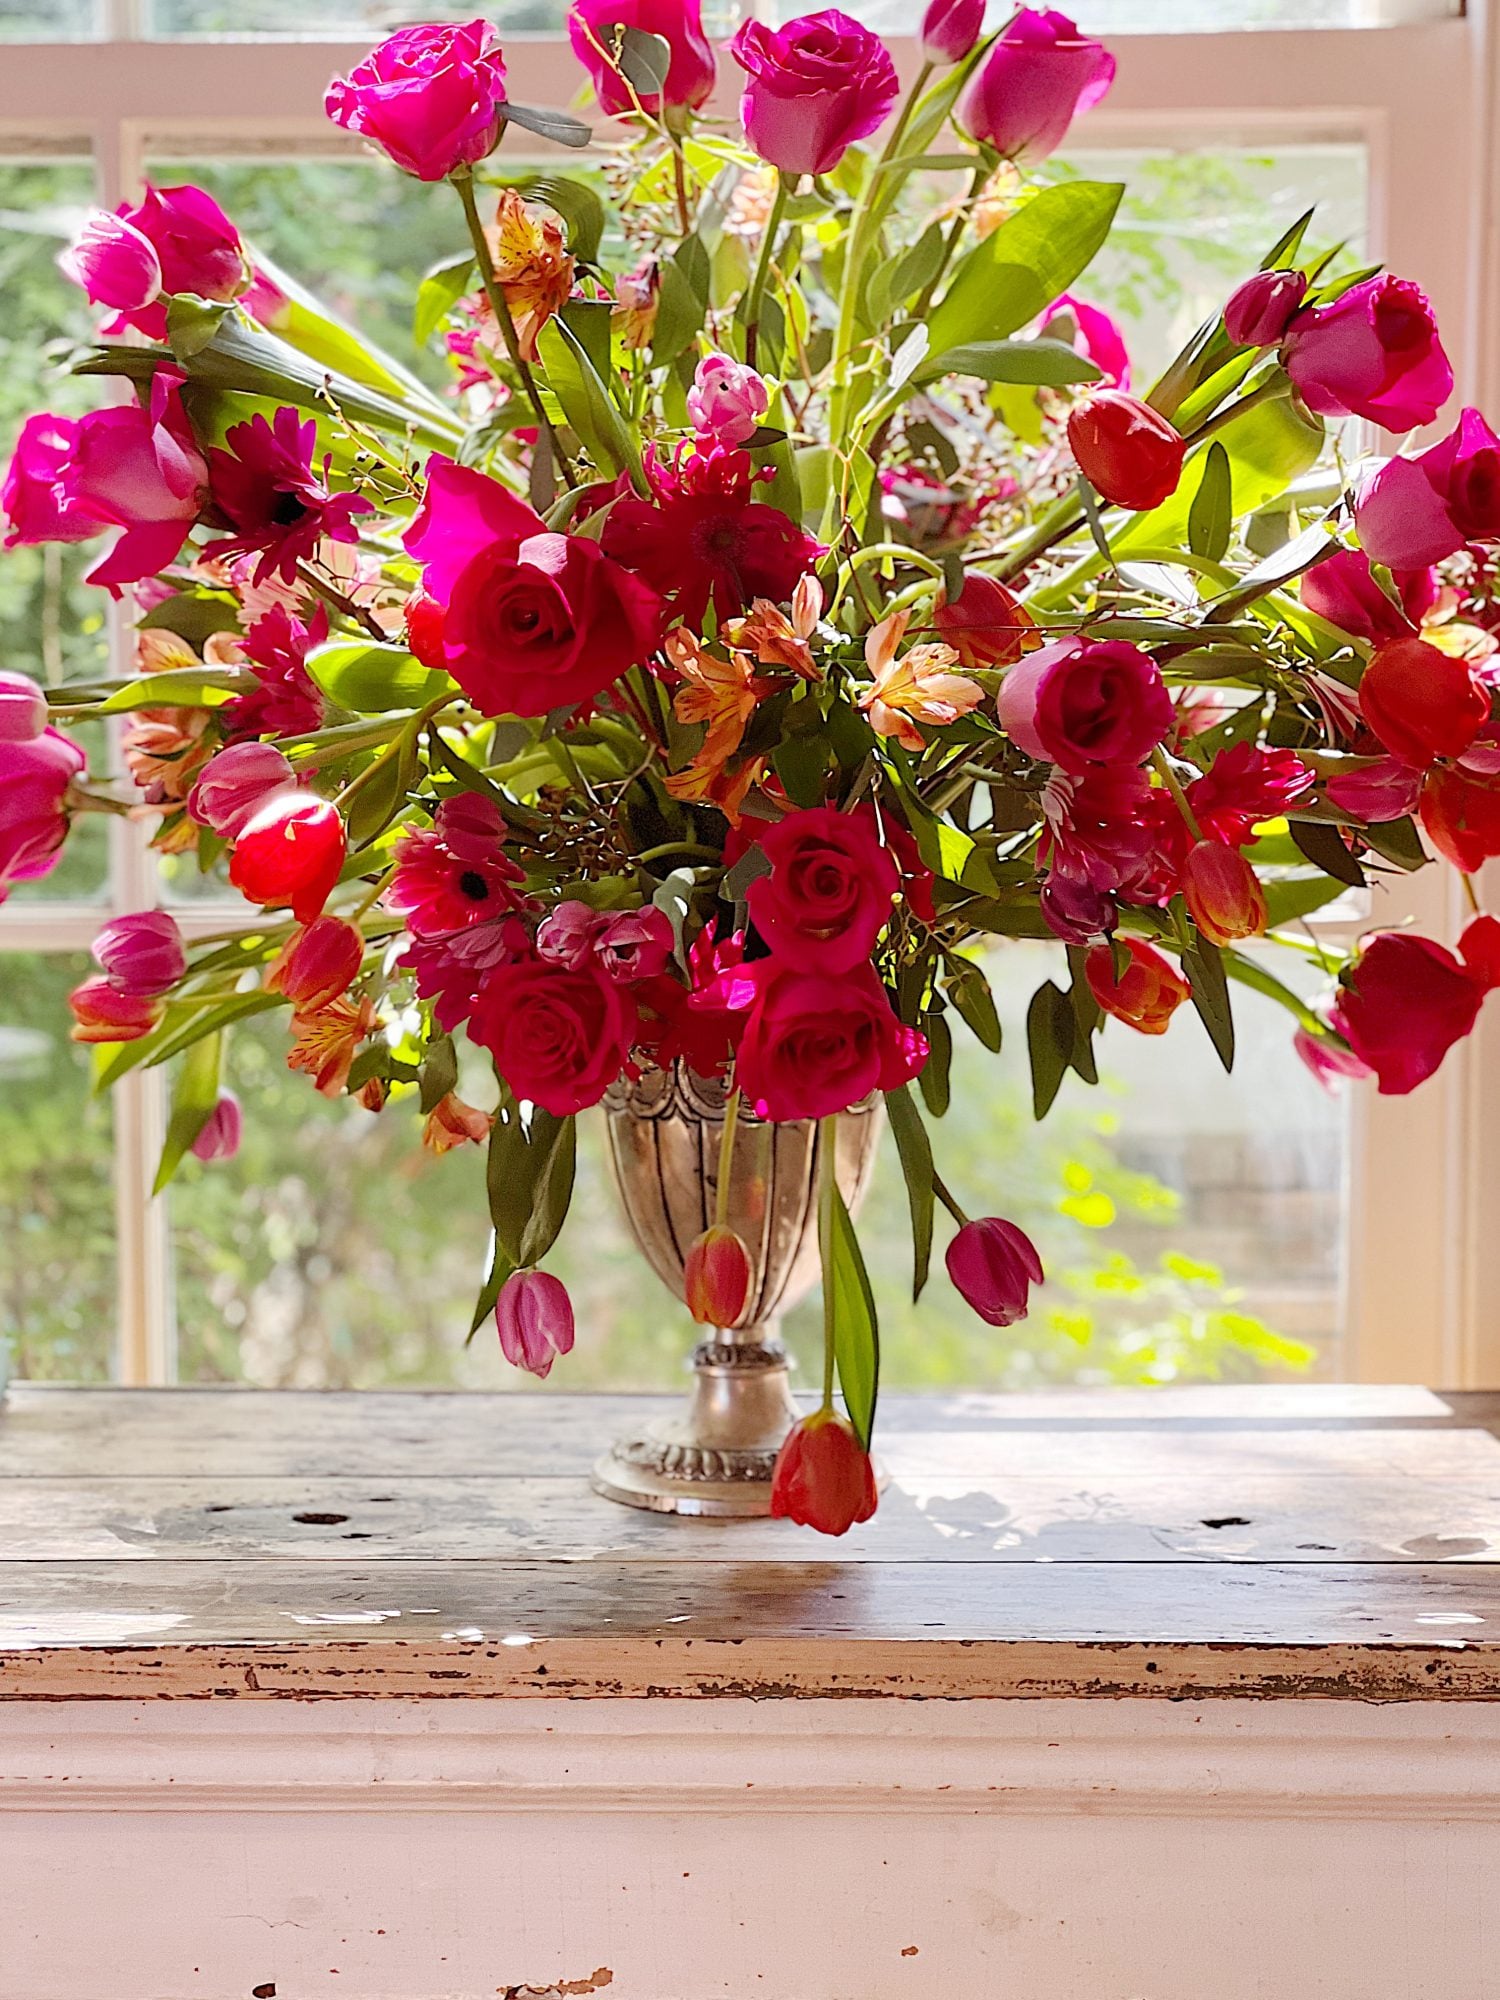
I started with the roses, which have the strongest and longest stems. I added them in equal amounts on each side of the foam brick and to the top of the brick. Honestly, at this point, I was excited that this plan I had cooked up in my head might work!
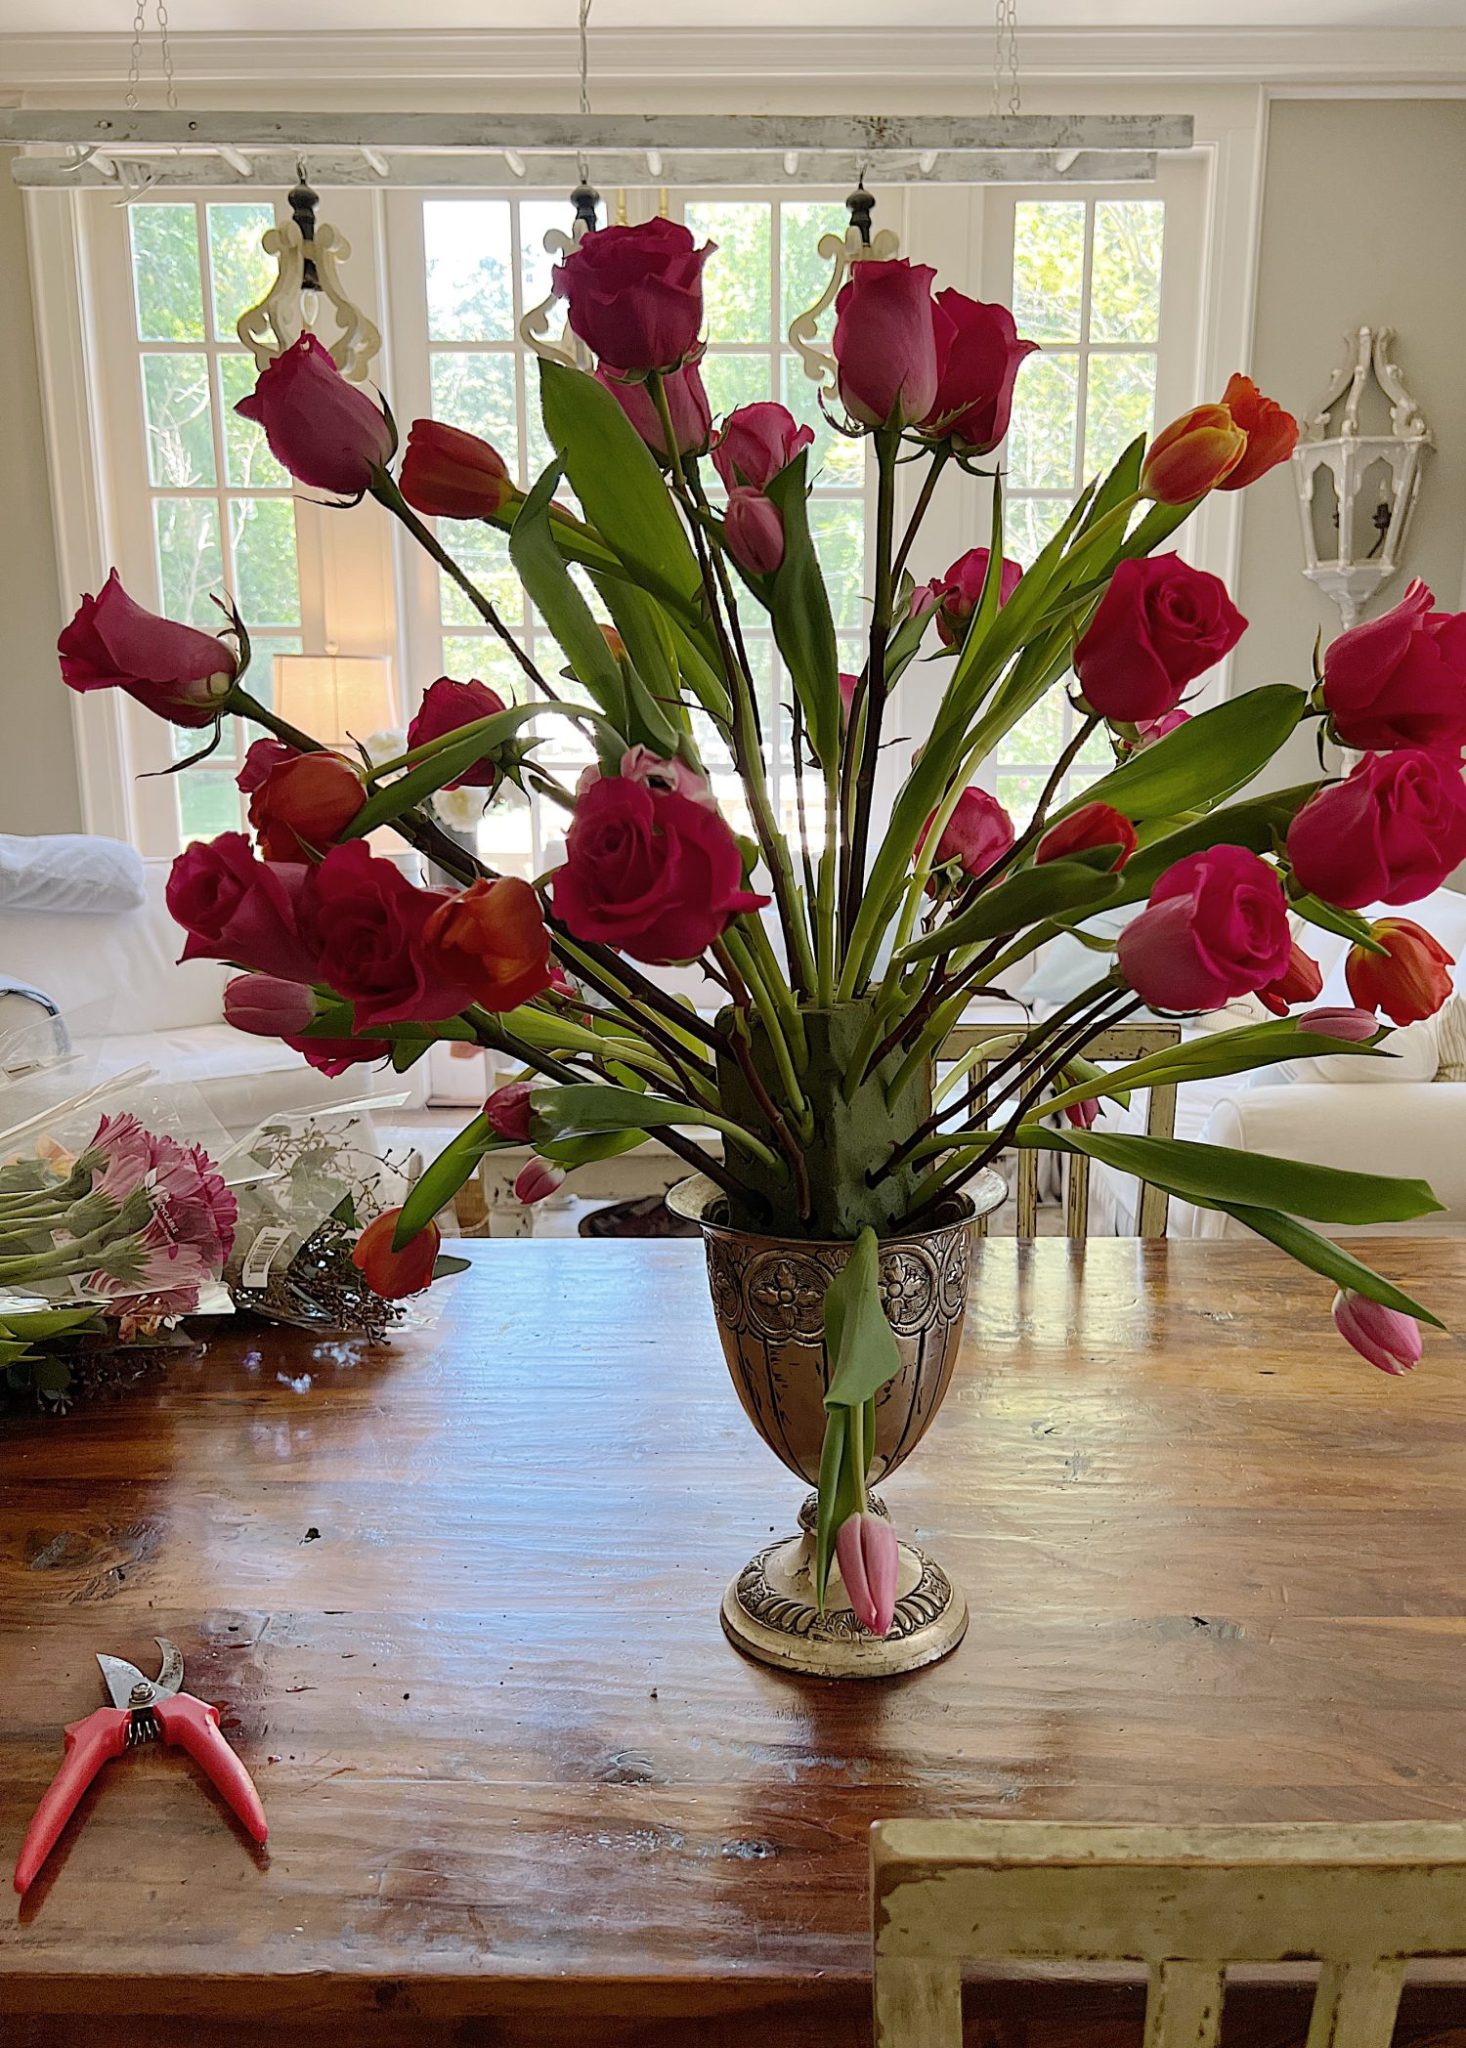
Adding the Tulips
Next, I added the tulips. Tulips are a little tricky because their stems are not as strong as some other flowers, so when inserting the tulip stems into the floral foam, I held the stems very close to their ends and guided them into the foam. I carefully added the tulips evenly on all sides, including the top.
Once all the pink and darker pink tulips had been added, I began adding the orange tulips. There is something almost magical about pink and orange together. They are beautiful partners, each complementing the other while also allowing them to shine on their own.
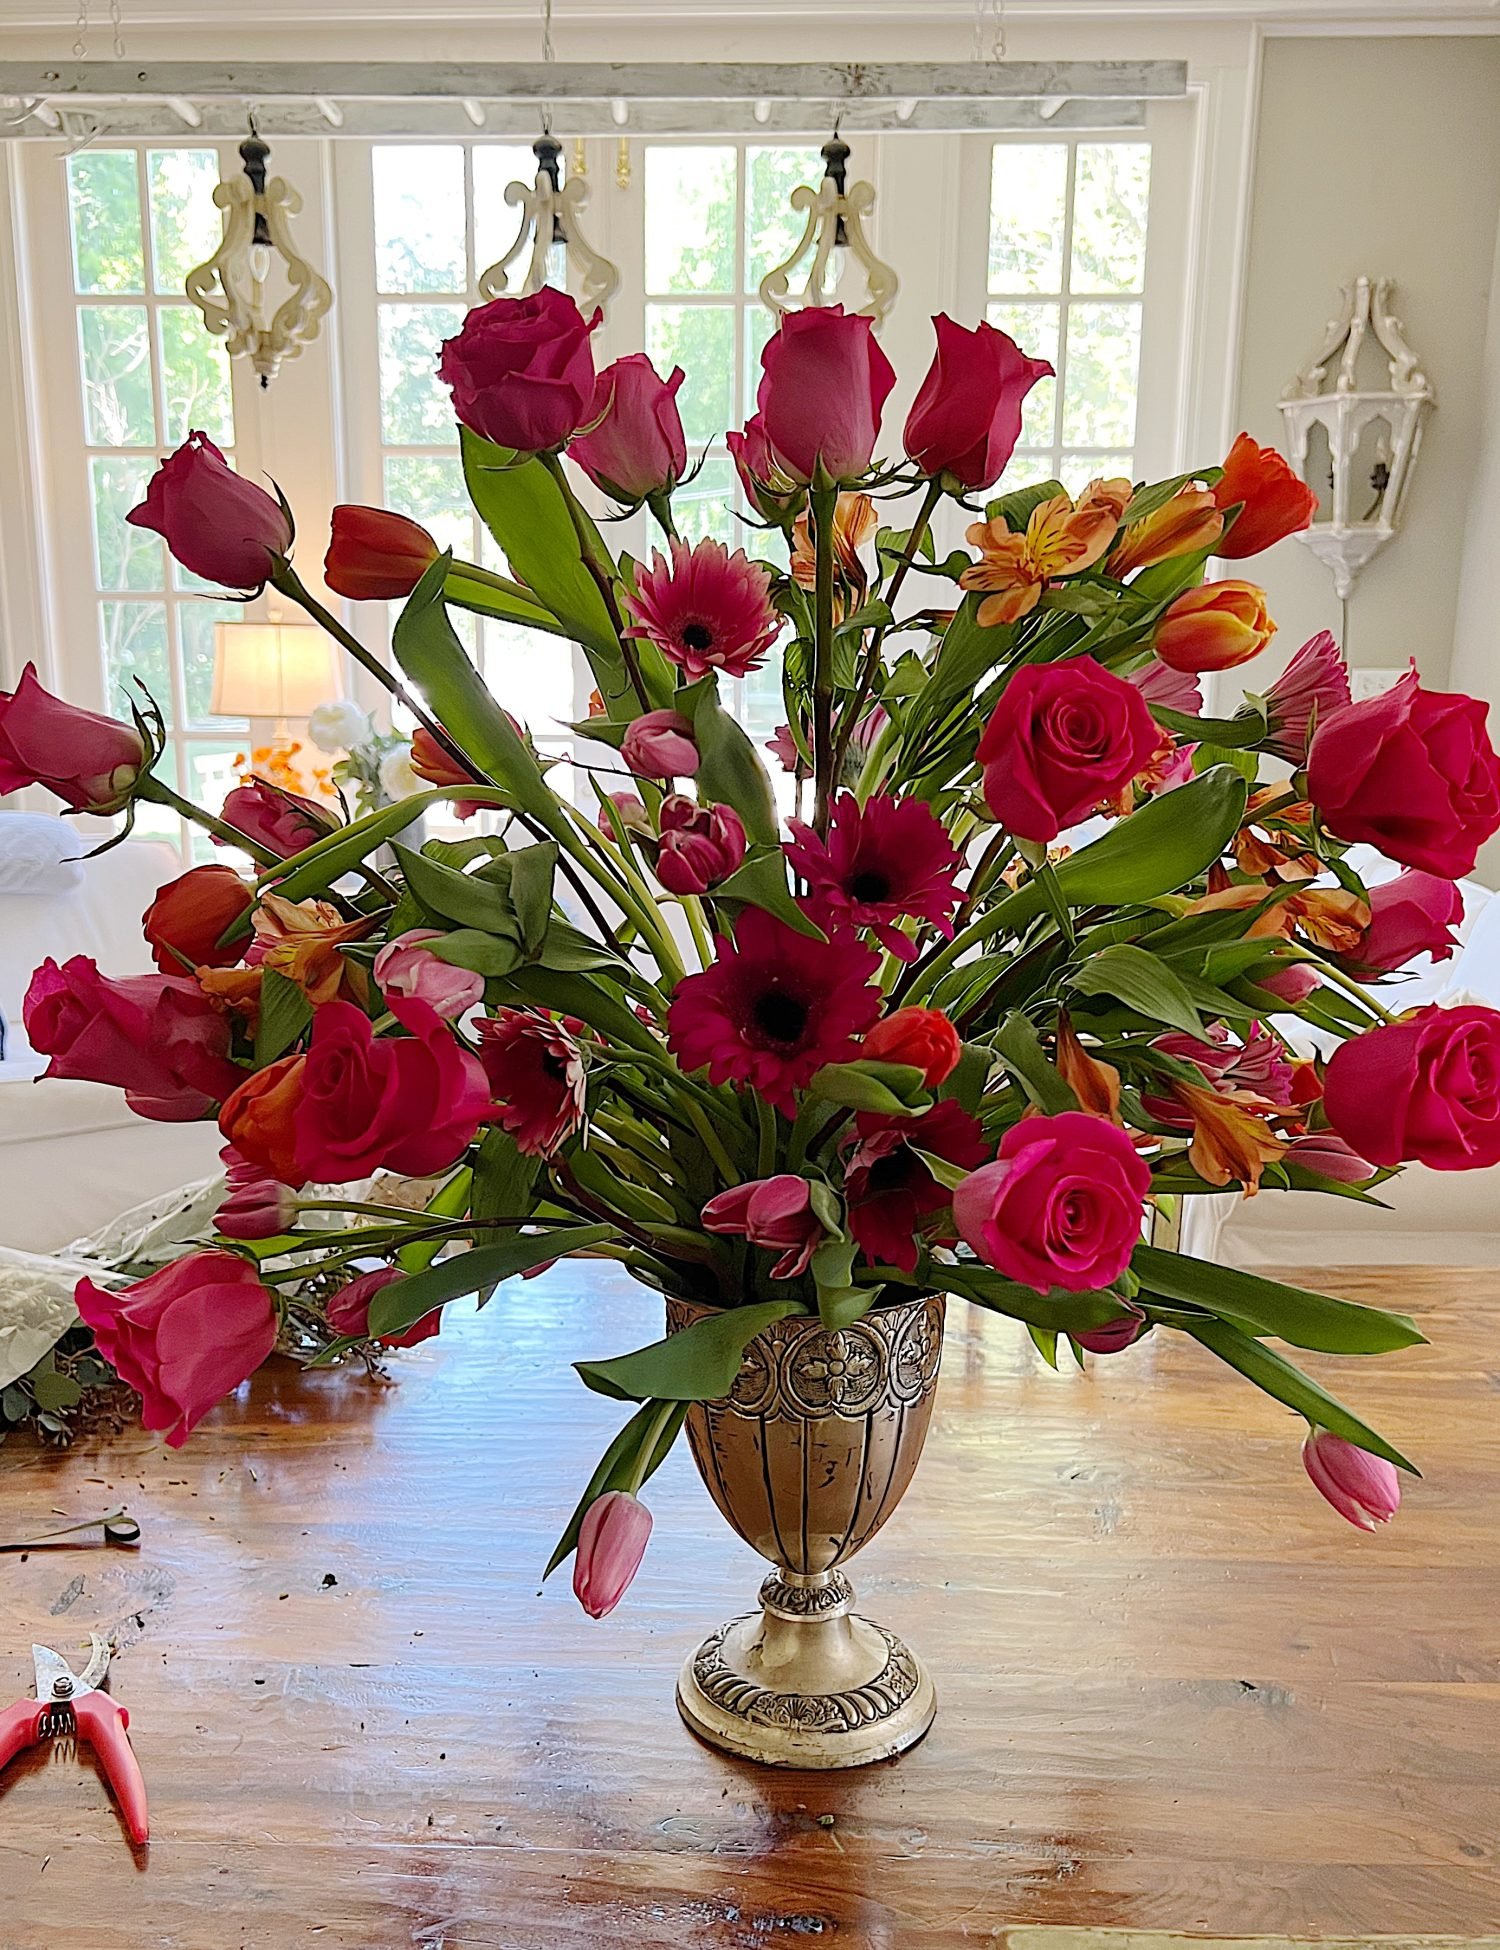
Adding the Final Flowers
Once the roses and tulips were in, I began to fill in the gaps closer to the floral foam with the gerbera daisies and alstroemeria. This was a little bit tricky getting my hand in near the foam to secure the stems, but I wanted the flowers to shine and use very little greenery.
Lastly, I added a few springs of the seeded eucalyptus to fill some bald spots.
A Large Flower Arrangement
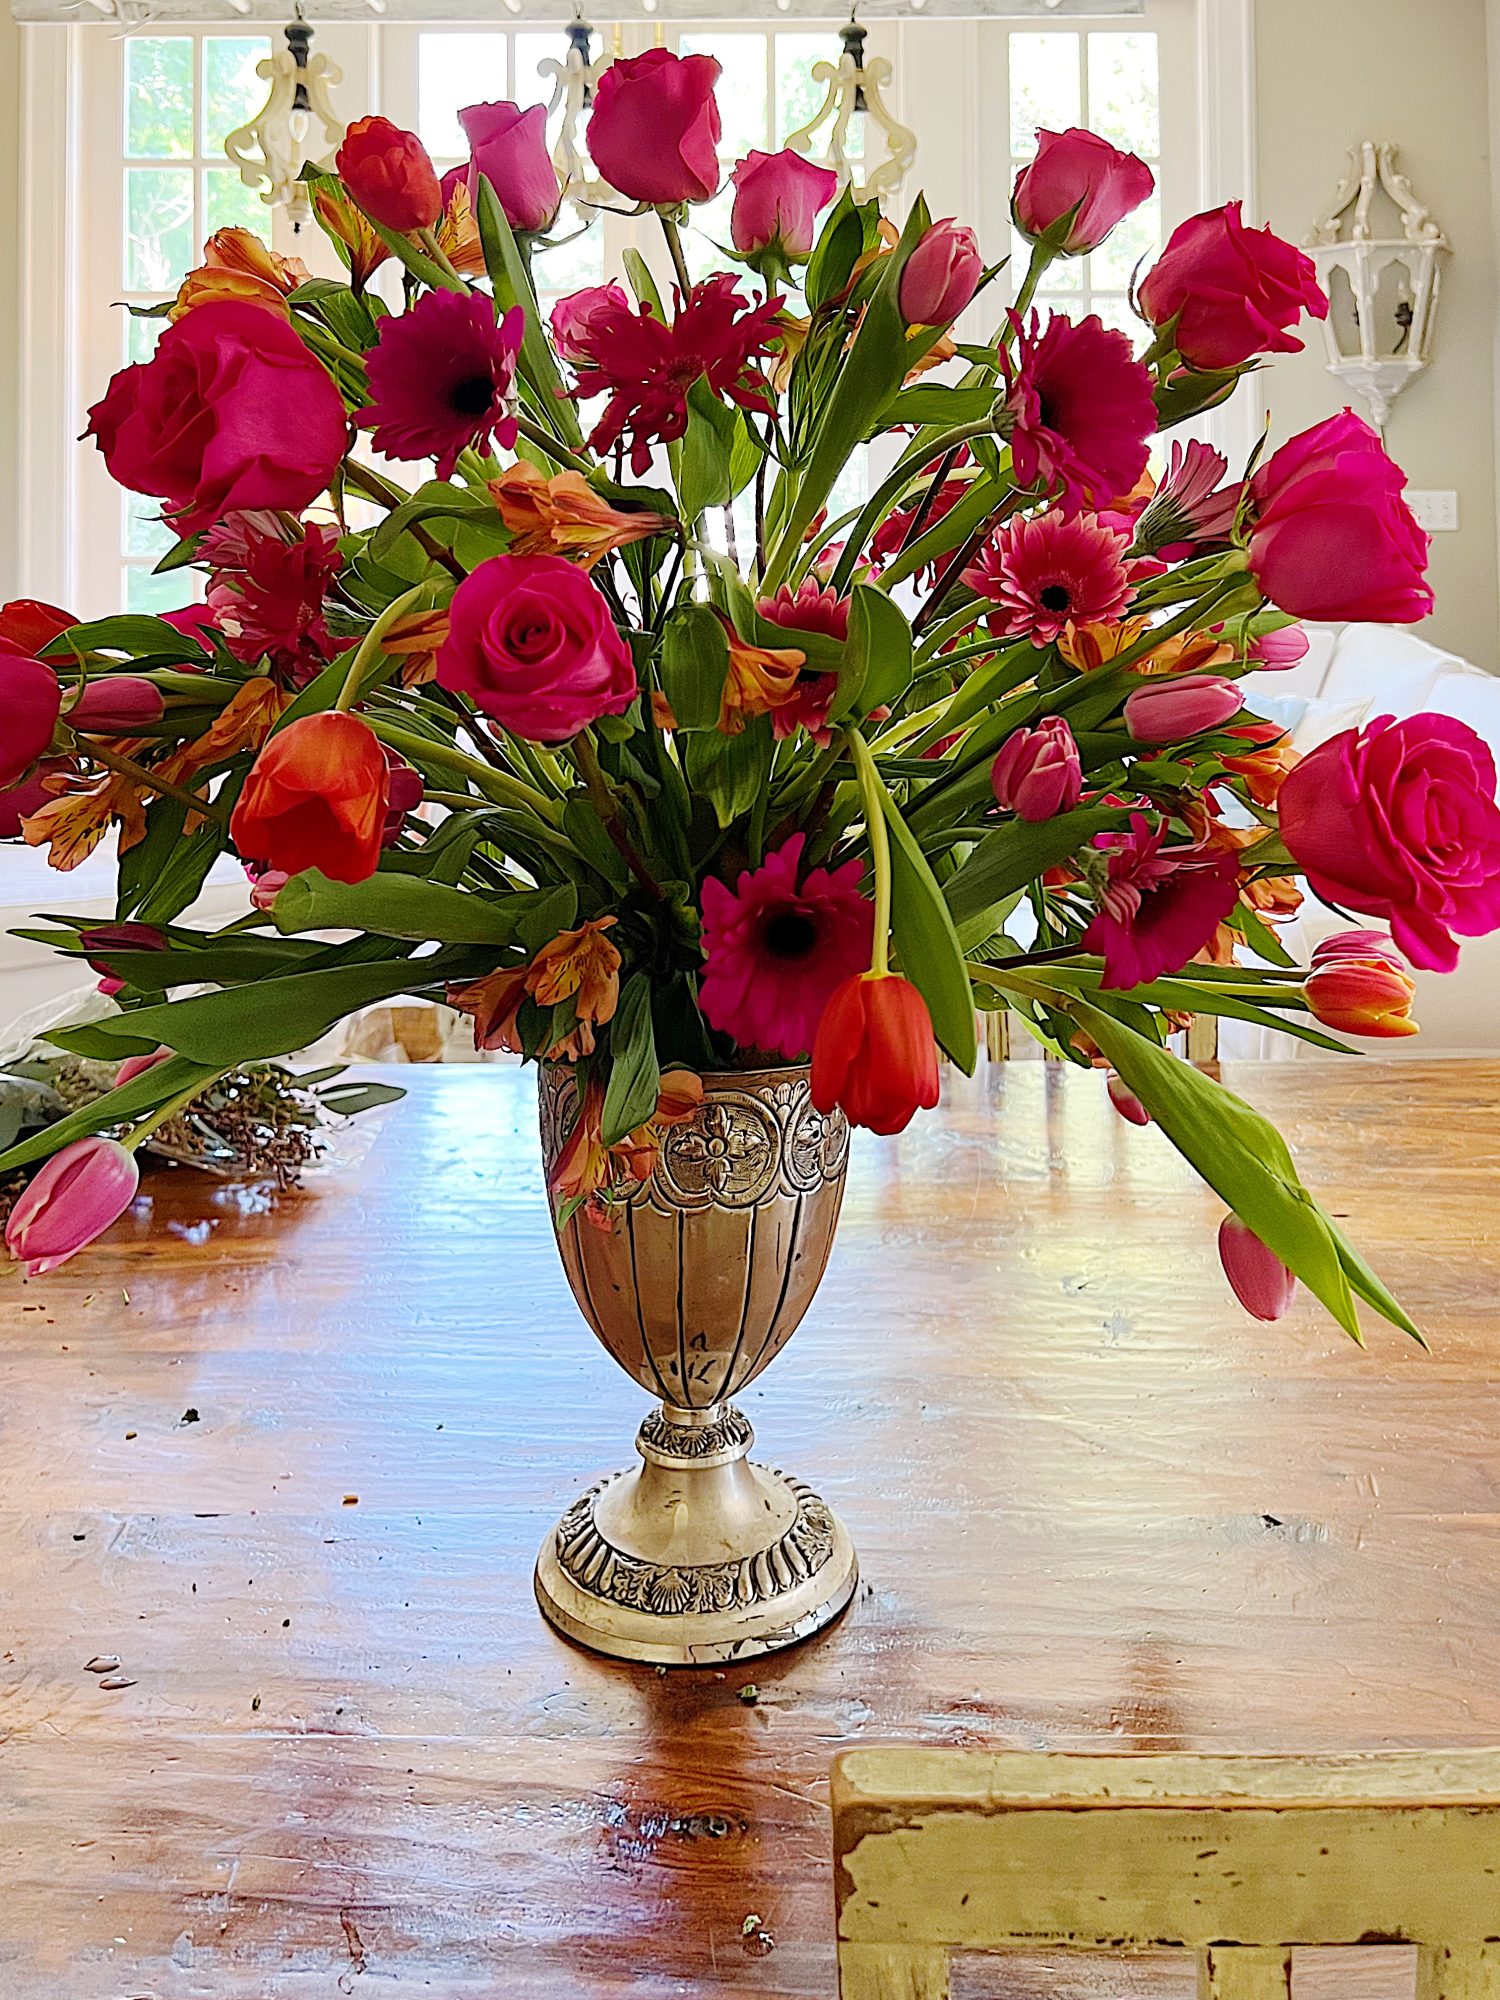
I am thrilled with the way this large arrangement turned out. This was very easy to create and is a project that I think anyone can be successful at. Large flower arrangements don’t have to be difficult. With the right tools and practice, you can create beautiful displays that will wow your guests. I hope this blog post has inspired you to create a large flower arrangement project. Get creative and start arranging those flowers!

If you enjoy my blog, you can sign up to receive my updates here.
.


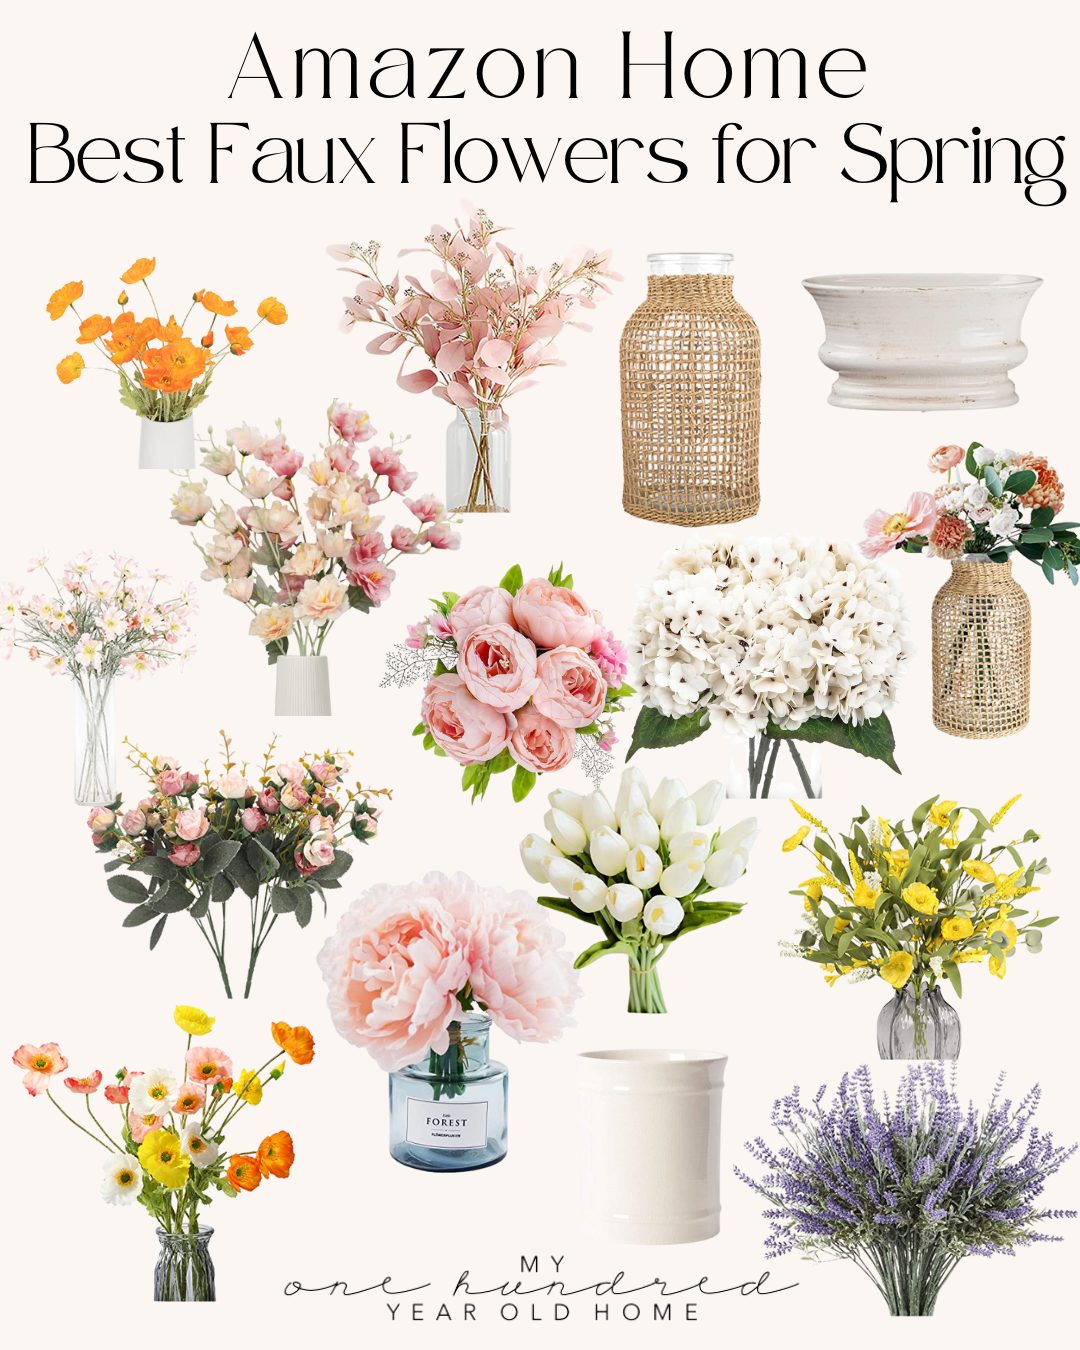
Gorgeous Faux Florals for Spring!
Watch My Amazon Live
Click here to watch any of my Amazon Live shows. All shows are recorded.
Here is one of my Amazon Live Shows, and you can watch it here.
Pin the image below to your boards on Pinterest (click the Pin button in the top left corner). You can also follow along with me on Pinterest!
For more real-time updates, follow me on Instagram @My100YearOldHome

This turned out beautifully. Really like the choice of colors.
Thank you for this lesson. I am terrible at arranging flowers even though I really like flowers in the home. I think my biggest problem is the vase – it never seems right for the flowers I have.
GORGEOUS! YOU MAKE THE BEST BOUQUETS!
Just lovely!!
Do you recall what the total was on the flower costs?
Thanks!!!
You might wrap each of the tulips with a piece of wire starting at the flower end and wrapping it slightly around the stem. It will help them last longer.
Oh thanks Diane, great tip! 🙏
Another beautiful flower arrangement Leslie. Thanks for the great tutorial.
Oh thanks so much Kim! Love flowers and arranging so much 🙏☺️
I love this one Leslie – you chose perfect colors, and it’s such a beautiful fluid shape. Thanks for all the tips!
You’re so kind, thank you Barbara! And Trader Joe’s makes it so easy 😍🙌🏻
Did not receive your Wednesday blog
Hi Heidi! So sorry to hear this- did you check your spam folder?
Leslie, how tall is the vase you use here? Thank you!
Do you use any preservative in your water for fresh flowers? If so, what? TJ’s used to include a little packet of stuff but don’t seem to do that anymore. Should I get some from Amazon or is there a home recipe that works just as well?
Jan
What a beautiful arrangement. Why don’t you use moss to cover the floral oasis ? As the floral teacher used to say “Cover your mechanics” You would use less product. Do you use Crown and Glory to make the flowers last longer ?
I am on the hunt for a large urn- at my price. Might take awhile !