The Craft Project That Failed
I decided to do an unusual thing today. I am sharing a craft project that I was really excited about. But it failed. I think it is just as important to see the projects that fail, as it is to the see the ones that work.
So here’s the thing.
I love creating craft projects and sharing them with you. Ninety-nine percent of the time they end up looking amazing. But every once in a while one of my wonderfully creative thought up projects ends up being a dud. This was definitely one that didn’t work. It was a craft project that failed.
Usually, the project ends up in the trash or back into my scrap craft bin. It’s put away, never to be spoken about, or shared.
But today is different. I decided that I wanted to share my craft failure. I blog almost every day about my life. I think it’s time my failures became just as important as my successes.
I also am also thinking that one of you might have an idea of where to go from here. You know, kind of like “you can be the hero and save the project” kind of thing? Once you see the project, and where it ended up, I am hoping some of you might have some good ideas.
The Failed Craft Project
Let’s start with where I got my inspiration.
A few weeks ago I made this glue gun stencil and stenciled paint on some napkins. Each one turned out great.
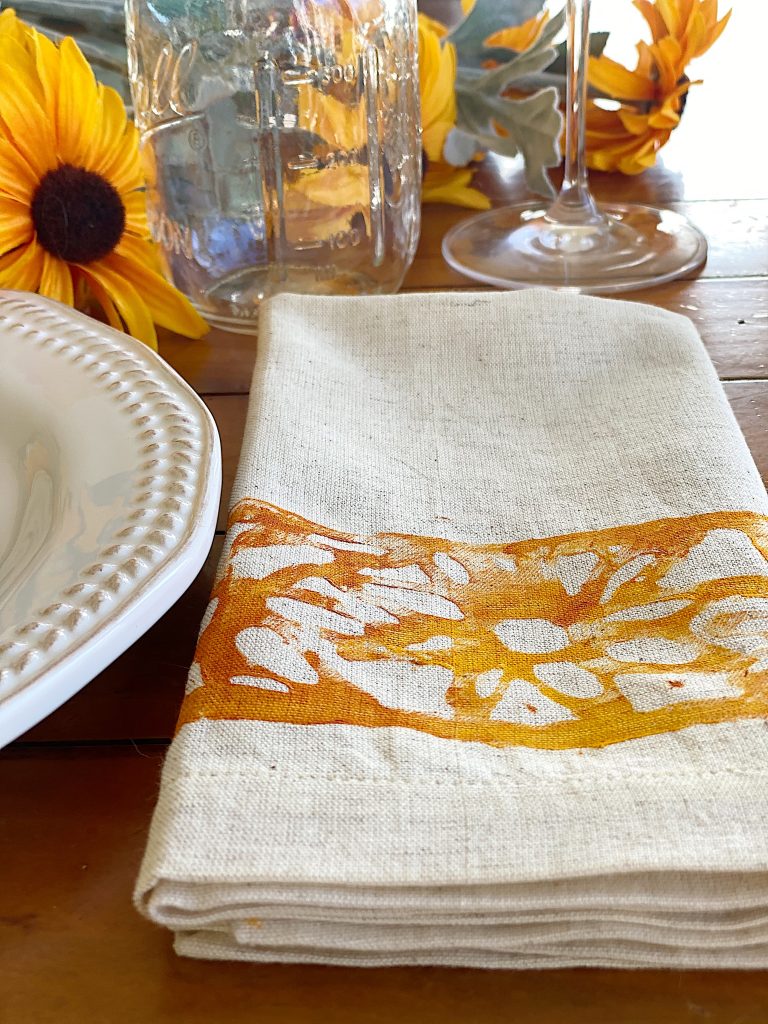
And the stencil I made is awesome!
I really enjoyed this project and decided I wanted to do another one and make a glue gun stencil. So I decided to make a large stencil for a pillow.
I chose an assorted leaf pattern.
I found this pattern on the Cricut Design Store. You can also find a pattern for just about any design just by googling it.
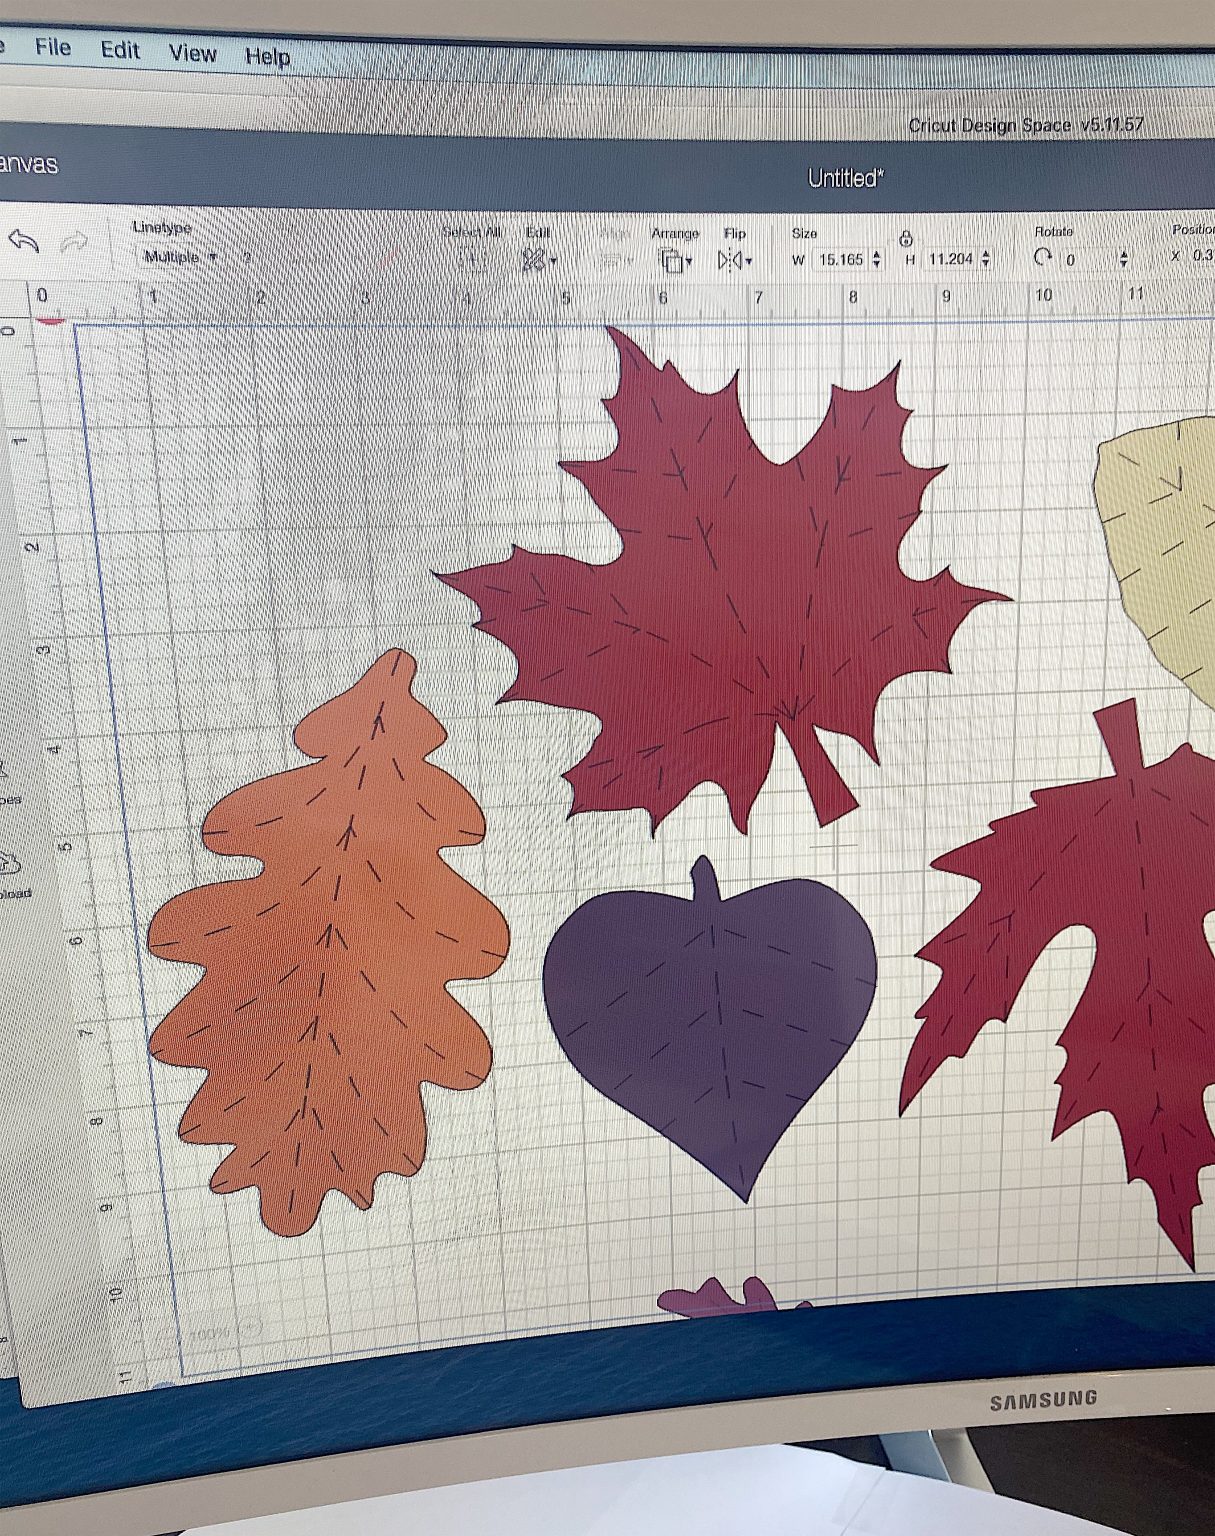
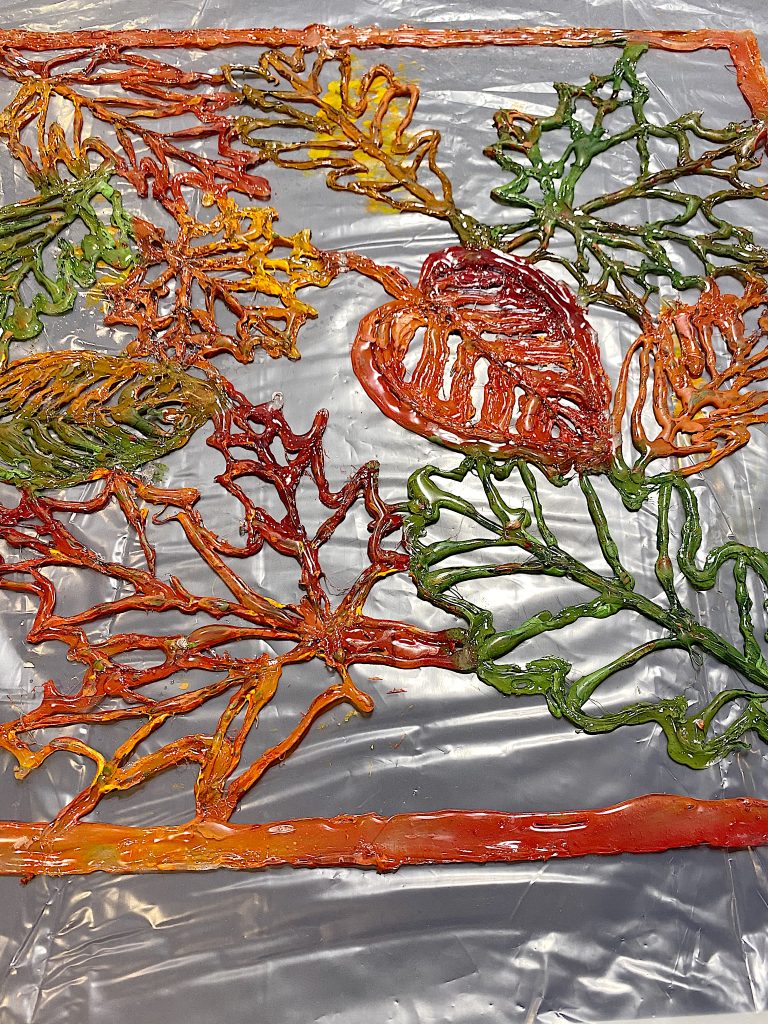
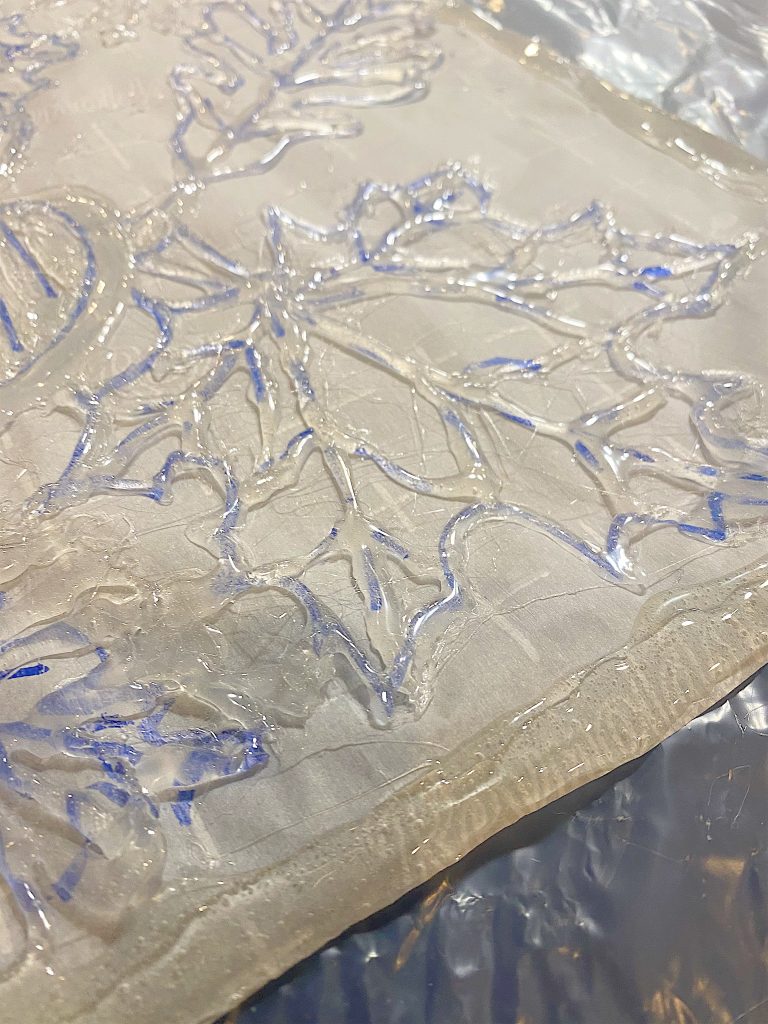
I have a big computer screen and traced the leaves in a haphazard pattern on to parchment paper. I traced them right on my computer screen!
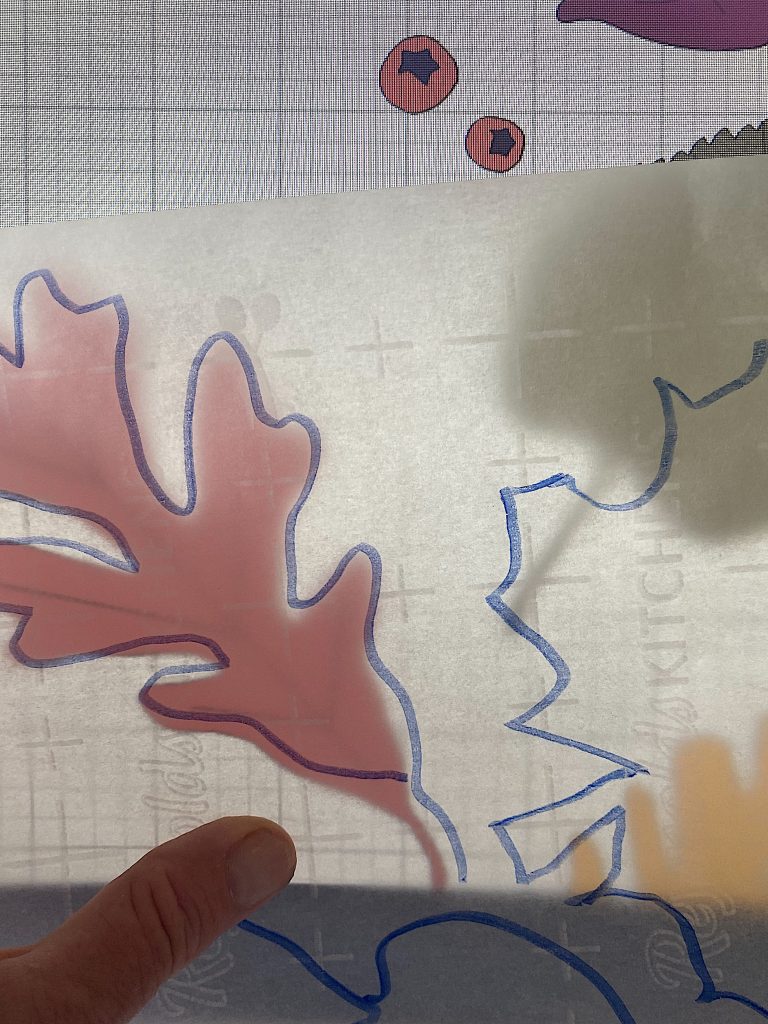
When I was done, the pattern looked like this.
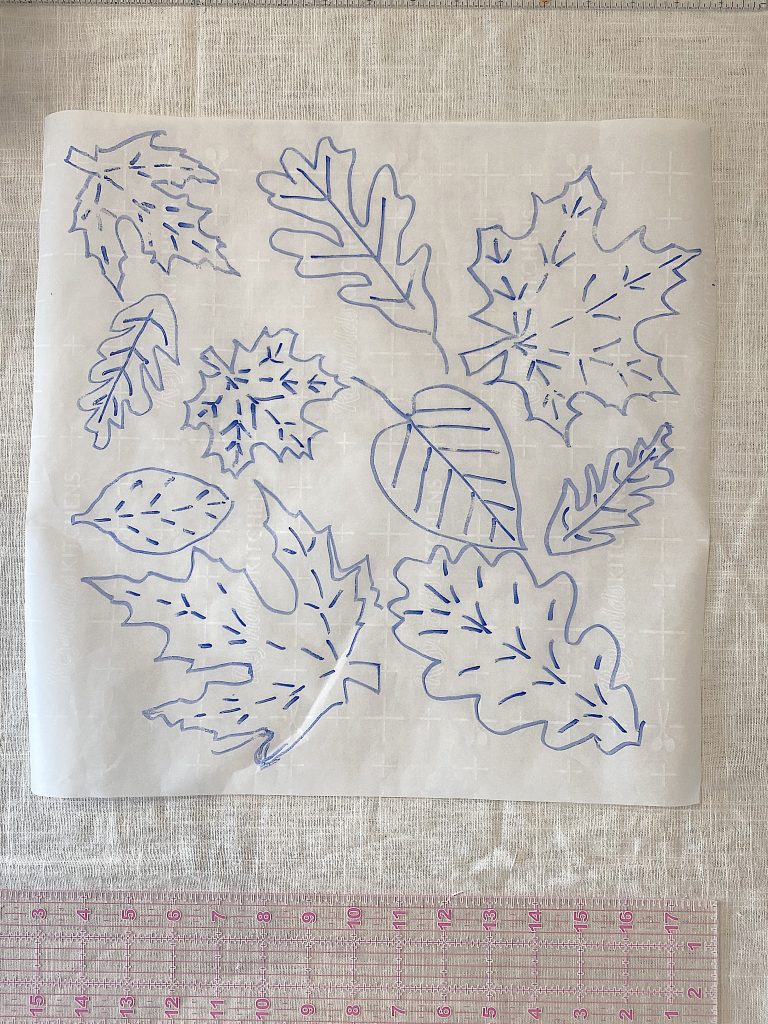
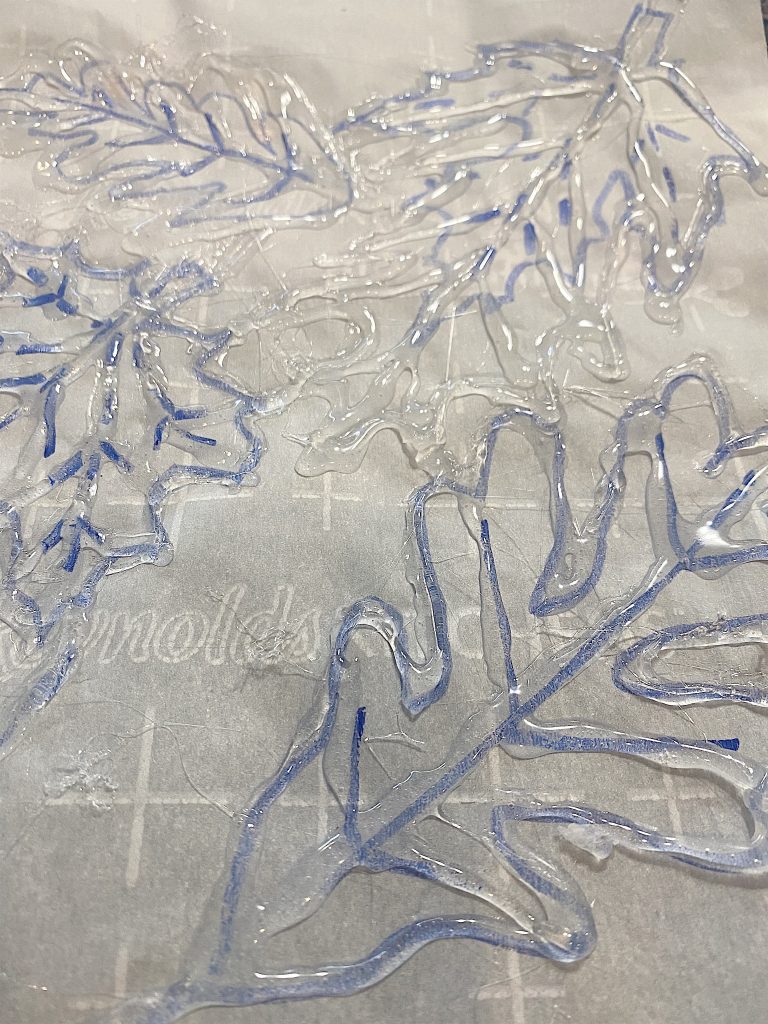
At this point, I should have realized I made my first mistake. When making the stencil, all of the leaves needed to be attached to one other. In my design, the leaves were kind of floating in the middle of the design. So I tried to attach them all in a haphazard way.
It kind of worked. But it really didn’t. After I added the paint, the stencil was so floppy that it was almost impossible to lay it flat on the fabric.
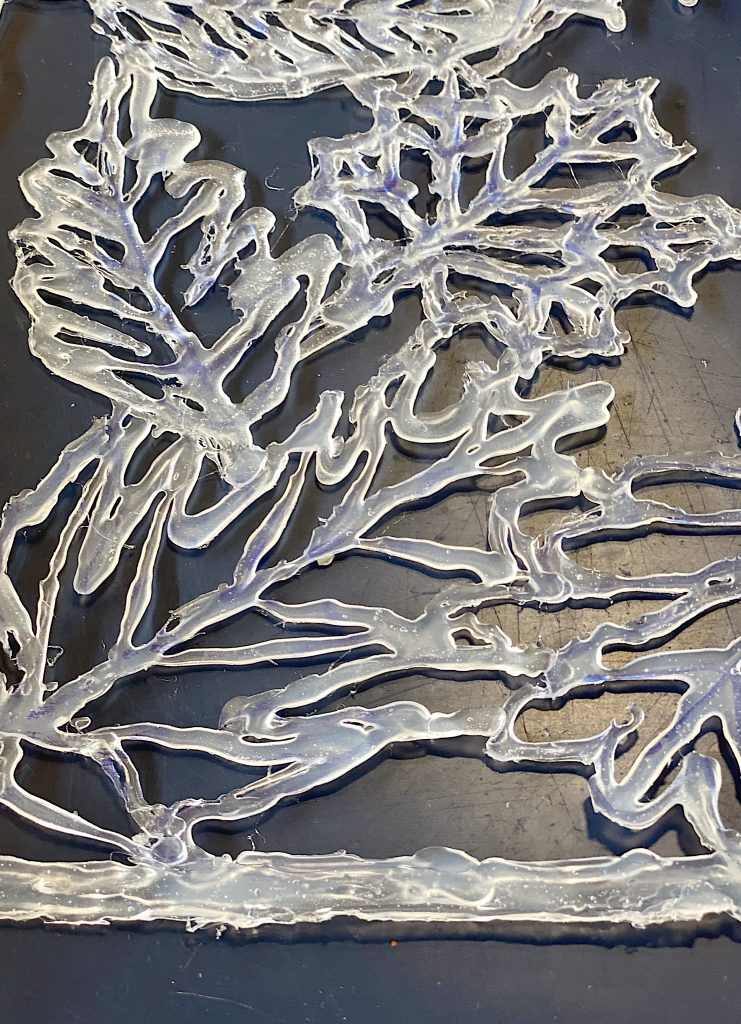
Making the stencil is easy. All it takes is a glue gun, a lot of glue sticks, a pattern, and some parchment paper.
The underneath side is actually the side that you use for the stencil. It’s flat and normally works great when you add the paint.
Or so I thought.
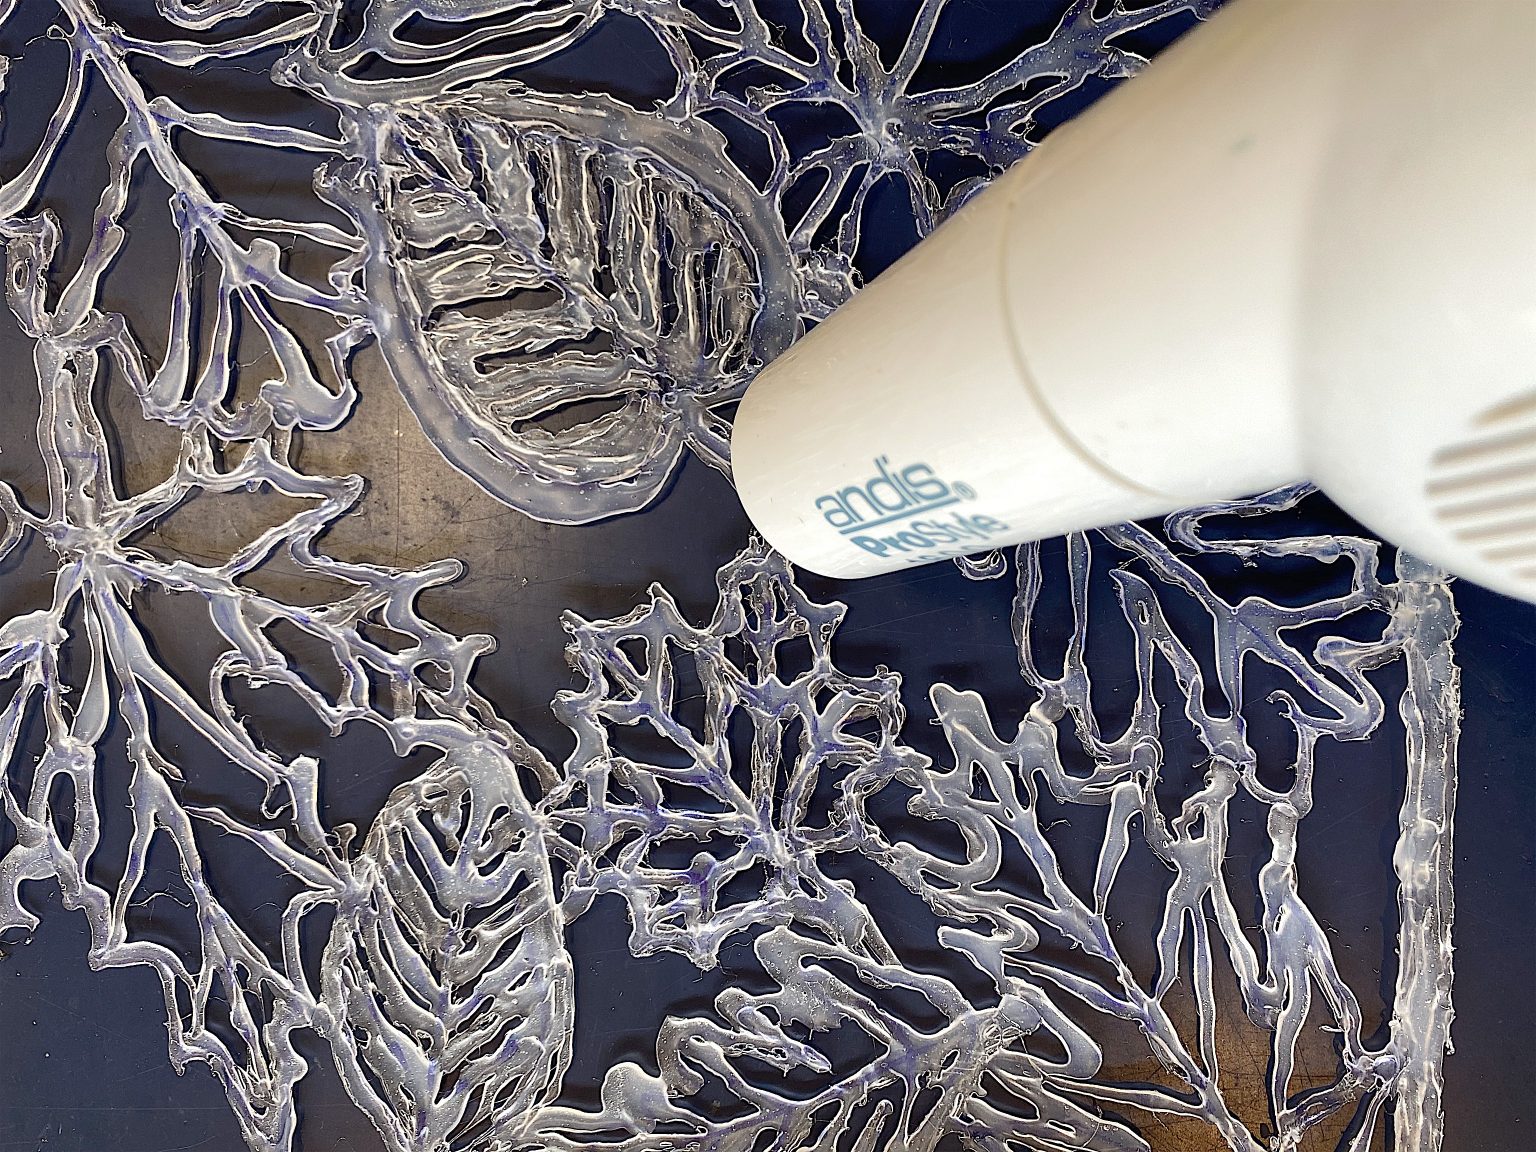
Here’s a little tip. Do you know those really irritating thin strings that are always everywhere after you use a glue gun? Take your hairdryer and quickly blow the hot air over your stencil. Be careful you don’t melt your stencil. But most of the glue strings will disappear.
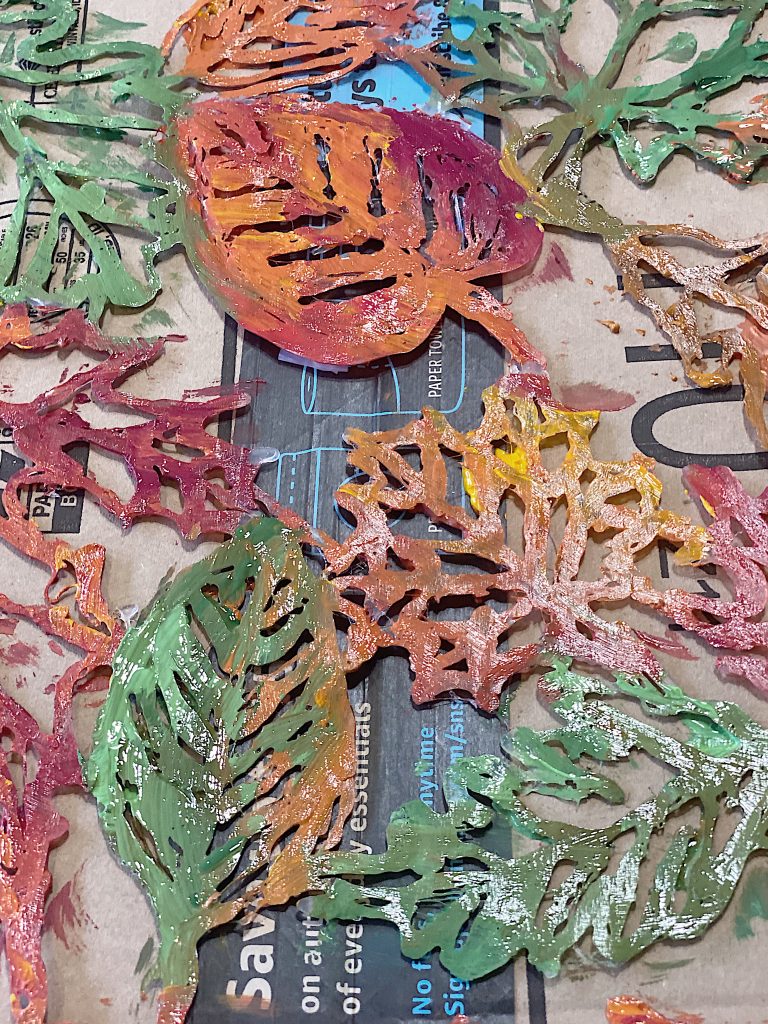
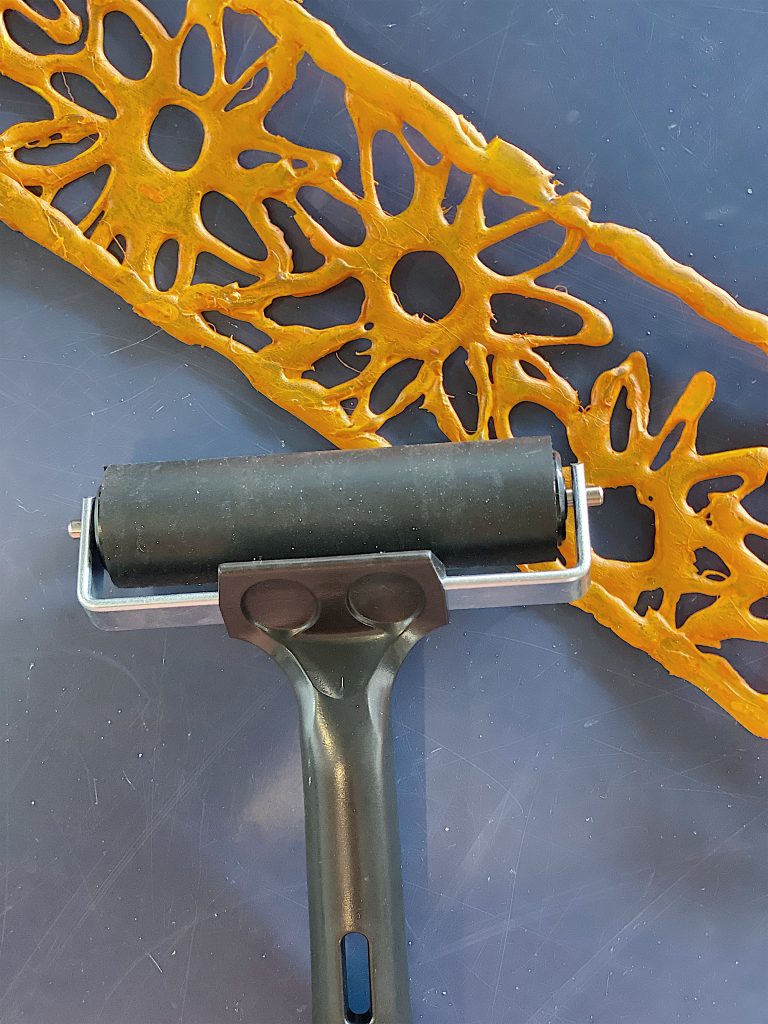
Here is the finished stencil. I thought it was attached enough. (What I forgot is that once I add paint on one side, I still need to flip it and put it on the fabric.)

The next step was to add the paint to the flat side of the stencil.

I chose fall colors and actually love this stencil so much.
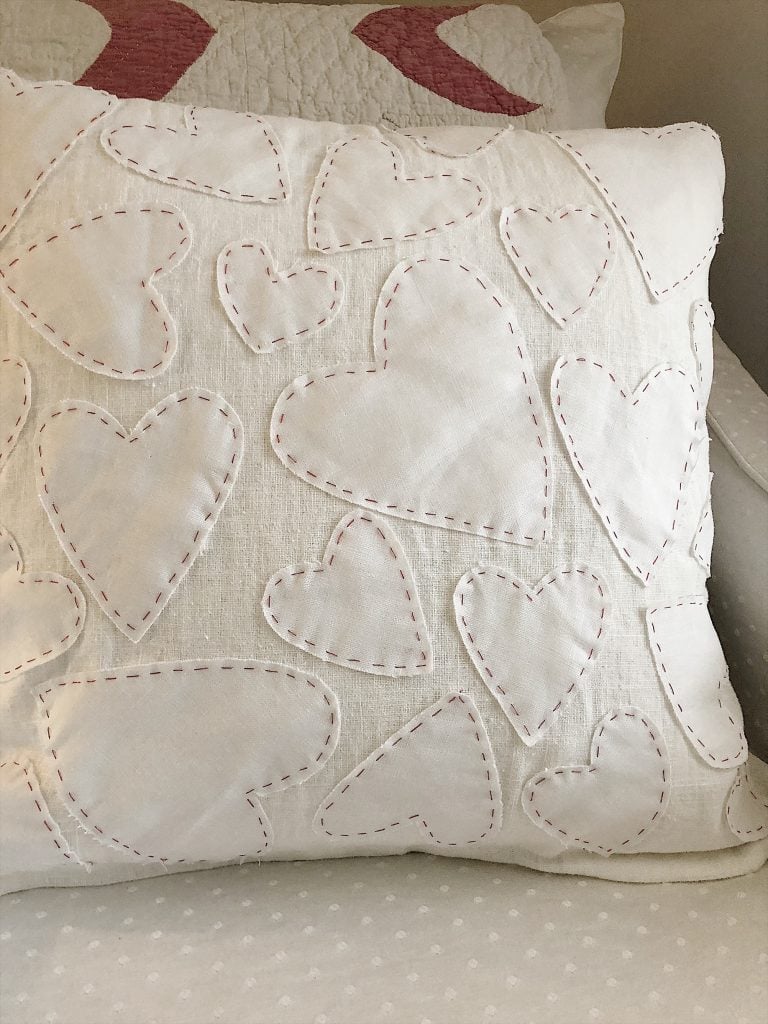
Next, I carefully laid the stencil, paint side down, on to my pillow. The amount of paint that ended up on me was likely more than what was on the stencil. And this large 16″ stencil was floppy and did not want to lay down flat without getting paint everywhere. It was a disaster.
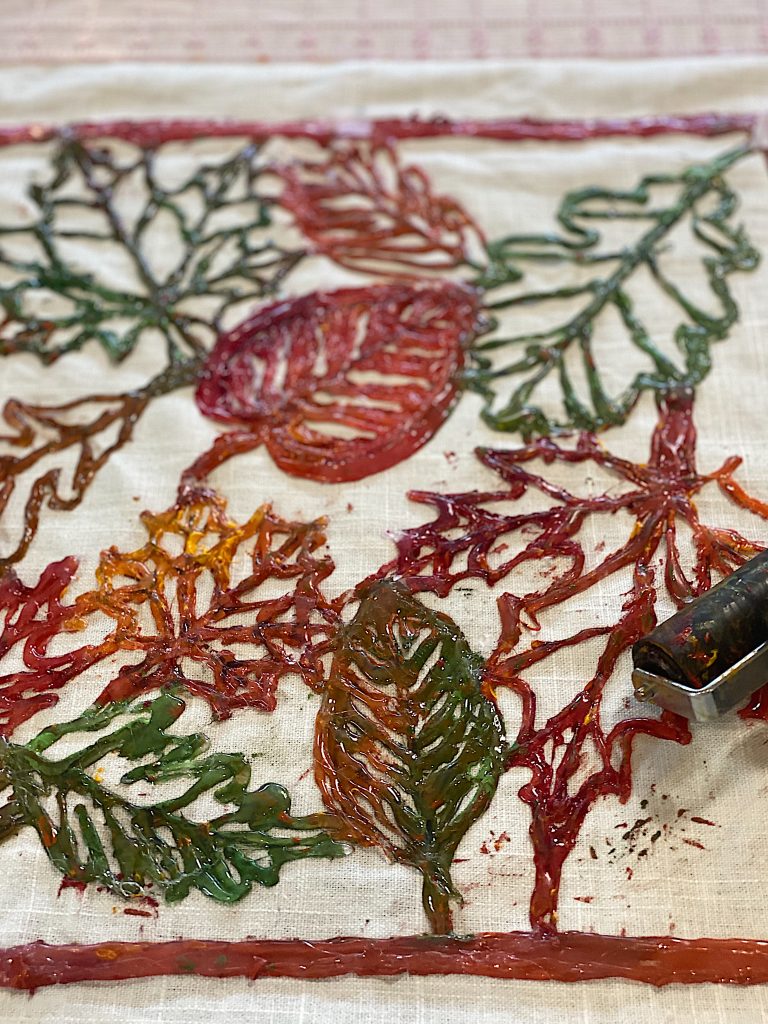
I used the brayer to push the paint onto the fabric and gently removed the stencil.
This is what it looked like. Aaaarrrgghh!
It didn’t work.
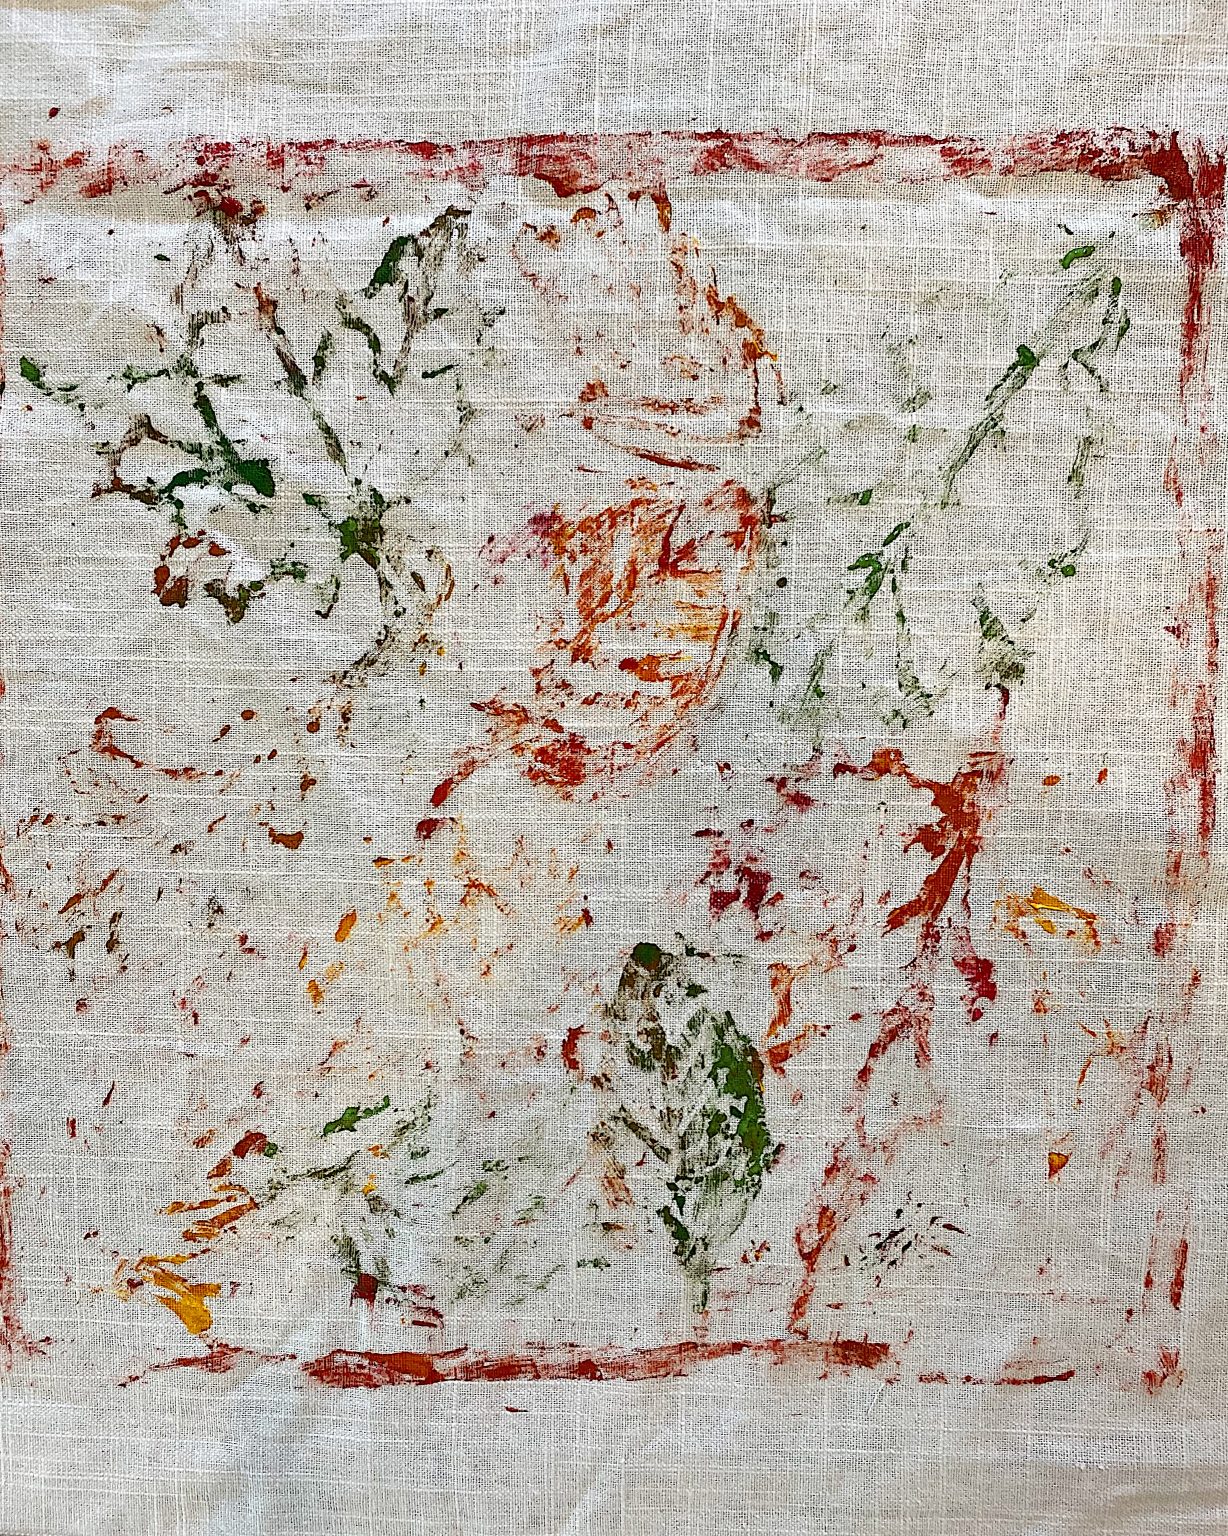
And at this point, I knew this craft project was a failure.
There is no doubt that anyone looking at the pillow would have no idea what it was. It just didn’t work.
So what are my options?
- Add more paint to the stencils, and try again. (There are so many reasons why this may not work a second time. It’s hard to add the paint and then flip it over onto the fabric. You also can’t put too much paint on the stencil or else the paint will end up everyt=where you don’t want it.)
- Just paint the pillow again but in leaf shapes and then maybe use free stitch embroidery. (Which means not using the stencil.) Like this.
- Come up with a creative way to use the stencil for something else. It is pretty cool.
So now you know. This project didn’t really work. And I don’t really know what to do next.
Your suggestions and comments are greatly appreciated.

I agree with laying your fabric on top of the painted stencil. Press down good by hand or use brayer.
Thank you so much for your feedback 🙂
I love your idea, especially using it as a border as in the napkins. One very tiny thing bothers me, and has nothing to do with the technique but the term instead. Isn’t your glue pattern more of a stamp than a stencil? That’s why it’s unique, and you won’t find it at a stencil retailer!
Have you tried printers ink? It will not dry as fast.
My suggestion too, is to lay the fabric on top of the painted stencil and bray.😉
Thank you for giving me incite and following along, Wendy!
Beautiful idea! I would cut it apart and make some more stenciled napkins or make a tablecloth with a leaf border.
That is a great idea, Lonna.
I love the design!!!, But I am not crazy about the bright colors since I am more into neutral fall colors, and since copper is going to be your theme for fall, maybe spray paint the entire design copper and prop it up on a shelf??? Not sure how flimsy it is, or if it needs a backing, but I like the design and would hate to see you cut it up. Of course I have not worked with stencils, so others gave good suggestions on what you might do to get the pillow idea to work.
Very true, Thank you for the feedback, Debbie!
See Leslie, one common thread for sure in all the posts…the stencil is gorgeous! The colors are wonderful, the shapes are fresh….time to get out your easel and paints Leslie! Looks like the beginnings of a fall painting.
You are very sweet, Mary. I appreciate all of the motivation so much!!
I love your stencil, I was wondering if it would work better if you glued the back of the stencil to a piece of would and stamped it onto the material. The stencil itself would be so pretty as a sun catcher or if you glued the stencil to a flat piece of plastic and put a frame around it.
Love your ideas, Miller. Thank you so much!
This is definitely a fail, it was not the end result you were looking for, but I kind of like it! It has an abstract look with just a hint of leaf shapes and fall color. Interesting! Love your blog and thanks for sharing the successes and the failures. We all have them!
Maybe just use it like a regular stencil. Don’t apply paint to the Stansel, just lay it dry on the fabric and apply paint with a stencil brush. The results would be the reverse of what you intended, but it might be cool.
Leslie it is so beautiful, why not just frame it. A frame and matting…and voila a great fall piece !!!!
So true, Pam. Thank you!
The stencil you’ve created appears as if it is cut from metal and patinaed.
It could be mounted as is to metal (stainless steel, copper) for durability and hung on an exterior door or wall.
Also, on metal it would be durable and somewhat flexible to be used as originally intended.
I also like your idea free motion embroidery, you could also use a paint pen for highlighting.
OR mount it with the muslin backing and frame under glass utilizing all that you have created
Love your site!
Instead of putting the stencil on the material – why not reverse the process (since the stencil is fragile) & lay the material on top of the stencil & press the material onto it & then gently lift it back up. Worth a try?