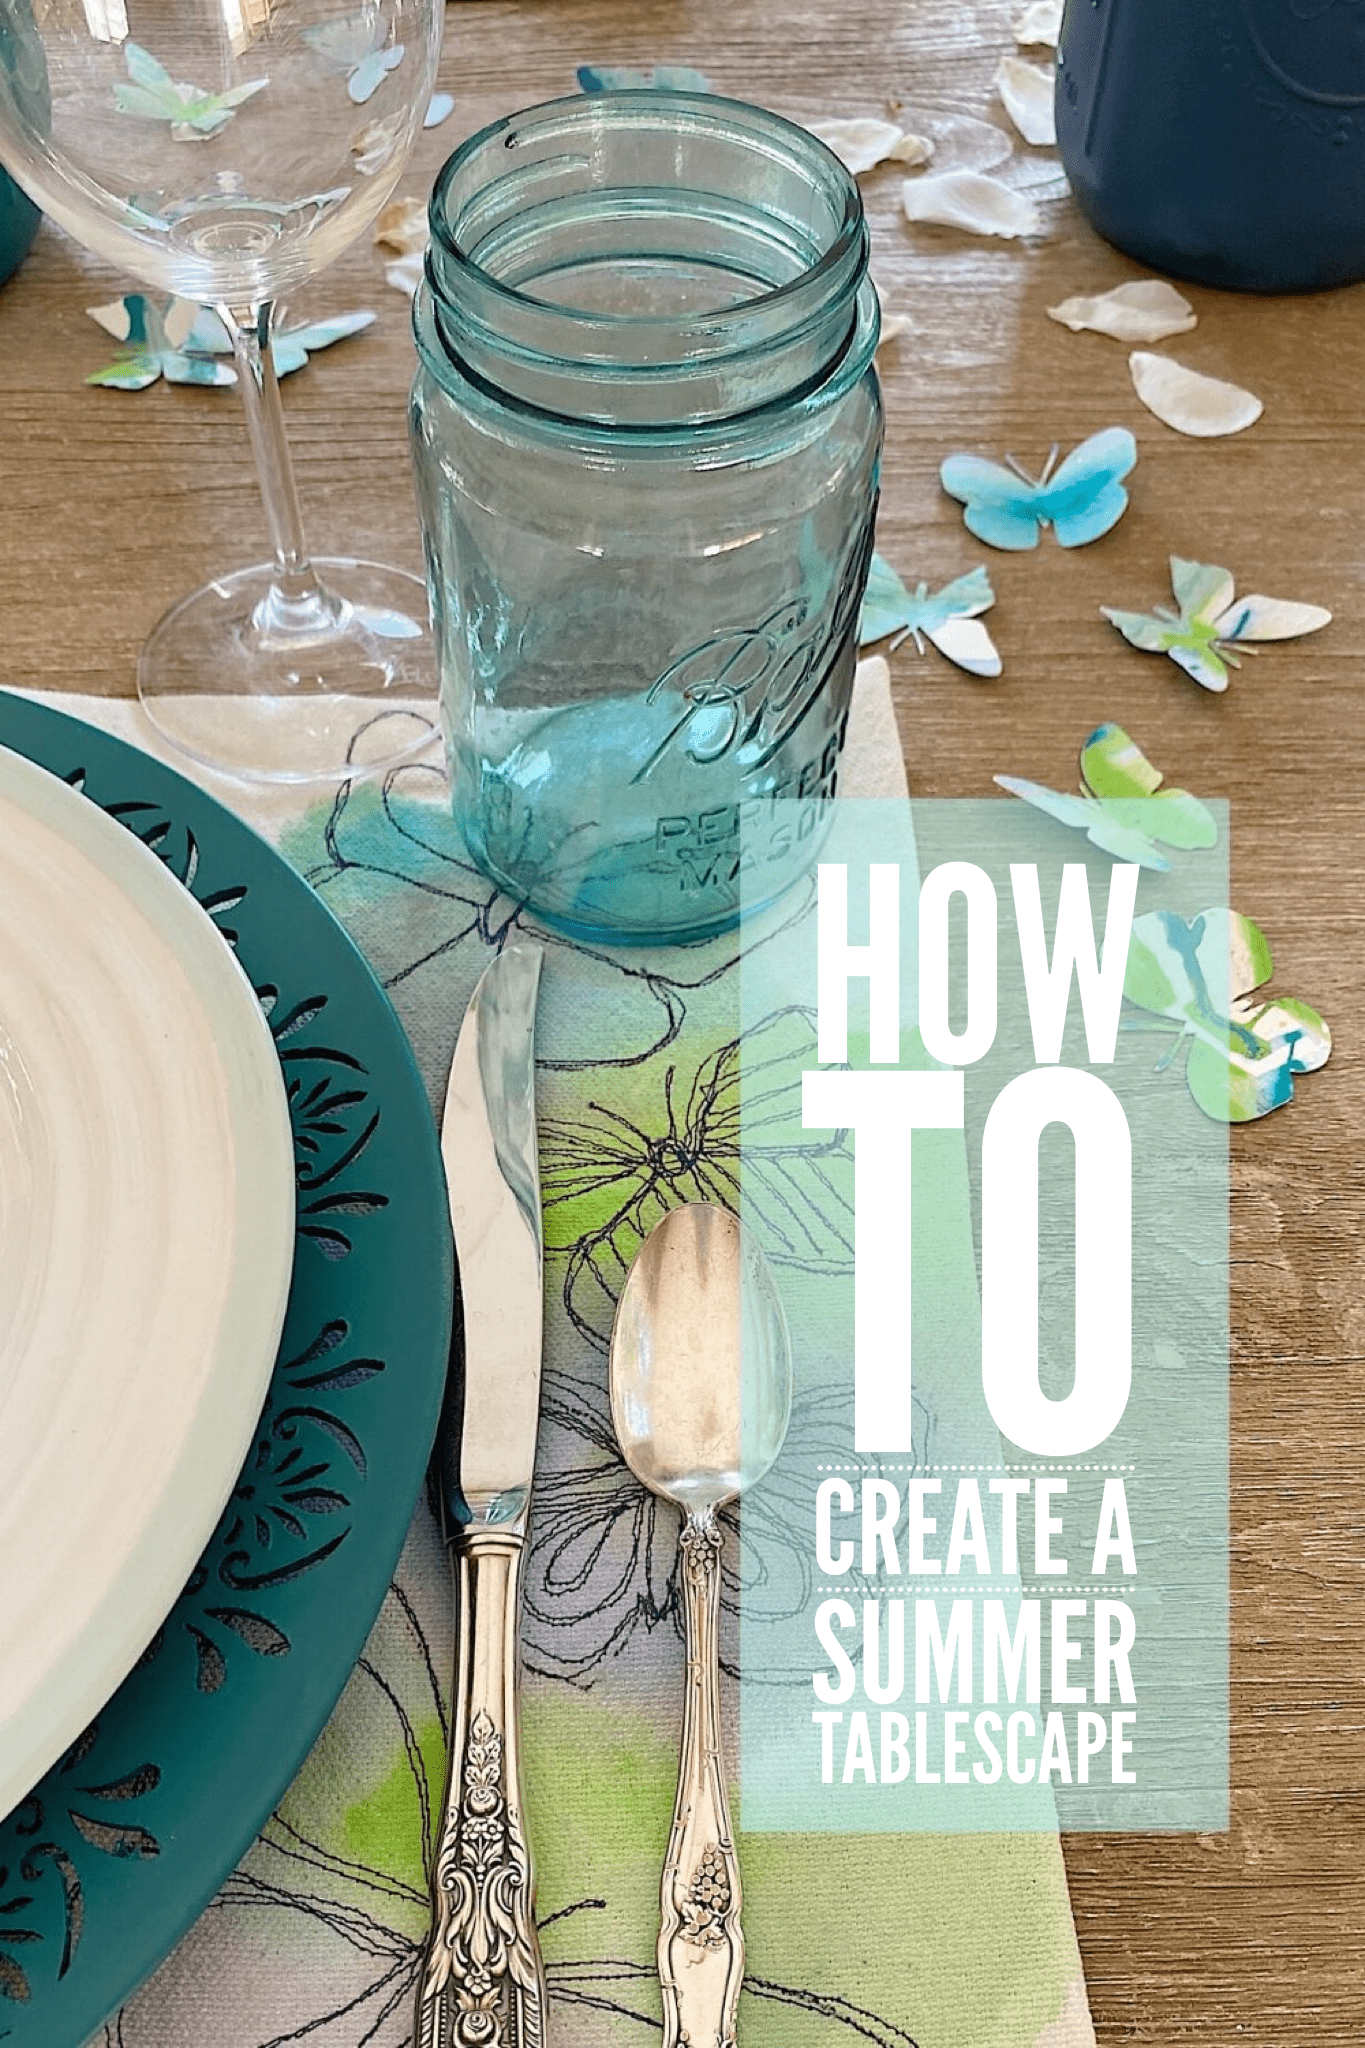
How to Use Paint to Create a Tablescape for Spring and Summer
I love how paint can make such a dramatic impact on a table setting. I cannot wait to share how I used paint to create a tablescape for Spring and Summer.

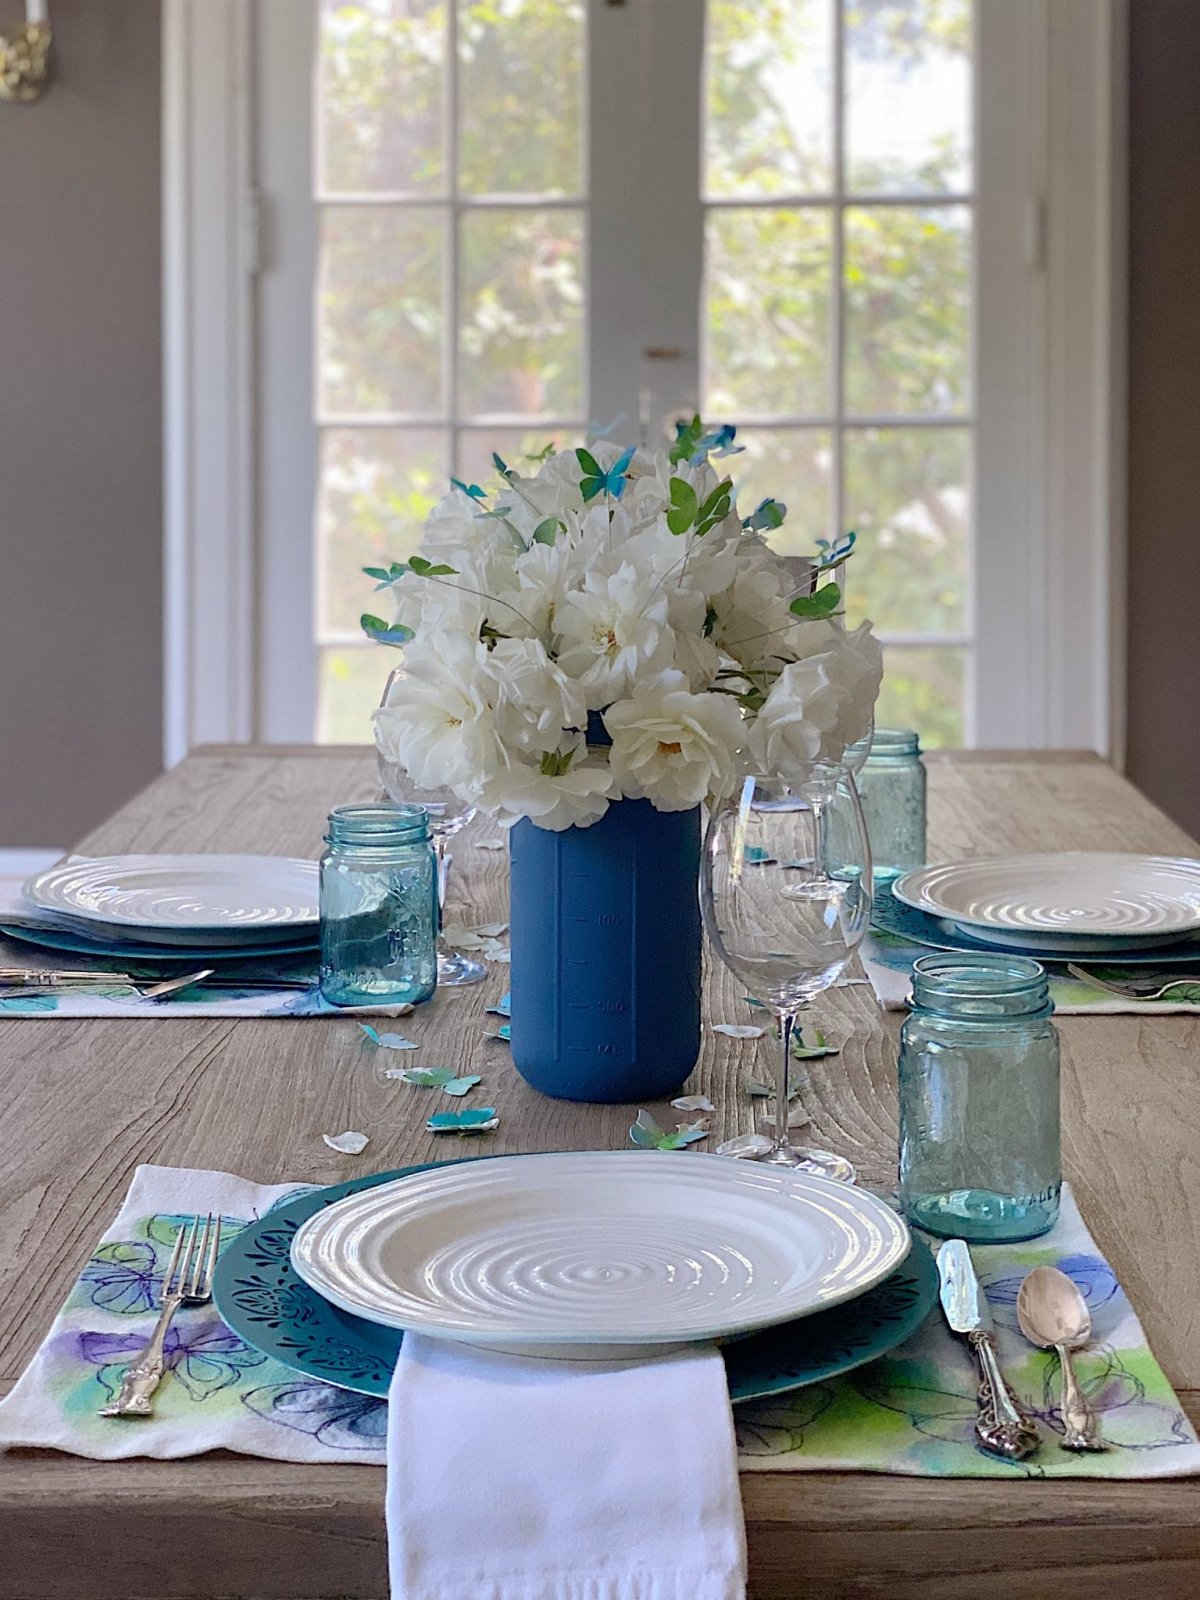
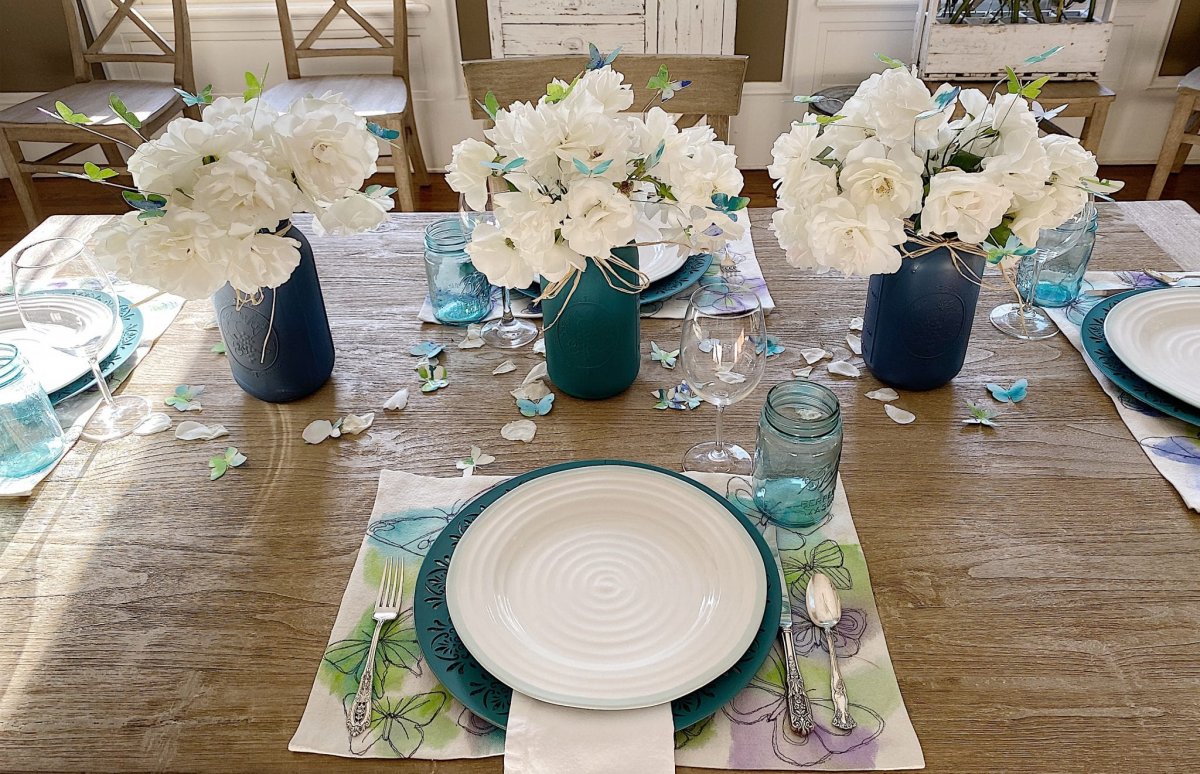
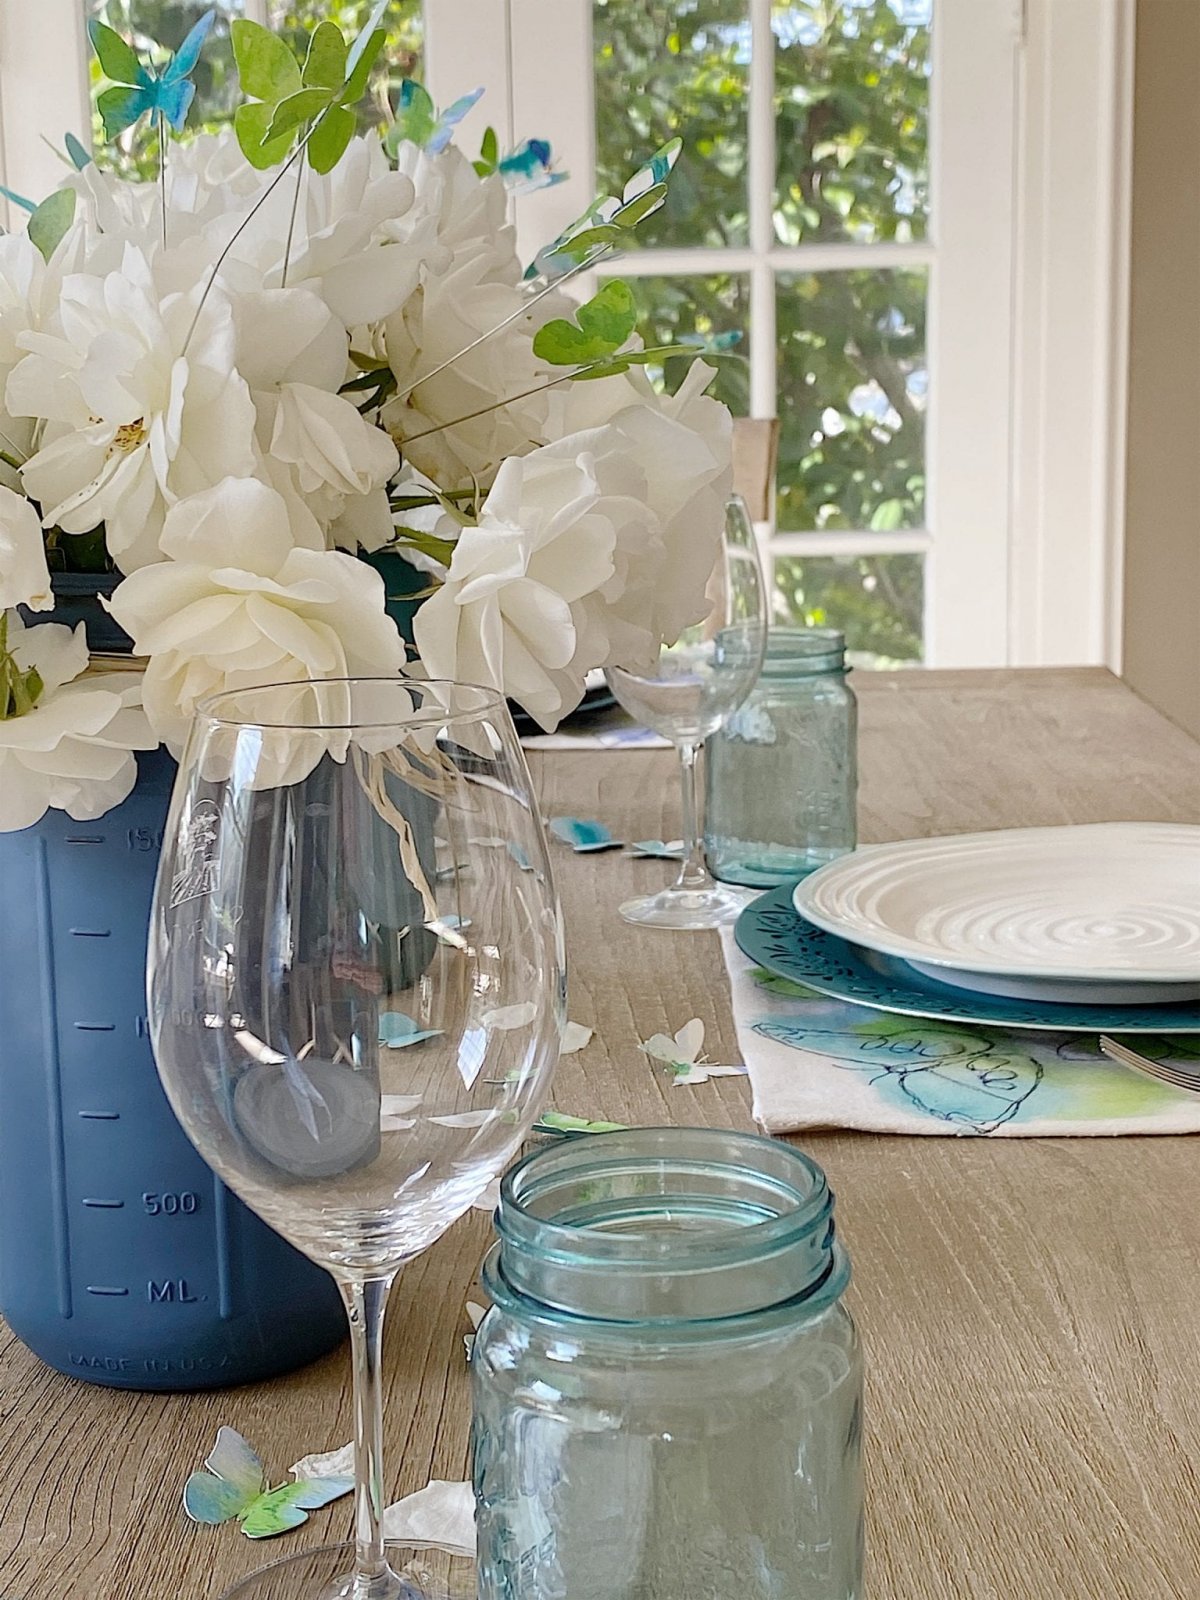
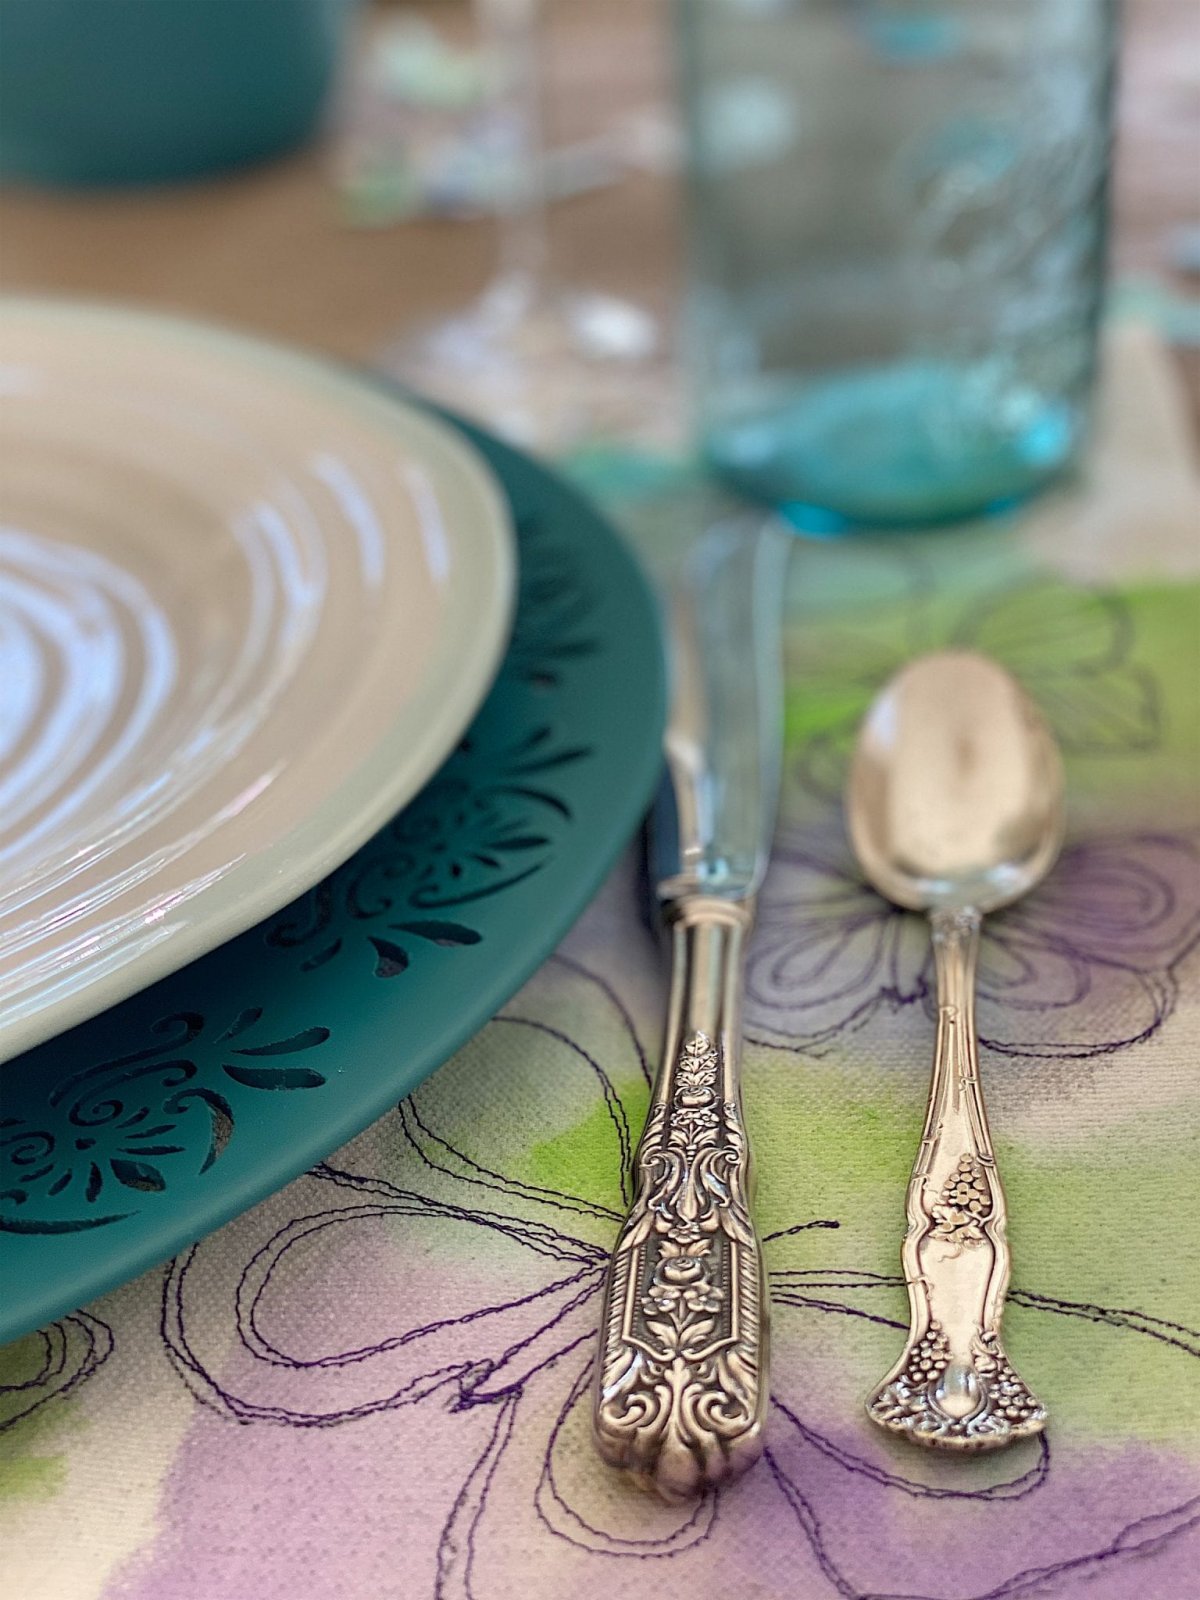
Oh goodness. I absolutely love this table! The colors, the butterflies, the chargers, the mason jars, and the placemats turned out way better than I ever imagined. And it’s all because of the paint.
Paint? That’s right.
I partnered with Testors paint to create a tablescape with lots of paint.
In fact, I used paint for four different projects to create this tablescape. I painted (and free stitch embroidered) the placements. I painted the chargers and I painted the mason jars. I also painted watercolor paper and cut out the butterflies.
This table is so perfect for spring and summer.
I have worked with Testors before, and as an artist, I have to say their paint colors are amazing. I picked out a different color palette (no orange and pink!) and absolutely love these greens, blues, and purples. The paint colors are such a refreshing color palette and I love them all.
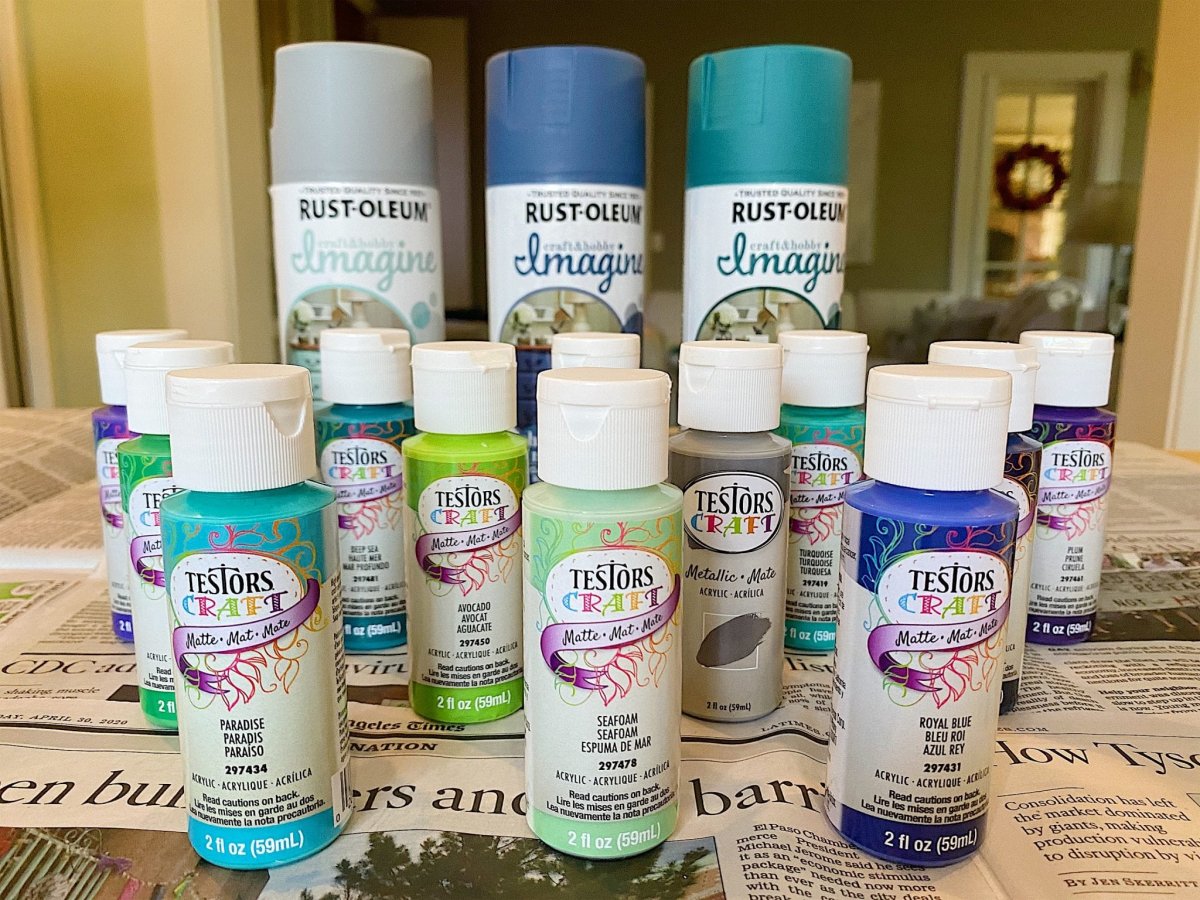
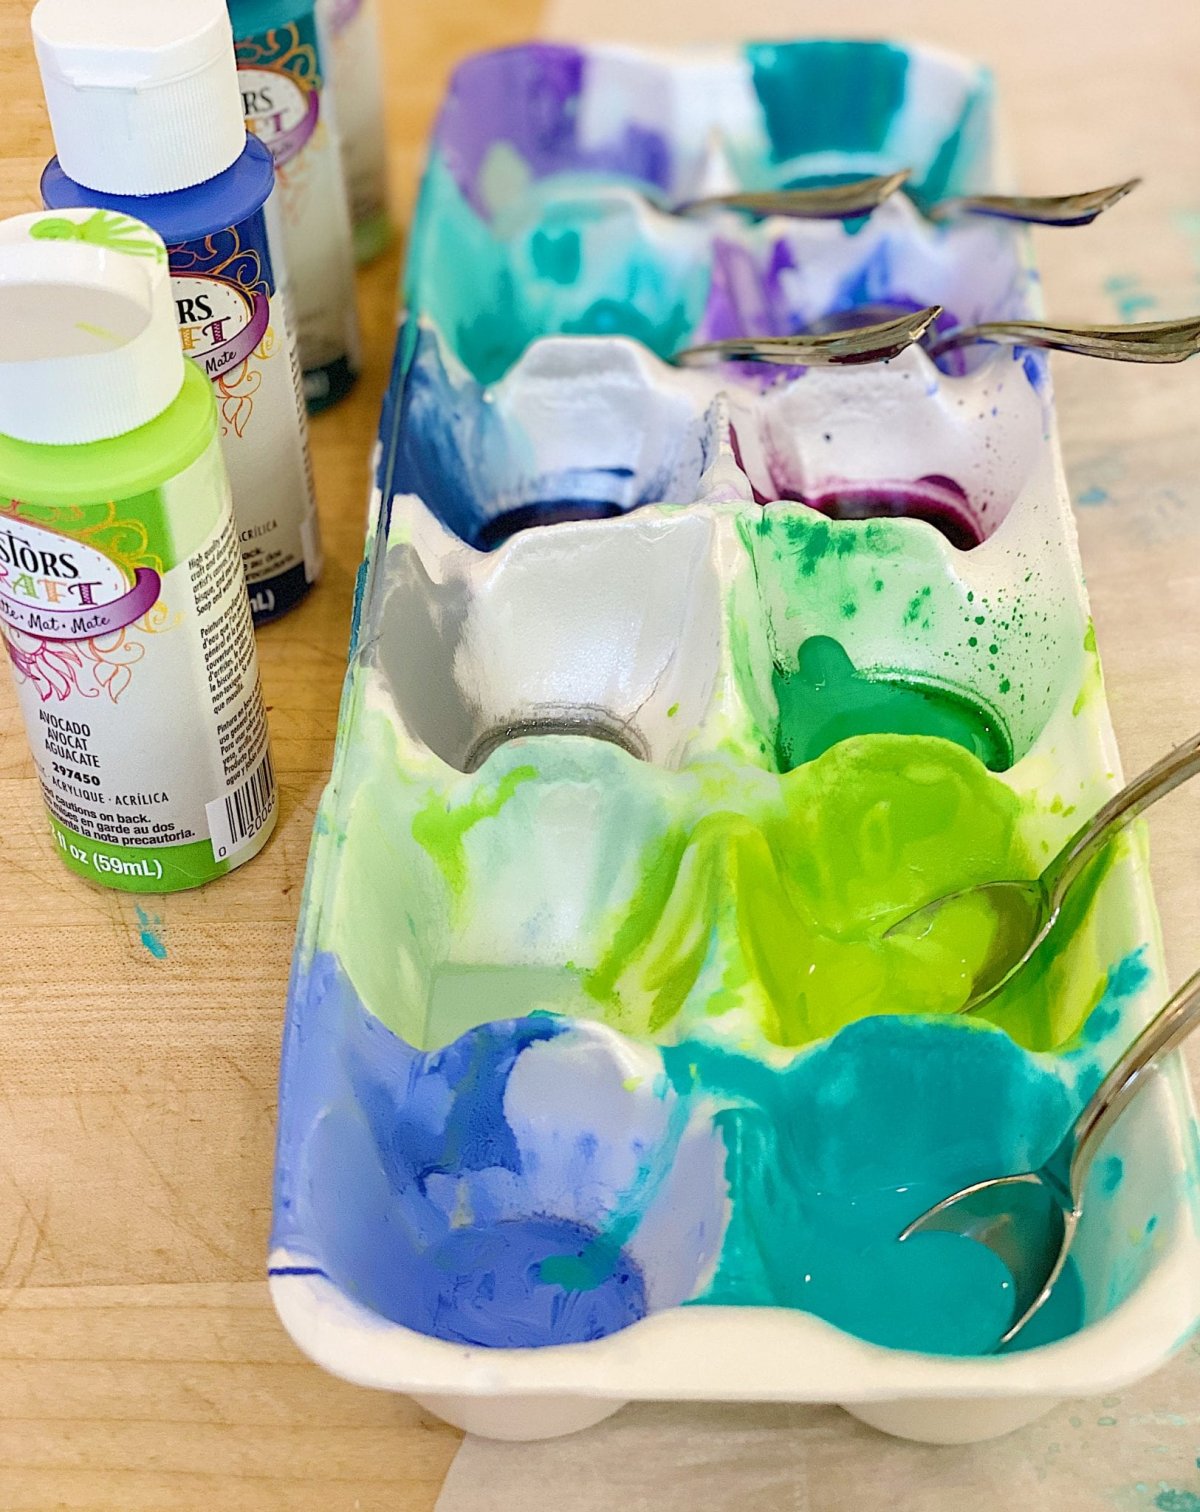
Here are the Testors Craft Acrylic paints I used. I used the colors: green, purple, hazel, sunshine, turquoise, navy blue, royal, paradise, shamrock, avocado, plum, seafood, deep sea, dark plum, artichoke, olive green, cactus, midnight blue, and white.
The primary colors I used were Paradise, Seafoam, Turquoise, Avocado, Deep Sea, and Royal Blue.
Testors Craft Acrylic can be purchased online at Amazon.com, Walmart.com, and at Do-It-Best, True Value, and Blain’s Farm & Fleet Stores.
There is something about the pigment in these Testors Craft Acrylics that I love. The colors are not chalky and diluted with white. The colors are pure and beautiful and they look amazing.
How to Make the Butterfly Placemats
You might remember the Motion Free Embroidery Stitch pillow I made earlier. One had flowers and the other had Easter eggs.
I made up the process. I painted shapes on fabric (which is actually dropcloth fabric) and then stitched the detailing on my sewing machine.
What You Need to Make These Placemats
Cotton fabric (I used dropcloth fabric)
Sewing machine
Free motion embroidery pressure foot
Embroidery Thread
*Before I get started, I do need to mention a disclaimer. Testors doesn’t market their craft acrylics to be used on washable items. However, if I showed you all of my items of clothing that have permanent “acrylic paint stains” I can tell you that once it dries, acrylic paint will withstand being washed. I painted abstracts with acrylic paints for years, and yes, I have a whole collection of paint-stained clothing,
How to Make the Placemats
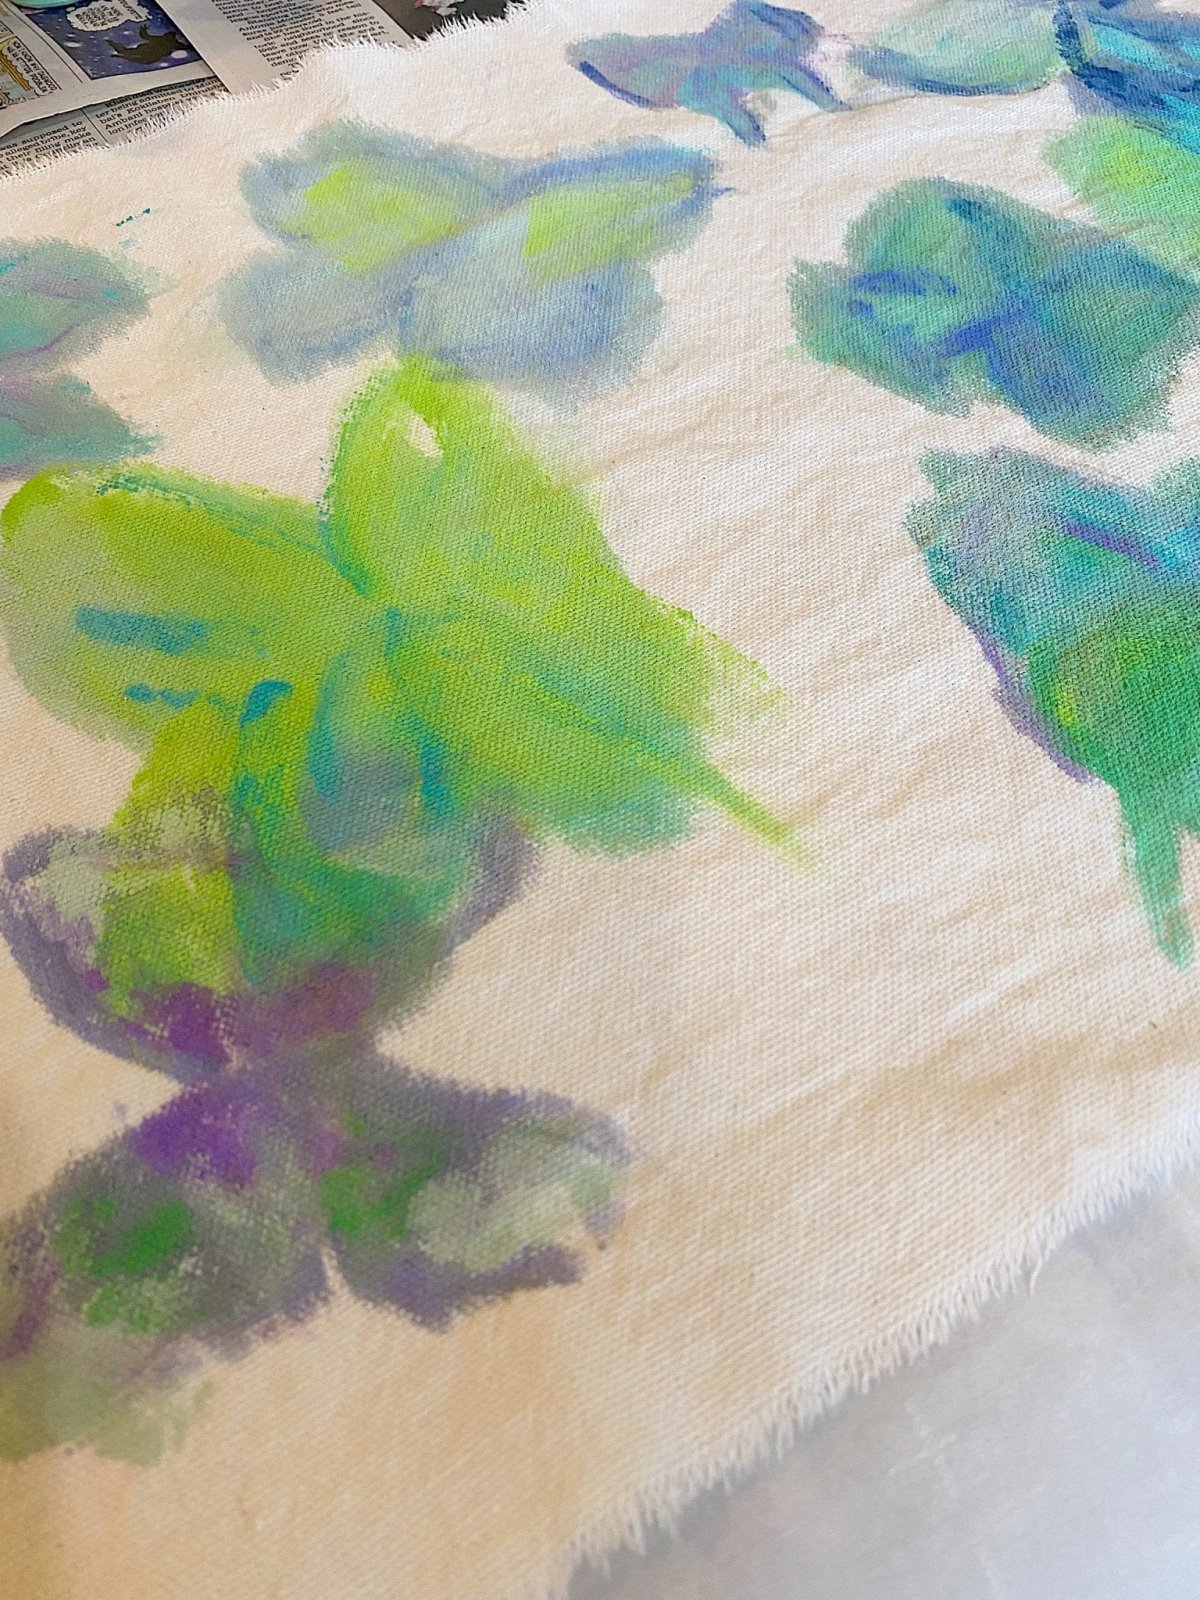
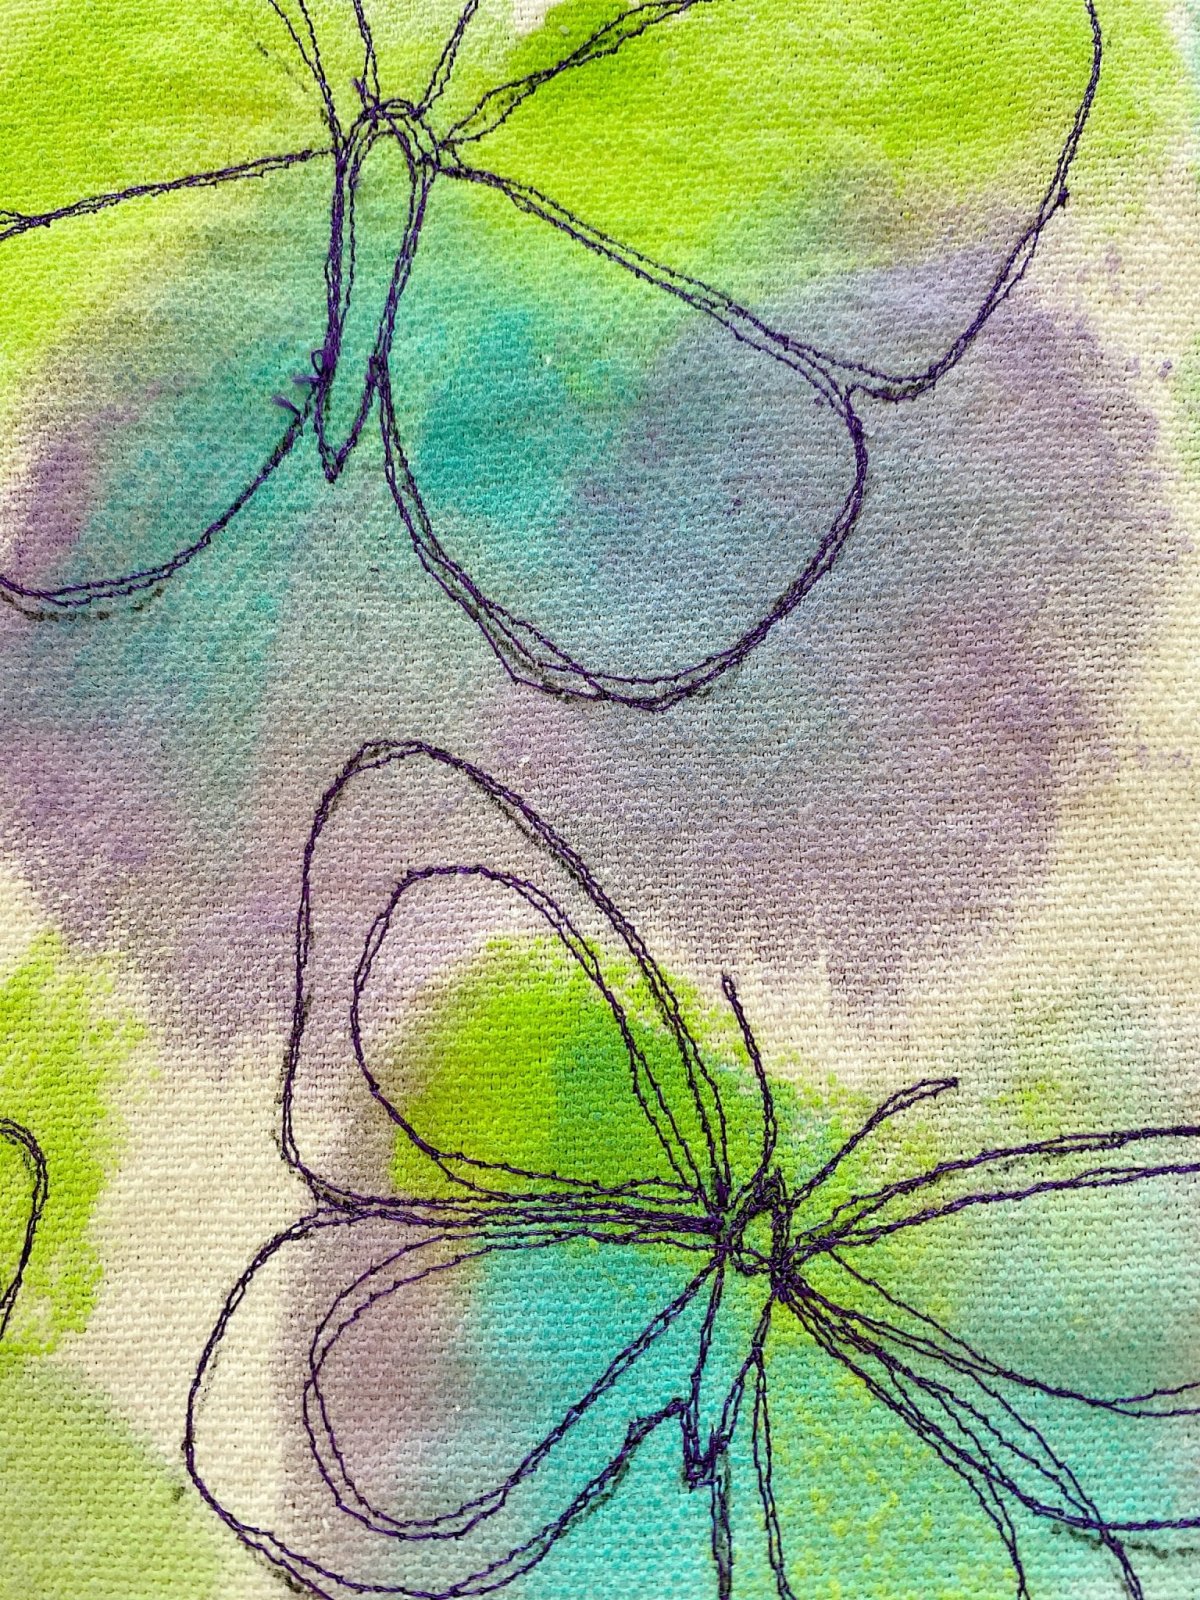
I started out by thinning the Acrylic paint with a tiny bit of water. This created a bit of a watercolor effect.
Next, I painted basic butterfly shapes on the fabric in a very loose way. And when I say basic, I mean basic! You do not need to be an artist to paint these shapes.
I went online and printed some butterflies to use as examples. I cut them out and then traced them on top of the painted area with a fabric marking pen.
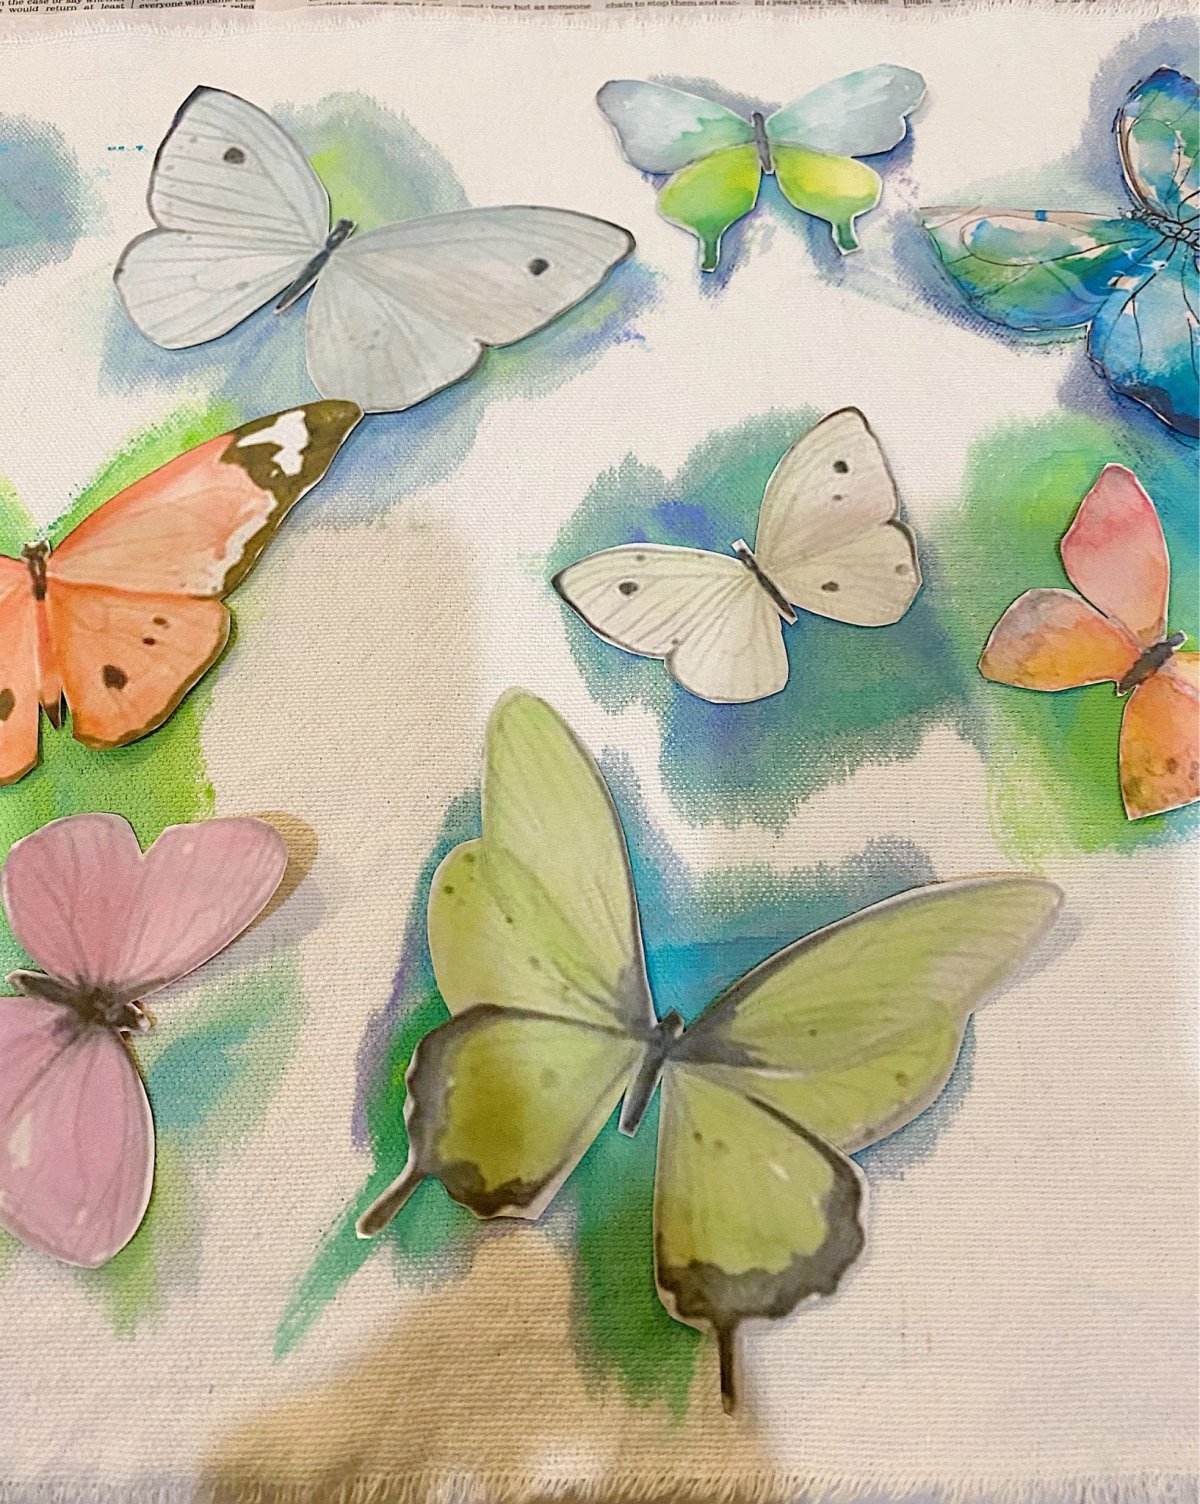
I love butterflies and though this was the perfect design for spring and summer. Of course, you could use flowers or birds or even vegetables. The possibilities are endless.
I then free machine stitched (using my sewing machine) the butterflies and added in the detail as I went along. I didn’t follow the designs on the templates exactly. Rather, I tried to free stitch the butterflies and just have fun.
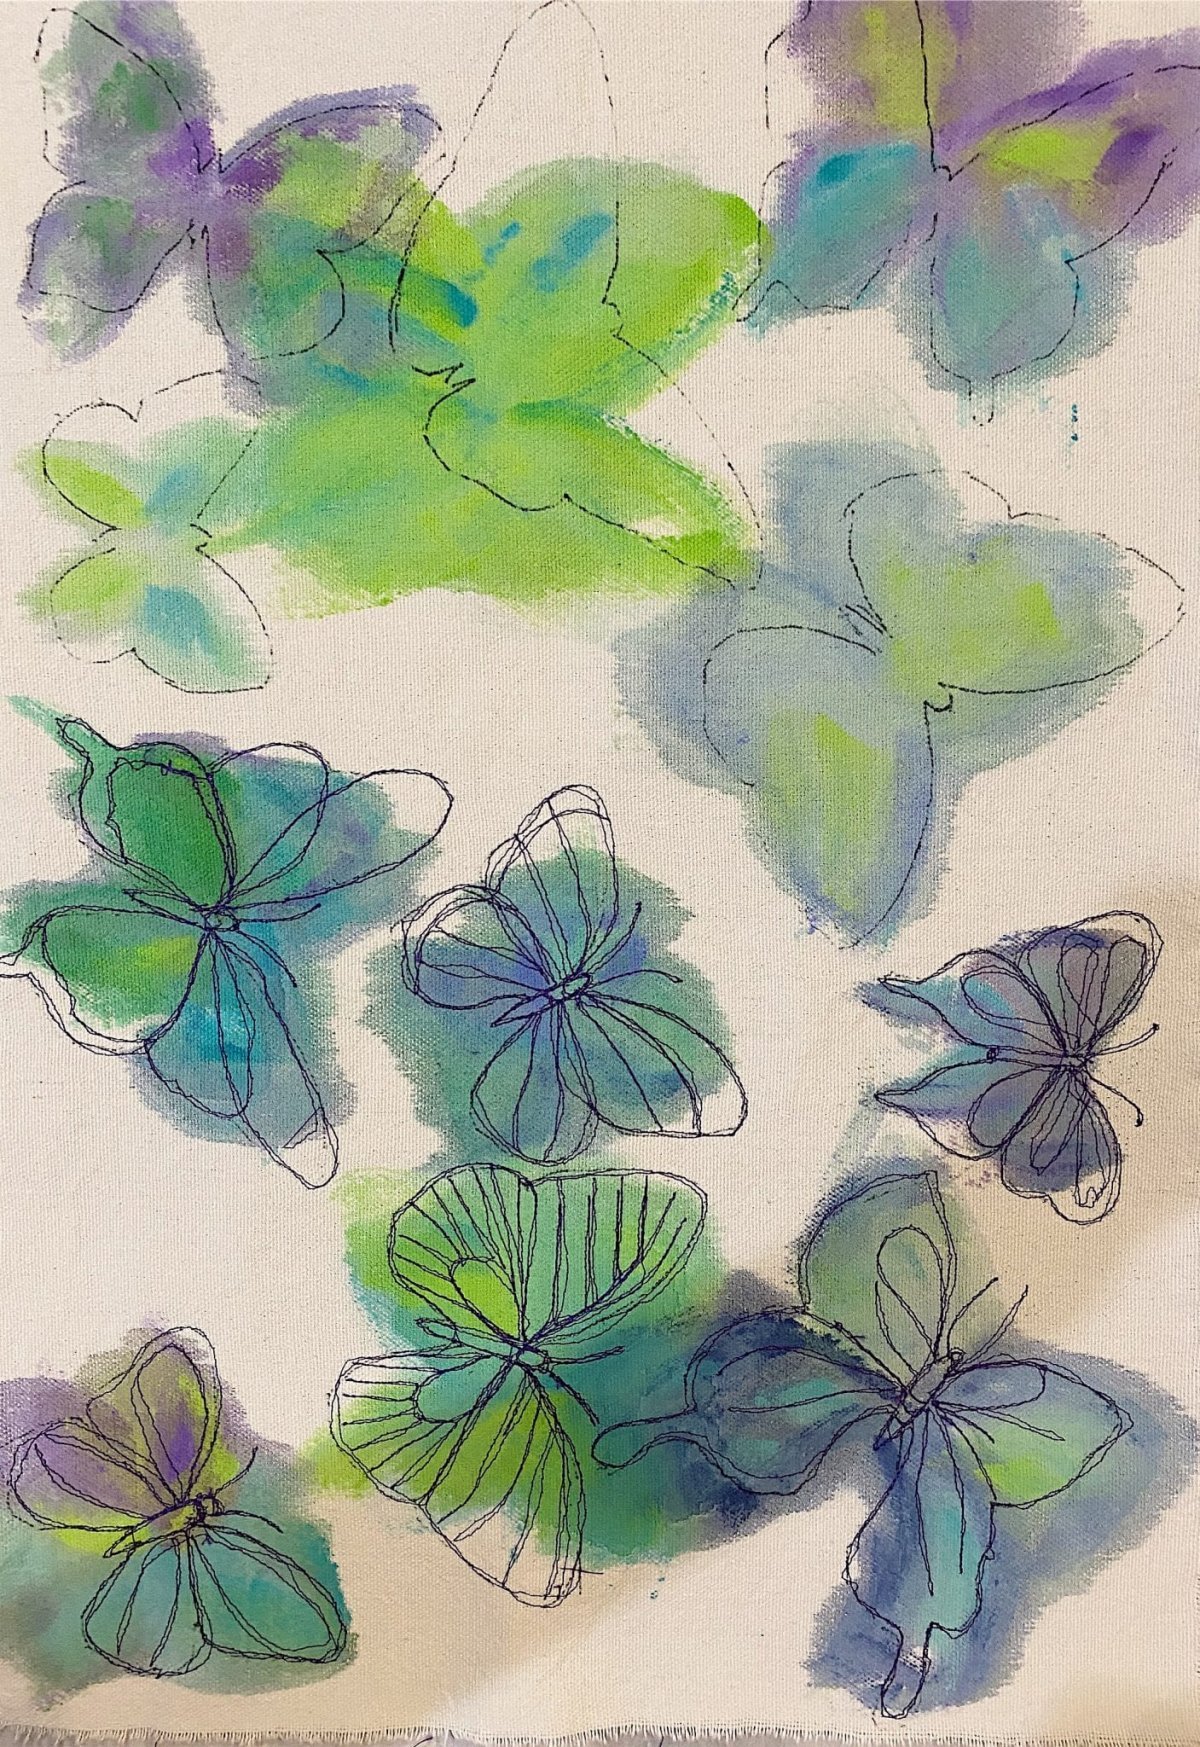
I used dark purple embroidery thread and stitched over the outline of the butterflies. In the photo above, you can see where I traced the butterflies and then where I stitched the butterflies at the bottom.

Click below to see a video of how to use free motion embroidery.
And look how great these placemats look!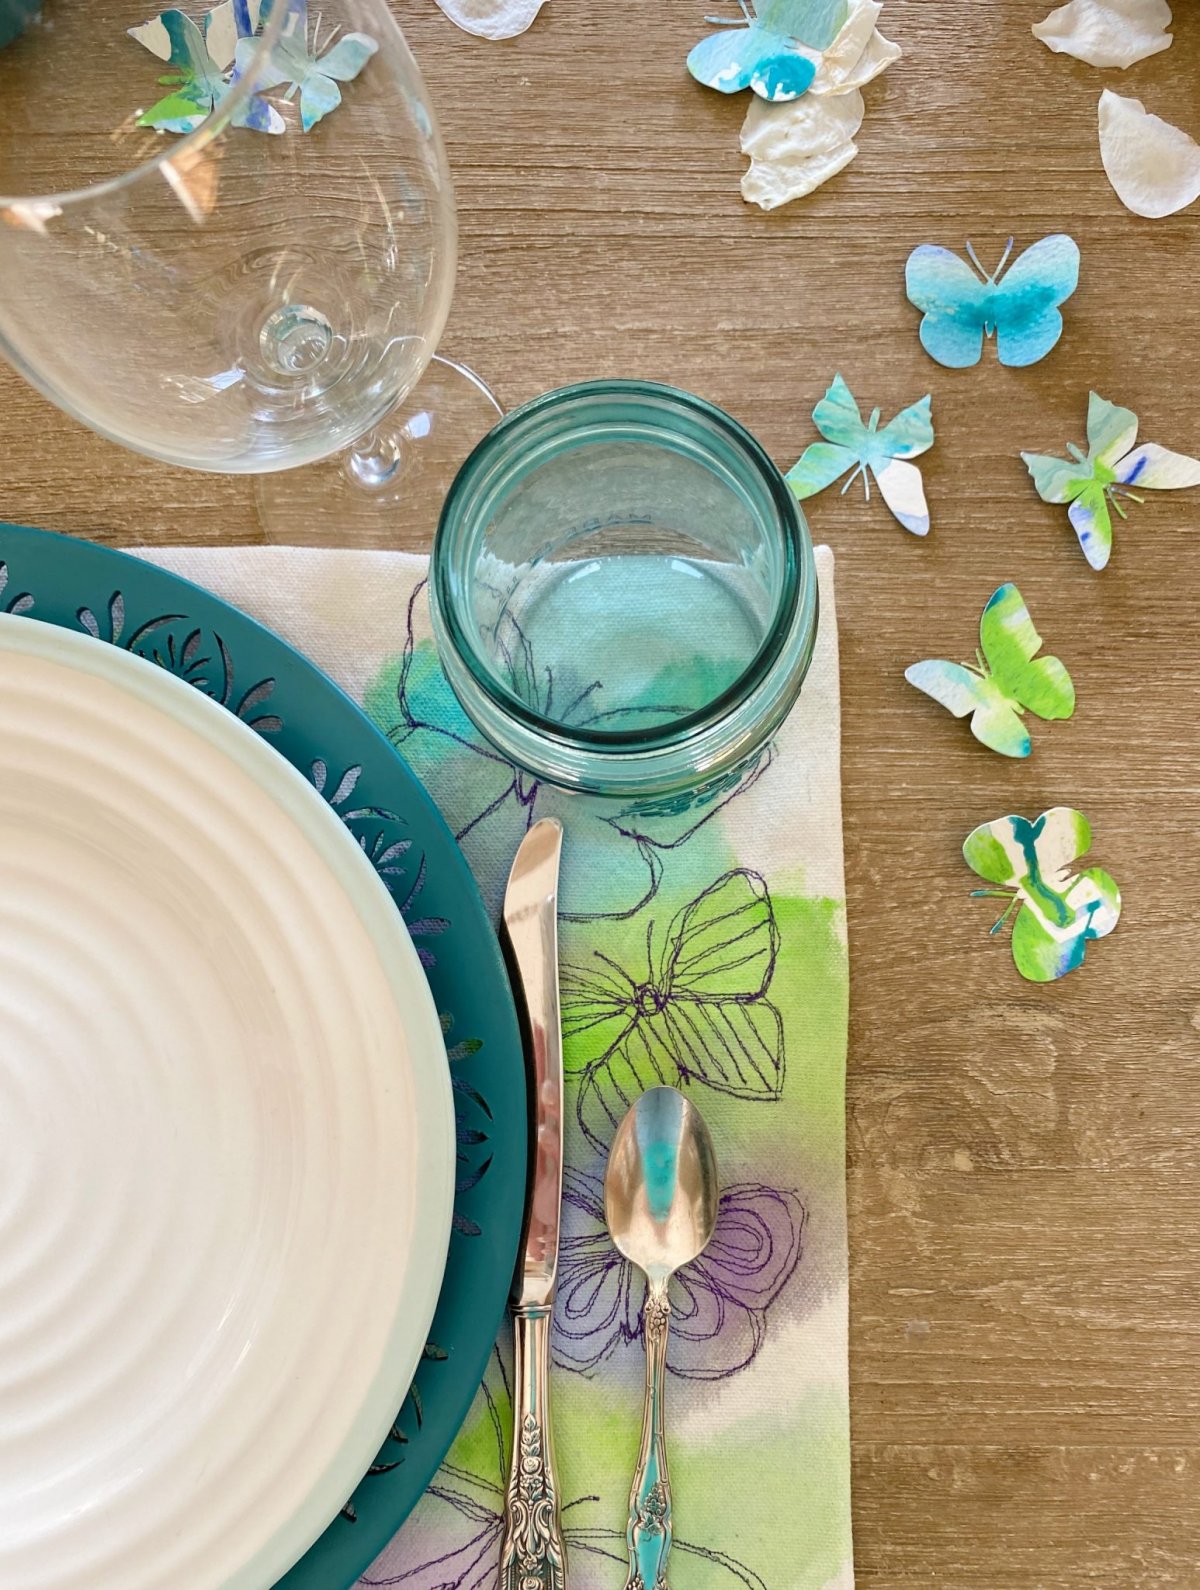
How to Paint the Chargers and Vases
I also thought it would be fun to use the Rust-Oleum Imagine spray paint to add some color to my vases and chargers. I used Rust-Oleum Imagine Chalk Finish Spray Paint in Coastal Blue and Serenity Blue.

I have had these shiny turquoise chargers but I have never used them. I bought them at a garage sale and they ended up being too glitzy and shiny. So I used the Rust-Oleum Imagine Chalk Finish spray paint to get a more matted look.
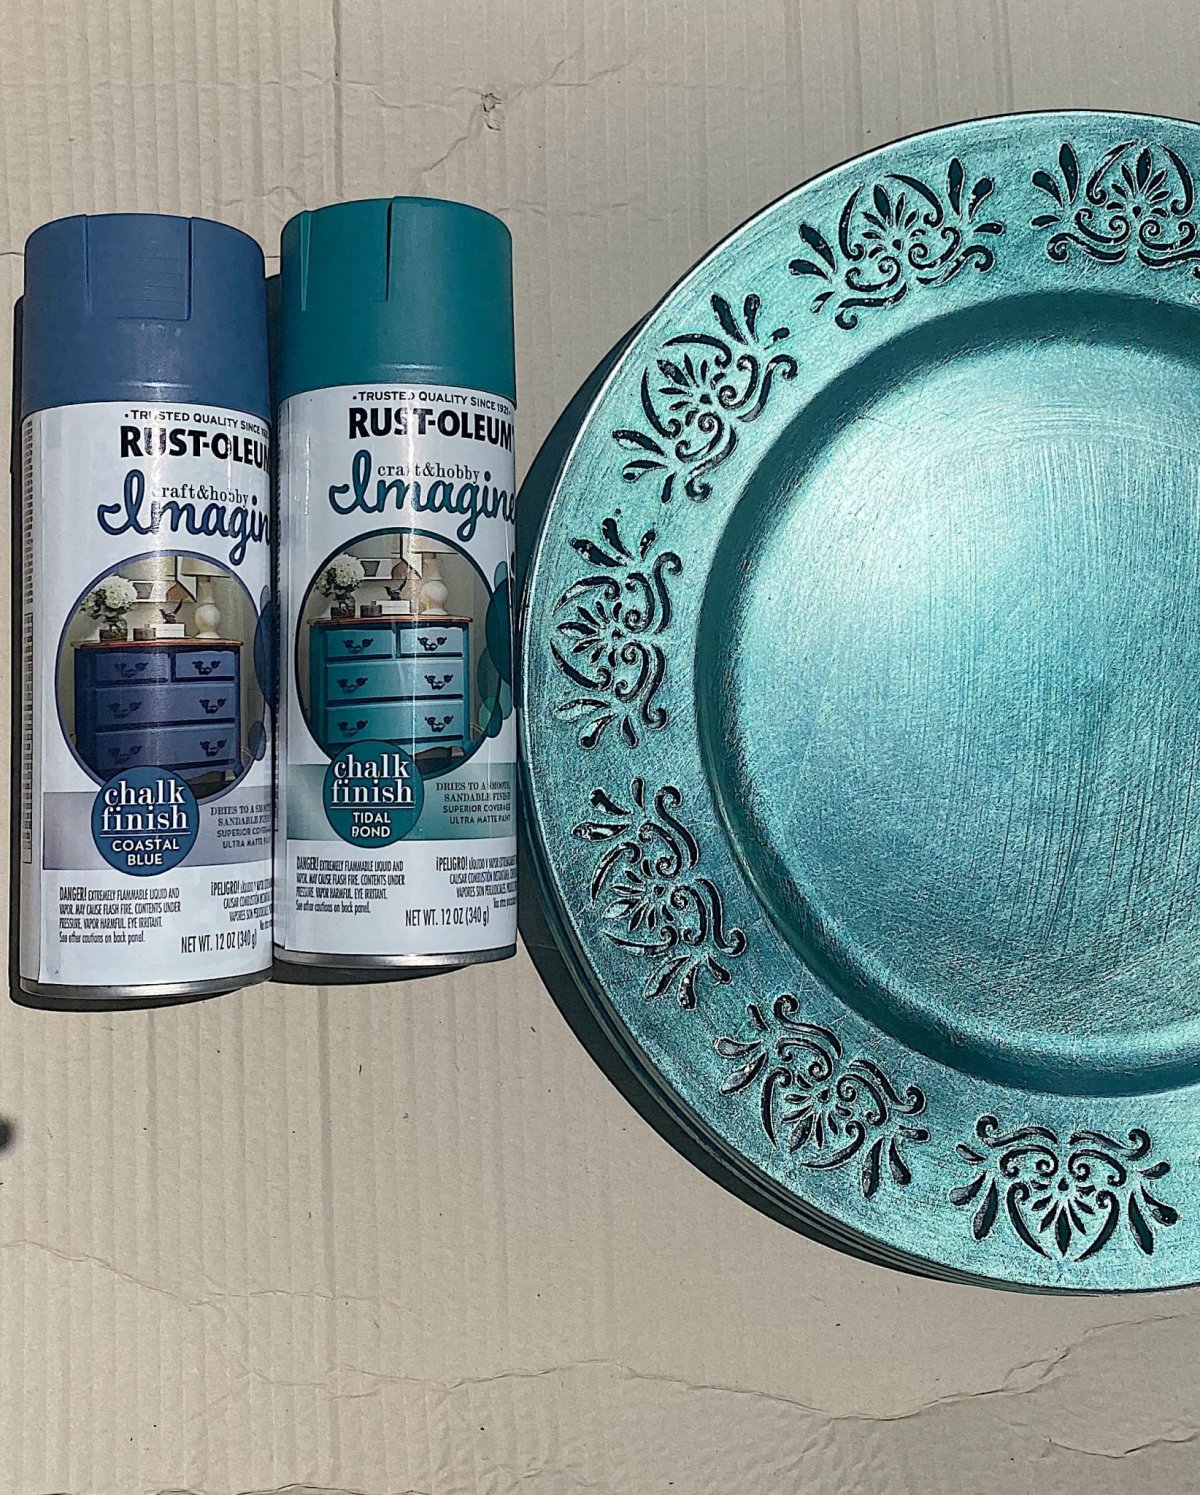
It took me about one minute to spray both of these items.
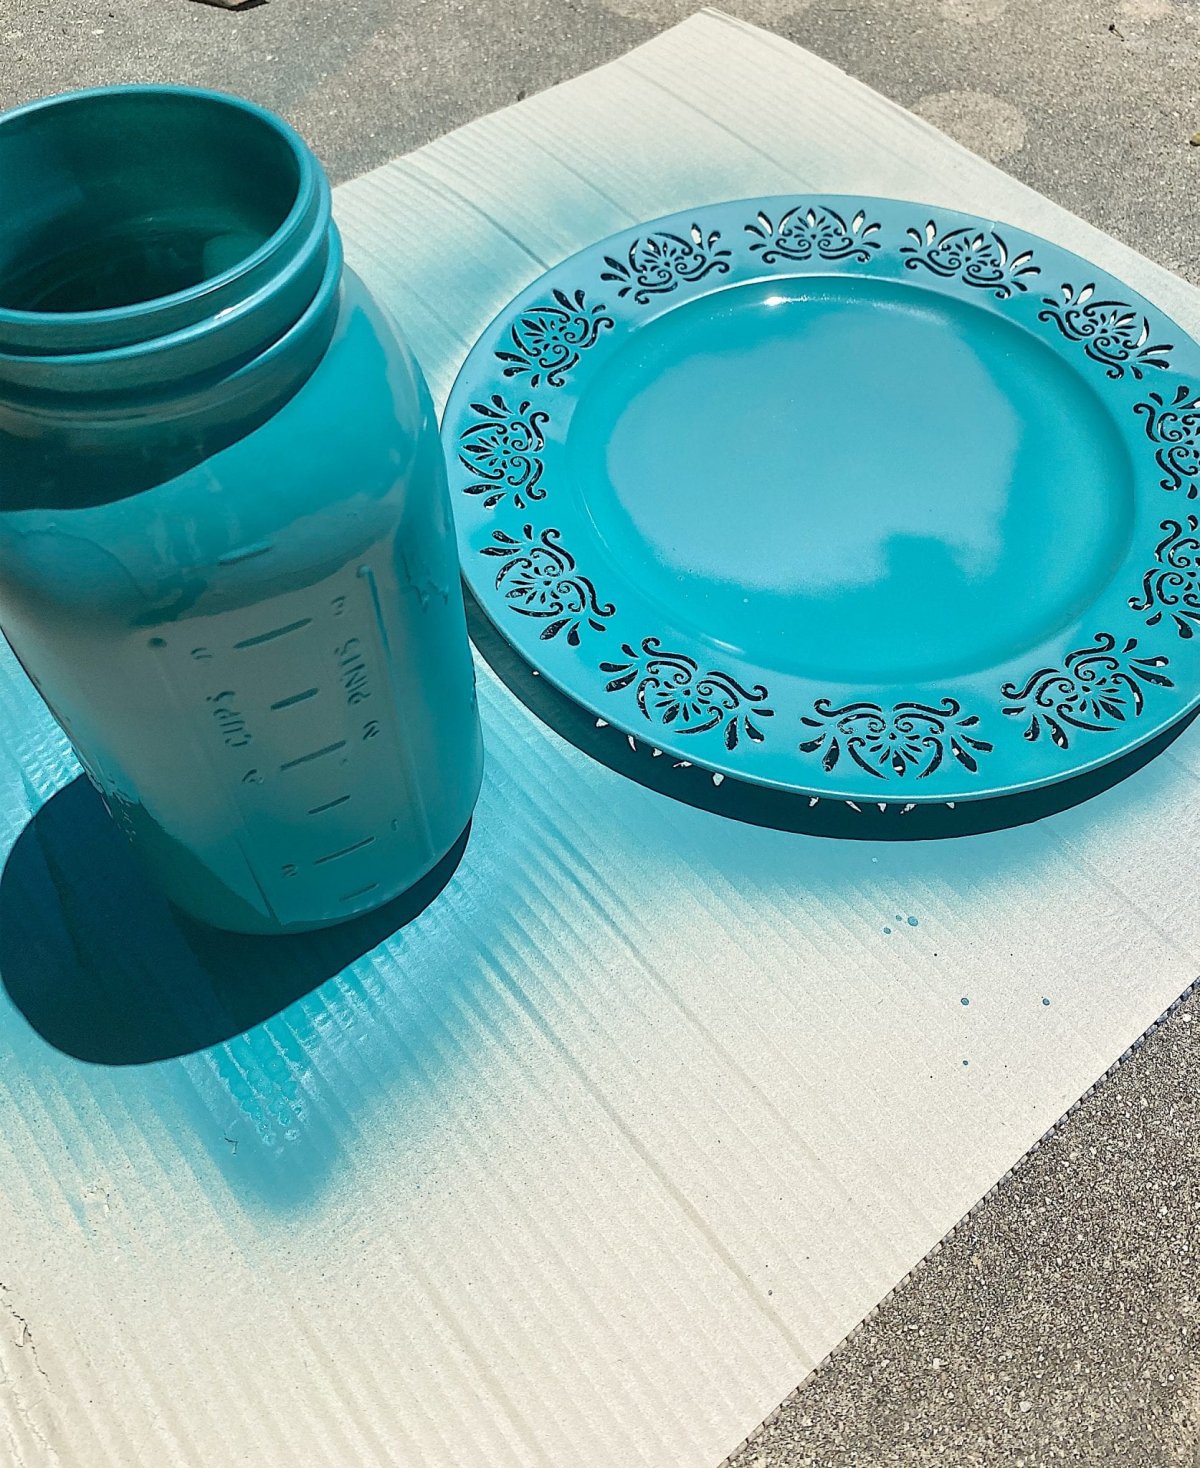
And look how great these vases turned out! I added a bit of raffia and I love how they look. The colors are perfect.
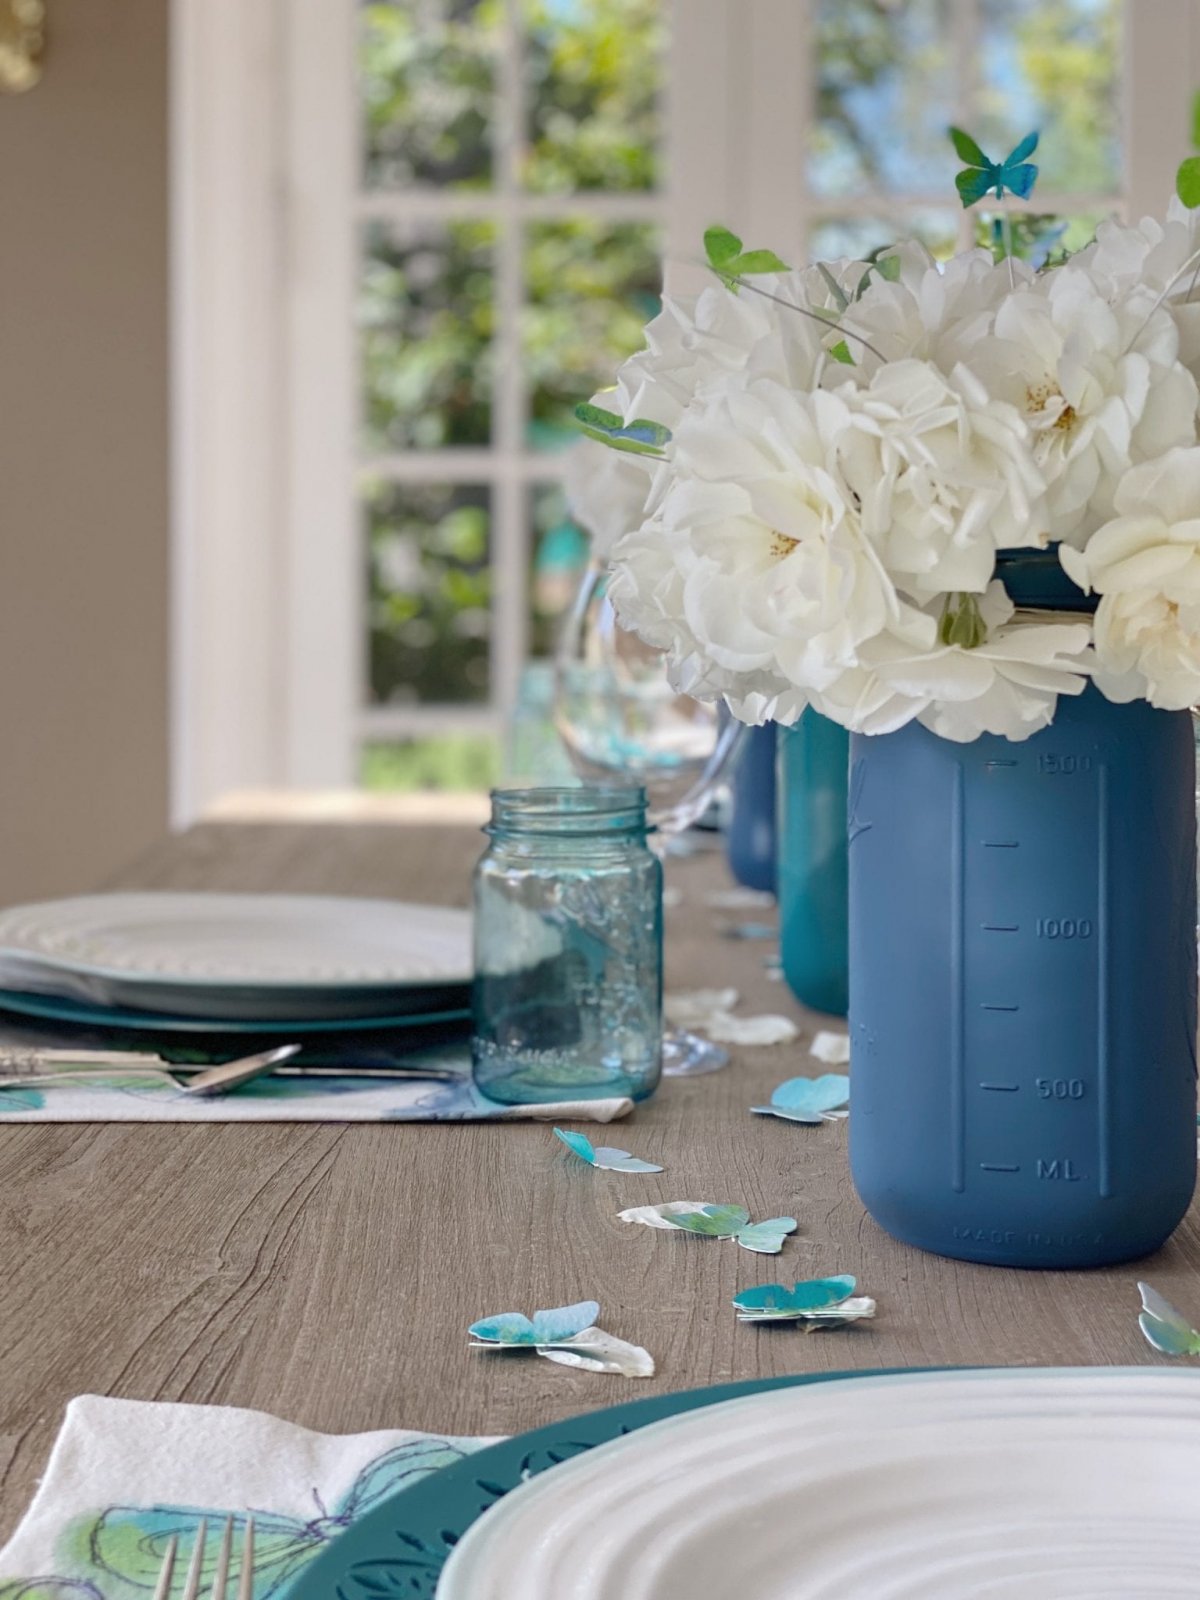
The chargers look so much better painted too!
I hope my sharing how to create a tablescape for spring and summer has inspired you to have some fun with paint. This was such a fun and easy project. Check back next week for my blog post to learn how I made painted watercolor paper with Testors paint and the cut butterflies.
Pin the image below to your Craft or Spring and Summer boards on Pinterest (just click the Pin button in the top left corner). You can also follow along with me on Pinterest!
For more real-time updates, follow me on Instagram @My100YearOldHome


I love the colors and textures. Just beautiful Leslie!
Thank you so much, Salli. I appreciate you following along with me!
Lovely! And very creative.
Thank you, Char!
I really really like the placemats, coasters, pillows; kidding aside, too bad you can’t whip up a little company and sell those! Table looks great.
Thank you so much, Mary! That would be great, haha!
The jars and place settings are so elegant and neat! I really love those butterflies! They add just the right touch. Thanks for sharing!
Sonya, I am so glad that you enjoyed this, Thank you for following along!
Love, love, love the whole look! Looking forward to entertaining again this summer. I read the “how to” on the wonderful placemats – how do you finish the edges? 1/4 inch hem sewn? Also, does the paint on the placemats make the fabric stiff in places or does it dry “soft”? Have you ever added fabric medium to your acrylic paints? (I have used It in the past to ensure ease of machine or hand washing.) Thanks for sharing these great ideas!
Fantastic so beautiful 😍