Bedroom Design Ideas – Makeover in a Month
I cannot believe there is only one more week left in the Makeover in a Month Challenge. I am so excited to share my bedroom design and progress.
It’s week three of the Makeover in a Month Challenge and I am happy to report that I made a lot of progress. I can finally see my bedroom design ideas coming to life!
If you want to catch up on my progress with this project, read my blog posts for Week #1 and Week #2.
You need to be sure and follow KariAnne at Thistlewood Farms, Marion at Miss Mustard Seed, and Melissa at The Inspired Room to see their progress!
I do have to admit that my blogger friends appear to be ahead of me. But that’s ok, I am going to finish my bedroom design with a bang!
What Did I Do This Week?
It looks like my bedroom design ideas are going to happen! I painted the bedroom and spent two days rearranging the bookshelves (I am still not done). I sorted through all of the books and decided the college (and high school) textbooks could be donated. My husband commented that he didn’t think Calculus had changed since he was in school. But I assured him the textbooks had surely been updated.
I had a lot of fun covering books and finding lots of fun decor pieces to adorn the bookshelves.
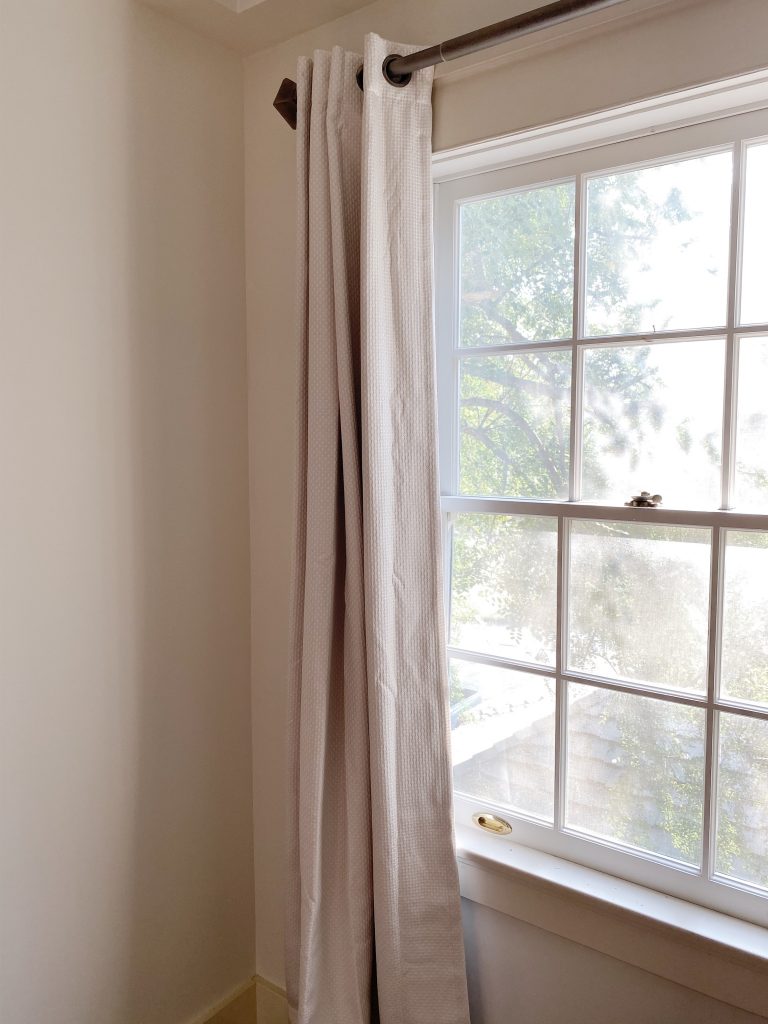
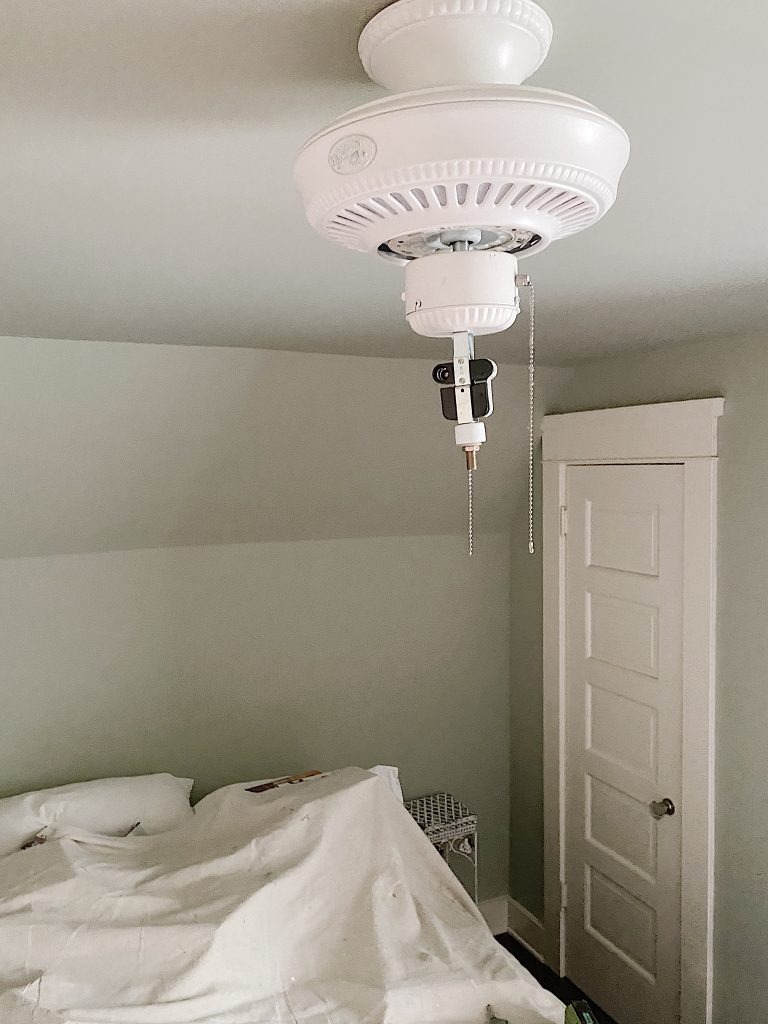
I hired an electrician who removed the ceiling fan and relocated two chandeliers. (I know better than to think I could do that on my own!) And I hung the drapes … which unfortunately didn’t go so well. More about that later.
I measured the slipcover six times and cut it out. I am using a strip ticking fabric and think I have all of the seams matching and facing the right direction.
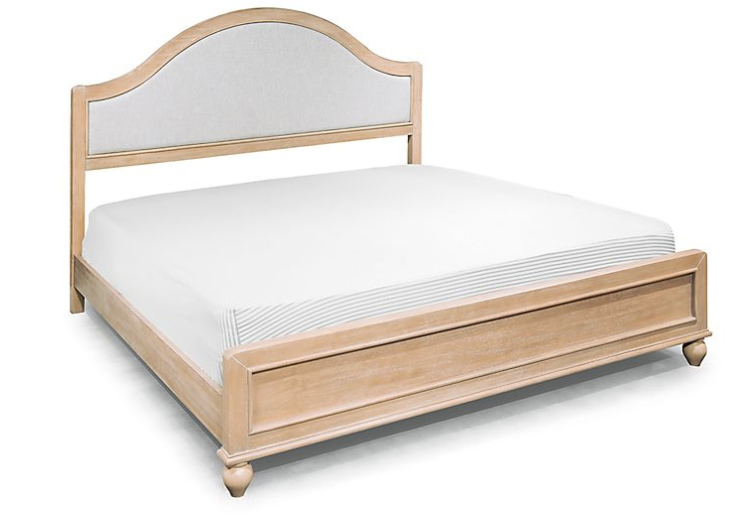
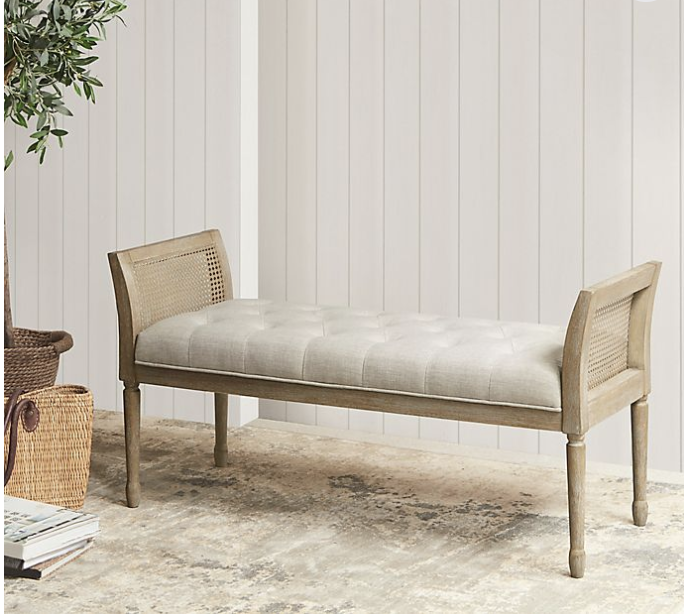
I also unboxed most of the decor items from Bed, Bath and Beyond. I am so excited because it turns out there are only two furniture pieces that I have to put together … the bed frame and the bench. Somehow I thought there would be a lot more!
Painting the Room
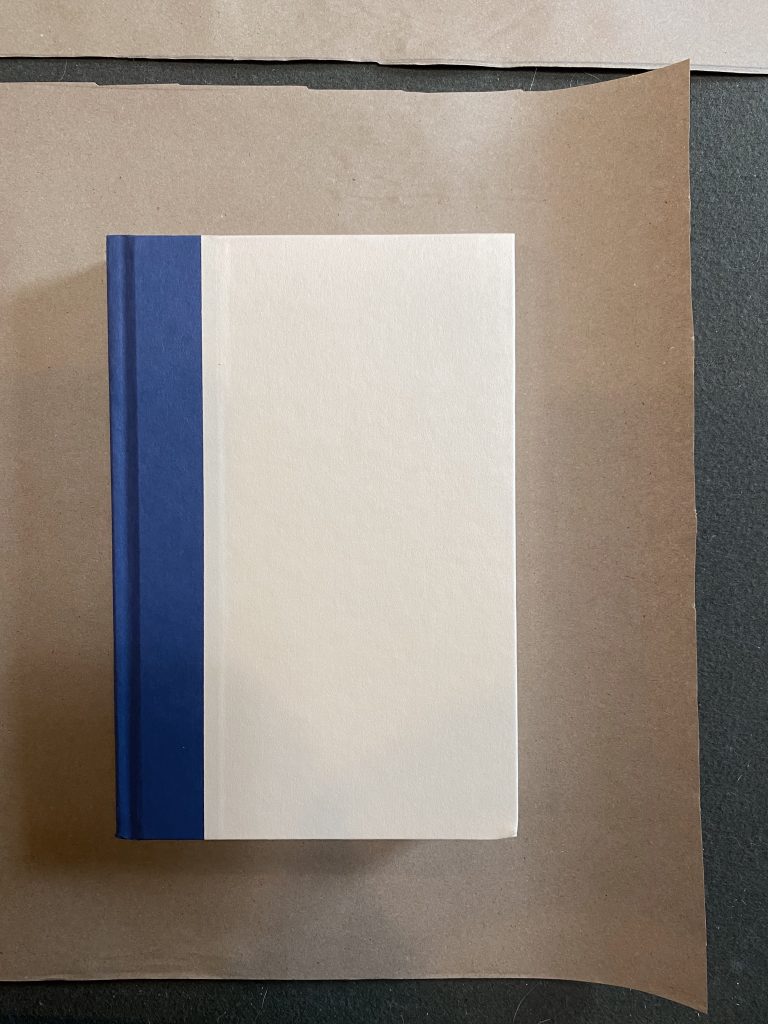
The entire third-floor was painted a sage-grey color over ten years ago when we did the remodel. I shared the first pictures of our third-floor guest suite a few months ago. I think I have mentioned it before but I went through a serious sage green phase that was so bad my friends threatened to create “sage green anonymous” meetings for me. It was literally everywhere in our home, my wardrobe, and more. I think the sage green paint looks ok in the great room, but I really wanted the bedroom to feel light and fresh.
You can see in the photo below the difference between the two colors. I love the paint color and I am so happy I chose it for the bedroom.
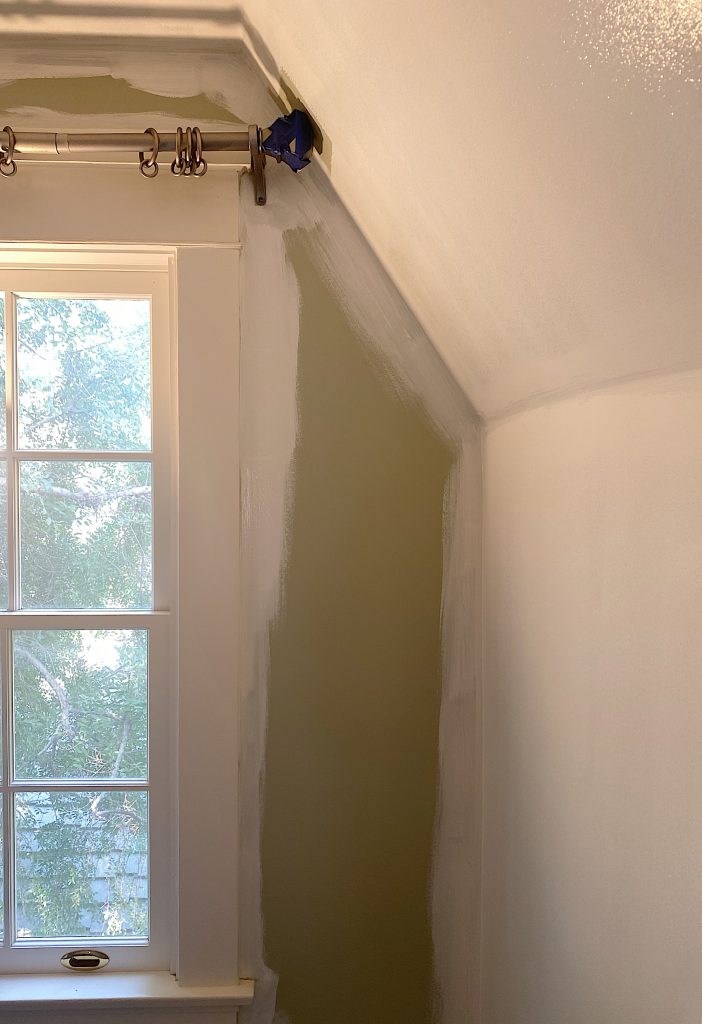
I painted the room with my favorite white paint, Swiss Coffee from Dunn Edwards. The good news is that I didn’t have to paint the trim because it looked like it was in great shape. The bad news is it took one coat of primer and two coats of paint which necessitated one extra trip to the paint store.
As I was painting I realized in the last eleven years, the trim had yellowed a bit, so I may decide to hire someone to take on that project. We shall see.
Doesn’t the new paint look fabulous? I knew this is what I wanted when I planned this bedroom design.
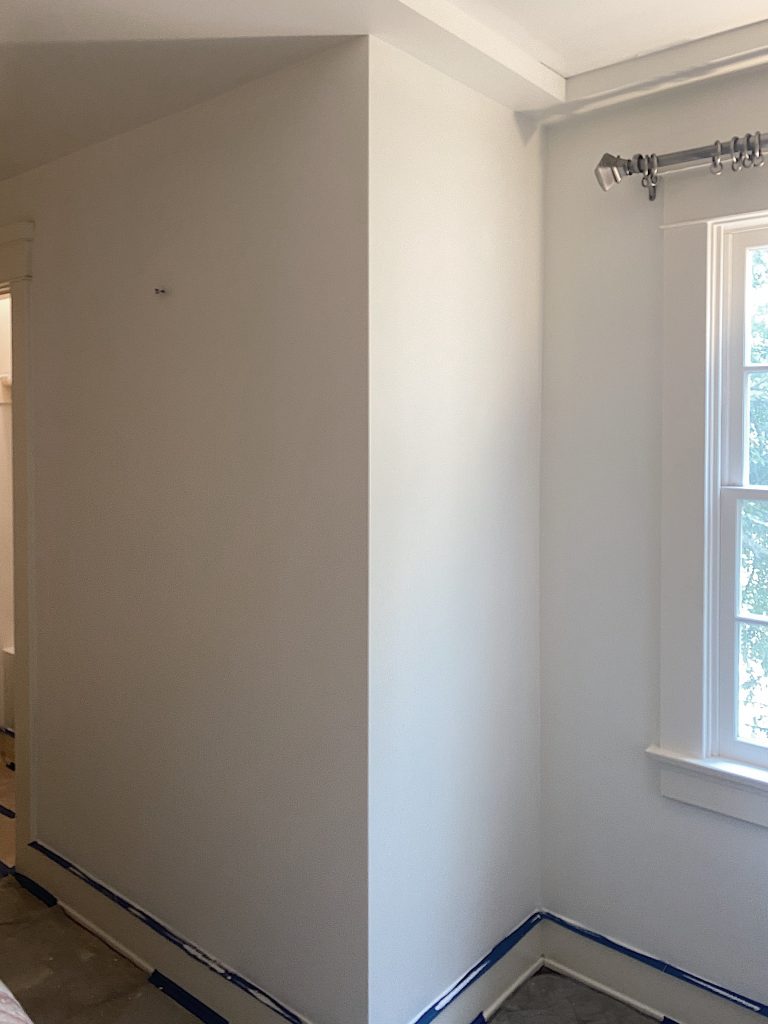
I took the photo below looking out to the great room. If you look closely you can see this is where I stored everything that used to be in the bedroom. (It’s not going back into the room so where am I going to put it?)
And yes, those are Christmas bulbs. Oh my.
As soon as the walls were dry I hung the drapes. These are blackout drapes and I love them because they don’t look like blackout drapes. I didn’t steam them because as soon as I hung them I realized they were three inches too short. (Obviously, this was my mistake!) I am just going to lower the poles to the middle of the molding.
That should work, right?
Electrical and Lighting
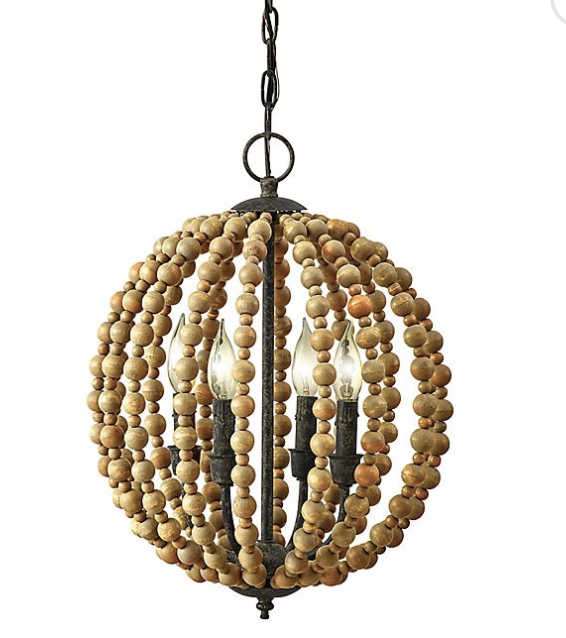
I am so excited about this Bee & Willow™ Sequoia Beaded Chandelier in Natural I found at Bed, Bath and Beyond to hang over the bed. It’s very reasonably priced and I love the look.
My electrician took down the ceiling fan and moved the electrical ceiling box 14″ closer to the headboard. I had to move it because my sons are all very tall (6’7″, 6’6″, and 6″5″) and they are tired of hitting their heads on the chandeliers I keep hanging from the ceiling. The chandelier now hangs over the bed so no “ducking” will be needed in this room by my tall boys.
This is the last piece of the ceiling fan before it was removed.
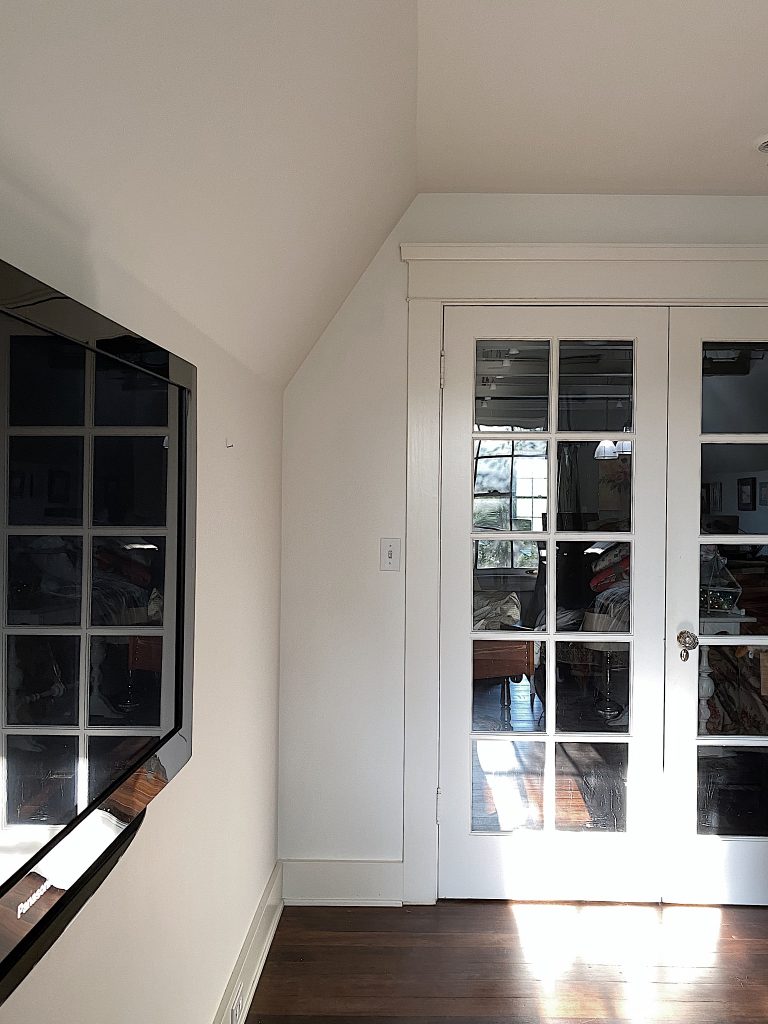
I also added a hanging reading light in the center of the window. Actually, it’s just under an inch off due to the attic door in the ceiling. (I forgot about the 2″ x 4″ frame around the ceiling door.) This will forever bother me but there was nothing that could be done. Ugh.
This corner will serve as a reading area and have a chair and ottoman (that hopefully will be slipcovered by me).
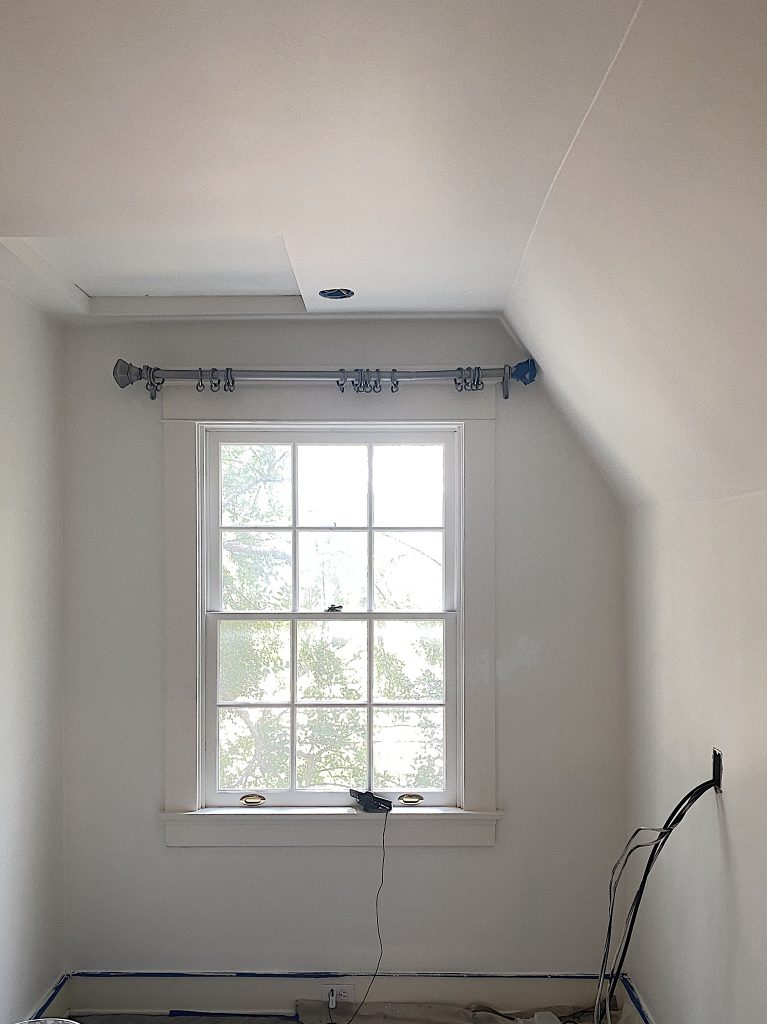
Also, when I moved the dresser, I discovered some TV cables coming out of the middle of the wall. Seriously? How did I let that happen when we first remodeled this room? It will need to be moved this weekend.
I unboxed these two Jonathan Y Elicia Table Lamps in Natural with Linen Shades and they are even better than I imagined. Aren’t they fantastic?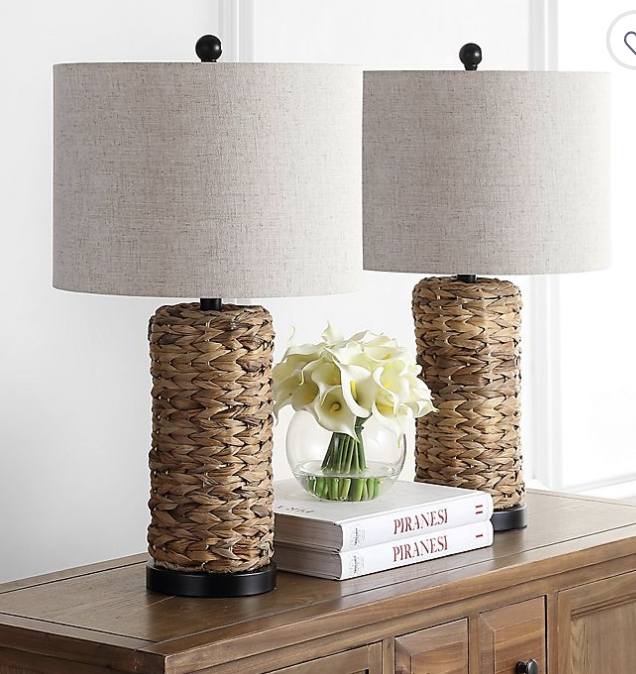
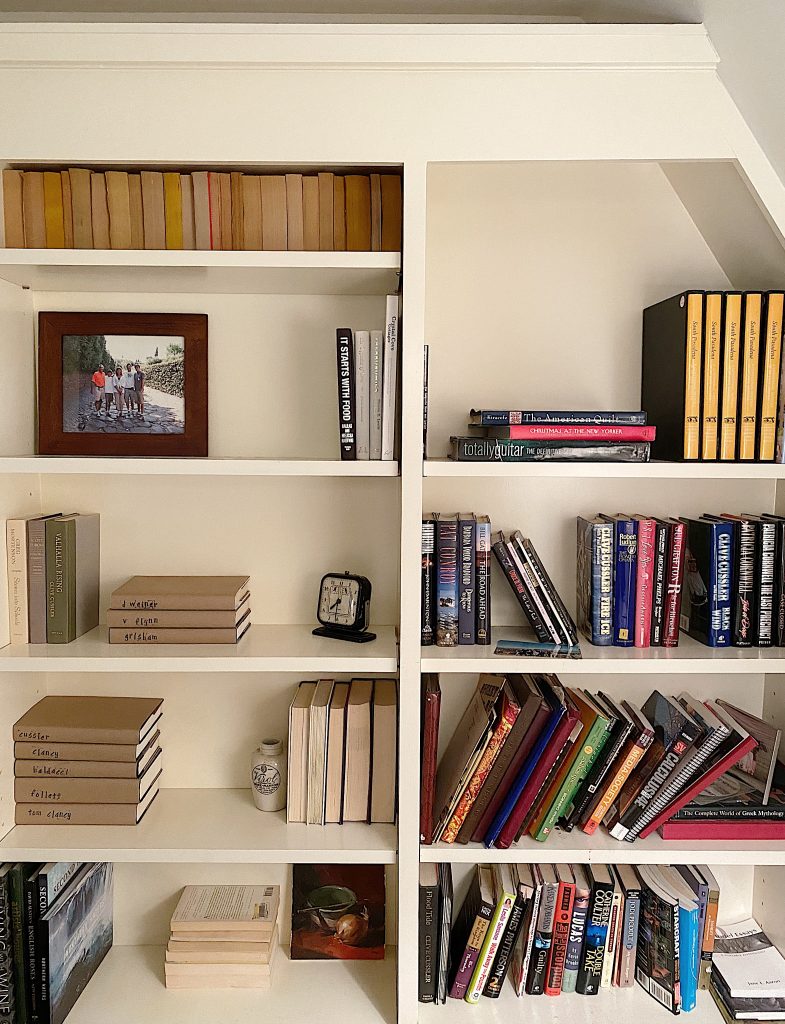
De-Cluttering the Bookcases
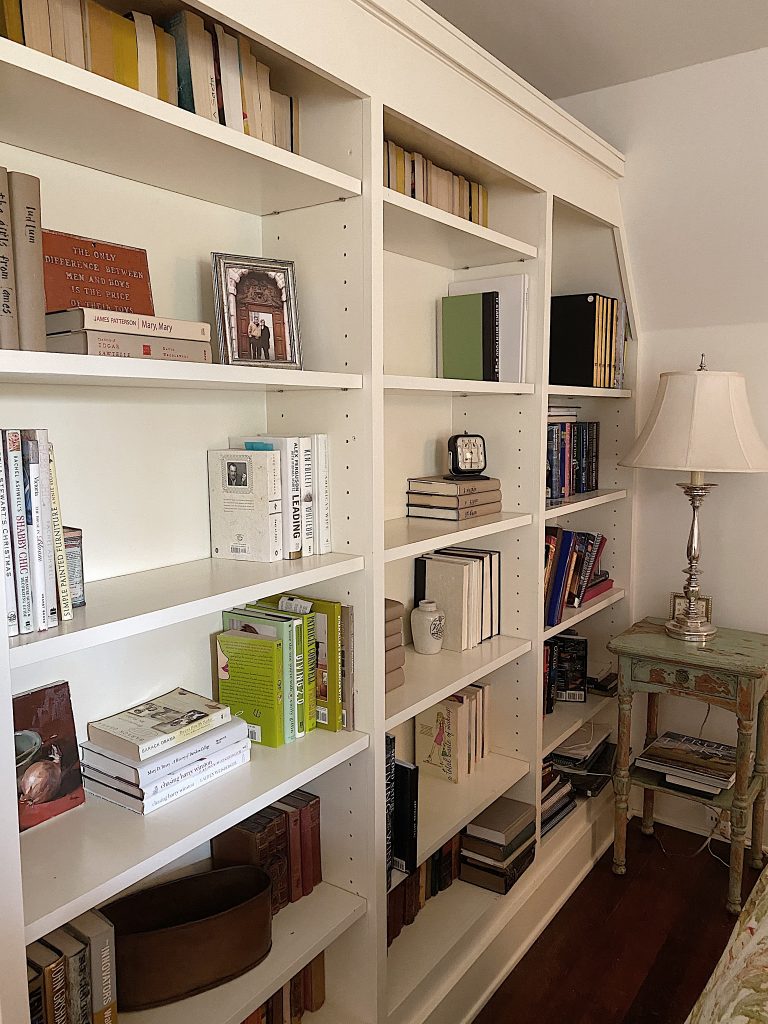
Before I started painting I went to work on the bookshelves. I decided to take one section at a time and I emptied and cleaned each shelf. My color scheme for the room is tan/light brown and off white, with accents of green and an orangy-copper color. (The last two colors are for fall and will change throughout the year.)
NONE of the bookshelves are done. I still need to add more books, decor, photos, and more. At least you can see the direction I am going with this project.
This an AFTER (but not finished) and BEFORE photo. I really like what have I started as seen on the left side of the bookcase. It’s exactly what I had hoped to do in this bedroom design.
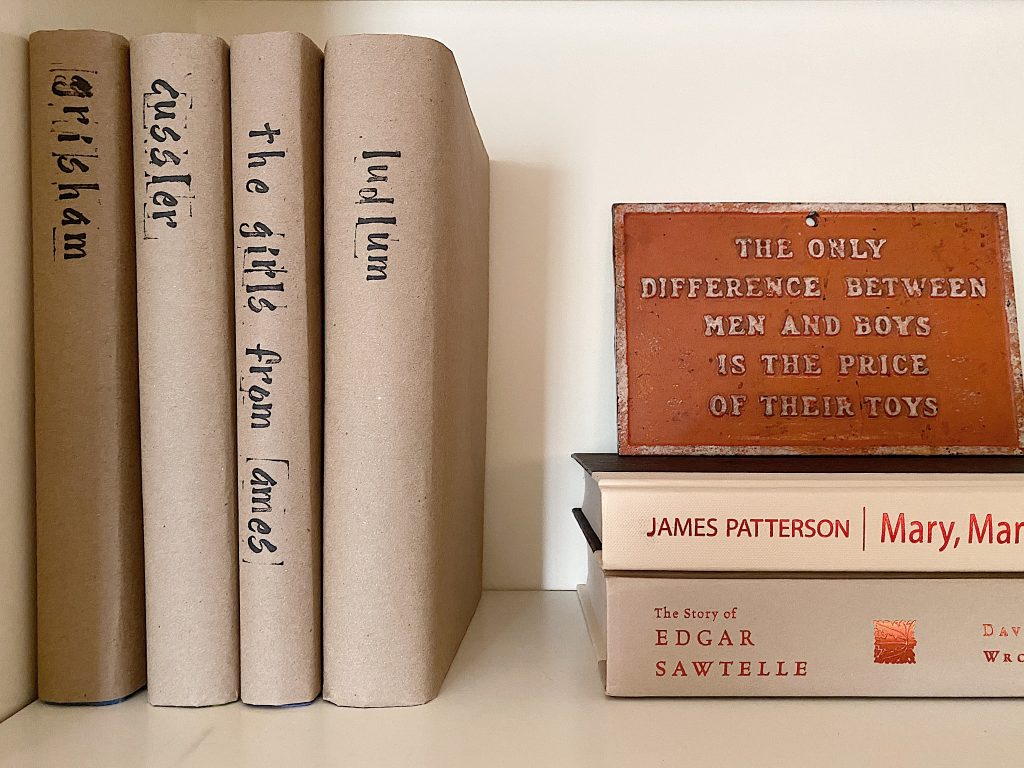
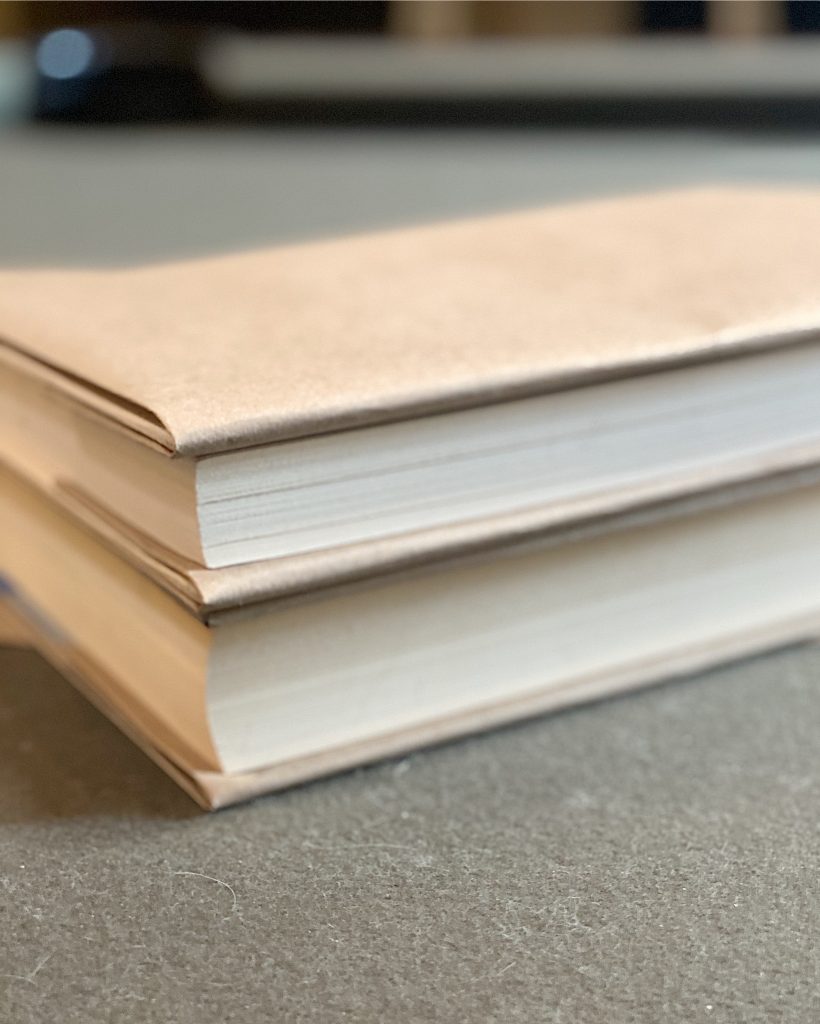
At least 75% of the existing books on the shelves had a blue cover and there is no blue in my color palette in this room. I decided it would be fun to make some book covers to cover some of the “blue books”.
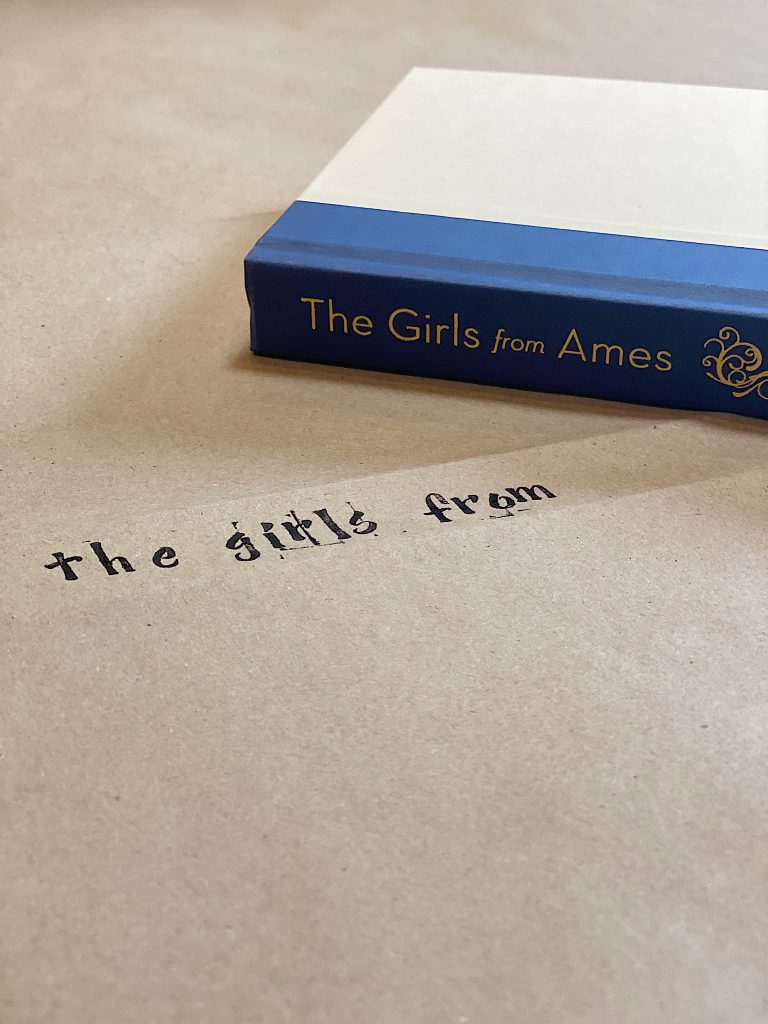
I stamped the covers with author names and in some cases, book titles.
I love that they are not perfect. (Which is a good thing because I did at least attempt to make them perfect.)
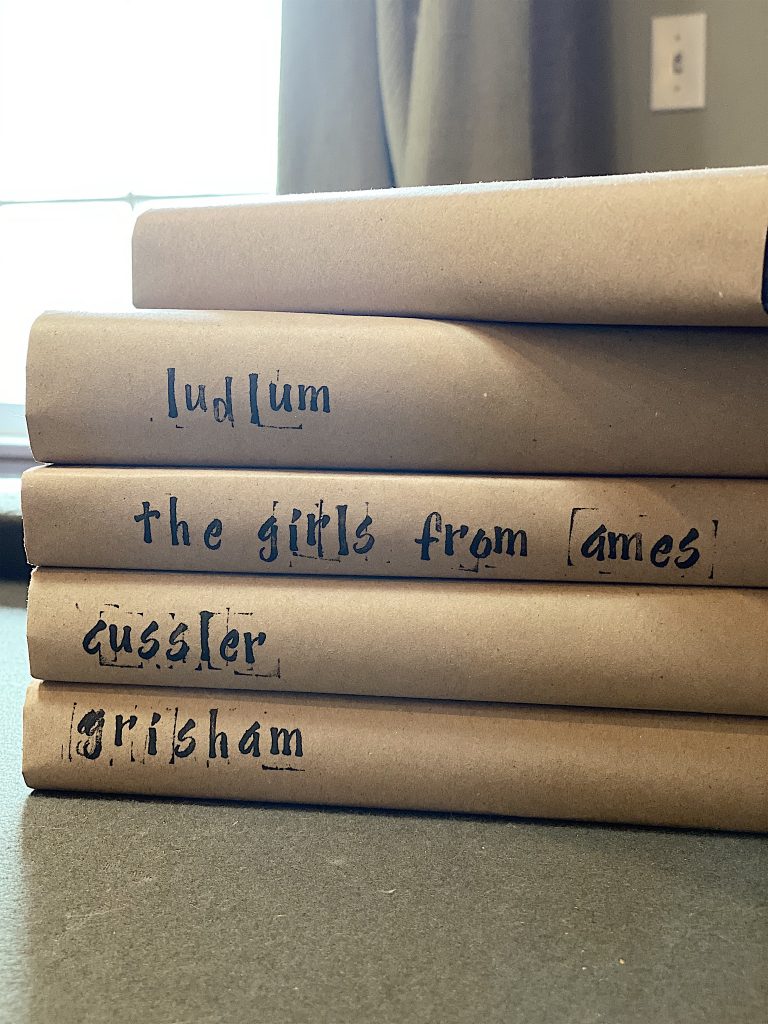
I cover my books with brown butcher paper and use the same method I used to cover my books when I was in junior high school.
I am assuming you all know how to do this.
Stamping the covers was by far my favorite part.
I had to post this photo again because I love it so much. The wonderful saying about “boys” is a vintage metal piece that I picked up at a flea market years ago.
Furniture Delivery
Ninety-five percent of the furniture has arrived from Bed, Bath, and Beyond and I am thrilled!
I am going to assemble both the Homestyles Cambridge bed and Martha Stewart bench on Sunday.
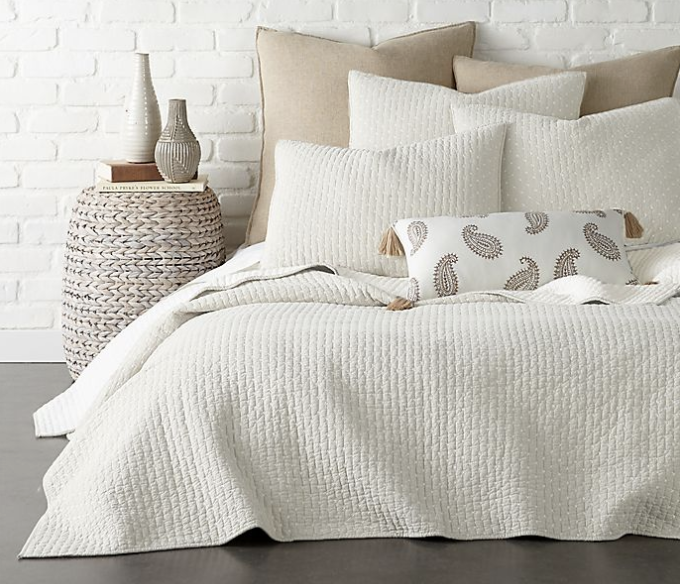
I also love this Levtex Home Torrey Reversible Quilt Set. The stitched “x” is my favorite.
The “Other” Projects
The Slipcover
There are two other projects I am working on. The first is, of course, the slipcover.
I have cut it out and I think it is going to work out. If you happen to drive by our house next week and hear someone yelling in frustration, then that will be me.
I have the confidence that I will finish it in time. It’s a good thing I have a lot of extra fabric.
The Focus Wall
I had promised I was going to add something to the wall behind the bed. The product arrives on Sunday and I expect it will be done on Monday.
Original Artwork
I am also hoping to paint an abstract painting for the room. I have the perfect spot for it so you might just see it on the wall at the final reveal. Fingers crossed!
Pin the image below to your Bedroom or Remodeling boards on Pinterest (just click the Pin button in the top left corner). You can also follow along with me on Pinterest!

For more real-time updates, follow me on Instagram @My100YearOldHome

It is great to see someone who loves their home and is always striving to create a “better” place. Thanks for sharing your home! I’m working on mine and love to do it!
Thank you, Caron. I have no doubt yours is so great and welcoming as well!
You are so busy as usual. I love reading this since I have been on the third floor of your house. Good luck with the slipcover. I have never attempted to do one.
Isn’t it so great! Should be fun to reveal 🙂
looking soooo good! Totally agree about the paint, even though I really am a “green” person. I think I’ve moved into a bright, light and blue phase.
Thank you, Diane!
Love the redo on the bookshelves!
Thank you, Diane! It is really coming together.
No shame about those before shots! Without a doubt, I and many others probably have worse.
I love your choices and am looking forward to the reveal.
Thank you so much, Bonnie!
I love your choices and style. I agree with you regarding Swiss Coffee, too. Someone once told me bookcases/shelves should be 1/3 books, 1/3 decor and 1/3 open space. Yours look so nice!
That is a great rule of thumb. Thank you for the feedback, Becky!
I love it and can not wait for the final reveal!! I adore the MEN & BOYS sign, very true!! LOL
Have a great start to your weekend and prayers going out to you on that slip cover!!
Thank you so much!
Great work on the bookcase, it really does look nice and the books look more “approachable” like you might want to actually read them. Really like the lamps, they will look great. Are you sure you want to lower the drapery rods? Just add a few inches of your slipcover fabric and then return them later when the challenge is finished. The ceiling over that window is kind of pointy and will showcase the window. Have at it Leslie, you’re going to be working hard!
Love seeing how it’s coming along! I just found you and love everything you share. It’s really been a light in the midst of some hard times so thank you!
I LOVE the furniture and think I may need to purchase the same as I want to re-do my master bedroom.
Have a wonderful time finishing and know I’m cheering you on!
That is so sweet, Kristen! I am so glad you found me as well. Thank you for the cheerful motivation!
where did you find the drapes
love that they are black out shades
beautiful job
My mom always said the difference between men and boys is the length of their pants.
Looking forward to seeing the completed room.
Why not return the drapes for the correct length? Rather than moving the rod and having to patch the holes. Ugh!!!
Looking good! I love the covered books – I’ve been thinking about that for my own for a long long time. Maybe now that you’ve inspired me! 😉 Keep on keeping on with that slipcover – I can’t wait for the reveal!
Thank you, Barbara. I am so excited!
I love the alphabet stamps that you used! Where did you get them?
Where did you get stamps from for books. Looking for them atm- maybe cause I live in Aust
Where did you get the blackout drapes?
Instead of lowering the curtain rods, coukd you add some of the ticking fabric for a 3 inch border on the bottom?
Brilliant idea!
Thank you, Michele!
That is a great idea, Nancy! Thank you for following along with me on this project!
Looks great so far!!
Where did you find your curtains and what color are they?
Thank you
Brenda
Coming together perfectly as usual. I am sending you positive vibes on sewing your slipcover. Can’t wait for the final reveal.
Thank you for always motivating me, Miche!
Okay. No offense…. but I love that you make mistakes, like me! You measure incorrectly and just figure out the solution and move on! I make a mistake and it is a national crisis!! It holds me back. Good to know someone so amazing and talented is human! I’m now inspired!!
So much to love in this room! With your color choices I might have gone with brown ink to stamp the titles on the covers. I’m going to check out those lamps and the quilt spread, they look like my style. Love that you don’t try for perfection.