A Spring Flower Pillow DIY – A Handmade Spring
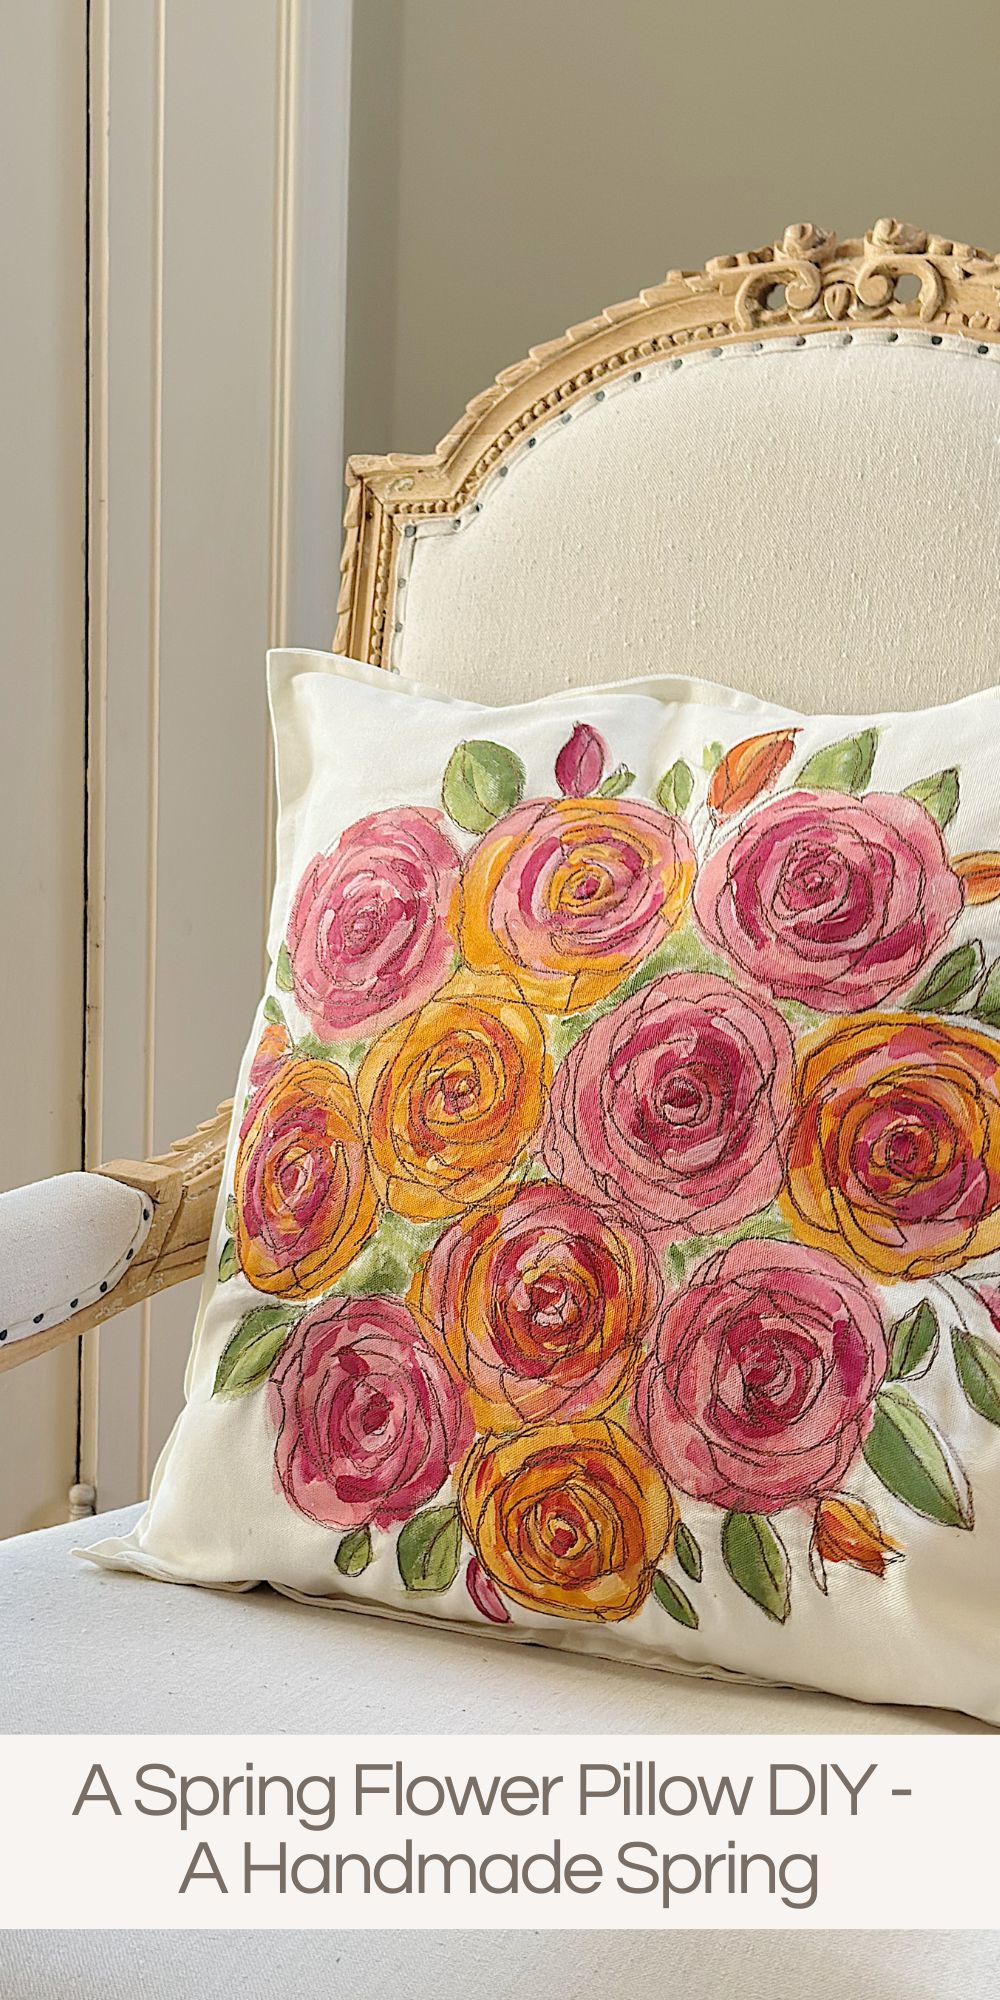
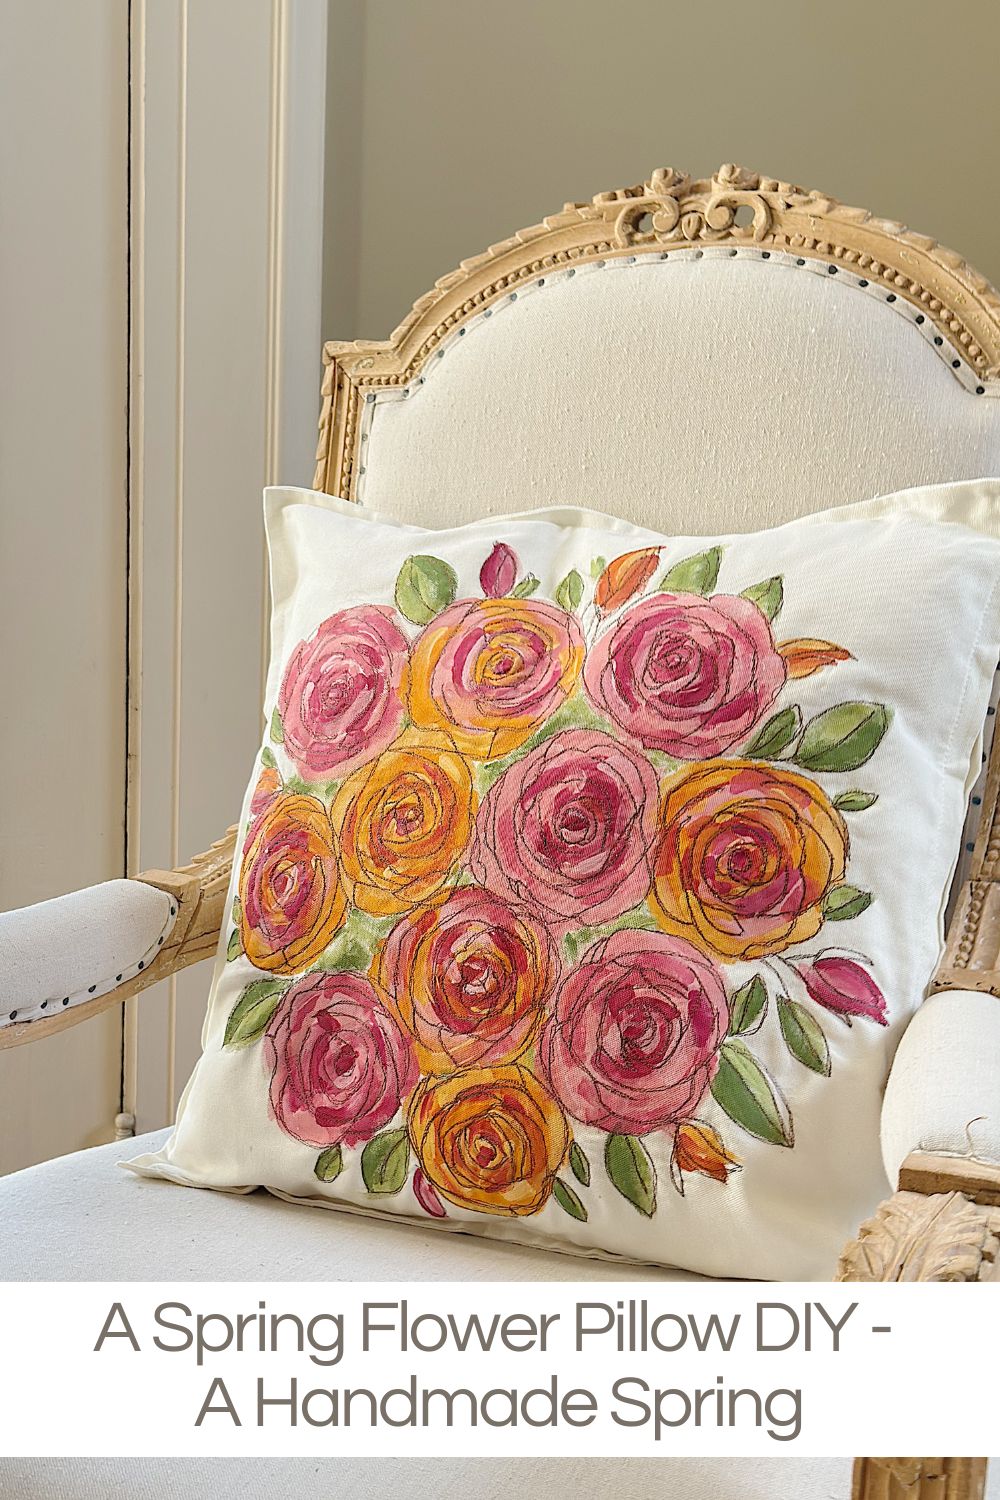
Today, I am sharing a brand-new flower pillow project in my A Handmade Spring series, combining painting, embroidery, and a touch of creative innovation in my craft room.
This Spring Flower Pillow is one of those projects that feels special because it is completely customizable, surprisingly easy to make, and absolutely beautiful once finished.


A Spring Flower Pillow
One of my favorite parts of spring decorating is adding fresh color and handmade details throughout my home.
After months of cozy winter textures and deeper tones, spring always feels like a fresh start. I find myself drawn to soft florals, gentle colors, and projects that feel creative, joyful, and personal.
A Handmade Spring Series
This project also inspired me to add a new crafting tool that has completely changed the way I work.
And honestly, I am wondering why I didn’t do this sooner.
Keep reading for more.
I may sometimes use affiliate links on this blog, which means I earn a small commission if you purchase through the link. The price will be the same whether you use the affiliate link or go directly to the vendor’s website using a non-affiliate link.

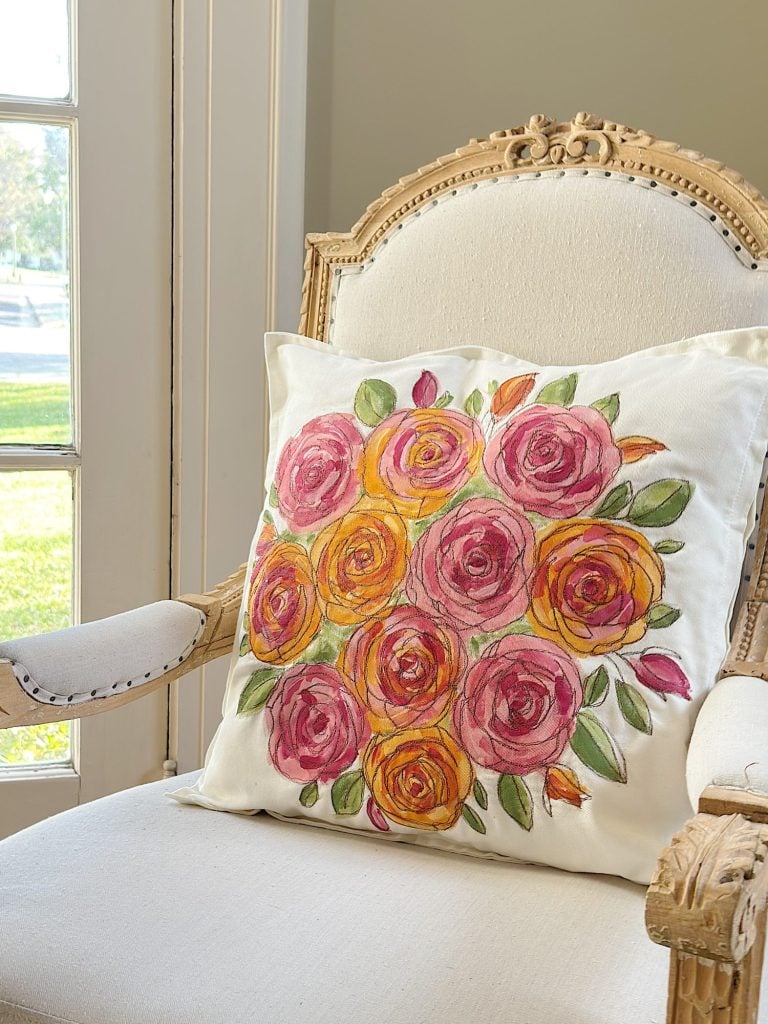
Designing My Spring Flower Pillow
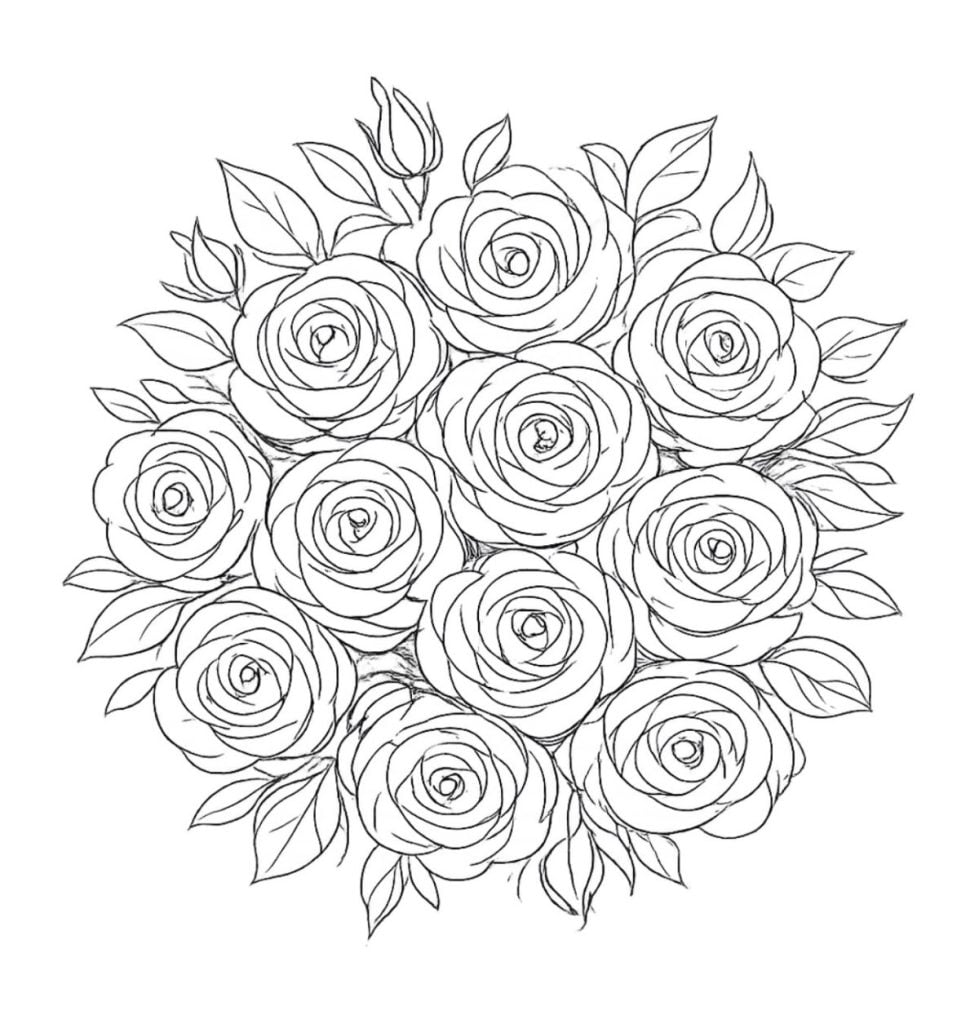
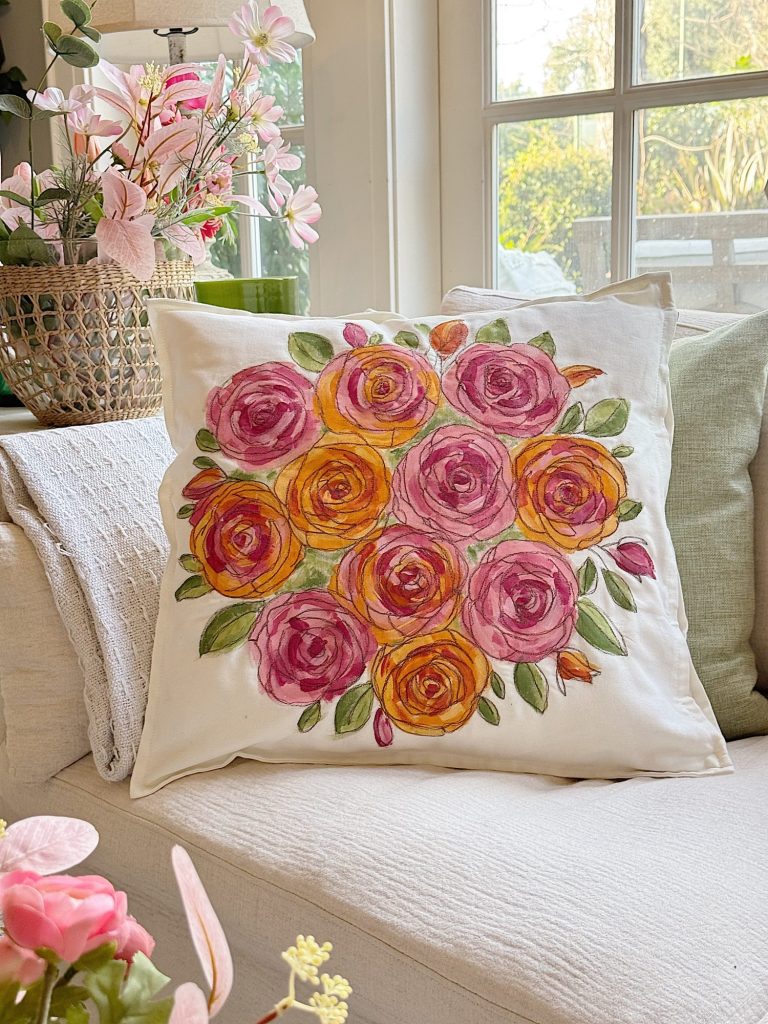
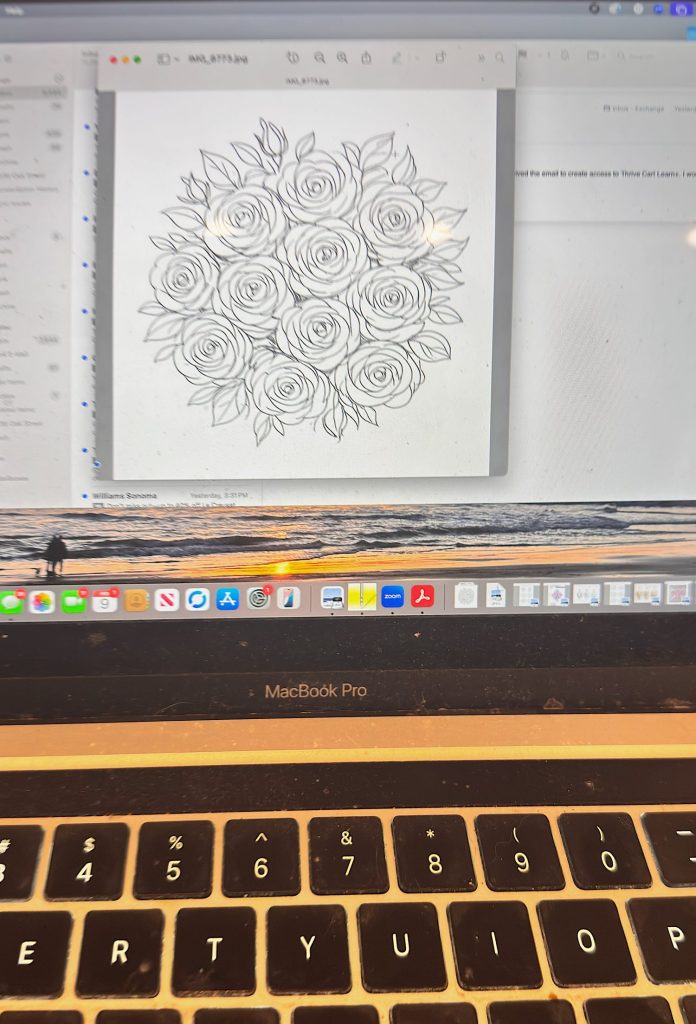
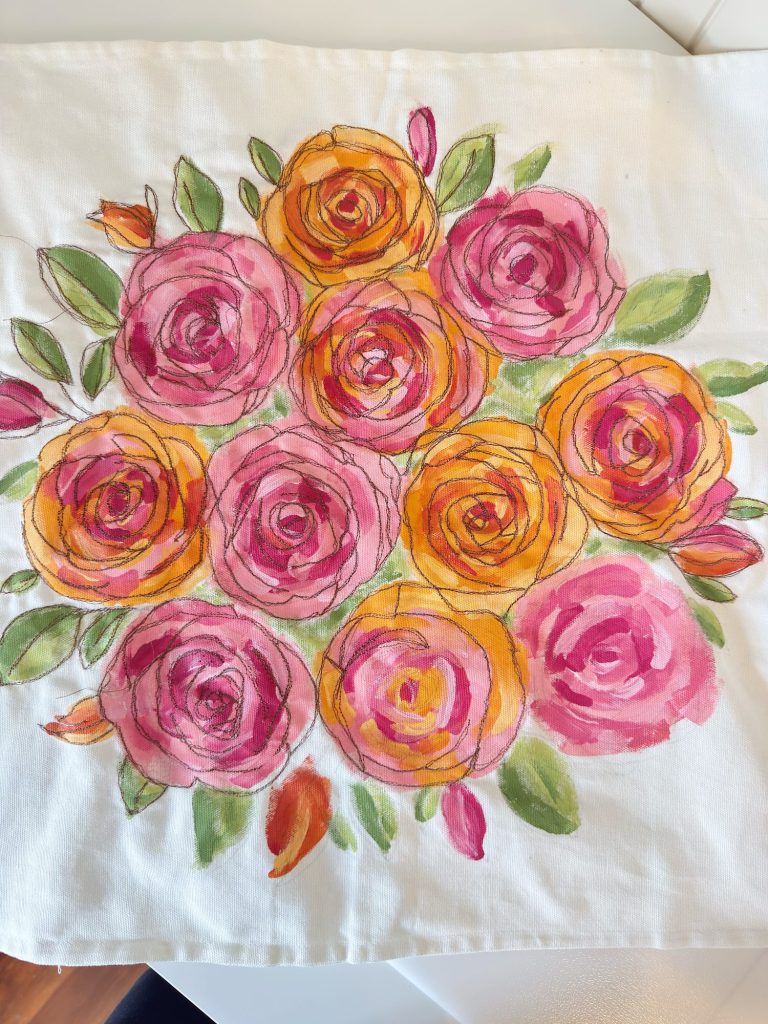
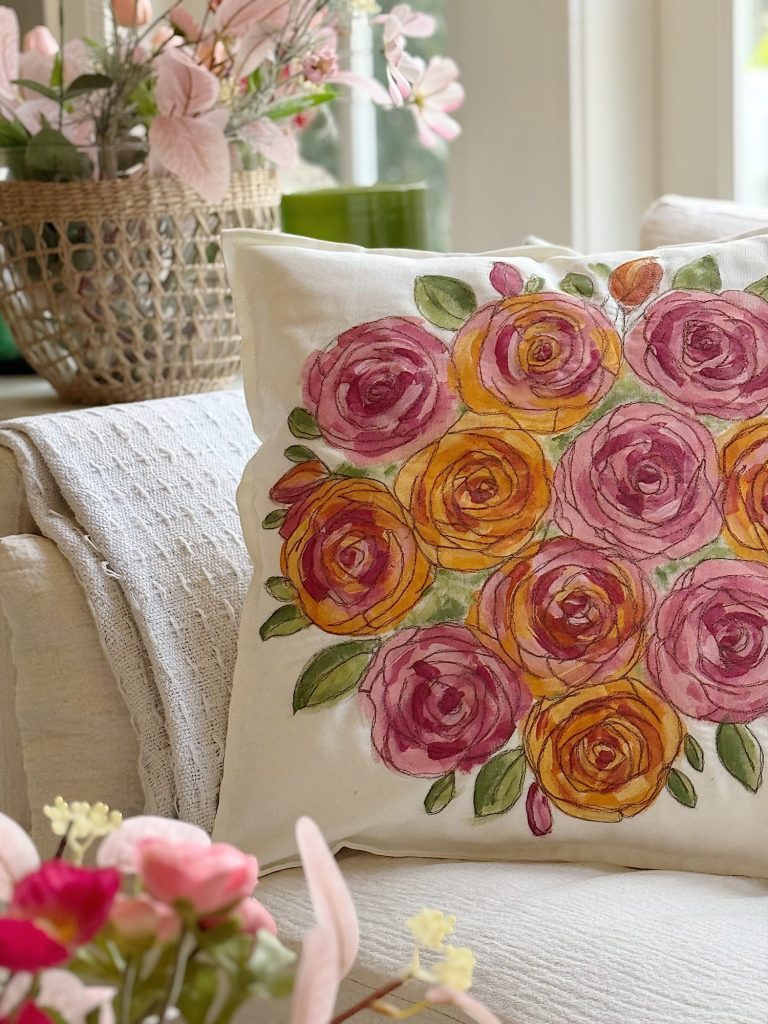
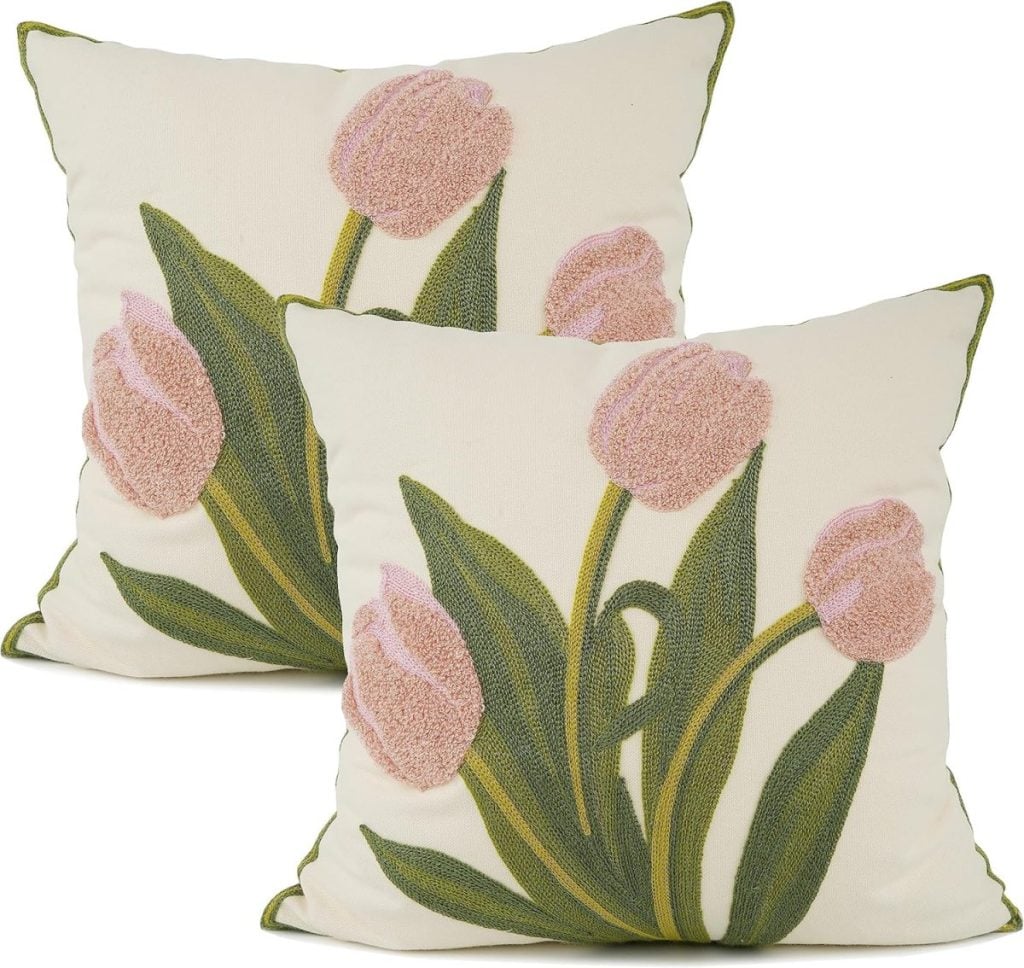
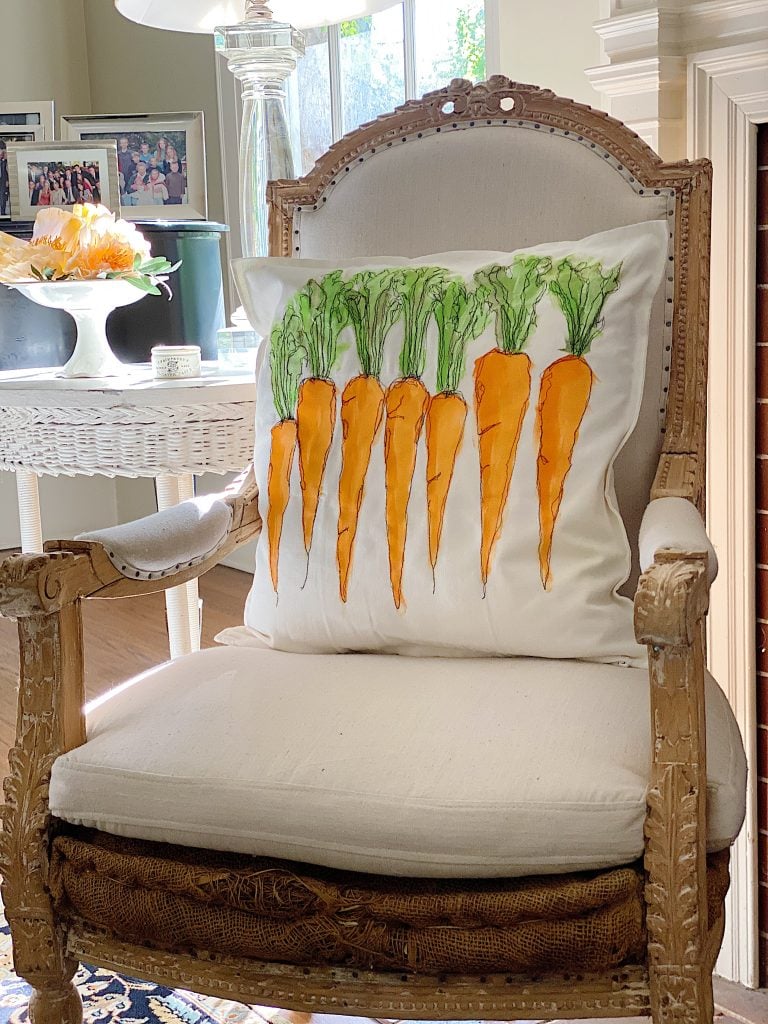
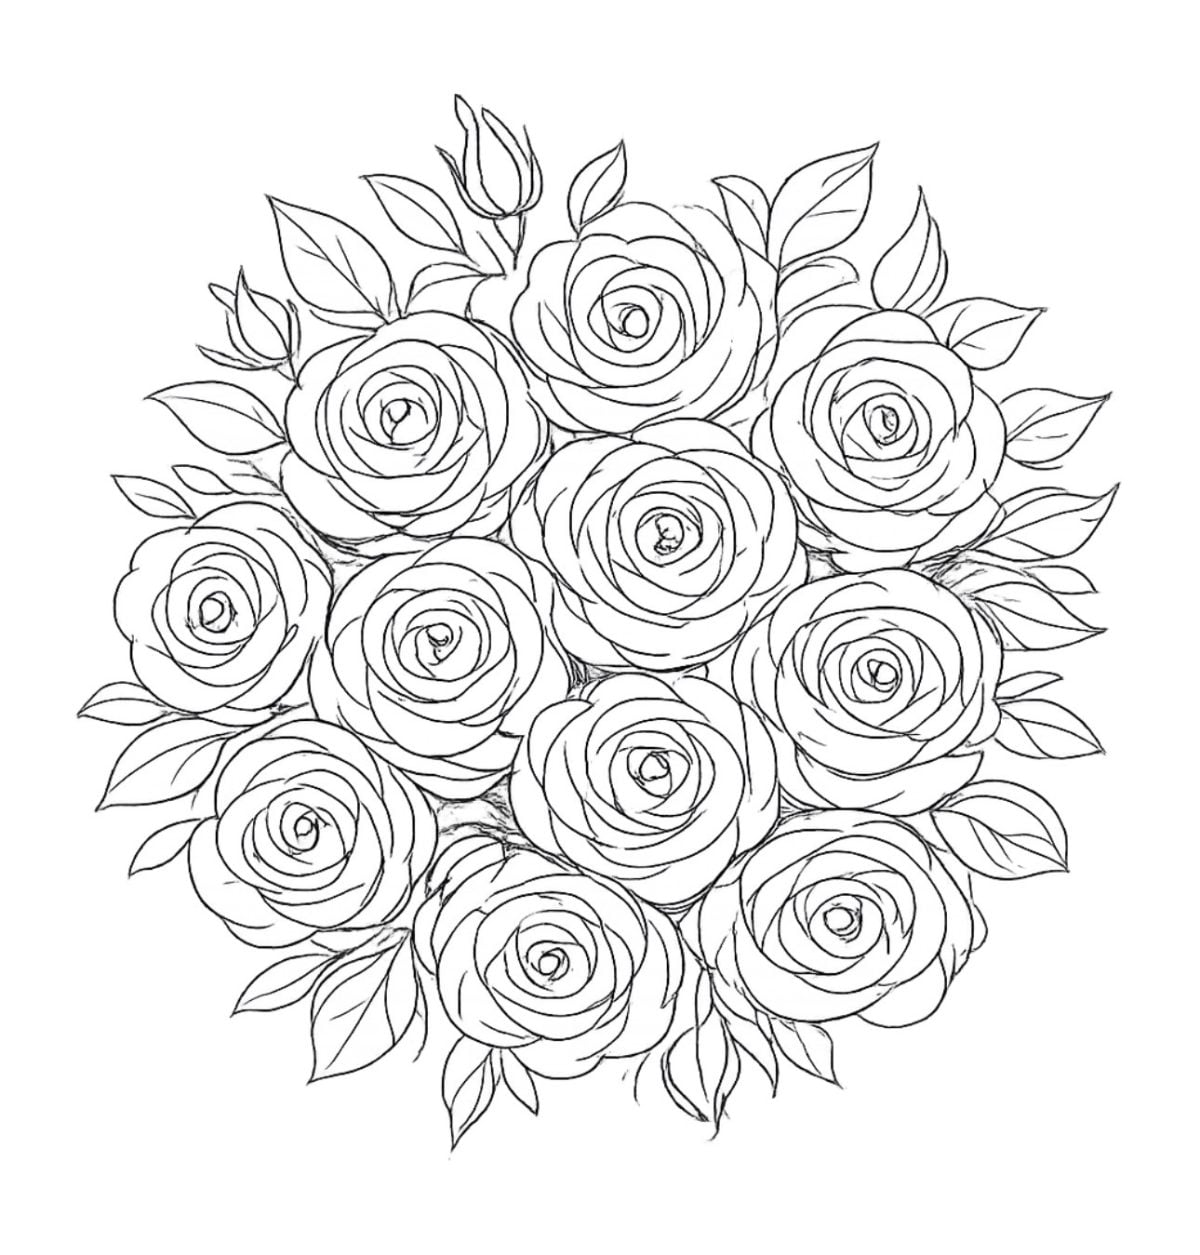
I started this project by designing my own spring flower pillow featuring roses. I wanted something that felt soft and romantic yet simple enough for anyone to recreate. Roses felt like the perfect choice because they are classic and timeless, instantly evoking spring.
You can download the rose flower design here.
When I design a project like this, I think about how it will look in multiple spaces around my home. I wanted a pillow that would work in the living room, bedroom, entry bench, or even on a chair in the craft room. The goal was to create something versatile, cheerful, and handmade without looking overly complicated.
Once I finalized my design, the next step was transferring it onto a blank pillow cover. Normally, this can be the most challenging part of a project like this. Tracing designs onto fabric can feel intimidating, especially when you want accuracy and clean lines.
But this time, everything changed.
The Game-Changing Tool in My Craft Room
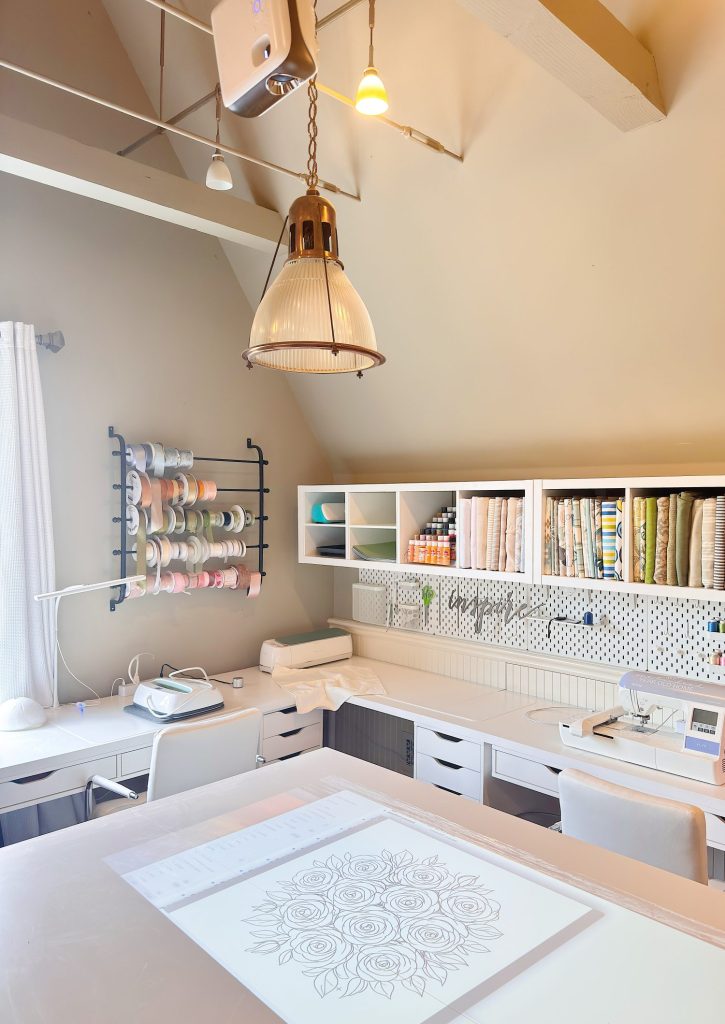
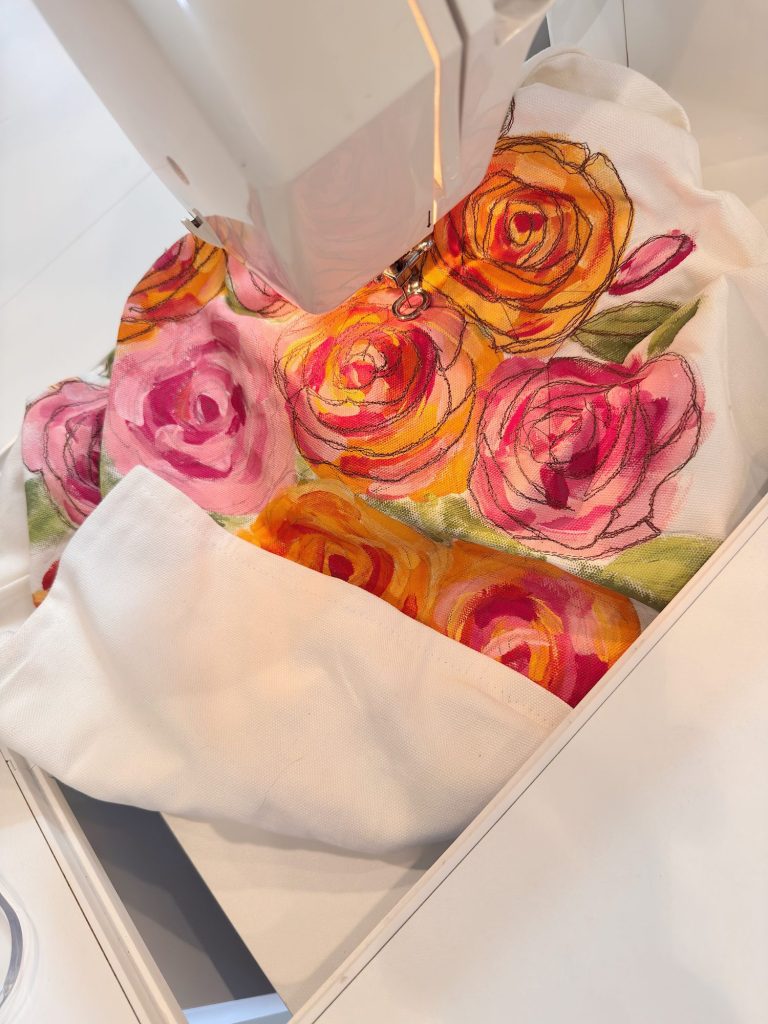
Look above the ceiling light in the photo above, and you will see my newest tool!
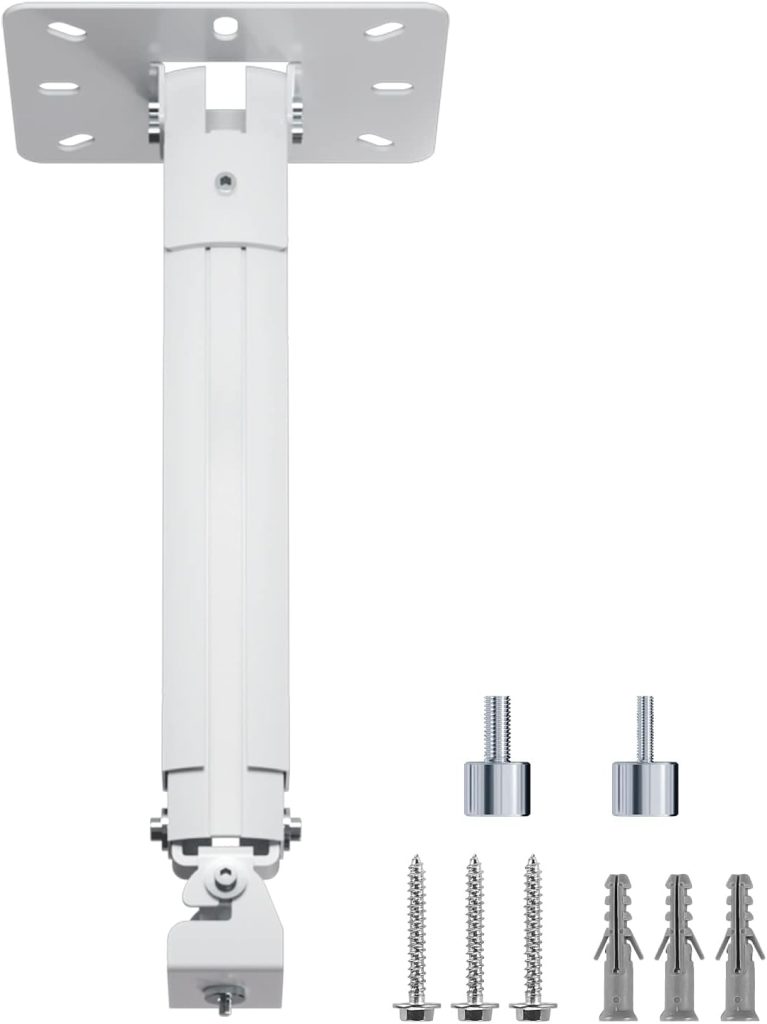
I installed a projector above my work table in my craft room, and I cannot tell you how much this has transformed my creative process.
Can you see how easily I projected the artwork onto my table?


The projector connects directly to my computer and allows me to project anything onto my work surface. That means I can project designs, sewing patterns, quilt blocks, embroidery guides, or anything else I want directly onto fabric.
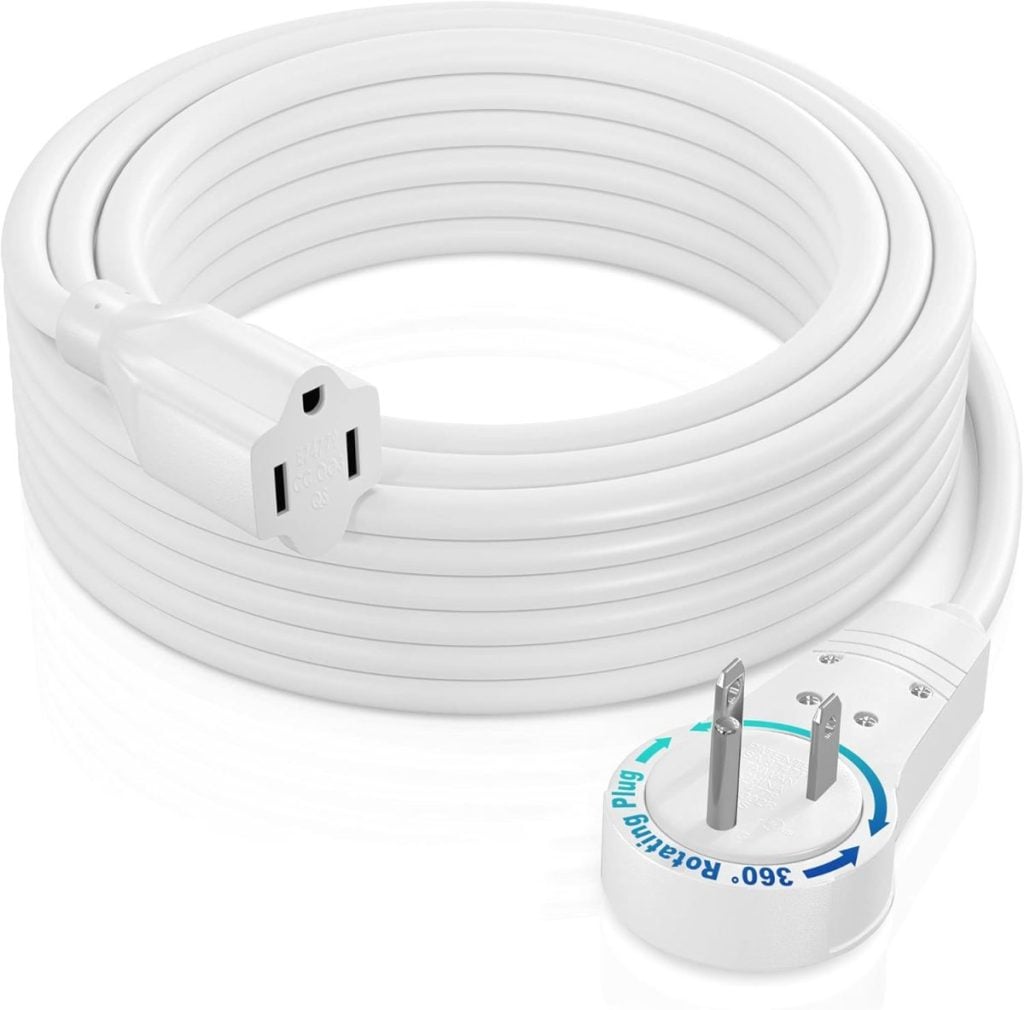
I used a very long extension cord and an HDMI cable and ran them along the ceiling, down the wall, and all the way to my desk in my Dreambox.
For this pillow, I simply opened my flower design on my computer, adjusted the size to fit the pillow cover, and projected it onto the fabric. The lines appeared perfectly scaled and positioned exactly where I needed them.
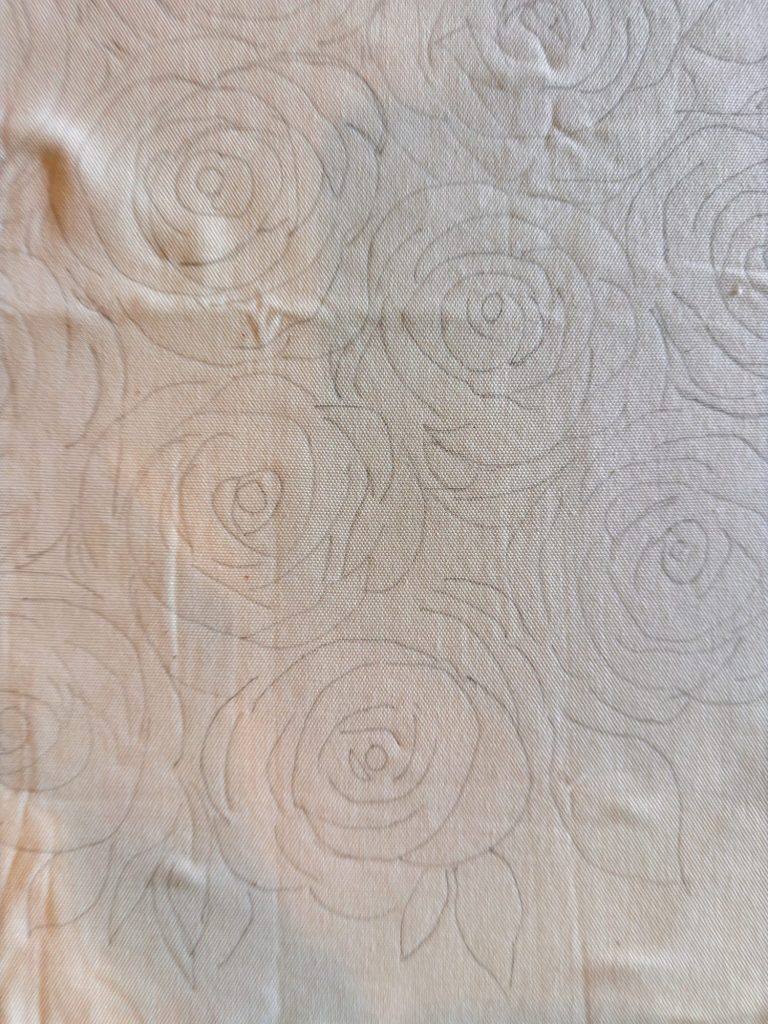
Tracing the design was incredibly easy. No guessing. No complicated transfer methods. Just clean, accurate lines ready for painting.
I will share more details about my projector setup on Sunday, as it truly is a game-changer for anyone who loves sewing, crafting, or DIY projects.
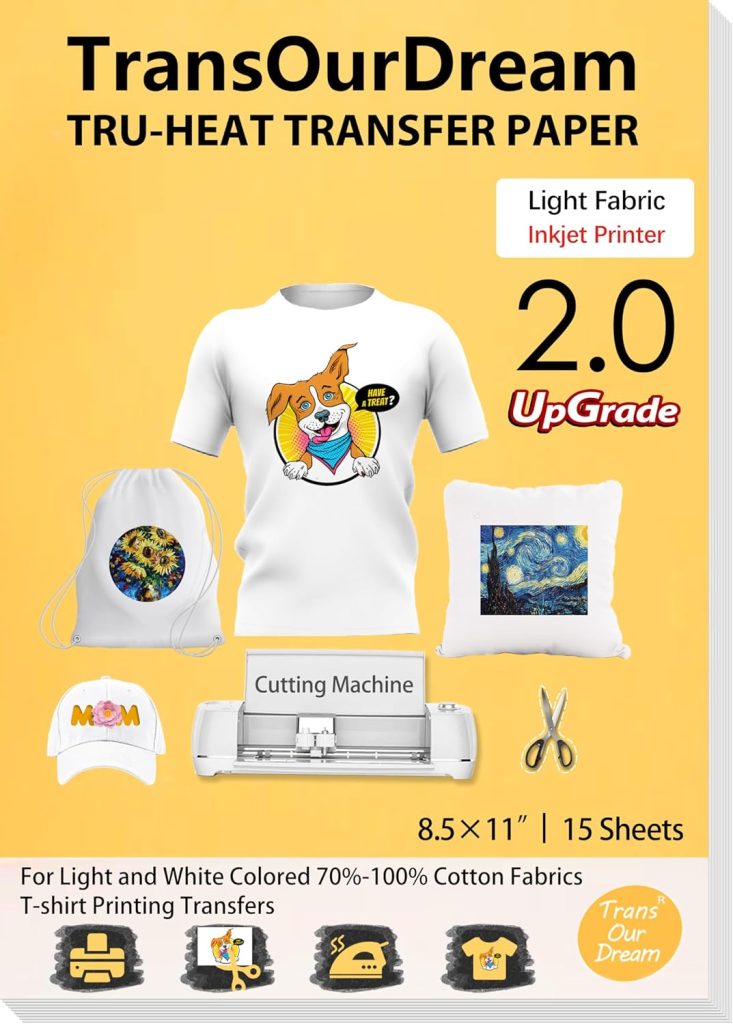
How to Trace This Without a Projector
Use Printable Iron-On Transfer. This removes tracing entirely.
Steps:
- Print the floral design onto printable iron-on transfer paper with your computerchat gpt
- .
- Iron directly onto the pillow cover following instructions.
- Stitch or paint over the transferred design.

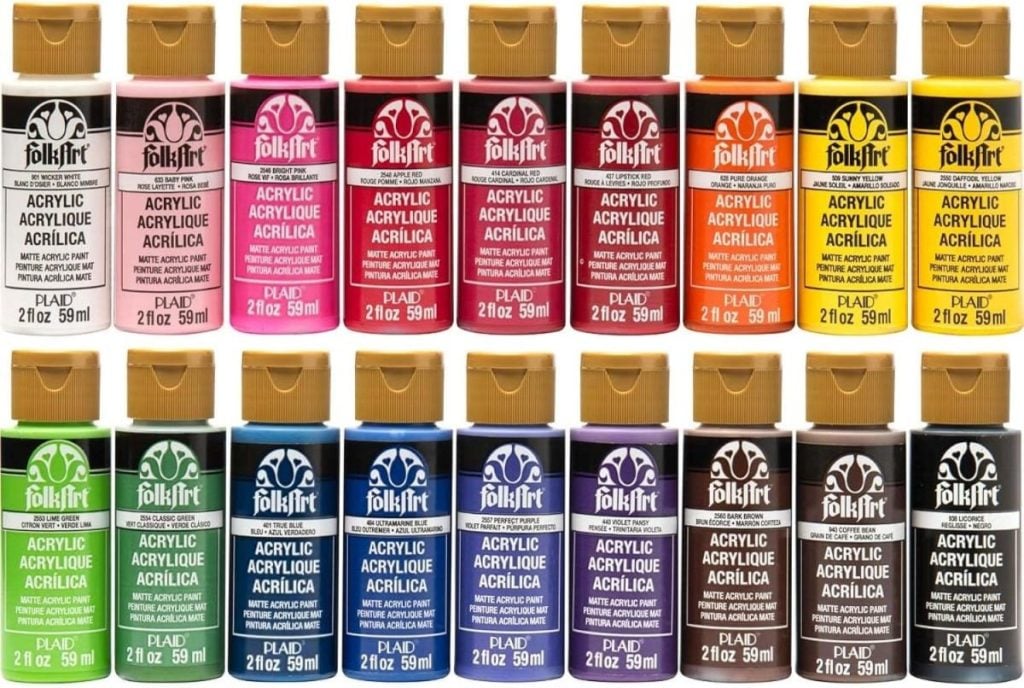
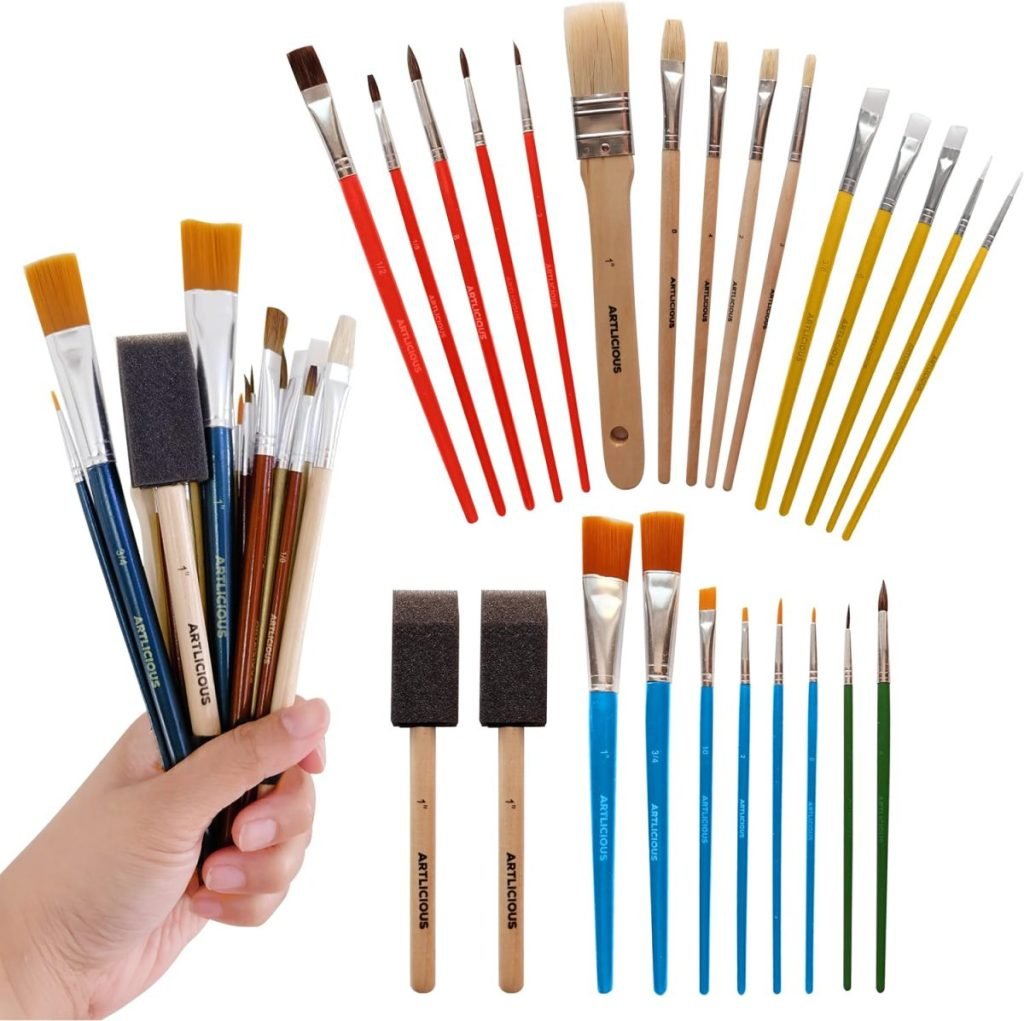
Materials Needed to Make the Flower Pillow
- pillow cover
- parchment paper
- acrylic paint
- small paint brushes
- embroidery thread
- permanent thin marker (optional)
- sewing machine (or use the marker if you don’t want to use a machine)


Painting the Spring Flowers
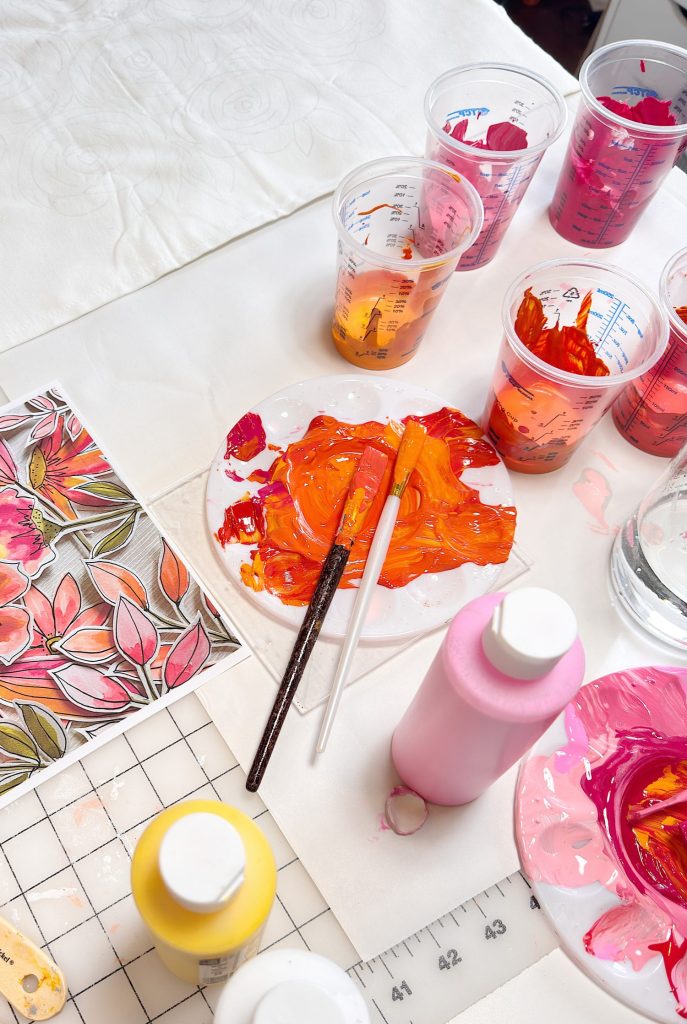
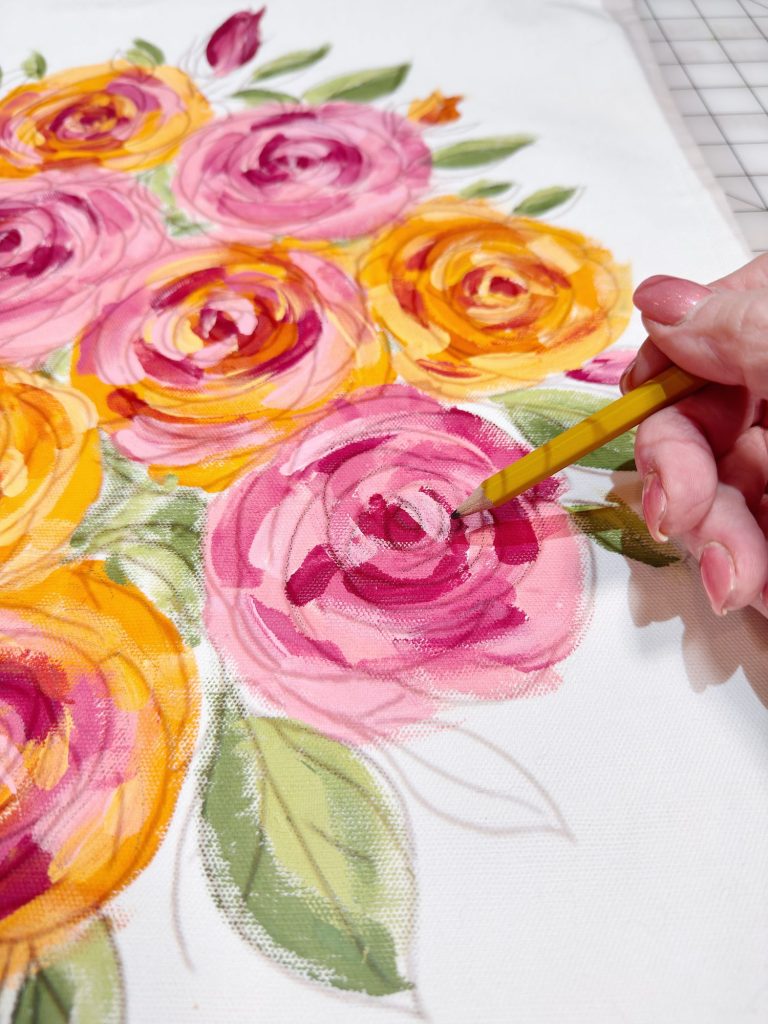
Once the design was transferred onto the pillow cover, it was time for my favorite part. Adding color.
Before you paint the pillow cover, place wax paper or parchment paper inside the pillow. This will prevent the paint from seeping to the back side of the cover.
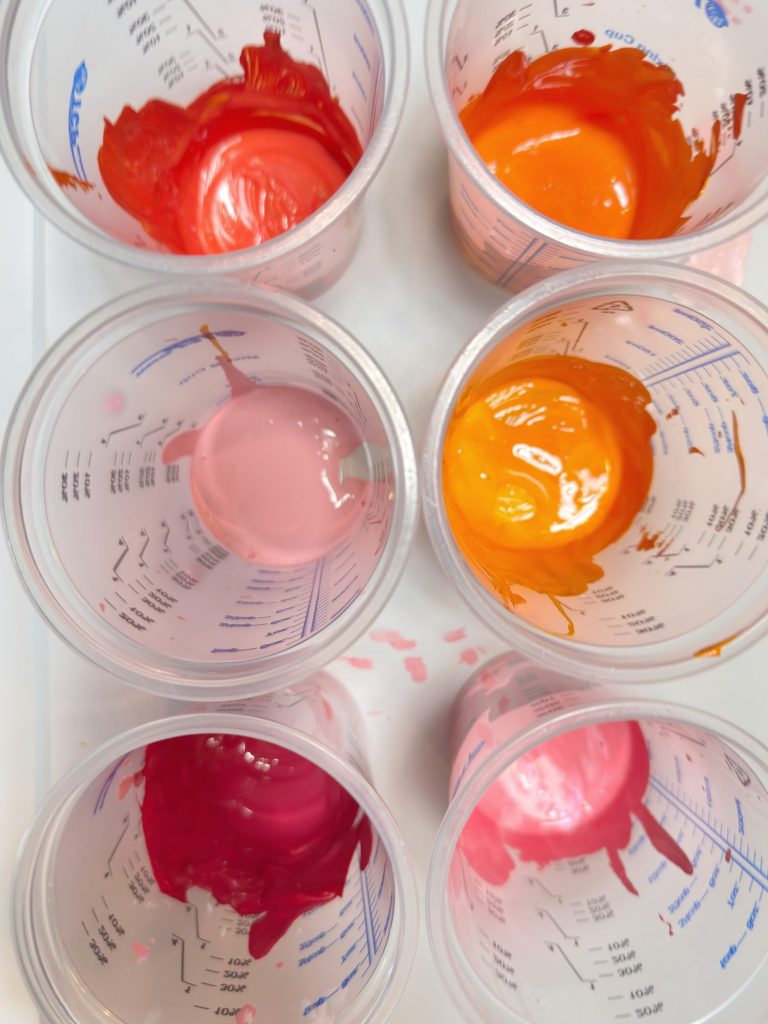
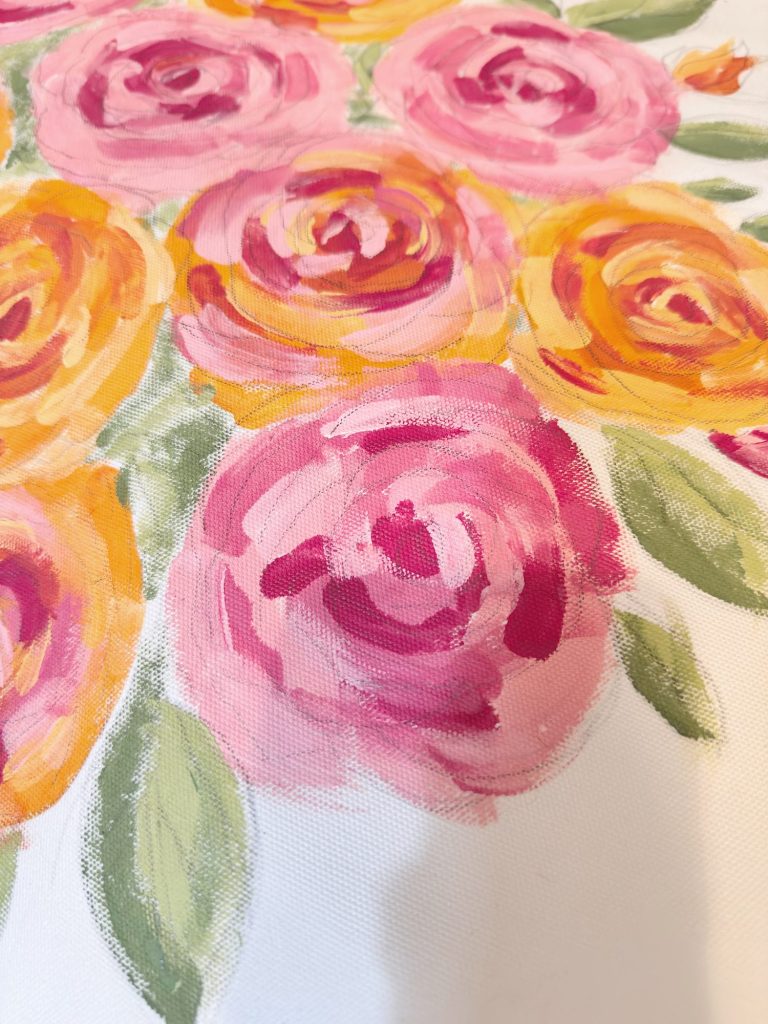
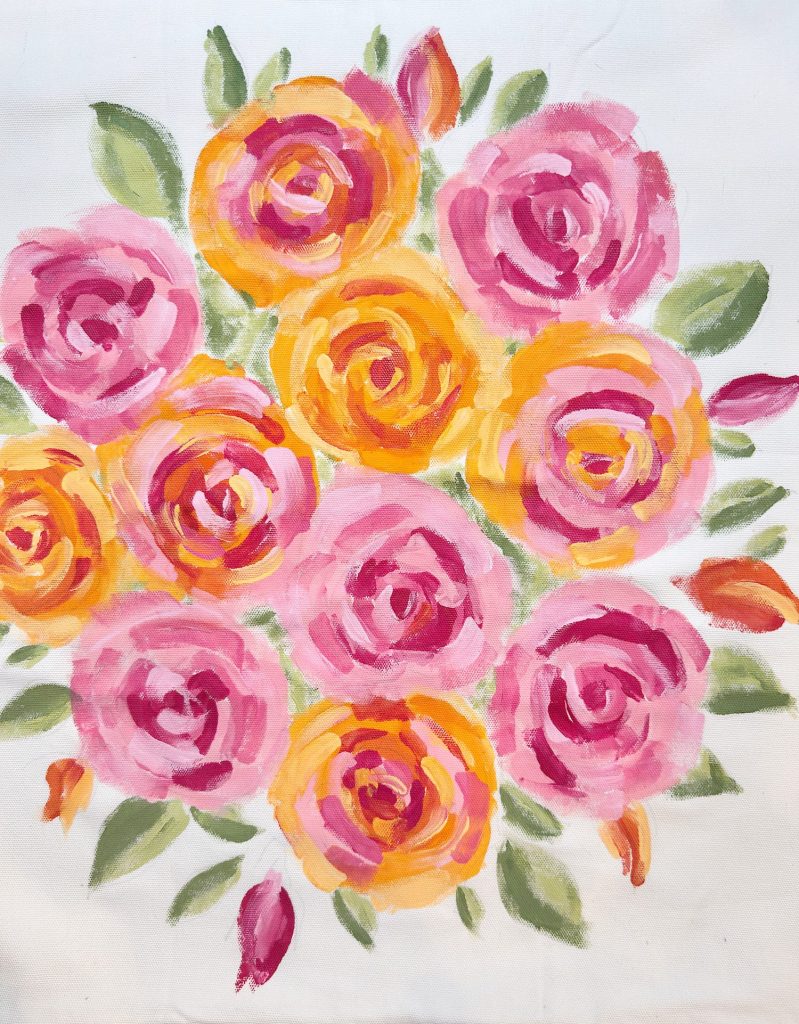
I mixed three shades of pink and orange for the flowers and two shades of green for the leaves. I love mixing my own colors because it gives me control over the final design’s softness and depth. Spring colors should feel fresh and layered rather than flat, and mixing your own palette helps achieve that.
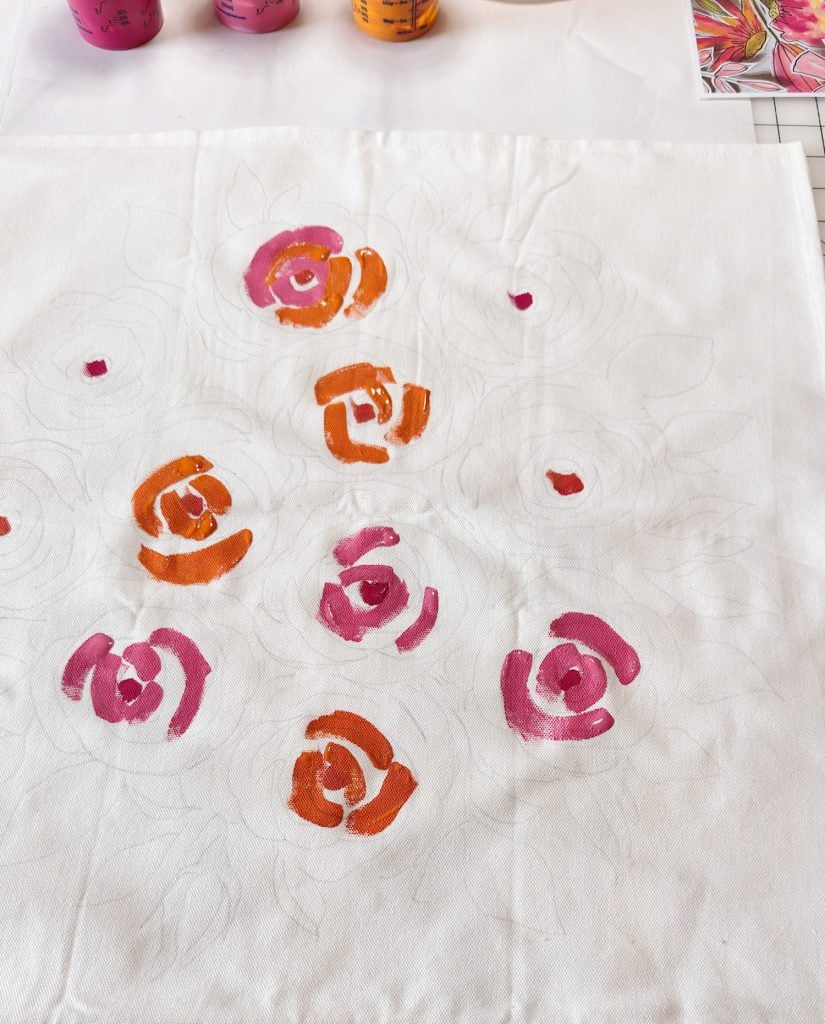
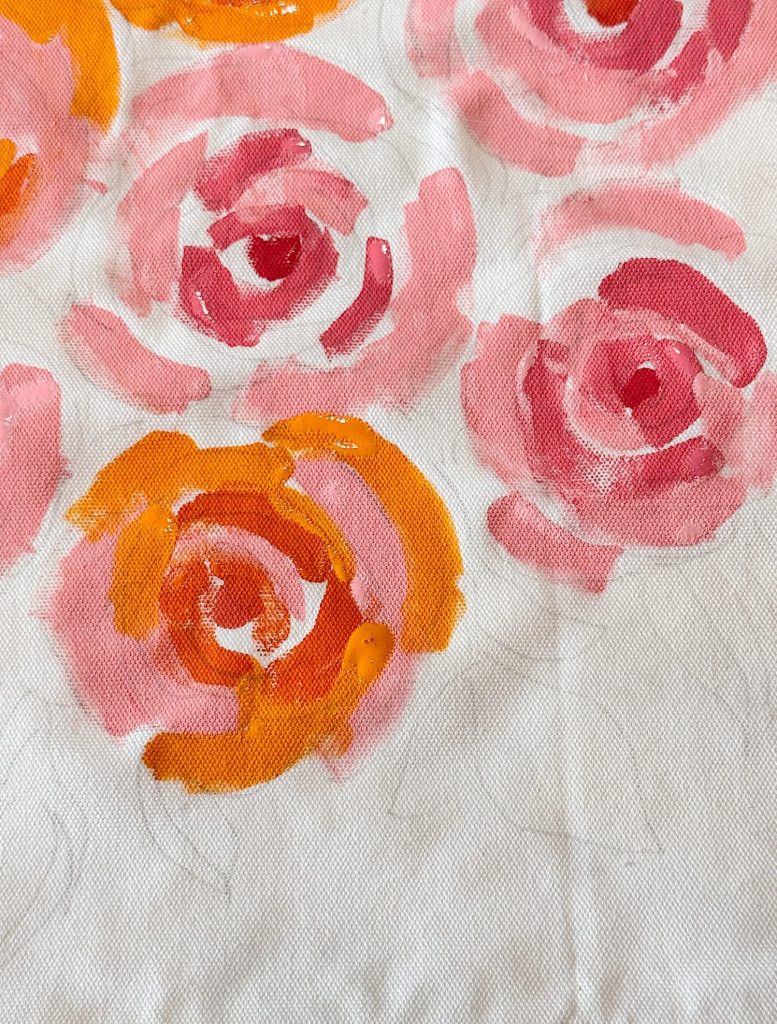
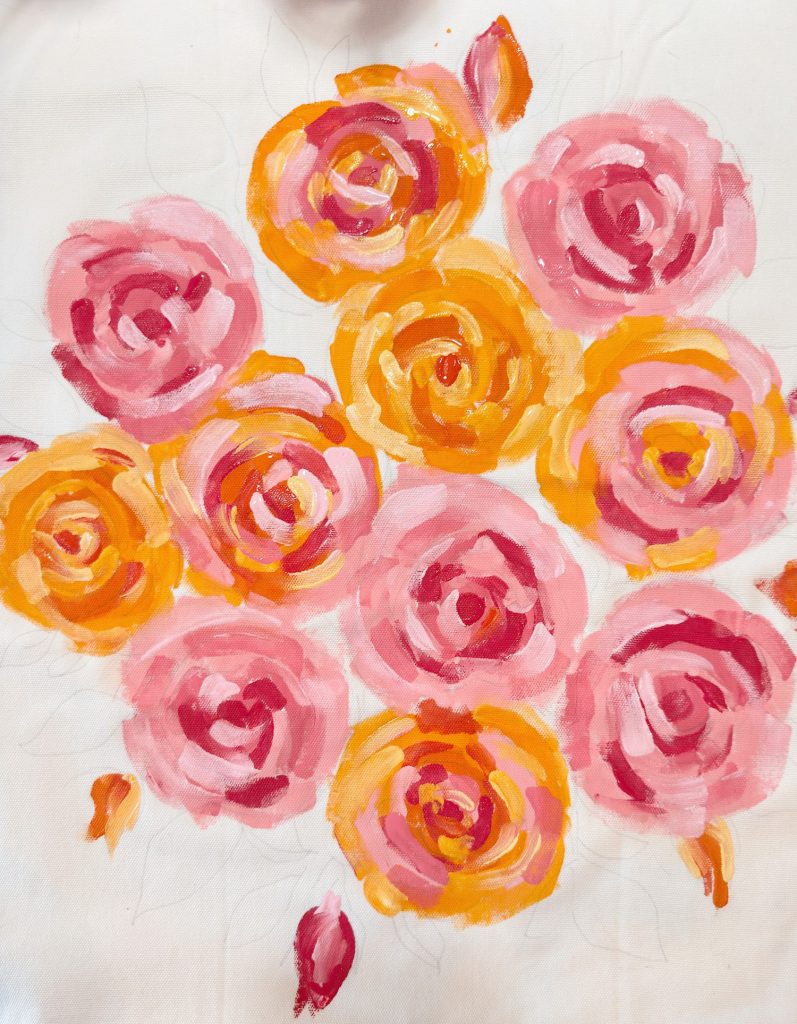
Using acrylic paint, I carefully filled in the flowers and leaves. This process took about an hour from start to finish, and it felt incredibly relaxing. Painting on fabric has a different rhythm than painting on canvas.
One of my goals with this pillow was to keep the painting loose and slightly painterly rather than overly detailed. The embroidery would come later to define the shapes, so the painted layer acts as the soft foundation.
When the painting was finished, I let the pillow dry completely and then ironed it to set the paint. This step is important because heat-setting helps ensure durability and prevents the paint from fading or washing out later.
Making Free Motion Embroidery Easier Than Ever

Normally, once the paint is dry, I would move straight to my sewing machine to begin free-motion embroidery. But I decided to try something different this time that makes this project much more approachable for beginners.
One of the biggest concerns I hear from readers is this:
“I love free motion embroidery, but I never know where to sew.”
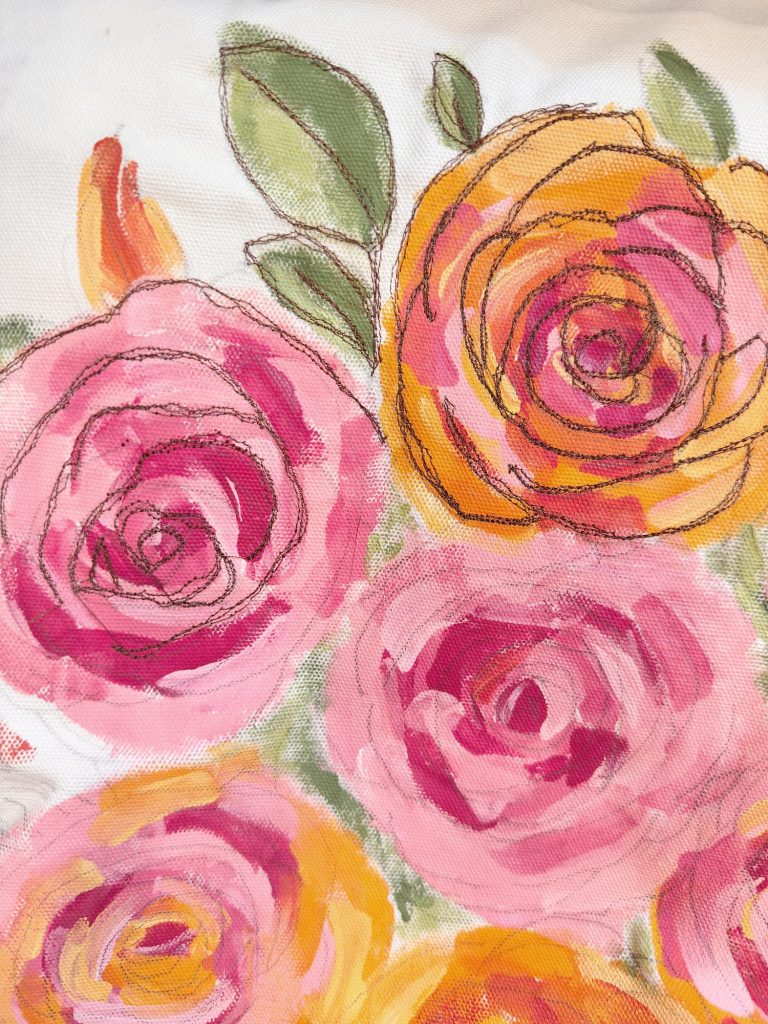
So instead of relying on memory or guesswork, I placed the pillow back under the projector and displayed the outline of my design again. Then I traced the lines directly onto the painted pillow cover with a pencil. These lines became my stitching guides.
This small step removes much of the intimidation from the process. Instead of wondering where to stitch, you simply follow the lines just like a coloring book or tracing exercise.
If you have ever wanted to try free-motion embroidery but felt unsure about where to begin, this approach makes it incredibly approachable.
Adding the Free Motion Embroidery Details

With the stitching guides now on my painted design, I moved to my sewing machine and began adding free-motion embroidery details. This is where the magic really happens.
The stitching adds dimension, texture, and personality to the painted flowers. It defines the petals, creates movement in the leaves, and gives the pillow a handcrafted look that makes it feel special.
To learn how to do free-motion embroidery, head to this blog post for a step-by-step tutorial.
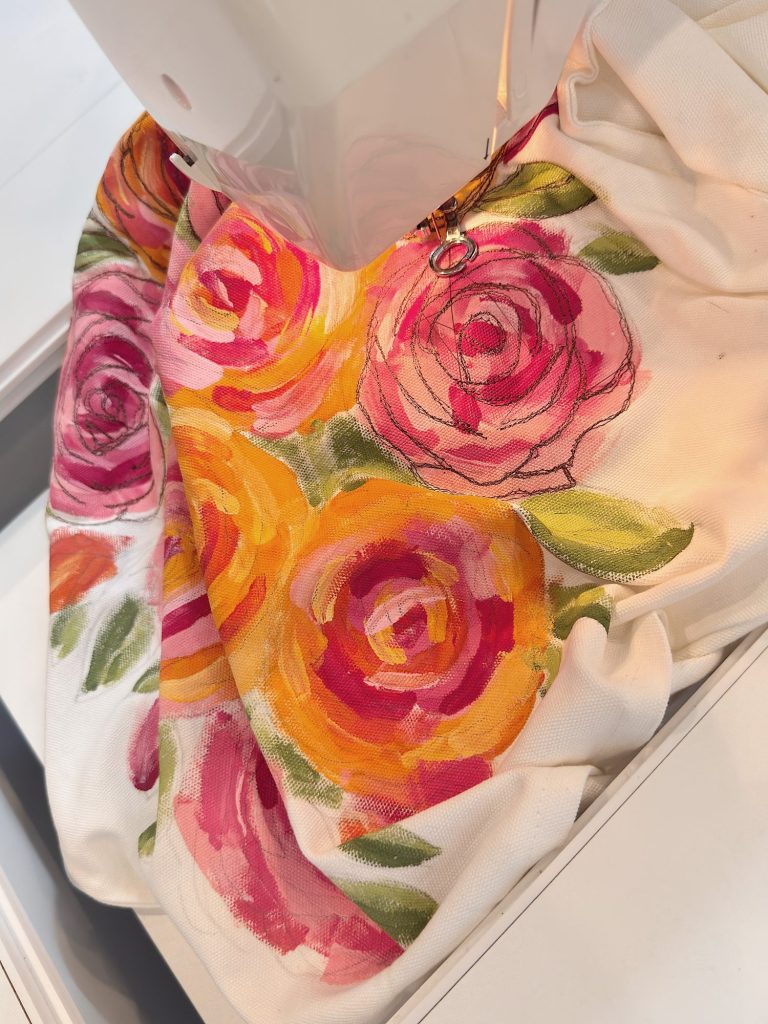
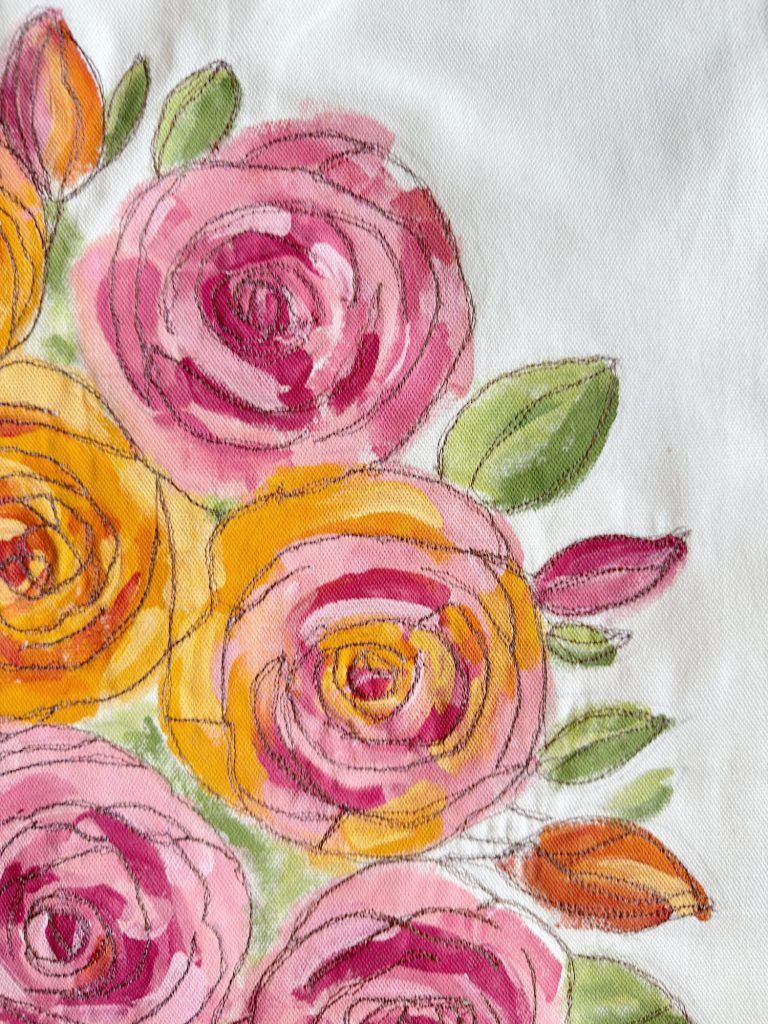
I love the combination of painting and stitching because each layer enhances the other. The paint provides softness and color, while the embroidery stitching adds structure and detail.
If you are new to free motion embroidery, start slowly and allow yourself to experiment. Imperfect lines often add charm and character, which is part of what makes handmade pieces so beautiful.
A No-Sew Alternative
If sewing feels intimidating or you simply do not want to set up your machine, there is a wonderful alternative.
You can achieve a very similar finished look by using a thin permanent marker to draw in the details instead of stitching them.
Simply follow the same projected lines and carefully draw the outlines onto the painted pillow. The result still looks layered and intentional, and many people may not even notice the difference from a distance.
I love offering options because crafting should feel accessible and enjoyable, not overwhelming.
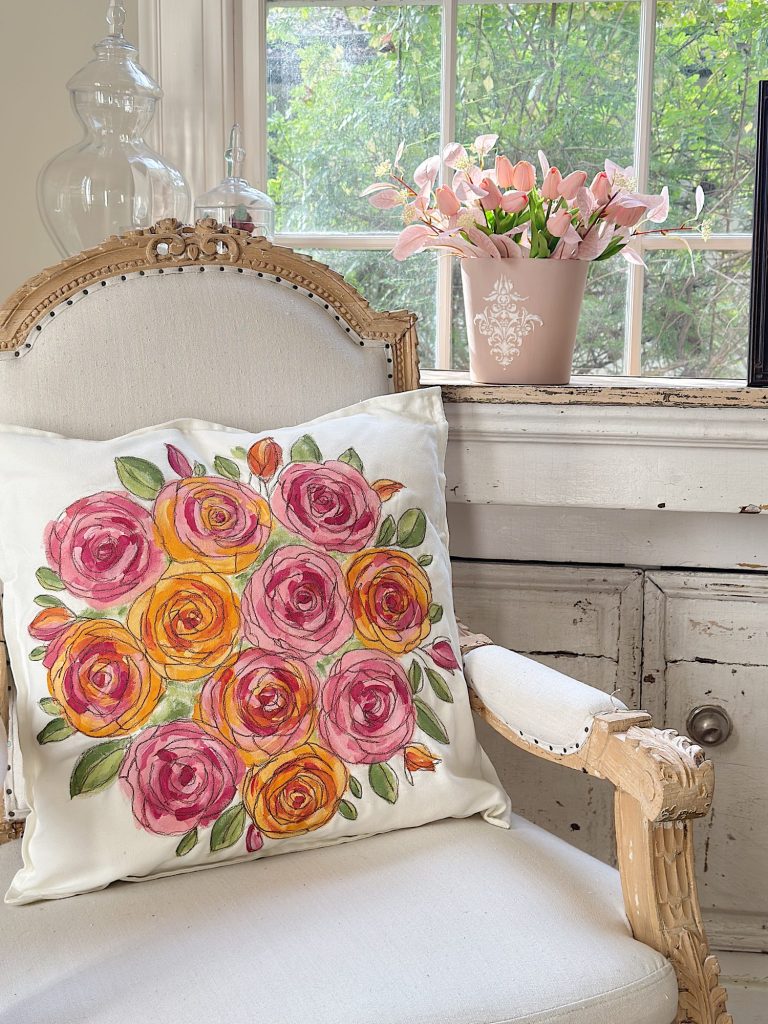
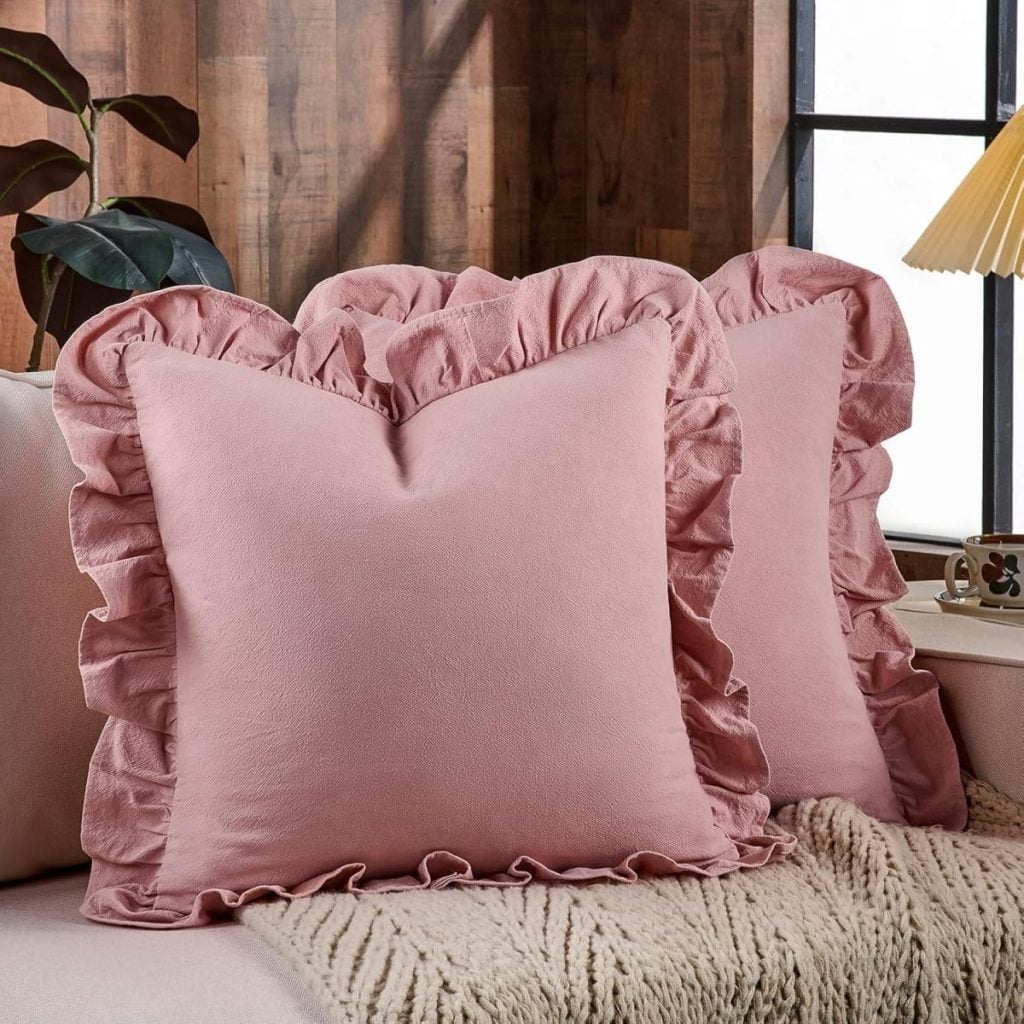
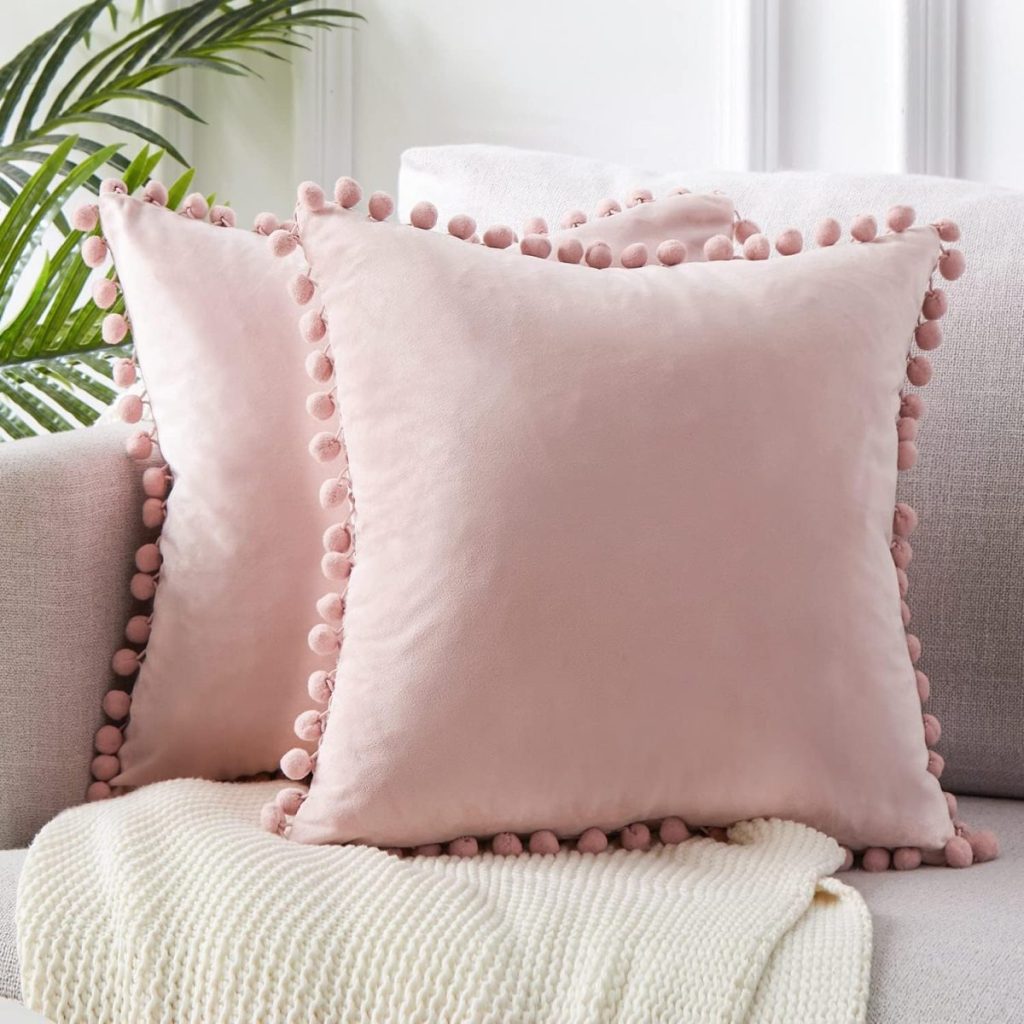
Styling Your Spring Flower Pillow
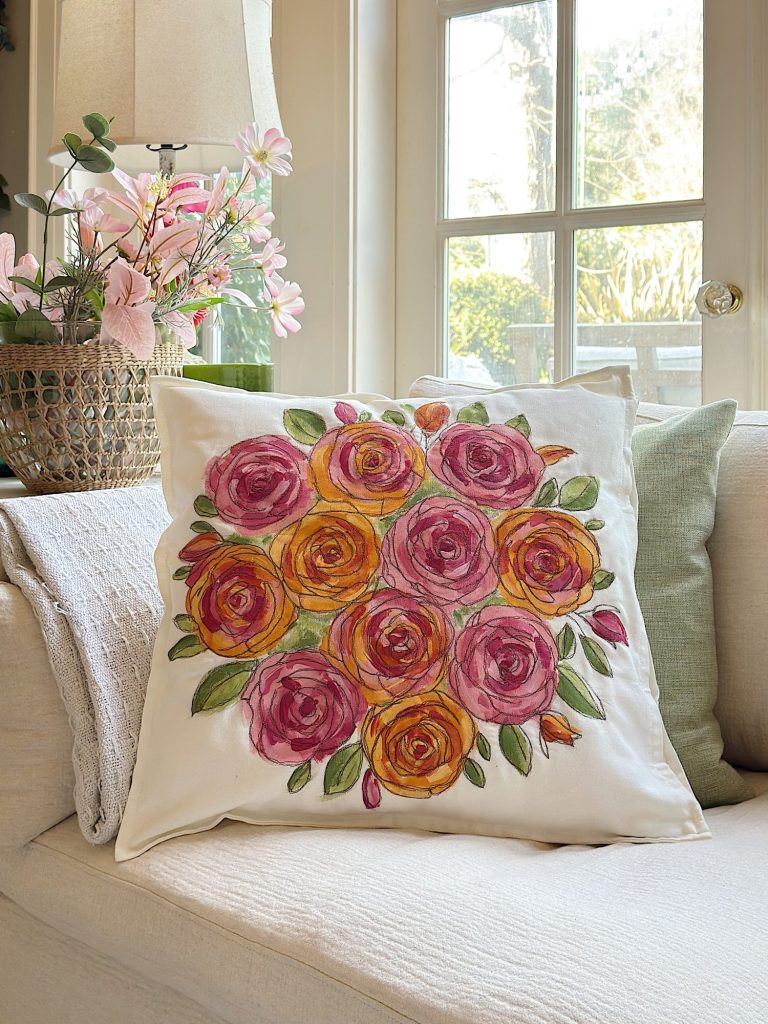
One of the things I love most about this project is how versatile the finished pillow is. It instantly adds a touch of spring wherever you place it.
Here are a few favorite styling ideas:
- Pair it with neutral pillows to let the florals stand out.
- Add it to a chair or bench for a subtle seasonal update.
- Layer it with soft textures like linen or cotton throws.
- Use it in a bedroom for a gentle spring refresh.


Because the design is handmade and slightly artistic, it works beautifully in many different rooms without feeling overly themed.
Why This Project Feels Like Spring
Spring always inspires me to try new techniques and embrace fresh ideas. This pillow combines so many things I love. Painting, sewing, creativity, and finding new ways to simplify the process so more people feel confident trying something new.
Installing the projector in my craft room has opened up so many possibilities, and I already know it will become an essential part of future projects. Being able to project designs directly onto fabric removes so many barriers and allows creativity to flow more freely.
And honestly, projects like this remind me why I love handmade decor so much. Every stitch and brushstroke tells a story. Every finished piece feels personal and meaningful.
What’s Coming Next
I will be sharing more details about my projector setup this Sunday, including exactly how I installed it, how I use it, and why it has completely changed my crafting workflow.
If you have ever struggled with transferring designs or felt intimidated by free motion embroidery, you are going to love it.
In the meantime, I hope this Spring Flower Pillow inspires you to try something creative this season. Whether you paint, stitch, or simply draw the details, this project is a wonderful way to bring handmade beauty into your home.
Spring is the perfect time to create something new.
How to Follow Along With A Handmade Spring
Each week, a new spring craft will be shared here on the blog. I will also be sharing behind-the-scenes moments, progress videos, and finished projects on Instagram so you can see each craft come to life.
You can jump in at any point. There is no need to start at the beginning or complete every project. Choose the ones that speak to you and make them your own.
If you love seasonal crafting, this series is designed to inspire you throughout spring.
Here are all of the A Handmade Spring craft projects so far. I can’t wait to share all twelve.

Latest Posts
-
Five Easy Steps to Adding Hanging Planters in Your Yard
Today, I am sharing how I created the hanging planters in our backyard. I love mine so much! Hanging planters look lovely in any yard. My hanging planters have been looking awful all winter long. Here are five easy steps to add (or redo) hanging flower baskets in your yard. Adding hanging planters is a…
-
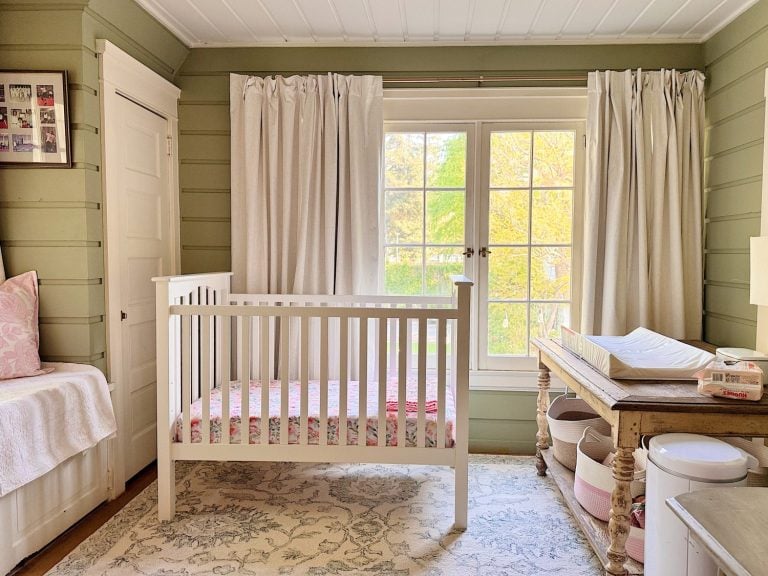
Spring Cleaning and Sunday Morning Coffee
I don’t know about you, but every spring I feel this strong pull to refresh something in our home, and this year I started in a place that might surprise you. It’s Spring Cleaning time! The very first room on my spring-cleaning list was our nursery. And yes, I know that sounds a little unexpected,…
-
Best Easter Brunch Egg Dish: Loaded French Onion Frittata
Easter brunch is one of those special meals where the table is complete, the laughter is loud, and the food is nothing short of spectacular. If you want to wow your guests with something savory, cheesy, and unforgettable, let me introduce you to your new Easter brunch hero: a Loaded French Onion Frittata.
-
The Best Spring Pillow DIY – A Handmade Spring
There are certain projects that start as an idea and quietly turn into something you love far more than you expected, and this Spring pillow is exactly that. As part of my A Handmade Spring series, I wanted to create something soft, beautiful, and full of texture, and this pillow checked every box. This pillow…


My Recent Instagram Posts

You can pin the image below to your boards on Pinterest (click the Pin button in the top left corner) or follow me on Pinterest!

For more real-time updates, follow me on Instagram @My100YearOldHome
Wow, what a great idea! Go to town. the sky is the limits.
I love this pillow project! I made your Christmas tree pillow and I get lots of compliments. I’m unsure how to use the 8.5″ x 11 print of the flowers (using the transfer paper)on the large pillow. That size print of the flowers will look too small on the pillow. Can you help?
A Spring Flower Pillow DIY – Handmade for a Fresh Spring
Bring the beauty of spring into your home with a handmade spring flower pillow. This DIY project is perfect for adding a touch of nature and color to any room. Using soft fabrics and colorful floral patterns, you can create a cozy and decorative pillow that reflects the freshness and vibrancy of the season. Whether you place it on your sofa, bed, or favorite chair, this handmade pillow adds a cheerful and personalized touch to your spring décor. Plus, making it yourself allows you to customize the size, colors, and flower designs to perfectly match your style.