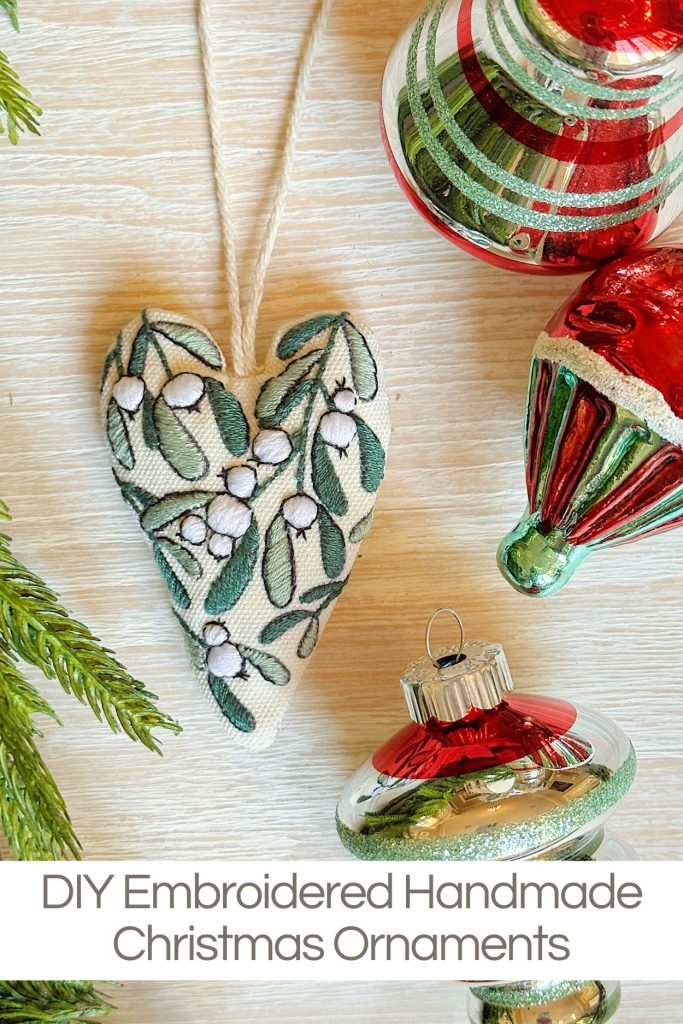
DIY Embroidered Handmade Christmas Ornaments

There’s something so special about handmade Christmas ornaments … the kind that hold a story, a little bit of creativity, and a whole lot of heart.
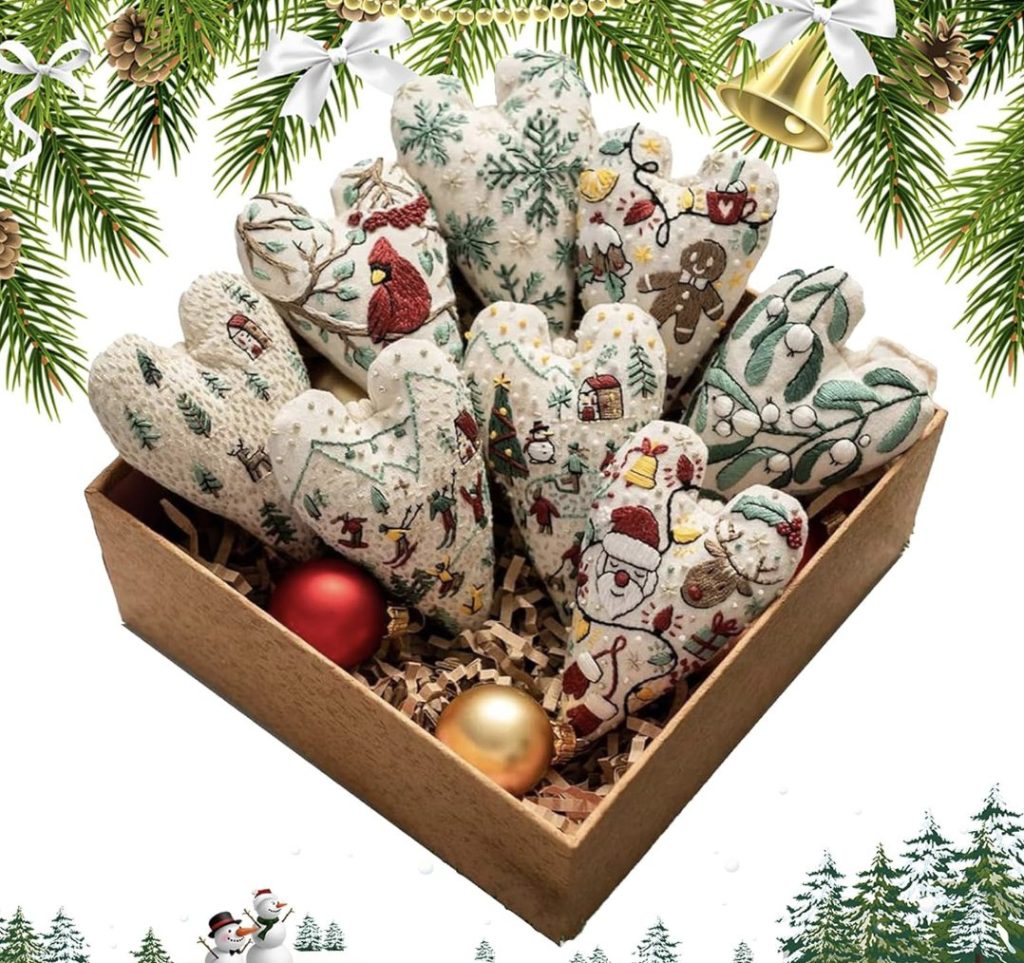
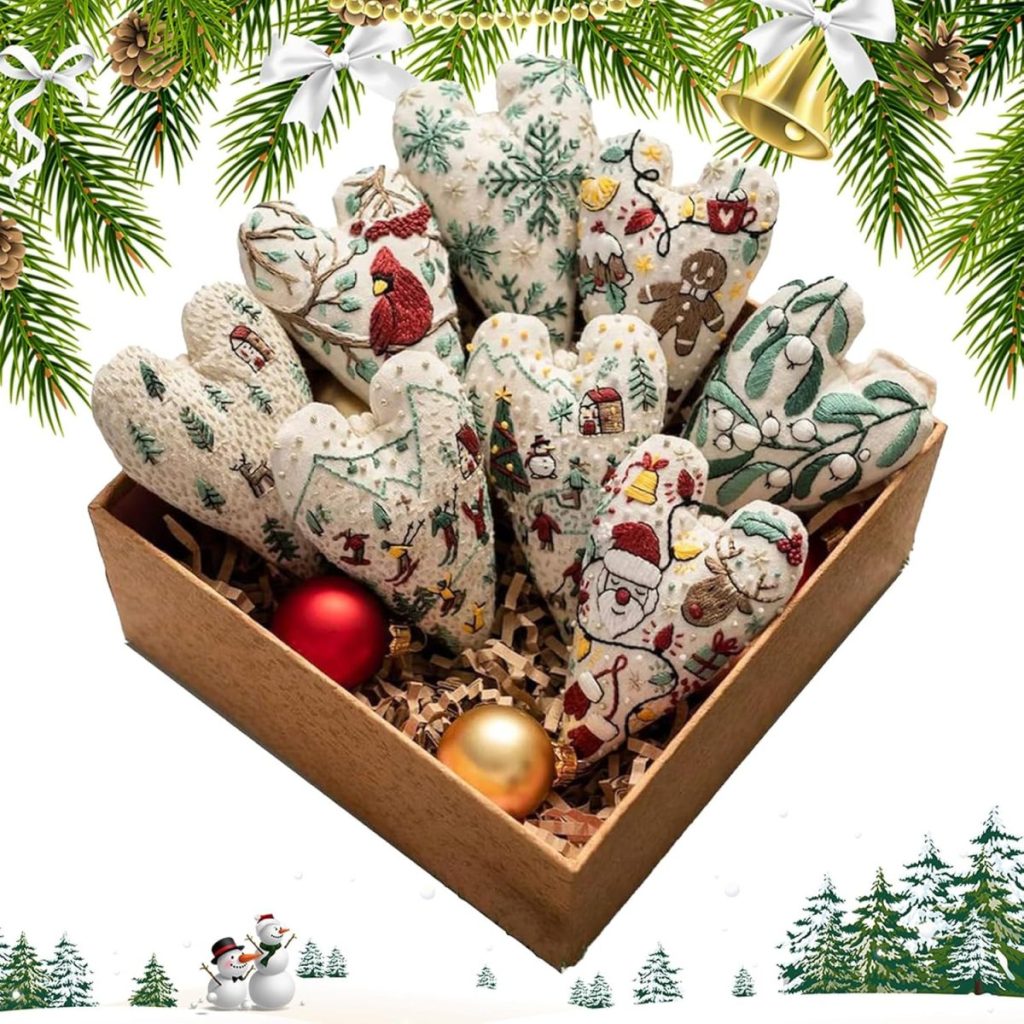
Every year, I enjoy discovering new ways to create unique and meaningful decorations for our tree, and this year’s project is something I think you will all enjoy. Why? Because it’s part of a kit to make eight handmade Christmas ornaments!

Heart Handmade Christmas Ornaments (Made from a Kit!)
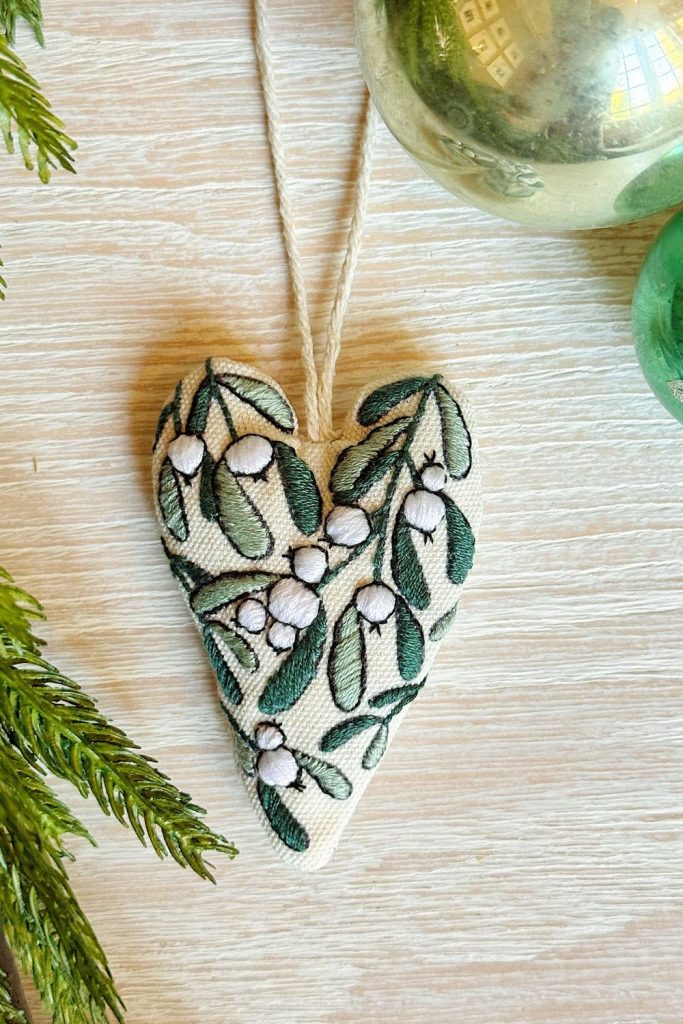
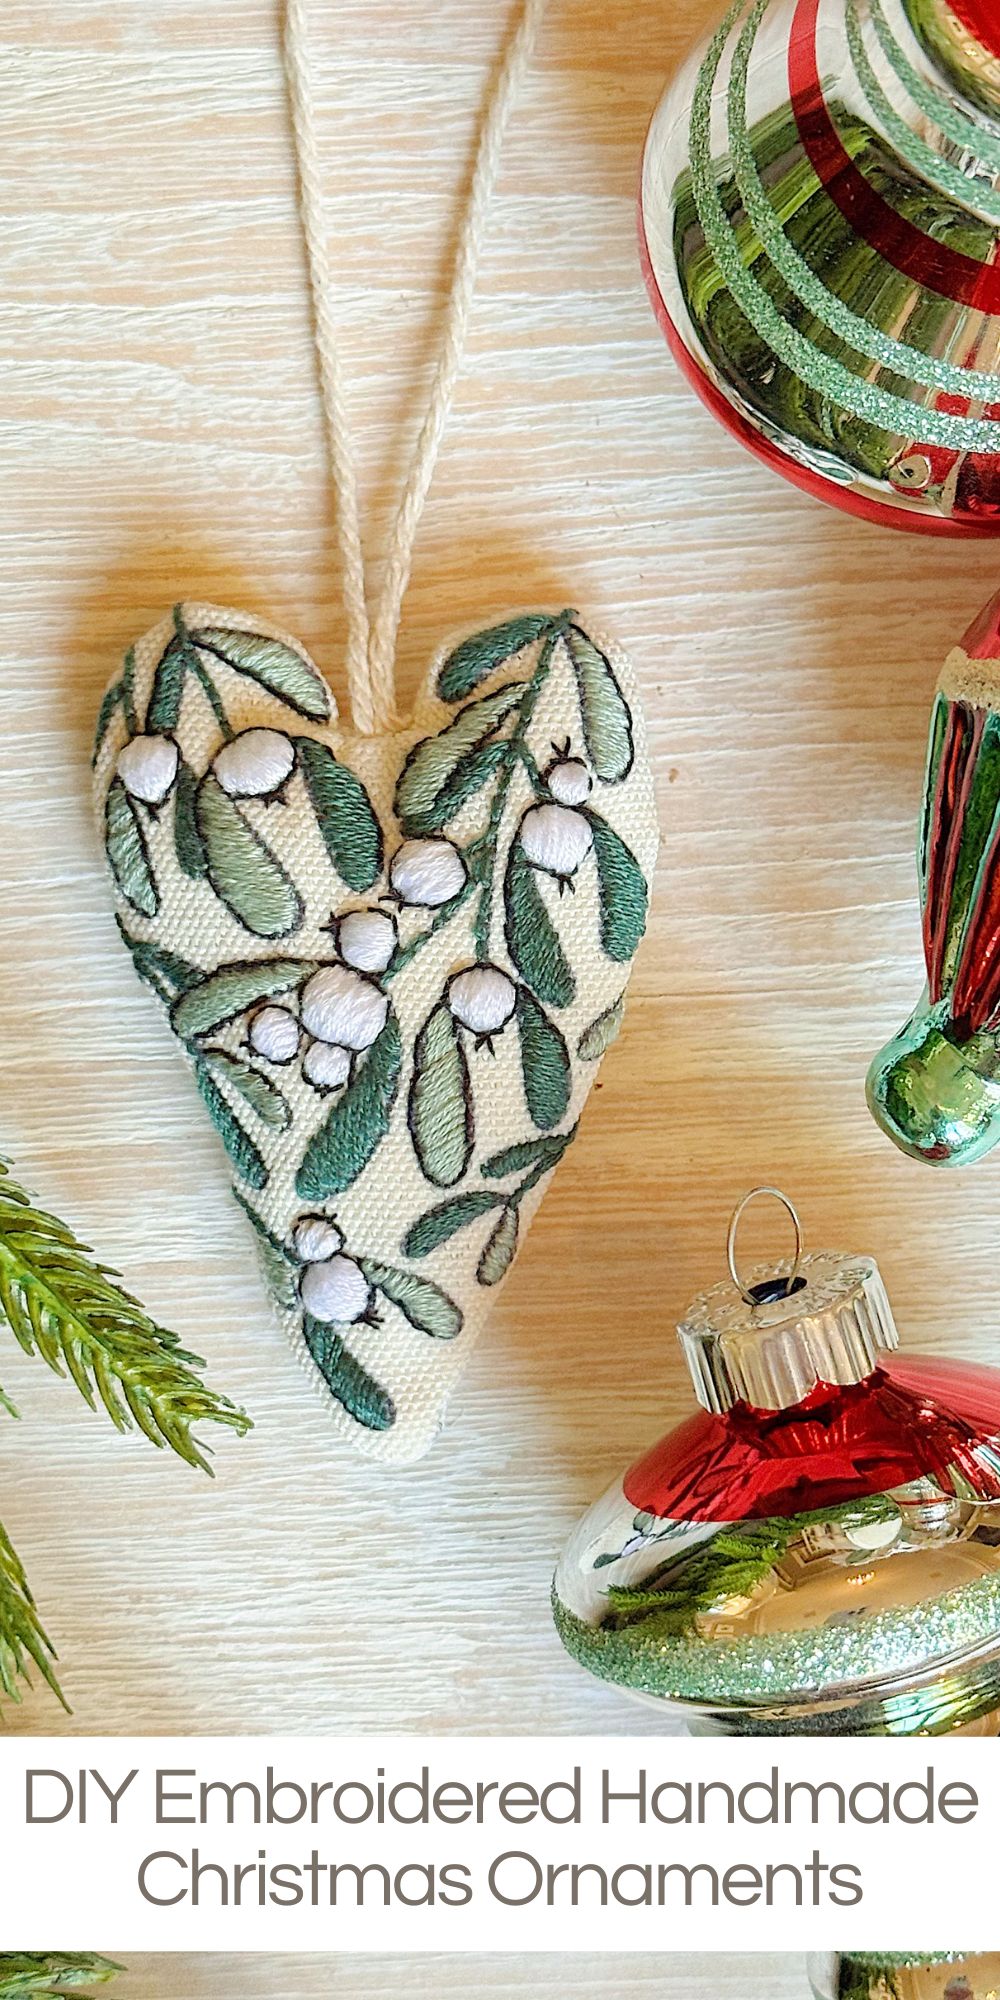
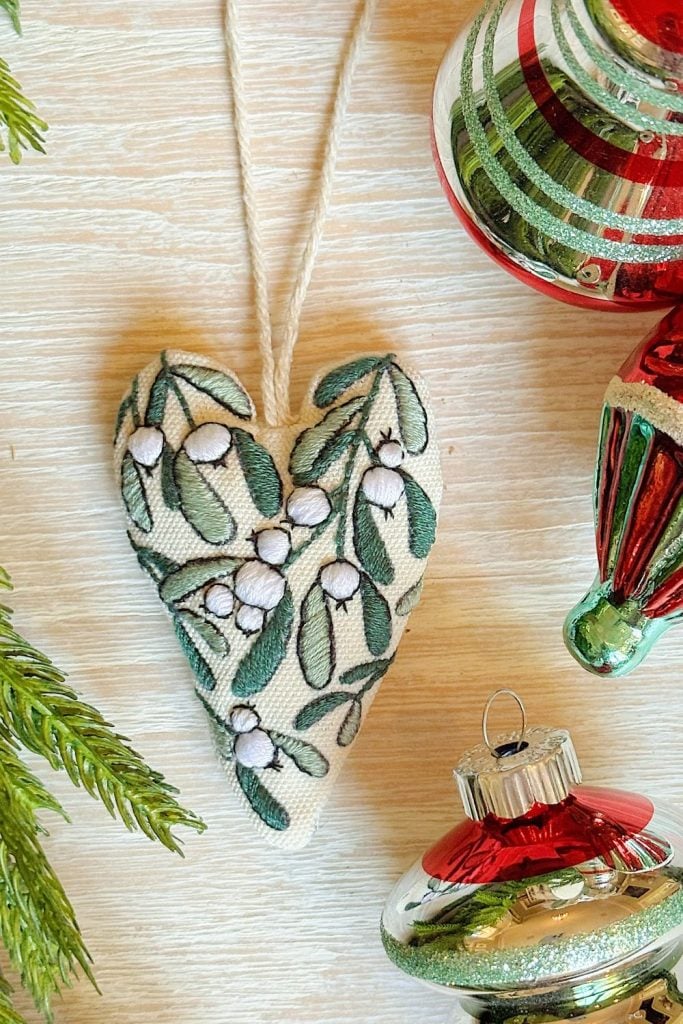
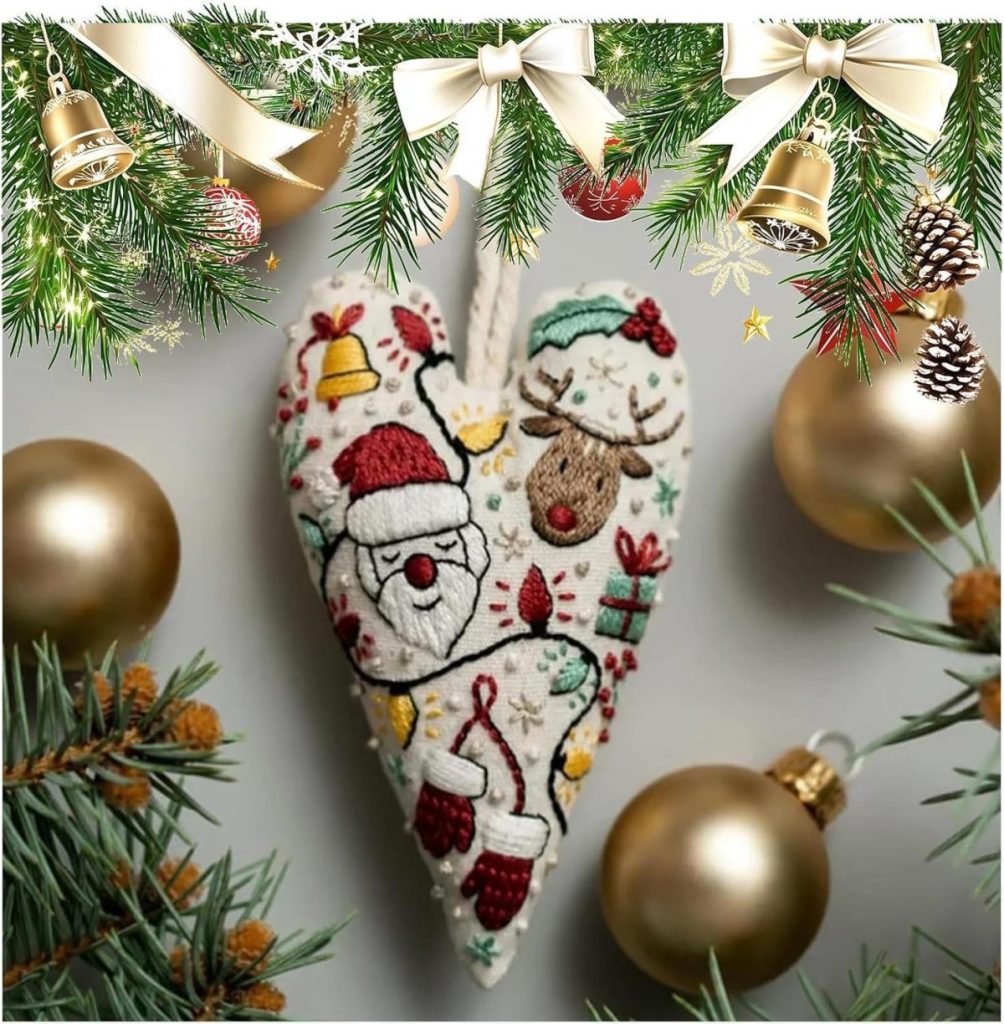
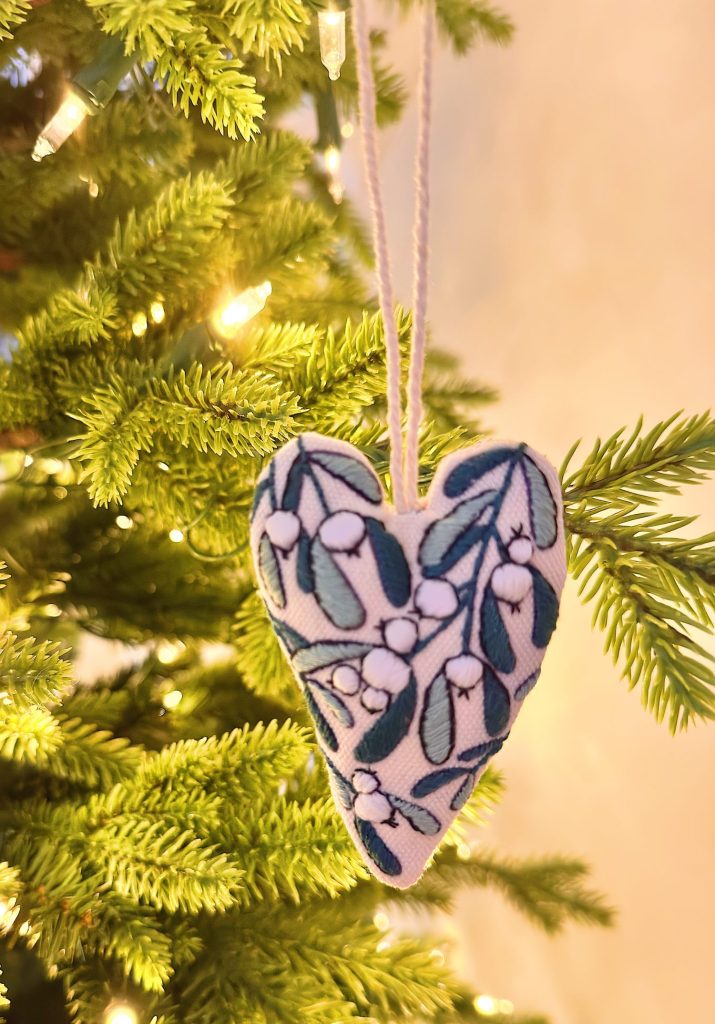
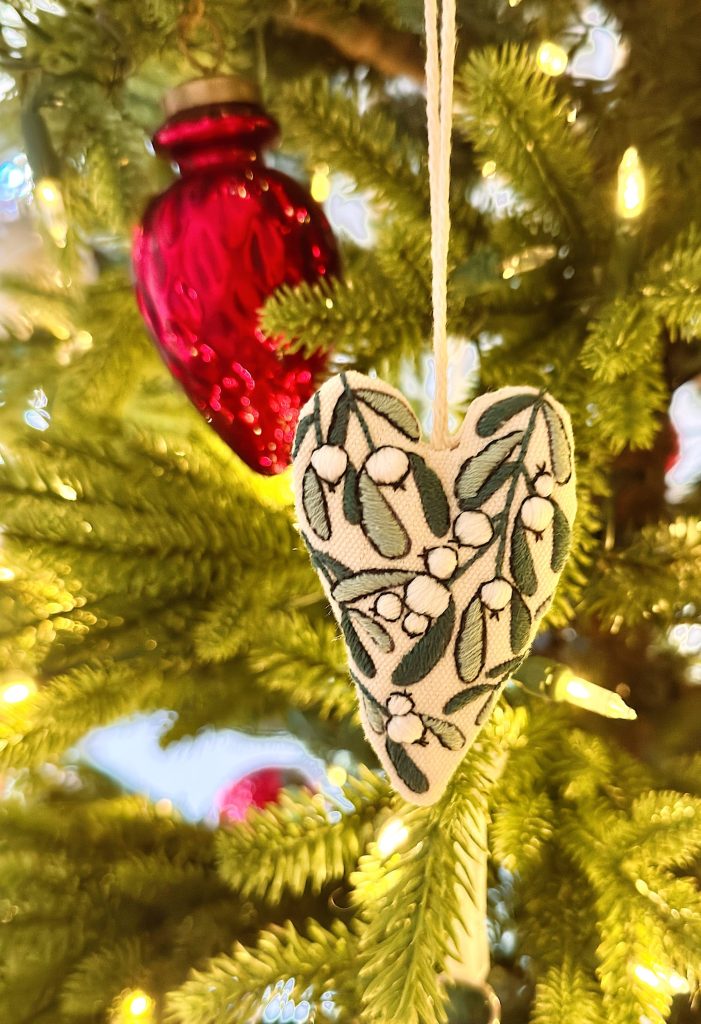
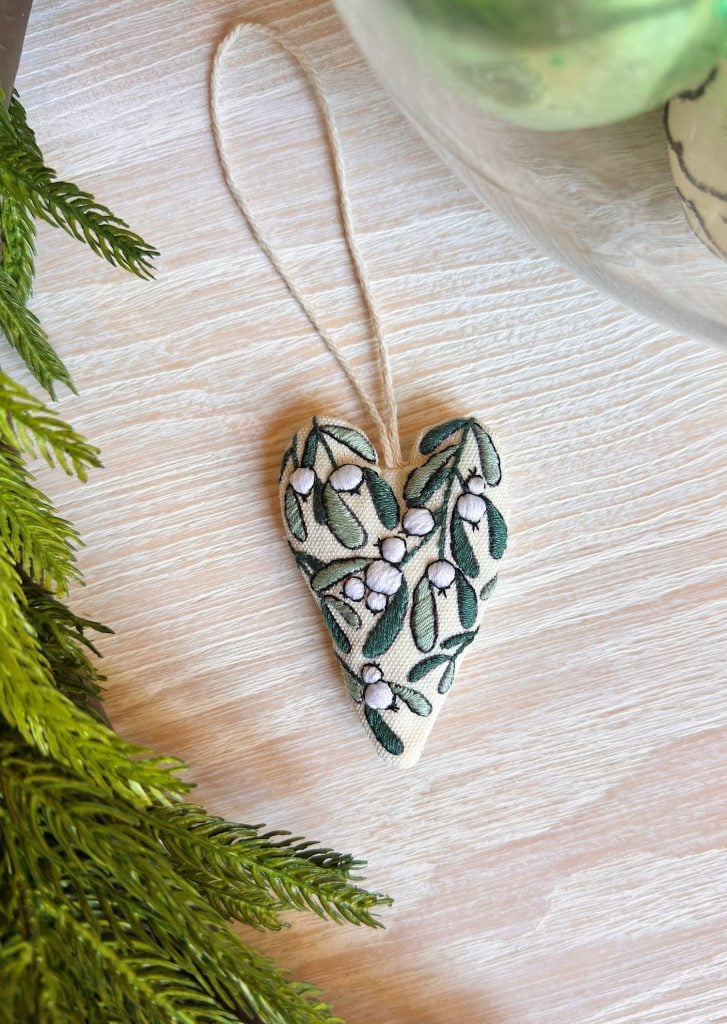
I made this beautiful, hand-embroidered heart-shaped Christmas ornament … and yes, it came from a kit!
I found an all-in-one kit that includes everything you need to make eight beautiful ornaments for just over $3 each. It’s easy, beginner-friendly, and so much fun to do while sipping cocoa and watching your favorite holiday movie.
This project is part of a blog hop with some of my favorite bloggers. And this one fits perfectly into my list of easy and meaningful handmade gifts that add a personal touch to your Christmas decor.
The Ornament Kit I Used
This DIY Heart-Shaped Christmas Ornament Embroidery Kit is for beginners, and I knew I had to try it. I love any project that combines texture, color, and a handmade touch, and these little embroidered hearts captured all of that perfectly.
What I love most about this kit is that it includes everything you need to make eight heart-shaped ornaments. No extra trips to the craft store required.
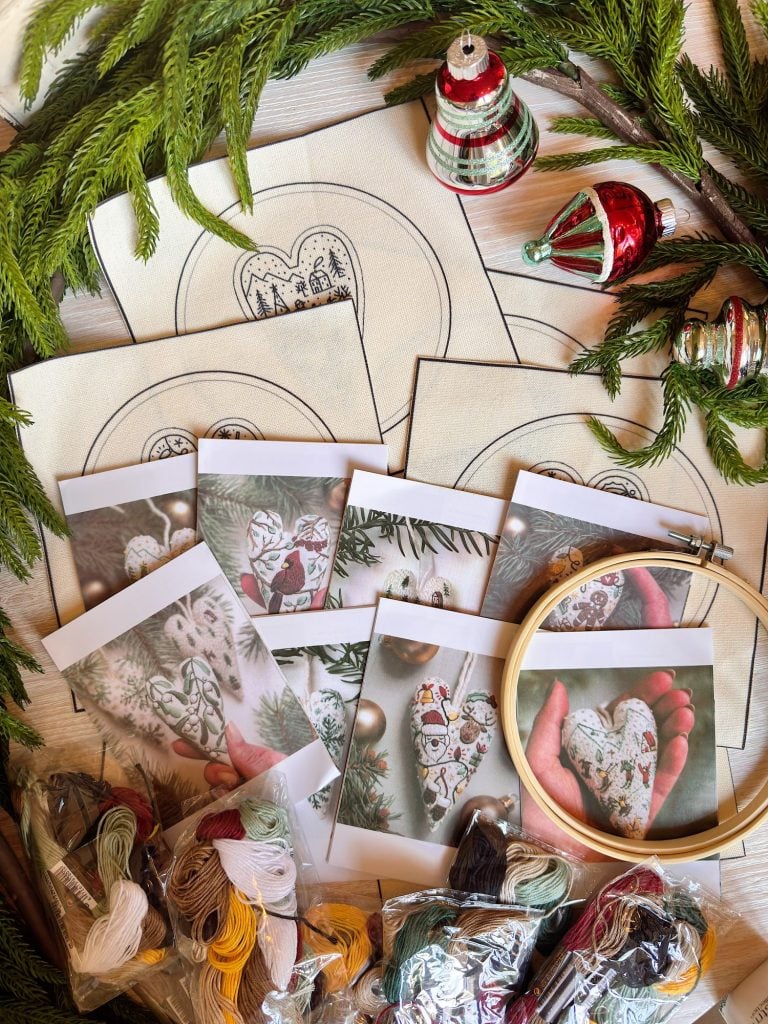
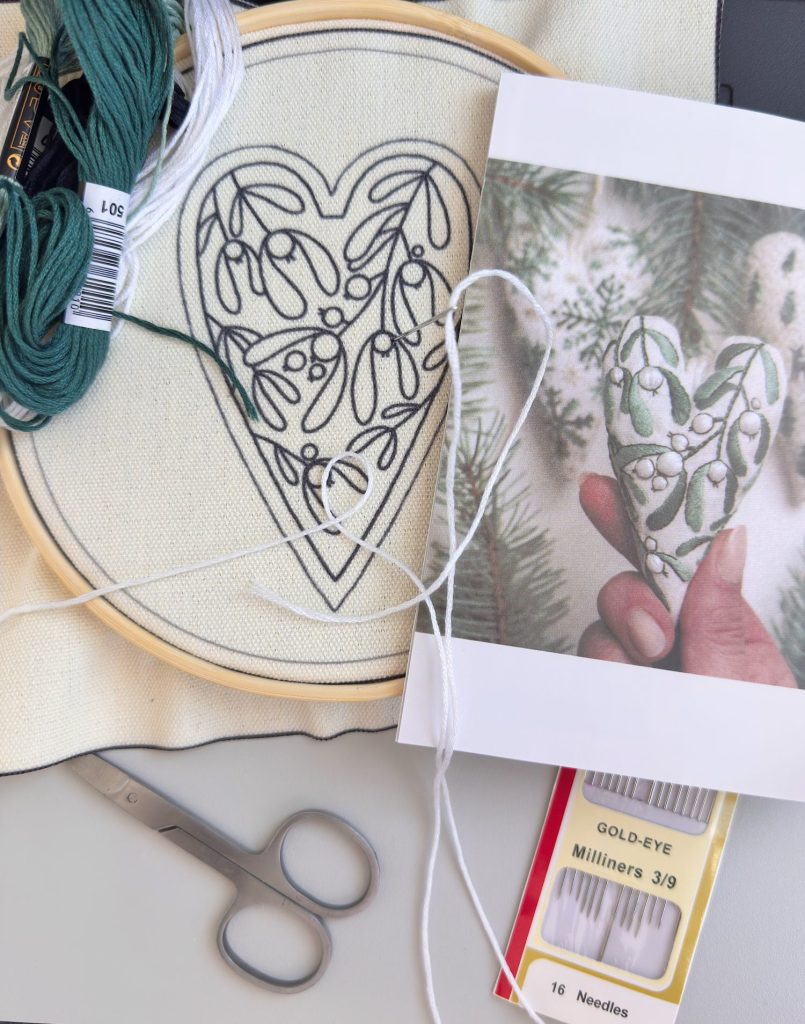
Inside the kit, you’ll find:
- Eight pre-drawn fabric heart shapes and matching backing fabric
- Embroidery floss in coordinating colors for each of the eight designs
- A pack of embroidery needles
- An embroidery hoop
- Stuffing material for the ornaments
- Ribbon for hanging
- A full-color guide with step-by-step embroidery patterns
The kit is thoughtfully designed for beginners, which makes it a wonderful project even if you’ve never embroidered before. The stitches are simple, mostly consisting of backstitch, running stitch, and French knots, and the included guide clearly shows every detail.
And honestly, that’s part of why I fell in love with this project. You don’t need fancy tools or years of crafting experience. You need a little time, some cozy music, and a holiday spirit.
On this blog, I may occasionally use affiliate links, which means I earn a small commission if you purchase through the link. The price will be the same whether you use the affiliate link or go directly to the vendor’s website using a non-affiliate link.


Getting Started
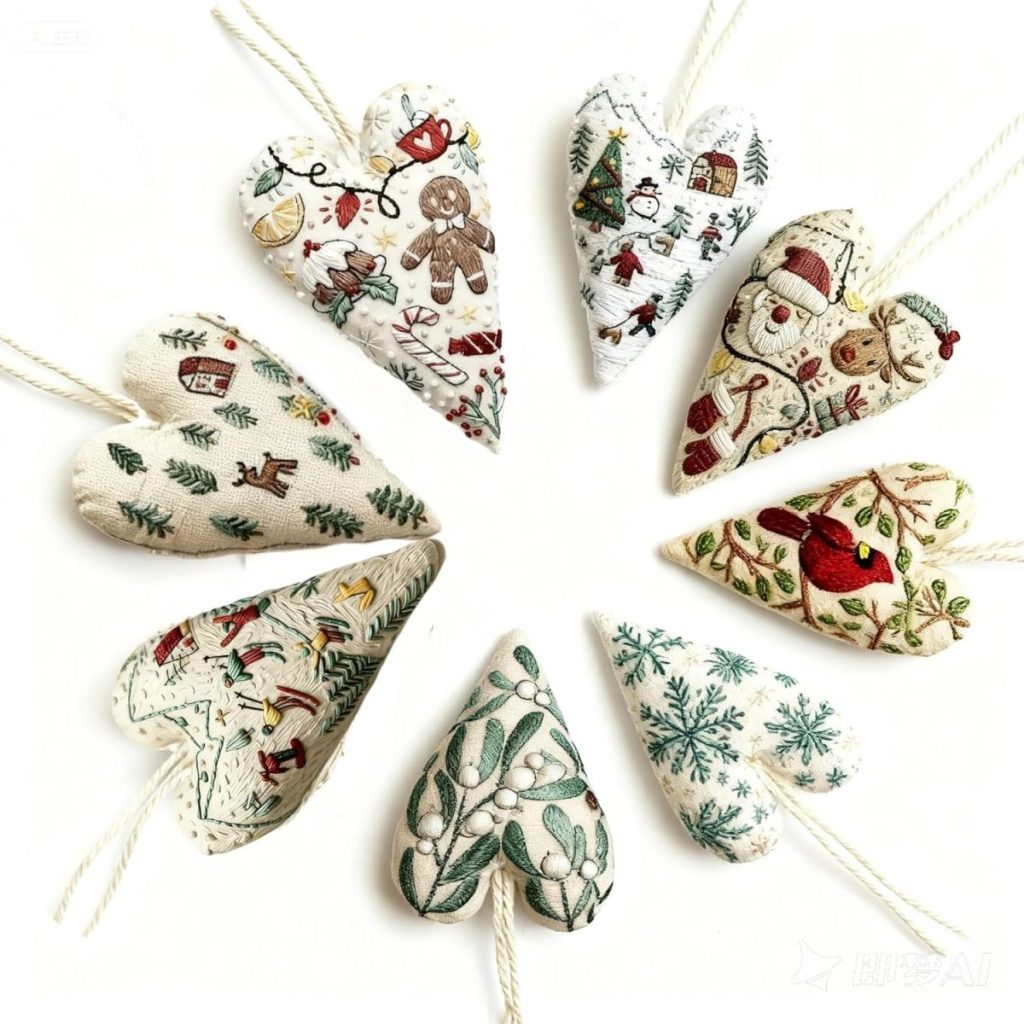
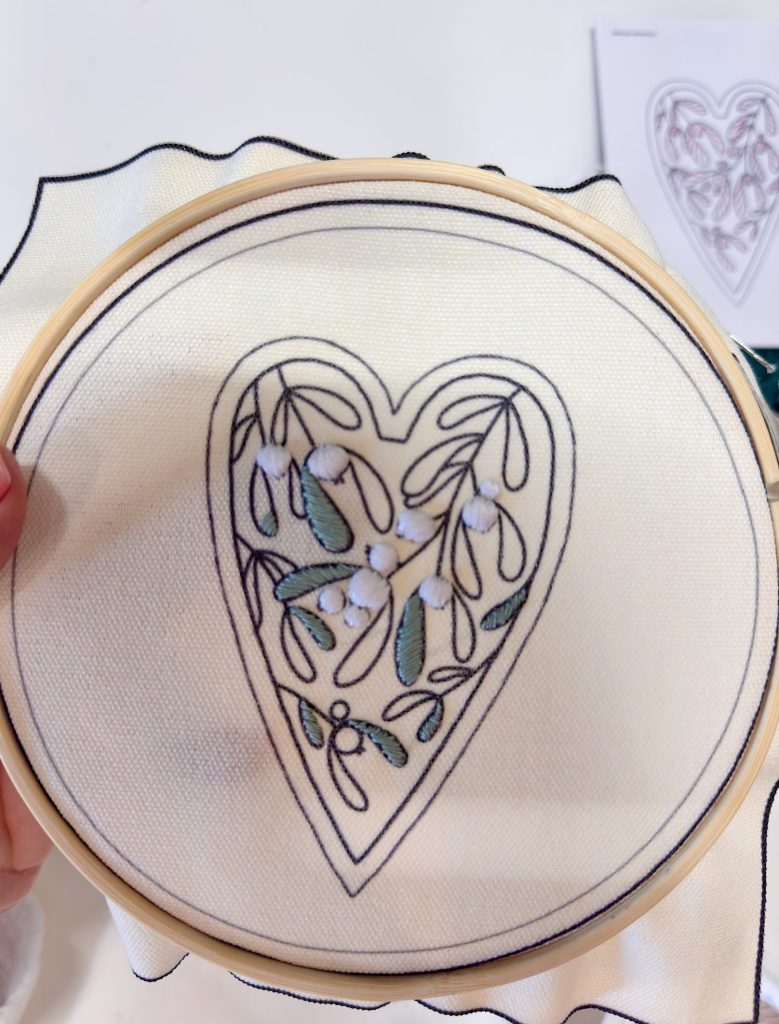
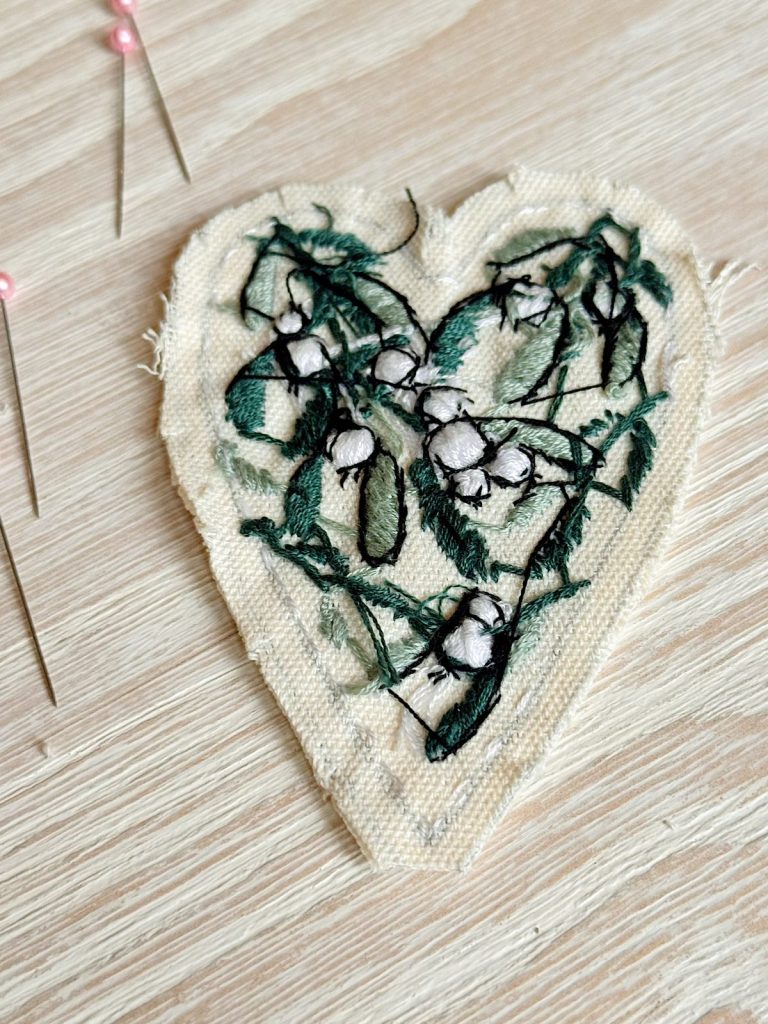
When I opened the kit, everything was perfectly organized. I decided to make this one of the eight ornaments so you could see how cute these are. Each one has its own unique design.
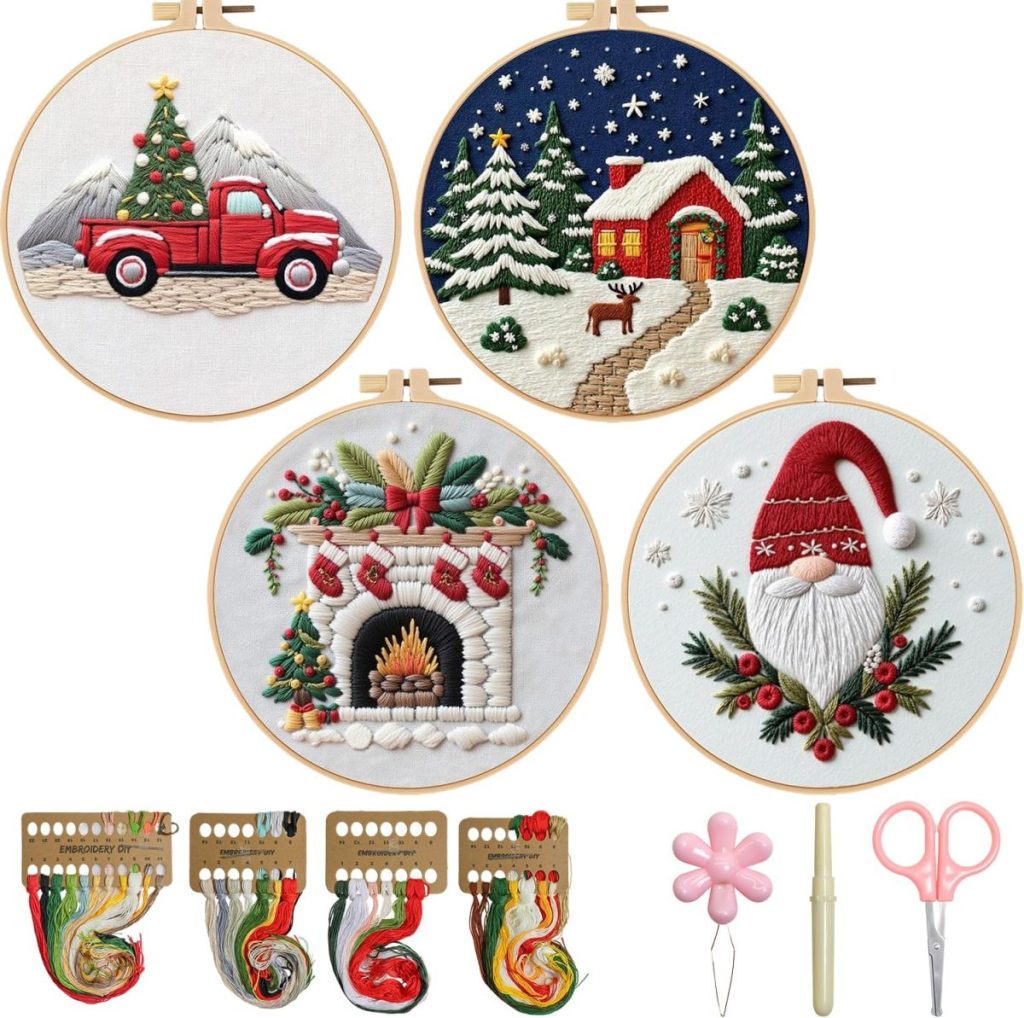
The first step was setting up the embroidery hoop that came with the kit. I placed one heart inside and gently tightened the hoop so the fabric was smooth and ready to stitch. The printed guide features a variety of patterns — including snowflakes, Christmas scenes, and Christmas florals — all festive yet simple enough to complete in a few hours.
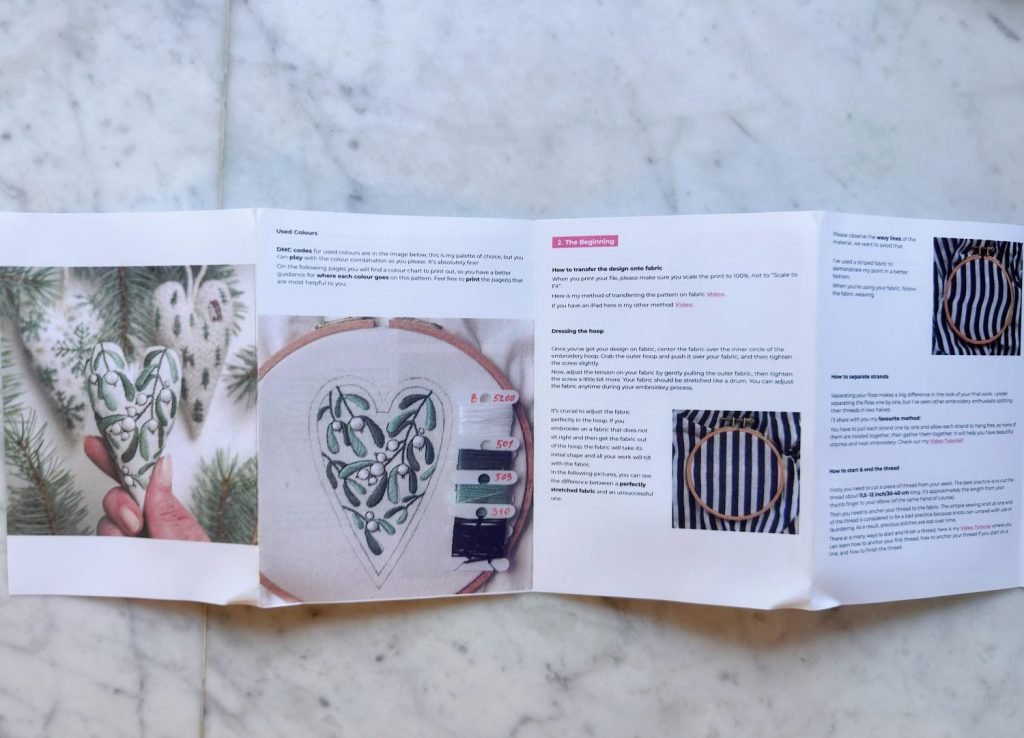

If you’ve never embroidered before, this is a great project to start with. The guide walks you through the basic stitches, and the patterns are repetitive in the best way — they let you get into a creative rhythm. Within a few minutes, I found myself completely relaxed, focused on each little stitch as my design came to life.
How to Make the Ornaments
Step 1: Choose Your Design
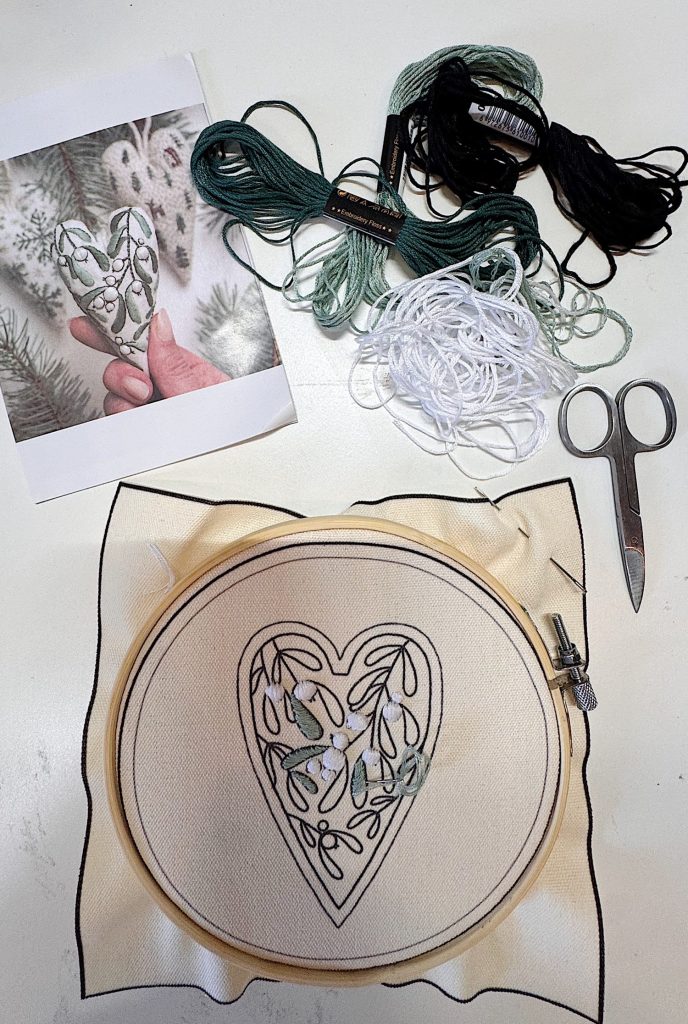
Each heart has its own unique pattern, so I started by matching the thread colors to the design guide. Some feature classic red and green, while others use soft neutrals and gold — all perfect for a timeless Christmas look.
Step 2: Set Up the Embroidery Hoop
Place one of the felt hearts inside the hoop, centering it so you have enough space to stitch the entire design. Tighten the hoop until the felt is taut but not stretched.
Step 3: Begin Stitching
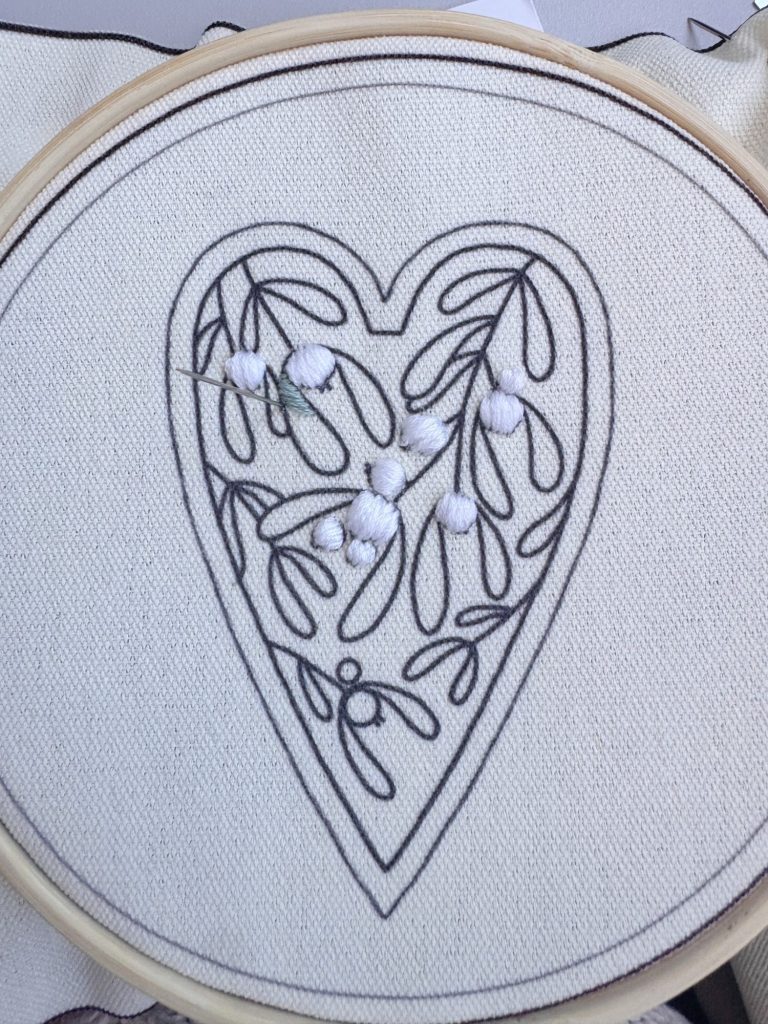
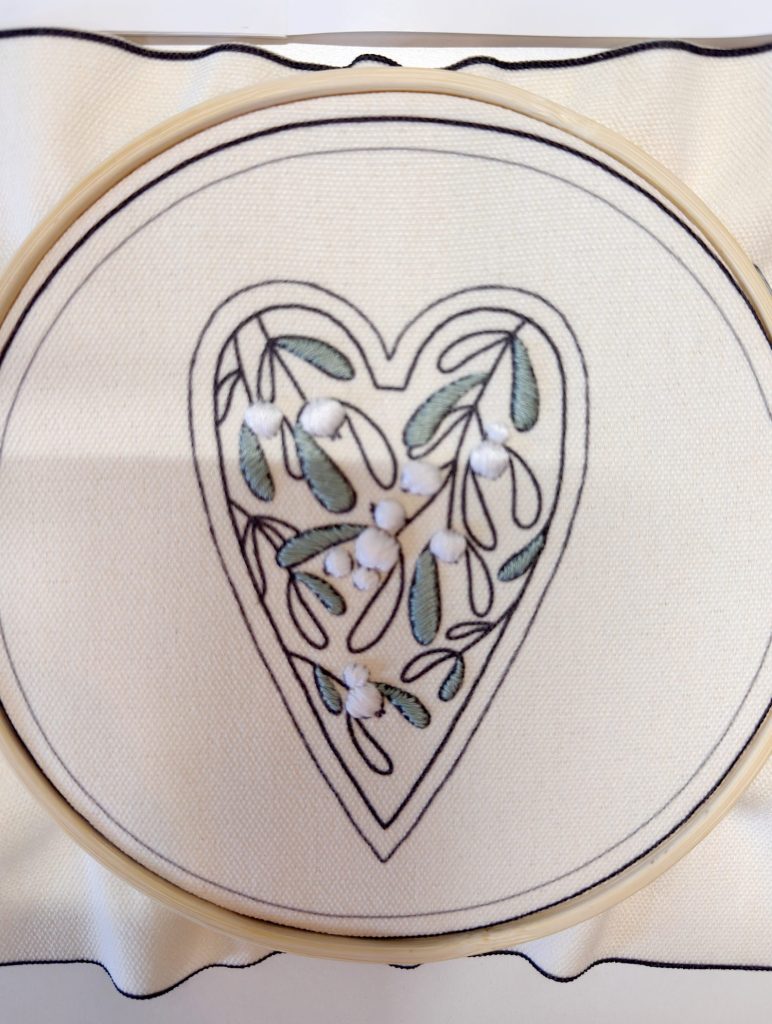
Thread your needle with one of the embroidery floss colors and tie a knot at the end. Follow the printed guide as it’s full color and numbered to show precisely where to stitch. Most of the patterns utilize basic stitches, such as backstitch and straight stitch, so even beginners will feel confident after just a few minutes.
Step 4: Add More Stitching
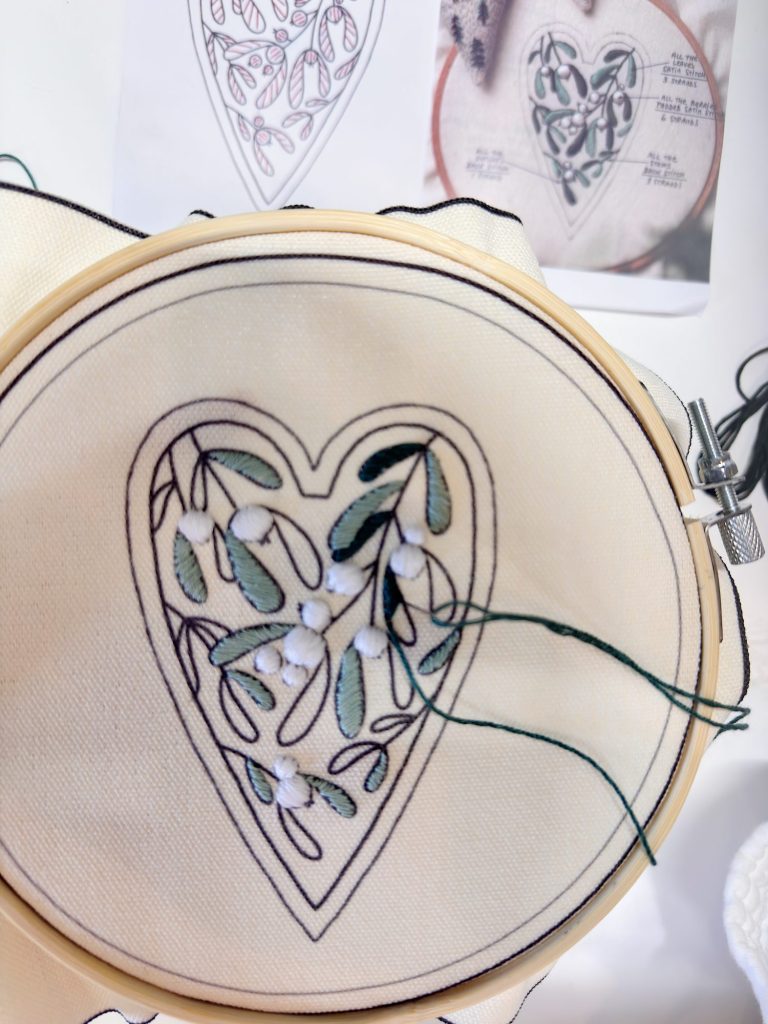
After filling in the berries and leaves, I added the stems and outline stitching. If you’d like, you can also add small embellishments such as a few extra French knots, some metallic thread, or tiny sequins for added sparkle. The fabric holds up beautifully to layering, so it’s easy to personalize each heart.
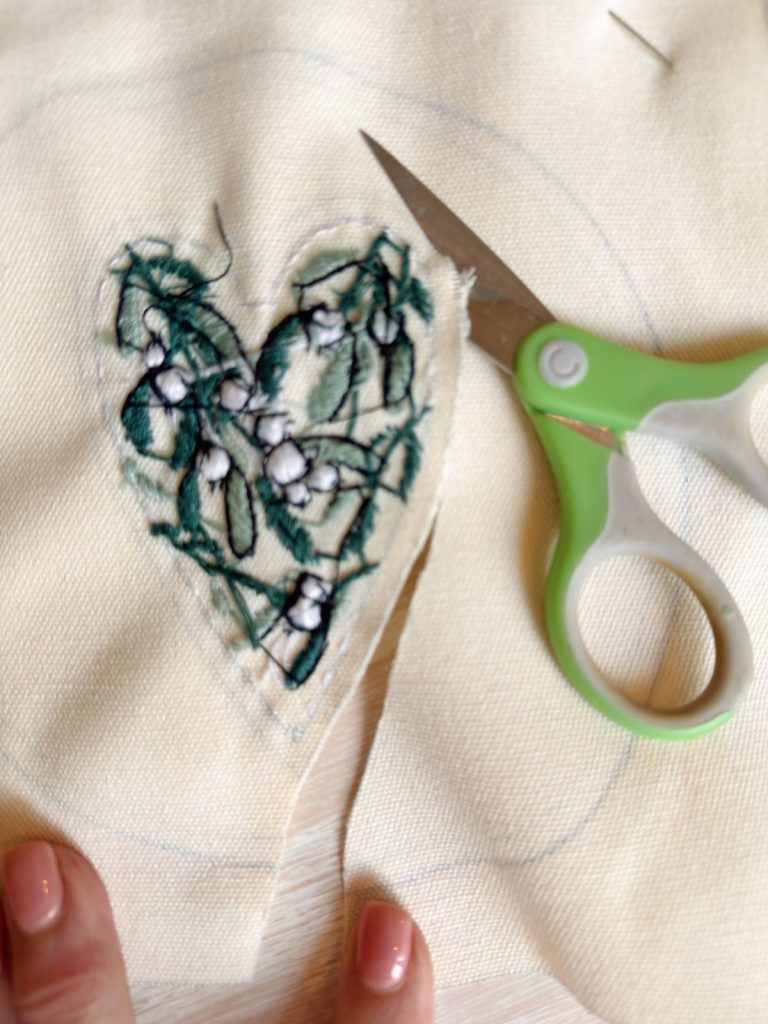
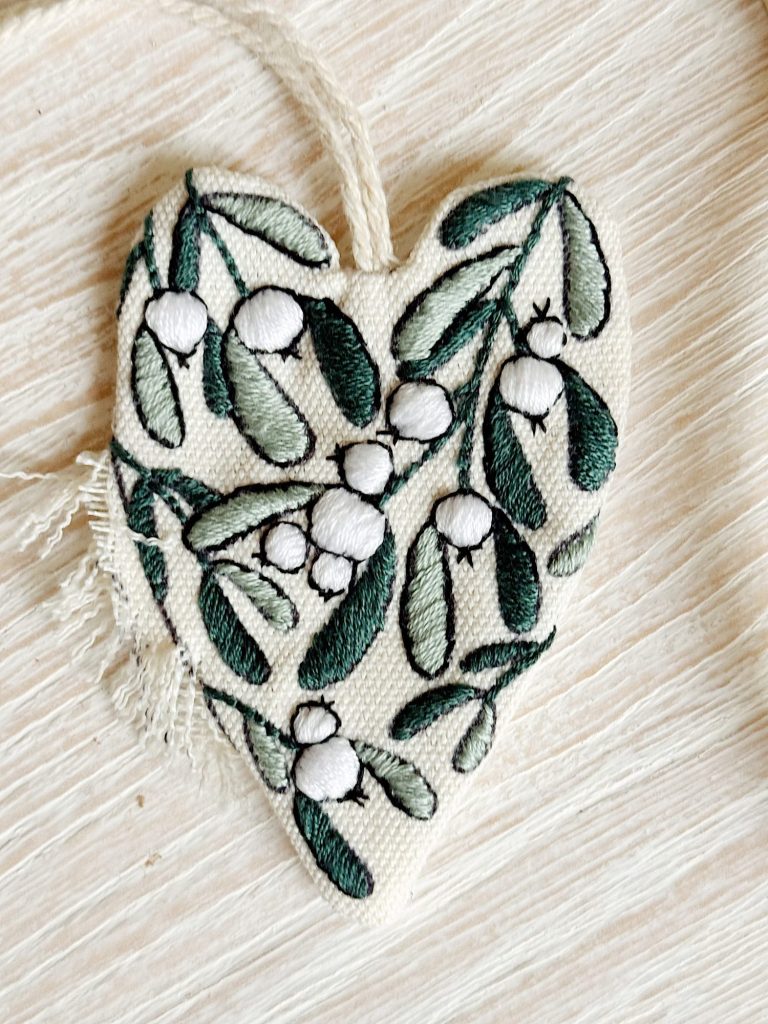
Step 5: Assemble and Stuff
After finishing the embroidery, remove the heart from the hoop. Place it face-up on a flat surface, trace the outline of the heart on the back piece of fabric, and then cut. Layer the second felt heart shape behind it.
The kit comes with ribbon for hanging. Simply insert it inside the layers of the heart before stitching.
Stitch around the outside edge, leaving an opening, by hand or with a sewing machine.
Add a small amount of the provided stuffing to give the ornament a soft, plump shape. When it feels full enough, stitch the opening closed.
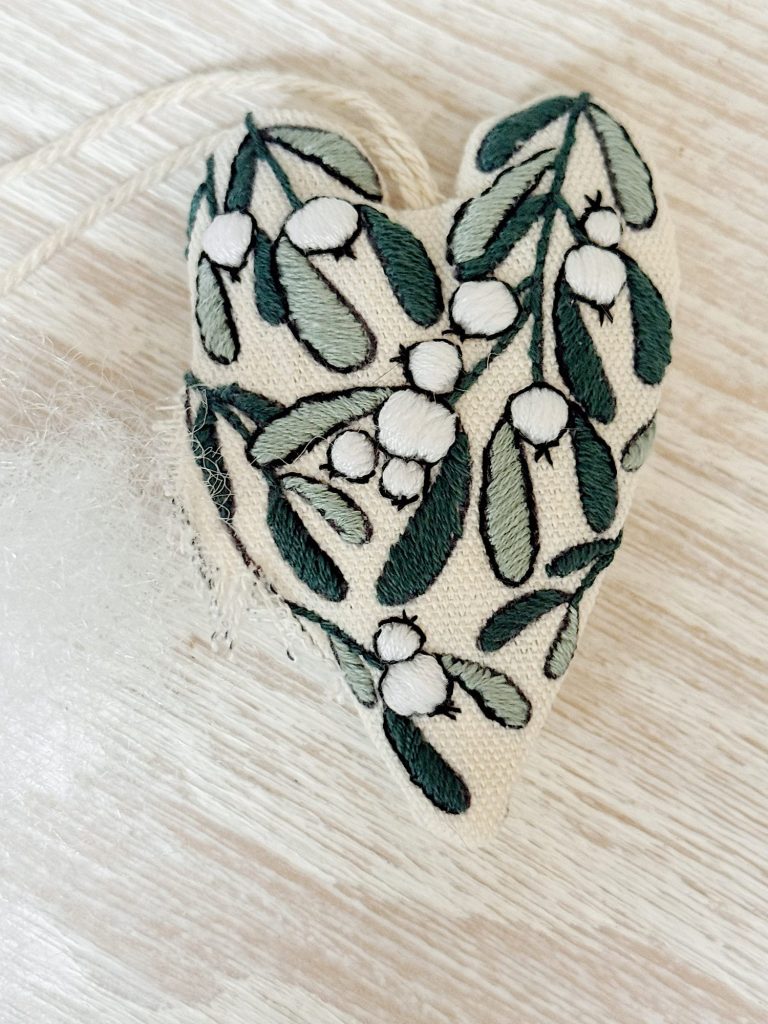
And just like that, you have a handmade ornament. One of eight that will soon become part of your Christmas collection.
Why I Love This Ornament Kit
I’ve done a lot of craft projects over the years, but this one stands out because it’s the perfect blend of creativity and simplicity. Everything you need is included, so there’s no guesswork, and yet, the end result feels completely handmade and personal.
Here’s why I think this kit is such a great find:
Decorating with Handmade Ornaments
Once I finish all eight hearts, I will need to start thinking about how to use them — and the possibilities are endless!
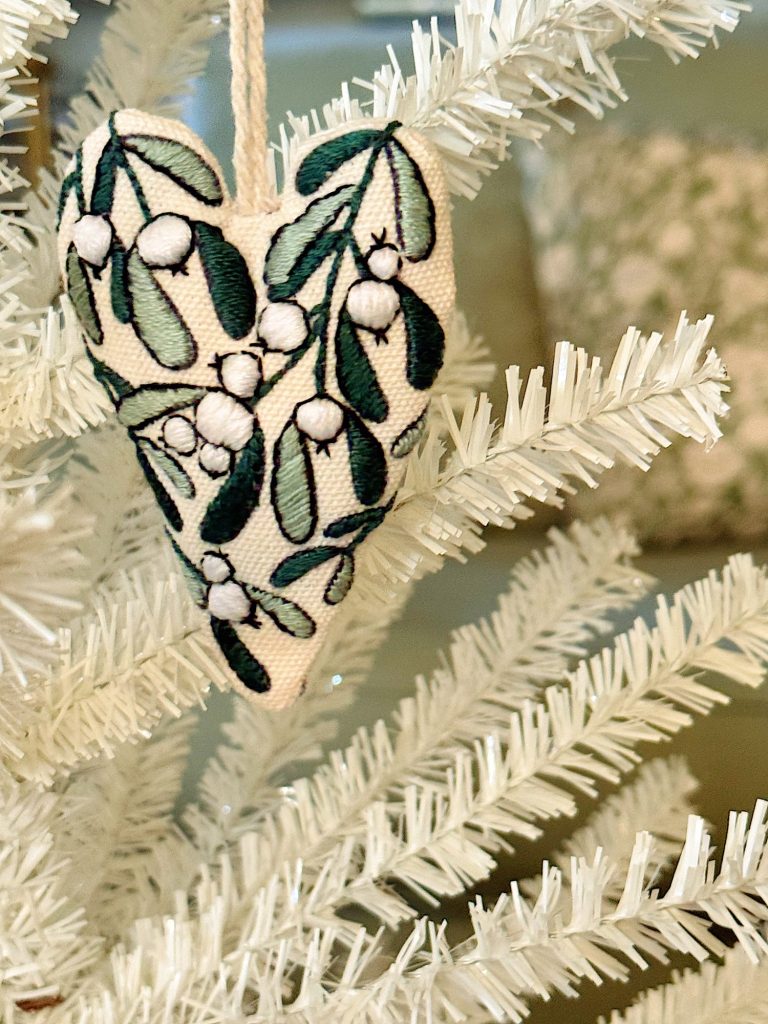
- On the Christmas Tree: Of course, these look beautiful hung on a tree. The texture of the felt and embroidery thread catches the light beautifully, and each ornament feels special.
- As Gift Toppers: Tie one of these onto a wrapped present for an extra-personal touch. It’s a little gift on top of a gift!
- As Table Decor: Lay them across your holiday table or tie them to napkin rings for a cozy, handmade look.
- In a Garland: String several hearts together with twine or ribbon to create a soft, whimsical garland for a mantel or window.
- As Keepsakes: Add initials or the year to each one so you’ll always remember when they were made.
I might even hang a few from the knobs of my dining room sideboard as they add such a cheerful pop of color and texture.
A Few Tips for Embroidery Beginners
If you’ve never embroidered before, don’t worry as this project is the perfect introduction. Here are a few tips I learned along the way:
- Use short lengths of thread. About 18 inches is plenty. Longer threads can knot easily.
- Work slowly and gently. Felt is forgiving, but you don’t need to pull tight. Light, even stitches look best.
- Practice stitches first. If you’re new, try a few lines on a scrap of felt before starting your ornament.
- Trim edges neatly. Once the ornament is stitched together, trim any visible threads for a clean finish.
- Enjoy the process. This isn’t about perfection — it’s about creating something from the heart.
Handmade Ornaments Make the Best Gifts
If you love giving handmade gifts, this is one you’ll want to add to your list. The finished ornaments are small enough to tuck into gift boxes, mail to friends, or give as part of a holiday goodie bag.
You could even make all eight and give them as a set … tied together with ribbon in a clear box. Add a note that says, “Handmade with love,” and you’ll have a gift that’s thoughtful, personal, and memorable.
Because each one is stitched by hand, no two are exactly alike, and that’s what makes them so special.
Why Handmade Matters
Every year, I try to incorporate at least a few handmade projects into our holiday decorations. Whether it’s ornaments, garlands, or a new wreath, I love knowing that our home is filled with things created with care and creativity.
Handmade pieces bring warmth and personality that store-bought decor can’t replicate. And during a season that can feel incredibly busy, taking time to create something with your hands — something that lasts — is a wonderful way to slow down and reconnect with what the holidays are truly about.
Final Thoughts
If you’re looking for a Christmas craft that’s simple, affordable, and deeply satisfying, this DIY Christmas Ornament Embroidery Kit is a must-try. It’s beginner-friendly, beautifully designed, and a perfect way to spend a cozy afternoon creating something that will be part of your Christmas traditions for years to come.
At less than $4 per ornament, it’s also a fantastic value — and the results look like they came from a boutique holiday shop.
So grab a cup of cocoa, turn on your favorite Christmas playlist, and stitch a little love into your holidays this year. These embroidered heart ornaments are proof that the best Christmas decor doesn’t come from a store; it comes from your hands and your heart. ❤️
If you enjoy my blog, you can sign up to receive my updates here.
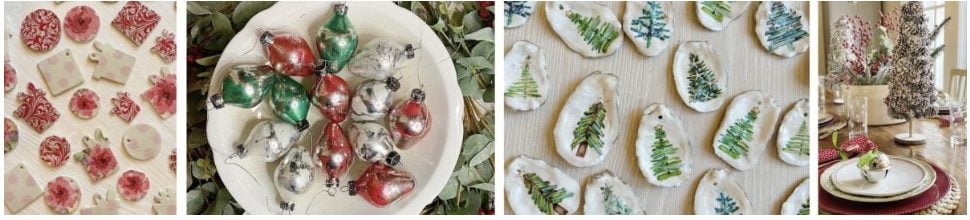
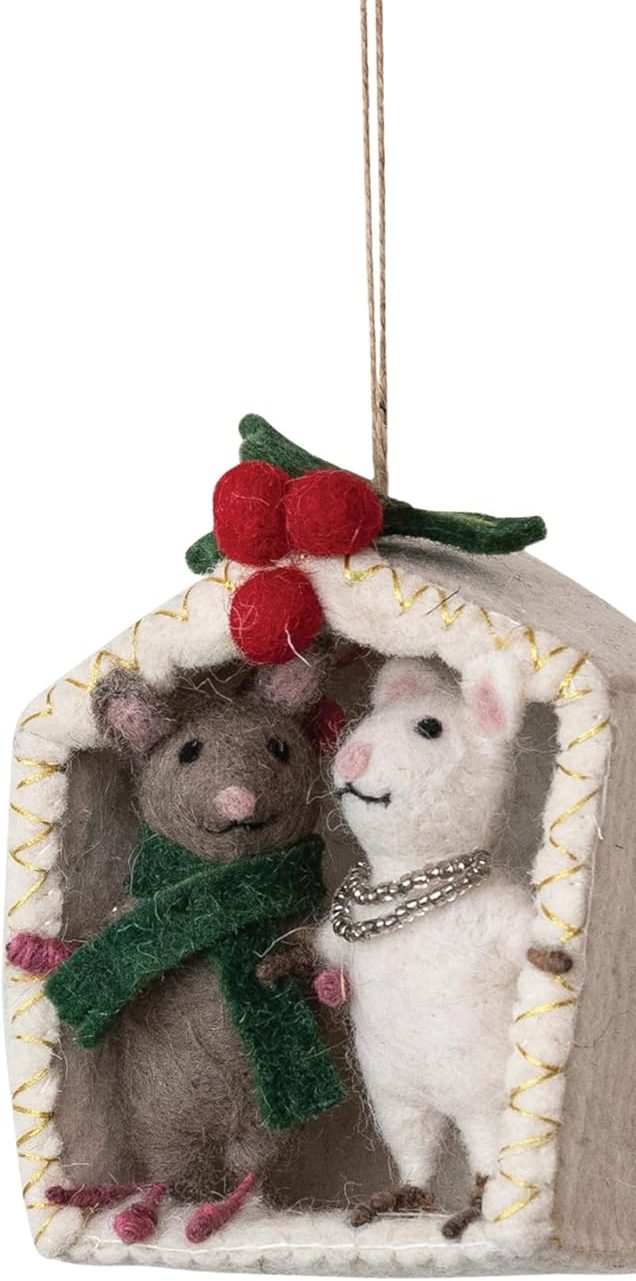
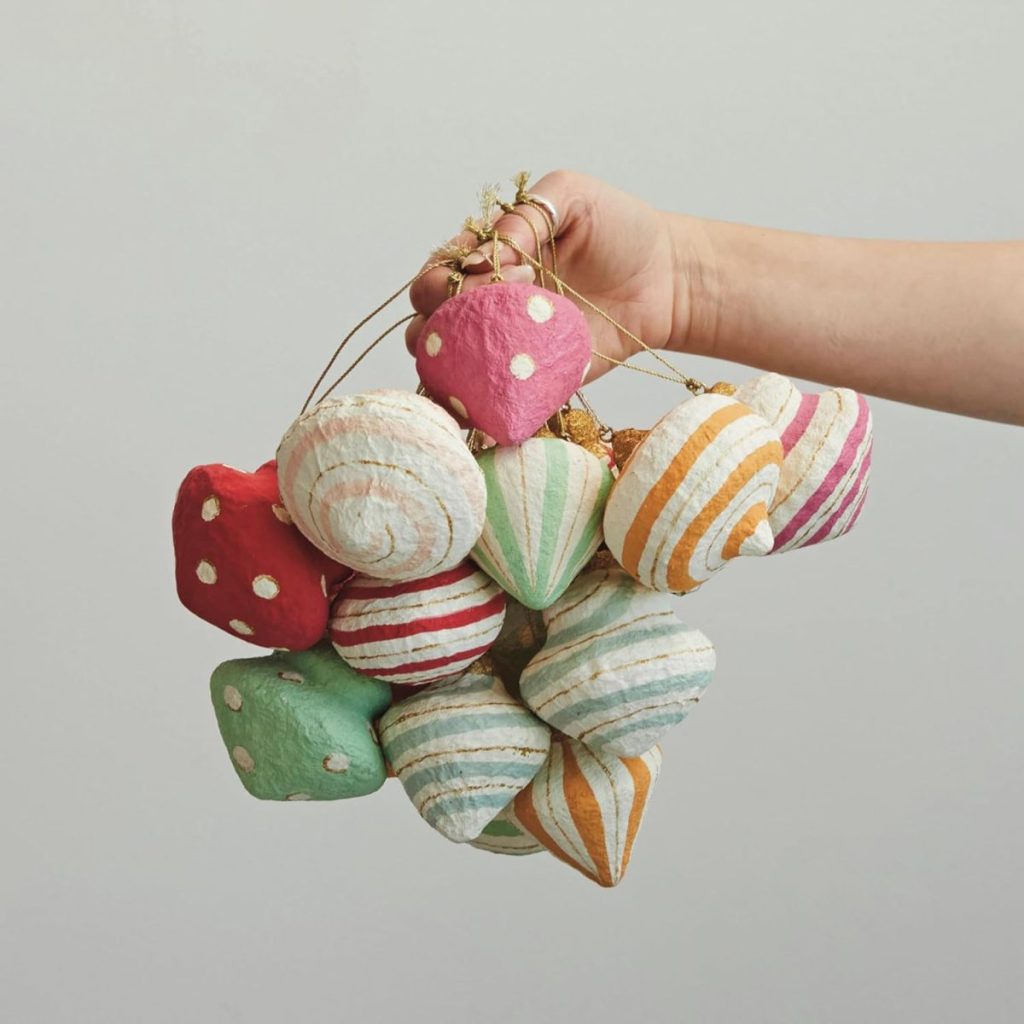
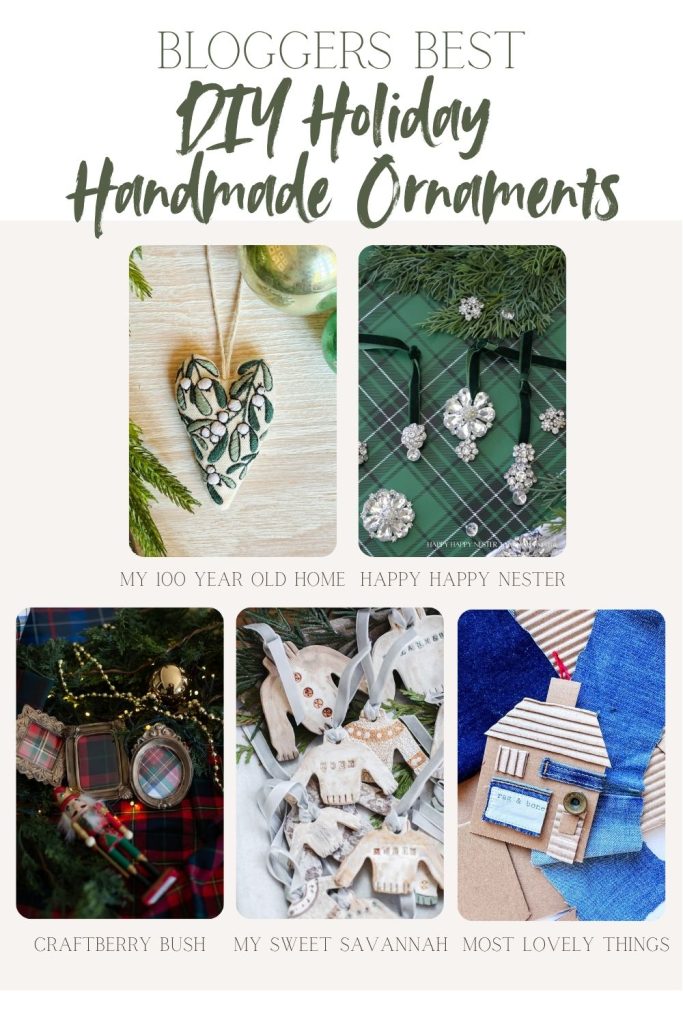
.Blogger’s Best DIY Holiday Handmade Ornaments
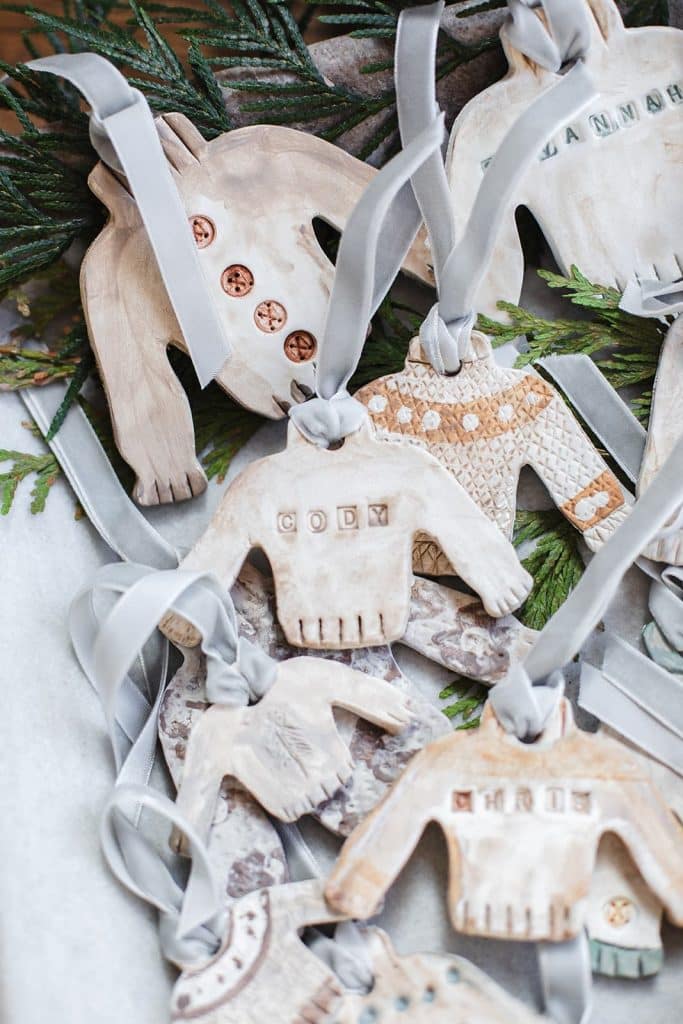
Homemade Clay Sweater Ornaments | My Sweet Savannah
Learn how to make homemade clay sweater ornaments with cookie cutters, paint, and ribbon for a charming holiday craft.
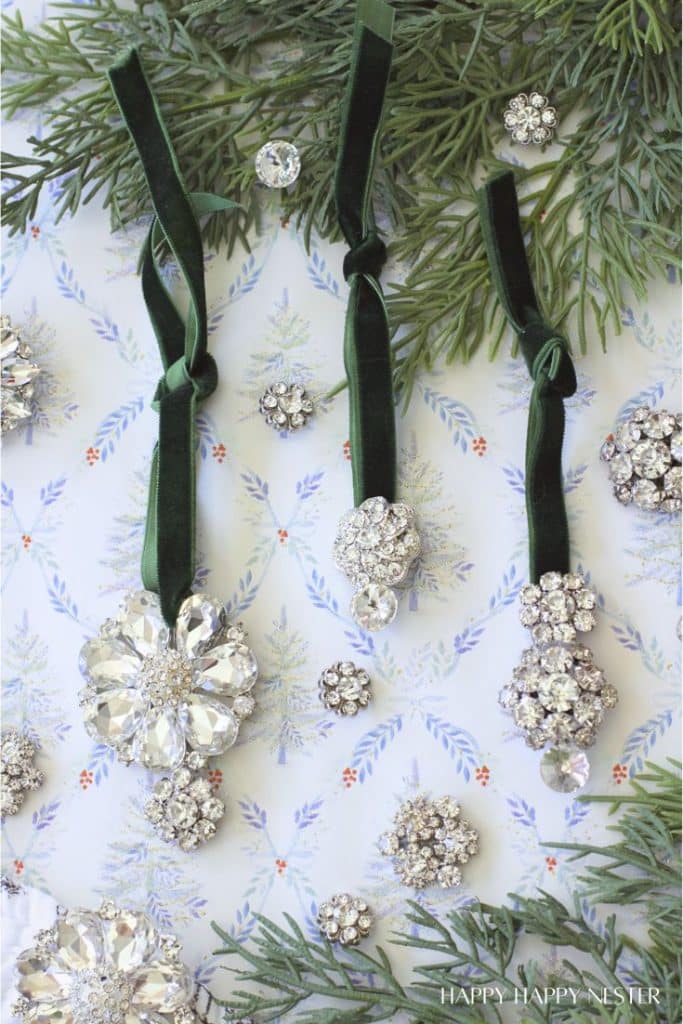
Vintage Style Christmas Ornaments DIY | Happy Happy Nester
Vintage Style Christmas Ornaments DIY projects are a beautiful way to bring a touch of nostalgia and sparkle to your holiday decor. In this easy and elegant craft, I’m transforming retro-style rhinestone buttons into dazzling ornaments trimmed with soft velvet ribbon.
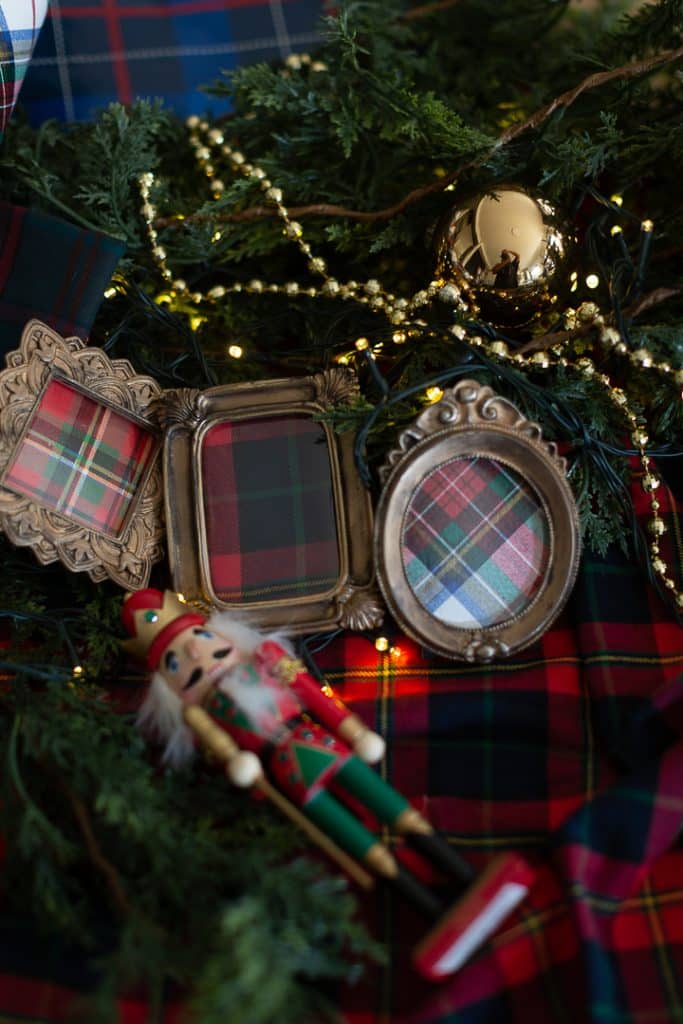
Plaid Christmas Ornaments | Craftberry Bush
These plaid Christmas ornaments are so easy to make. Perfect for the currently trending nostalgic Christmas decor.
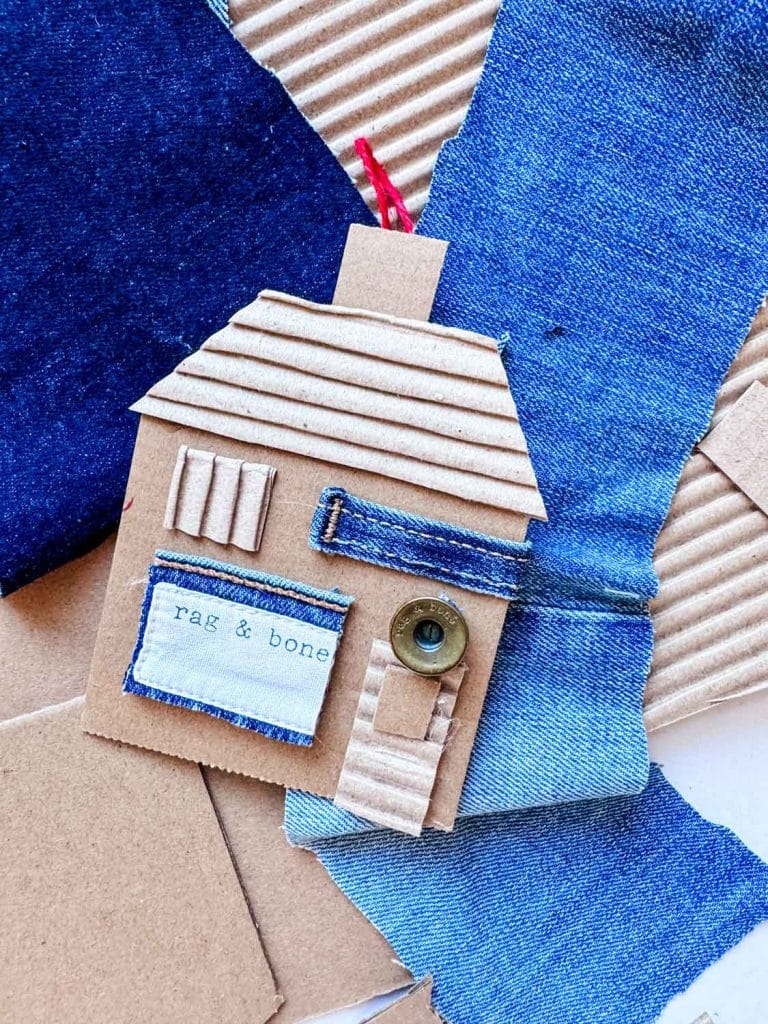
Upcycled Denim House & Cardboard Ornaments | Most Lovely Things
Make these upcycled house ornaments using denim and cardboard. A great craft for older kids. Once you get started, you can get very creative with the materials. No two house ornaments would be alike!
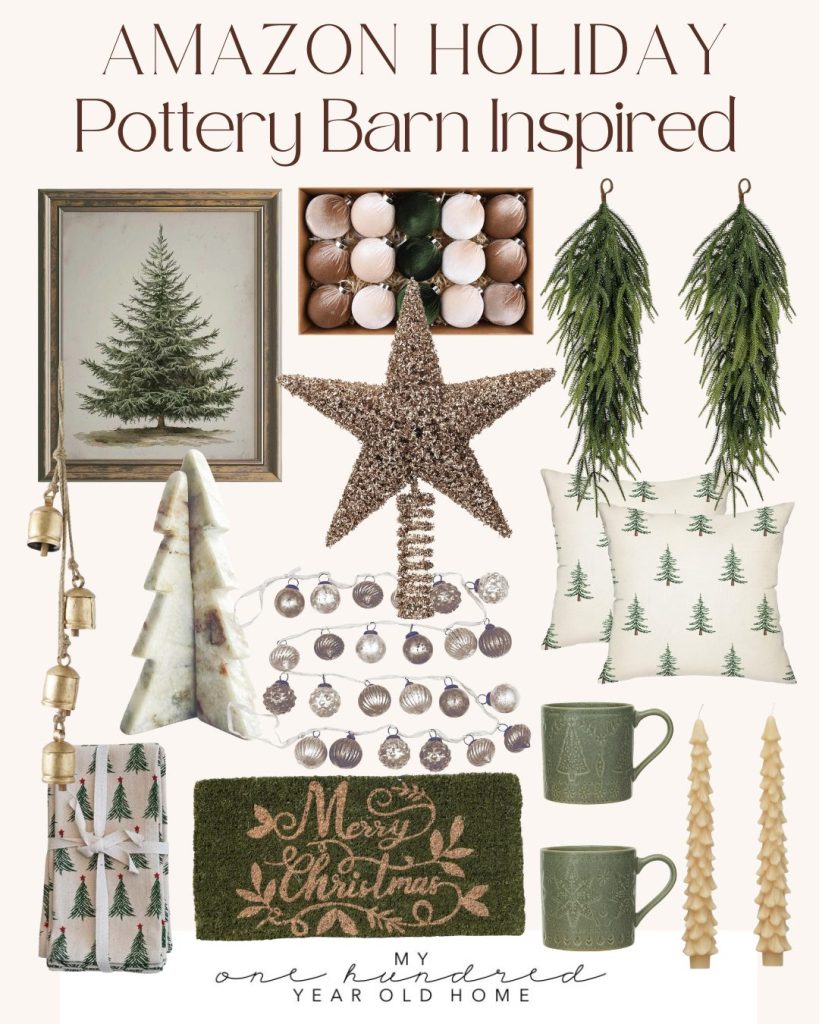
Pottery Barn Inspired Christmas Decor Favorites
Latest Posts
-
Spring Cleaning and Sunday Morning Coffee
I don’t know about you, but every spring I feel this strong pull to refresh something in our home, and this year I started in a place that might surprise you. It’s Spring Cleaning time! The very first room on my spring-cleaning list was our nursery. And yes, I know that sounds a little unexpected,…
-
Best Easter Brunch Egg Dish: Loaded French Onion Frittata
Easter brunch is one of those special meals where the table is complete, the laughter is loud, and the food is nothing short of spectacular. If you want to wow your guests with something savory, cheesy, and unforgettable, let me introduce you to your new Easter brunch hero: a Loaded French Onion Frittata.
-
The Best Spring Pillow DIY – A Handmade Spring
There are certain projects that start as an idea and quietly turn into something you love far more than you expected, and this Spring pillow is exactly that. As part of my A Handmade Spring series, I wanted to create something soft, beautiful, and full of texture, and this pillow checked every box. This pillow…
-
DIY Clay and Metallic Foil Easter Eggs
With Easter just around the corner this week, I decided to create something special and truly unique for my spring décor … handmade clay and metallic foil Easter eggs. These little works of art are soft, pastel, and subtly shimmery, and they’re a beautiful way to add a handmade touch to your Easter celebrations. While…


My Recent Instagram Posts

You can pin the images below to your boards on Pinterest (click the Pin button in the top left corner) or follow me on Pinterest!
For more real-time updates, follow me on Instagram @My100YearOldHome
I’ve been spying these kits for a while. Your recommendation gave me the push I needed. They look like a great travel project too!
Leslie—I love your embroidered ornaments! Embroidery is really popular again and I can see why! They are so charming! The kits would make excellent gifts!
I absolutaly love this project!!!