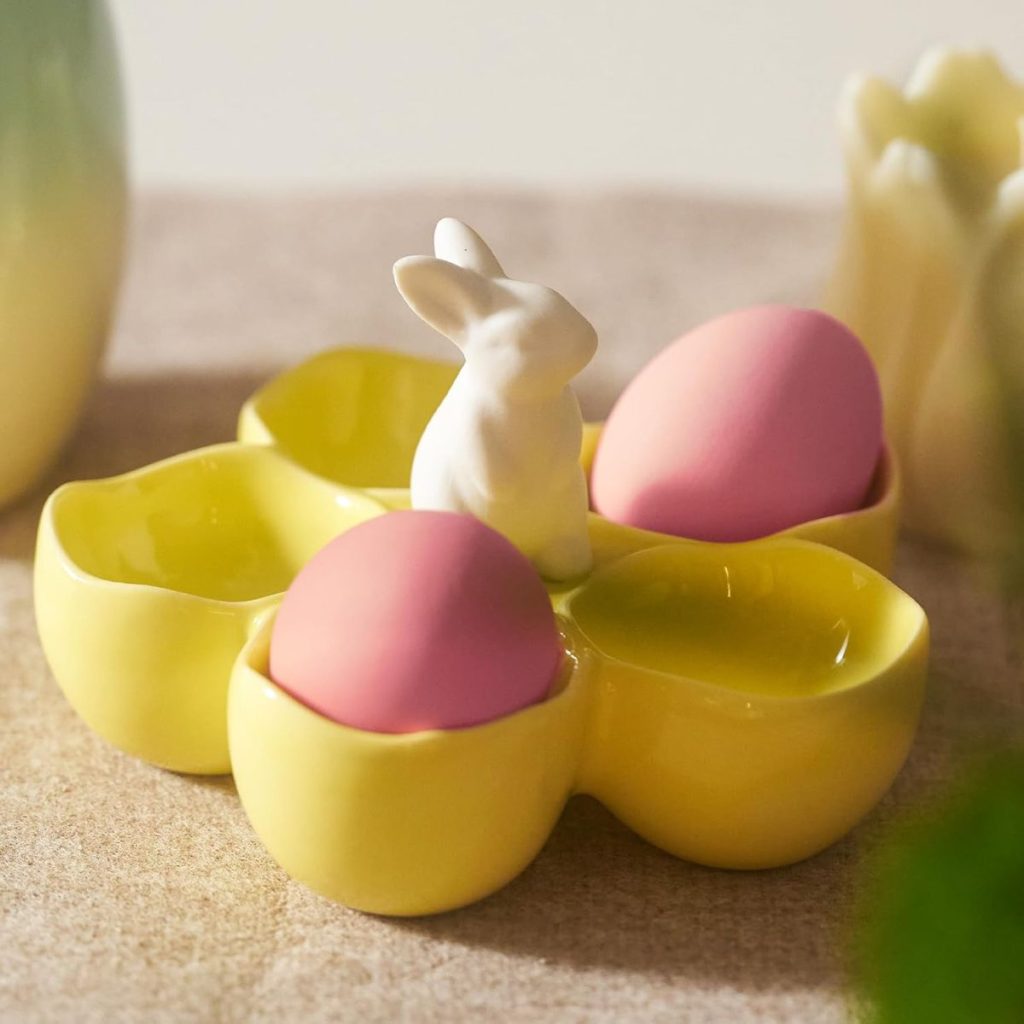
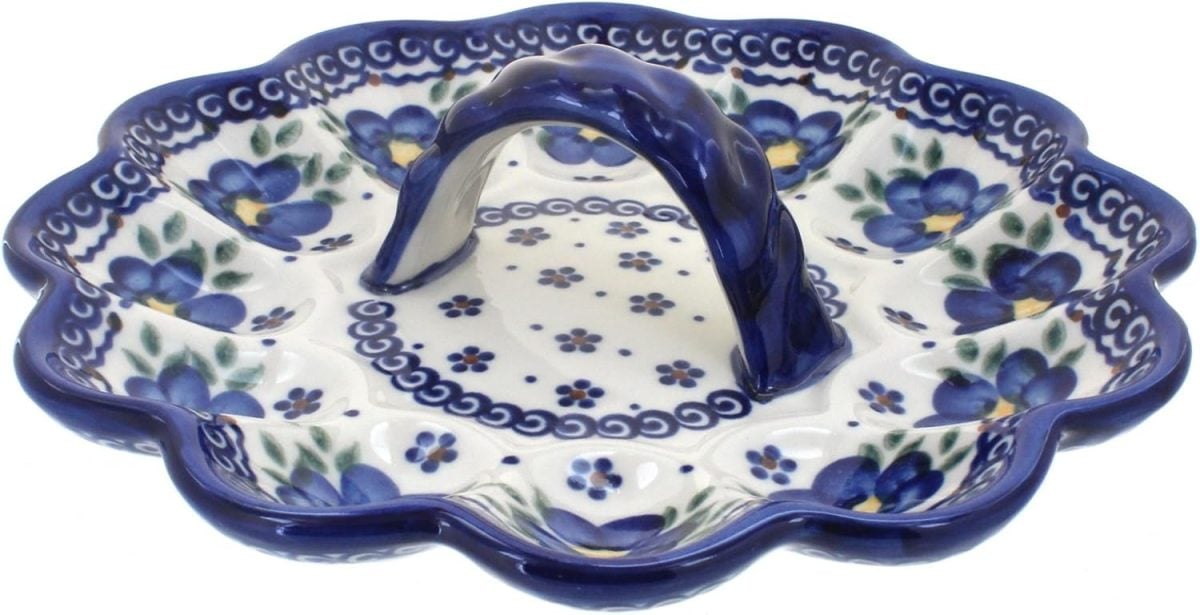
Air Dry Clay Egg Tray – A Handmade Spring
This Air Dry Clay Egg Tray is a simple DIY project that transforms everyday materials into a charming handmade piece for your kitchen, table, or Easter decor.
Easter is less than a month away, which always feels like the perfect time to start creating handmade pieces that celebrate spring. For the next project in my A Handmade Spring series, I wanted to make something seasonal, functional, and beautiful enough to use year after year.


Air Dry Clay Egg Tray
A Handmade Spring
What I love most about this Air Dry Clay Egg Tray project is how approachable it is. There is no pottery wheel, no kiln, and no special equipment required.
Instead, I used air dry clay and one unexpected household item as the mold.
An egg carton.
Sometimes the best craft ideas really are hiding in plain sight.
The Inspiration Behind This Project
Spring decorating almost always includes eggs. Whether displayed in bowls, baskets, or centerpieces, eggs instantly signal the arrival of the season. But this year, I wanted something more intentional than simply placing eggs in a dish.
I envisioned a tray that felt soft, handmade, and slightly vintage-inspired. Something imperfect in the best possible way. A piece that could sit on the kitchen counter holding fresh eggs, decorate an Easter brunch table, or become part of spring decor long after the holiday has passed.
Air dry clay turned out to be the perfect material because it allows shaping at your own pace. You can mold, smooth, and adjust without pressure, making this project ideal even if you have never worked with clay before.
I may sometimes use affiliate links on this blog, which means I earn a small commission if you purchase through the link. The price will be the same whether you use the affiliate link or go directly to the vendor’s website using a non-affiliate link.
Materials You Will Need
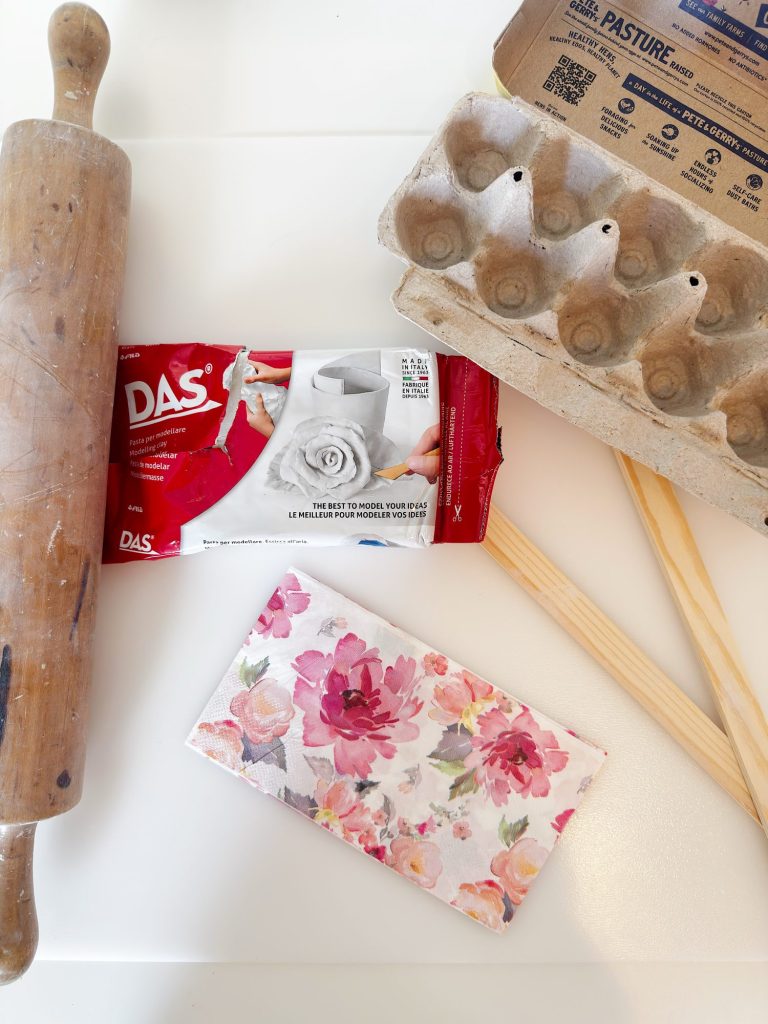
One of the best parts of this DIY is how affordable the supplies are.
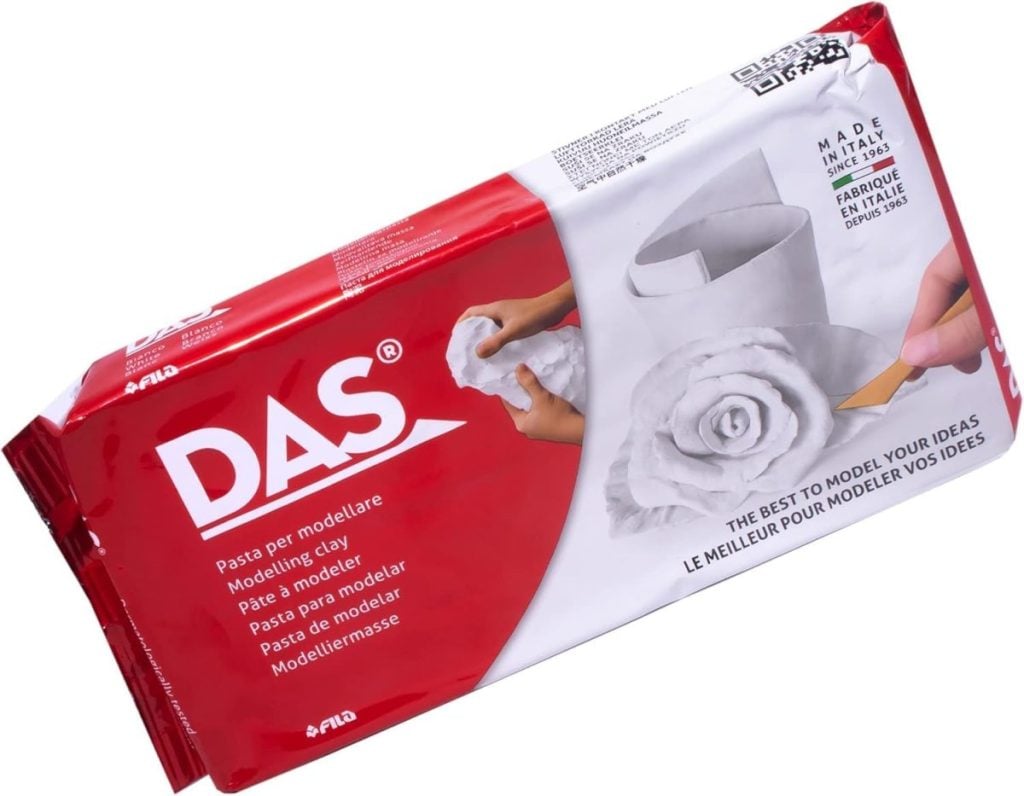
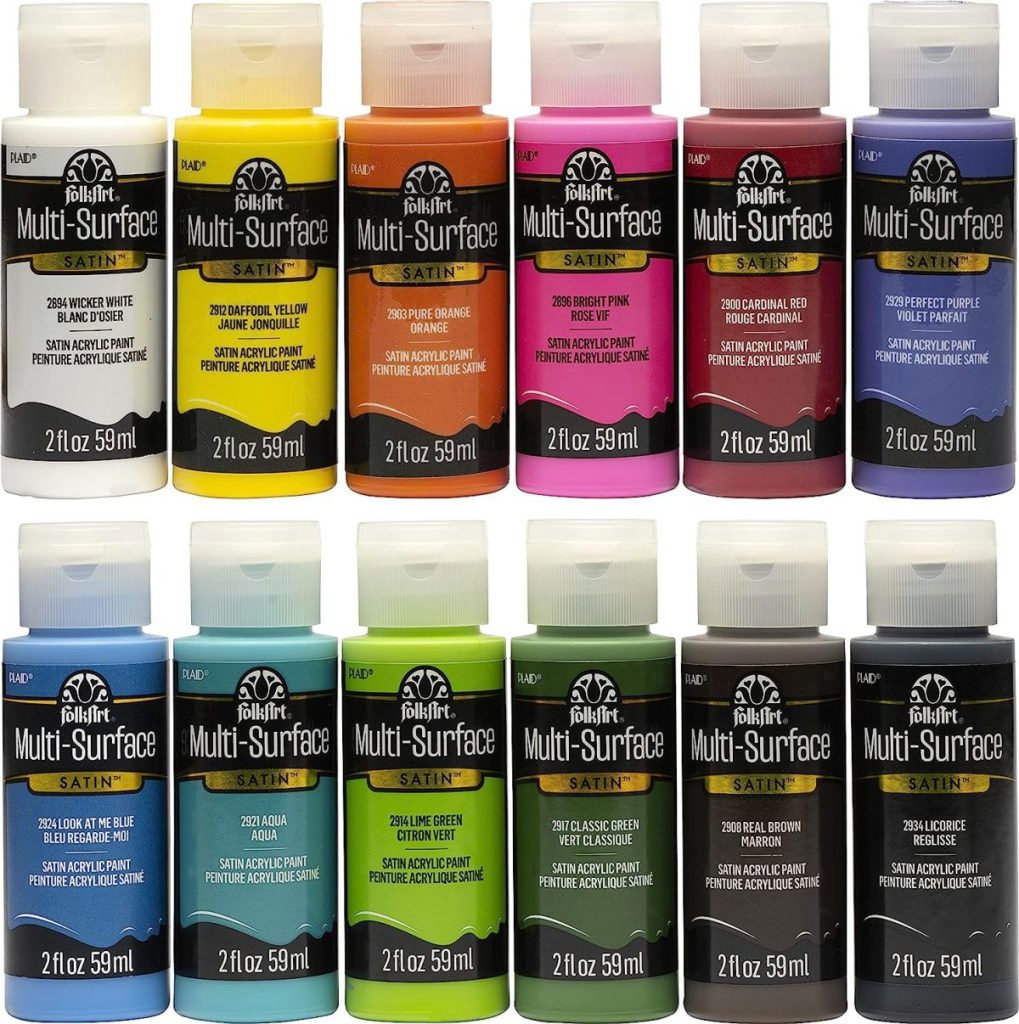
• Air dry clay
• Cardboard egg carton
• Plastic wrap
• Rolling pin
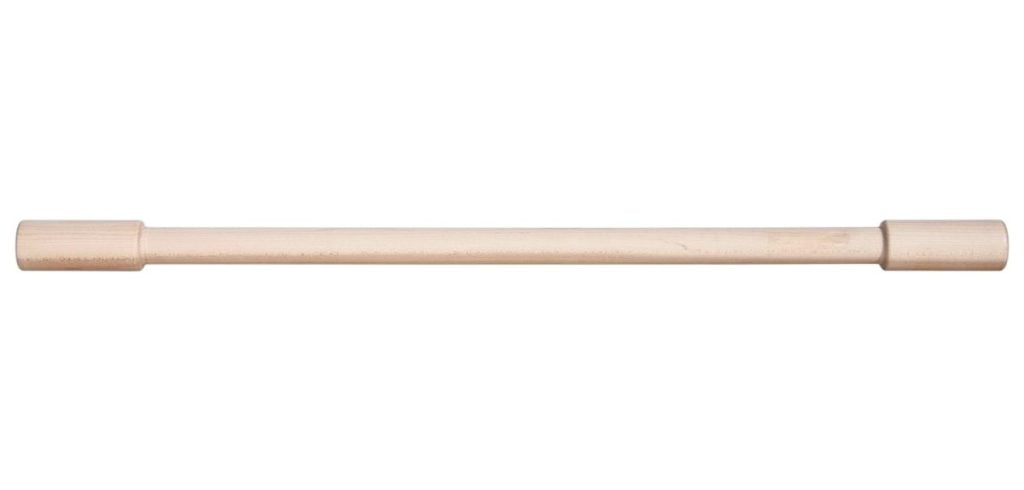
• Wooden egg or rounded object
• Pottery soft sponge
• Craft knife or clay tool
• White paint
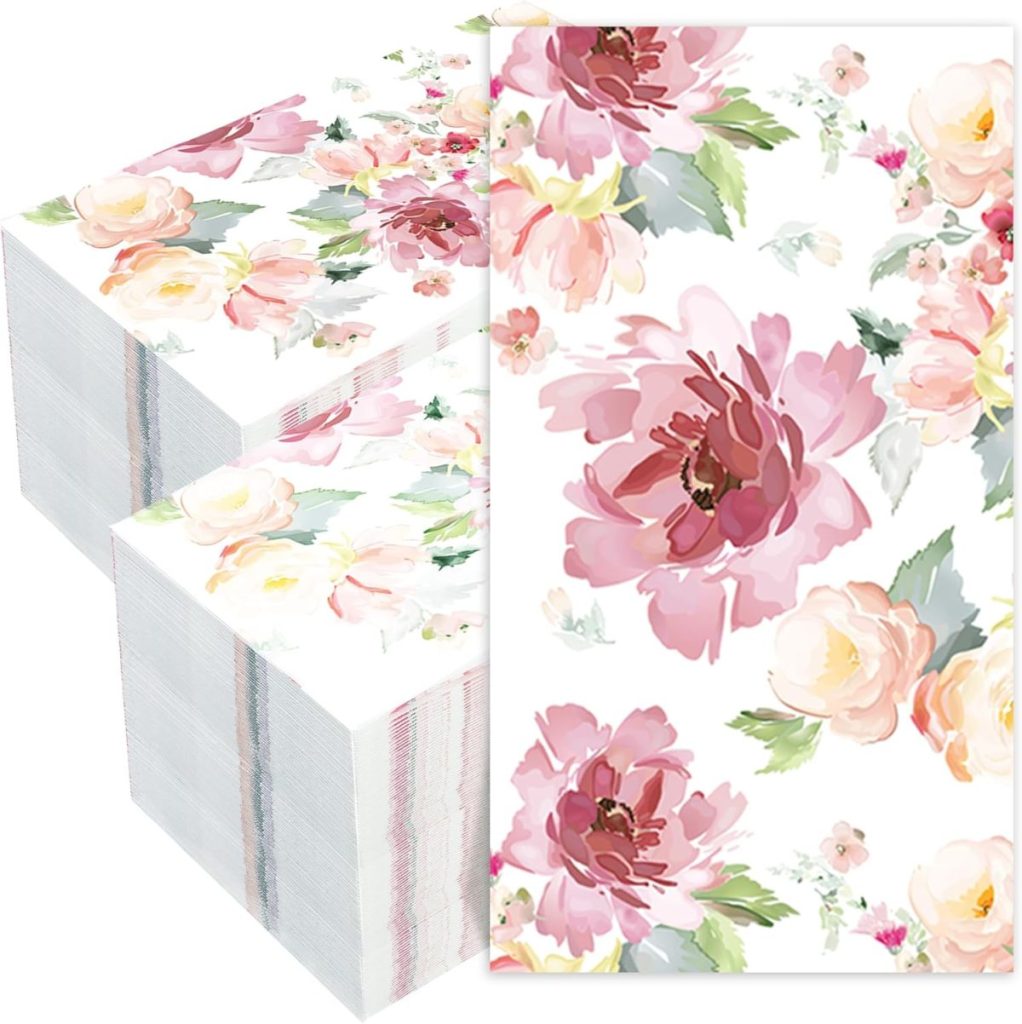
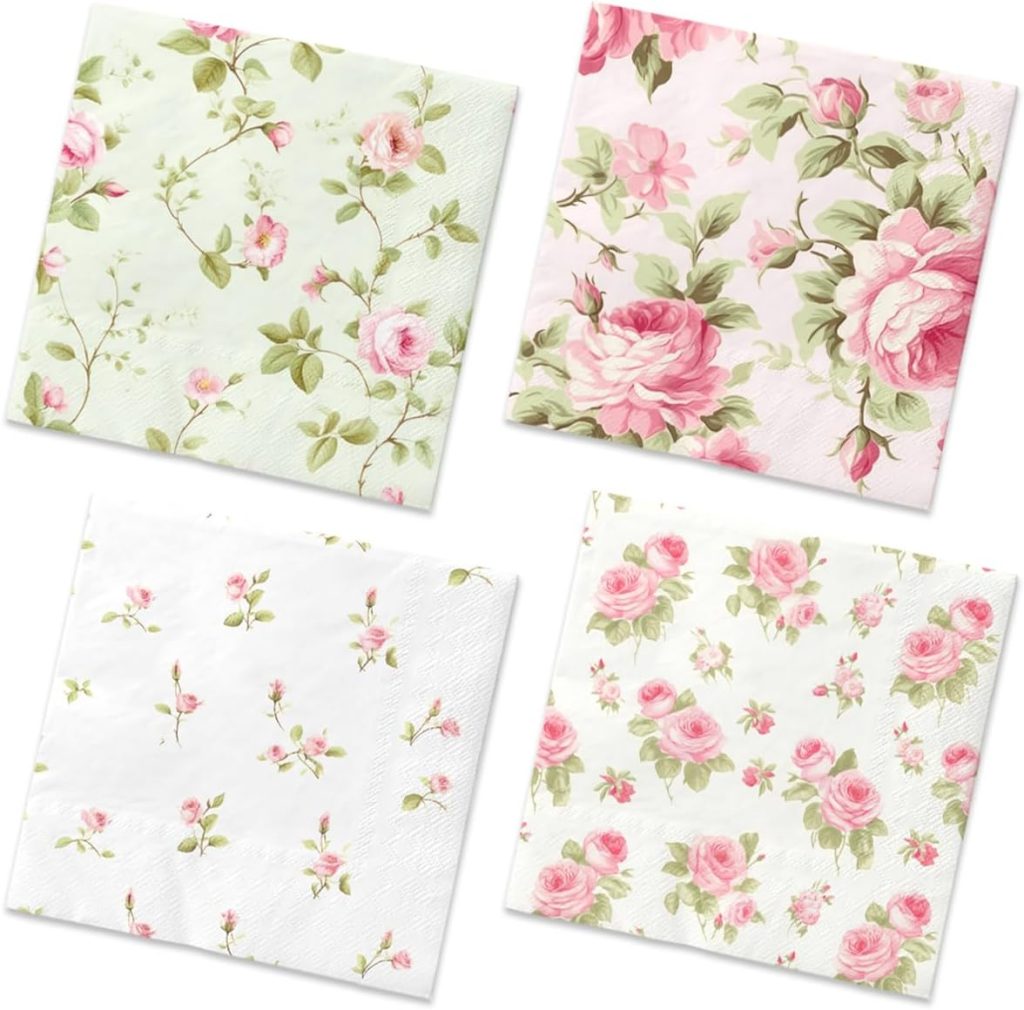
• Floral paper napkins
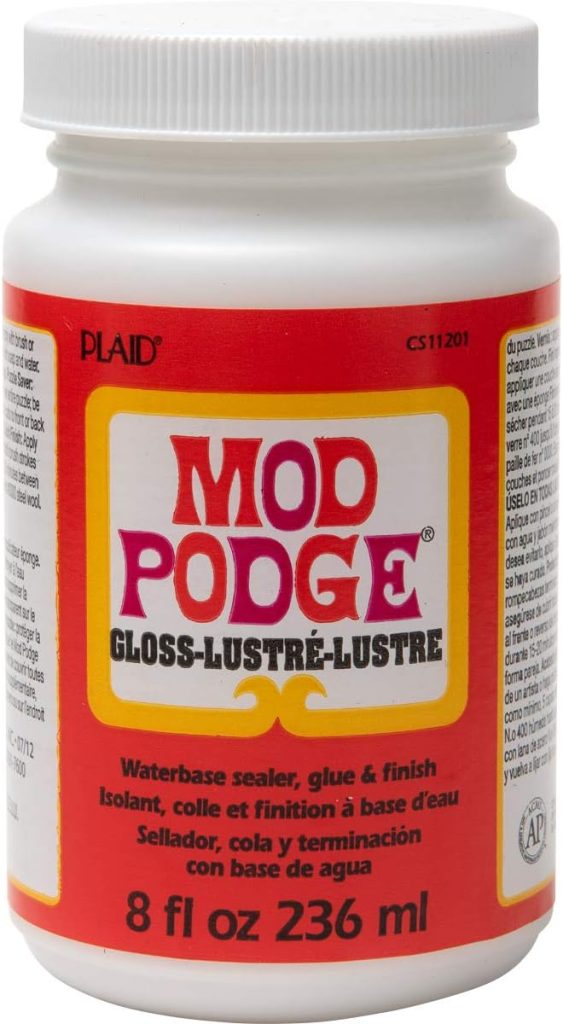
• Mod Podge
• Soft paintbrush
• Clay Glaze


Many of these were already in my craft room, which made this project even more fun to start spontaneously.
Using an Egg Carton as a Mold

The egg carton is truly the secret to this project.
Instead of sculpting individual egg wells by hand, the carton naturally creates perfectly spaced cavities that hold eggs beautifully. It removes guesswork and makes shaping incredibly easy.
I began by trimming down the pointed peaks inside the egg carton. Cutting these slightly lower prevents sharp impressions and helps create smoother egg pockets once the clay is pressed into place.
Next, I covered the entire carton with plastic wrap. This step is important because it prevents the clay from sticking and allows the tray to lift off easily once dry.
Rolling and Placing the Clay
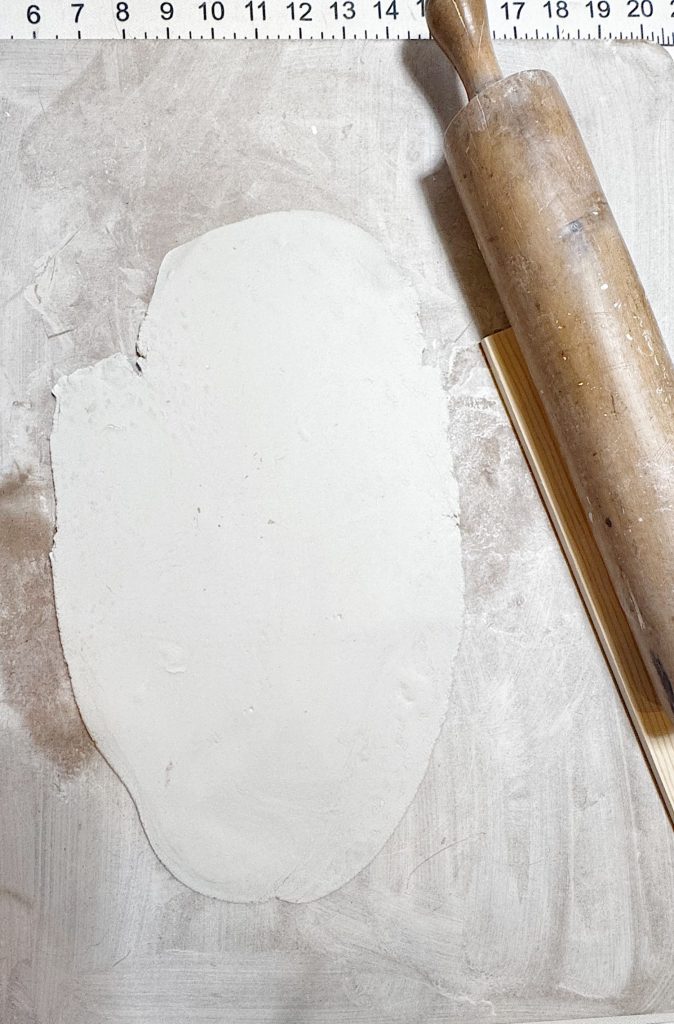
Roll the air dry clay to approximately one quarter inch thick. This thickness provides durability while still allowing flexibility during shaping.
If the clay is too thin, it may crack during drying. Too thick, and it becomes difficult to mold smoothly.
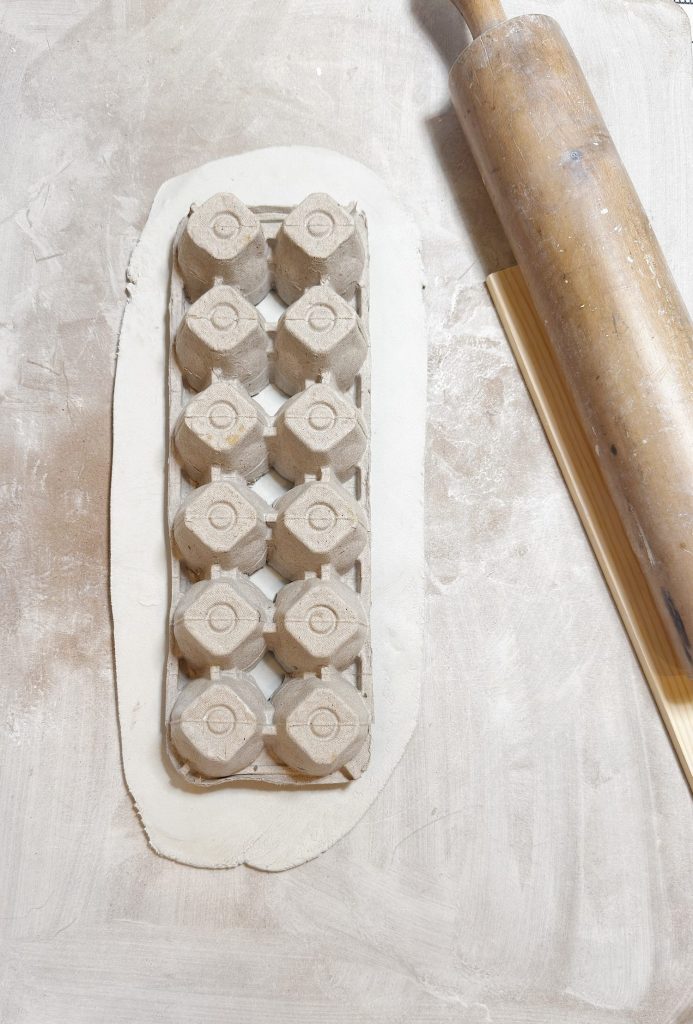
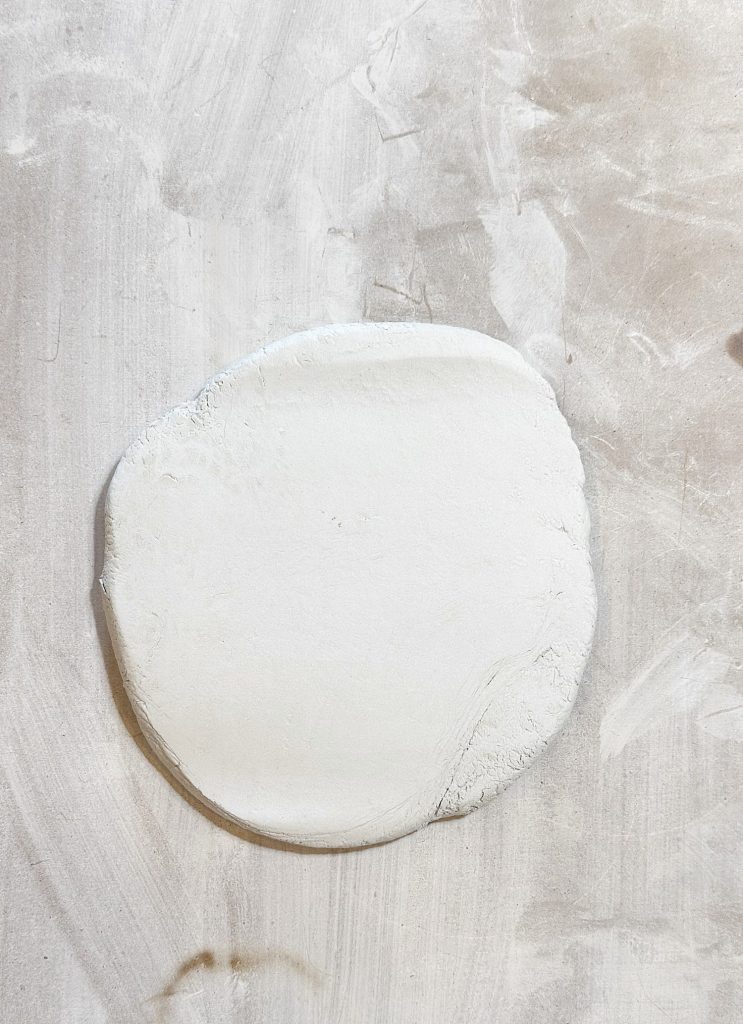
Once rolled, carefully lift the clay sheet and place it over the prepared egg carton mold. At this point, it may look uneven or rough, but that is completely normal.
The shaping process is where everything comes together.
Shaping the Egg Tray
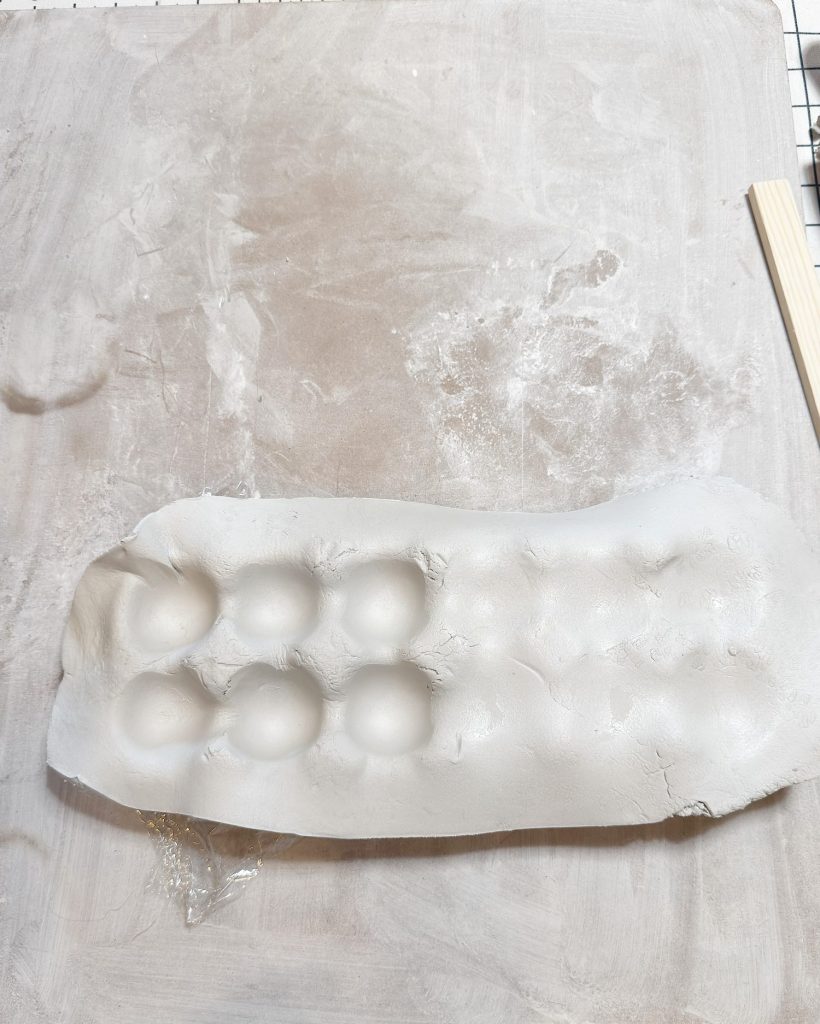

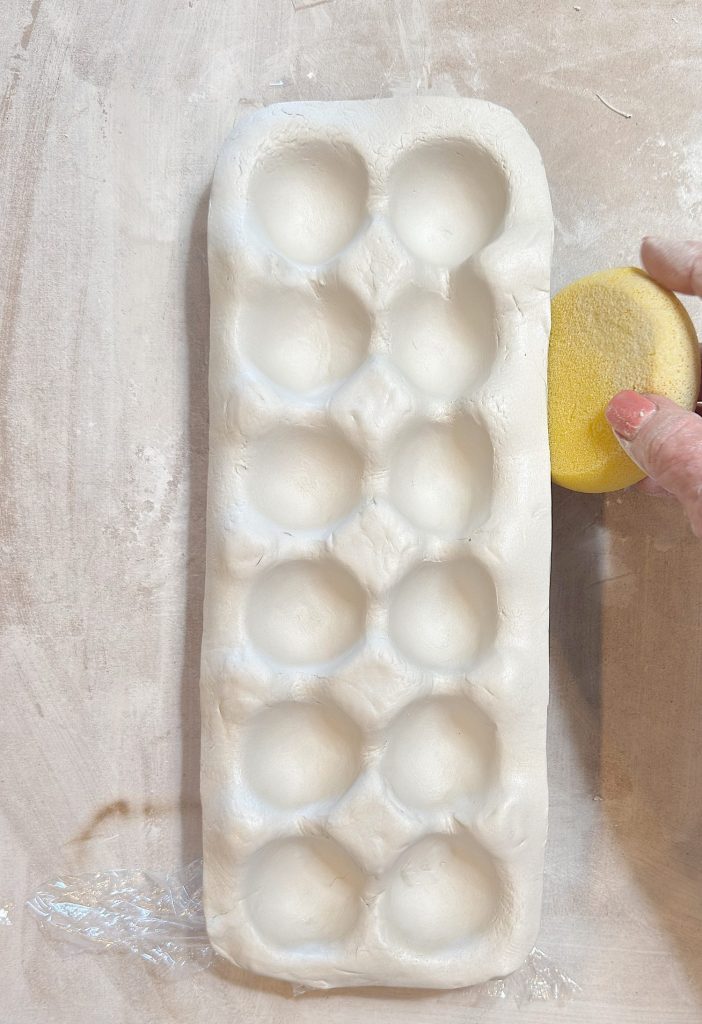
Starting in the center, I gently pressed the clay downward using a wet pottery sponge and a wooden egg.
The damp sponge keeps the clay smooth and prevents cracking, while the rounded wooden egg helps form perfectly shaped wells. Working slowly outward, I pressed the clay into each cavity, allowing the shape of the carton to guide the design.
There is no need for perfection here. Slight irregularities are what give handmade clay its charm.
Once the wells were formed, I gently molded the outer edges with my hands and trimmed the clay around the outside of the tray with a craft knife. I followed the natural contour of the carton so the tray would feel organic rather than overly structured.
Drying the Tray
Allow the clay to dry completely before decorating.
You can let the tray air dry naturally, overnigh, but I chose to speed up the process slightly by placing it in the oven at 200 degrees Fahrenheit for about 15 minutes on each side.
After flipping carefully halfway through, the tray dried evenly and became firm enough to handle.
It is important that the clay is completely dry before moving on. Any remaining moisture can interfere with paint and decoupage later.
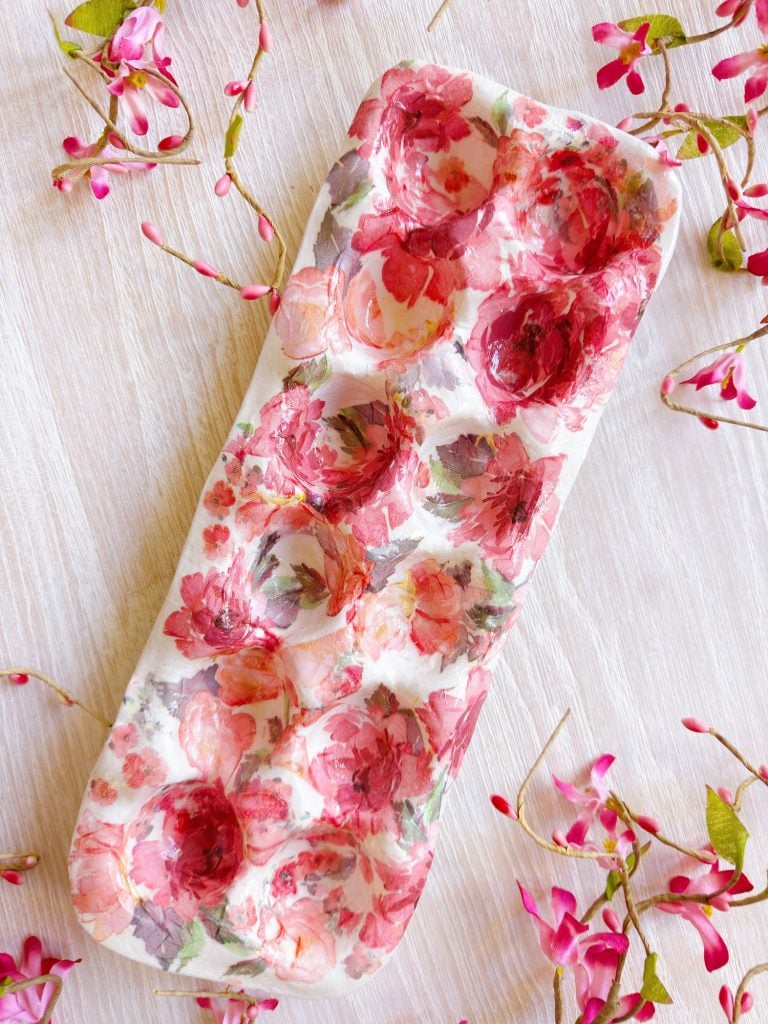
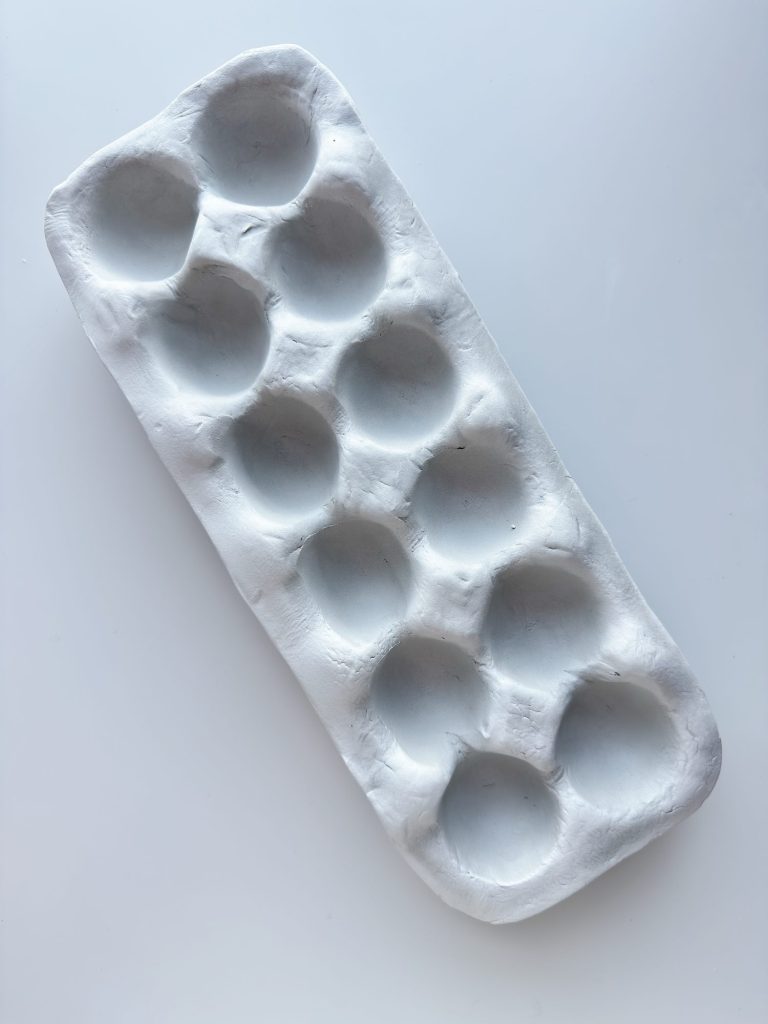
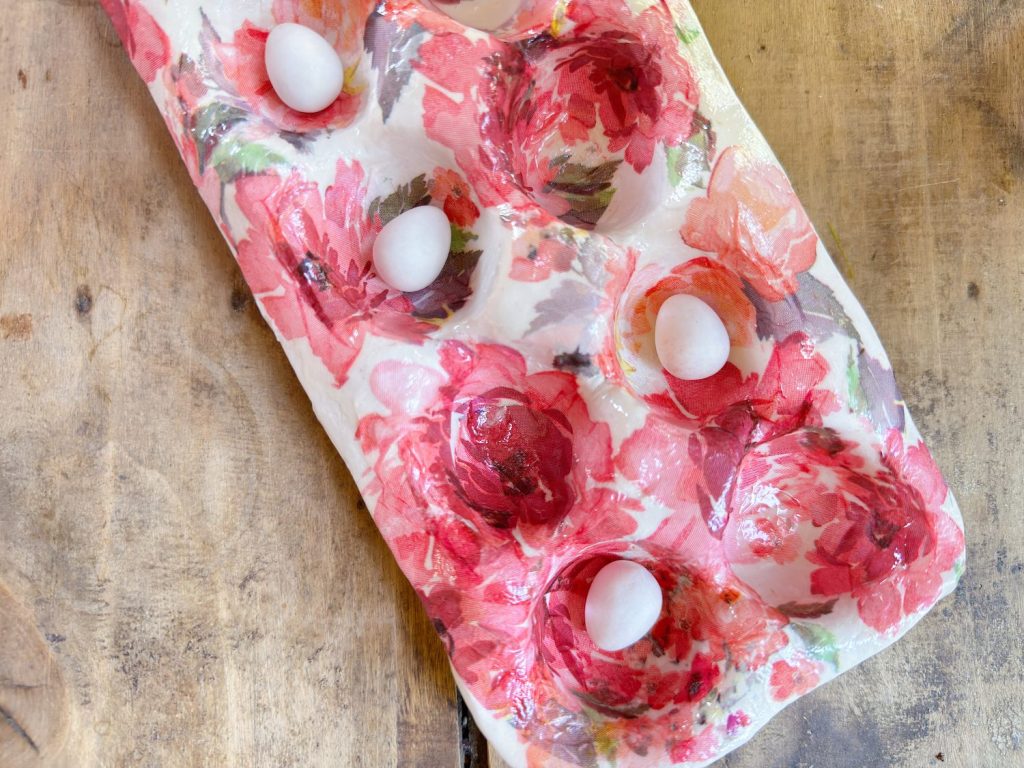
Once dry, simply remove the egg carton and plastic wrap to reveal the finished tray shape.
This is the moment when the project truly comes to life.
Painting the Base
After drying, you can apply a coat of white paint across the entire tray.
This step creates a clean foundation for the decorative layer and prevents the natural clay color from showing through delicate napkin designs. It also brightens the finished piece and gives it a more refined look.
Allow the paint to dry completely before continuing.
Adding the Floral Decoupage
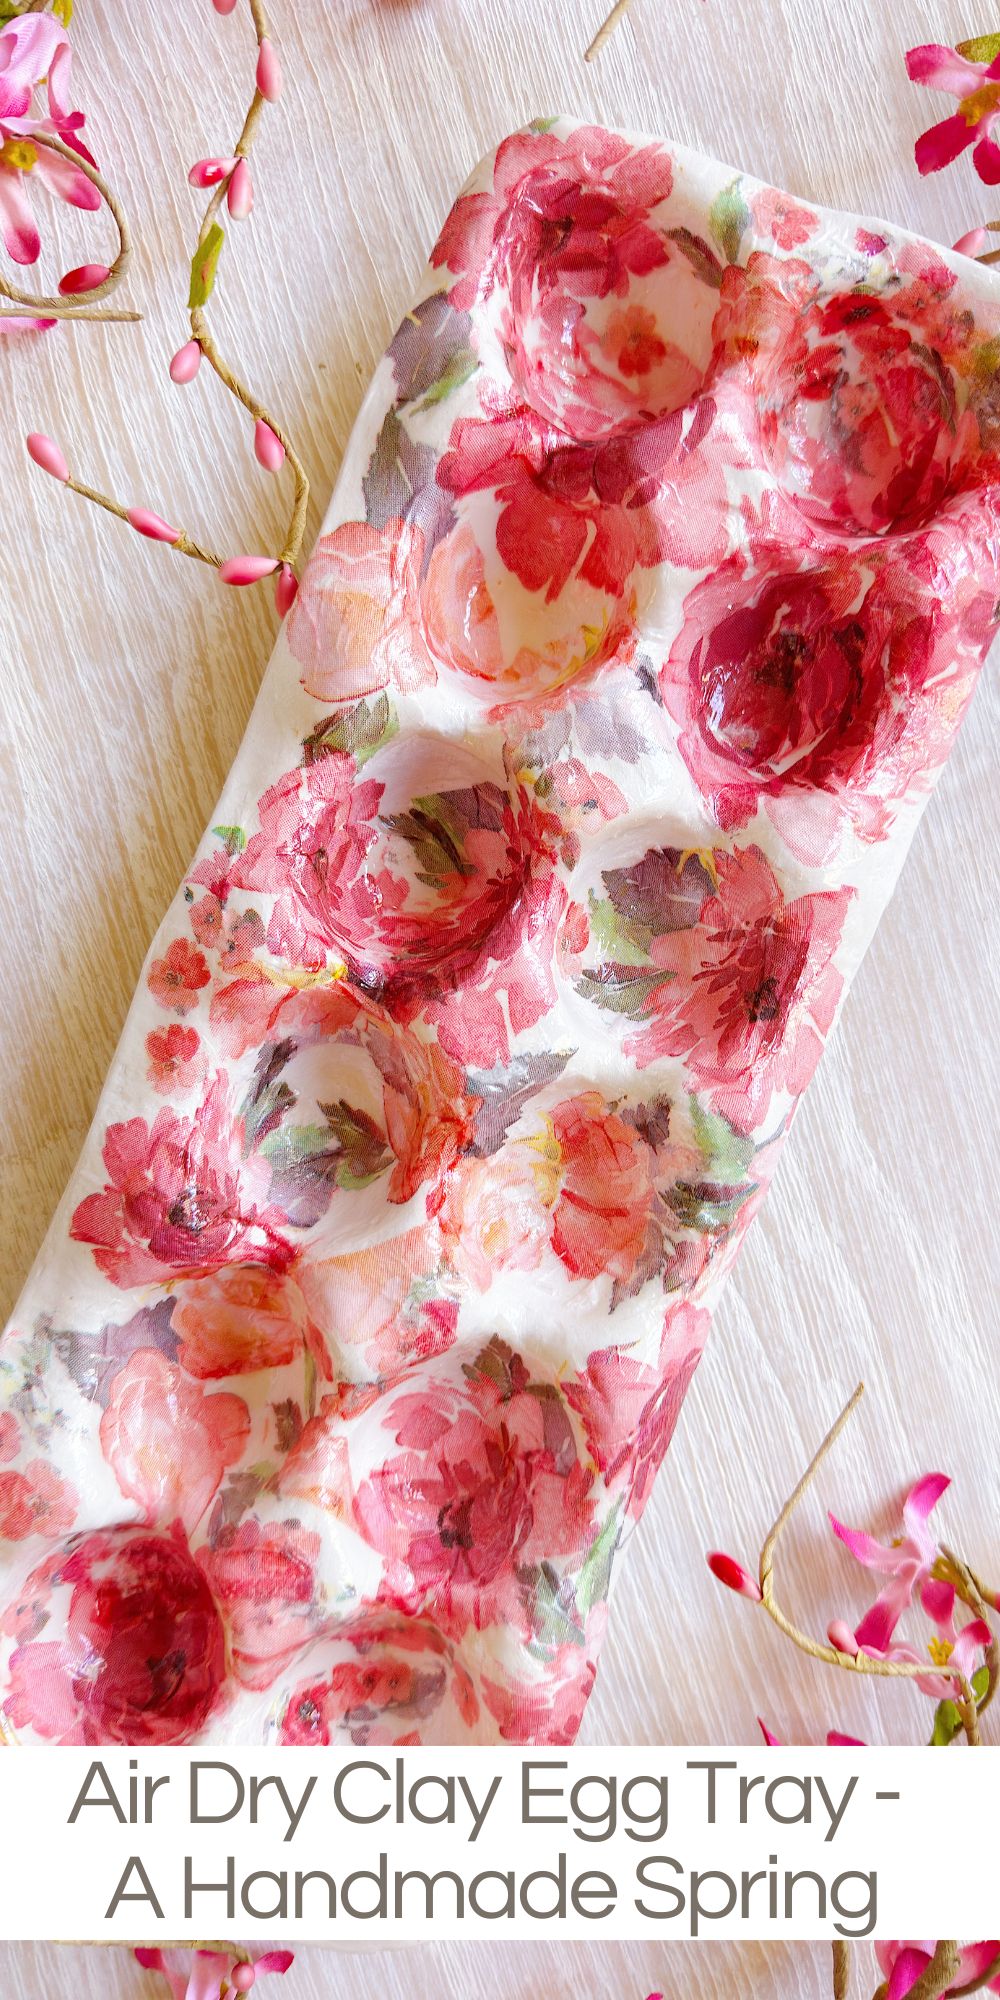
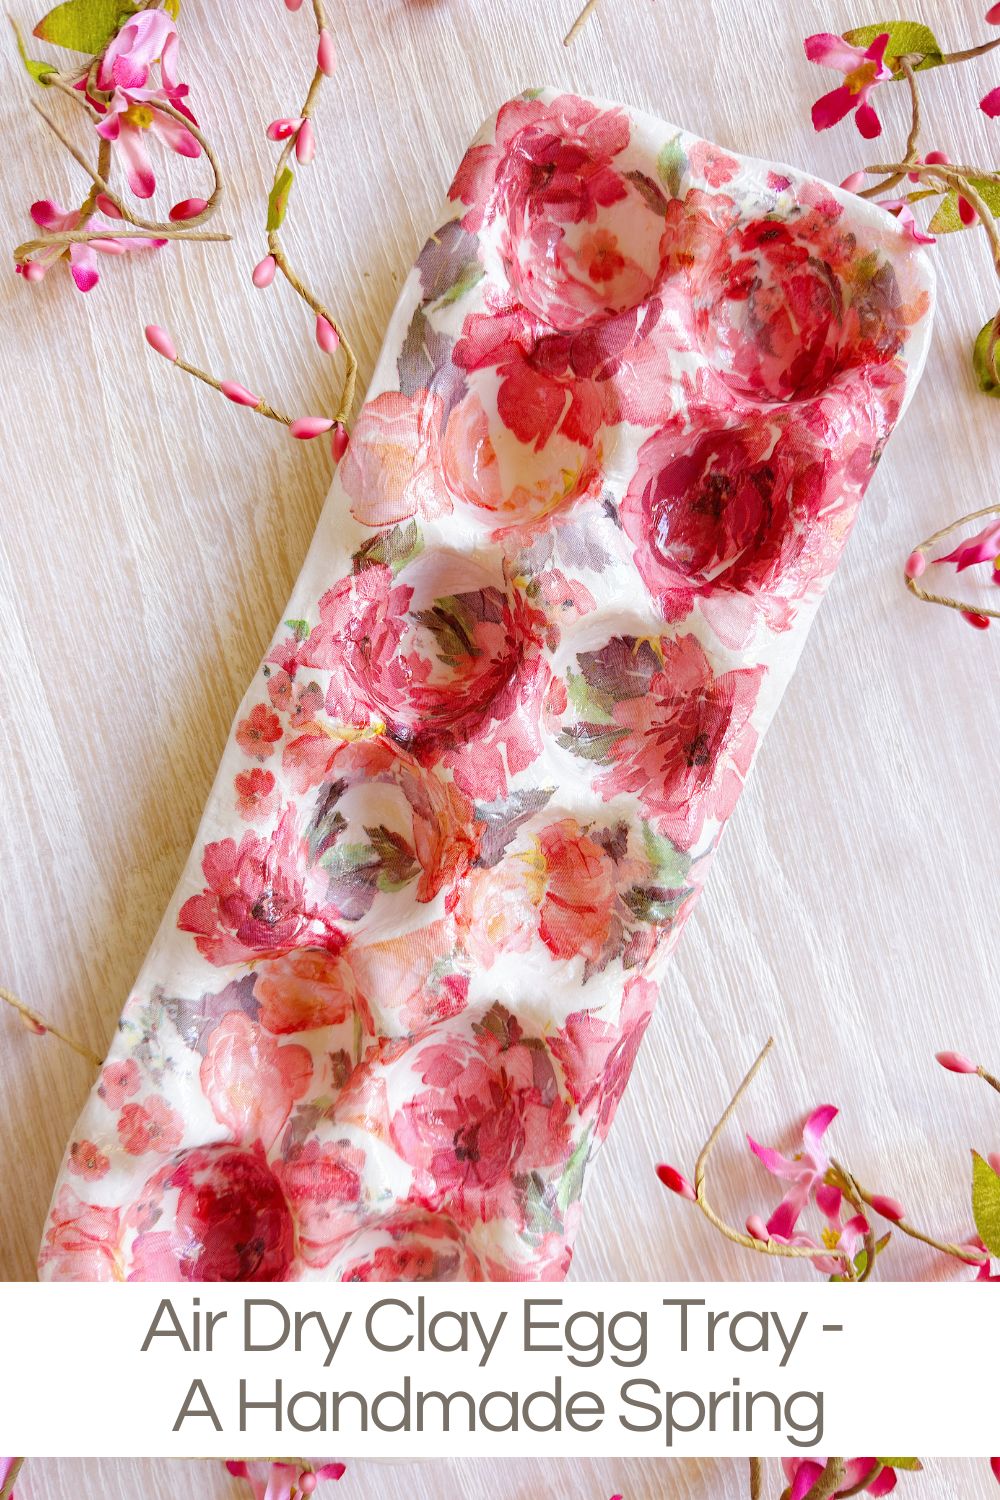
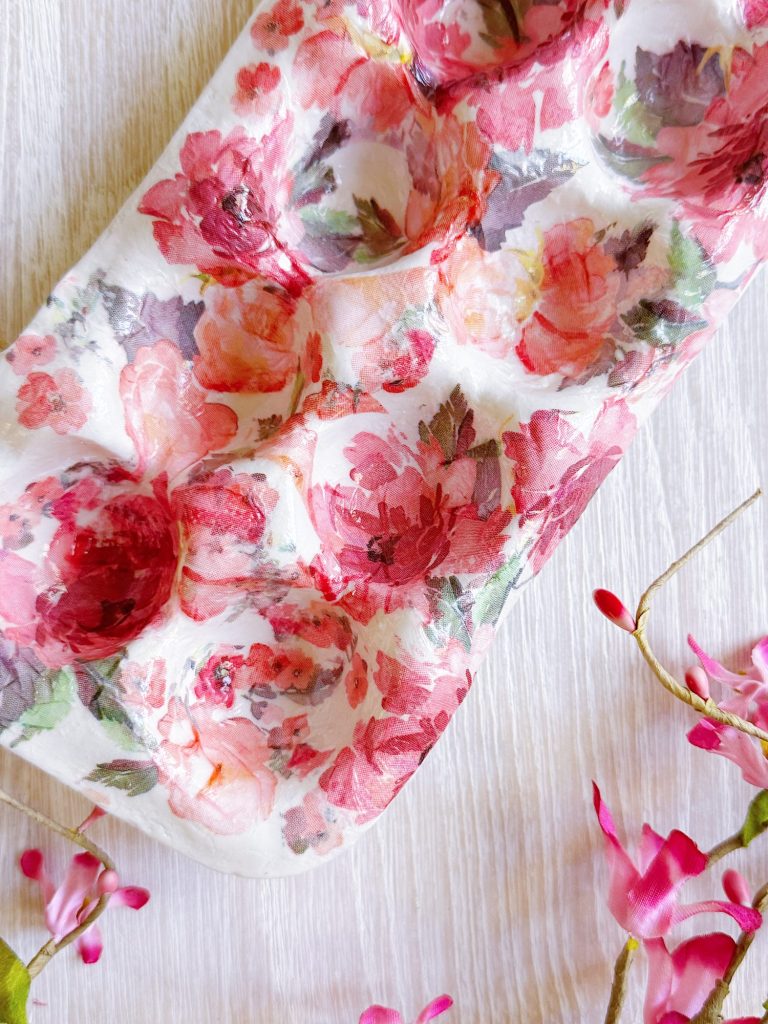
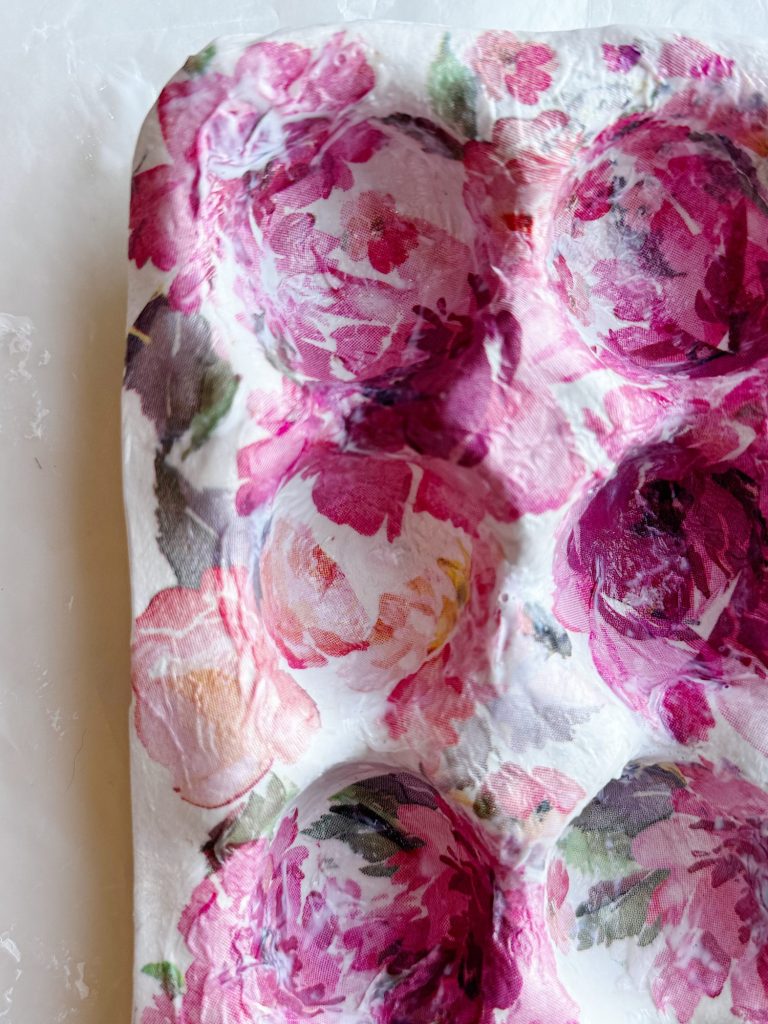
This is where the tray transforms from simple clay into something truly special.
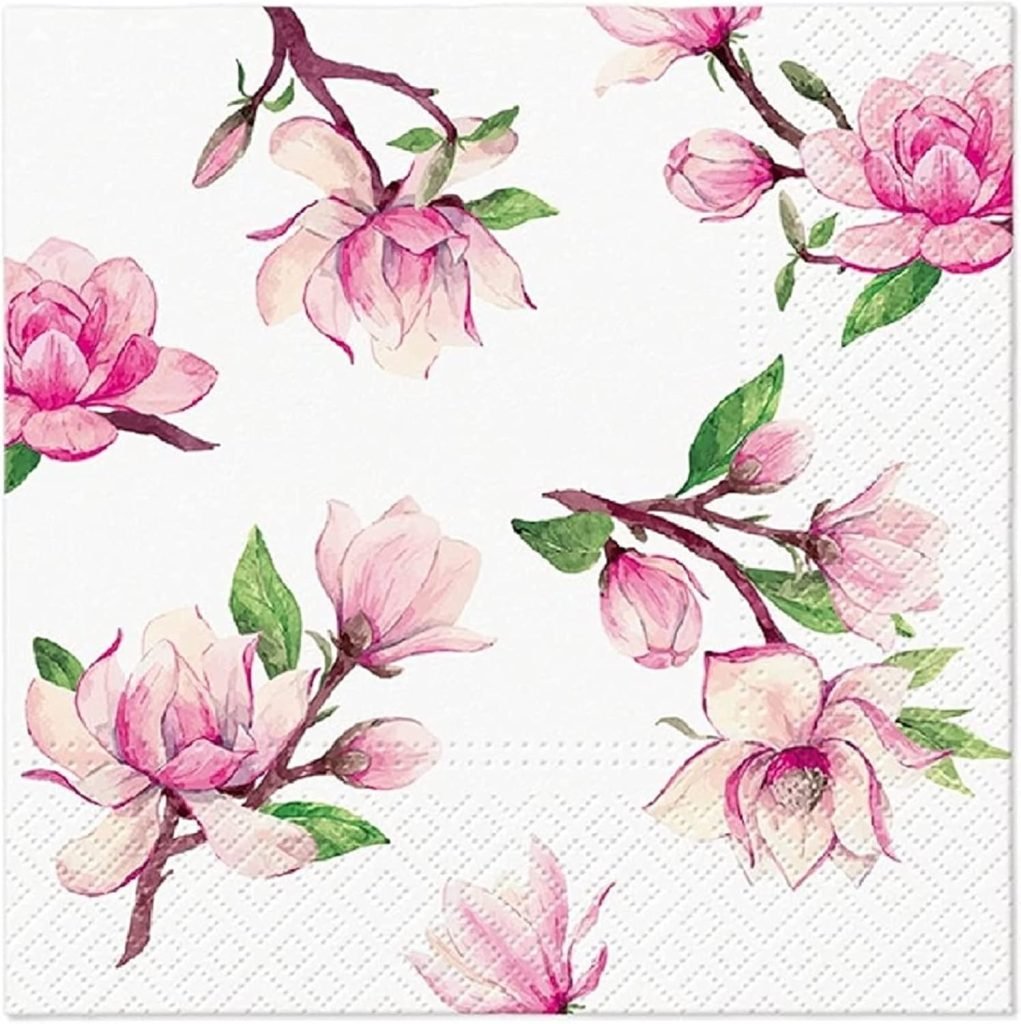
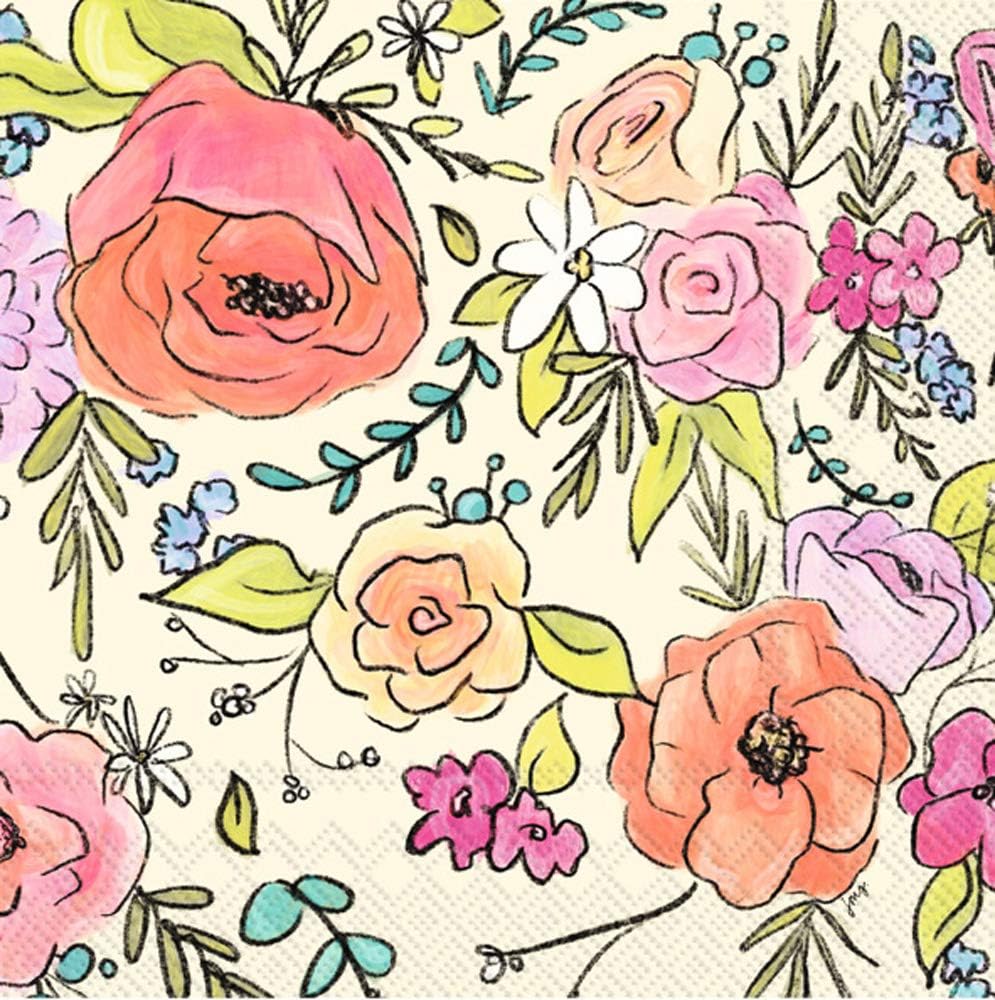
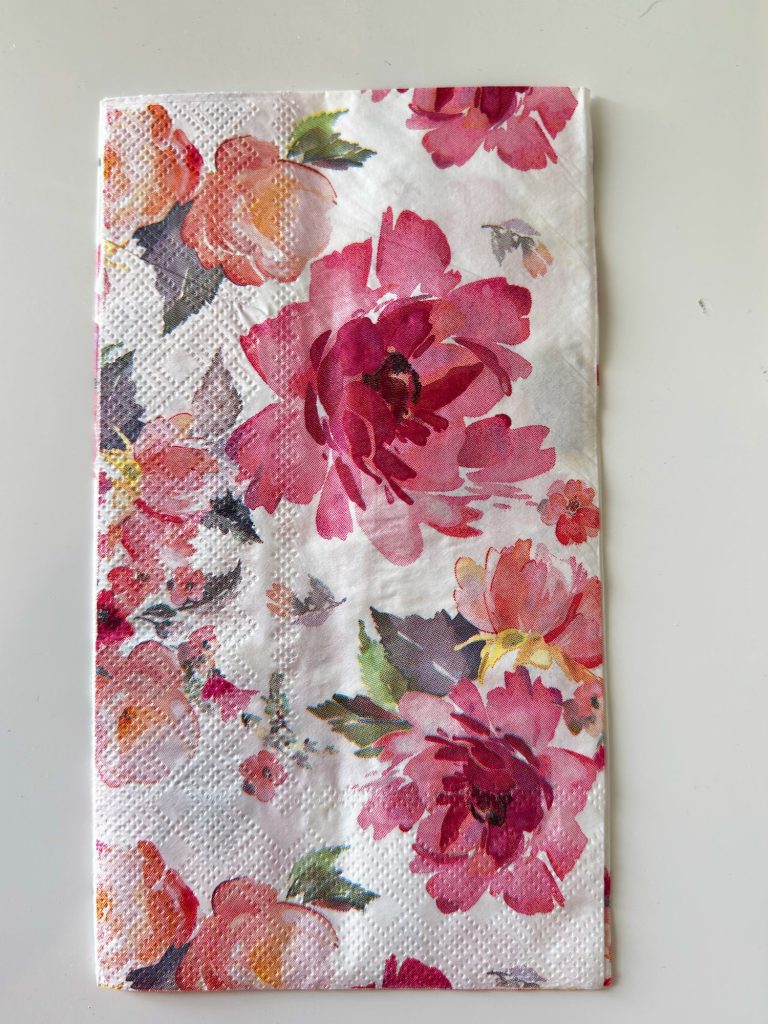
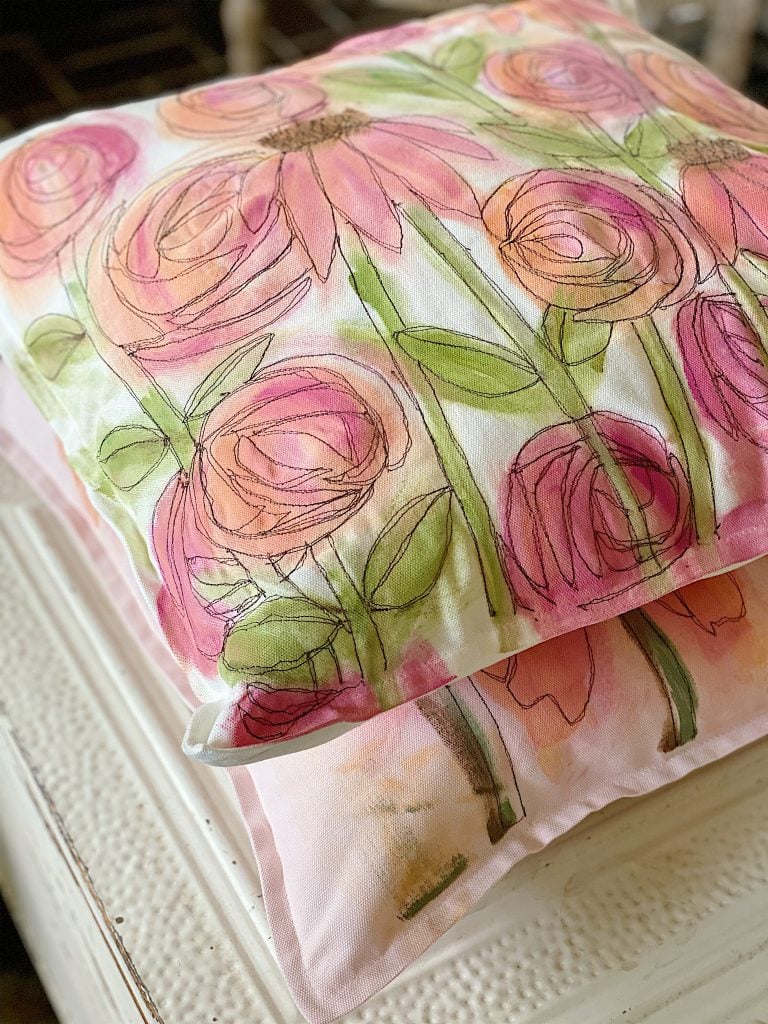
I selected beautiful, floral pink paper napkins that felt perfectly suited for spring. Napkins work wonderfully for decoupage because their thin layers blend seamlessly into the surface.
Be sure to peel the napkin down to one ply. Throw away the extra layers.
Instead of wrapping entire napkins around the tray, I first carefully cut out individual floral designs. This made an enormous difference.
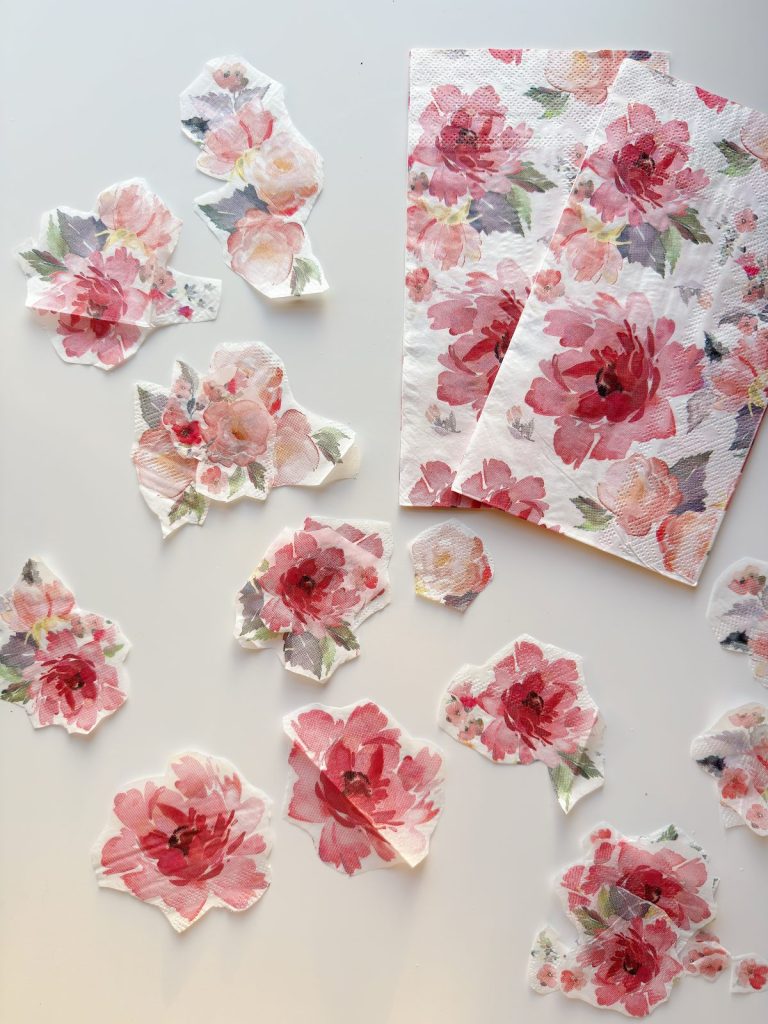
Applying large napkin sections over curved surfaces often causes wrinkles and overlapping patterns. Cutting individual motifs allows precise placement and creates a smoother, more intentional finish.
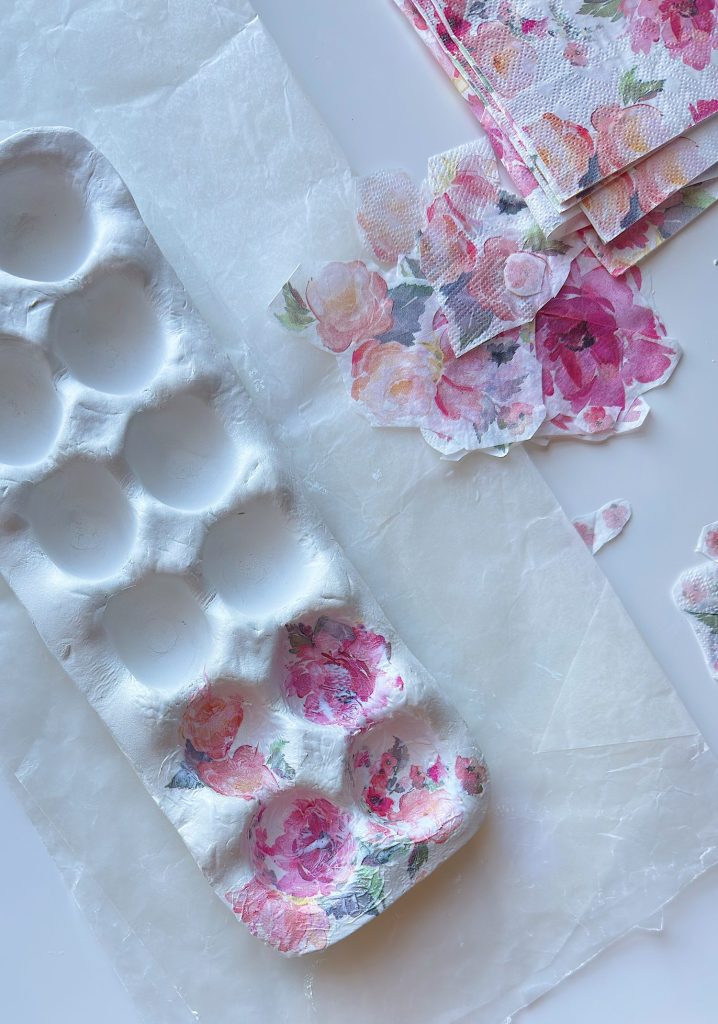

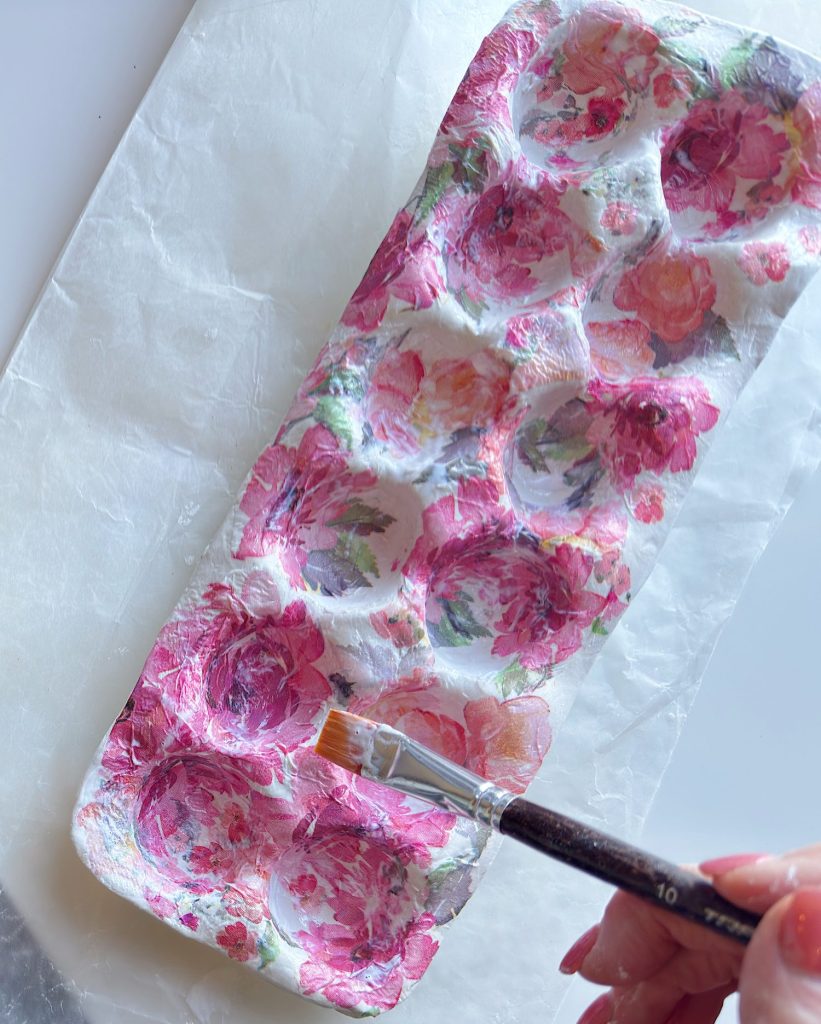
Using a soft brush, I applied a thin layer of Mod Podge to the clay surface, gently placed the napkin design, and then brushed another light coat over the top to seal it.
Working slowly and using thin layers prevents tearing and keeps the designs looking crisp.
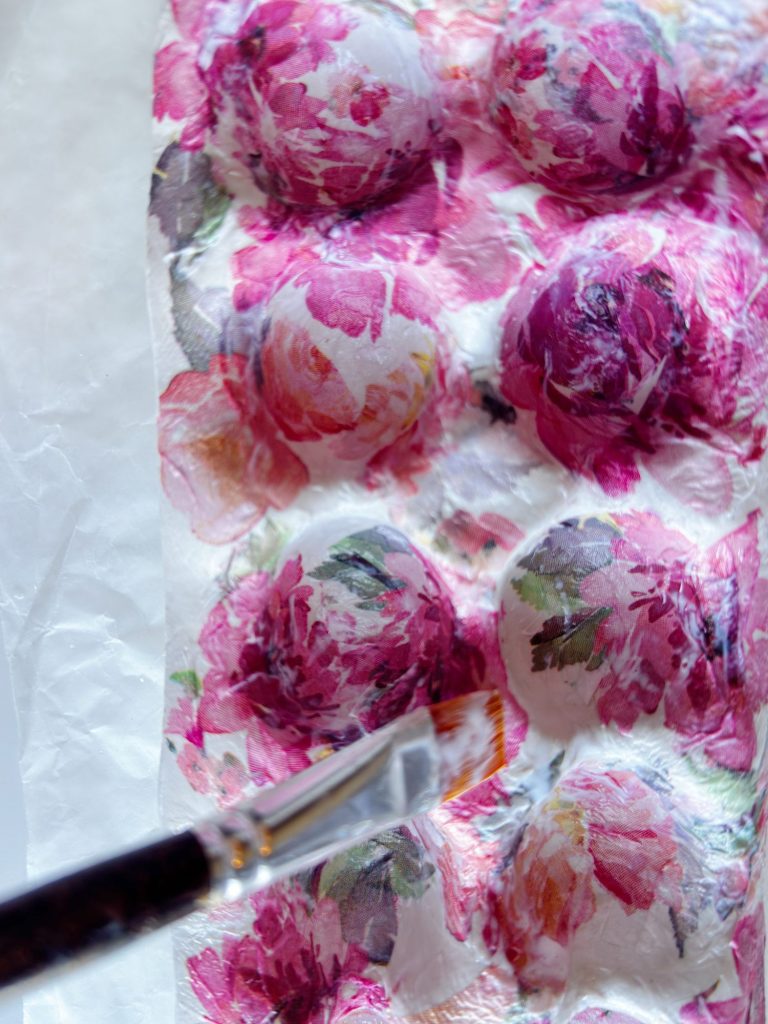
Once dry, the florals appear almost painted onto the clay.
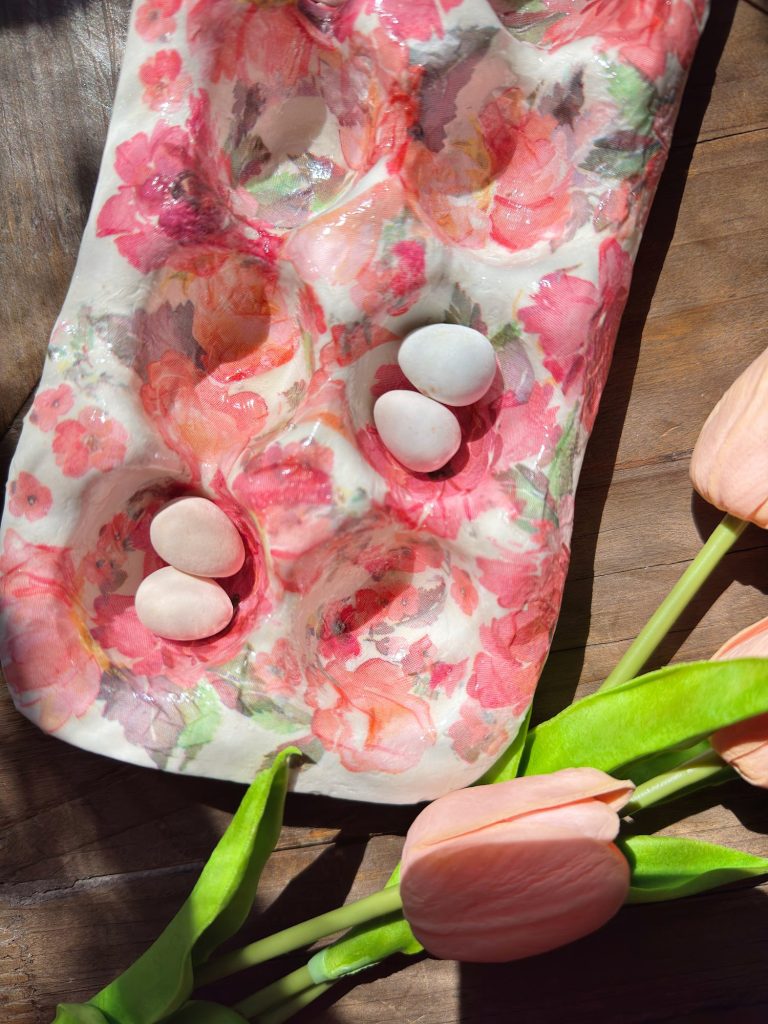
Sealing With Clay Glaze
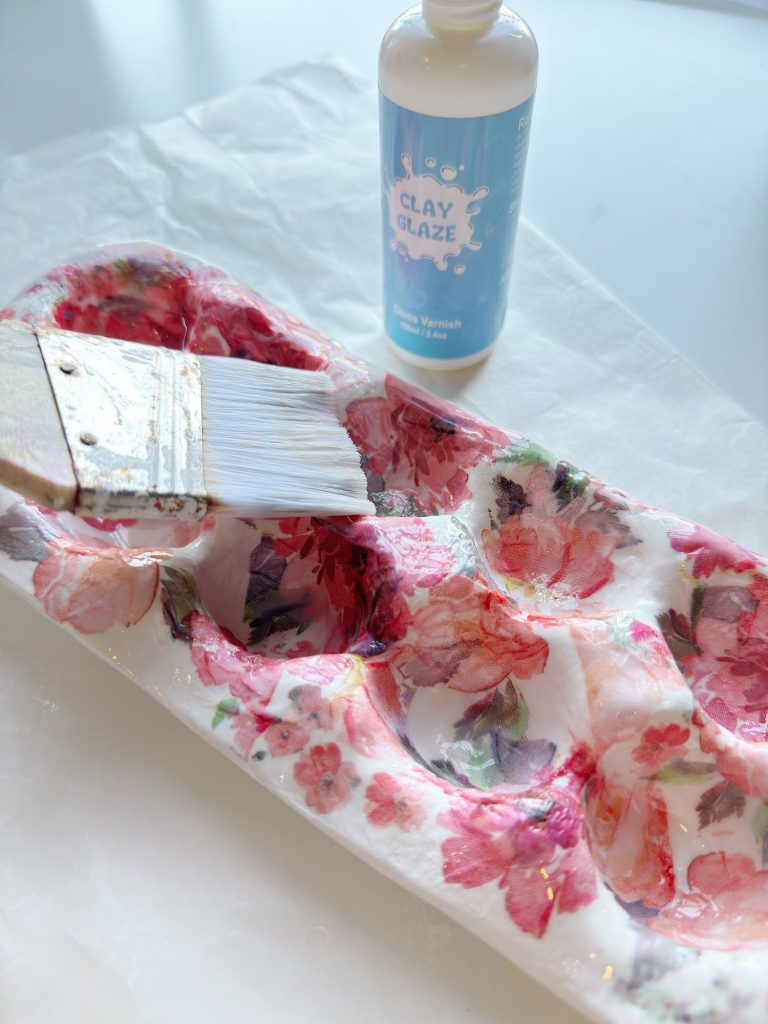
The final step is sealing the tray with Clay Glaze.
This step enhances everything.
The glaze protects the decoupage, strengthens the surface, and adds a soft finish that makes the tray look polished and complete. It also slightly deepens the colors, giving the florals a beautiful finished look.
Apply the glaze evenly across the entire tray and allow it to dry thoroughly.
At this point, the transformation is remarkable.
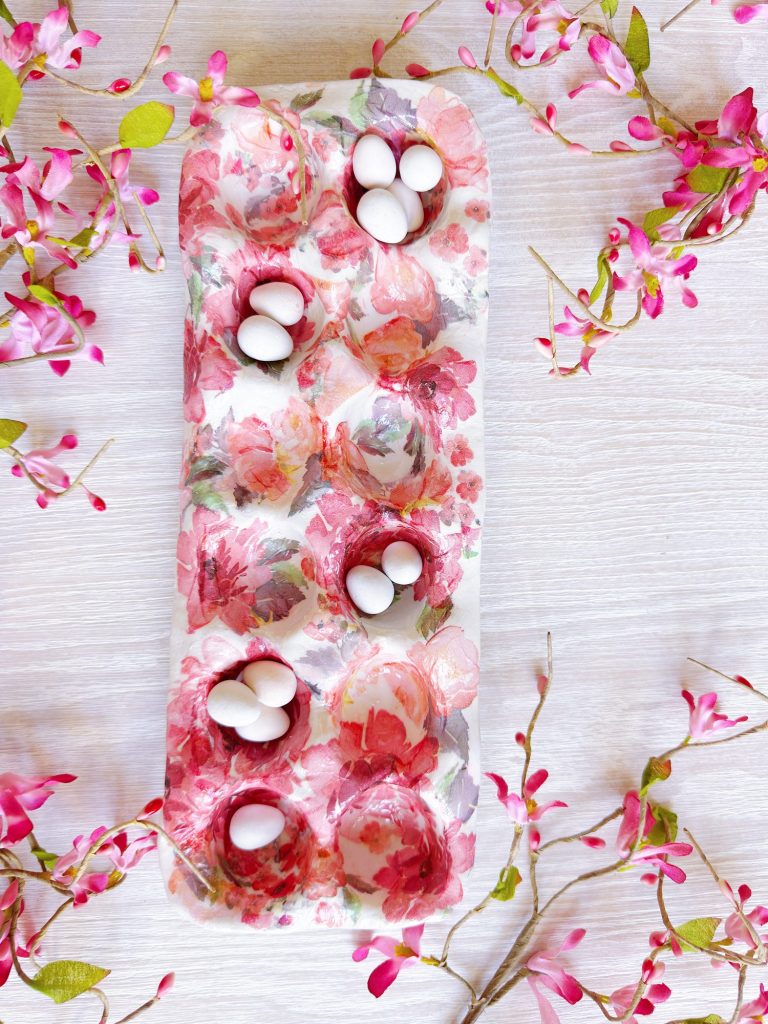
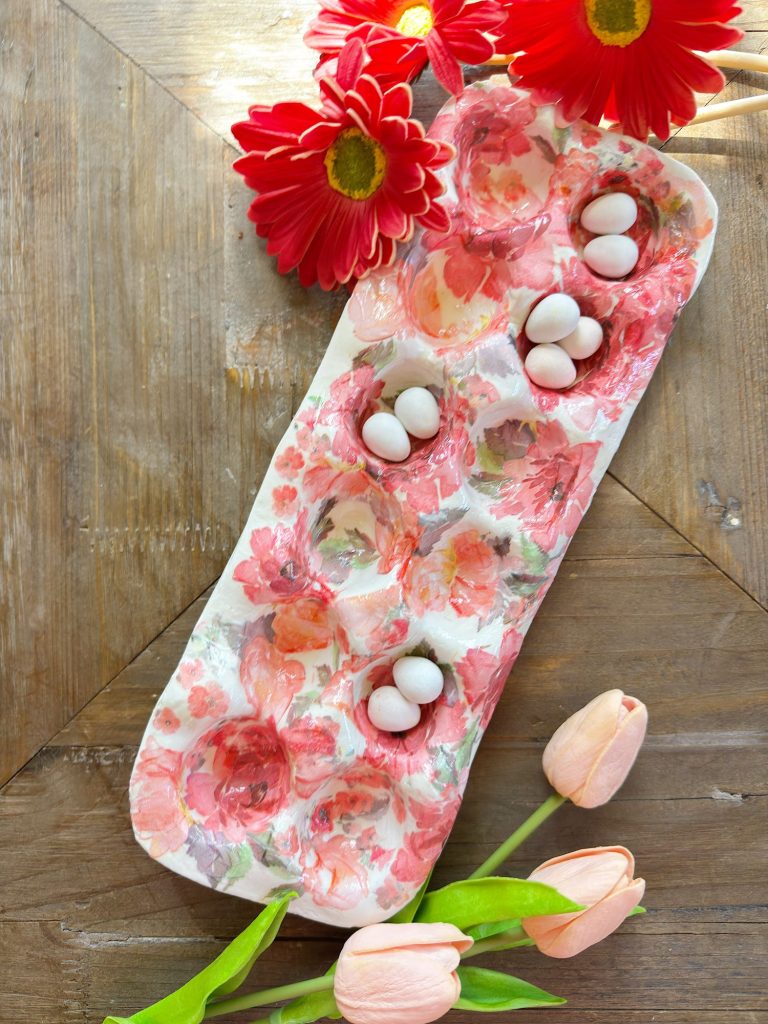
Styling Your Finished Egg Tray

Once complete, the tray can be used in so many ways throughout the season.
It works beautifully holding fresh eggs on a kitchen counter, displaying dyed Easter eggs for brunch, or serving as part of a spring centerpiece. It also makes a thoughtful handmade gift when filled with decorative eggs or seasonal treats.
Because every tray is handmade, no two will ever look exactly alike.
What I Love About This Project
This DIY perfectly captures what A Handmade Spring is all about.
It combines creativity, simplicity, and function in a way that feels relaxed rather than complicated. The egg carton mold removes intimidation from working with clay, making this project accessible for beginners while still producing impressive results.
And the decoupage step allows endless customization. Different napkin patterns could easily adapt this tray for other seasons or color palettes.
Tips From My Experience
After completing this project, here are a few helpful tips:
- Keep the clay thickness consistent for strength.
- Use a damp sponge often while shaping.
- Cut napkin designs individually rather than applying them in large sections.
- Apply Mod Podge in thin layers.
- Allow drying time between every step.
Patience truly makes the difference.
How to Follow Along With A Handmade Spring
Each week, a new spring craft will be shared here on the blog. I will also be sharing behind-the-scenes moments, progress videos, and finished projects on Instagram so you can see each craft come to life.
You can jump in at any point. There is no need to start at the beginning or complete every project. Choose the ones that speak to you and make them your own.
If you love seasonal crafting, this series is designed to inspire you throughout spring.
Here are all of the A Handmade Spring craft projects so far. I can’t wait to share all twelve.
This Air Dry Clay Egg Tray feels timeless to me. It is seasonal yet practical, decorative yet functional. And it began with something as ordinary as an egg carton.
That is the beauty of handmade projects.
With a little imagination, everyday materials can become something worth displaying, gifting, and enjoying year after year.
I cannot wait to see how you make this project your own as we continue creating together this spring.
Latest Posts
-
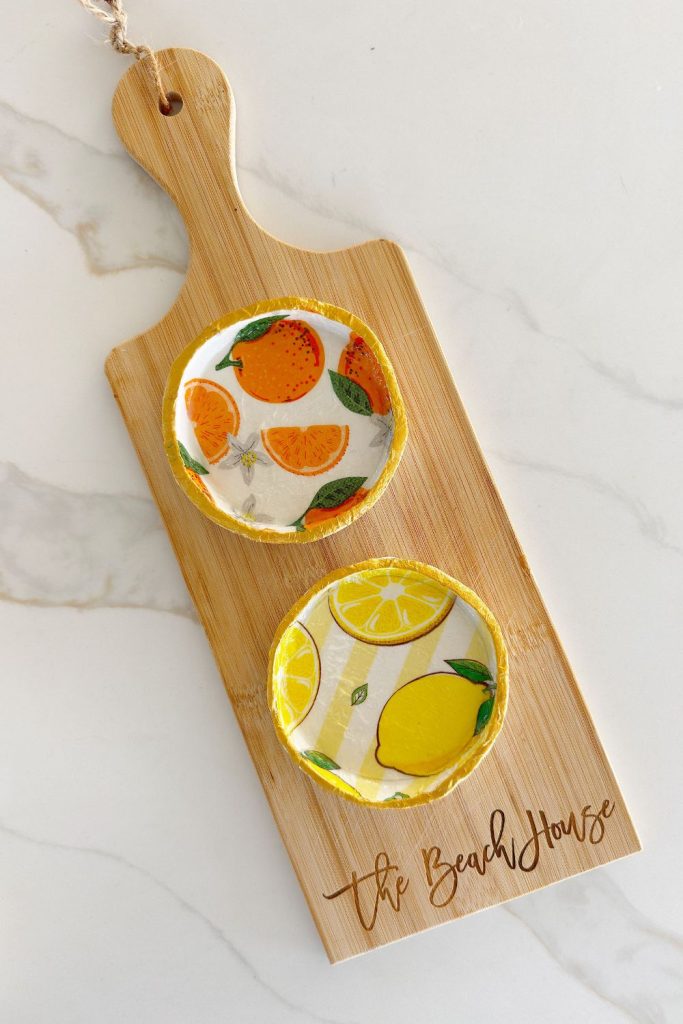
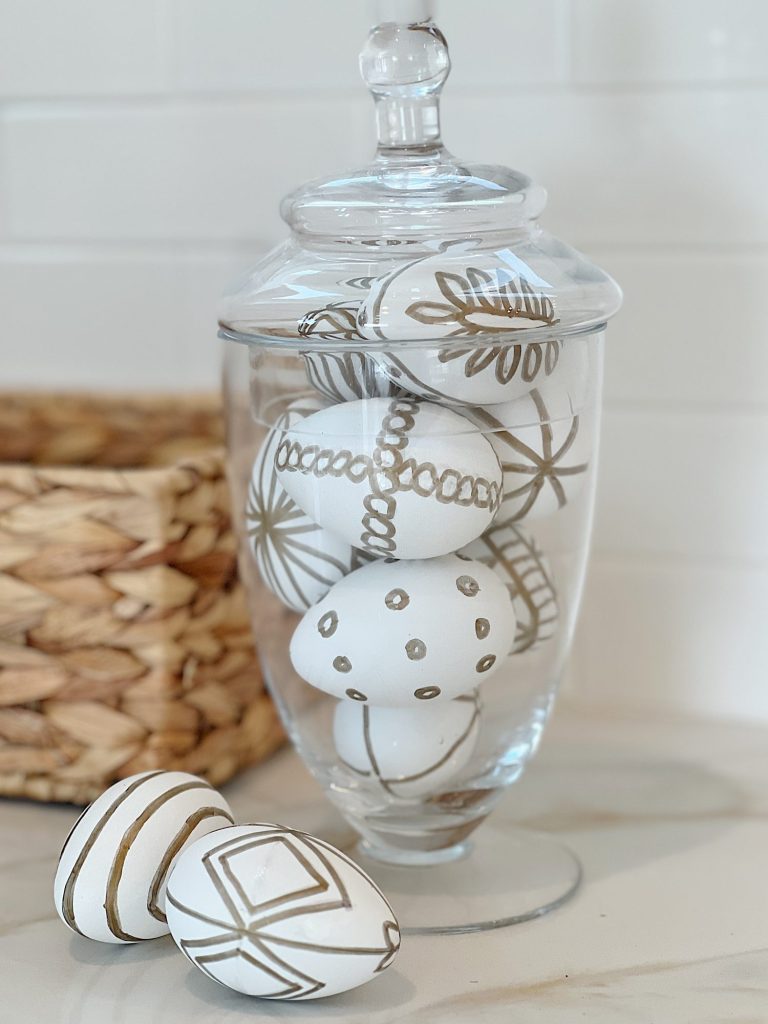
Hand Painted Plastic Easter Eggs DIY
I am so in love with these hand-painted plastic Easter eggs. All I did was paint them with a Sharpie pen! They make the best Easter decor. I was at the Beach House when I made these eggs, so the copper-and-white palette perfectly matched our beach house decor. But you can make these hand-painted plastic…
-
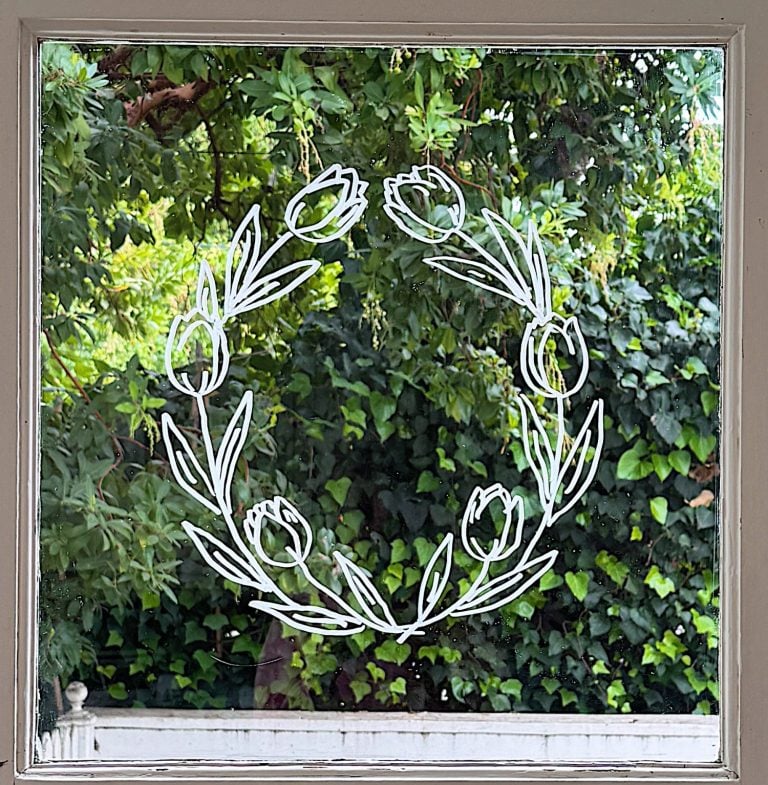
April Window Wreaths
April Window Wreaths mark the fourth release in my year-long window-wreath series, a collection of monthly templates designed to bring handmade creativity into your home. With nine brand-new April Window Wreaths to trace and place on your glass, this collection continues the series’ best: simple techniques, calming creativity, and thoughtfully designed seasonal art. April embraces…
-
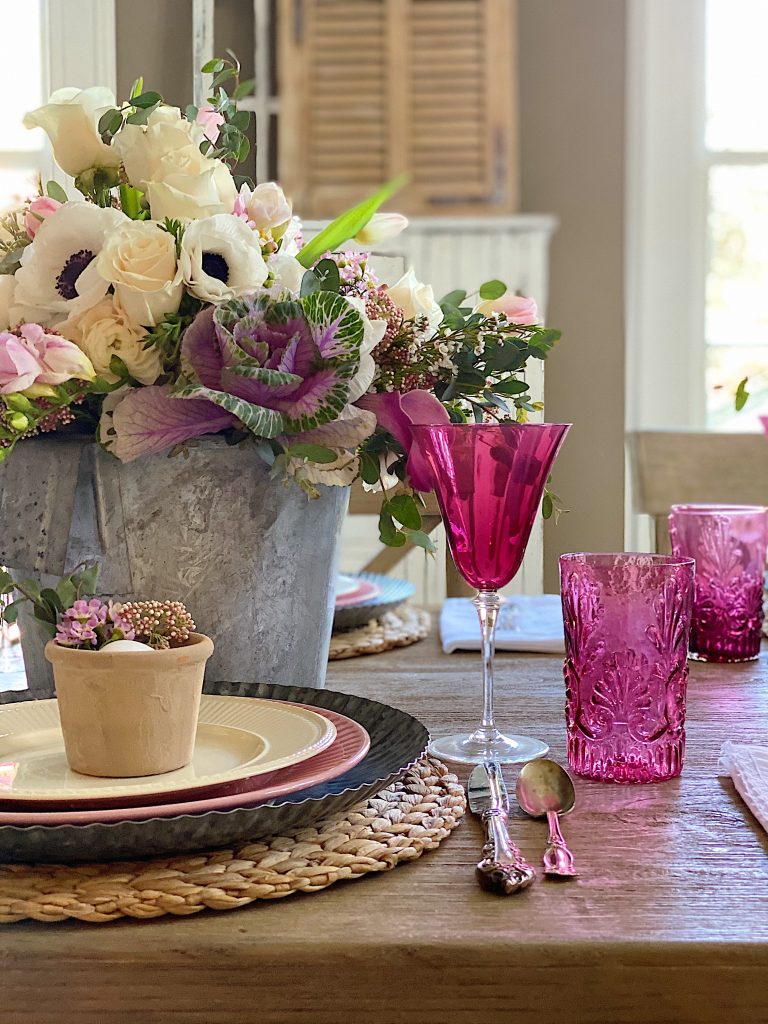
How to Set a Beautiful Table with Easter Colors
I am so excited to share my Easter brunch table ideas. I love the bright Easter colors and can’t wait to share the florals, table setting, and fun glassware. Easter Brunch is one of my favorites. I already shared my favorite Easter Brunch recipes. Today, I set a table and love how these Easter colors…
-
Five Easy Steps to Adding Hanging Planters in Your Yard
Today, I am sharing how I created the hanging planters in our backyard. I love mine so much! Hanging planters look lovely in any yard. My hanging planters have been looking awful all winter long. Here are five easy steps to add (or redo) hanging flower baskets in your yard. Adding hanging planters is a…

My Recent Instagram Posts

You can pin the image below to your boards on Pinterest (click the Pin button in the top left corner) or follow me on Pinterest!

For more real-time updates, follow me on Instagram @My100YearOldHome

This sounds like such a lovely spring project! I’m always looking for functional and beautiful decor, and the idea of using air dry clay with no special equipment, just an unexpected household item as a mold, is really intriguing. I can’t wait to see what that secret item is!
Quick questions regarding the Egg Tray:
1. Did you apply the dry clay to the underside?
2. If no, what are the steps to treat the tray underside?
Thank you