How to Stain Orange Wood Furniture
Have you ever wished for a way to get rid of orange stain found on older furniture? I finally figured out how to stain orange wood furniture and the result is amazing!
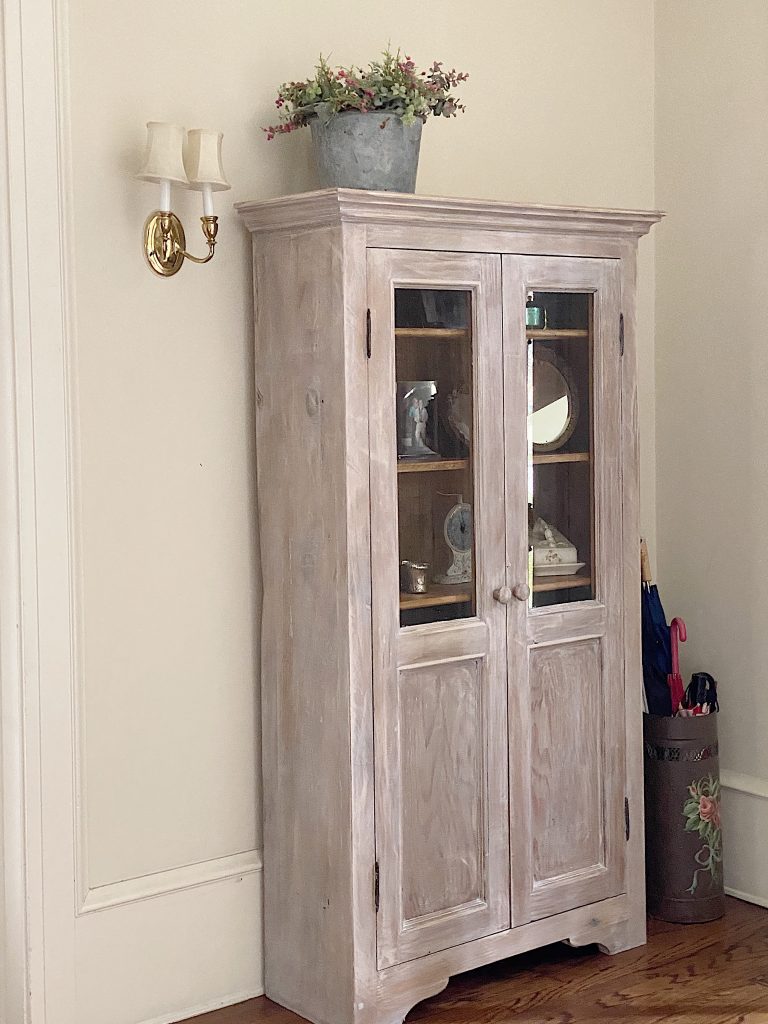
Do you have any orange stained wood in your home? You might have it on your kitchen cabinets, on a table, or even a cabinet like mine. Either way, at some point most of us have wished there was a way to get rid of the orange on our wood furniture. I just figured out how to do it!
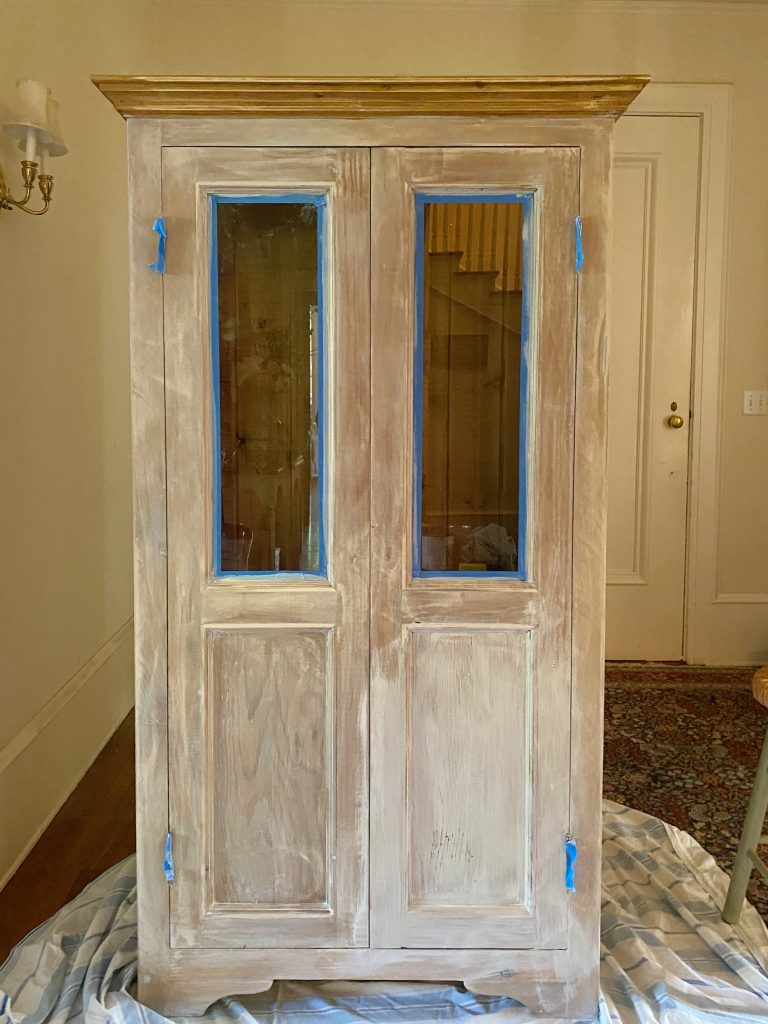
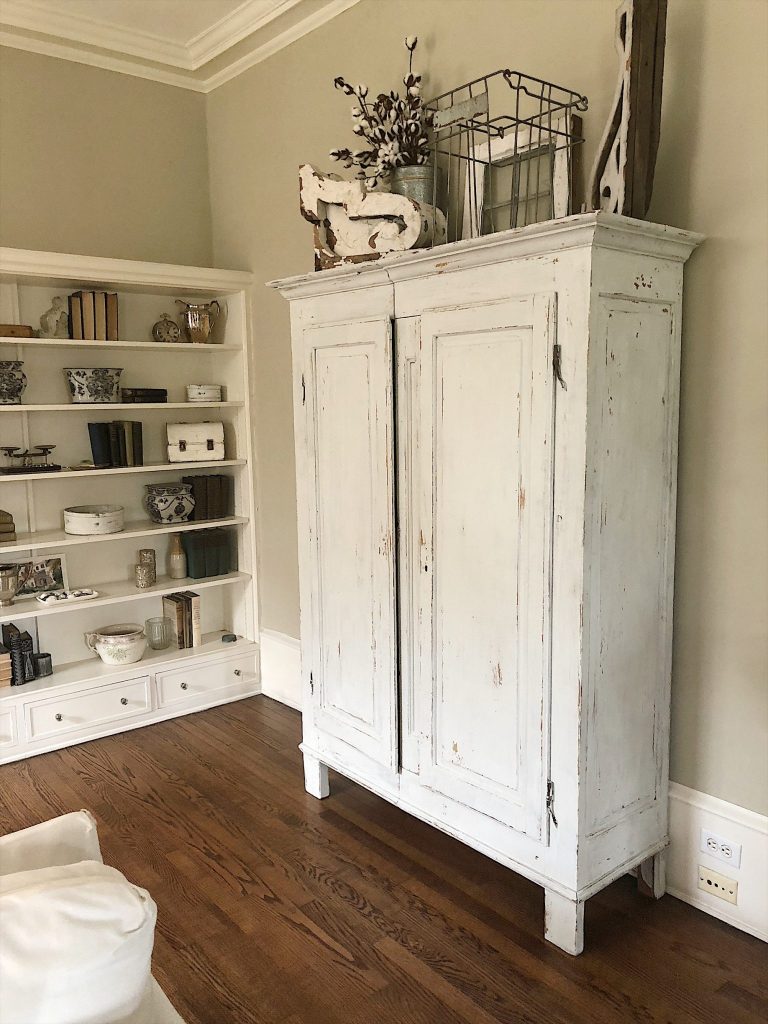
The photo above is the cabinet that I stained in a couple of hours.
The photo below is the “before photo”.
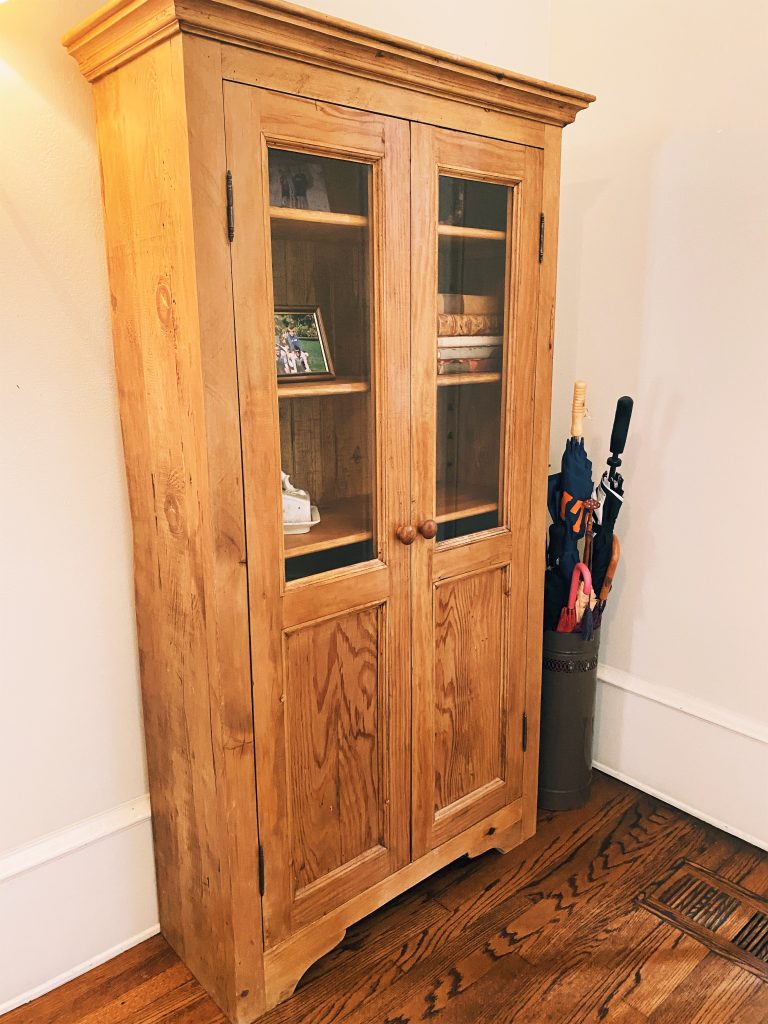
Pretty remarkable, don’t you think? I shared this project on my Instagram over the weekend. I had so many DM’s on my feed that I decided I needed to write a blog post to answer all of your questions.
The first thing you need to know is this total project should cost you about $20.00. I partnered with Varathane products and the stain I used is amazing!
What You Need to Stain Your Cabinet
Varathane Whitewash Wood Stain (8 oz.)
Varathane Water-Base Polyurethane (8 oz.)
Medium grade sandpaper
Paintbrush
Painters tape
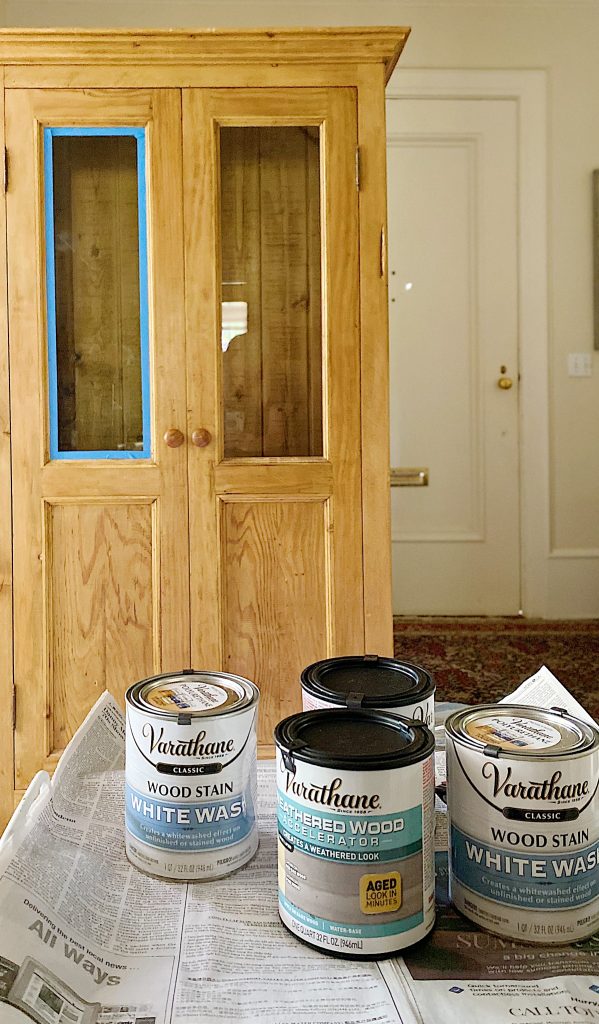
Why I Chose These Varathane Products
The Varathane Whitewash Woodstain allows users to change the color of wood projects without sanding or stripping the original finish. It can be applied right over existing polyurethane finishes. It can be used on furniture pieces with difficult to sand areas like turned-table legs or indoor projects when sanding and stripping isn’t an option.
I sanded my cabinet just a bit to help the wood absorb the stain. In hindsight, I think I could have skipped this step.
You need to use a top coat since the stain is waterbased. The Varathane Water-Base Polyurethane is a protective topcoat that should be applied over Varathane stain products. It is available in various sheens like Matte, Semi-Gloss, and Gloss. It is also available in brush-on or aerosol format. I used the matte brush on.
All of the Varathane products are sold at Home Depot.
I used the small 8 oz. cans and used less than 1/2 of each can.
How To Stain a Cabinet
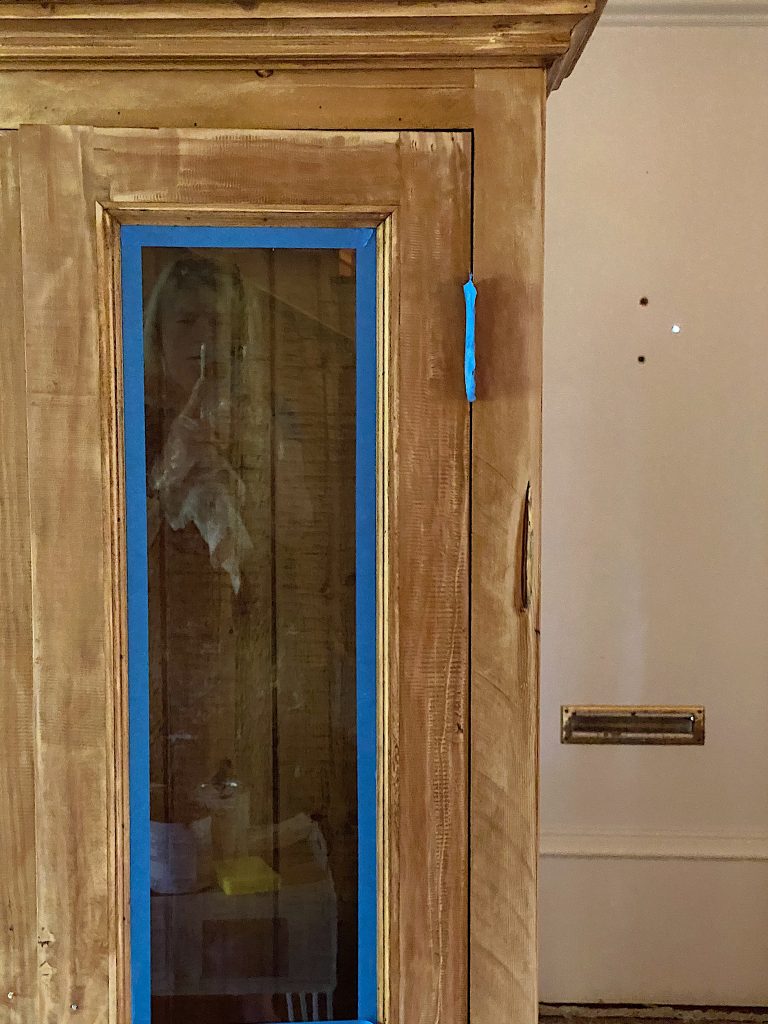
Protect all of your hardware and glass with painters tape. Remove any knobs or additional items.
I lightly sanded the entire cabinet at this point. According to the directions on the Varathane can, you don’t even have to do this. So it’s up to you. It took less than half an hour anyway.
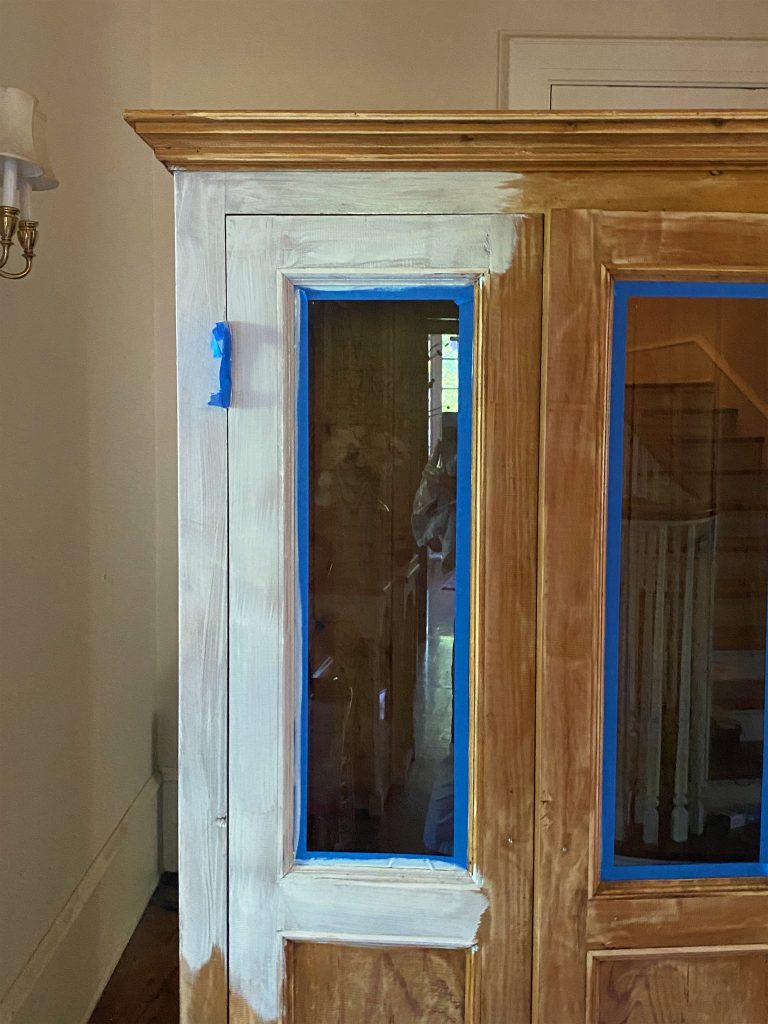
Before I applied the stain, I practiced on the back of the cabinet so I could determine how much stain to apply and how hard I wanted to rub it off.
Mix the can of stain and apply the stain to a small area. Let it sit for three to five minutes.
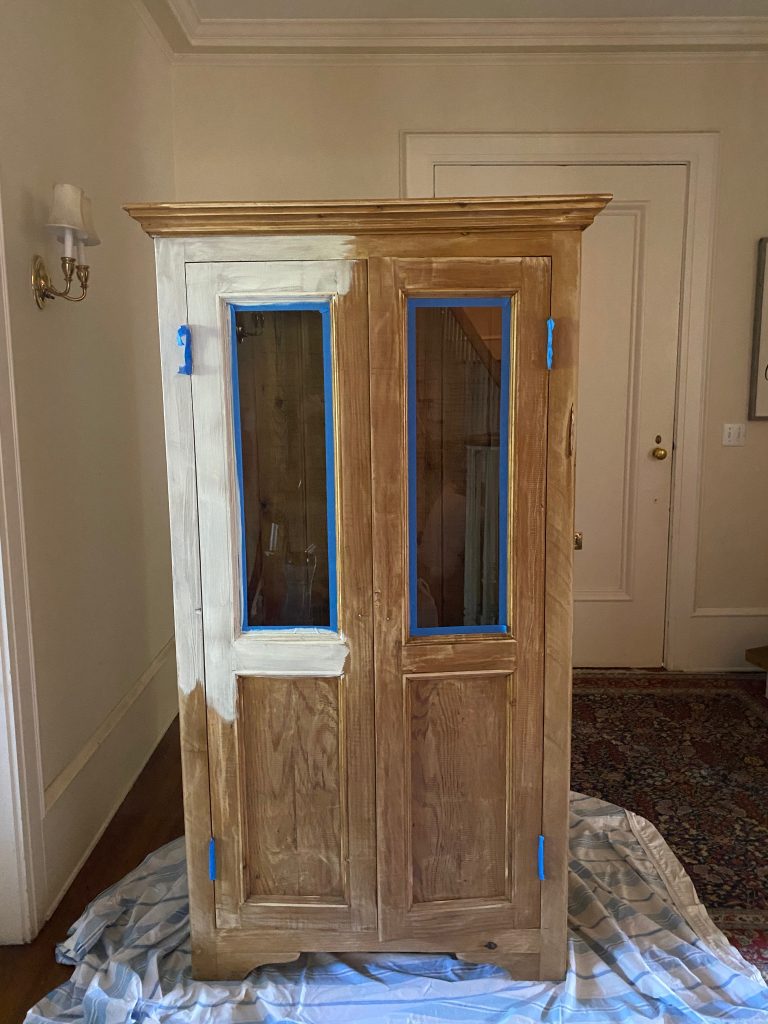
Using a soft, dry towel, gently rub off the stain. You can decide how much you want to leave on the cabinet by how long and how hard you rub.
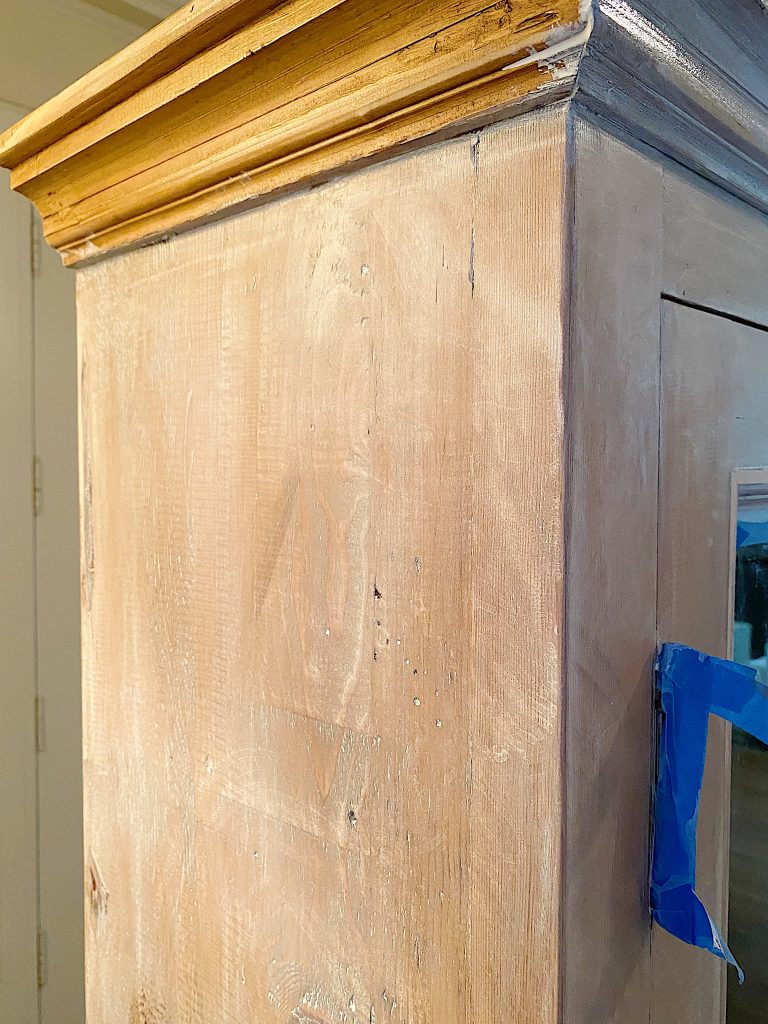
Continue painting and rubbing in manageable segments. Don’t get ahead of yourself. In the photo below, you can see that the top hasn’t been painted with the stain yet.
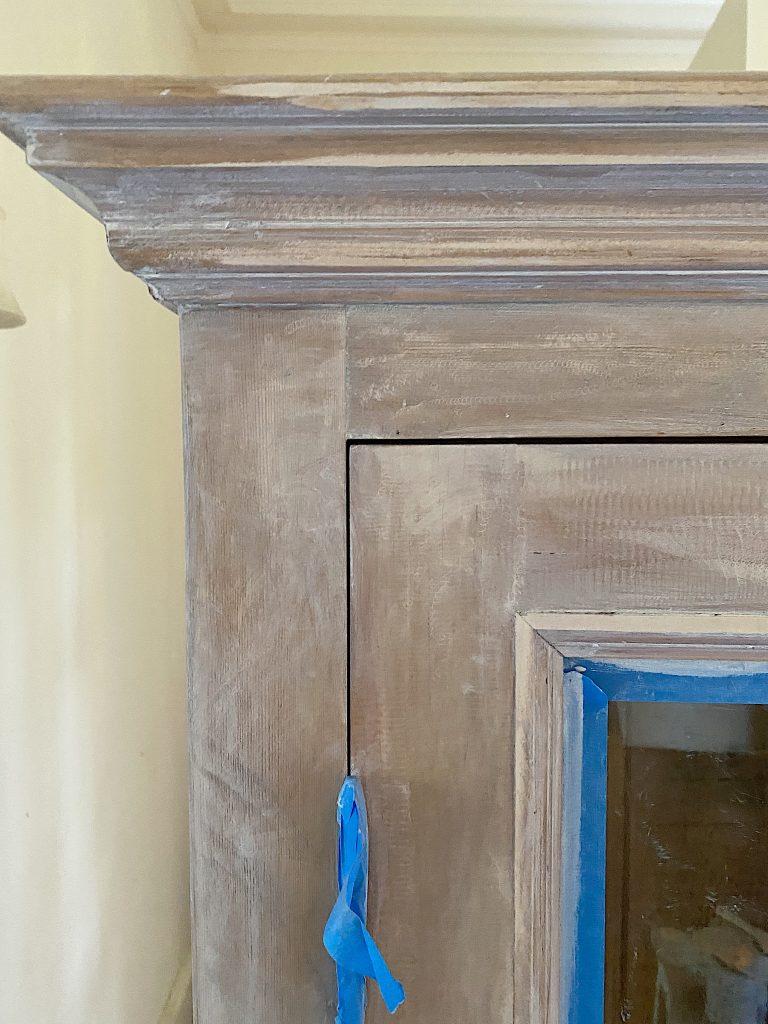
Here is a closeup view of the side of the cabinet. Can you believe how easy it is to stain orange wood furniture?
My final step was to apply the Varathane Water-Base Polyurethane. I used the matte finish so you can’t even see a difference.
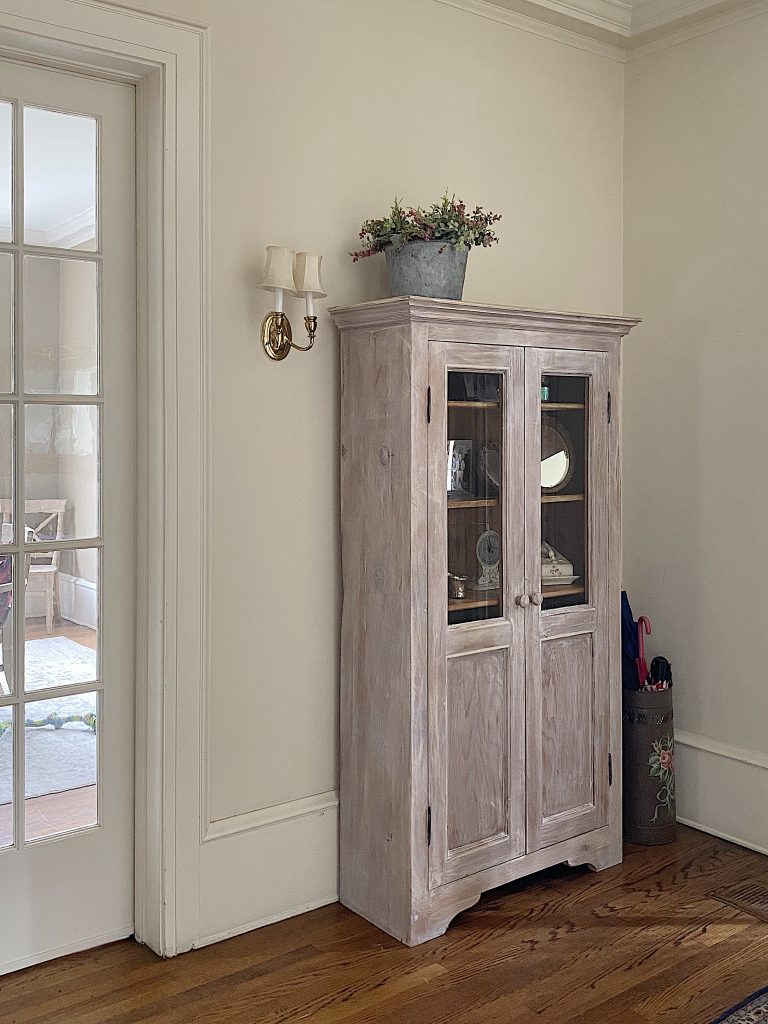
I added a few accessories and the cabinet looks like it was always this color!
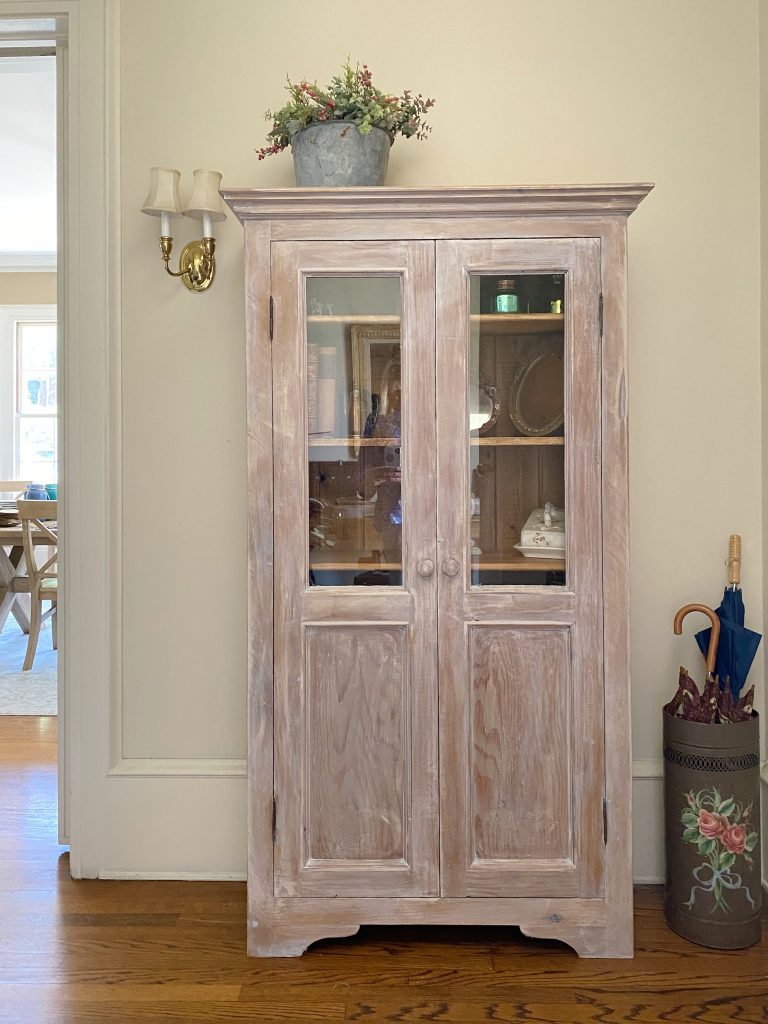
I will paint the inside of the cabinet this weekend. I ran out of time but that will be a very simple project.
Here is a video showing all of the details.
Pin the image below to your DIY or Project boards on Pinterest (just click the Pin button in the top left corner). You can also follow along with me on Pinterest!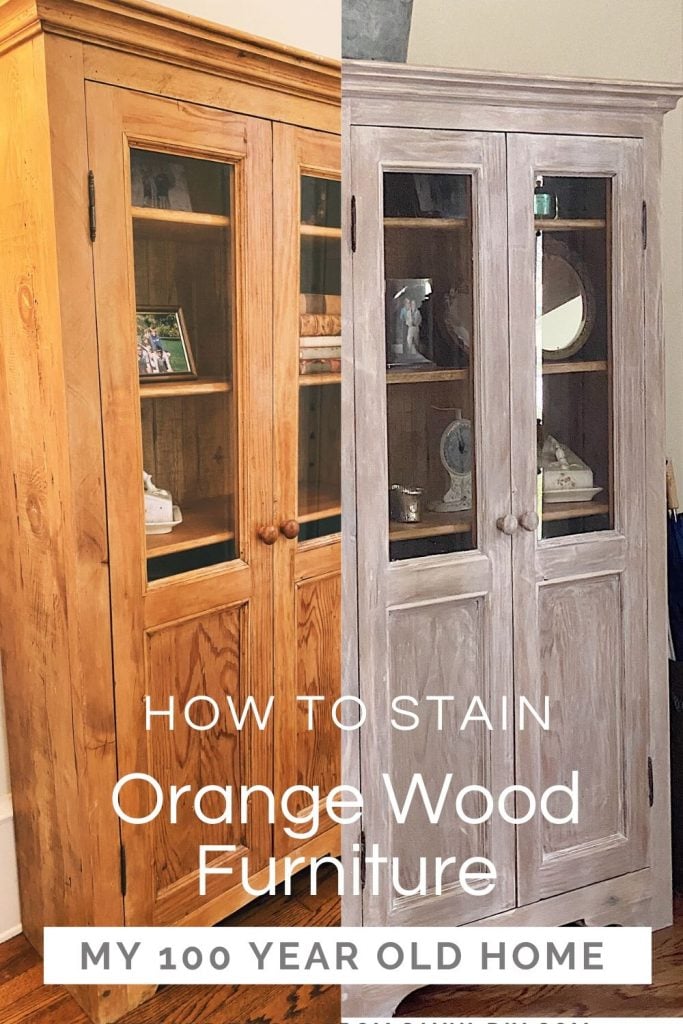
For more real-time updates, follow me on Instagram @My100YearOldHome



Wow, what a difference that made. Thanks so much for sharing. I have some very dark brown, stained, beams in my home and I wonder if I could use the Varathane stain to get them lighter. Might be worth a try!
Totally worth a shot, Sandy! Good luck!
Nice change for the hutch and really nice it was relatively inexpensive! Good catch!
Did you ever make the table tops??? Your post for building were the tomato cages (I bought my supplies today) and you said you were going to make table tops. Would be nice to see those! Thanks
I have horrible red oak original floors. Do you think this would work for lightening them up and kill some of that yellow/red undertone?
It is definitely possible!
I’m wondering if this would work onvv NBC a piece that has been French polished?
I’m in Australia and not sure whether I can purchase the product here – I’ll have to investigate 😊
Beautiful! Your picture shows a can of weathered wood accelerator but I don’t see in the instructions how you incorporated it. Can you elaborate?
Thank you.
Robyn
WOW! What a transformation that sounds so easy! I think I need to get this Varathane stain…I can’t believe the difference. I like that the wood grain shows through. I have used chalk paint a lot and I love the ease of it but I would have liked the wood grain to show through on a few pieces…so this sounds great! I would love to have you come and link up to my Centerpiece Wednesday Linky party and share this or any other posts that you would like https://karinskottage.com/2020/06/linky-party-happy-4th-of-july.html Hope to see you there!
Karin
I would love to hear from you as to how you managed to feather in areas on the cabinet. We’re looking to do a similar cabinet, but its has a smoother, finer finish, in pine. Just wonder if we can achieve the same effect.
This is amazing! I’m so glad I found you through Pinterest! This is EXACTLY What I was looking for in order to change my 80s orange built ins 👏🏼👏🏼👏🏼
I am so glad you found yourself here as well! Thank you!
This is beautiful. I am working on a bedroom suite now and I’m ordering this stain and poly from Home Depot. Since these products are water based, do I need to use a natural bristle brush? Also, in hard to reach areas would you recommend using a cloth to apply the poly? I’m new to this and I don’t want to use the wrong brush or a cloth if that will not work well. Thanks for your advice.
What is the weathered look accelerator for and how did you use it?
In her video she said she did not use the accelerator.
Beautiful! Your picture shows a can of weathered wood accelerator but I don’t see in the instructions how you incorporated it. Can you elaborate?
Thank you.
Robyn says:
June 30, 2020 at 7:43 AM
Beautiful! Your picture shows a can of weathered wood accelerator but I don’t see in the instructions how you incorporated it. Can you elaborate?
Thank you.
Robyn.
Others have asked about the weathered wood accelerator. Did you use it? If so, before or after the white wash? Thank you. Judy
I cannot wait to try this! I have number of pieces I need to do and the thought of not sanding makes me happy. Also so much cheaper than milk or chalk paint and the grain showing through. You are brilliant!
One question, do you think it’s Ok to use a poly from another company. I happen got have General Finish Flat. Would love to use it if you think it’s ok?
Thank you Nicole for reaching out. To be honest, I have only tried this project with the Varathane product line, and the result was amazing. I am unfamiliar with the product that you mentioned, so I don’t know how that would work.
I’m glad you liked this transformation and that it worked well for you. From my perspective, I like the “before” equally well to the “after.” The after, in a few years, will look dated to the early 2020s. Buy well-made furniture and then keep it as close to its natural form as possible. Maybe the best is no stain at all — just bare wood with clear finish? Then the wood is what it is.
There was alot of good questions that I wondered too but I didn’t see the replies. I have wainscotting that is a honey oak color. I doubt it is oak would it work for that.
I’m not sure Darla, but it seems like it could work! Maybe try a test patch to make sure that it works to the desired effect that you are looking for before trying it in a visible spot. Let me know how it goes!
I have the 80’s style banisters which are stained in this dated orange tone. Do you think your technique would work on this?
This “dated orange color” is not a stain at all. It is the result of sealing raw wood with polyurethane. I happened to my dining room set when I sent it out to get stripped and urethane only, no stain. I was very disappointed. Bright orange! Now I am going to tackle it myself. I will practice on the table leaf first for technique.
In the instruction description you stated that the Varathane whitewash stain is water-based, but when I looked the product up online it is stated as oil-based. I would think that you could work with an oil-based stain product in the house. Does the product come in both water and oil-based?
In the pictureof the Varathayne products, it shows the white wash on left and right and in the middle a weathered look accelerator. Did you mix those two together? The list of products did not mention the accelerator, just the polyurathane top coat. Can you tell me where you used that or did you use that instead of white wash or vice versa? You mentioned a top coat of poly but I did not see that product pictured. Can you clarify? I have 5 pieces of picked oak that has turned very yellow and orange over the years.
How is this different than just white washing with flat white paint?
Great post! Is the end-result tone a weathered brown or a weathered grey? Computer monitors can distort color. Thanks so much.
Hello! What you did to this piece is lovely!
It is exactly what I am looking for for my kitchen table. However, I have spent the last year off and on working on sanding down all my kitchen and bathroom cabinets and a few pieces of furniture to restain. I am so over sanding and would like to try something like this. I did notice that it appears you used weathered wood accelerator first. Is that right? I noticed that the product description on their website says to use on bare wood, so I just wanted to confirm that you used it and it worked well. Thanks!!