Five Easy Steps to Edit Your Instagram Photos
If you’re like me, you take a lot of pictures with your phone. Today, I am sharing five easy steps to improve your Instagram photos.
Most of us take photos with our phones and post them on Instagram without editing them first. While this sometimes works, other times the photo could be improved with a quick edit. So next time you snap a photo, follow these simple tips and make it look great!
 We all know that having good photos on Instagram is important. What many of you might not know, is that the photos you see on my Instagram feed don’t look like that when they are taken on my camera. The truth is that I edit every single photo before I post it on my Instagram. Fortunately, the editing is easy as it happens in five easy steps
I first need to explain why I edit my photos. I edit photos because often they don’t look like the room I am photographing. They come out darker and more yellow than the room actually is. When I edit my photos, I lighten, sharpen and desaturate the color in them. Occasionally, I straighten the photos too. My biggest reason for editing is to make them look more like the actual room and make them easier to see. I lighten them so you can see more details in my photos. I sharpen them so they are clearer. The camera also often yellows my photos so I desaturate the color in all of my photos to achieve a cooler value. That is why when you look at my Instragram feed, the photos look similar as they have the same amount of lightness and color in each one.
Editing my photos is a very simple process. I use a free app on my phone and it’s called VSCO. You can download it from the app store.
This is a photo I took on my iphoneX of my living room yesterday afternoon. Obviously the room isn’t actually this dark in the middle of the day. So it needs to be edited. I am going to show you how I edit it before I post it on Instagram.
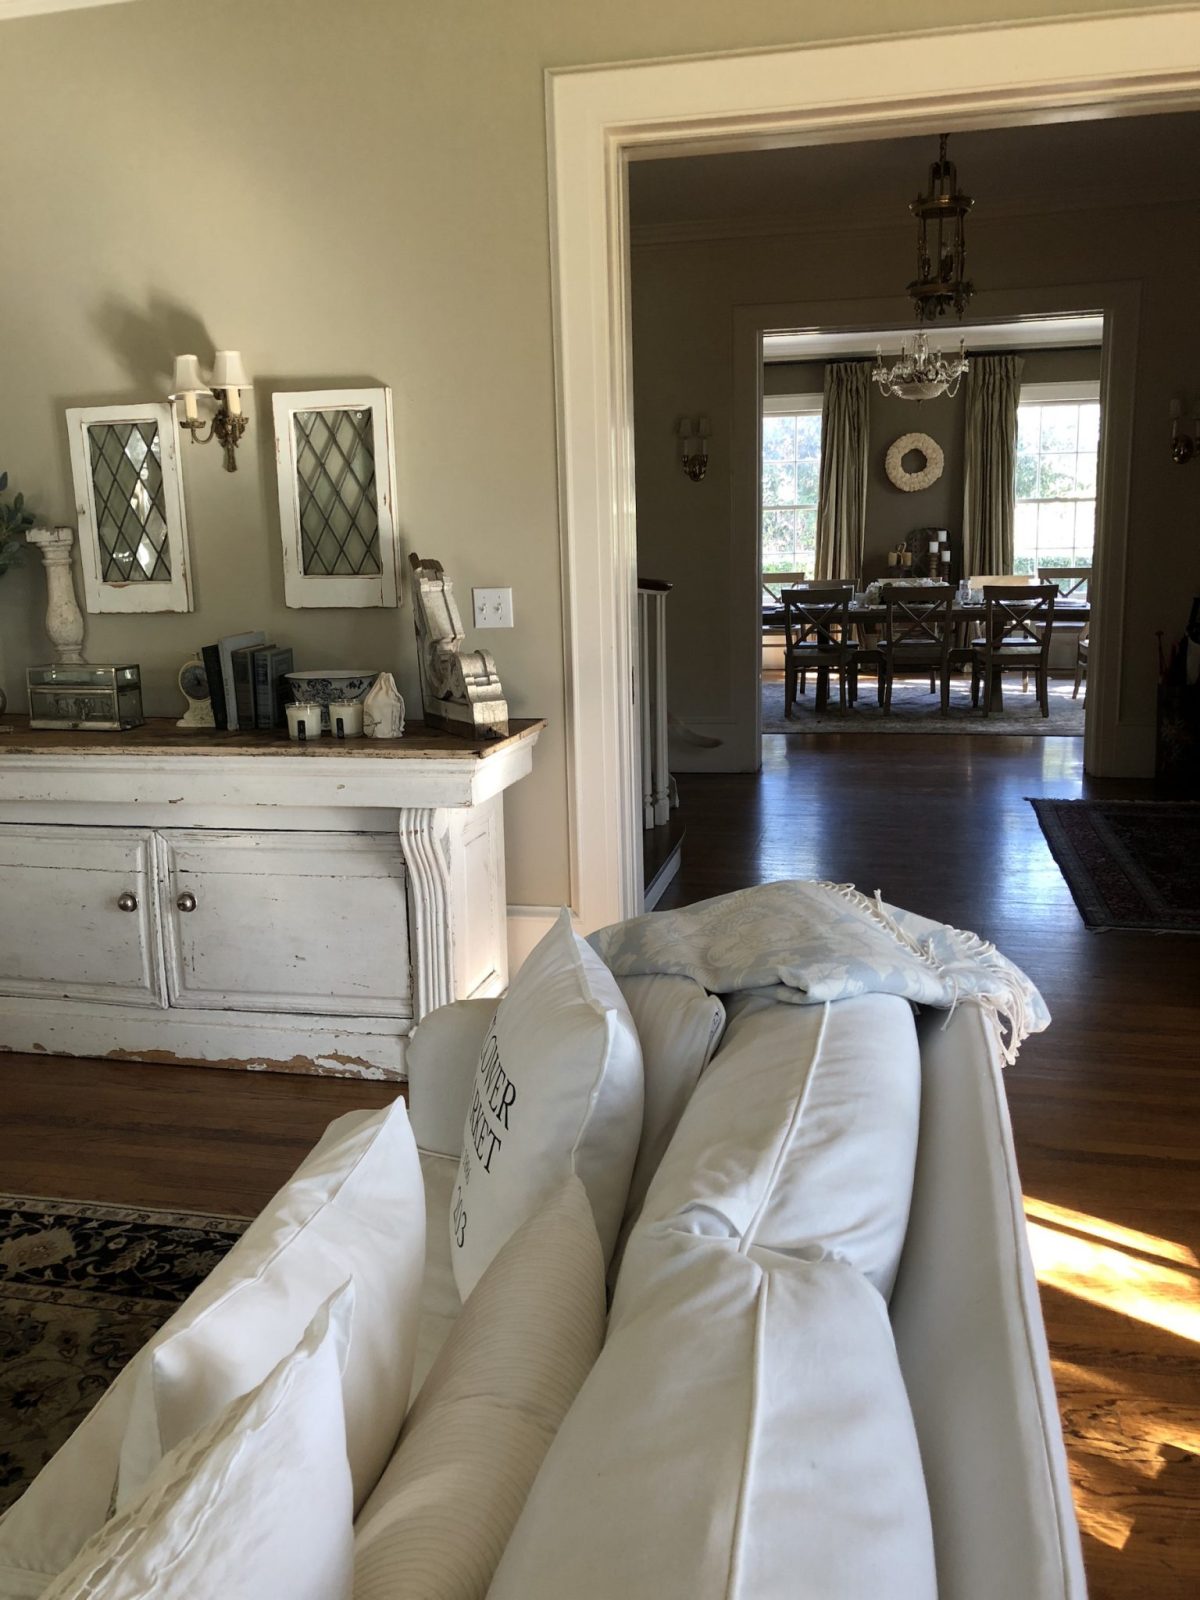
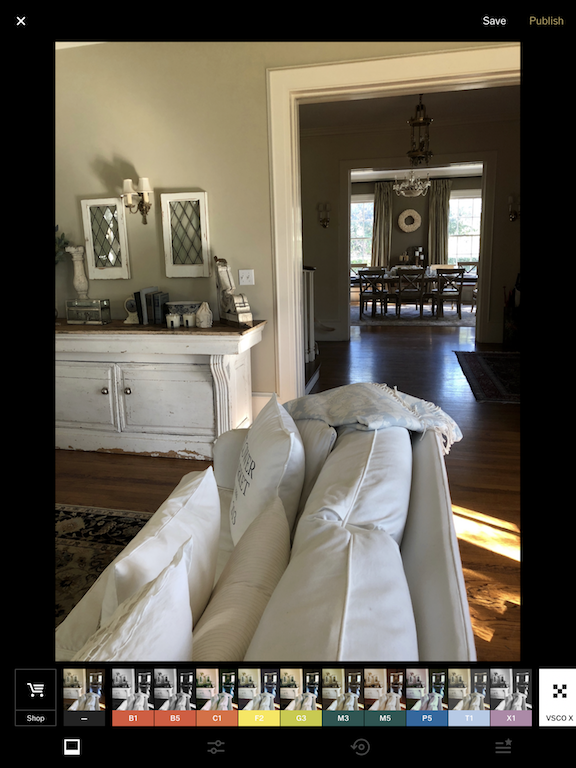
I uploaded it to the app VSCO and selected the editing option.
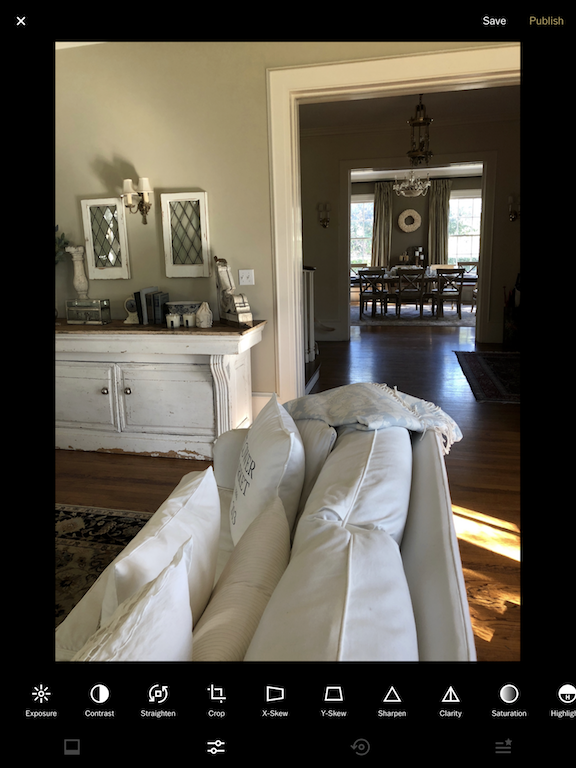
These are some of the editing tools you can use with your photo. I only use three: Exposure, Sharpen and Saturation.
Step #1
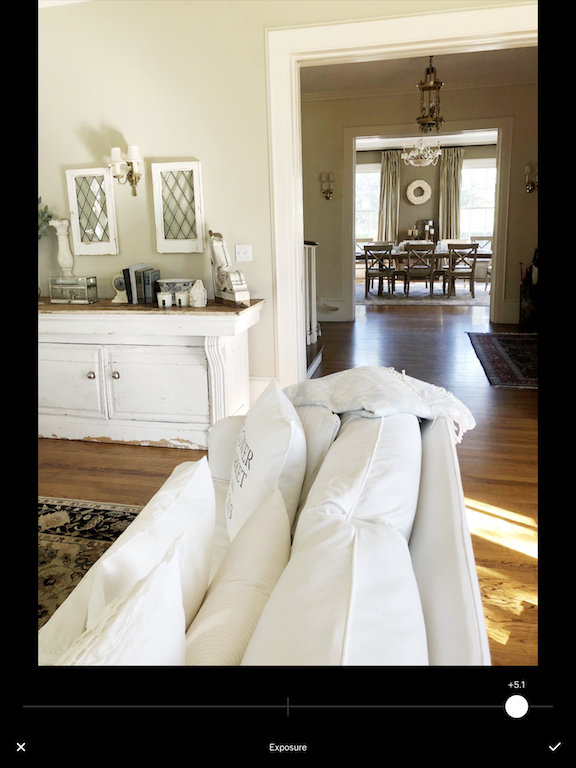
The first thing I adjust is the Exposure. I move the lever to the right until the photo is bright enough. Be careful not to move it too far. And note that every photo is different so you will have to determine how much light to add to each photo.
Step #2
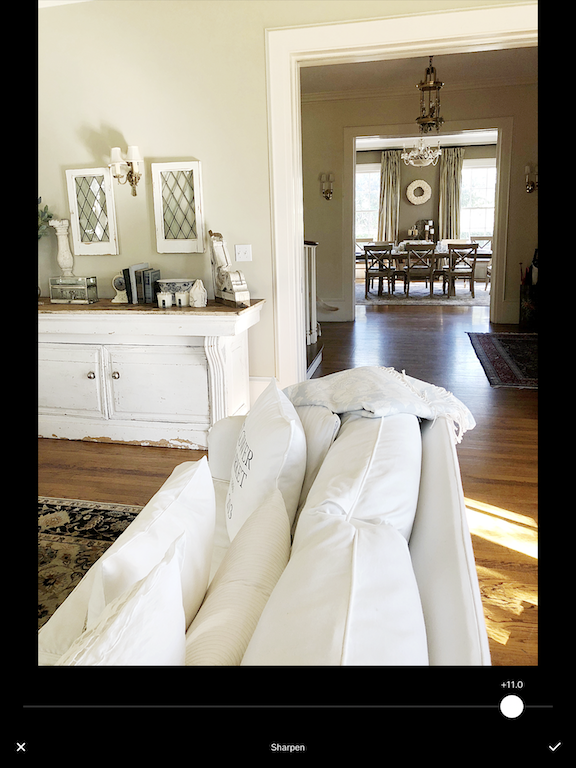
Next, I sharpen the photo. I move the lever to the far right as it gets clearer. Most photos are at about the same level of sharpness.
Step #3
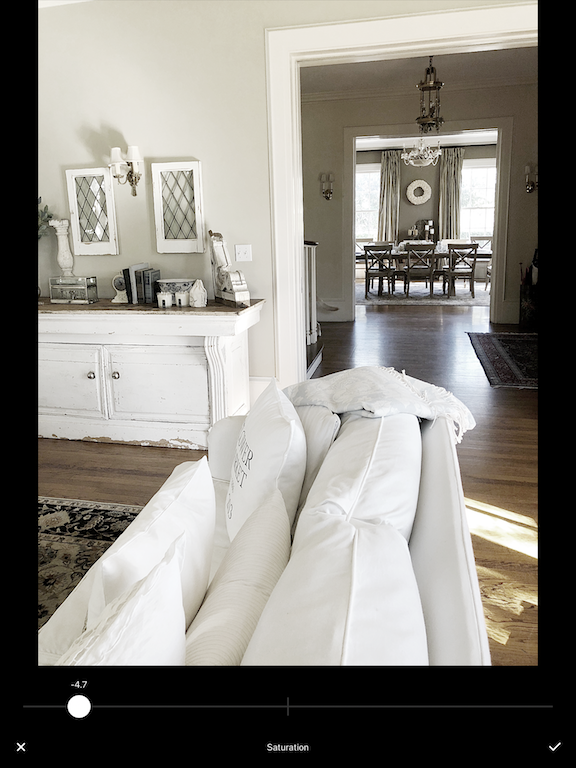
The next thing I do is decrease the color Saturation. This cools the photo and takes out the yellows and warmth.
Step #4
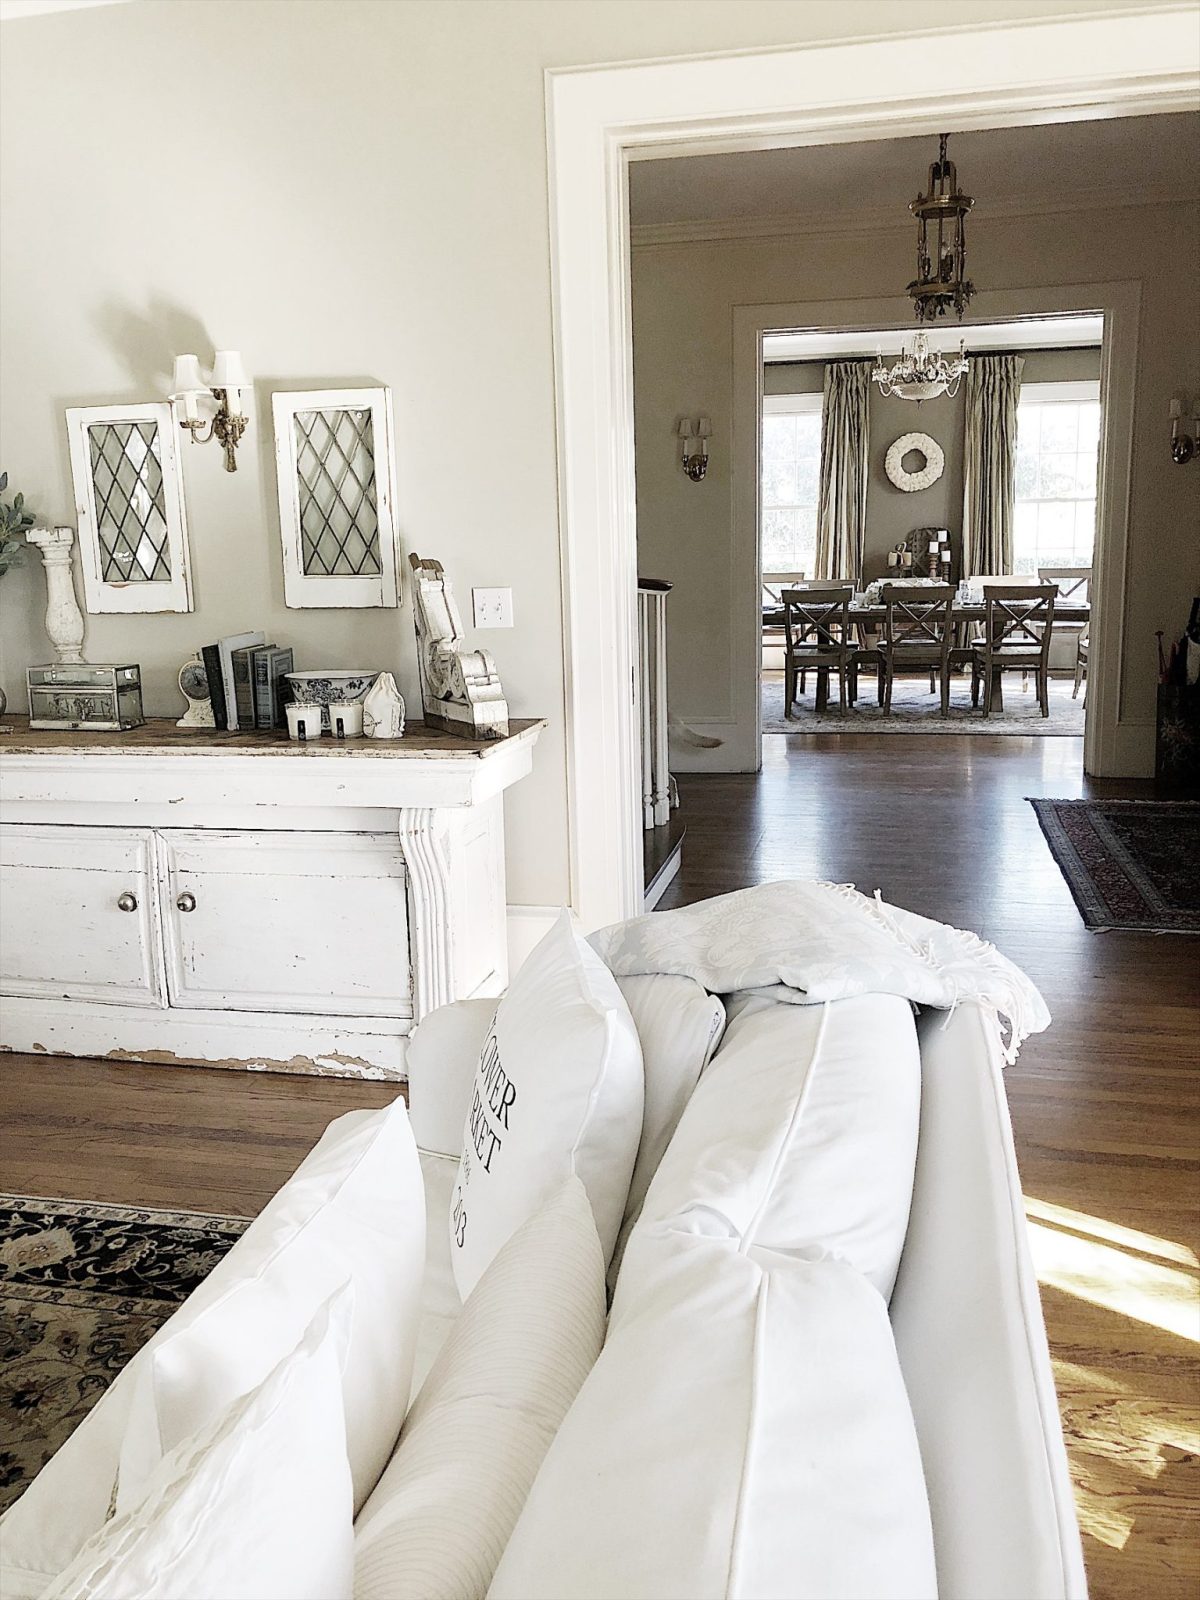
Here is the final photo. Notice how much easier it is to see the details in the photo, especially in the dining room. I probably could have straightened the photo but there are a lot of conflicting lines and it gets tricky. Quite often I use the straighten tool on my photos when needed.
Step #5
At this point, I save the photo and save it to my Camera Roll on my phone. It usually takes me about one minute to edit the photo with VSCO.
There are lots of other apps you can use to edit your photos. I use VSCO because I like how the photos look and it is easy to use. I know Adobe photoshop can edit your photos in batches so I will likely look into that someday. It just might save me some time. But for now, VSCO it is.
For more real-time updates, follow me on Instagram @My100YearOldHome



Great tips on editing Instagram photos! I especially love the suggestion to use natural lighting for better results. I can’t wait to try out the editing apps you recommended. Thank you for sharing!
Great tips on editing Instagram photos! I never realized how much a simple adjustment in brightness could enhance the overall vibe. Can’t wait to try out the filters you recommended!
Great tips on editing Instagram photos! I especially loved the section about using filters strategically. Can’t wait to try out some of these techniques to enhance my feed!
Great tips! I never knew about those hidden features in the Instagram editing tools. Can’t wait to try them out on my next post!
Great tips on editing Instagram photos! I particularly loved the section about using filters creatively. Can’t wait to try out some of these techniques on my next post!
Great tips! I never knew about the importance of lighting and how it can completely change the mood of a photo. Can’t wait to try out some of these editing techniques on my own pictures!
Great tips on editing Instagram photos! I loved the part about using filters to enhance colors without overdoing it. I can’t wait to try out some of these editing techniques on my next post!
Great tips on editing Instagram photos! I never thought about using different filters to achieve the mood I want. I can’t wait to try out the techniques you mentioned. Thanks for the inspiration!
thanks for sharing this such an amazing article with us love it really
Great tips on editing Instagram photos! I especially loved the suggestions for using filters creatively. Can’t wait to try out the techniques you shared!
Great tips on editing Instagram photos! I especially loved the recommendations for apps and presets. Can’t wait to try them out on my feed!
Great tips on editing Instagram photos! I love how you broke down the steps for each app. Can’t wait to try out some of these techniques for my next post!
Sa pamamagitan ng 10.0 0.1, madaling ma-access ang router admin panel at ma-configure ang internet settings para sa mas mabilis at secure na browsing experience.