Stikwood Reclaimed Wood Planks
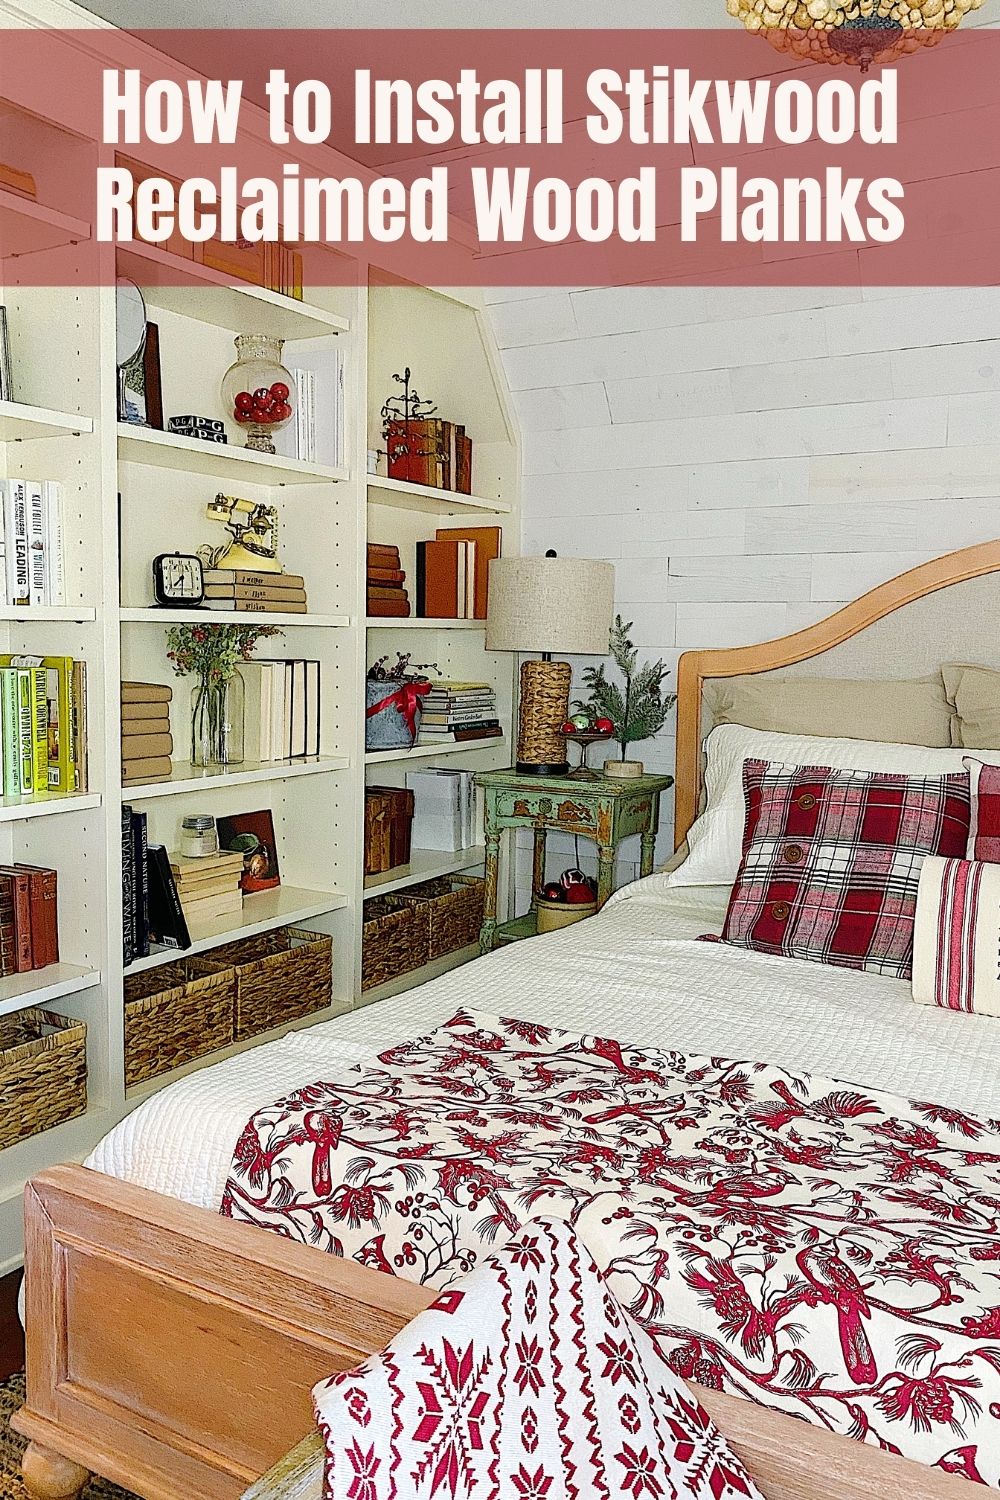
We recently added these Stikwood reclaimed wood planks to our third-floor bedroom and the wall looks amazing!
This post is sponsored by Stikwood. It may contain affiliate links but all words, reviews, and opinions are mine.
Have you ever looked at a room and thought that it needed something to stand out? I recently partnered with Stikwood and installed these Reclaimed Wood Planks and I couldn’t be happier.
Do you want to know the best news? I shared this room with my son yesterday when he and his wife arrived home for Christmas. He walked into the room and said, “Mom, it is amazing. I love that!”.
Guess what he was talking about?

My new Stikwood Reclaimed Wood Plank wall!
I smiled because I installed this wall myself and I love that it was the first thing he noticed.
I also added some holiday decor to welcome him and his wife home for the holidays. But the wall completely had his attention.

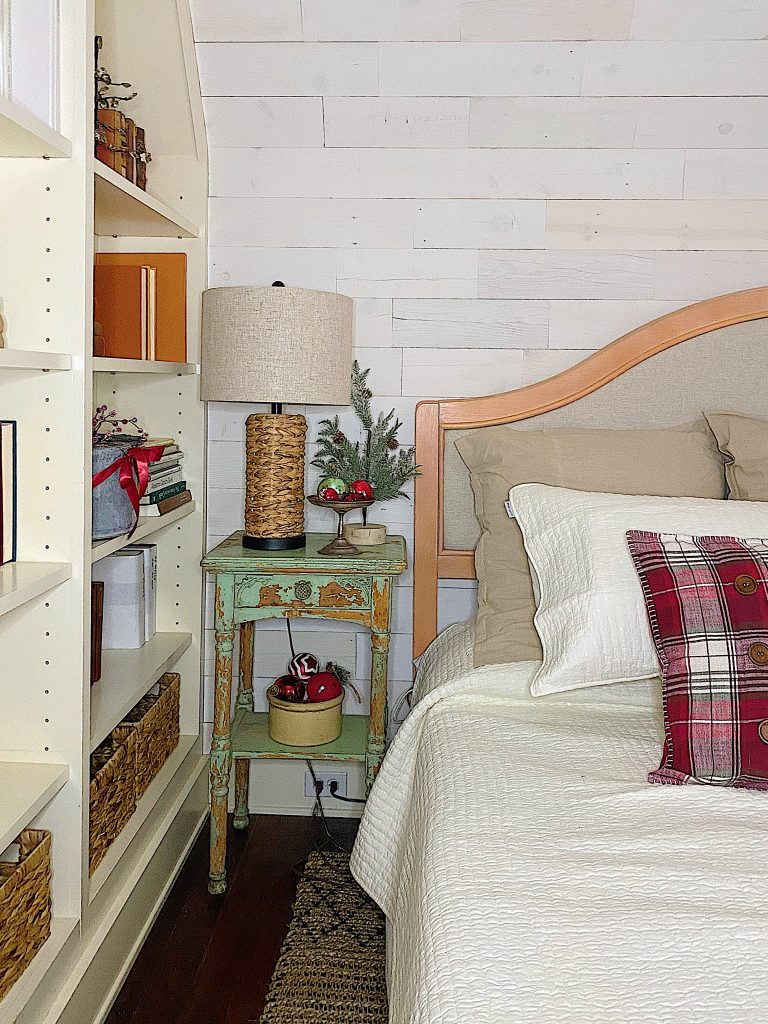
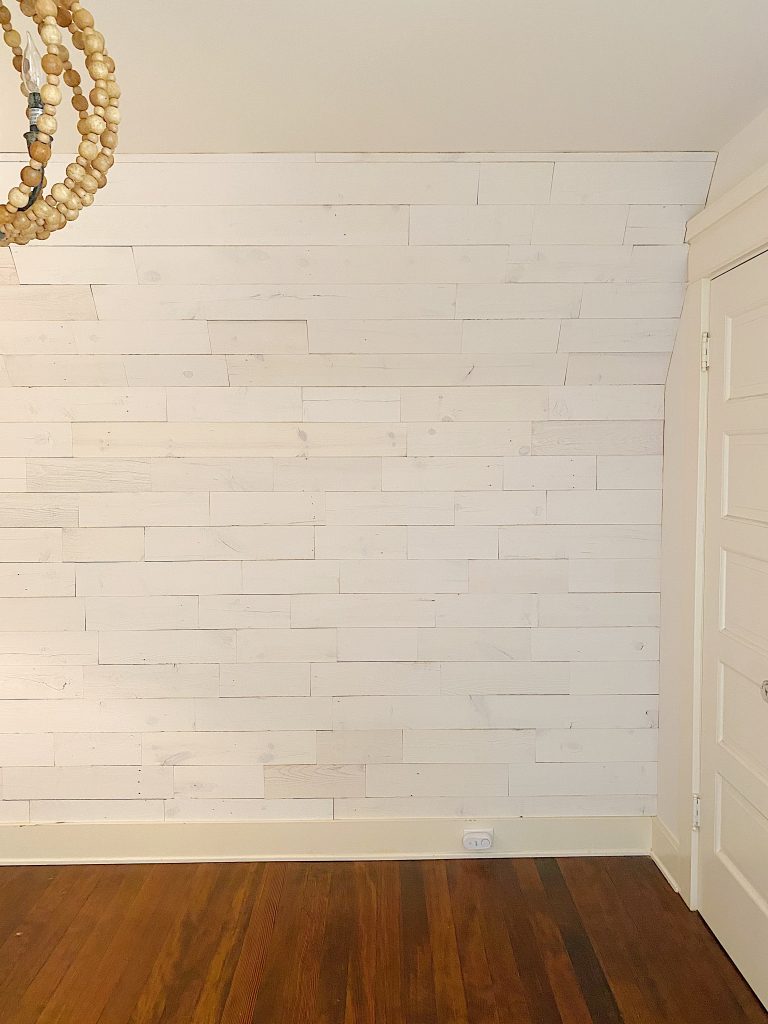
This bedroom is on our third floor which we remodeled a few years ago. It’s part of our “third-floor apartment” upstairs. It has a bedroom, a bathroom, and a very large bonus room. And … my third-floor craft storage room is also located on the third floor

Stikwood has a lot of different products you can use. I used 100 square feet of Hamptons Stikwood Peel and Stick Wall Planks. I love the fact that these are sustainable wood and look like a solid wood wall.
Easy Installation of the Stikwood Reclaimed Wood Planks
It is so easy to measure how many wood planks you will need for your room. It’s also easy to install the planks once you receive them.
Why is it so easy?
Because the Stikwood website is amazing. They have excellent tutorials and everything is so easy to understand. Just go to the Stikwood site and select Work Bench for all of the tutorials.
All of the panels have peel and stick backings. Each board has three peel and stick tapes on the back.
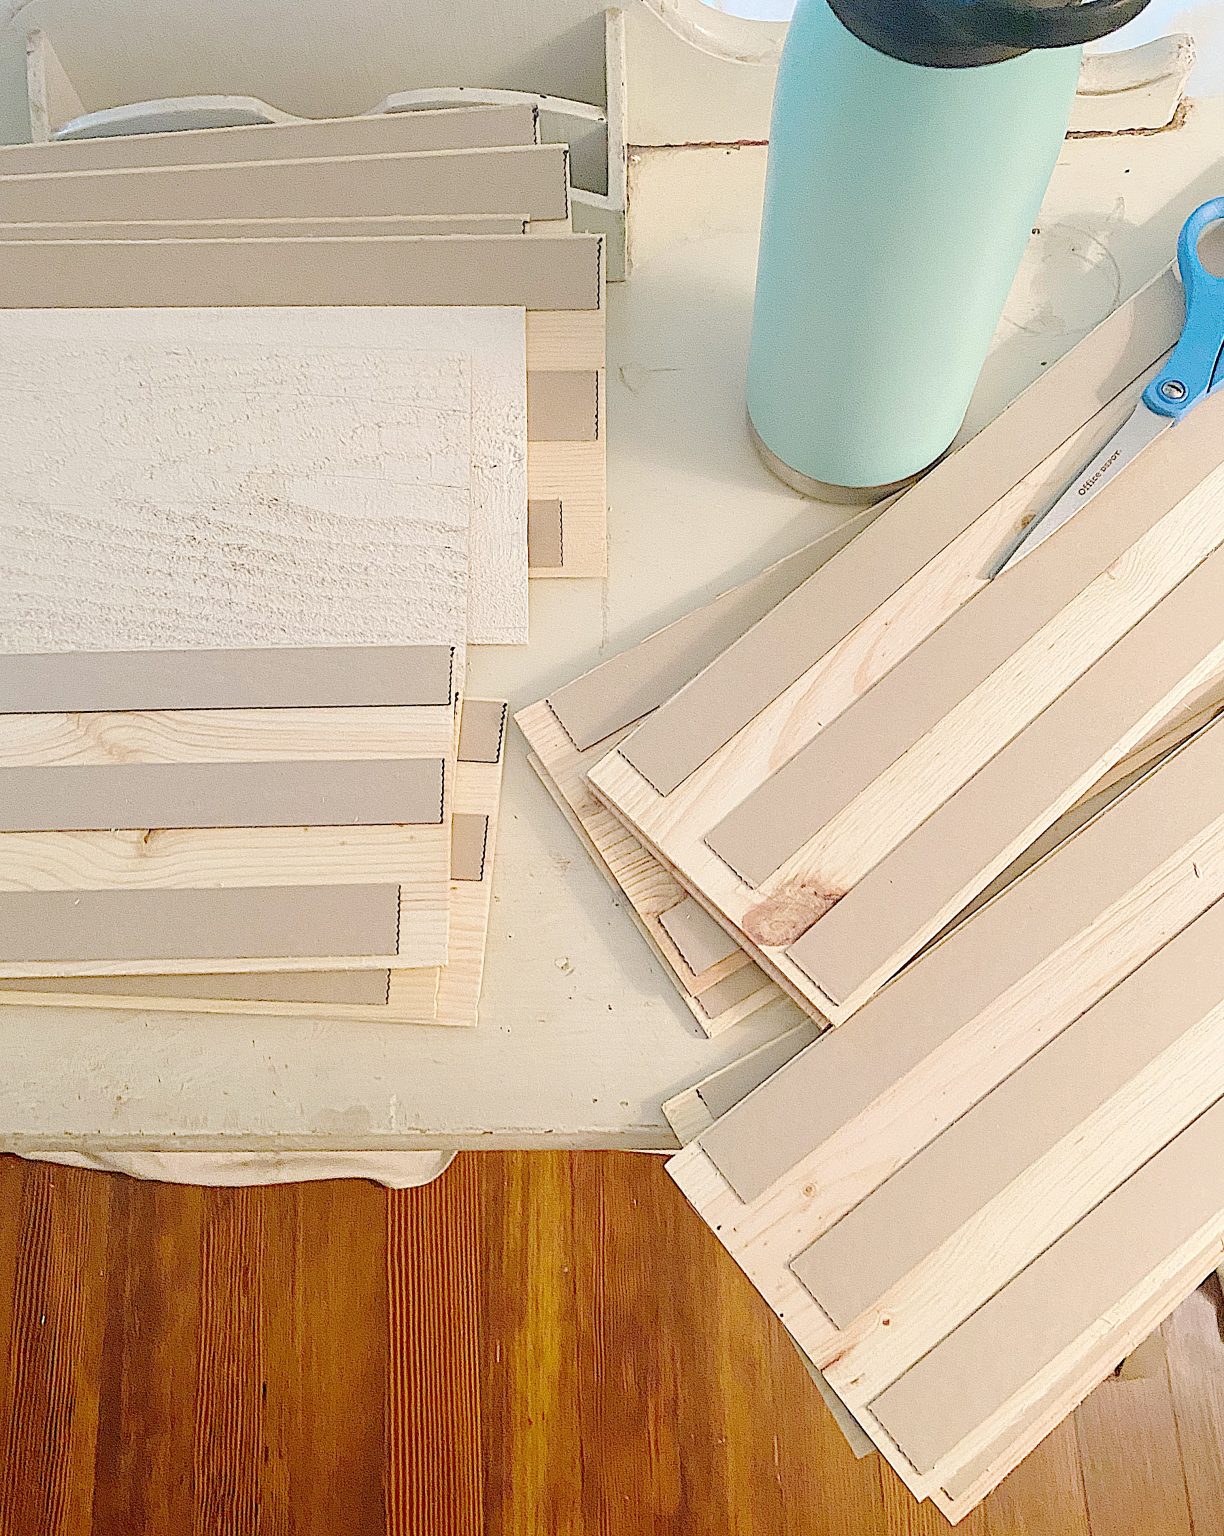
The first thing you want to do is “acclimate” the panels to the room they will be installed. Why is this? Because humidity can affect wood and if you let it sit for 72 hours in the room where it will be installed, it can acclimate to the conditions. It won’t change (i.e. expand or shrink) after you install the planks.
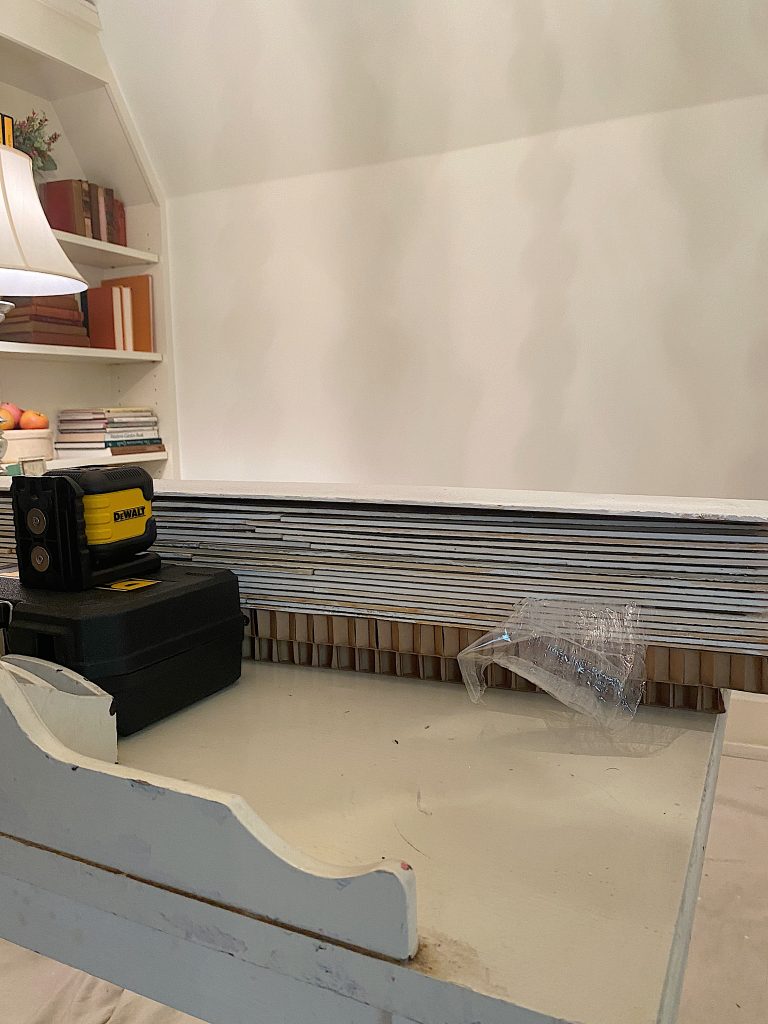
It is very important to install the Stikwood Reclaimed Wood Planks straight and use a level. I used a Red Cross Line Laser Level which made the installation so much easier.
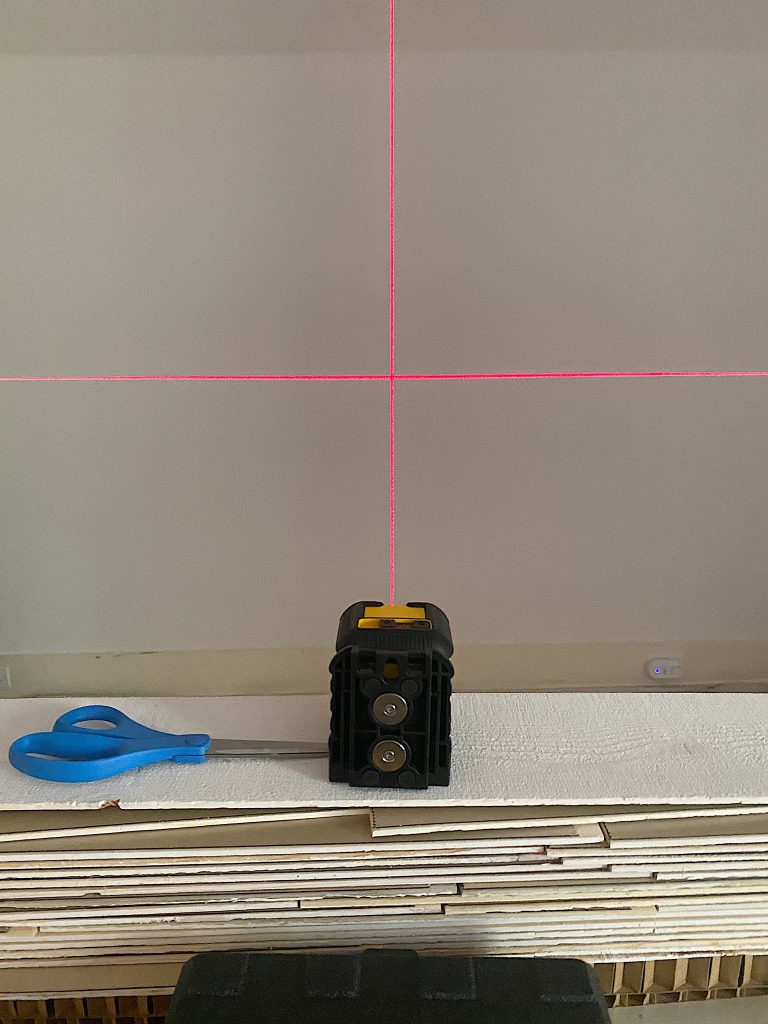
I also used my Circular Saw to cut the planks so they would fit each wall.
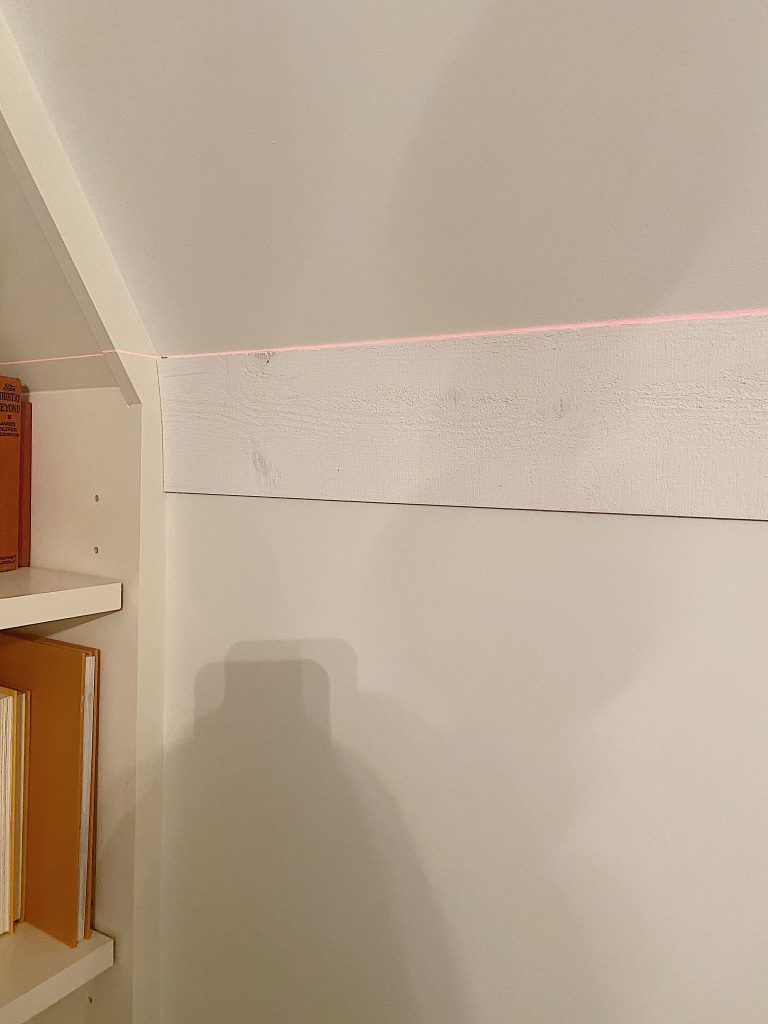
Since I had a slanted ceiling line, I realized there was no margin for error.

I realized I had to start at the slanted ceiling line because it had to be straight! Here is the first plank I installed.
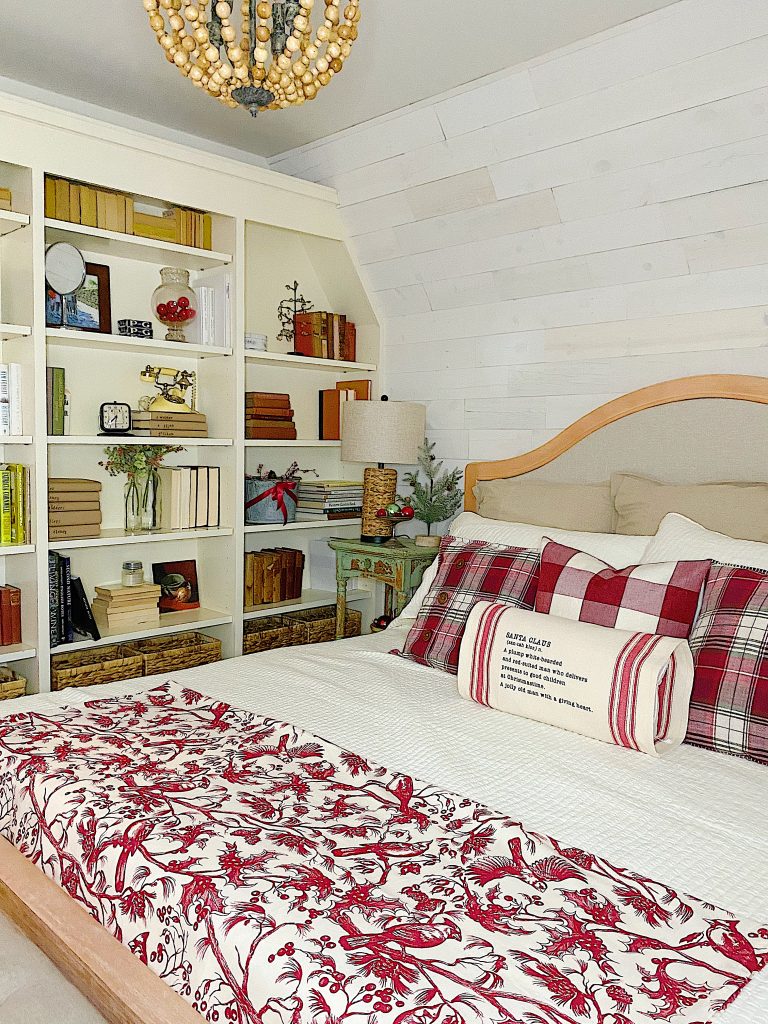
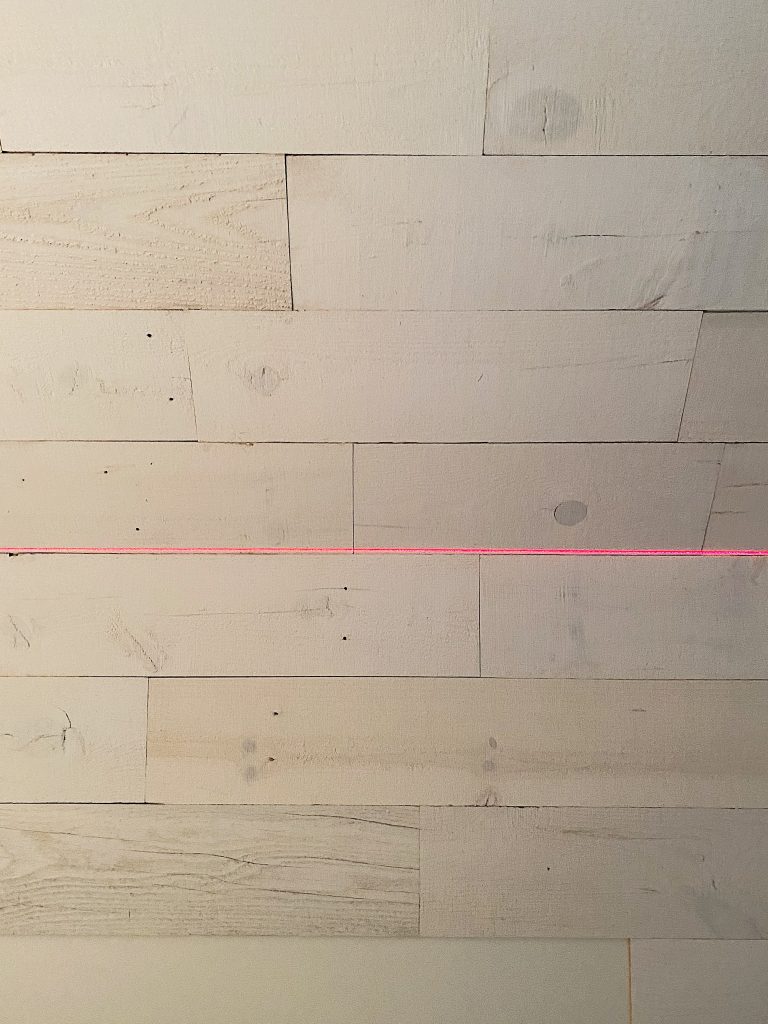
After about an hour, look how great this area looked.
Here is the finished wall! Doesn’t it look amazing?
I did the entire project in a day and I cannot believe how much different the room feels with the accent wall.
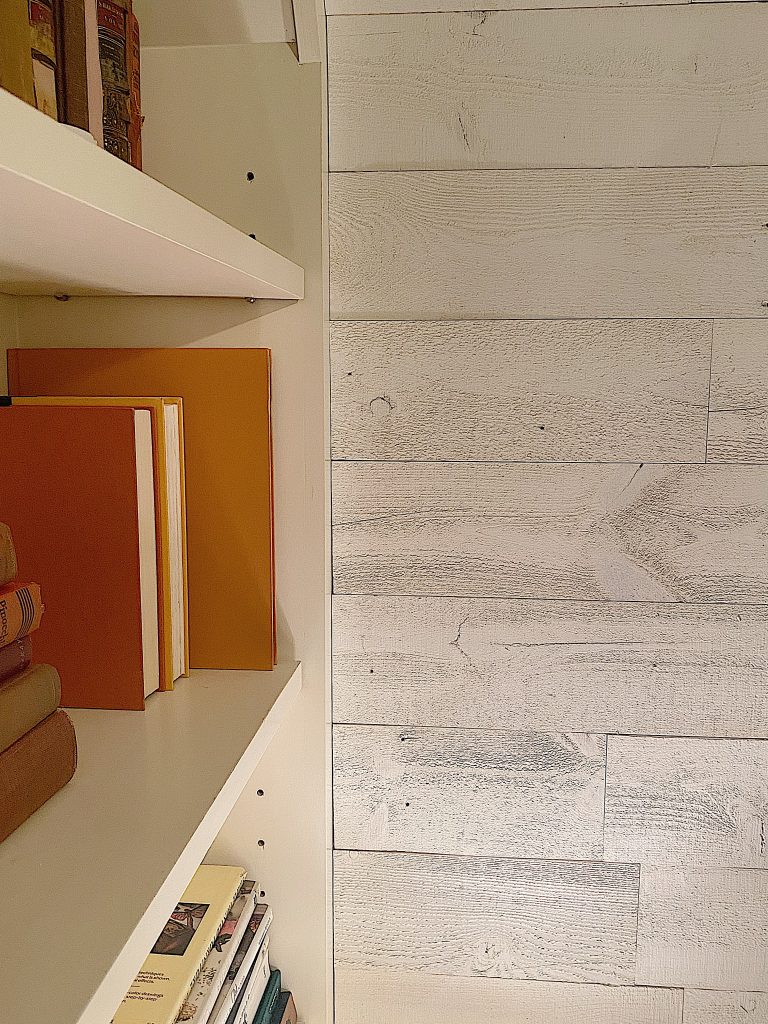
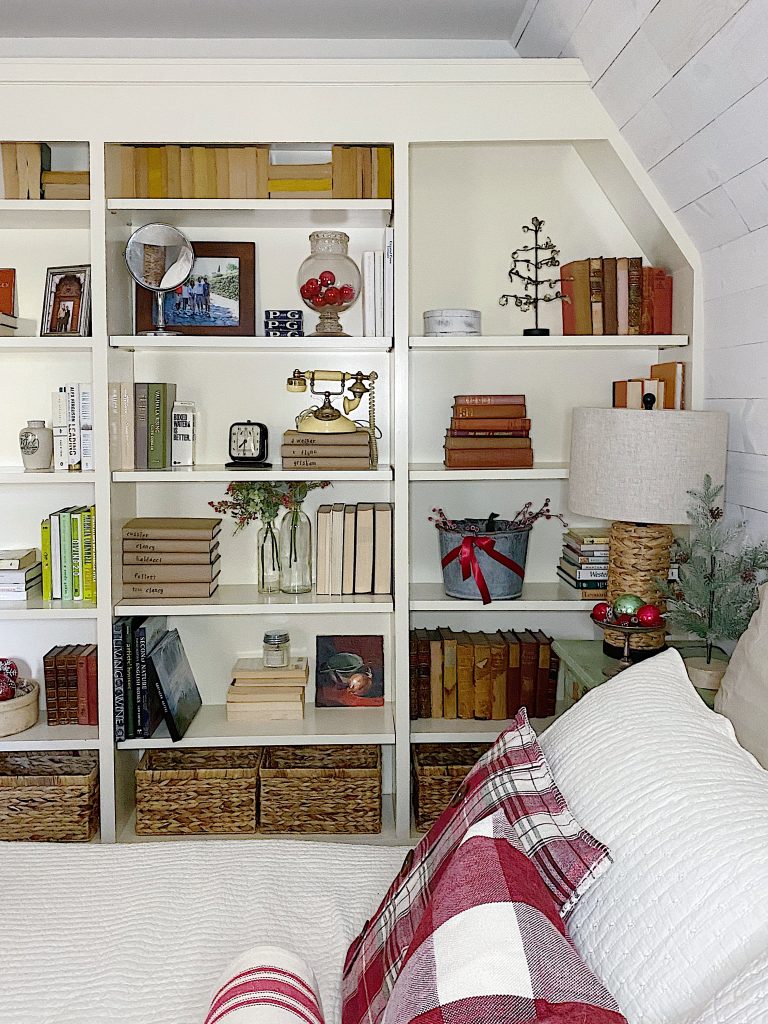
I love this close up photo.
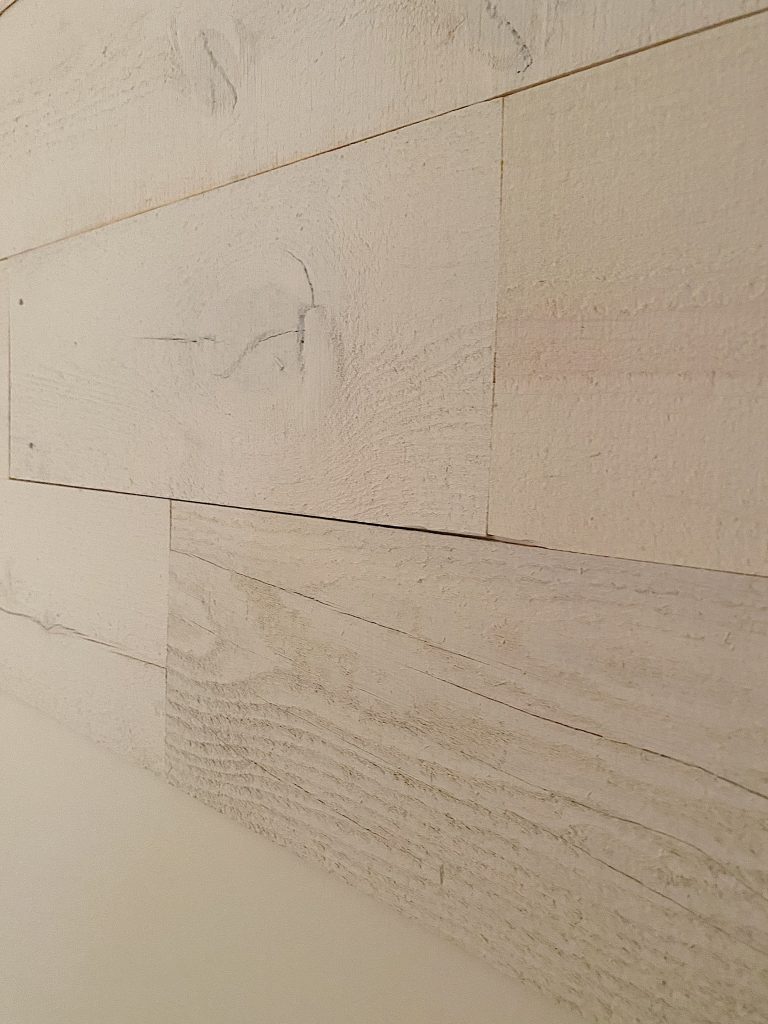
I think this shows how amazing my wall looks in the bedroom.
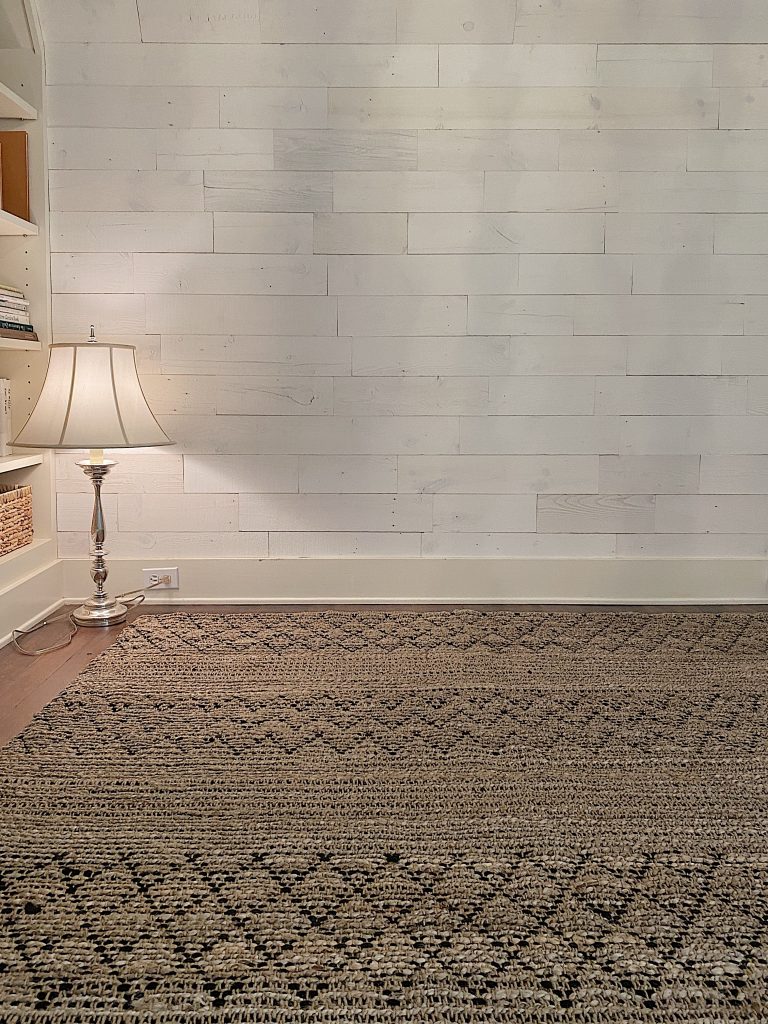
I loved adding all of the decor and essentials to the bedroom once the wall was finished.
If you are looking for a way to create an amazing feature wall, you need to be sure to check out Stikwood.
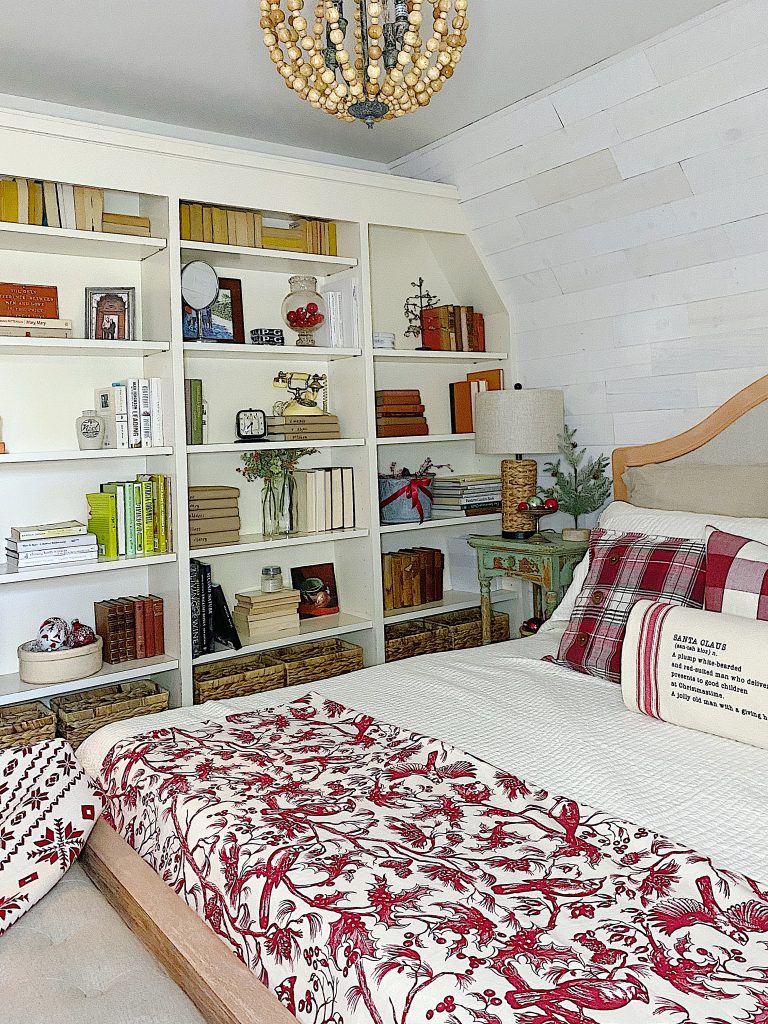
I love this new bedroom so much.
Pin the image below to your Craft or Christmas decor boards on Pinterest (just click the Pin button in the top left corner). You can also follow along with me on Pinterest!

For more real-time updates, follow me on Instagram @My100YearOldHome

Just grand!
Tell us about the bedding.
Than look s!
This looks fantastic! Does the wall of bookshelves also come from Stikwood ? Would love to know about it!
The wall looks incredible and it was just what it needed! Please share where your bedding from! It’s gorgeous also!
I just love how this turned out!! We have a wall that has a dart board on it and the drywall around it is destroyed because of missed shots! Do you think this would be a good place to use this product??
Oh my gosh! I love the wall—and the stick on wood is ingenious. I think *I* could do it! And the bedding and subtle Christmas decor is beautiful!
Love the bedding, pillows. Where did you purchase it?
Love the wall. Amazing!
Wow Leslie! It looks so great. Leaving now to find a wall…..
That looks amazing. I might try it over our mantle. Thanks, Leslie.
Looks fabulous! I too, would love to hear about the bedding. Always a pleasure!!!
I love this idea! Thank you! And I am joining in with all the others in asking you about the red and white bedding at the foot of the bed.
Kathy
Love it! Wondering if these planks can be placed on a wall with an electrical outlet? Seems it would change the thickness of the wall significantly and maybe would not be flush around the outlet plate?
Leslie, what a beautiful room you designed! Always love getting these emails and follow you on IG!
This looks great!!! Did you have to paint/stain the wood that white/cream color, or did it come that way?
Thanks! Happy New Year!!
Hi My 100 Year Old Home,
Quick question for you, totally out of curiosity: What’s the one thing you wish clients would do in those incredible spaces that they almost never do?
Asking because my specialty is helping people move past that intimidation factor, especially with seafood.
I have a simple guide I’ve been working on, titled something like, ‘Beyond Burgers: What to Actually Cook in Your Outdoor Kitchen.’ The goal is to help your clients feel confident enough to use the space the way they imagined when they first hired you.
Open to seeing an outline?
Either way, keep up the incredible work.
Best,
Steven