How to Make a Cardboard Gingerbread House of Your Home – A Handmade Christmas
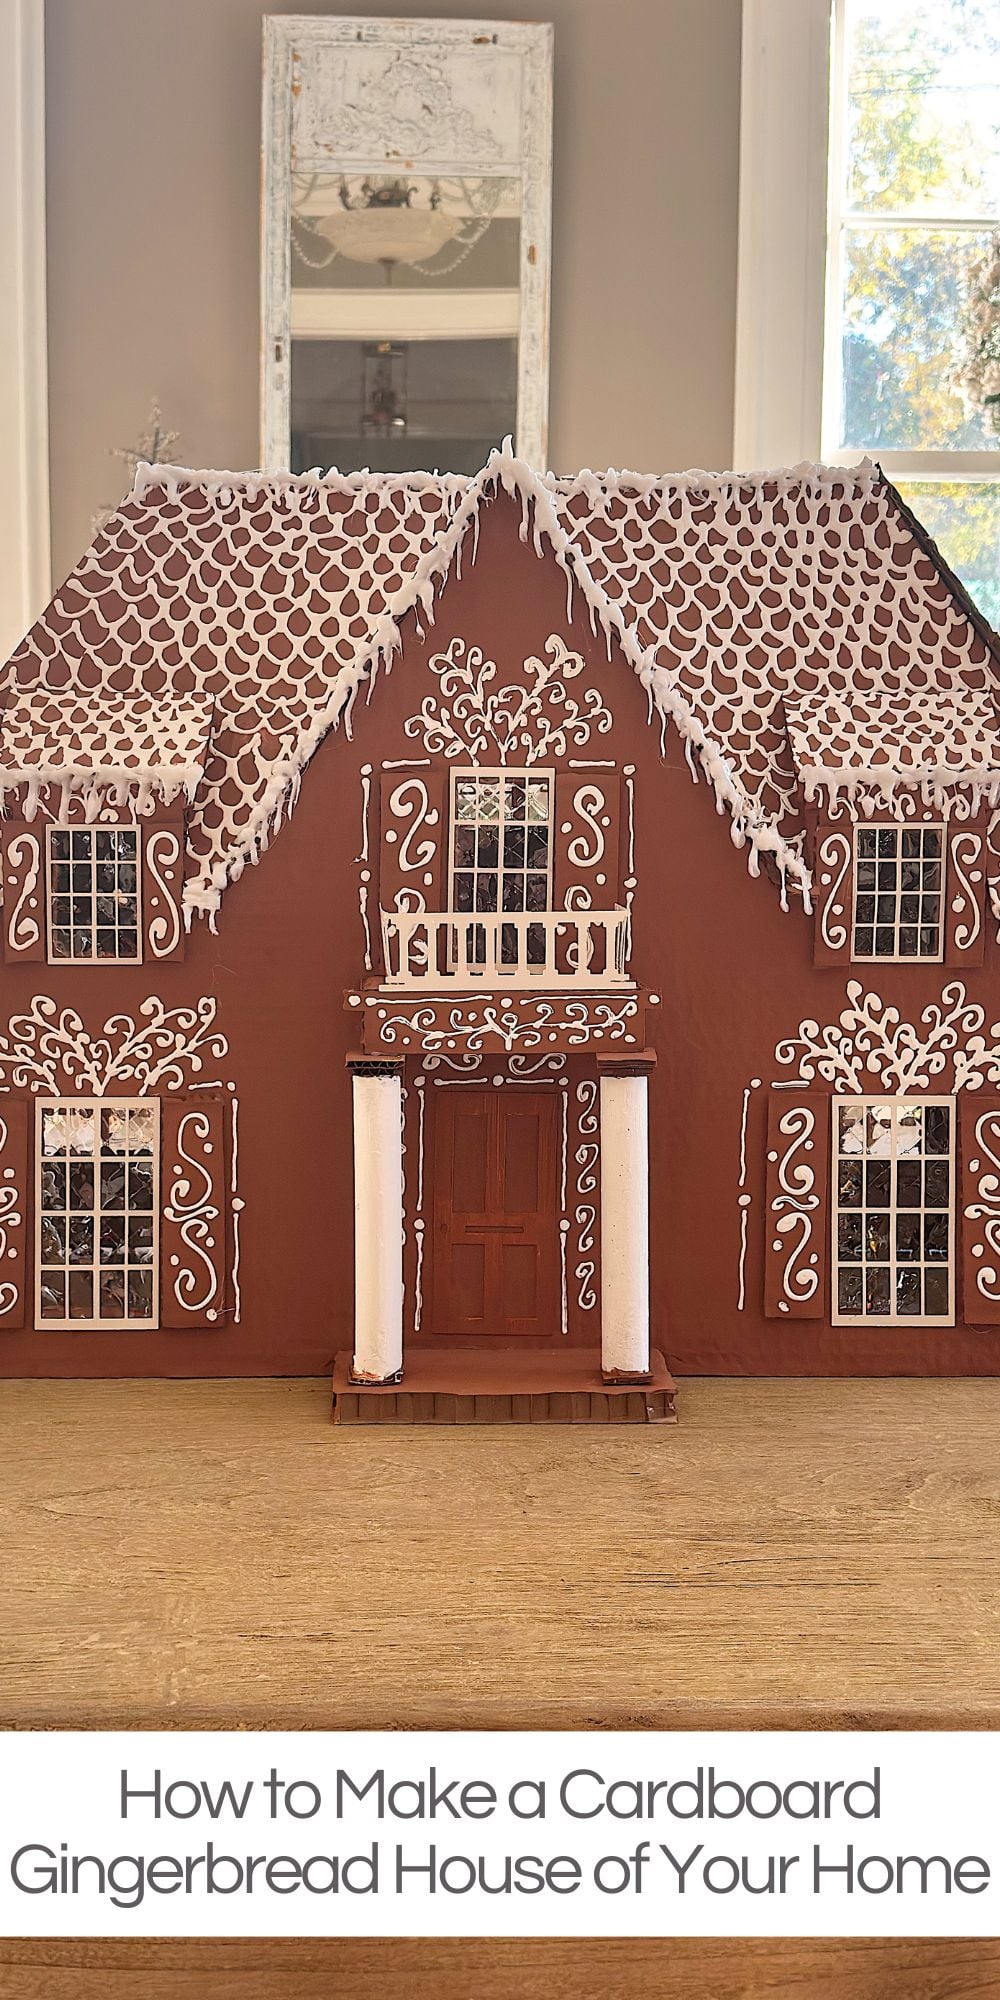
It’s week fifteen of my A Handmade Christmas series, and I decided to take on a project I’ve dreamed about for ages: replicating our actual house in a cardboard gingerbread house.
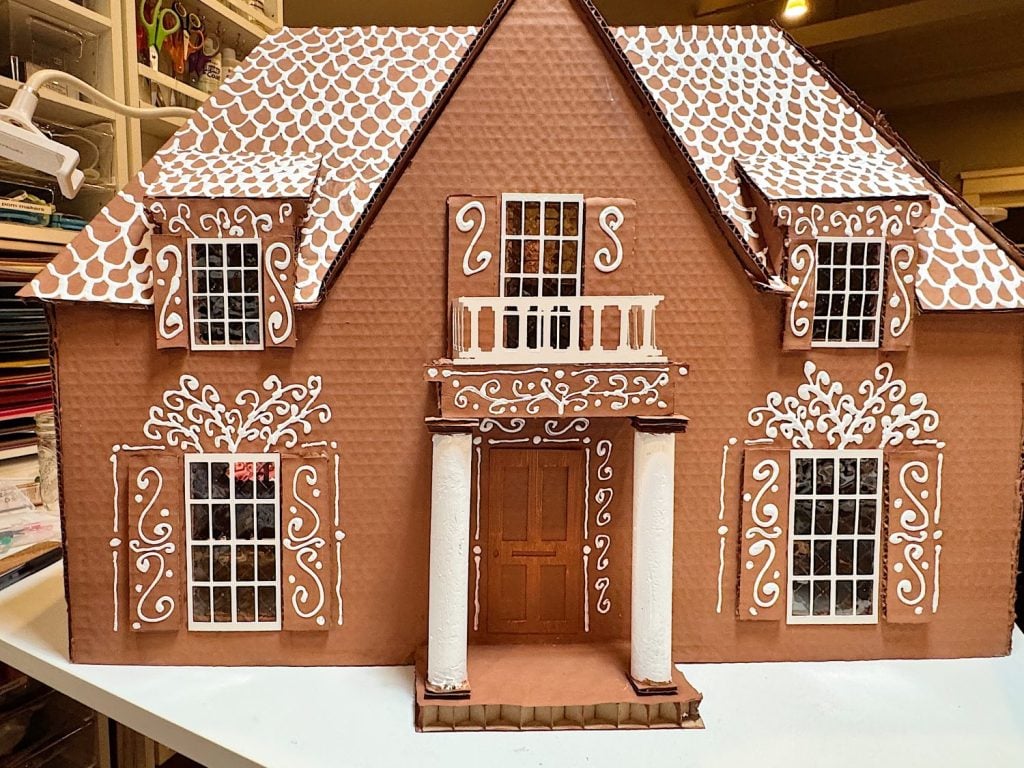
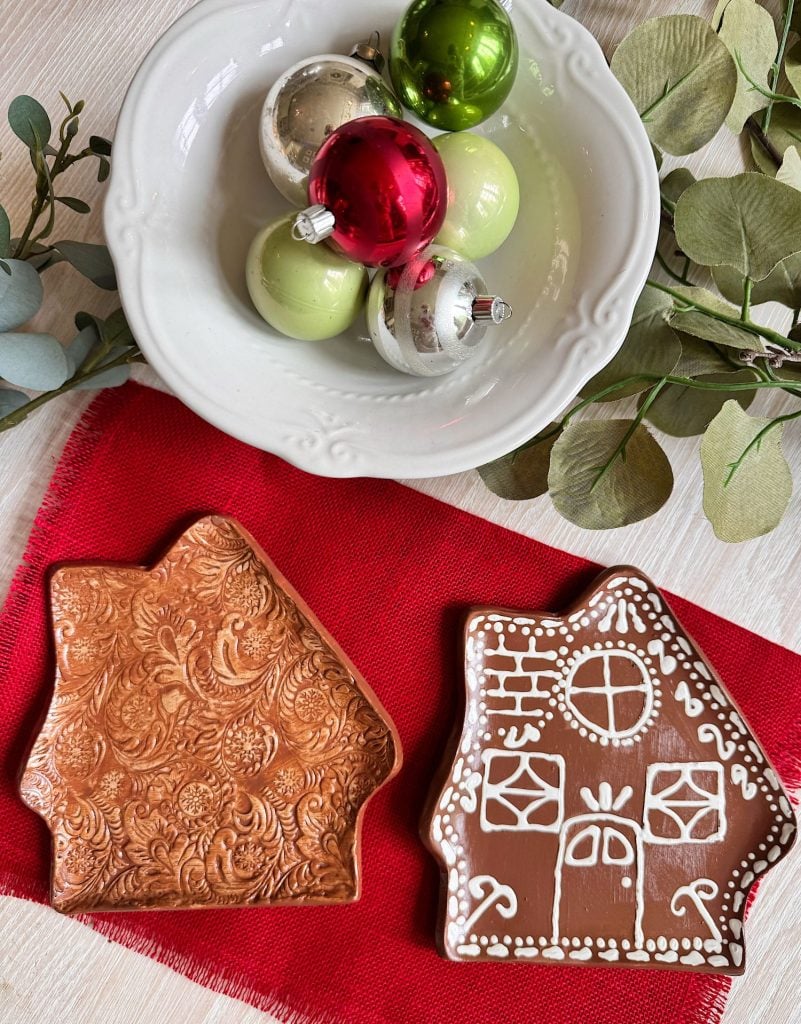
Every year, I try to create at least one handmade Christmas project that captures a little bit of our family’s story. This year, I decided to take that literally by using our home’s design to create a gingerbread house. Seeing the familiar lines of our porch, the shutters, and that tall, steep roof come to life in miniature form felt almost nostalgic.

How to Make a Cardboard Gingerbread House of Your Home
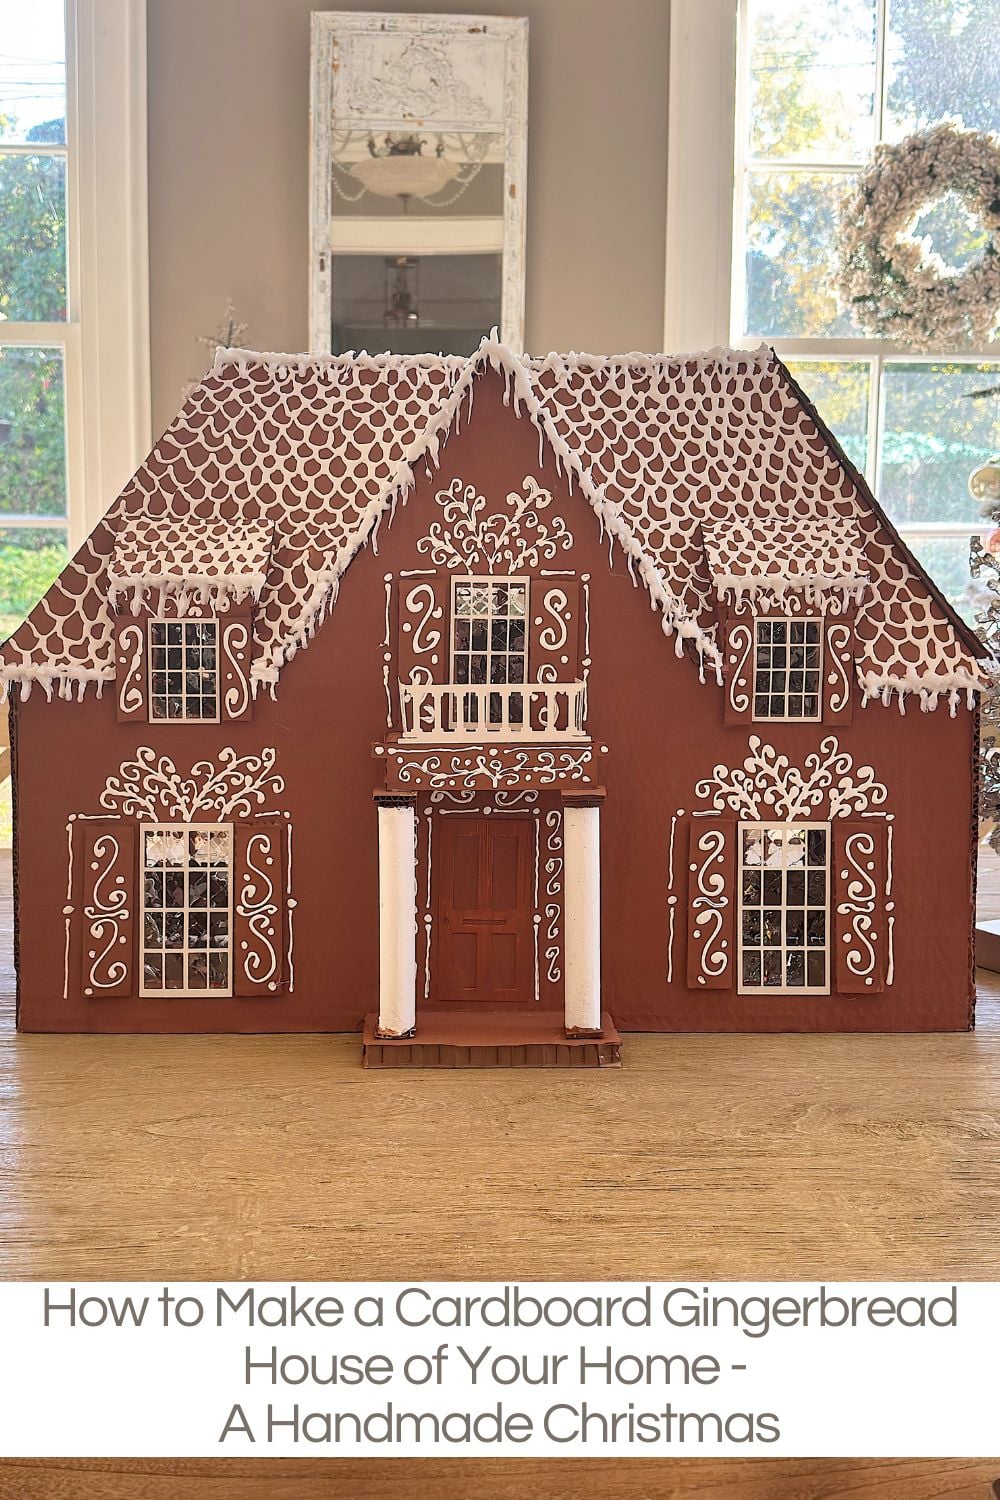
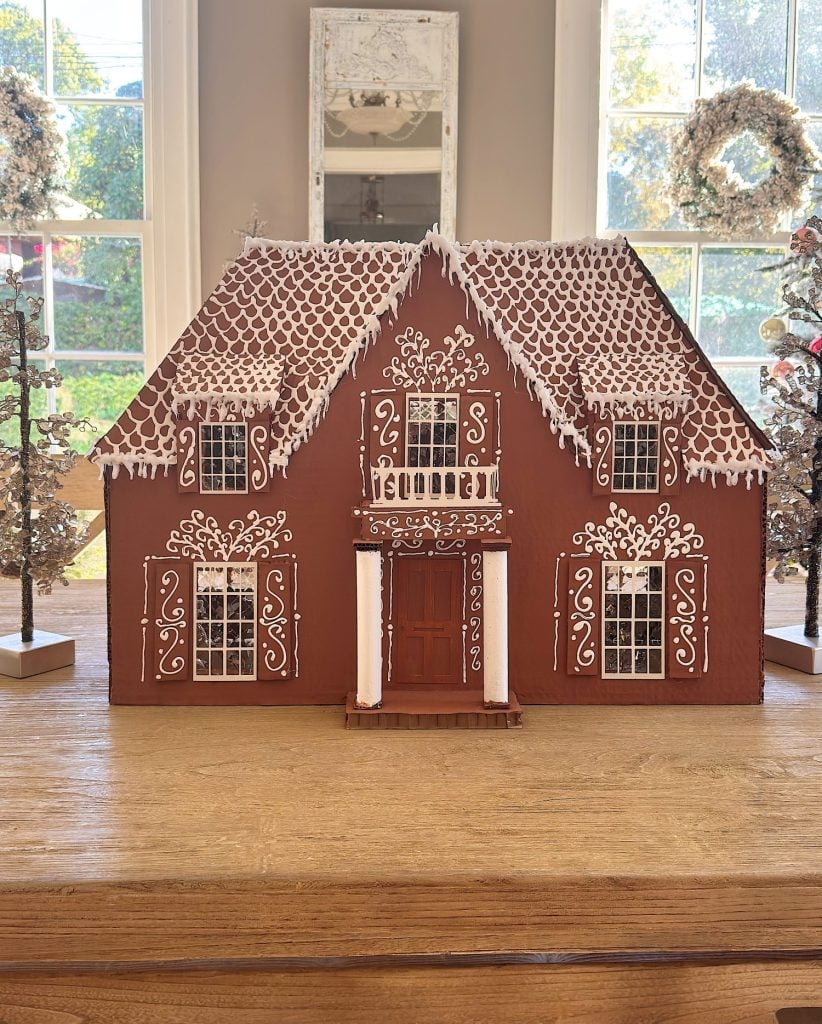
For my series, A Handmade Christmas, I have spent considerable time developing a new handmade Christmas project that feels special and meaningful. For the last week, I finally tackled something I’ve dreamed about for ages, a cardboard gingerbread house modeled after our own home. And friends… I am obsessed. It turned out even better than I imagined.
If you’ve ever looked at your house and thought, “This would make the cutest gingerbread cottage,” then this project is absolutely for you. The best part? It’s made entirely of cardboard, paint, and simple craft supplies, and it’s designed to last for years.
In today’s blog post, I’m sharing everything you need to make your own cardboard gingerbread-style house, whether it’s your home, your childhood home, or any place that holds a special memory.
You will learn:
- How to photograph your home so you can turn it into a house template
- How to simplify the architectural details
- How to build the house so it actually looks like your real home
- How to decorate it with paint and “icing” details
- How to ask ChatGPT (yes!) to generate printable templates for you
Let’s get started!
Why Make a Gingerbread House of Your Home?

There is something incredibly magical about creating a miniature version of a place you love. I think what makes this craft so special is that it turns your home into a little piece of art — something you can bring out every Christmas and cherish year after year.
This miniature house becomes:
- a keepsake
- a sentimental décor piece
- a handmade gift
- a holiday village centerpiece
- a display for your mantel or entryway
And because it’s made of cardboard and not real gingerbread, it lasts forever.
I do need to mention that our home is not an easy home to duplicate! The roof lines, pop-out windows, and architecture are complex. I spent hours thinking about this project and changed my mind four times about how to begin
Fortunately, I figured it out.
It took a few days to make, but I love it so much!
What You’ll Need
You don’t need fancy supplies to make this. Here’s all it takes:
Materials
- Corrugated cardboard sheets (if you are patient, Amazon boxes may work). Otherwise, you can purchase your own. I ended up buying 24′ x 36″ sheets so both the front and back, as my house ended up being quite large.
- X-Acto knife or craft knife
- Cutting mat
- Ruler or straight edge
- Hot glue gun (low-temp is easier with cardboard)
- Glue sticks
- White wax sticks for snow
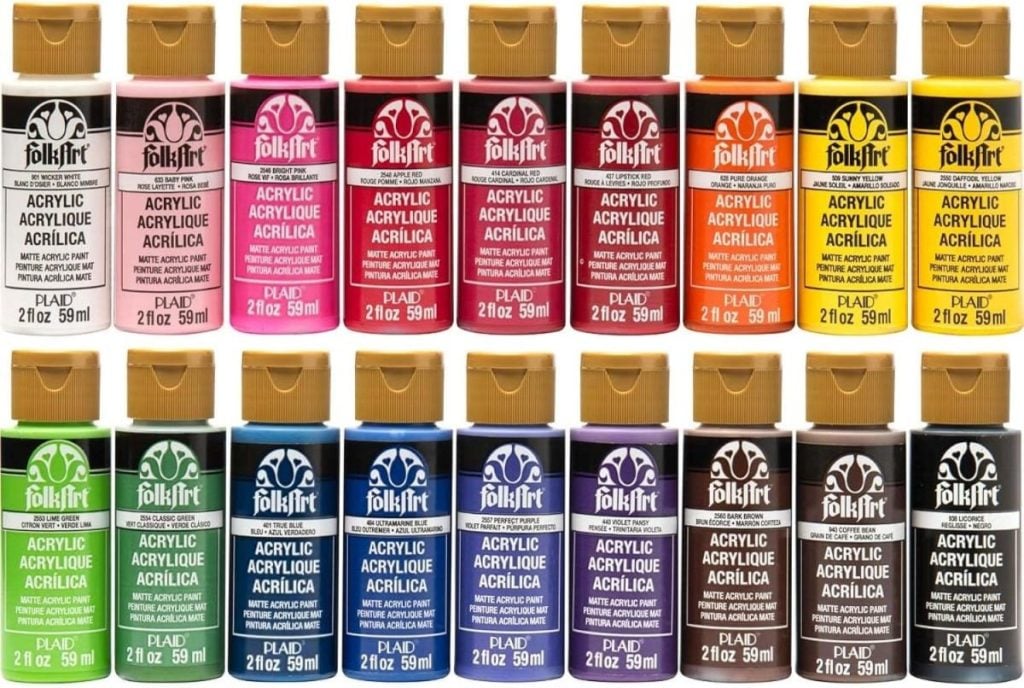
- White acrylic paint
- Detail brush
- White acrylic paint and Brown acrylic paint to mimic true gingerbread
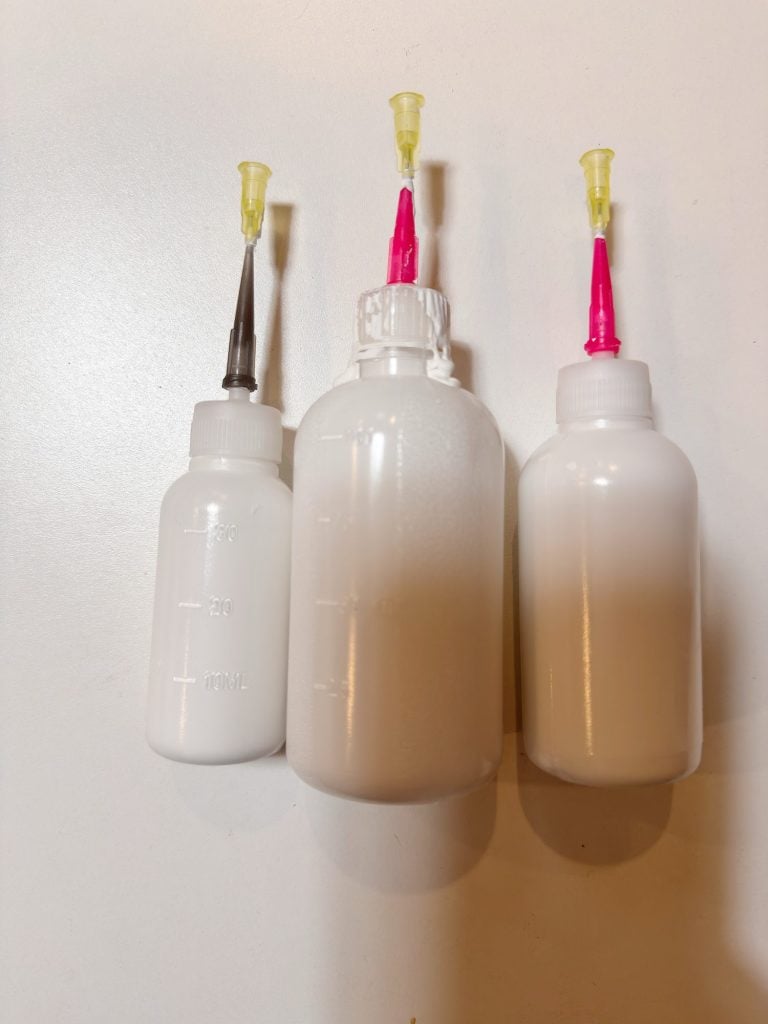
- Precision Tip Applicator Bottle to decorate the house
- Optional: Puffy paint for 3-D “icing”
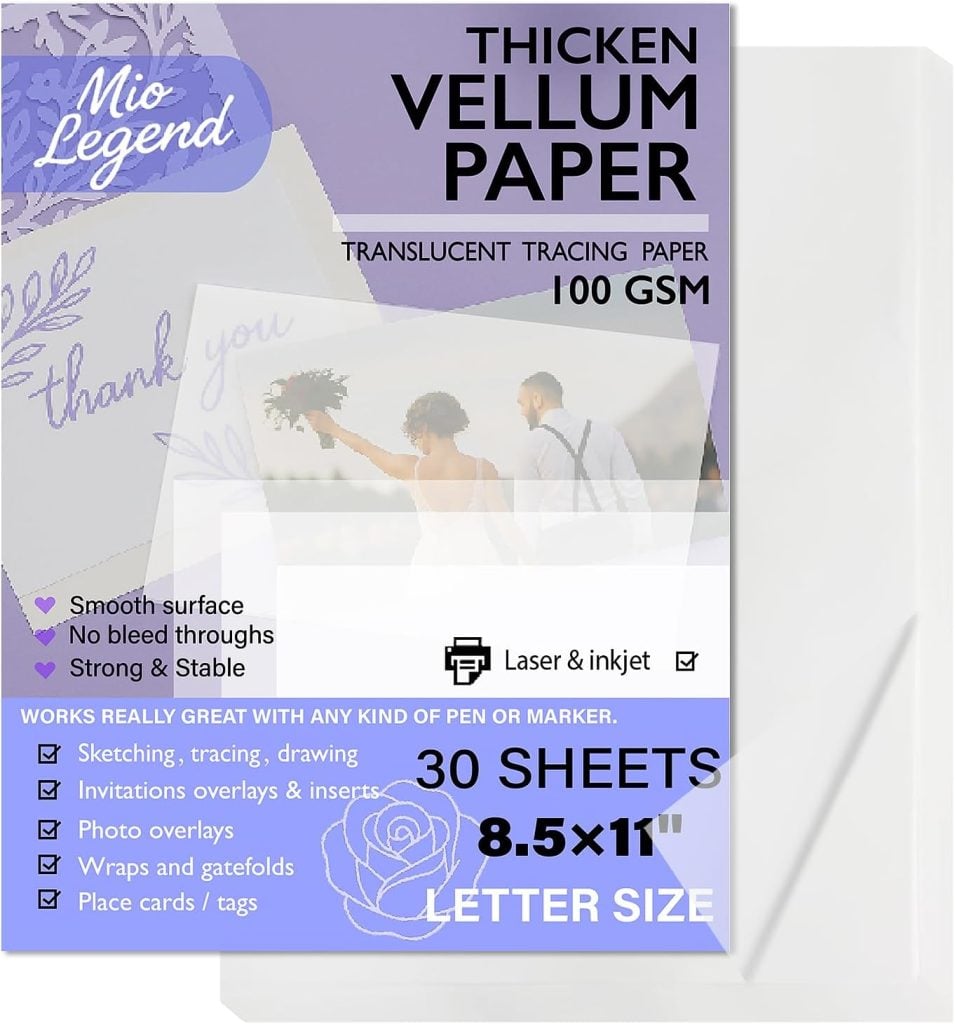
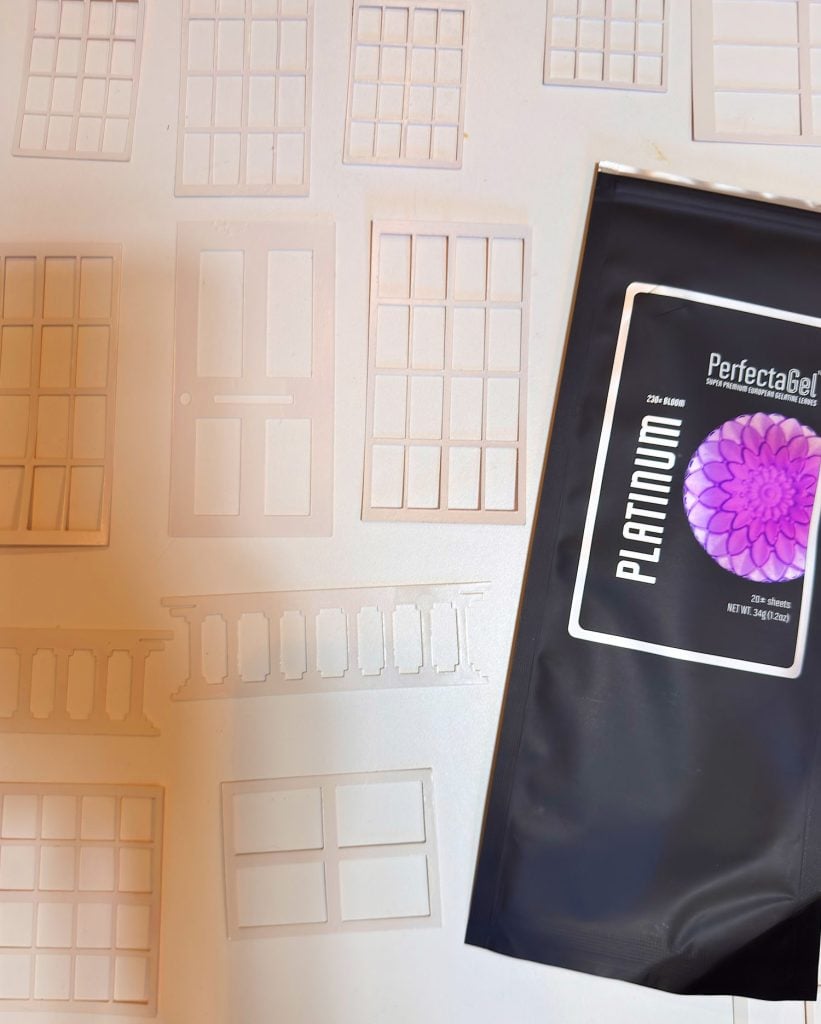
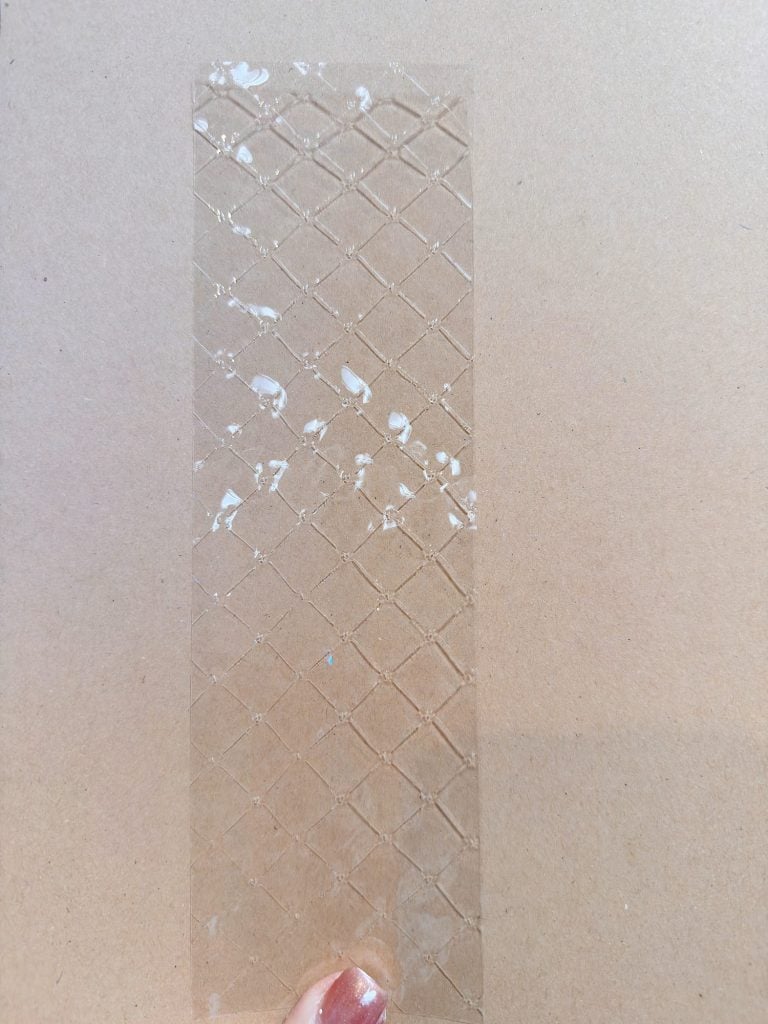
- Gelatin sheets for windows
- Pencil
- Printer + printed templates (optional but very helpful!)
I may occasionally use affiliate links on this blog, which means I earn a small commission if you purchase through the link. The price will be the same whether you use the affiliate link or go directly to the vendor’s website using a non-affiliate link.


Step 1: Photograph Your Home (This Matters!)

Before you start cutting cardboard, take a straight-on photo of the front of your home. You want the camera centered, not angled, so the proportions are clear.
If you want a more accurate 3-D version, also take:


- a left-side photo
- a right-side photo
- a photo of the roof angle
This helps when you’re converting your home into a template.
Step 2: Simplify the Details
The trick to turning a real home into a gingerbread-style house is understanding that this is a stylized interpretation, not a perfect replica.
Here’s what I kept from our home:
- the tall steep gable
- the black shutters
- the front door framed by columns
- the window layout
- the little balcony
- the signature white shingles
Here’s what I simplified:
- exact windowpane counts
- siding details
- deep roof angles
- tiny trimwork
When you make yours, focus on the architectural features that make your home recognizable. Everything else can be simplified into clean lines, shapes, and outlines.
Step 3: Break Your House into Pieces (the Template Stage)
To build your house from cardboard, you need to turn your photos into a set of flat panels. Just like a gingerbread house, you’ll have:
- Front panel
- Back panel (can be simpler!)
- Two side panels
- Two roof panels
- Optional: porch, bay windows, chimney, dormers
Here’s how to do it:
- Print your photo of the front of the house.
- Place tracing paper over it.
- Draw the outline of the house — just shapes, no tiny details.
- Draw where the windows, doors, and shutters will go.
- Trace the sides of the house in the same way.
- On a new sheet of paper, redraw each panel so that it can be cut out and glued like gingerbread.
This is your raw template.
If you want to skip the drawing, keep reading — I have an easier way.
Step 4: Ask ChatGPT to Make Your Template for You
This step makes the project SO much easier.
ChatGPT can generate printable templates of your home, sized to fit on standard paper, with all the pieces ready to cut and assemble from cardboard.
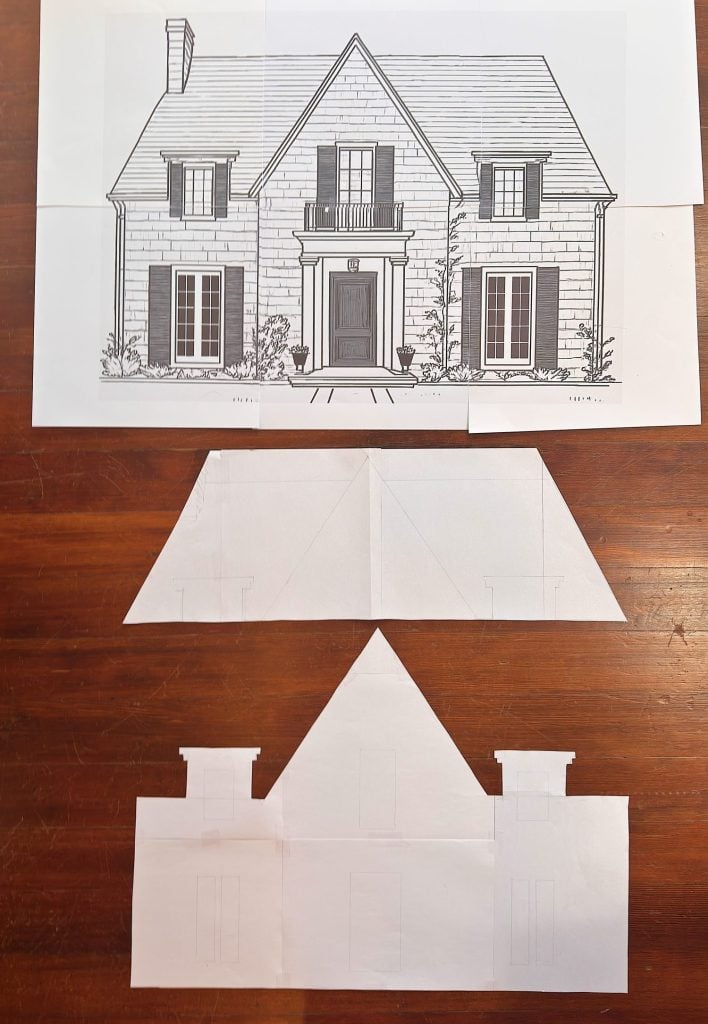
I did need a drawing of our home to use as a template. So I uploaded the color photo of our home into ChatGPT and used this prompt: “Please create a black and white line drawing of our house photo”.
This is what I got.
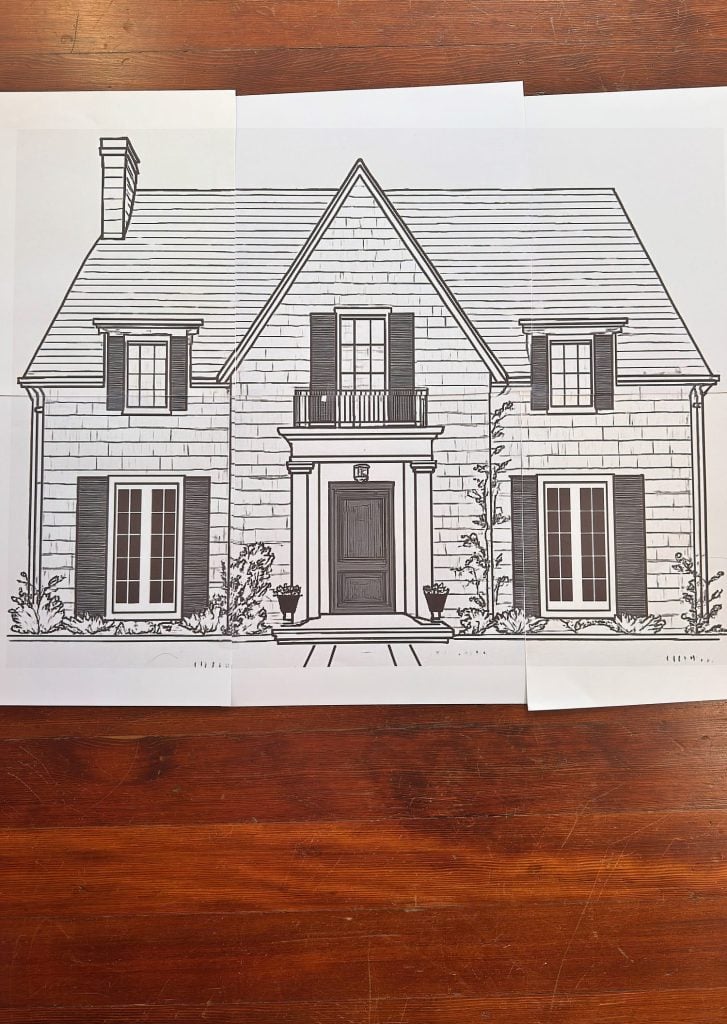
It was perfect, and I resized it on my computer to make it larger. I printed this photo to use as my template.
This is how I created my own house pieces, and it made the whole project far more accurate and much easier.
Step 5: Cut Out the Cardboard Pieces
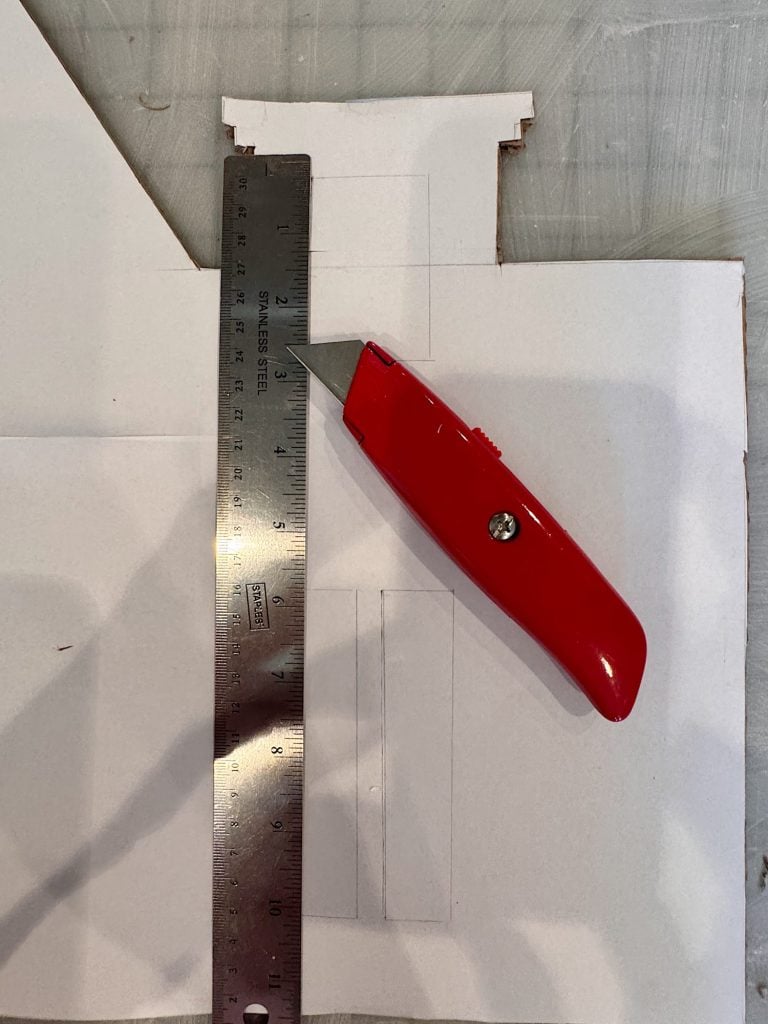
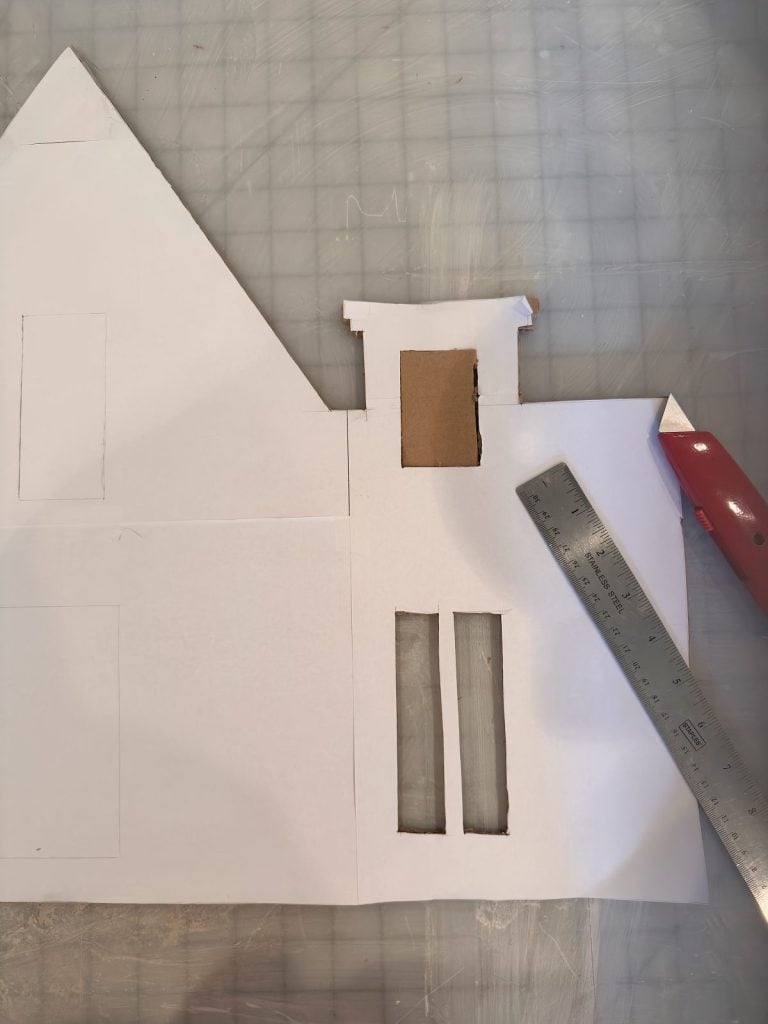
Once you have your templates, trace them onto cardboard and carefully cut everything out with a craft knife.
Label each piece as you go:
- Front
- Back
- Left side
- Right side
- Roof 1
- Roof 2
- Porch top
- Porch sides
- Chimney
This helps when you assemble everything later.
Step 6: Assemble the House
This is the fun part!
1. Build The Main Box
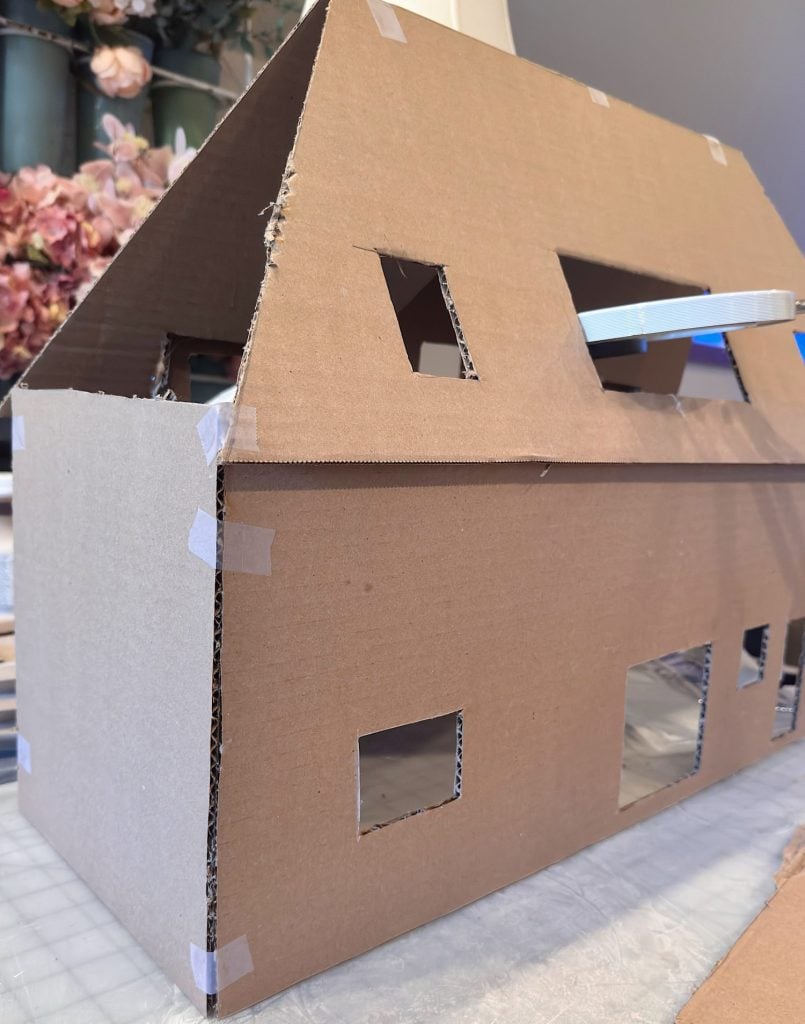
I taped the pieces together and then used hot glue to attach the front to the sides, then the sides to the back.
2. Add The Porch
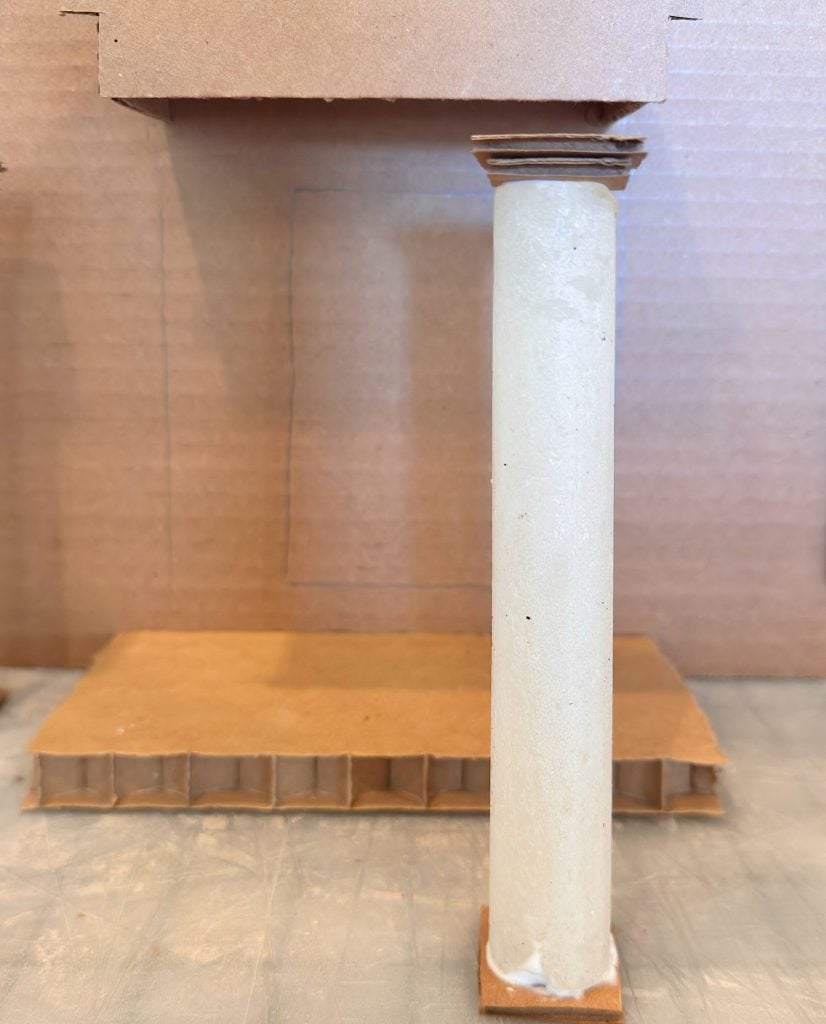
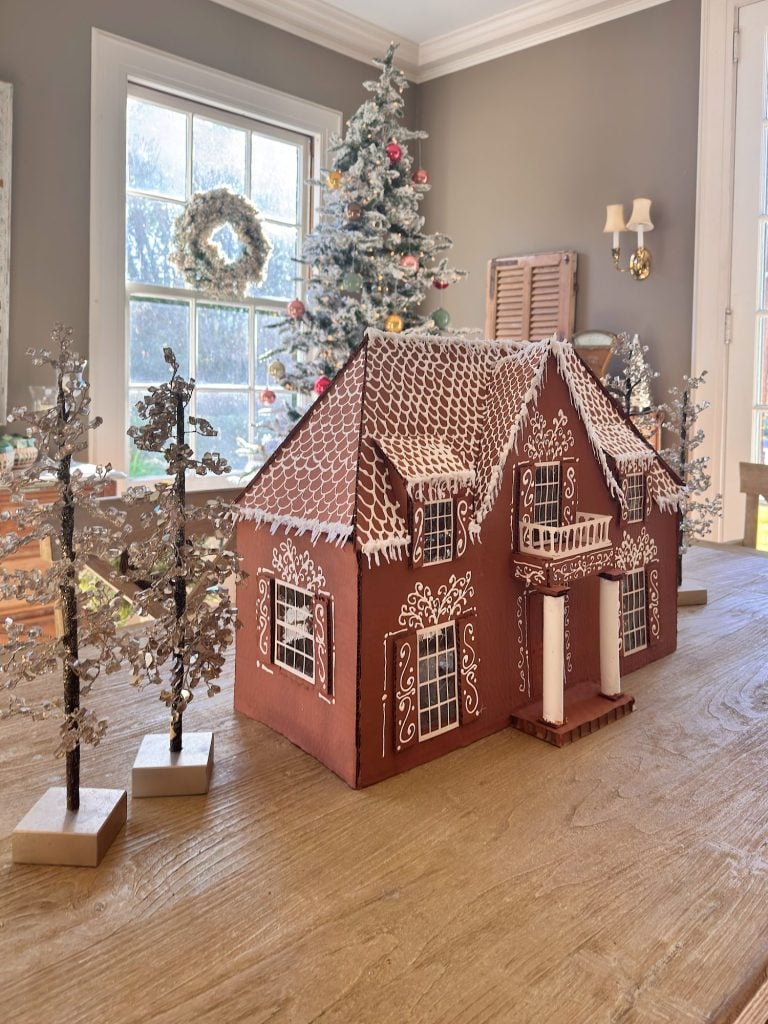
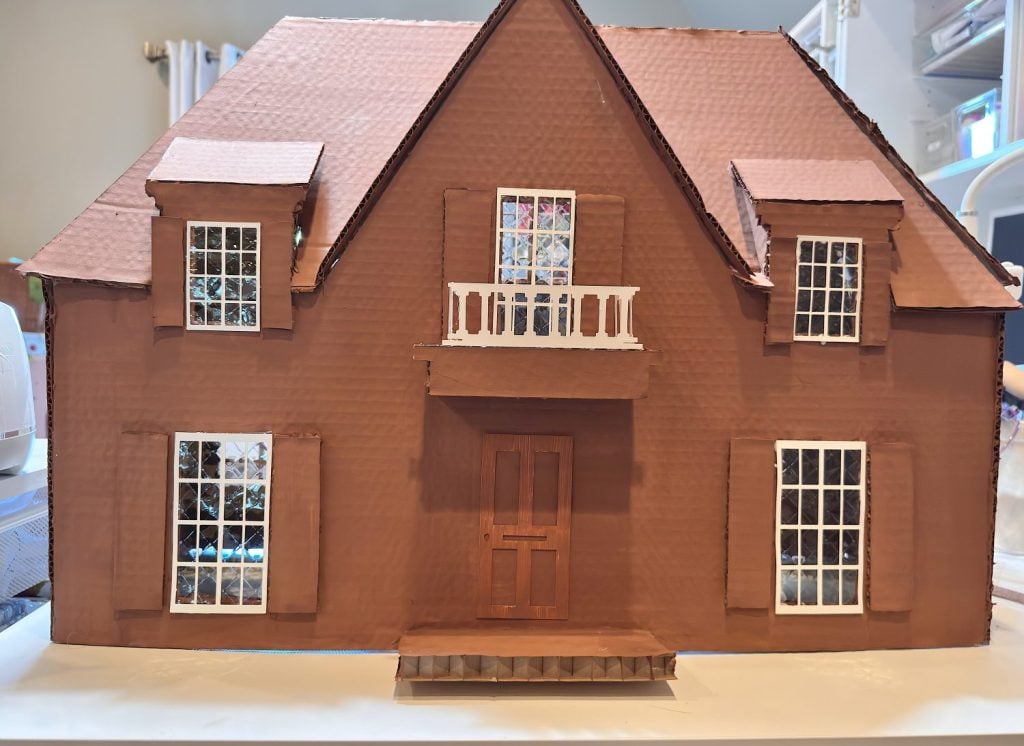
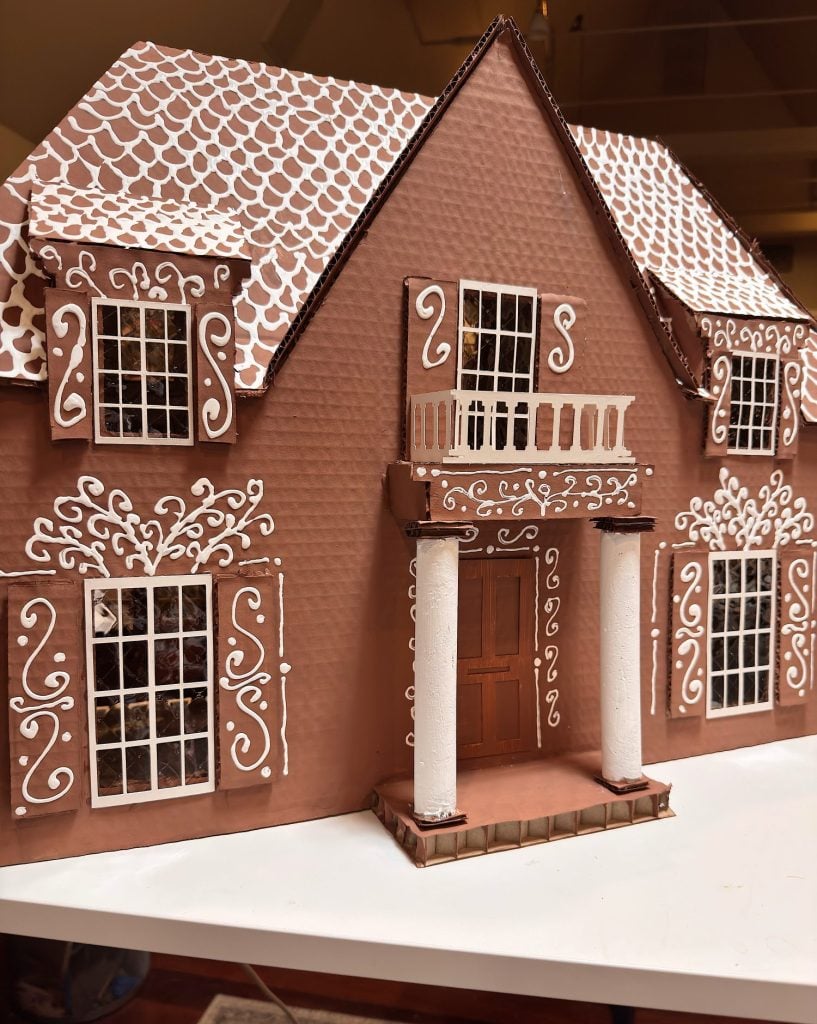
Your home may have a protruding entry or porch area. Create this as a small rectangular box and glue it onto the front. Add simple rolled-paper columns if your home has them. I decided to use two candles for the pillars and painted them white.
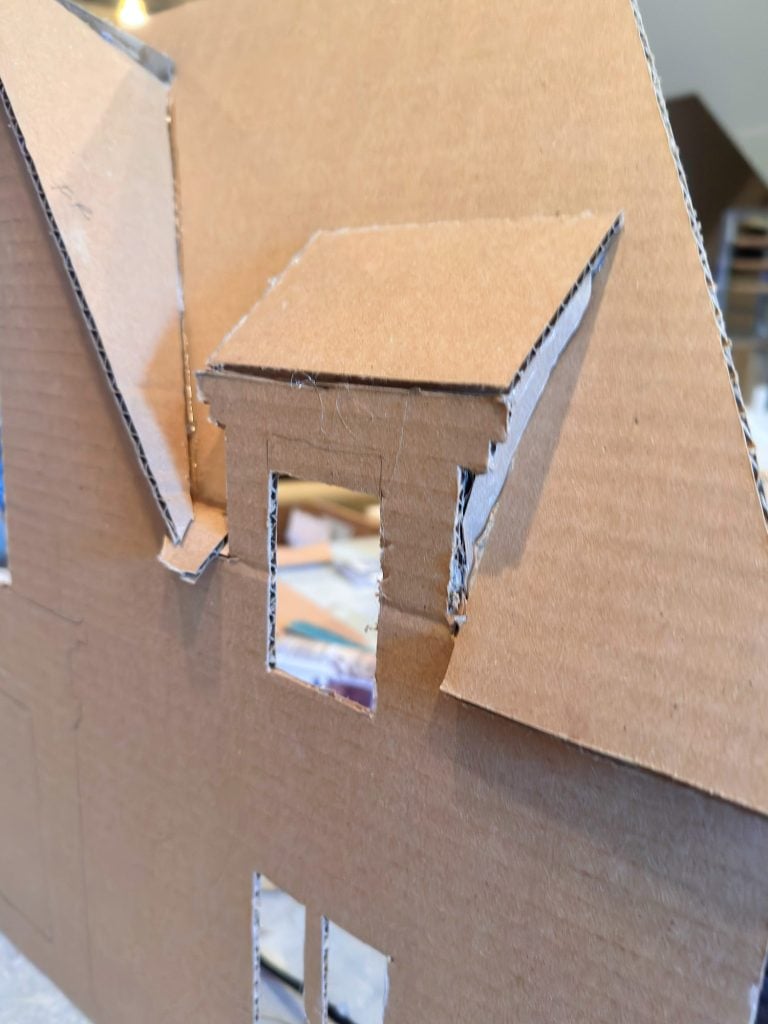
3. Attach The Roof

Glue the roof panels on at the correct angle. Reinforce the inside seam with a strip of cardboard. Most home designs do not have a roof line like ours. This was very hard! But after a few long hours, I got it to work.
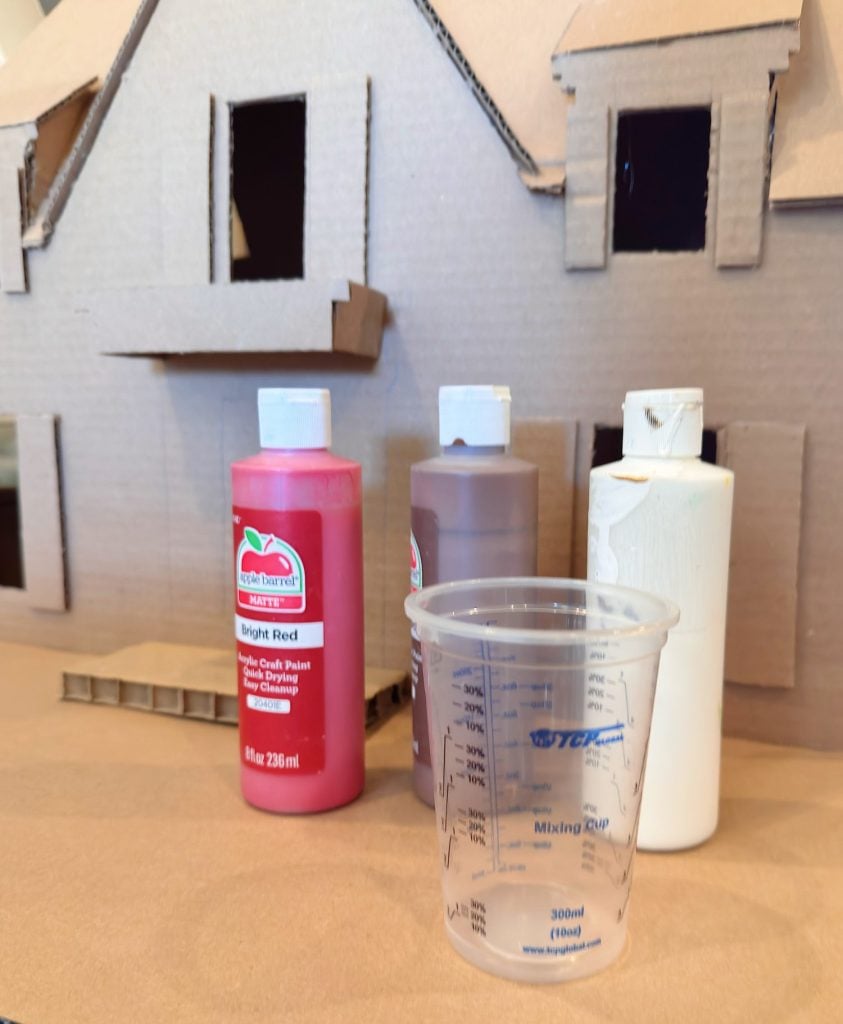
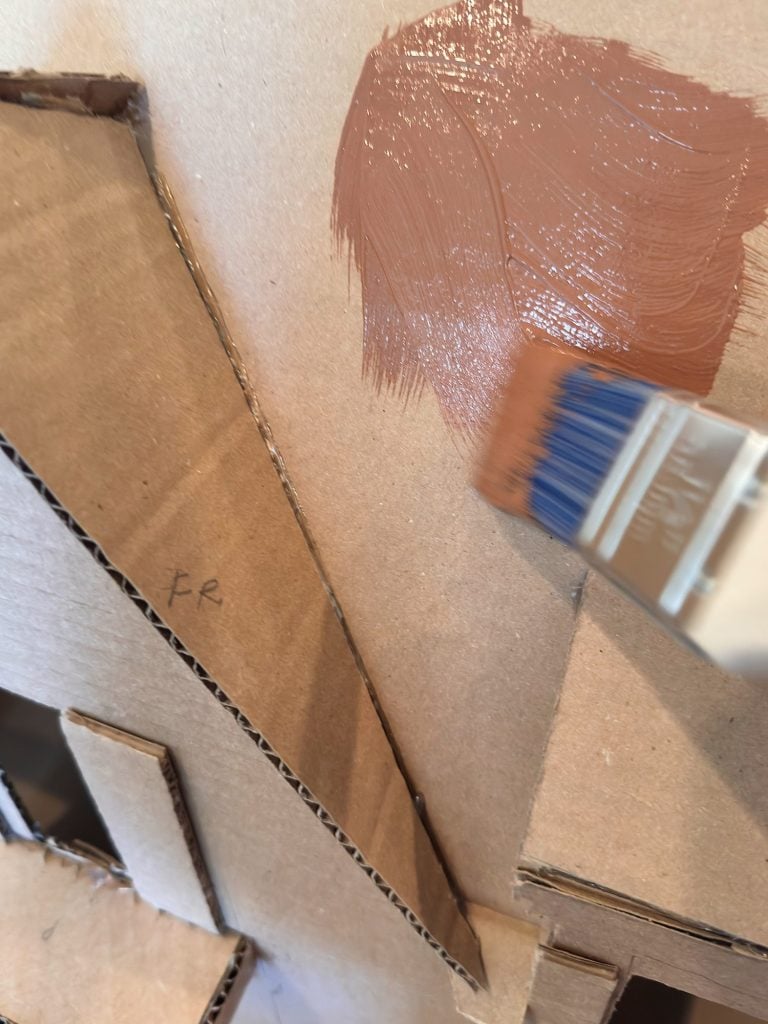
Step 4: Paint Your Gingerbread House
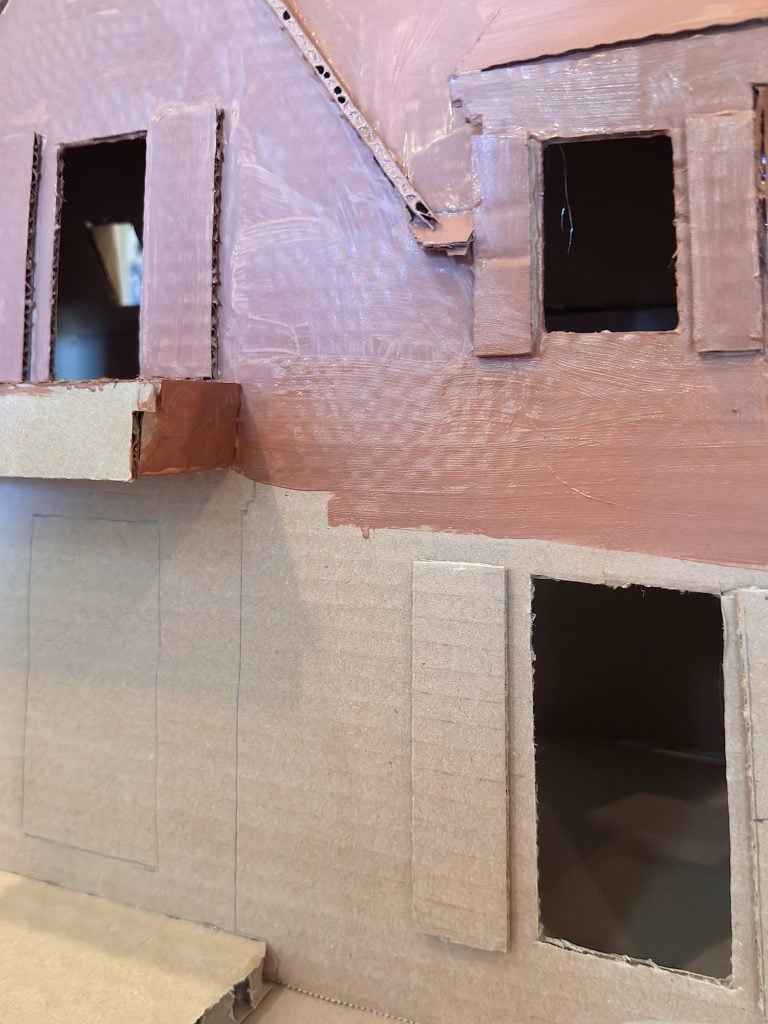
I mixed my paint color using brown, red, and a tiny bit of white. (I am sure you can buy this color.) I thought I wouldn’t need to paint the house, but I am so glad I did. It looks so much better.
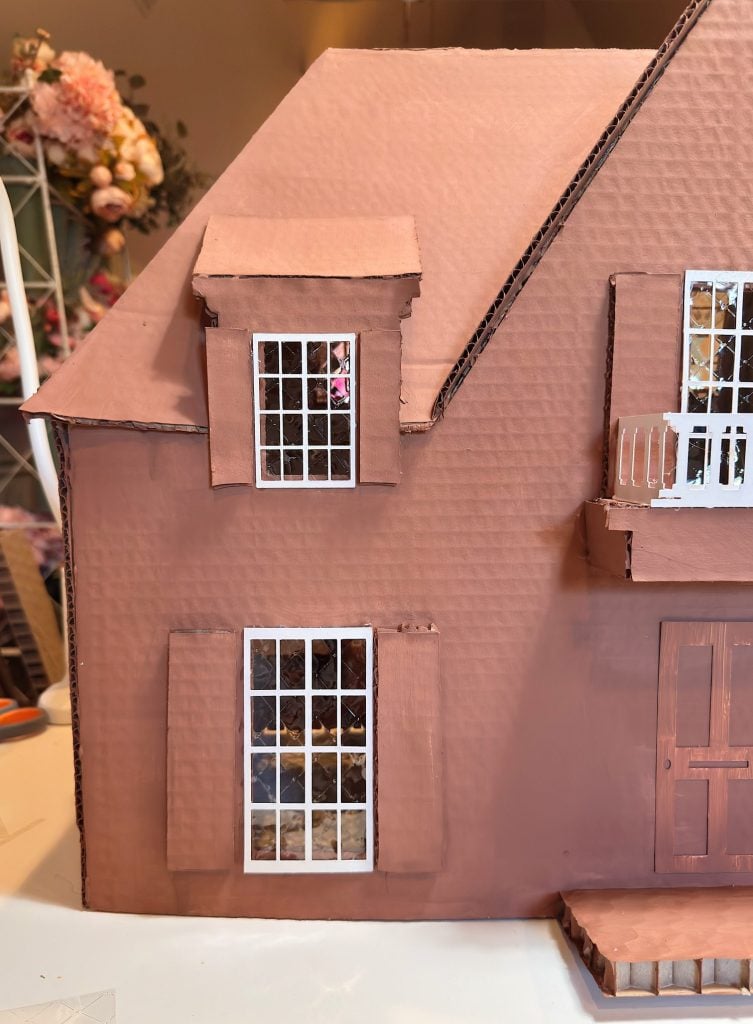
Step 5. Add The Windows
I knew I needed some window frames, and my Cricut came to the rescue.
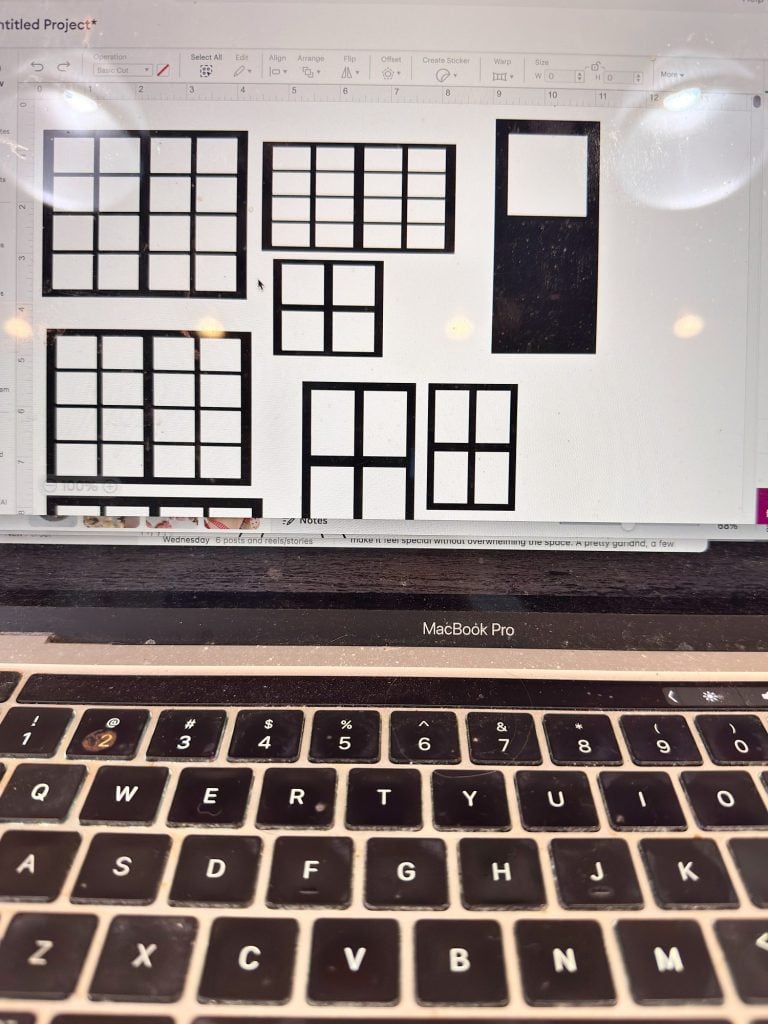
All I did was open up Cricut Design Space, search for “window frames” in the images, and lots of great choices were available, for free. I selected one, and after I measured each window opening (there are a lot!), I resized each Cricut window frame in seconds.
Then, I did the same for doors.
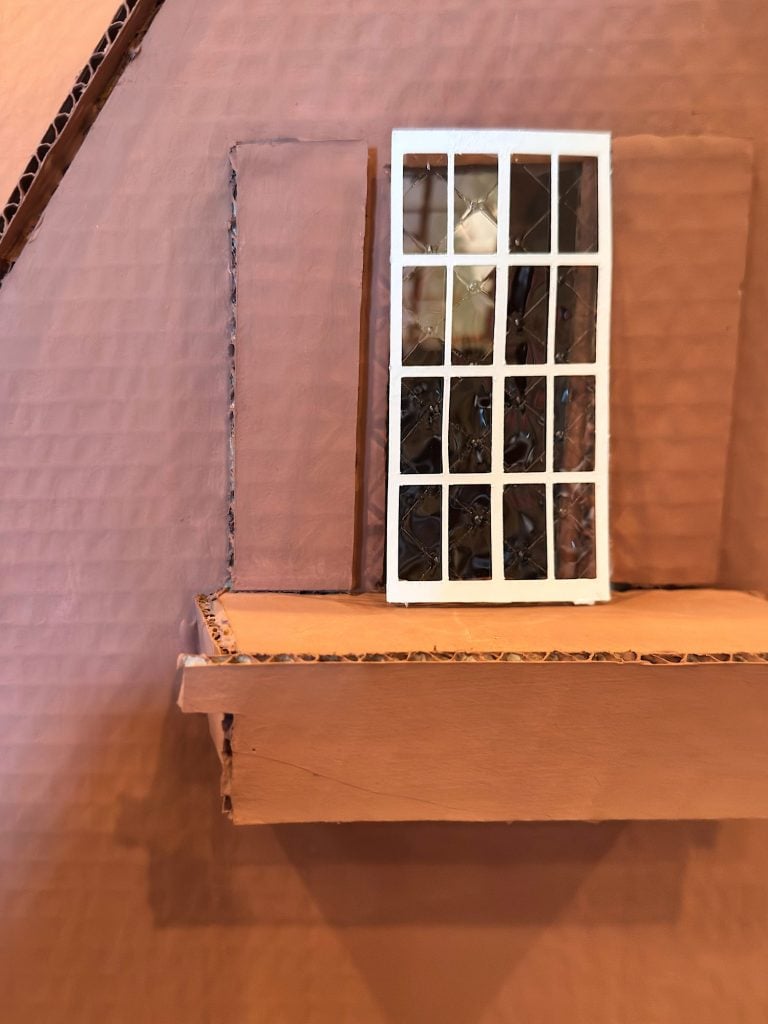
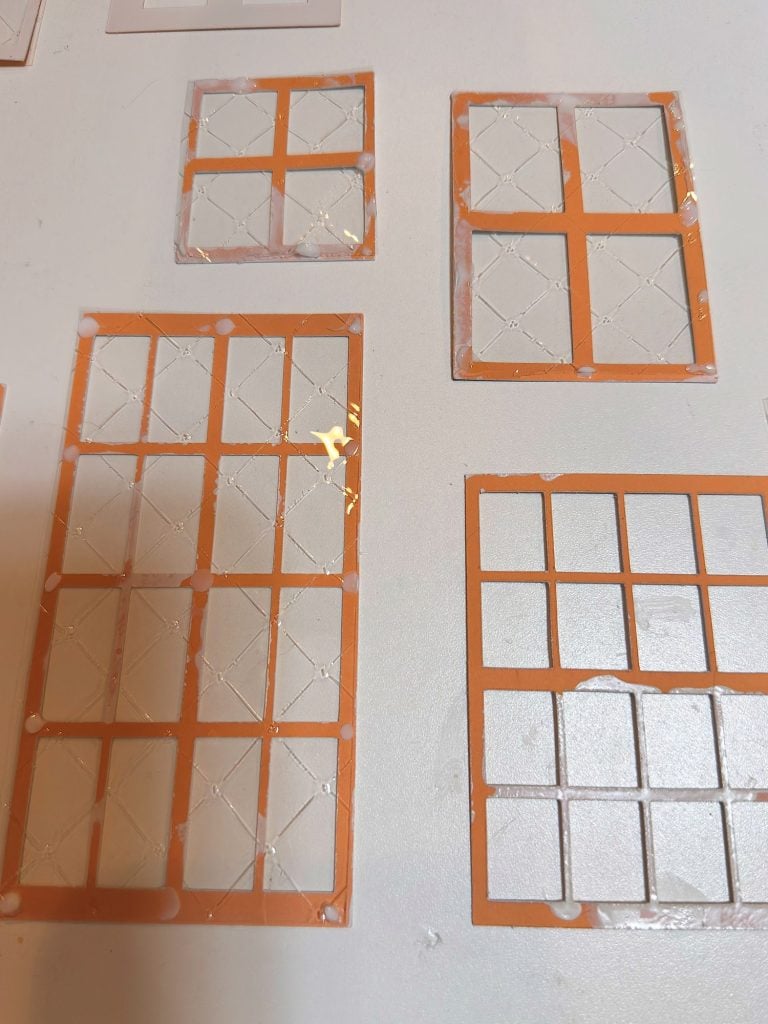
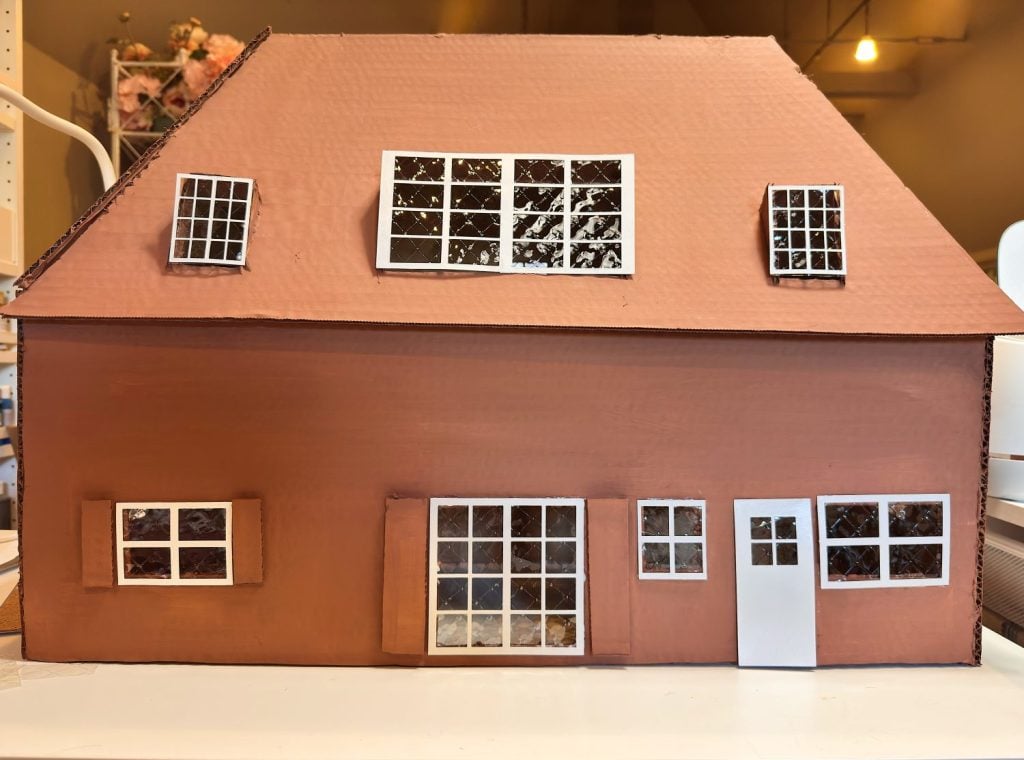
I cut them out on cardstock. I didn’t have any thick white cardstock in my studio, so I used another color. Unfortunately, that meant I had to spray paint them all white. I found some Platinum Gelatin Sheets to replicate wavy antique glass, and I love them!
I attached the gelatin sheets to the back of the window frames with craft glue since I am pretty sure a hot glue gun would melt them.
The detail of the window frames makes a big difference.
Step 6: Decorate Your Gingerbread House
You can go all-out gingerbread or keep the color of your real home. Here are two ways to decorate:
Gingerbread Style
- Paint the entire house a warm gingerbread brown (or use the cardboard color).
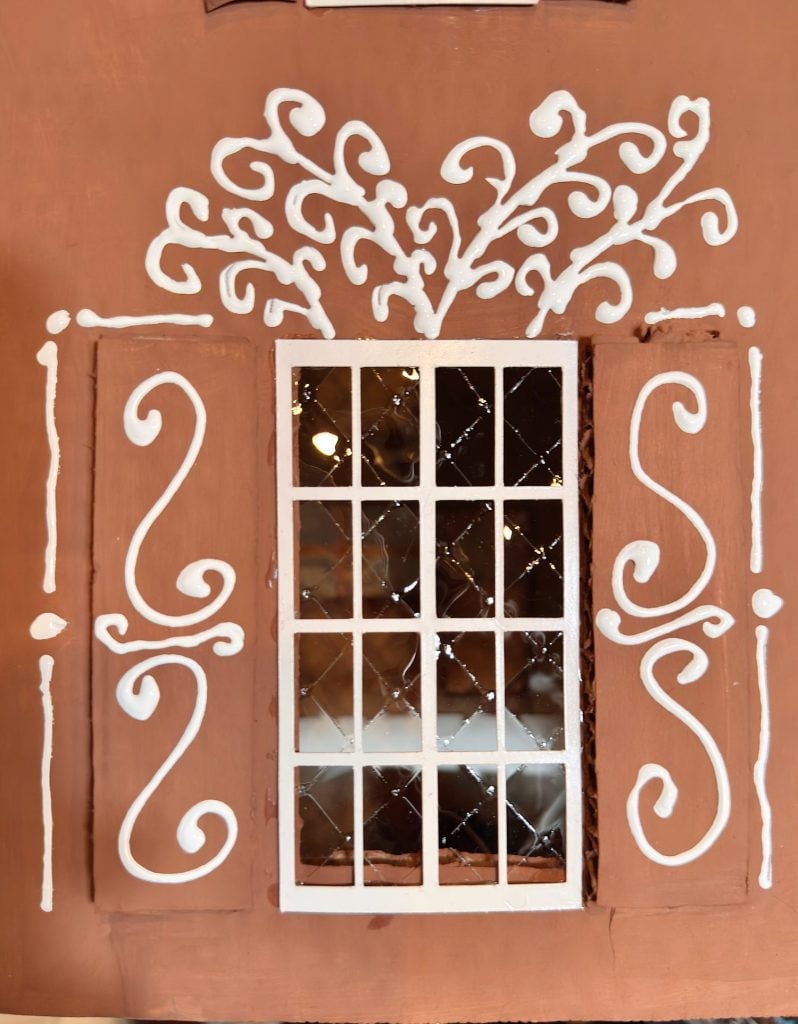
- Use white paint to outline windows, doors, shingles, and trim.
- Use puffy paint for dimensional icing lines.
- Add snowy eaves and dots of “frost.”
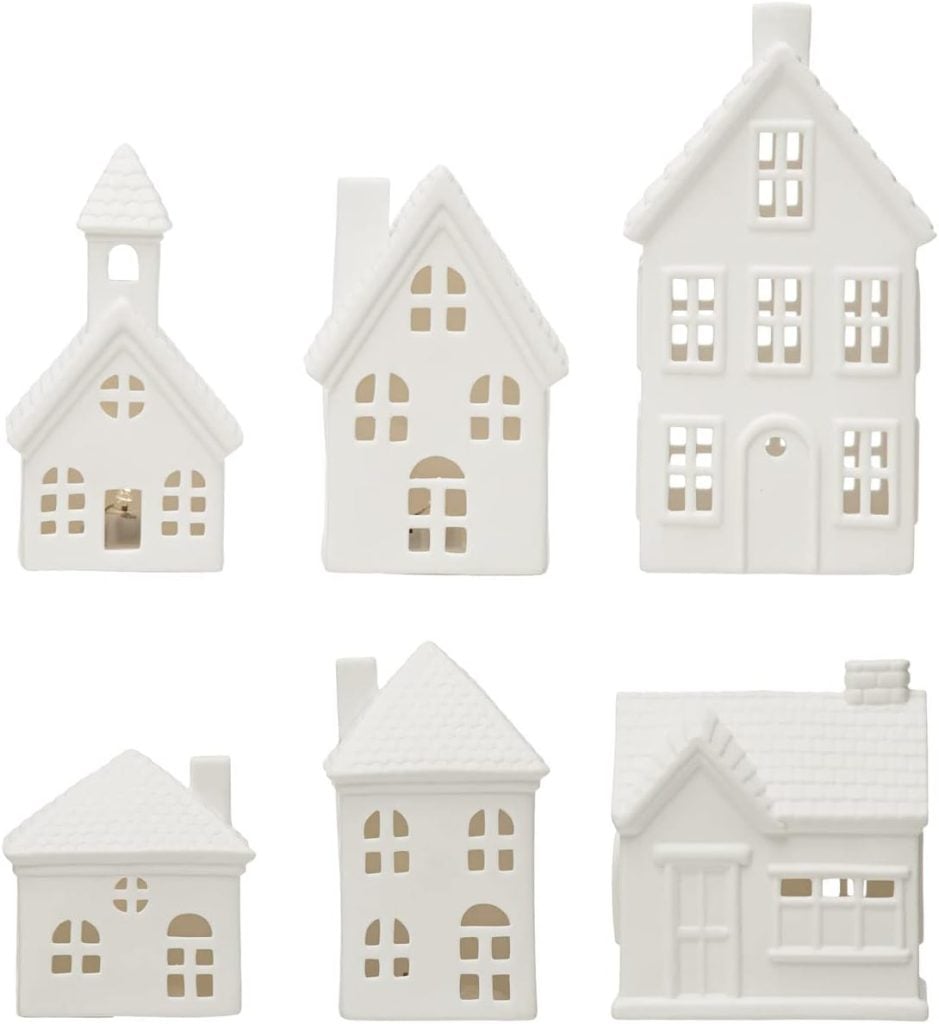
Classic White Cottage
- Paint the house white.
- Use a detail brush to add:
- shingle outlines
- window grids
- shutters
- porch details
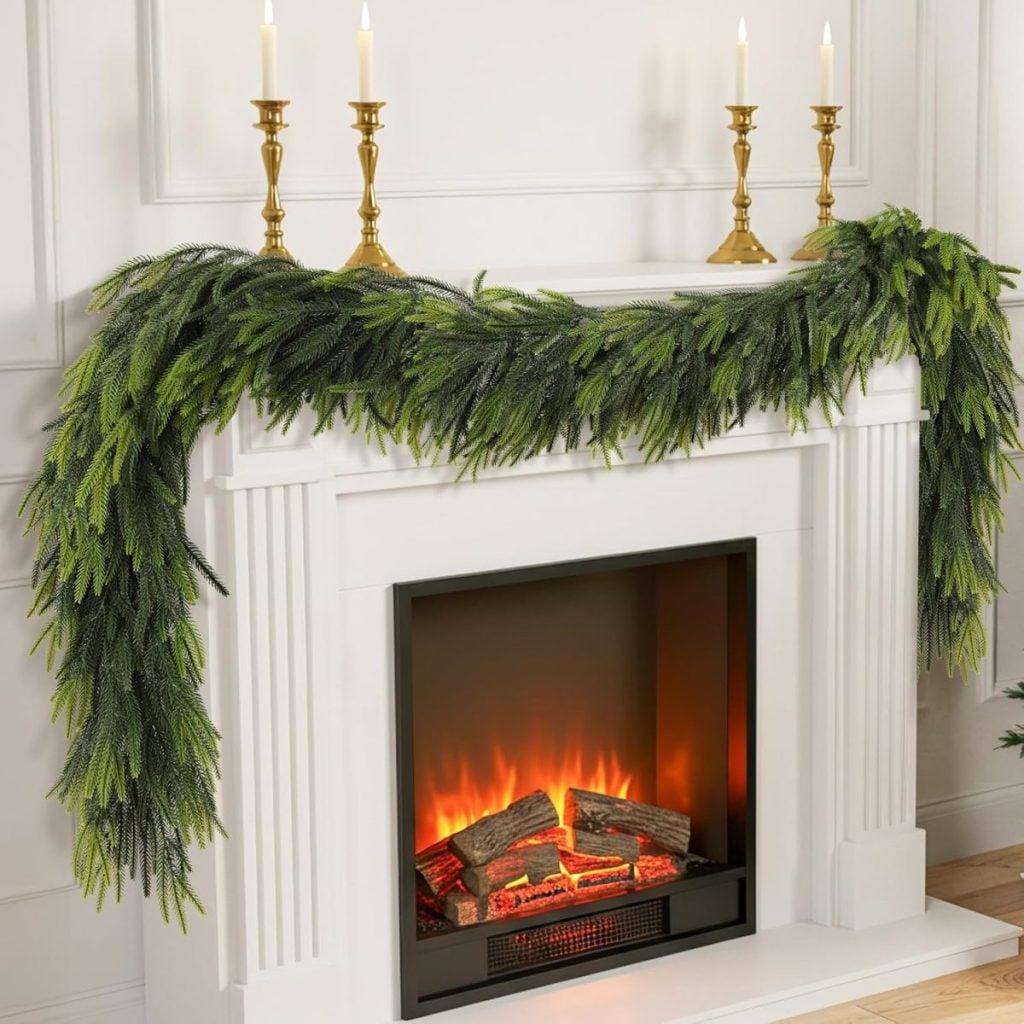
- Add wreaths, garlands, or fake greenery to mimic your authentic décor.
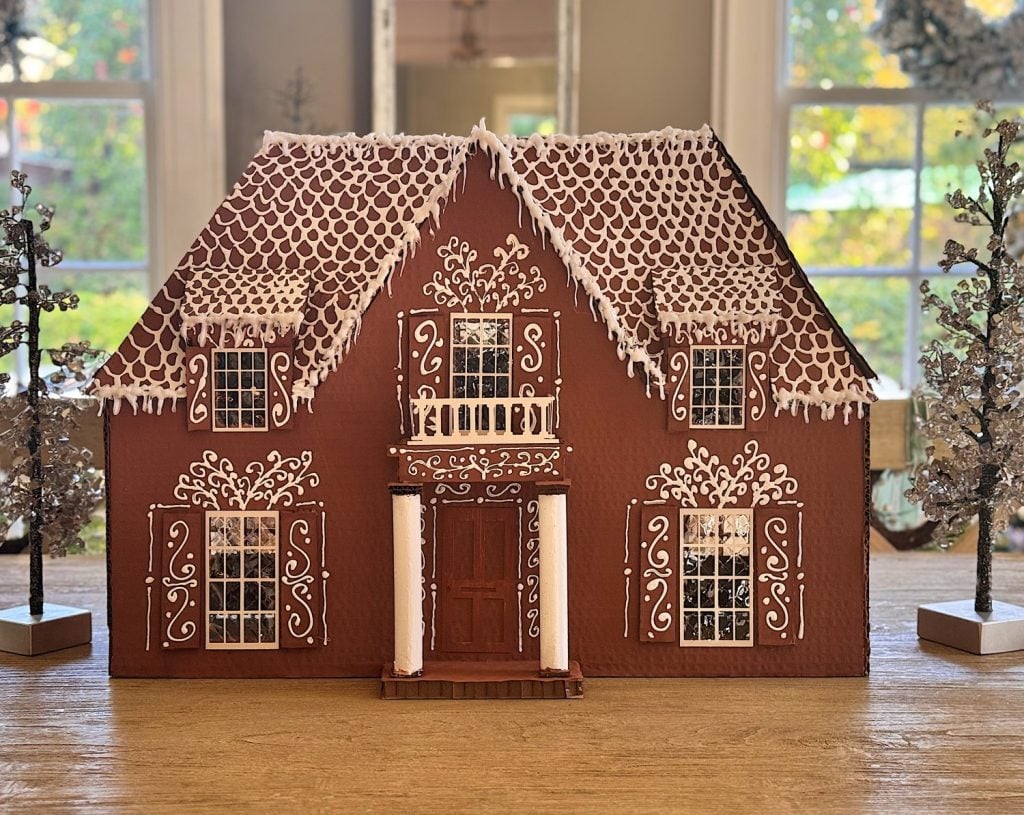
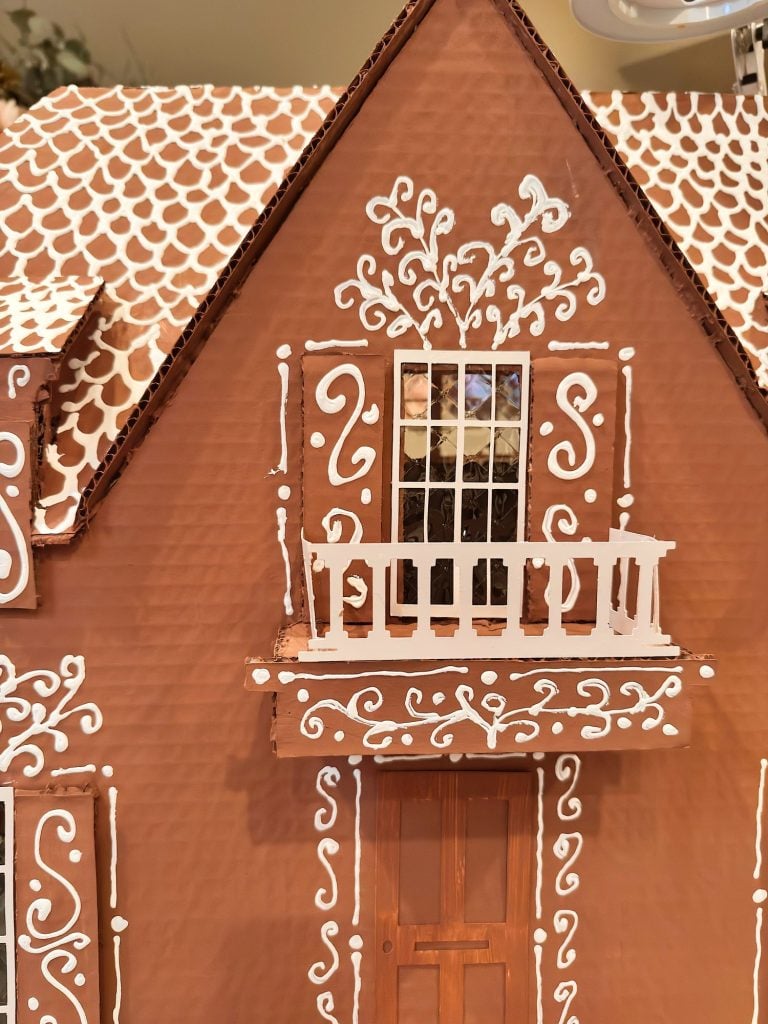
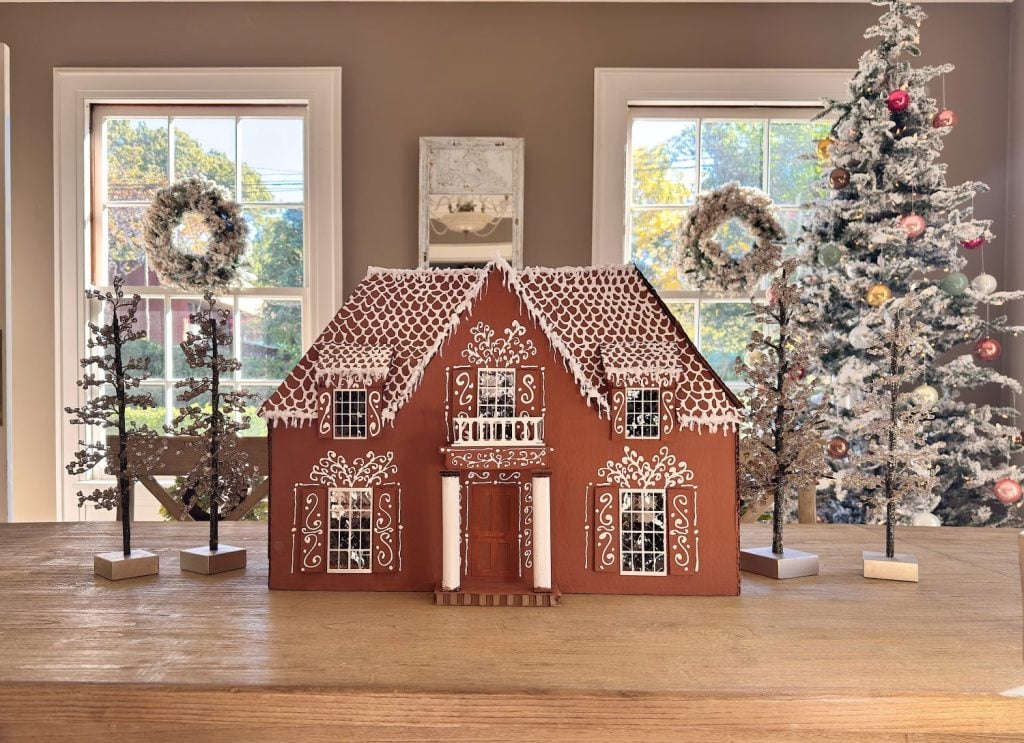
I chose the Gingerbread Style because I didn’t just want to make a replica of our home.
I didn’t use a paintbrush; instead, I used a Precision Tip Applicator Bottle. I filled them with white acrylic paint, which made decorating much easier and more fun.
Step 7: Add The Snow
I used my glue gun, filled with a stick of white wax, and created the “dripping snow effect”. I placed my cutting template under a piece of parchment paper and used it as a guide. This was pretty easy to do, as I love the effect.
I glued the “dripping snow” to the home with craft glue (since a glue gun would melt the wax).
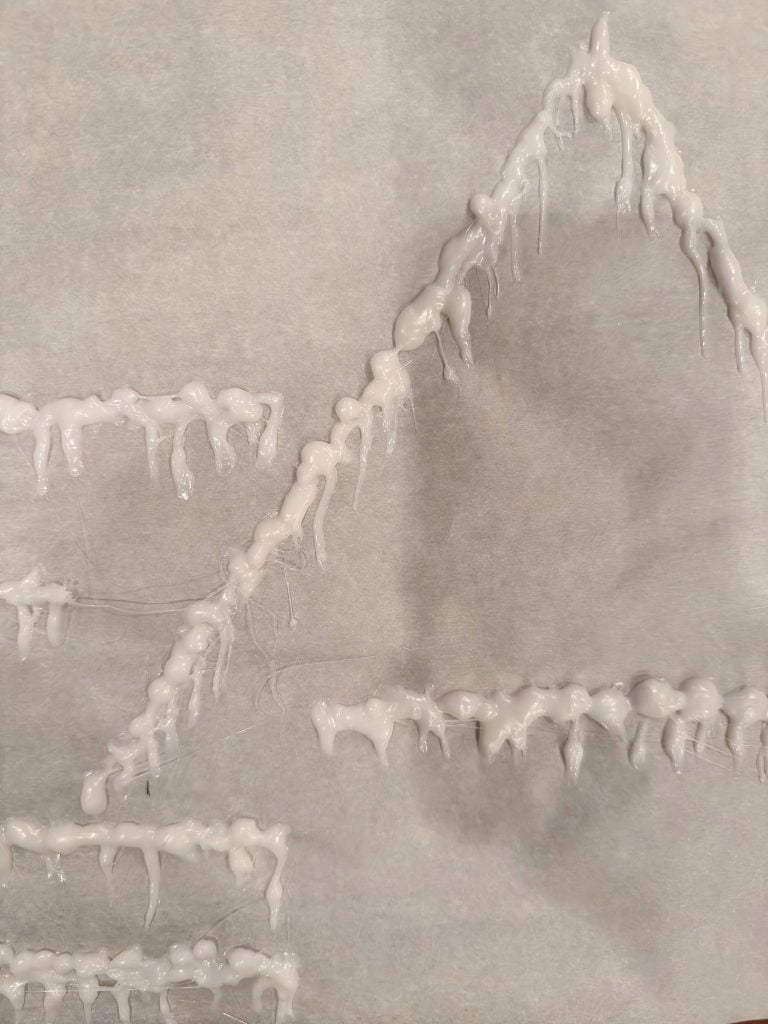
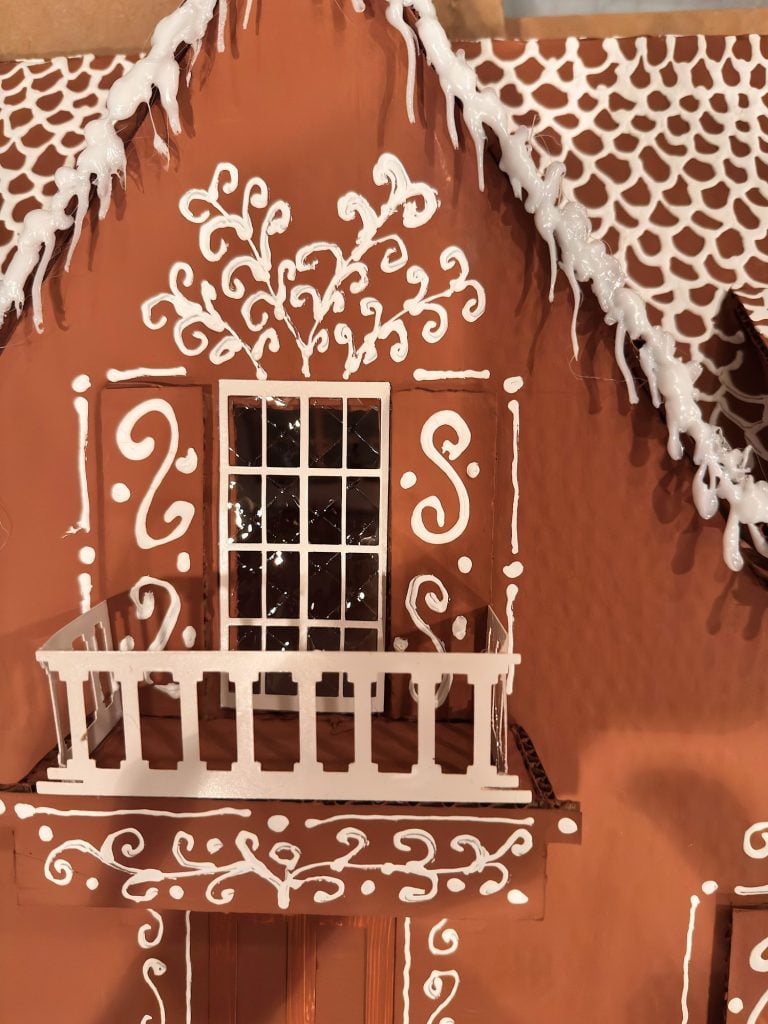
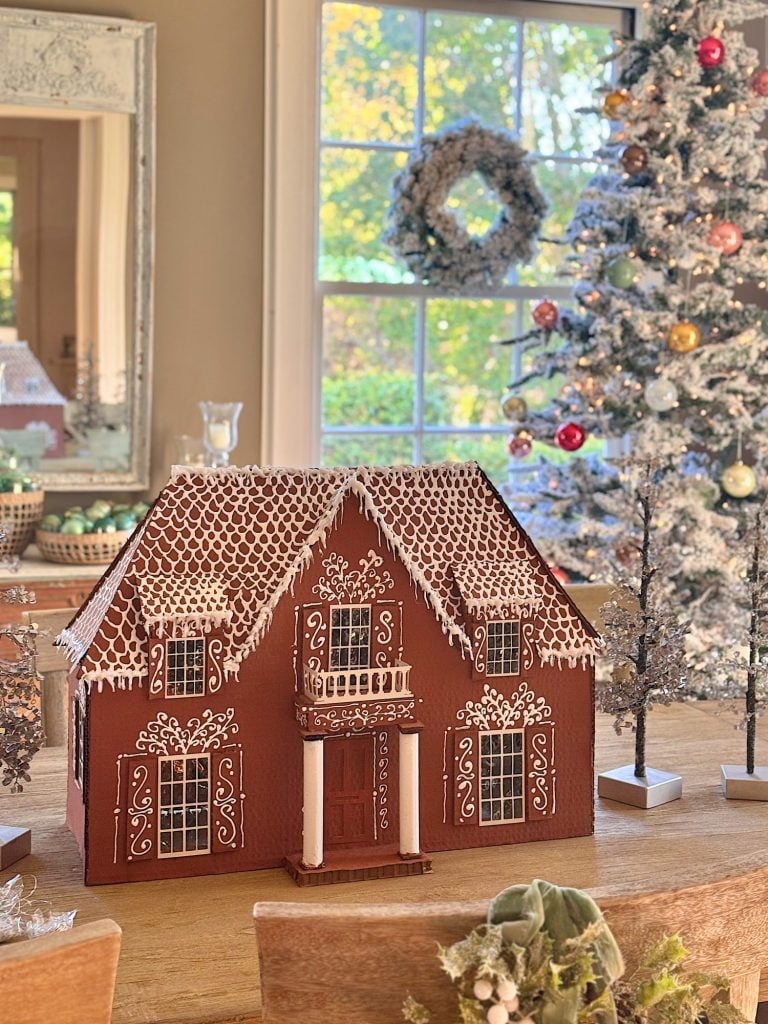
I tried to add snow to all of the surfaces that would collect it in a real snowfall.

The house looks great! I even placed 5-foot Christmas trees in the front windows and decorated them with mini battery-powered lights.
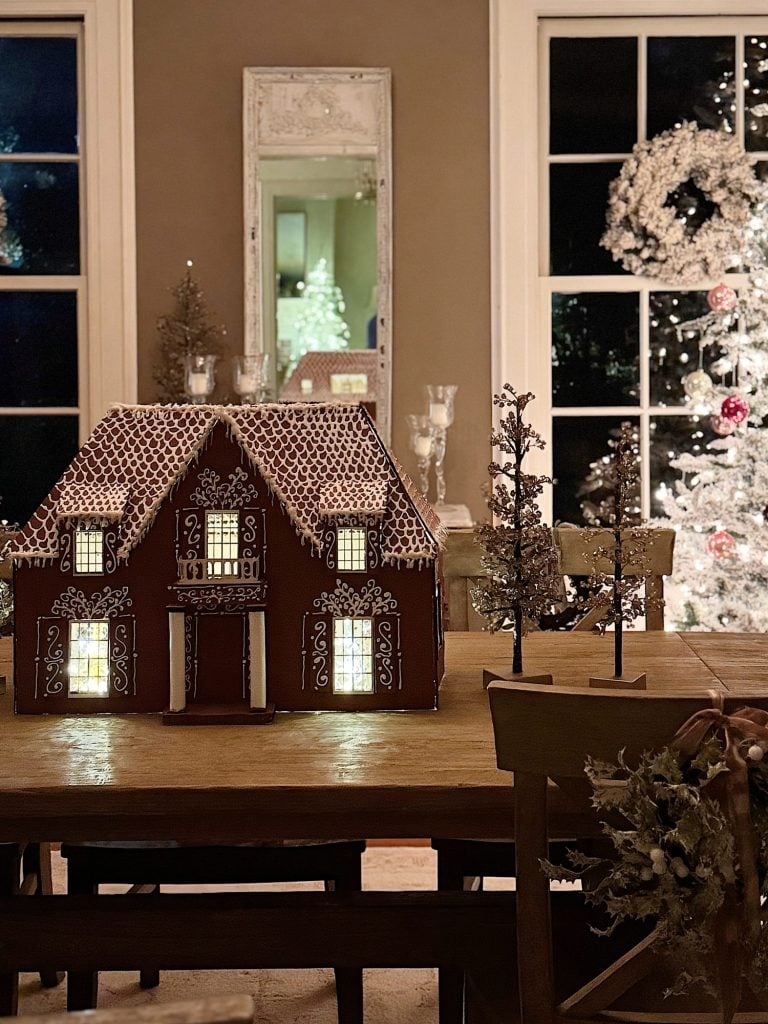
Display Ideas
- On your kitchen counter
- On your mantel
- In a village scene
- Under a glass cloche
- As a centerpiece
- With twinkle lights inside


Tips to Make Your House Last for Years
If you want to pull your house out every Christmas (and you will!), here are my best longevity tips:
✔ Use thick cardboard or double layers
✔ Reinforce all corners with extra cardboard strips
✔ Paint both inside and outside to prevent warping
✔ Seal everything with matte Mod Podge
✔ Store upright instead of flat
Most importantly, measure your gingerbread house and keep an eye out during the holidays for a box to store it.
Final Thoughts
This cardboard gingerbread house has become one of my favorite handmade Christmas projects ever. It’s personal, nostalgic, and just so charming. I love that it gives all of us the chance to create something meaningful from the place we call home.
I hope you’ll try making one this season. Whether you recreate your home, your childhood house, or a dream cottage, I promise it will be a treasure you’ll enjoy bringing out year after year.


If you enjoy my blog, you can sign up to receive my updates here.
.Sixteen Weeks of A Handmade Christmas
Here are the first fifteen weeks of A Homemade Christmas. Can you believe I have only one more to share?


You can pin the image below to your boards on Pinterest (click the Pin button in the top left corner) or follow me on Pinterest!

For more real-time updates, follow me on Instagram @My100YearOldHome


OMG I’m obsessed with this idea. What a wonderful project. I love it. Now all you need is one of those miniature wreaths on your front door!!
So beautiful Leslie! Something you can pass on to your grandchildren.
What a GREAT idea. I HOPE to try this…I’m just putting FALL away today and getting Christmas out now… (altho i leave my tree up until the end of BLA Jan!!) THANKS!
Leslie, I should have read your post before I embarked on making a replica of our 1910 Mission style historic home. Our home has so many different architectural details, bump-outs, arches and a highly complicated roof. I literally measured each nook and cranny and without AI (why didn’t I think of that), I built only the front out of gingerbread. That was so complicated, thankfully I didn’t undertake the porte-cochere, the attached sun porch of the other three sides of the house. It was exhausting but the end result actually looks like our home. I would love to keep it until next year and keep adding onto it, but I doubt it will survive. Thanks for all the tips and your roof and details are so impressive! Cardboard is the answer, not tasty gingerbread!
Happy New Year!