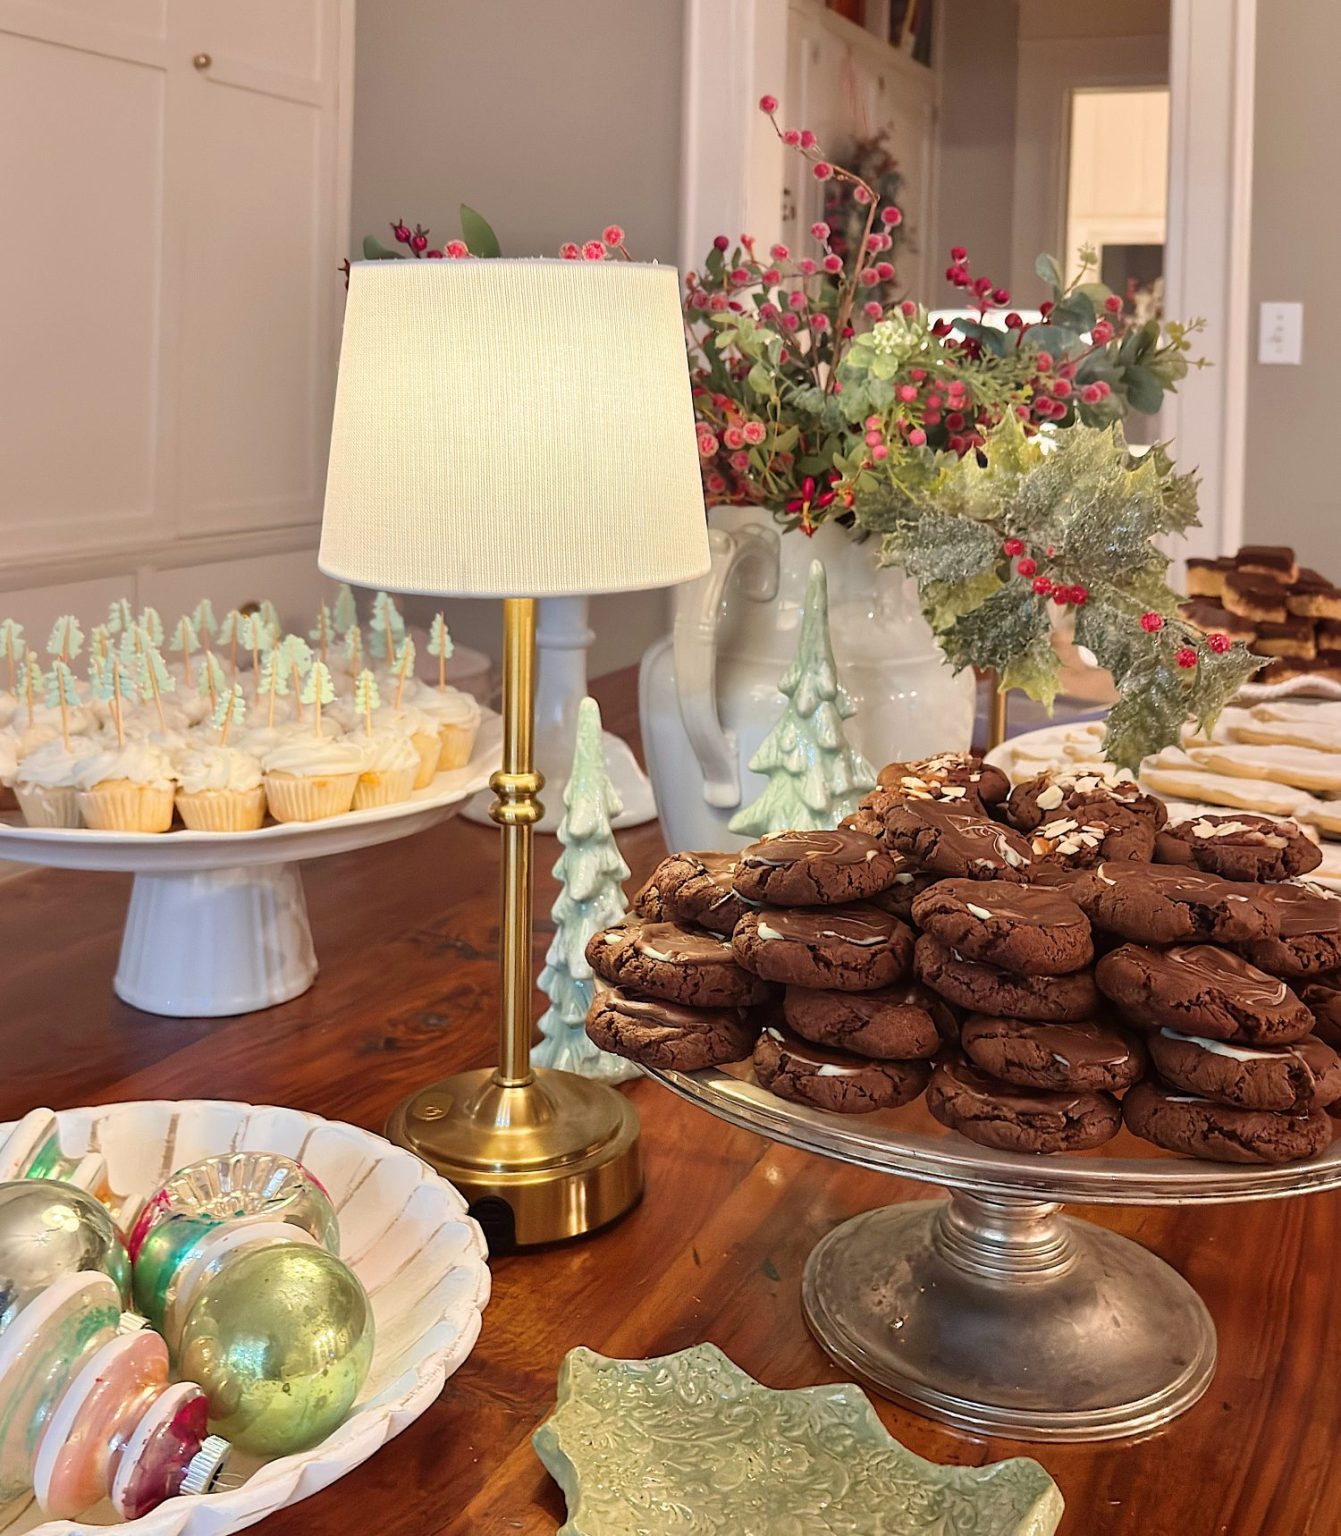
All of Our Christmas Party Recipes
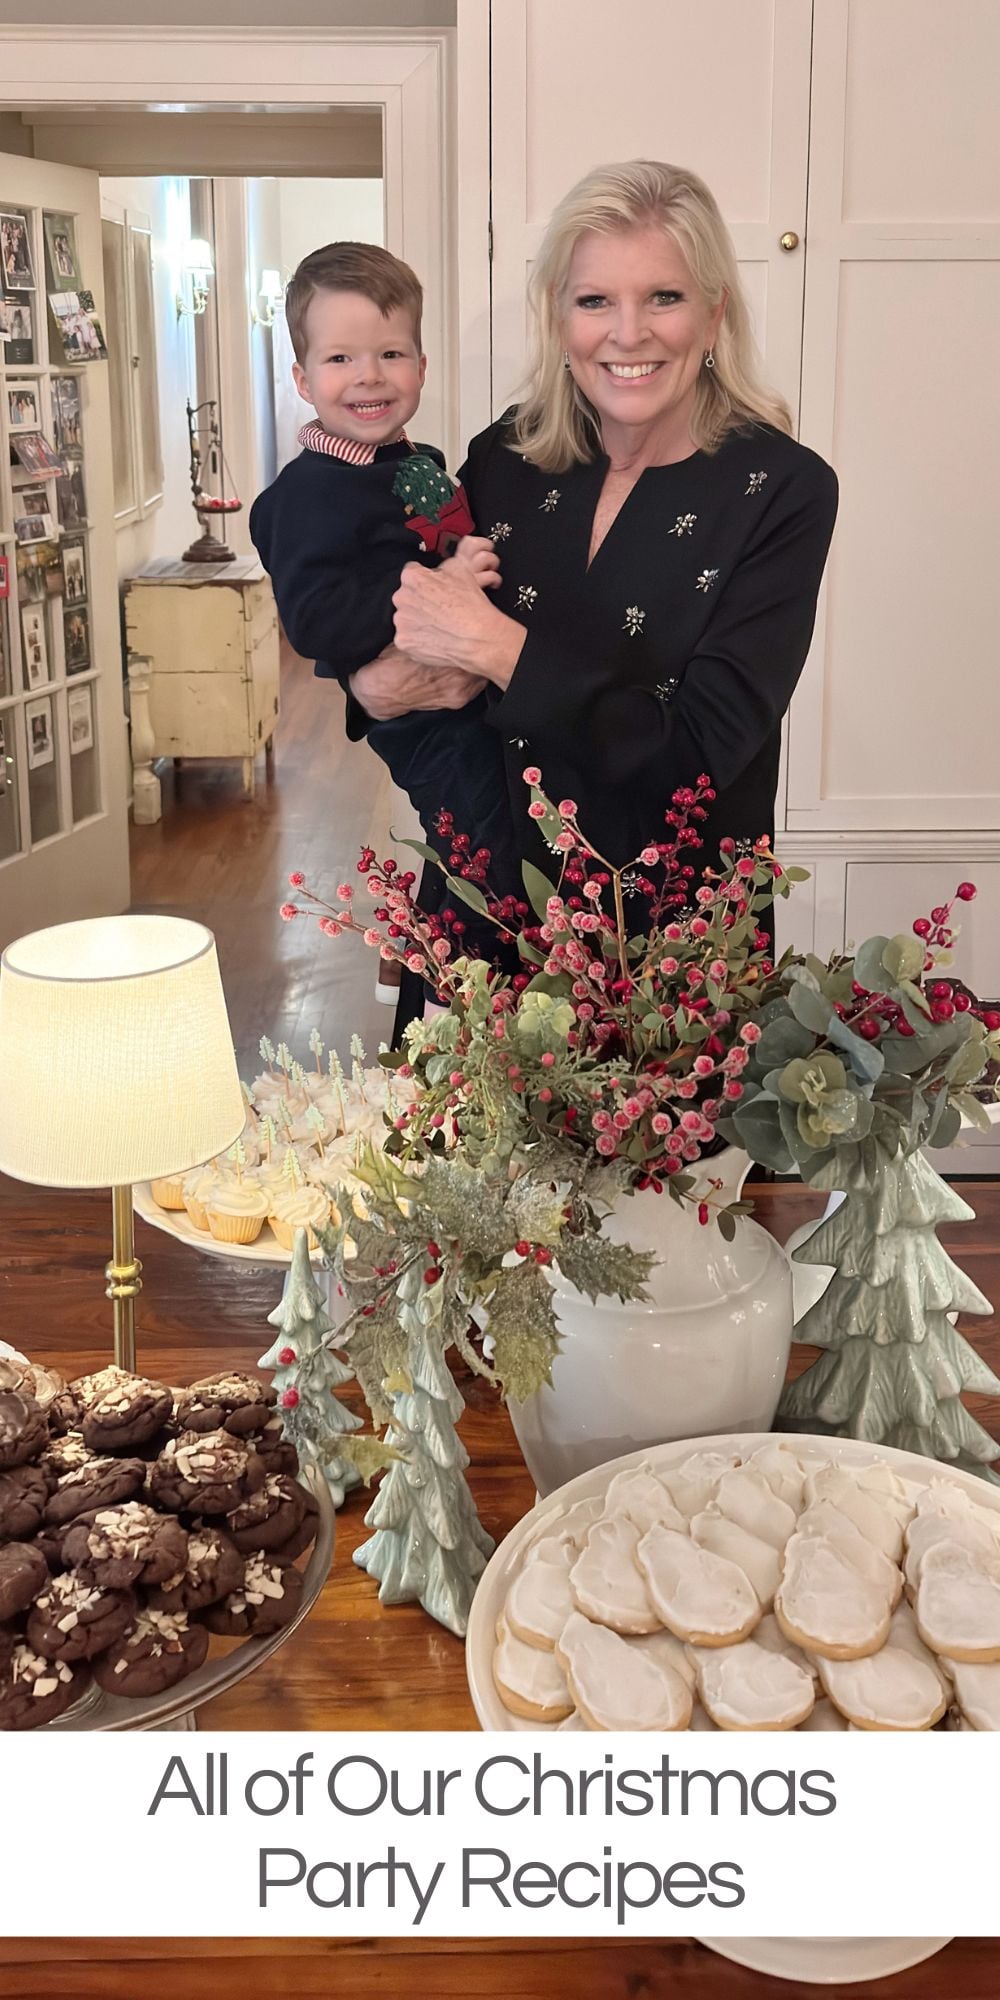
Hosting a Christmas party for 150 – 200 people is no small feat, but it’s one of my favorite ways to celebrate the season and unite those we love. Today, I am sharing our Christmas Party recipes.
Every December, my kitchen is a whirlwind of activity for weeks as I prepare all the food for the party. Our party menu features 14 – 16 appetizers and six to eight desserts each year. I chose the menu items to offer something for everyone while embracing the festive spirit of Christmas.


The Christmas Party

Our Christmas party is more than just an event—it’s my gift to our friends and family and my favorite gift to give every year. Over the years, it’s become a space to celebrate old friendships, create new memories, and enjoy the warmth and comfort of the holiday season.
From the delicious food to the festive decorations and laughter echoing through our home, it’s a night we look forward to all year.

I am excited to share my recipes for our Christmas party this year, which was our 38th party. I included recipes from items that have been on the menu in previous years, too, and I hope you enjoy them as much as we do.

You can find the DIY at How to Make a Cardboard Gingerbread House of Your Home.
Is It True I Make All of The Food For Our Party?
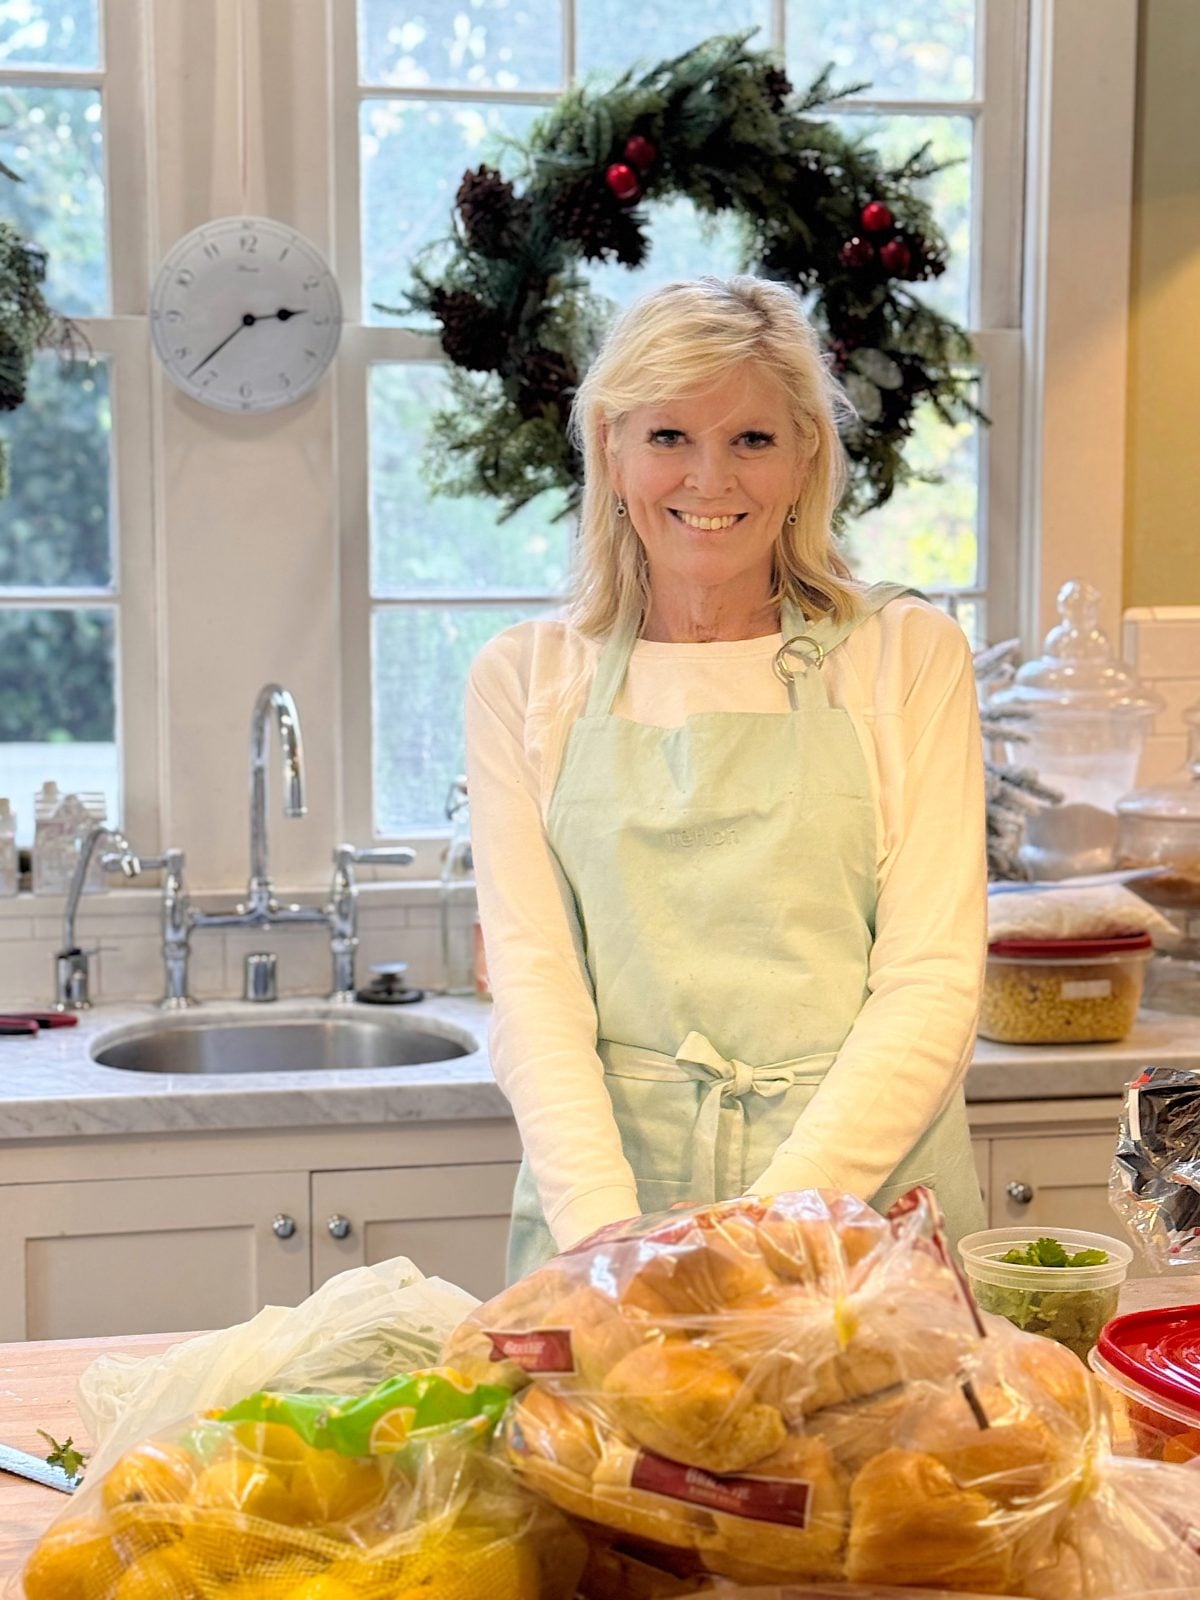
Every year, when I tell people I’m making all of the food for our holiday party, the first question is always the same. “How do you do it?” Especially when I add that the party is for 150 people and includes 16 appetizers and eight desserts. The short answer is planning.
The long answer is my color coded spreadsheet.
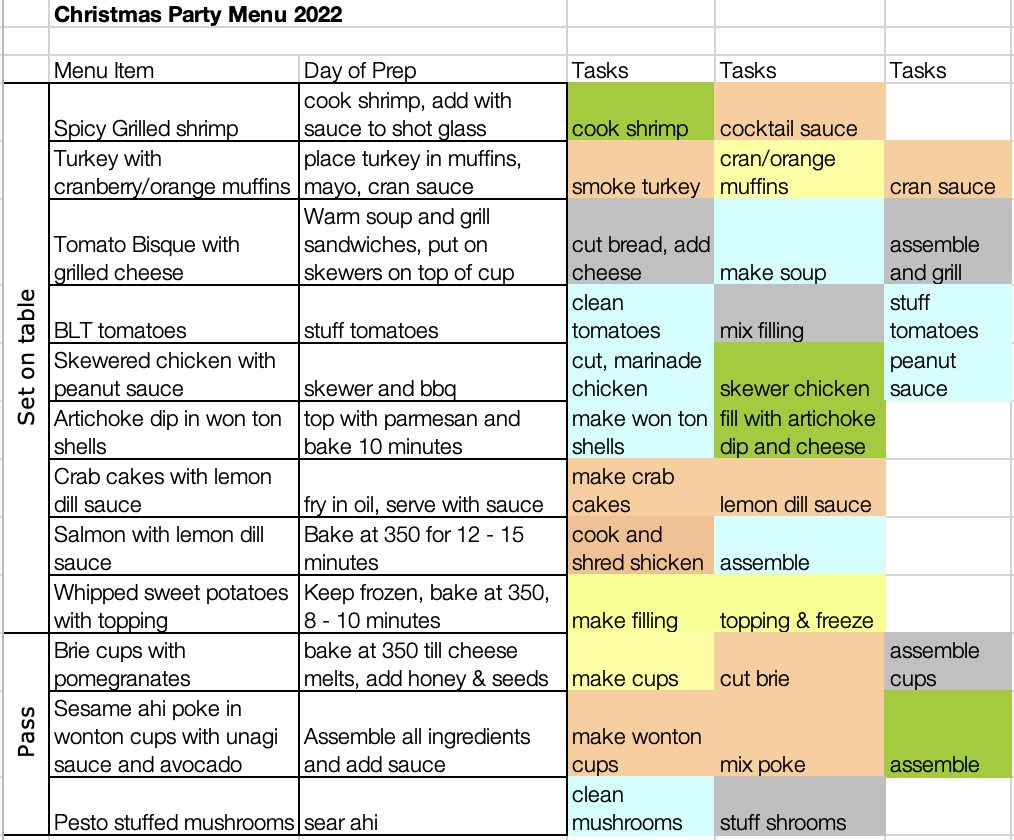
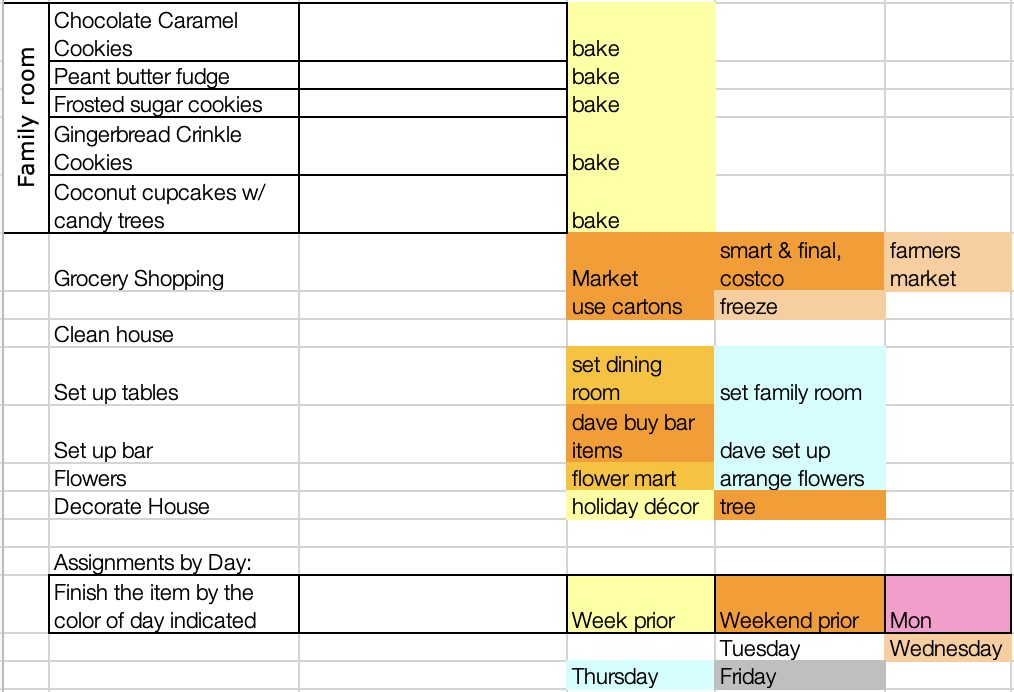
I learned a long time ago that the only way to tackle something this big without stress is to break it down into very small, very manageable pieces. My spreadsheet is the backbone of the entire process. Every appetizer and dessert gets its own line, color-coded by what needs to be done on which day, so I can see everything at a glance. I know exactly what can be made ahead, what needs to be frozen, what should be assembled the day before, and what must be finished the morning of the party.
I prep for ten straight days. Each day has a realistic list of tasks. Each day involves baking, chopping, assembling, or freezing. I never try to do too much at once. The rule is simple. Finish the day’s tasks before stopping. If I complete what’s scheduled, I know I’m still on track.
That structure gives me so much peace of mind. Instead of feeling overwhelmed by the total number of dishes, I focus only on what needs to be done that day. Once something is finished, it gets crossed off and put away. The containers are labeled, stacked neatly in the refrigerator or freezer, and nothing is left to chance.
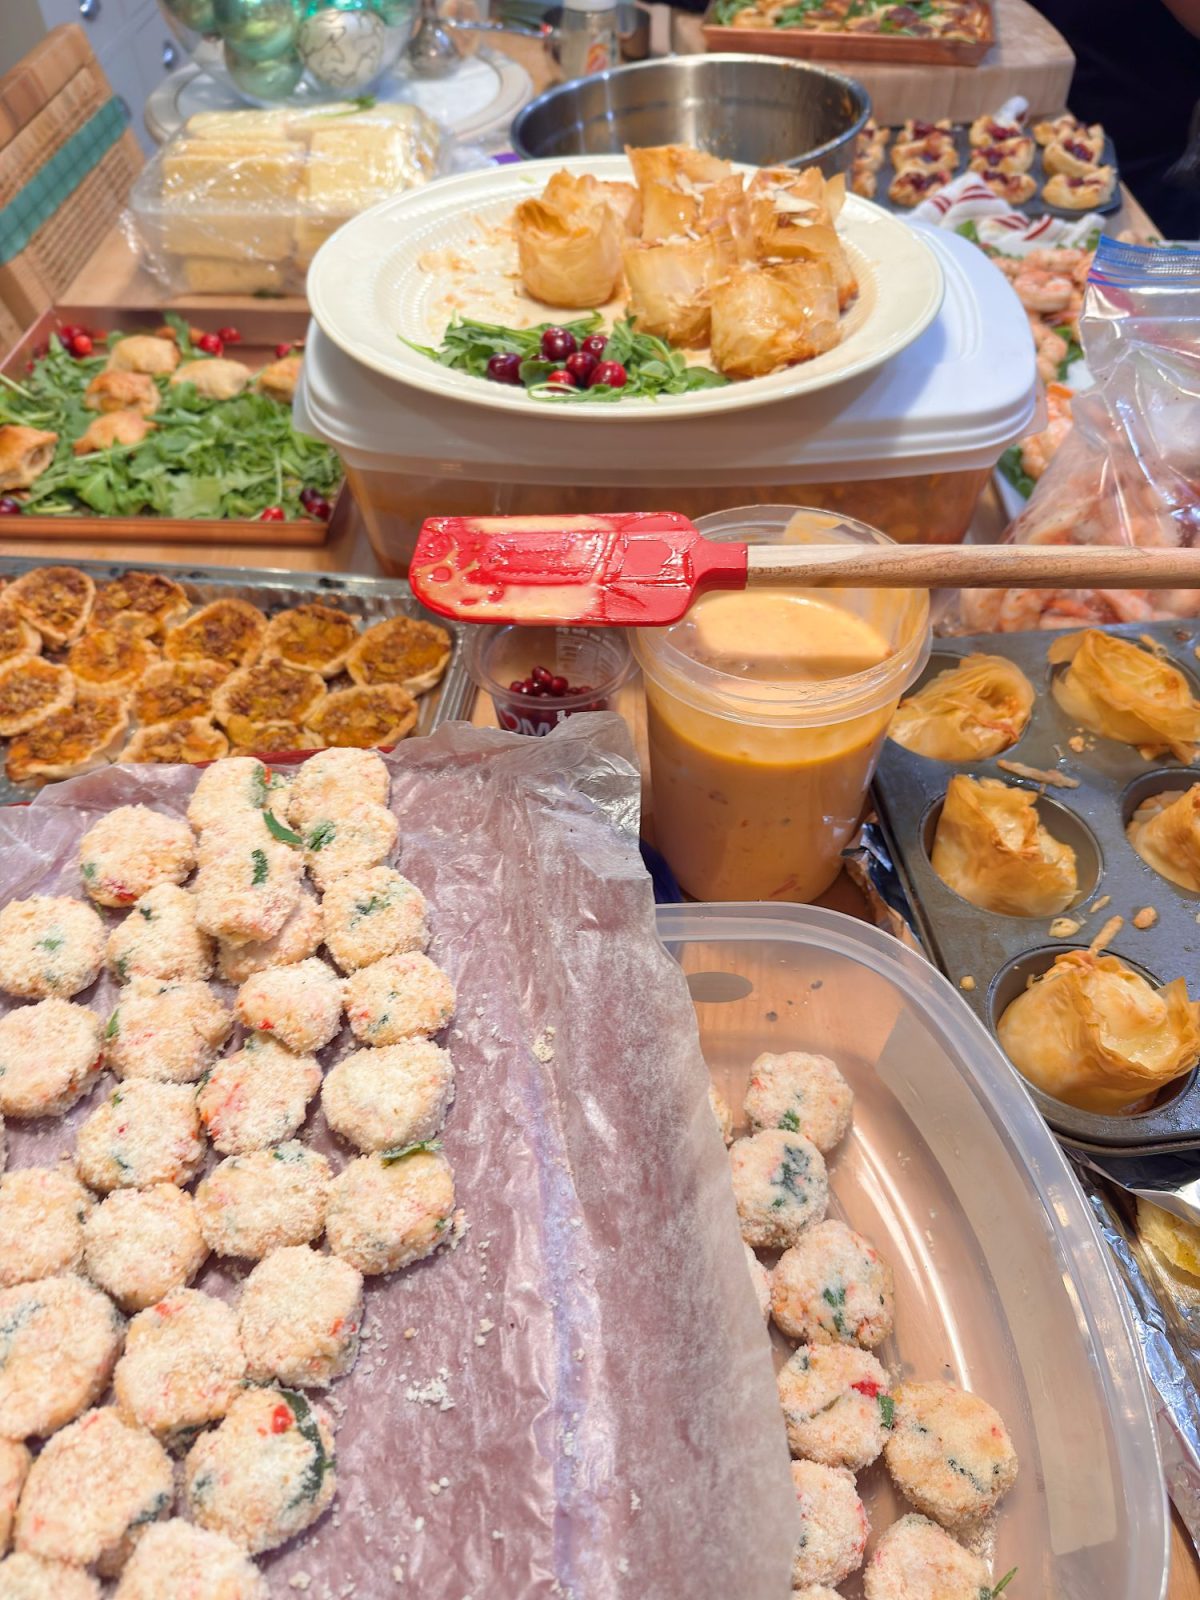
The beauty of this system is that by the time party day arrives, almost everything is done. I have the most fantastic group of helpers that arrive mid-day on party day, and they cook, plate, reheat, and serve our guests. Appetizers are passed or plated in the dining room. Desserts are on display in the family room.
This means I can actually enjoy the day, take a shower, and greet guests without being stuck in the kitchen.
Hosting a large holiday party doesn’t have to be stressful. With a solid plan, clear organization, and a little discipline, it becomes something I genuinely look forward to every year. That spreadsheet may not look glamorous, but it’s the secret that turns ten days of prep into a joyful celebration.
The Menu
The Christmas Party Menu
H O R S – D’ O E U V R E S

- Beef Tenderloin Sandwiches
- Grilled Salmon with Lemon Dill Sauce
- Roasted Shrimp Cocktail with Lemon-Horseradish Aioli
- Seared Ahi Tuna with Maple Ginger Soy Sauce
- Turkey with Cranberry-Orange Muffins
- Tomato Bisque with Grilled Cheese
- BLT Tomatoes
- Skewered Chicken with Peanut Sauce
- Won Ton Cups with Artichoke Spinach Dip
- Crab Cakes with Lemon Dill Sauce
- Caramelized Onion and Goat Cheese Bites
- Whipped Sweet Potatoes with Topping
- Brie Cups with Pomegranates
- Pesto Stuffed Mushrooms
- Cranberry Brie Bites in Puffed Pastry
- Caprese Wreath
I may sometimes use affiliate links on this blog, which means a small commission is earned if you purchase via the link. The price will be the same whether you use the affiliate link or go directly to the vendor’s website using a non-affiliate link.


The Christmas Party Menu
D E S S E R T S
- Chocolate Caramel Cookies
- Peanut Butter Fudge
- Frosted Sugar Cookies (Ugly Christmas Sweaters) or Pear)
- Double Mint Chocolate Cookies
- Coconut Cupcakes with Candy Trees
- Chocolate Peanut Butter Rice Krispy Treats
- Chocolate Almond Coconut Bars
- Millionaire Oreo Cookies
- Peanut Butter Chocolate Chip Cookies


The Christmas Party Recipes
H O R S – D’ O E U V R E S
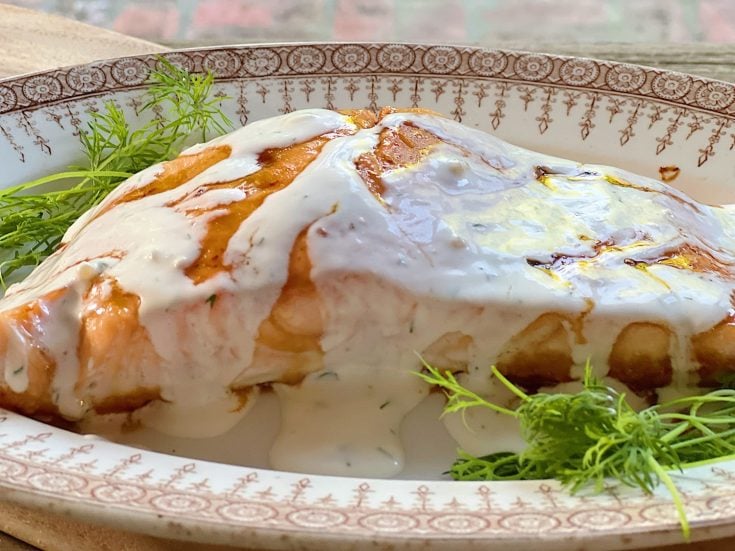
Grilled Salmon with Lemon Dill Sauce
Ingredients
- 4 salmon fillets, skin-on
- 1/4 cup olive oil
- 2 tablespoons lemon juice
- 2 cloves garlic, minced
- 1 teaspoon smoked paprika
- 1 teaspoon dried thyme
- 1/2 teaspoon salt
- 1/4 teaspoon black pepper
- For the Sauce:
- 1/2 cup mayonnaise
- 1/3 cup of buttermilk
- 2 tablespoons chopped fresh dill
- 1 tablespoon lemon juice
- 1 teaspoon lemon zest
- 1/2 teaspoon chopped garlic
- Salt and pepper, to taste
- Cedar or Alder pellets
Instructions
- Preheat your Coyote Pellet Grill to 350°F using Cedar or Alder pellets. These pellets are ideal for cooking fish and will infuse your salmon with a delicious smoky flavor.
- In a small bowl, whisk together the olive oil, lemon juice, garlic, smoked paprika, thyme, salt, and black pepper.
- Place the salmon fillets, skin-side down, on a piece of aluminum foil. Brush the olive oil mixture generously over the top of the salmon fillets.
- Place the aluminum foil with the salmon directly on the grill grates, and close the lid. Cook the salmon for 15-20 minutes, or until the internal temperature of the salmon reaches 145°F.
- While the salmon is cooking, prepare the sauce. In a small bowl, whisk together the mayonnaise, buttermilk, dill, lemon juice, zest, garlic, salt, and pepper until well combined.
- When the salmon is done, remove it from the grill and serve it immediately, topped with the sauce.
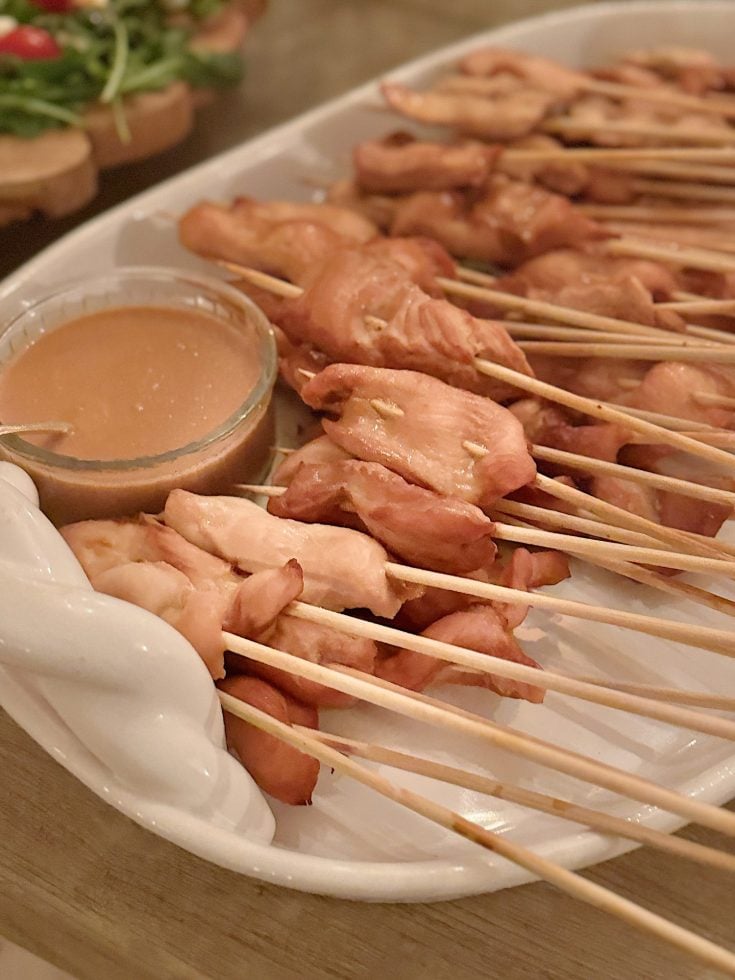
Skewered Chicken with Peanut Sauce
Ingredients
- 1/2 cup smooth peanut butter
- 1 clove garlic, roughly chopped
- 1/2 teaspoon grated fresh ginger
- 2 tablespoons lime juice
- 2 tablespoons low-sodium soy sauce
- 1 teaspoon sugar
- 1/4 teaspoon crushed red pepper flakes
- 3 boneless, skinless chicken breast halves (about 1 1/3 lb. total), cut lengthwise into 16 1/4-inch strips or two flank steaks, sliced in to strips
- 2 tablespoons olive oil
- Salt and pepper
Instructions
- Blend peanut butter, garlic, ginger, lime juice, soy sauce, sugar, crushed red pepper, and 1/3 cup water until smooth. Heat till warm.
- Preheat the grill to high. Thread chicken onto 16 skewers and place in 1 layer on a baking sheet. Brush both sides of the chicken with oil; season with salt and pepper. Working in batches if necessary, grill chicken until cooked, turning once, for about 15 minutes.
- Serve immediately or at room temperature, with peanut sauce on the side.

Won Ton Cups with Artichoke Spinach Dip

These Won Ton Cups with Artichoke Spinach Dip are a fun and elegant twist on the classic creamy artichoke dip, baked into crispy wonton shells for a bite-sized, crowd-pleasing appetizer. Perfect for parties, holidays, or any gathering, they offer all the delicious, cheesy goodness of traditional artichoke dip with the added crunch of the wonton cups.
Ingredients
- For the Artichoke Dip:
- 1 can (14 oz) artichoke hearts, drained and chopped
- 1 cup mayonnaise (or Greek yogurt for a lighter version)
- 1 cup grated Parmesan cheese
- 1 cup shredded mozzarella cheese (or a mix of mozzarella and provolone)
- 1/2 cup cream cheese, softened
- 1 garlic clove, minced
- 1/2 tsp lemon juice (optional, for brightness)
- 1/4 tsp red pepper flakes (optional, for a slight kick)
- Salt and pepper, to taste
- For the Wonton Cups:
- 1 package (about 30-40) wonton wrappers
- Olive oil spray or melted butter (for greasing the cups)
- One cup of grated parmesan cheese and parsley or chives, finely chopped (for garnish, optional)
Instructions
Prepare the Artichoke Dip:
- Preheat your oven to 350°F (175°C).
- In a medium-sized mixing bowl, combine the chopped artichokes, mayonnaise, Parmesan, mozzarella, cream cheese, minced garlic, lemon juice (if using), red pepper flakes (if using), and a pinch of salt and pepper.
- Mix everything until fully combined. Taste and adjust the seasoning, adding more salt, pepper, or lemon juice as needed. The dip should be creamy and flavorful.
Prepare the Wonton Cups:
- Lightly grease a mini muffin tin with olive oil spray or melted butter. This will help the wonton wrappers crisp up nicely.
- Using a biscuit cutter, cut the wonton wrappers into a circle about 1 1/2" inches wide.
- Take one wonton wrapper at a time and gently press it into a mini muffin cup, forming a "cup" shape. You may need to fold the edges slightly but try to keep the edges from overlapping too much, as they will get crispy when baked.
- Spray or brush the wonton wrappers with olive oil or melted butter to help them crisp up while baking.
- Bake the wonton wrappers in the mini muffin tin for 5-6 minutes or until just cooked. Keep an eye on them toward the end of the baking time to prevent burning. Remove from the oven and set aside.
Assemble the Artichoke Dip Cups:
- Spoon 1-2 tablespoons of the prepared artichoke dip into each baked wonton cup, filling them generously. The dip should be heaping on top.
- Sprinkle with parmesan cheese.
- Place the filled wonton cups back into the oven and bake for 8-10 minutes until the dip is hot, bubbly, and lightly golden on top.
Garnish and Serve:
- Once baked, remove the wonton cups from the oven and let them cool for a few minutes.
- Garnish with finely chopped fresh parsley or chives for color and freshness.
- Serve warm and enjoy!
Tips:
- Make Ahead: You can make the artichoke dip ahead of time and refrigerate it for up to 2 days before assembling the wonton cups. Just spoon the cold dip into the baked wonton shells and bake as directed.
- Wonton Wrappers: If you don't have a mini muffin tin, you can bake the wonton wrappers on a baking sheet by simply shaping them into small cups using a muffin tin or small oven-safe ramekins.
- Cheese Variations: Feel free to experiment with different cheeses. A combination of mozzarella, Parmesan, and Gruyère or cheddar works well, depending on your taste preferences.
- Extra Flavor: Add a tablespoon of chopped sun-dried tomatoes, olives, or fresh spinach to the artichoke dip for a unique twist.
Notes
These Artichoke Dip Wonton Cups are crispy, creamy, and utterly delicious! The crunchy wonton shells combined with the rich, cheesy artichoke dip make for the perfect bite-sized appetizer that’s sure to be a hit at any party or gathering. Enjoy!
Caramelized Onion and Goat Cheese Bites
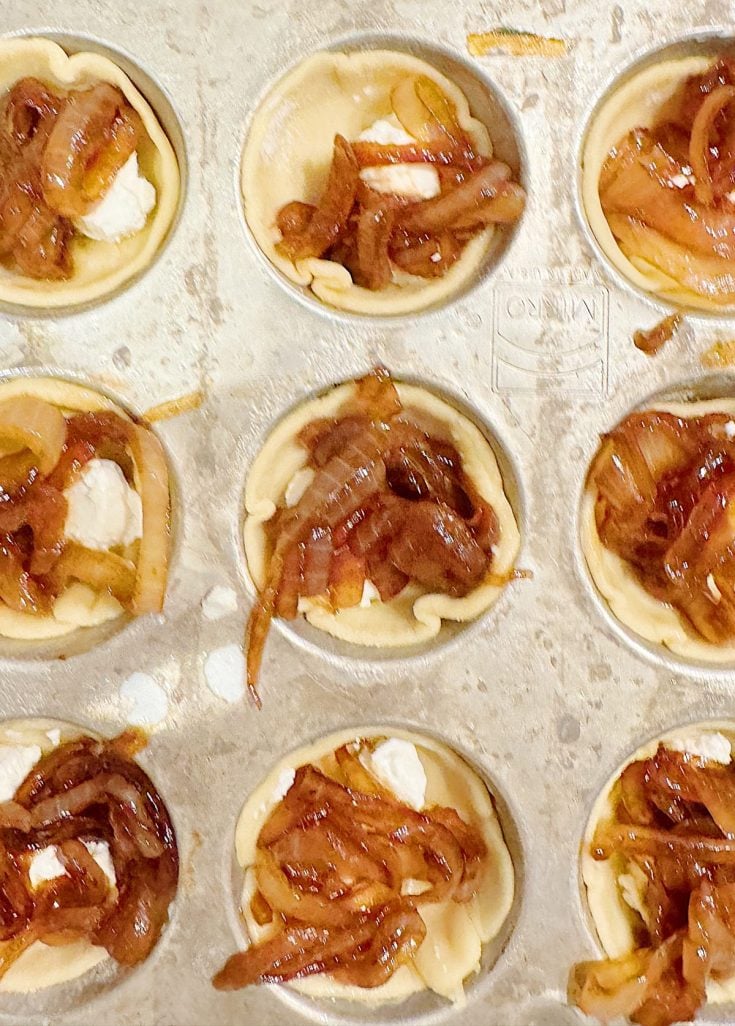
These Caramelized Onion and Goat Cheese Bites blend savory, creamy, and sweet flavors wrapped in a crispy pastry shell. The rich, sweet caramelized onions and tangy goat cheese create a mouthwatering contrast that will have everyone reaching for seconds. Whether for a party appetizer or a special snack, these bites are delicious.
Ingredients
- For the Caramelized Onions:
- 2 large yellow onions, thinly sliced
- 2 tbsp olive oil
- 1 tbsp unsalted butter
- 1 tbsp balsamic vinegar (optional, for extra depth of flavor)
- 1 tsp fresh thyme leaves (or 1/2 tsp dried thyme)
- 1/2 tsp salt
- 1/4 tsp black pepper
- For the Bites:
- 1 sheet puff pastry (store-bought, thawed if frozen)
- 4 oz goat cheese, softened (crumbled or spreadable)
- 1/4 cup grated Parmesan cheese (optional, for extra flavor)
- 1 egg, beaten (for egg wash)
- Fresh thyme sprigs (optional, for garnish)
- Honey for drizzling (optional, for added sweetness)
Instructions
- Heat the olive oil and butter in a large skillet over medium heat.
- Add the sliced onions and a pinch of salt, stirring occasionally. Cook for about 20-25 minutes, stirring every 5 minutes, until the onions are soft, golden, and sweet. If the onions start to stick to the pan, add a splash of water to deglaze.
- Once the onions are fully caramelized and have turned a deep golden brown, stir in the balsamic vinegar (if using) and thyme leaves.
- Cook for 2-3 minutes to allow the vinegar to reduce and coat the onions. Remove from heat and set aside to cool.
- Preheat your oven to 375°F (190°C) and line a baking sheet with parchment paper.
- Roll out the puff pastry on a lightly floured surface to smooth it out and prevent any creases.
- Cut the puff pastry sheet into small squares or circles, depending on your preference. You should get about 12-16 pieces, depending on the size.
- Gently press each pastry square or circle into the cups of a mini muffin tin or onto a baking sheet to form little "bites." You can also form small tartlet shapes using a tart pan.
- Crumble or spread the softened goat cheese into each pastry cup. You can use about 1-2 tsp of goat cheese per bite, depending on your preference.
- Spoon about 1 tsp of caramelized onions on top.
- Crumble or spread the softened goat cheese on top of the onions. You can use about 1-2 tsp of goat cheese per bite, depending on your preference.
- Sprinkle with a little grated Parmesan cheese if desired for an extra layer of flavor.
- Brush the edges of the puff pastry with the beaten egg to give the bites a golden, glossy finish as they bake.
- Bake in the oven for 15-20 minutes until the puff pastry is golden brown and crispy and the cheese is slightly melted.
- Remove from the oven and let the bites cool slightly.
- Garnish with fresh thyme leaves or drizzle with a little honey for an added touch of sweetness, if desired.
- Serve warm and enjoy!
Caramelize the Onions:
Prepare the Puff Pastry:
Assemble the Bites:
Bake the Bites:
Finish and Serve:
Notes
- Caramelized Onions: The key to great caramelized onions is patience! Don’t rush the cooking process. Low and slow is the best way to bring out their natural sweetness.
- Make-Ahead: You can caramelize the onions in advance and store them in the fridge for up to 3 days. Reheat them before assembling the bites.
- Goat Cheese Options: If you prefer a creamier texture, you can use spreadable goat cheese instead of crumbled. Alternatively, mix a little cream cheese with the goat cheese for a smoother filling.
- Flaky Pastry: If you’re short on time, use phyllo dough or pre-made tartlet shells, though puff pastry provides the best flakiness and texture.
- These Caramelized Onion and Goat Cheese Bites are savory, sweet, and flavorful. The crispy pastry, creamy goat cheese, and sweet onions create a perfect bite-sized treat. Enjoy!
Beef Tenderloin Sandwiches

I purchase my beef tenderloin at Costco. I know it’s expensive, but it is amazing.
Ingredients
- Beef Tenderloin
- 3 tablespoons unsalted butter, softened
- 5 teaspoons kosher salt
- 1 teaspoon dry mustard
- 3/4 teaspoon black pepper
- 2 cloves of garlic, minced
- 1 (3- to 3 1/2-lb.) beef tenderloin, trimmed
- Sour Cream Horseradish Sauce
- 3⁄4 cup sour cream
- 2 tablespoons prepared horseradish.
- 1 whole green onion (green and white parts finely chopped)
- 1 teaspoon lemon juice.
- 1⁄4 teaspoon Worcestershire sauce.
- 1⁄4 teaspoon salt.
- 1⁄8 teaspoon fresh ground pepper.
Instructions
- Stir together butter, salt, mustard, pepper, and garlic. Place beef on a wire rack in a rimmed baking sheet. Rub butter mixture all over beef, and chill, uncovered, at least 8 hours.
- Let beef stand for about 20 minutes at room temperature. Preheat oven to 425°F.
- Bake in a preheated oven until a meat thermometer is inserted into the thickest portion, which registers at 135°F (medium-rare) for 25 to 30 minutes.
- Cover loosely with aluminum foil; let rest for about 15 minutes before slicing.
- Combine all remaining ingredients to make the Horseradish sauce. Refrigerate until ready to serve.
Honey Brie with Pomegranates

Ingredients
- 40 small won ton wrappers
- 1 small brie round
- 80 pomegranate seeds
- 1/4 cup honey
Instructions
Cut the won ton wrappers with a small round biscuit cutter. Spray a tart pan with cooking spray. Place each won ton in a small muffin tin and cook for 3 minutes at 300 degrees until just slightly browned. Set aside or freeze.
Cut the skin off the brie and cut in to 1/2 inch cubes. Place in the won ton cups and cook till melted, about five minutes. Top with a small splash of honey and top with two pomegranate seeds.
NOTE:
I actually bake the won ton cups in advance and then freeze them until the day of our party.
Cranberry Orange Muffins
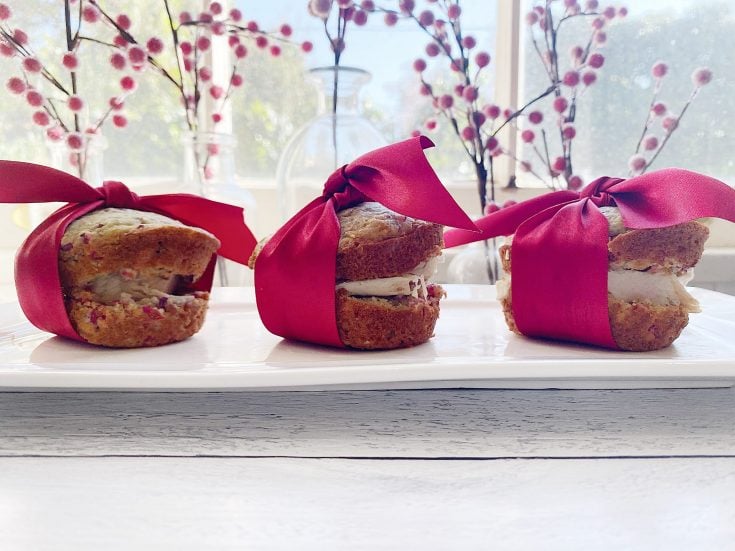
I make these every year for our holiday
party. I usually slice them and fill with smoked turkey. Some years I have even
tied bows around the sandwiches ... very festive but time-consuming!
Ingredients
- 2 cups flour
- 1 cup sugar
- 1 1/2 tsp. baking powder
- 1 tsp. salt
- 1/2 tsp. baking soda
- 4 TBL (1/2 stick) cold unsalted butter
- 1 egg, beaten
- Grated zest of one orange
- 3/4 cup freshly squeezed orange juice
- 2 1/2 cups chopped cranberries
Instructions
Preheat the oven to 350. Spray muffin tins with cooking spray.
Sift the dry ingredients together into a large bowl.
Using a pastry blender or food processor, cut the butter into the dry ingredients until the mixture is crumbly.
Add the egg, orange zest, and orange juice, and stir by hand until evenly moistened. Fold in the cranberries.
Spoon the batter evenly into the prepared muffin tins and bake until done, about
20 minutes. Turn out onto a wire rack to cool.
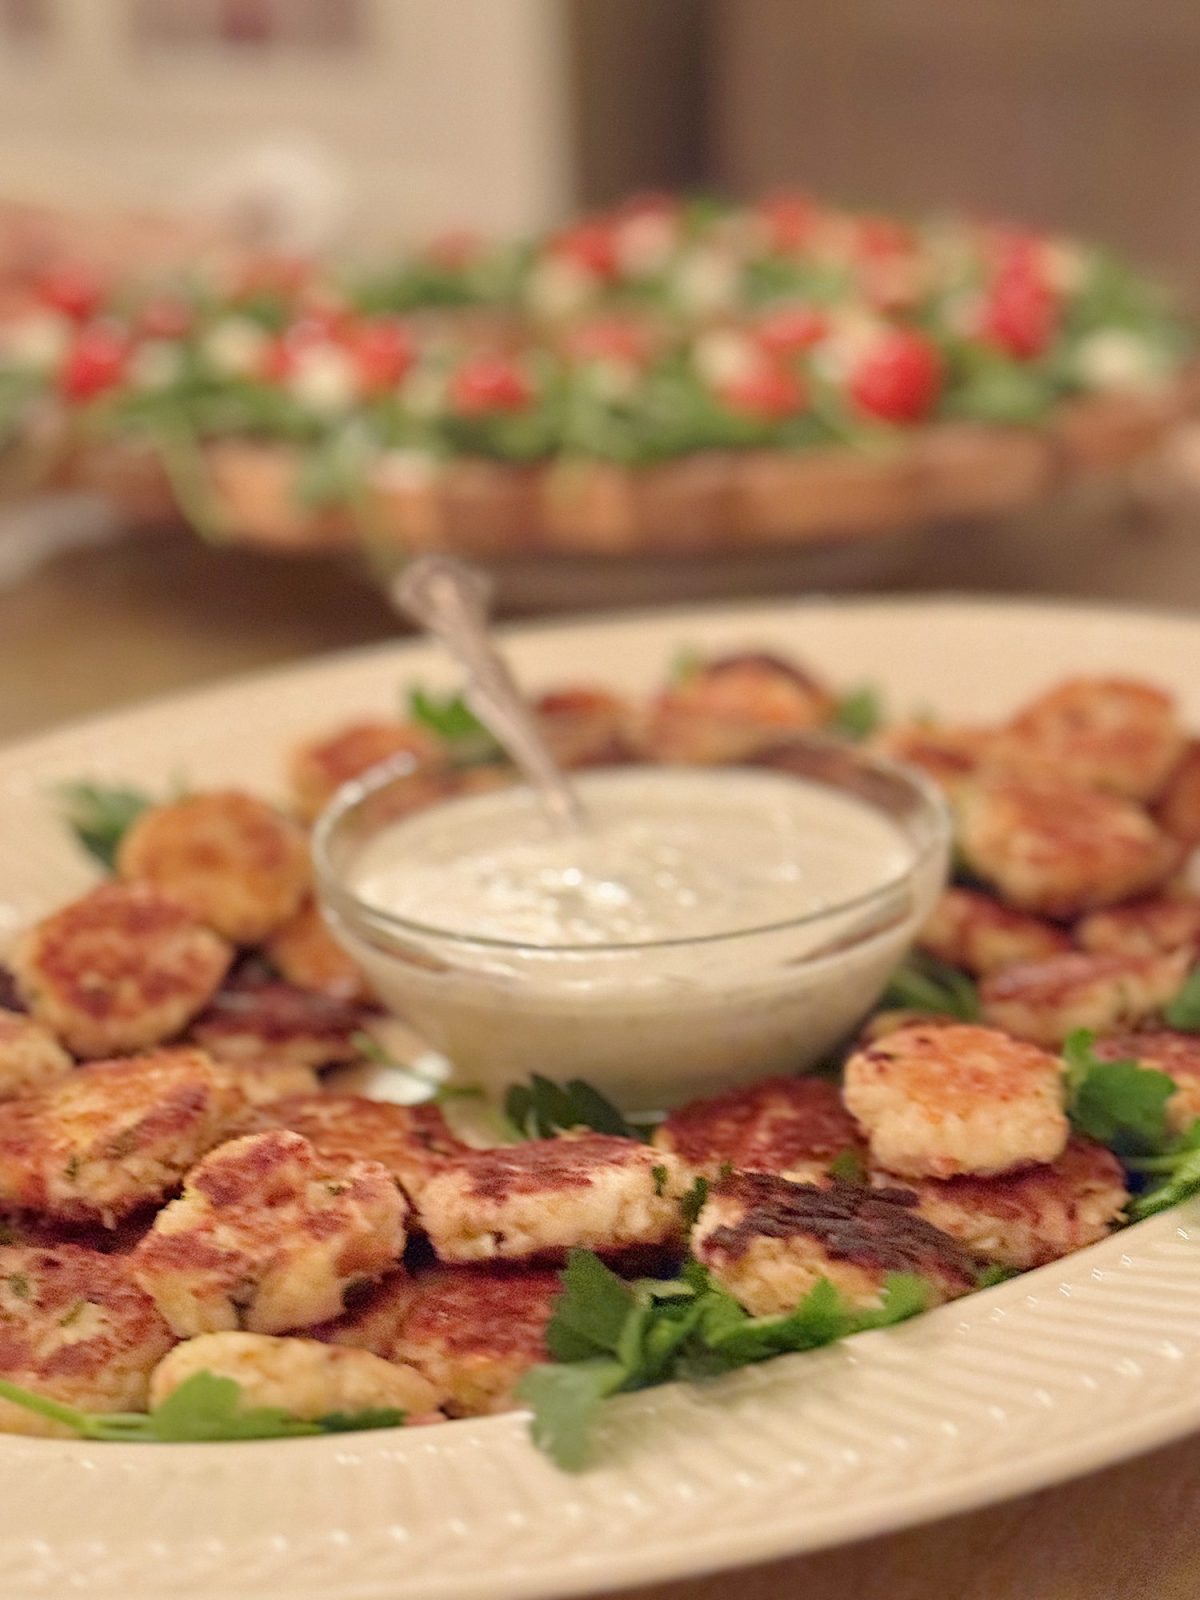
The Best Crab Cakes Recipe with Lemon Dill Sauce
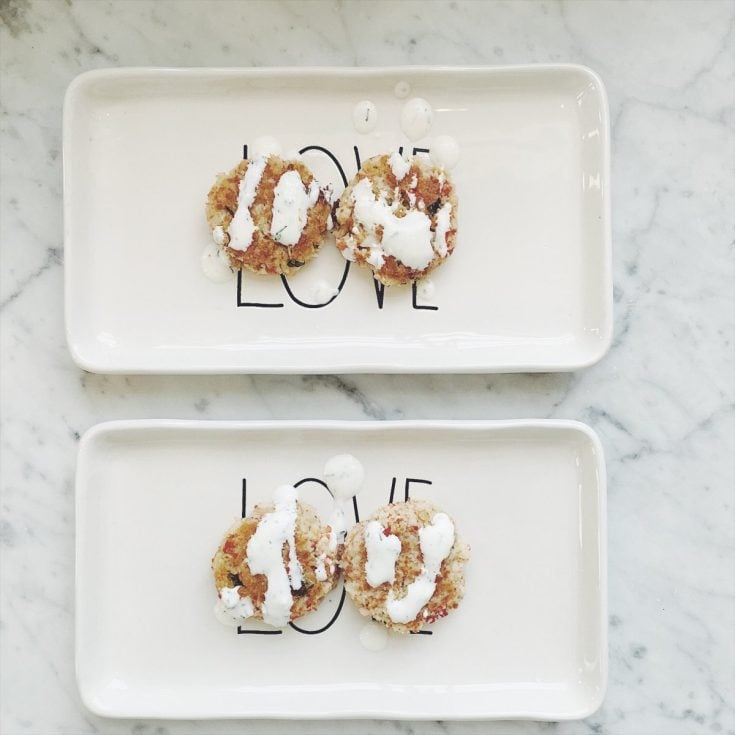
These crab cakes with lemon dill sauce are to die for. They aren't "fishy" and are by far the most popular appetizer anytime I make them.
Ingredients
- Crab Cakes
- 3 TBL butter
- 1 scallion, chopped fine
- 1 glove garlic, minced
- 2 TBL red bell pepper, chopped fine
- Ground red pepper (cayenne) to taste
- 3 TBL heavy cream
- 1 TBL dijon mustard
- 1 egg, beaten
- 1 tsp minced fresh basil
- 1 tsp minced fresh parsley
- 1 cup fine dry bread crumbs
- 1 pound fresh lump crabmeat
- 1/4 cup parmesan cheese
- 2 TBL vegetable oil
- Lemon Dill Sauce
- 3/4 cup mayonnaise
- 1/2 cup buttermilk
- 2 TBL fresh dill chopped
- 1 TBL minced fresh parsley
- 2 tsp fresh lemon juice
- 1 TBL grated lemon peel
- 1 clove garlic, minced
Instructions
Crab Cakes
- Lightly chop the crab meat in the food processor and set aside.
- Melt one TBL of the butter in a large skillet and saute the scallion, garlic and red bell pepper until wilted, about 2 minutes.
- Add the ground red pepper, cream and mustard.
- Cool slightly. Add the egg, basil, parsley, 1/2 cup of the bread crumbs, and the crabmeat.
- Mix lightly. Mold into 25 one-inch wide patties.
- Combine the remaining 1/2 cup of bread crumbs and the parmesan cheese in a shallow dish.
- Roll the patties in the crumb and cheese mixture.
- Chill for at least one hour. (The crab cakes can be made one day prior and refrigerated, covered, up to this point.)
- Combine the oil and the remaining 2 TBL of butter over moderate heat in a large skillet.
- Saute the crab cakes 3 minutes on each side.
Lemon Dill Sauce
- Combine all ingredients in a medium bowl.
- Chill until the mixture thickens.
Notes
The Lemon Dill Sauce in this recipe is also really great with salmon (baked or smoked).
Whipped Sweet Potatoes with Brown Sugar Pecan Topping
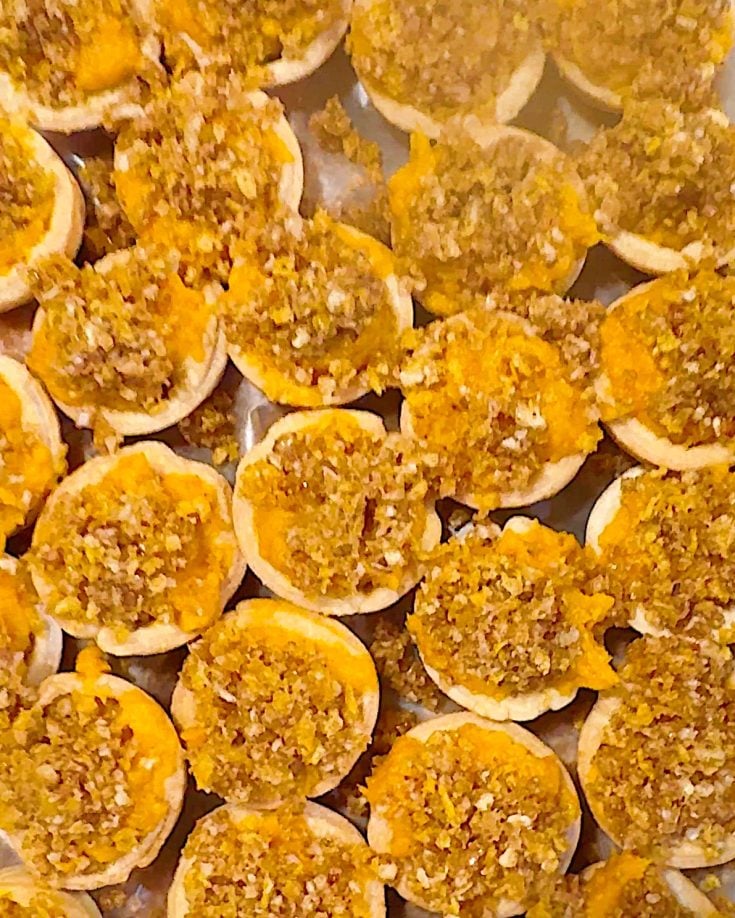
These are the best sweet potatoes in the world. You might want to double the topping recipe because everyone eats it before I can get it into the pan! I made this recipe as a casserole for Thanksgiving, but I modified it, and this appetizer is the best.
Ingredients
- Pie Crusts
- • Two packages of premade refrigerated pie crusts, 14 oz (2 crusts in each package)
- Sweet potatoes
- • 22 ounces red-skinned sweet potatoes (yams; about 4 large), peeled, cut into 1-inch pieces
- • 6 tablespoons (3/4 stick) unsalted butter, room temperature
- • 1 large egg
- • 6 tablespoons sugar
- • 1 teaspoon pumpkin pie spice
- • Pinch of salt
- Topping
- • 1 1/2 cups cornflakes, crushed
- • 1/2 cup (packed) brown sugar
- • 1/2 cup chopped pecans
- • 6 tablespoons (3/4 stick) unsalted butter, melted
Instructions
- Preheat oven to 350°F.
- Spray a mini muffin pan with o-stick cooking spray.
- Gently place the pie crust on a flat surface and roll out to expand the size by about 1" around.
- Using a 1.5" biscuit cutter, cut the dough into rounds and gently place in a mini muffin tin. Set aside.
- Cook sweet potatoes in a large pot of boiling water until tender, about 15 minutes. Drain; transfer potatoes to a large bowl and add butter.
- Using an electric mixer, beat until smooth. Add egg, sugar, spice, and salt; beat to blend.
- Spoon mixture into pie crusts.
- Meanwhile, prepare the topping and mix all ingredients in a medium bowl.
- Spoon topping evenly over potato mixture.
- Bake until beginning to brown around the edges and slightly puffed, about 20 minutes.
Notes
It can be made one day ahead. Cover and chill. Or freeze for up to four weeks
Seared Ahi Tuna with Maple Ginger Soy Sauce Recipe

This recipe is one of those recipes that looks amazing, tastes amazing but was easy to make. This Seared Ahi with Maple ginger Soy Sauce is a crowd-pleaser for sure.
Ingredients
- 1/2 cup maple syrup
- 1/2 cup soy sauce
- 1/4 cup wasabi powder (horseradish powder)
- 2 TBL chopped ginger
- 6 4-oz. sushi-grade yellowfin tuna ahi steaks
- 1/4 cup sesame seeds
- 3 TBL canola oil
- 4 large scallions, chopped
- 1/4 cup sesame seeds
- 3 TBL canola oil
- 1 tsp crushed ginger
Instructions
Combine the maple syrup, ginger, and soy sauce in a medium saucepan. Boil over medium heat until reduced to 1/2 cup, stirring occasionally, about 5 minutes (do not boil over).
The sauce can be made 1 day ahead, just reheat before serving.
If you want spicier ahi, mix 2 tsp. of wasabi powder, and 2 1/2 tsp. water in a small bowl to form thick but spreadable paste. Mix with crushed garlic. Rub about 1/4 tsp. paste on both sides of each tuna steak. Place sesame seeds on a small plate. Press both sides of each tuna steak into sesame seeds.
Heat oil in a large skillet over high heat. Add tuna to skillet and cook until sesame seeds turn light brown, about 20 seconds per side. Transfer to cutting board and cut each steak into small cubes.
Place small pieces into shot glasses or small plates. Drizzle with maple ginger soy sauce. Top with chopped green onions.
Fire Roasted Tomato Bisque with Grilled Cheese Sticks
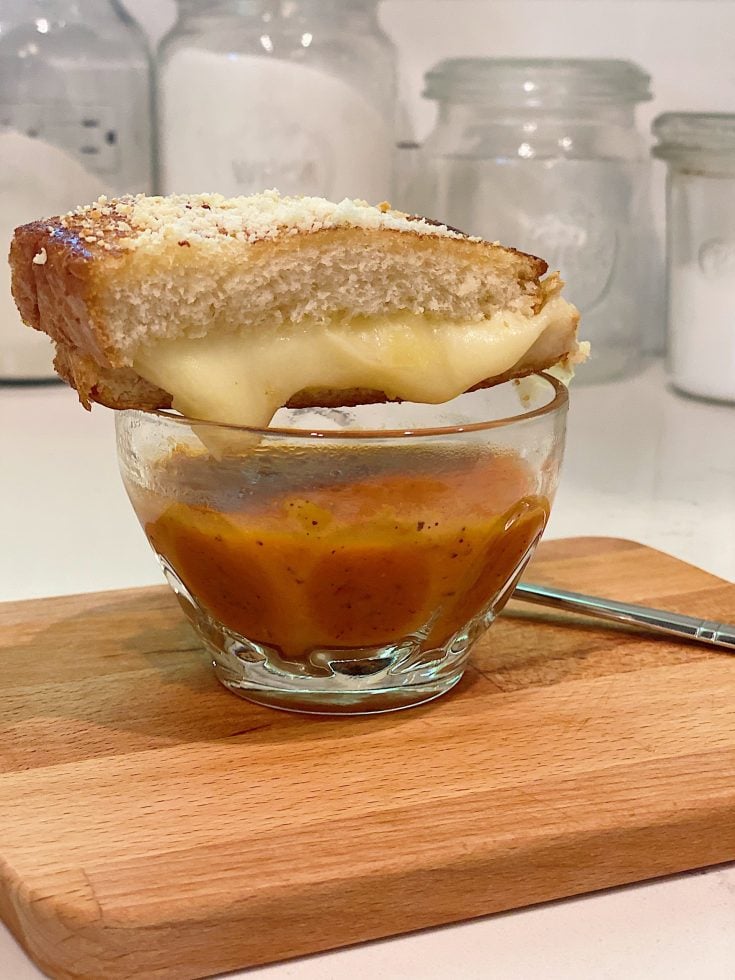
This Fire Roasted Tomato Bisque Soup and Grilled Cheese Sticks is one of the best soup recipes I have ever tasted. It is delicious.
Ingredients
- 3 tablespoon olive oil
- 1 tablespoon butter
- 2 Cups finely chopped yellow onions
- 1 tablespoon minced garlic
- 3 Cups Chicken Stock/Broth
- 1 28oz can and 1 14.5 oz can crushed fire roasted tomatoes
- ½ cup half and half
- 4 leaves fresh basil, finely chopped
- Salt and pepper to taste
- 1 loaf of Texas Toast
- 1 brick gruyere cheese, sliced thinly
- 1 brick sharp white cheddar cheese, sliced thinly
- 1 brick mozzarella cheese, sliced thinly
- 4 tablespoon olive oil
- 4 tablespoon butter
Instructions
Fire Roasted Tomato Bisque
- Place olive oil and butter in saucepan over low to medium heat. When oil and butter are combined and bubbly add onions and garlic. Cook until onions are translucent and beginning to brown. Remove from heat.
- In stock pot on low to medium heat, add chicken stock/broth, both cans of tomatoes (do not drain). Stir to combine. Add onions, garlic and oil.
- Add half and half and basil to pot, stir to combine. Season to taste with salt and pepper. Once combined and cooked through, remove from heat.
- Transfer soup to blender. Pulse until smooth.
- Return to pot. Soup can be made ahead and refrigerated. When ready to serve, warm slowly before serving.
Grilled Cheese Sticks
- Cut away crusts from bread. To assemble each sandwich, use two pieces of bread. Layer slices of gruyere on top of the bread. On top of the gruyere, layer the sharp white cheddar cheese slices. On top of the cheddar cheese, layer the mozzarella slices.
- In a saucepan, over medium heat, add 1 TBL of olive oil and 1 TBL of butter. Once the olive oil and butter is combined and bubbly.
- Carefully transfer the bread layered with cheese into the pan, bread side down. Place the second piece of bread on top of cheese.
- When the bread is golden brown, carefully flip the sandwich to brown the second piece of bread.
- Once both sides of the bread are browned, transfer the sandwich to a cookie sheet, lined with parchment paper.
- Place in oven heated to 300 degrees. Bake sandwich for 10-12 minutes until cheeses are melted.
- Cut sandwiches in half and serve with soup.
BLT Tomatoes

BLT tomatoes are kind of a pain to make. The cherry tomatoes are small and you need to hollow them out, then stuff them with the lettuce, bacon, mayo mixture. However, they are worth the effort. These are yummy little poppable bites and were the perfect size for our fourth course.
Ingredients
- 36 Cherry Tomatoes
- 6 Pieces Thick Sliced Bacon,
- ¼ Head Iceberg Lettuce
- ¼ Cup Mayonnaise
Instructions
BLT Tomatoes
- Slice top of cherry tomato off close to the top. With very small spoon, carefully scoop out the inside of the tomatoes. Throw away the tops and insides of the cherry tomatoes.
- Cook the bacon slices until very crispy. Blot any extra grease from bacon. Chop bacon very finely and set aside.
- Chop lettuce very finely.
- Mix bacon, lettuce and mayonnaise together. With a small spoon, fill the cherry tomatoes with the bacon lettuce and mayonnaise mixture. These can be made ahead and kept in the refrigerator until you are ready to serve.
Notes
*If you love BLTs, this can also be made into a salad. Chop tomatoes instead of hollowing them out and mix together. Voila, BLT salad!
Roasted Shrimp Cocktail with Lemon Horseradish Aioli

This recipe combines 36 plump, roasted shrimp and a zesty lemon-horseradish aioli, perfect for an elevated appetizer.
Ingredients
- For the Roasted Shrimp:
- 36 large shrimp (16–20 count), peeled and deveined, tails on
- 2 tablespoons olive oil
- 1 teaspoon garlic powder
- 1 teaspoon smoked paprika
- ½ teaspoon salt
- ½ teaspoon freshly ground black pepper
- Zest of 1 lemon
- For the Lemon-Horseradish Aioli:
- ½ cup mayonnaise
- 2 tablespoons prepared horseradish
- 1 tablespoon Dijon mustard
- 1 teaspoon garlic, finely minced or grated
- Zest of 1 lemon
- 1 tablespoon fresh lemon juice
- ½ teaspoon salt
- ¼ teaspoon freshly ground black pepper
- 1 tablespoon fresh parsley, finely chopped (optional, for garnish)
Instructions
Prepare the Shrimp:
- Preheat the oven to 425°F (220°C) and line a baking sheet with parchment paper.
- In a large bowl, toss the shrimp with olive oil, garlic powder, smoked paprika, salt, pepper, and lemon zest until evenly coated.
- Arrange the shrimp in a single layer on the prepared baking sheet.
Roast the Shrimp:
- Roast in the preheated oven for 8–10 minutes, or until the shrimp are pink, firm, and slightly caramelized around the edges. Be careful not to overcook.
- Remove from the oven and let cool slightly.
Make the Lemon-Horseradish Aioli:
- In a medium bowl, whisk together mayonnaise, horseradish, Dijon mustard, garlic, lemon zest, lemon juice, salt, and pepper until smooth.
- Transfer the aioli to a serving dish and garnish with fresh parsley if desired.
Serve:
- Arrange the roasted shrimp on a platter and serve with the lemon-horseradish aioli on the side for dipping. Or serve in shot glasses with the aioli.
- Optional: Add lemon wedges and fresh parsley sprigs to the platter for extra presentation.
Notes
This elegant and flavorful dish is guaranteed to impress your guests!
Christmas Caprese Wreath

This festive Caprese Wreath combines vibrant red grape tomatoes, creamy mozzarella pearls, and fresh arugula in a stunning holiday display. It's perfect as an appetizer or centerpiece for your holiday table!
Ingredients
- 4 cups fresh arugula
- 1 pint grape or cherry tomatoes, halved
- 8 ounces mozzarella pearls (small mozzarella balls)
- 2 tablespoons extra virgin olive oil
- 2 tablespoons balsamic glaze
- Salt and freshly ground black pepper, to taste
Instructions
- Prepare the Wreath Base: Arrange the arugula in a circular shape on a wreath-shaped cutting board or a large, round serving platter to mimic the look of a holiday wreath.
- Add the Toppings: Evenly scatter the grape tomato halves and mozzarella pearls over the arugula, ensuring a balanced mix of red and white for a festive look.
- Drizzle and Season: Drizzle the olive oil and balsamic glaze lightly over the wreath. Sprinkle with a pinch of salt and freshly ground black pepper for added flavor.
- Serve: Place the wreath in the center of your table and serve with toothpicks or tongs for easy grabbing.
Notes
- Prep the ingredients just before serving to keep the arugula fresh and crisp.
- Customize the look with festive decorations like edible flowers or red pepper flakes for a bit of heat.
This Christmas Caprese Wreath is a simple yet stunning dish that will bring holiday cheer to your gathering!

Pesto Stuffed Mushrooms
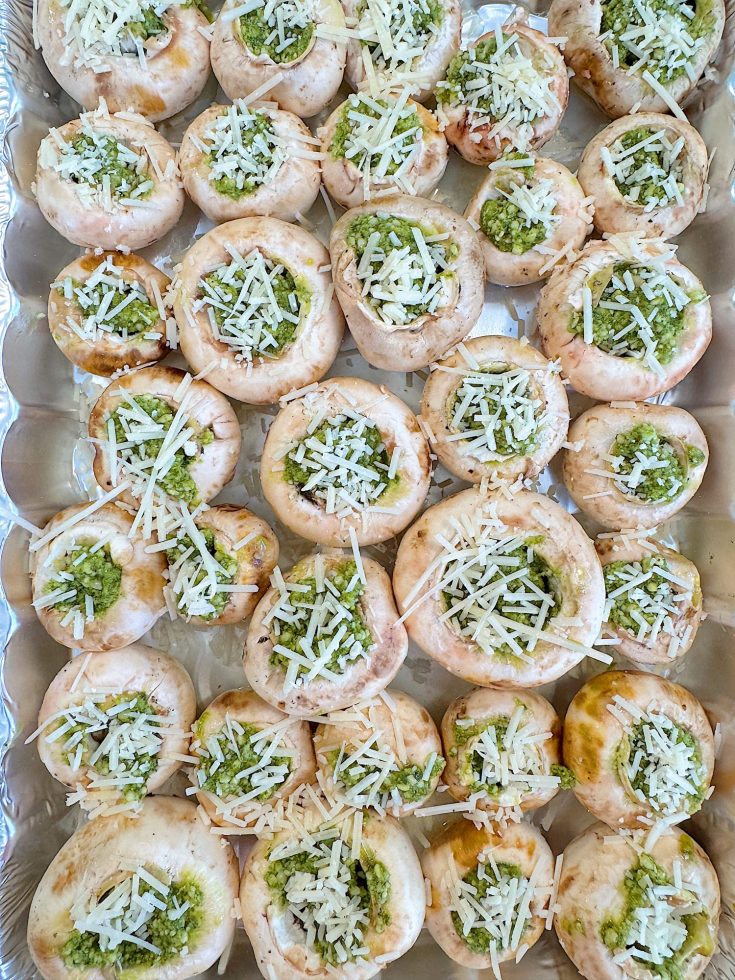
These Pesto Stuffed Mushrooms are bite-sized, savory, and packed with flavor, perfect for a crowd-pleasing appetizer. This recipe makes 24 mushrooms.
Ingredients
- 24 large white or cremini mushrooms, stems removed and cleaned
- 1 cup prepared pesto (store-bought or homemade)
- ¾ cup panko breadcrumbs
- ½ cup grated Parmesan cheese (plus extra for topping)
- 1 clove garlic, minced
- 1 tablespoon olive oil
- ½ teaspoon salt
- ¼ teaspoon black pepper
- Fresh parsley or basil leaves (optional, for garnish)
Instructions
- Preheat the oven to 375°F (190°C).
- Clean the mushrooms by gently wiping them with a damp cloth. Remove the stems and scoop out a bit of the center with a small spoon to create more room for stuffing.
- Combine the pesto, panko breadcrumbs, Parmesan cheese, minced garlic, olive oil, salt, and pepper in a medium bowl. Mix until well combined and forms a paste-like texture.
- Fill each mushroom cap with the pesto mixture using a small spoon, pressing gently to pack it in.
- Arrange the stuffed mushrooms on a baking sheet lined with parchment paper or lightly greased.
- Sprinkle a pinch of grated Parmesan cheese over each stuffed mushroom.
- Bake in the oven for 18–20 minutes, or until the mushrooms are tender and the tops are golden brown.
- Let the mushrooms cool for 5 minutes. Garnish with fresh parsley or basil leaves if desired. Serve warm.
Notes
- For extra crunch, broil the mushrooms for the last 1–2 minutes of baking.
- These can be made ahead; stuff the mushrooms, refrigerate, and bake just before serving.
These pesto-stuffed mushrooms are elegant, flavorful, and sure to be a hit at your next gathering!
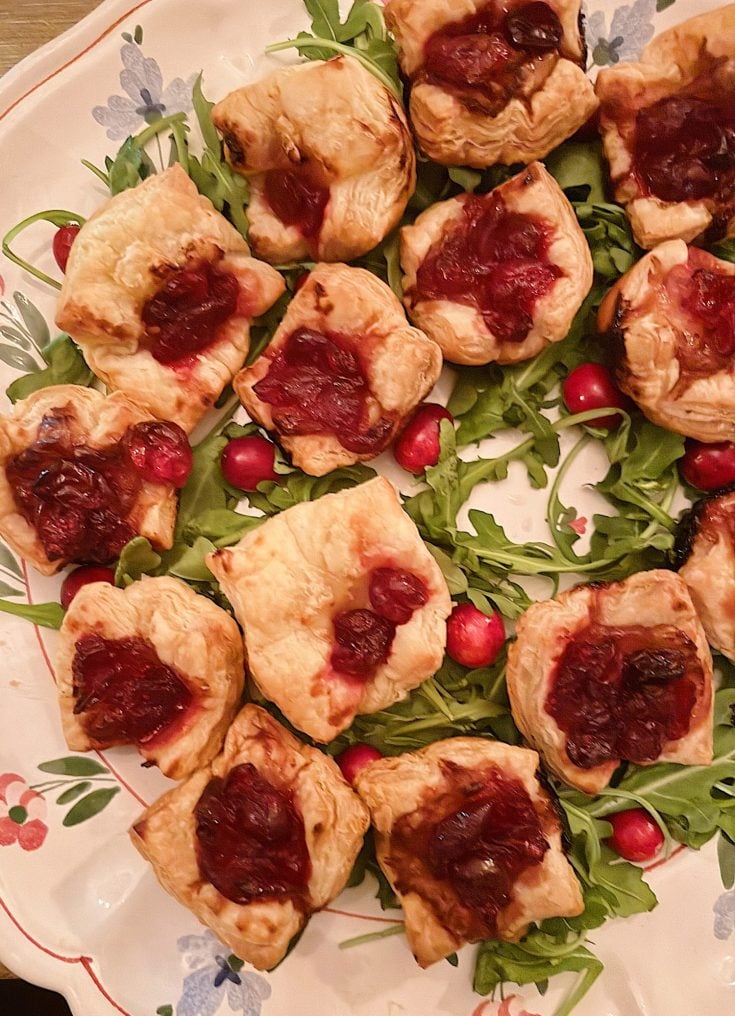
Cranberry Brie Bites in Puffed Pastry
Ingredients
- 6 ounces fresh, organic cranberries {roughly 11/2 cups}
- 1/ 4 cup plus 1 tablespoon water
- 1/ 4 cup sugar
- Pinch cinnamon, about 1/8 teaspoon
- Pinch orange zest, about 1/8 teaspoon {optional)
- 2 sheets all-butter puff pastry {a 17 or 18 ounce package}, thawed and
- kept cold in fridge
- 4 ounces brie cheese, cut into 24 small pieces (a little smaller than 1/2
- inch size square}
- 1/ 4 cup chopped, candied pecans, for garnish
- Honey, to drizzle
- 1 tablespoon thyme leaves, for garnish
Instructions
1. Begin by gathering and prepping all of your ingredients {except for the puff pastry, keep that cold) according to the
ingredient list above to have ready and organized for use.
2. Add the cranberries, water, sugar and pinch of cinnamon to asmall pot or sauce pan, and bring to a vigorous simmer. Then,
reduce the heat and gently simmer the cranberries for 6 to 8 minutes, until they begin to pop and break down, and the sauce thickens.
3. Spoon the cronberry souce into a dish and ollow the souce to cool slightly to room temp.
4. Have two mini muffin tins (24 wells total) on hond and ready.
5. Next, place one sheet of thowed, cold puff postry on a work surface in front of you, and very gently and slightly give it a roll to even it out {you don't want to enlorge it, just smooth and even it out a bit).
6. Cut the sheet into 12 squares by cutting the sheet into thirds verticolly, then into fourths horizontally. Gently press each puff pastry square into the well of one of your mini muffins tins, to create a cup-like shape.
7. Then, add one piece of brie cheese to the center of each, and place the filled muffin tins into the fridge to chill for at least 20
minutes. Repeat this process with the other puff pastry sheet and brie cheese, and place into the fridge to chill for at least 20 minutes as well.
8. Preheat your oven to 400°.
9. Once the puff pastry and brie has chilled, bake for 22 minutes, or until golden-brown and puffed.
10. Remove from oven and allow the puff pastry bites to sit for 5 minutes in the mini muffin tin.
11. Place the puff pastry bites onto a serving platter and dollop with some of the cranberry sauce. Sprinkle over some
chopped candied pecans, drizzle over a small amount of honey, then sprinkle over a small pinch of fresh thyme leaves.
12. Serve fresh out of the oven, or room temp.


Desserts
Ugly Christmas Sweater Cookies with Buttercream Frosting

I have shared this recipe over ten times already on my blog. These cookies are just so good!
Ingredients
- For Sugar Cookies
- 2 cups all-purpose flour (or gluten free 1 to 1 or measure to measure flour)
- 1/4 teaspoon salt
- 1/2 teaspoon baking powder
- 1/2 cup (1 stick) unsalted butter
- 1 cup sugar
- 1 large egg, lightly beaten
- 1 tablespoons milk
- 1 TBL lemon juice
- 1/2 teaspoon pure vanilla extract
- For Buttercream Frosting
- 1 cup, two sticks, of non-salted butter
- 4 cups of powdered sugar
- 1 tsp vanilla
- 4 - 6 TBLcoconut milk (I like Thai Kitchen Organic)
Instructions
For Sugar Cookies:
Mix flour, salt, and baking powder in a medium bowl. In the bowl of an electric mixer fitted with the paddle attachment, cream the butter and sugar; add dry ingredients, and mix until incorporated.
With the mixer running, add egg, milk, lemon, and vanilla; mix until incorporated. Transfer the dough to a work surface. Shape into two discs, cover with plastic wrap, and refrigerate for at least 1 hour.
Preheat oven to 350 degrees. Line baking sheets with nonstick baking mats or parchment paper; set aside.
On a lightly floured work surface, roll out dough to 1/8-inch thickness.
Cut into desired shapes and transfer to prepared baking sheets, leaving an inch in between. Leftover dough can be rolled and cut once more.
Bake until lightly golden, about 10 minutes; do not allow to brown. Transfer to wire racks to cool.
For Buttercream Frosting:
Cream the butter until soft in a mixer for about two minutes.
Add the sugar, vanilla, and three TBL of coconut milk.
Add the remaining TBL of coconut milk as needed. To decorate cookies, make sure the frosting is thick to hold its shape. If it gets too soft, place it in the refrigerator for about twenty minutes.
Cookies 'N Cream Millionaire Shortbread
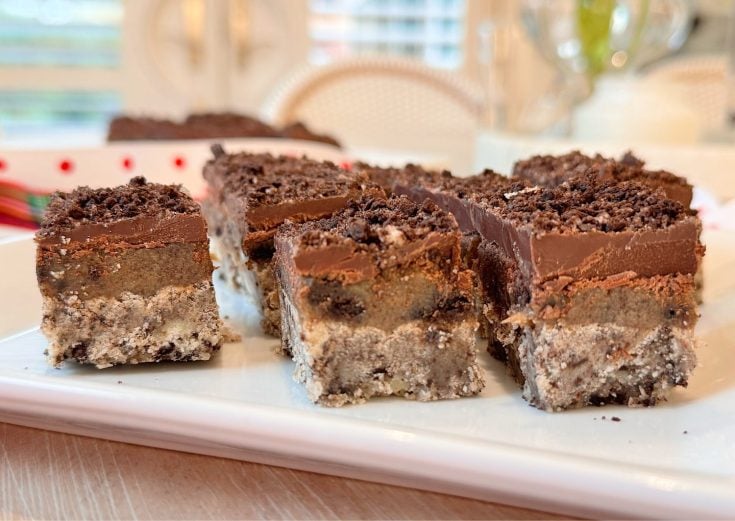
This cookie bar takes everything you love about a Twix bar and gives it a holiday upgrade. The buttery shortbread base holds a creamy layer of caramel mixed with crushed Oreos, and it’s finished with a silky chocolate topping and a dusting of cookie crumbs.
Ingredients
- For the Shortbread Base
- 1 cup (2 sticks) unsalted butter, softened
- ½ cup granulated sugar
- 2 cups all-purpose flour
- ¼ teaspoon salt
- 6 Oreo cookies, finely crushed
- For the Cookies ’N’ Cream Caramel Layer
- 1 (14-oz) can sweetened condensed milk
- ½ cup unsalted butter
- ½ cup light brown sugar, packed
- 3 tablespoons light corn syrup
- Pinch of salt
- 8 Oreo cookies, coarsely chopped
- For the Chocolate Topping
- 1½ cups semisweet or dark chocolate chips
- 2 teaspoons vegetable oil or coconut oil
- 4 Oreo cookies, finely crushed for garnish
Instructions
- Preheat and prepare.Heat oven to 350°F. Line a 9×13-inch pan with parchment paper, leaving a little overhang on the sides for easy lifting later.
- Make the shortbread.Cream butter and sugar together until light and fluffy. Add flour and salt and mix until crumbly, then stir in crushed Oreos. Press dough evenly into the pan and prick the top with a fork. Bake for 20–22 minutes, or until lightly golden. Cool completely.
- Cook the caramel.Combine butter, brown sugar, corn syrup, and condensed milk in a medium saucepan over medium heat. Stir constantly until the mixture comes to a gentle boil, then reduce heat and simmer 6–8 minutes, stirring frequently, until thick and golden. Remove from heat, stir in salt, and fold in chopped Oreos. Pour evenly over the cooled shortbread and let it set for about 30 minutes.
- Top with chocolate.Melt chocolate chips and oil together in a microwave or double boiler until smooth. Pour over the caramel layer and spread evenly. Sprinkle with crushed Oreos for a festive finish. Chill until firm, at least 1 hour, before cutting into squares.
Peanut Butter Stuffed Cookies

These cookies are soft, chewy, and filled with a surprise peanut butter center that melts in your mouth. I love that you can prepare them in advance, freeze them, and bake them off right before guests arrive.
Ingredients
- For the Cookie Dough
- 1 cup (2 sticks) unsalted butter, softened
- ¾ cup light brown sugar, packed
- ½ cup granulated sugar
- 2 large eggs
- 2 teaspoons vanilla extract
- 2¾ cups all-purpose flour
- 1 teaspoon baking soda
- ½ teaspoon baking powder
- ½ teaspoon salt
- 1½ cups semisweet chocolate chips or chunks
- For the Peanut Butter Filling
- ¾ cup creamy peanut butter
- 3 tablespoons powdered sugar
Instructions
- Prepare the filling. Stir together peanut butter and powdered sugar until smooth. Scoop small teaspoons onto a parchment-lined baking sheet and freeze until solid (about 30 minutes).
- Make the dough. Cream butter and both sugars until light and fluffy. Add eggs and vanilla, mixing until combined. In a separate bowl, whisk together flour, baking soda, baking powder, and salt. Gradually mix the dry ingredients into the wet mixture, then stir in the chocolate chips.
- Assemble the cookies. Scoop about 2 tablespoons of dough, flatten slightly, and place a frozen peanut butter ball in the center. Wrap the dough around the filling and roll it into a smooth ball. Place on a parchment-lined baking sheet, leaving about 2 inches between each cookie.
- Freeze before baking. Freeze for at least 1 hour, then transfer to an airtight freezer bag. These will keep beautifully for up to 3 months.
- Bake from frozen. Preheat oven to 350°F. Bake frozen cookies 13–15 minutes, or until golden around the edges and soft in the middle. Cool 10 minutes before serving — or serve warm for that irresistible gooey peanut butter center.


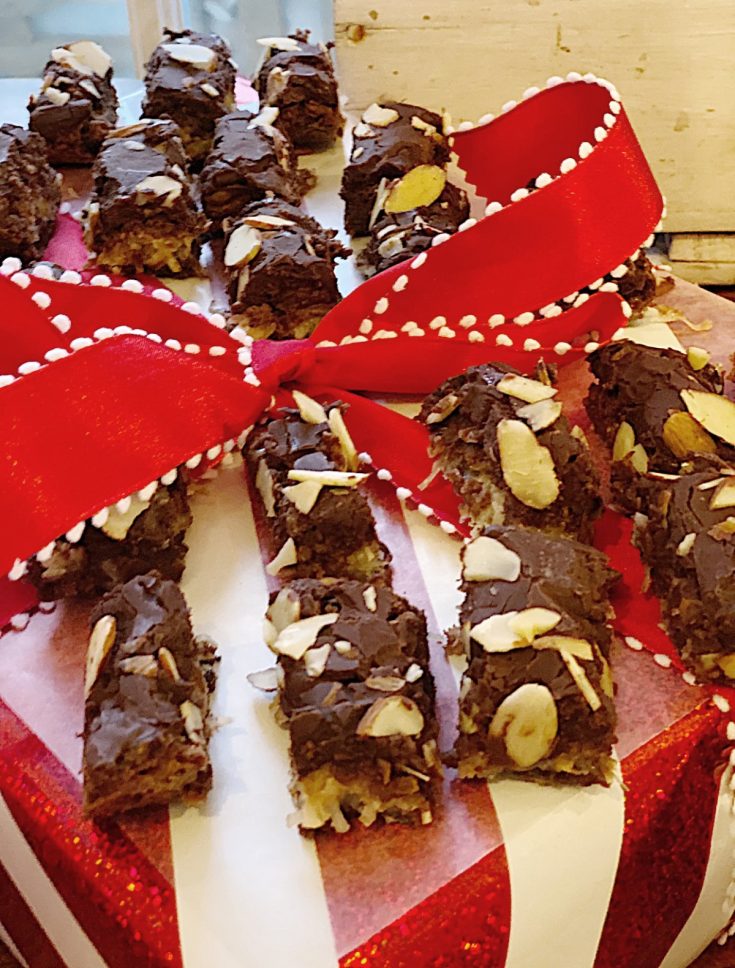
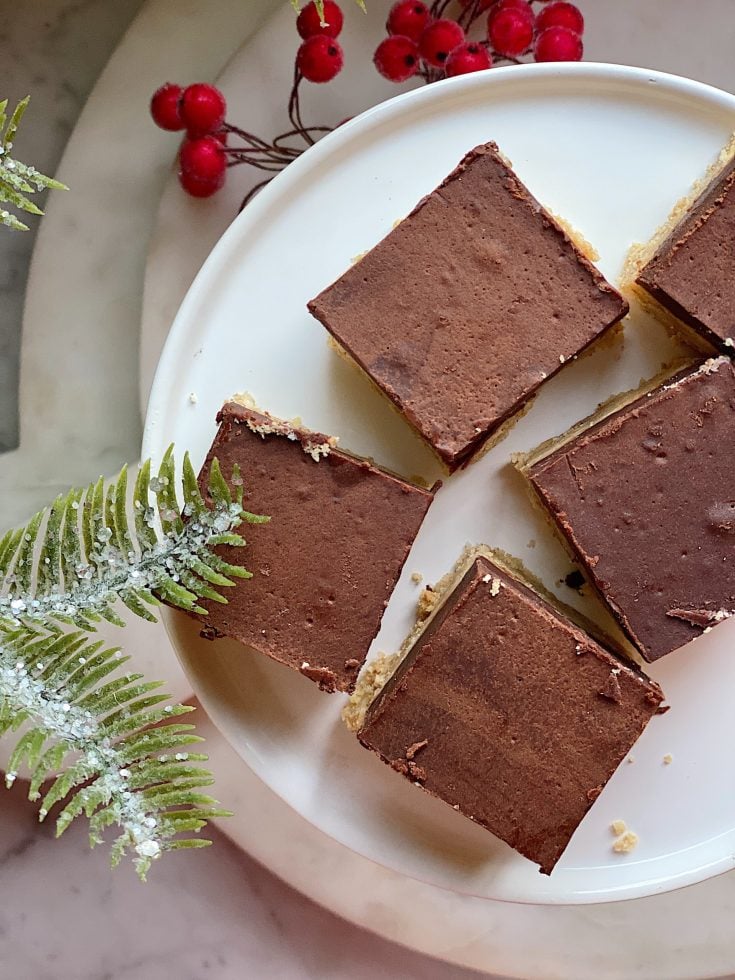
Chocolate Almond Coconut Bars
Ingredients
- Nonstick cooking spray
- 3/4 cup butter, melted
- 2 cups of sugar
- 2 teaspoons vanilla
- 3 eggs, lightly beaten
- 1 1/4 cups all-purpose flour
- 1/2 cup unsweetened cocoa powder
- 1 teaspoon baking powder
- 1/2 teaspoon salt
- 4 cups flaked coconut
- 1 14 ounce can sweetened condensed milk
- 1/2 teaspoon almond extract
- 1/2 cup chopped almonds, toasted*
- Milk Chocolate Ganache
- 3/4 cup heavy cream
- 1 11 1/2 ounce package milk chocolate pieces
Instructions
- Preheat oven to 350 degrees F. Line a 13x9-inch baking pan with foil, extending foil over edges of the pan. Lightly coat foil with cooking spray. In a large bowl stir together melted butter, sugar, and 1 tsp. of the vanilla until combined. Stir in eggs until combined.
- In another bowl combine flour, cocoa powder, baking powder, and salt. Add flour mixture to butter mixture and stir until combined. Spread half of the batter into the prepared pan. Bake 12 minutes or just until set. Cool on a wire rack for 30 minutes.
- Meanwhile, for filling, in a large bowl combine coconut, condensed milk, the remaining 1 tsp. vanilla, and the almond extract.
- Spread filling over baked chocolate layer; sprinkle with almonds. Carefully spread the remaining chocolate batter over the filling. Bake 20 to 25 minutes or until the chocolate layer is set. Cool in pan on a wire rack.
- To make the Milk Chocolate Ganache, place chocolate pieces into a medium bowl and set aside. In a small saucepan bring whipping cream just to boiling. Immediately pour cream over chocolate in a bowl. Let stand, without stirring, 5 minutes. Stir until smooth.
- Spoon ganache over cooled bars, spreading evenly. Chill for at least 1 hour or until ganache is firm. Use edges of foil to lift uncut bars out of the pan. Transfer to a cutting board. Cut into bars.
Notes
Place bars in a single layer in an airtight container; cover. Store in the refrigerator for up to 3 days or freeze for up to 3 months.
*TIP:
To toast nuts, preheat oven to 300 degrees F. Spread nuts in a shallow baking pan. Bake 10 to 15 minutes or until nuts are just golden, stirring once or twice. Let cool.
Nutrition Information:
Yield:
1Serving Size:
one barAmount Per Serving: Calories: 187Total Fat: 10 ggSaturated Fat: 6gTrans Fat: 28 mggUnsaturated Fat: 2gCholesterol: 6 gmgSodium: 98 mgmgCarbohydrates: 24gFiber: 1gSugar: 19 gg
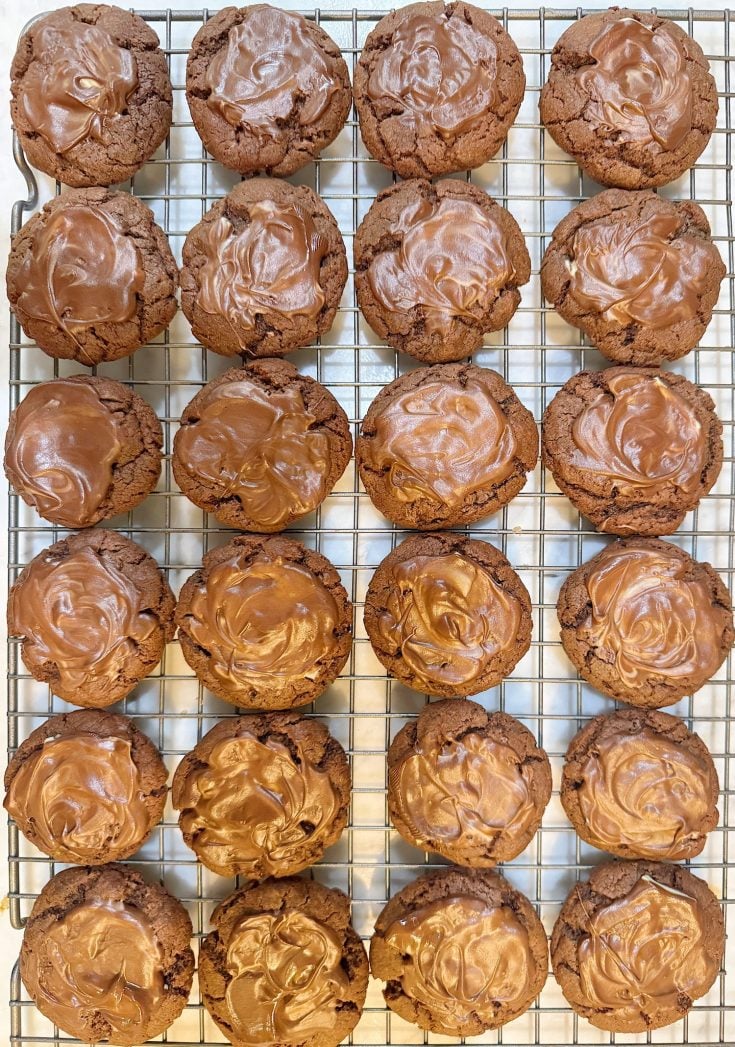
Chocolate Caramel Cookies

These soft-baked, fudgy caramel chocolate cookies perfectly balance rich dark chocolate, sweet caramel, and a hint of salt to enhance the flavors. These cookies will satisfy any sweet tooth with gooey caramel centers and loads of chocolate chips!
Ingredients
- For the Cookie Dough:
- - 1 cup (2 sticks) unsalted butter, softened
- - 3/4 cup packed brown sugar (light or dark)
- - 1/4 cup granulated sugar
- - 2 large eggs
- - 1 tsp vanilla extract
- - 2 1/4 cups all-purpose flour
- - 1 tsp baking soda
- - 1/2 tsp salt
- - 1/2 cup unsweetened cocoa powder (for a rich chocolate flavor)
- - 1 1/2 cups dark chocolate chips (or a mix of dark and milk chocolate chips)
- - 1/2 cup mini chocolate chips (optional, for extra chocolatey goodness)
- For the Caramel Filling:
- - 20-24 soft caramel candies (such as Kraft Caramels or similar), unwrapped
- - 2 tbsp heavy cream (to help soften the caramels)
- - 1/4 tsp sea salt (optional, for a salted caramel flavor)
- For Finishing:
- - Flaky sea salt, for sprinkling on top (optional but highly recommended)
Instructions
Prepare the Caramel Centers:
- Combine the unwrapped caramel candies and heavy cream in a microwave-safe bowl.
- Microwave in 20-30 second intervals, stirring between each, until the caramels are melted and smooth.
- If the mixture is too thick, add a bit more heavy cream, one teaspoon at a time, to achieve a pourable consistency.
- Once smooth, stir in the sea salt (if using), then set the caramel aside to cool and thicken slightly. You want it to be thick but still gooey for the center.
Make the Cookie Dough:
- Preheat your oven to 350°F (175°C) and line two baking sheets with parchment paper or silicone baking mats.
- In a large mixing bowl, cream the softened butter, brown sugar, and granulated sugar until light and fluffy (about 3-4 minutes).
- Beat in the eggs one at a time, then add the vanilla extract, mixing until combined.
- Whisk together the flour, cocoa powder, baking soda, and salt in a separate bowl.
- Gradually add the dry ingredients to the wet ingredients, mixing until just combined.
- Stir in the dark chocolate chips (and mini chocolate chips, if using).
Assemble the Cookies:
- Take about one tablespoon of cookie dough and flatten it slightly into a disk shape in your palm.
- Place a small spoonful (about 1 tsp) of the cooled caramel mixture in the center of the dough disk.
- Gently fold the dough around the caramel, forming a ball, and be sure to seal the edges well so the caramel doesn’t leak out while baking.
- Roll the dough ball between your hands to smooth it out, then place it on the prepared baking sheet, leaving about 2 inches of space between cookies.
- Optionally, press a few extra chocolate chips on top of each dough ball before baking.
Bake the Cookies:
- Bake the cookies for 10-12 minutes, or until the edges are set but the centers are still soft. The caramel will stay gooey inside, and the cookies will firm up as they cool.
- Important: Don’t overbake! The cookies will continue to cook slightly as they cool, and you want them to stay soft and fudgy.
Finishing Touches:
- Once the cookies are out of the oven, let them cool on the baking sheet for 5-10 minutes.
- Sprinkle the tops of the warm cookies with a little flaky sea salt for that sweet-salty flavor contrast.
- After cooling completely, store in an airtight container for up to 1 week (if they last that long!).
Chocolate Peanut Butter Rice Krispy Treats

These Chocolate Peanut Butter Rice Crispy Treats are the perfect no-bake dessert, combining the crunch of crispy rice cereal with the rich, creamy flavors of peanut butter and chocolate. Made in just one layer, they’re quick and easy to whip up, requiring minimal effort but delivering maximum indulgence. The gooey texture and marbled chocolate-peanut butter finish make these treats a crowd-pleaser for parties, bake sales, or a simple sweet snack at home. Whether you’re craving something sweet or looking for a fun recipe to make with kids, these treats are sure to satisfy!
Ingredients
- 5 cups crispy rice cereal
- 1 cup creamy peanut butter
- ½ cup honey or light corn syrup
- ½ cup granulated sugar
- 1 teaspoon vanilla extract
- 1½ cups semi-sweet or milk chocolate chips
Instructions
- Prepare the Pan:
- Line a 9x13-inch baking pan with parchment paper or lightly grease it. Set aside.
Melt the Base Ingredients:
- In a medium saucepan, combine the honey (or light corn syrup) and sugar and cook over medium heat. Stir frequently until the sugar dissolves and the mixture begins to simmer (do not boil).
- Remove from heat and stir in the peanut butter and vanilla extract until smooth.
Combine with Cereal:
- Add the crispy rice cereal to the peanut butter mixture and gently fold until fully coated.
Add Chocolate:
- Immediately fold in the chocolate chips while the mixture is still warm. The chips will partially melt, creating a marbled effect.
Press into the Pan:
- Press the mixture evenly into the prepared baking pan using a spatula or lightly greased hands. You can also use silicone candy mold shapes.
Set and Serve:
- Let the treats cool at room temperature for 1–2 hours, or place them in the refrigerator for about 30 minutes to set.
- Once firm, cut into squares or bars and enjoy!
Notes
Store in an airtight container at room temperature for up to a week or in the refrigerator for up to two weeks.
Coconut Cupcakes with Chocolate Trees

These cupcakes taste delicious and are also adorable. For complete instructions, visit my blog post Christmas Tree Cupcakes.
These Mini Vanilla Coconut Cupcakes are moist, fluffy, and packed with a tropical coconut flavor. With a light vanilla base, they're topped with sweet coconut buttercream frosting for the perfect bite-sized treat. These cupcakes are ideal for parties, special occasions, or just a sweet snack!
Ingredients
- For the Cupcakes:
- 1 1/4 cups all-purpose flour
- 1 tsp baking powder
- 1/4 tsp baking soda
- 1/4 tsp salt
- 1/2 cup unsalted butter, softened
- 1/2 cup granulated sugar
- 1/4 cup packed brown sugar (light or dark)
- 2 large eggs
- 2 tsp vanilla extract
- 1/2 cup buttermilk (or whole milk)
- 1/4 cup unsweetened shredded coconut (plus extra for topping)
- 1/4 cup sweetened coconut flakes (for a more textured coconut flavor)
- For the Coconut Buttercream Frosting:
- 1/2 cup unsalted butter, softened
- 3-4 cups powdered sugar (adjust for desired consistency)
- 2-3 tbsp coconut milk (or regular milk)
- 1/2 tsp vanilla extract
- 1/4 cup shredded coconut (to mix in the cupcakes)
- Pinch of salt (optional, to balance sweetness)
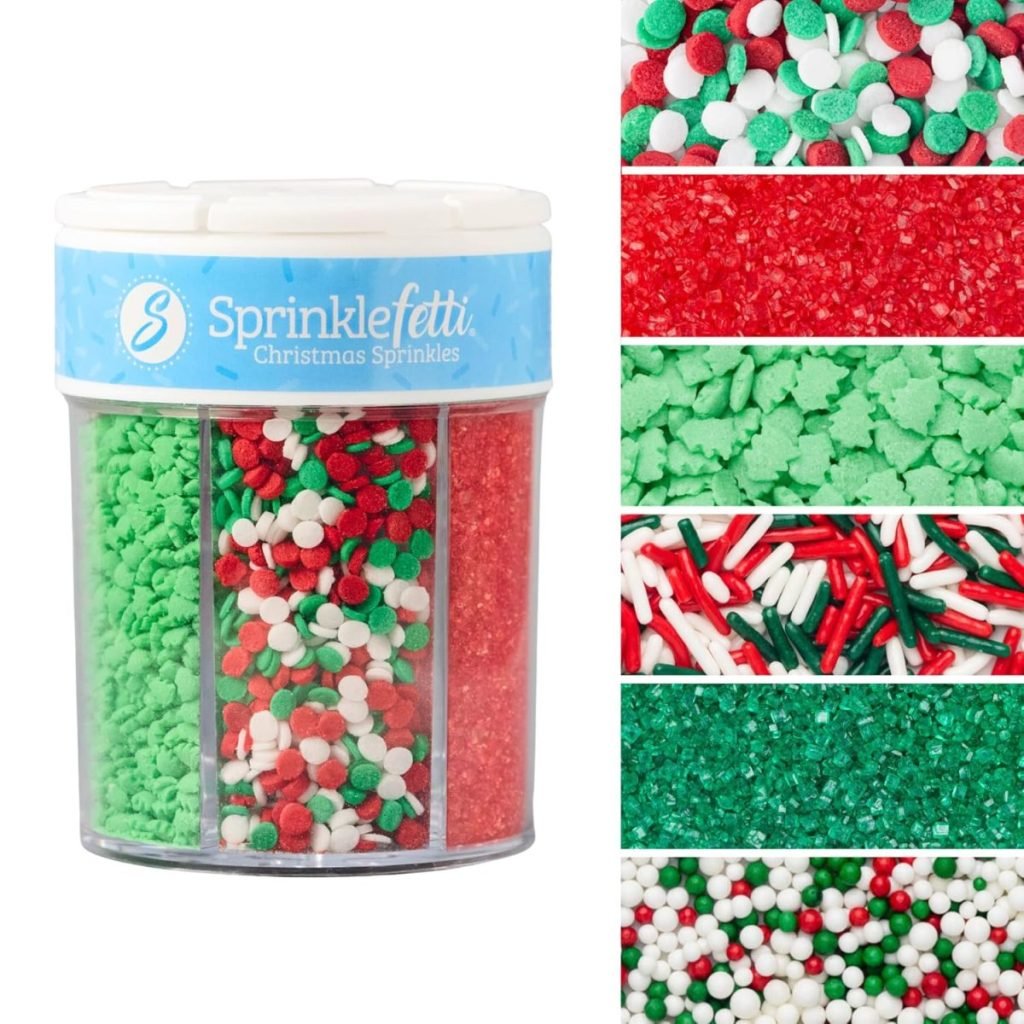
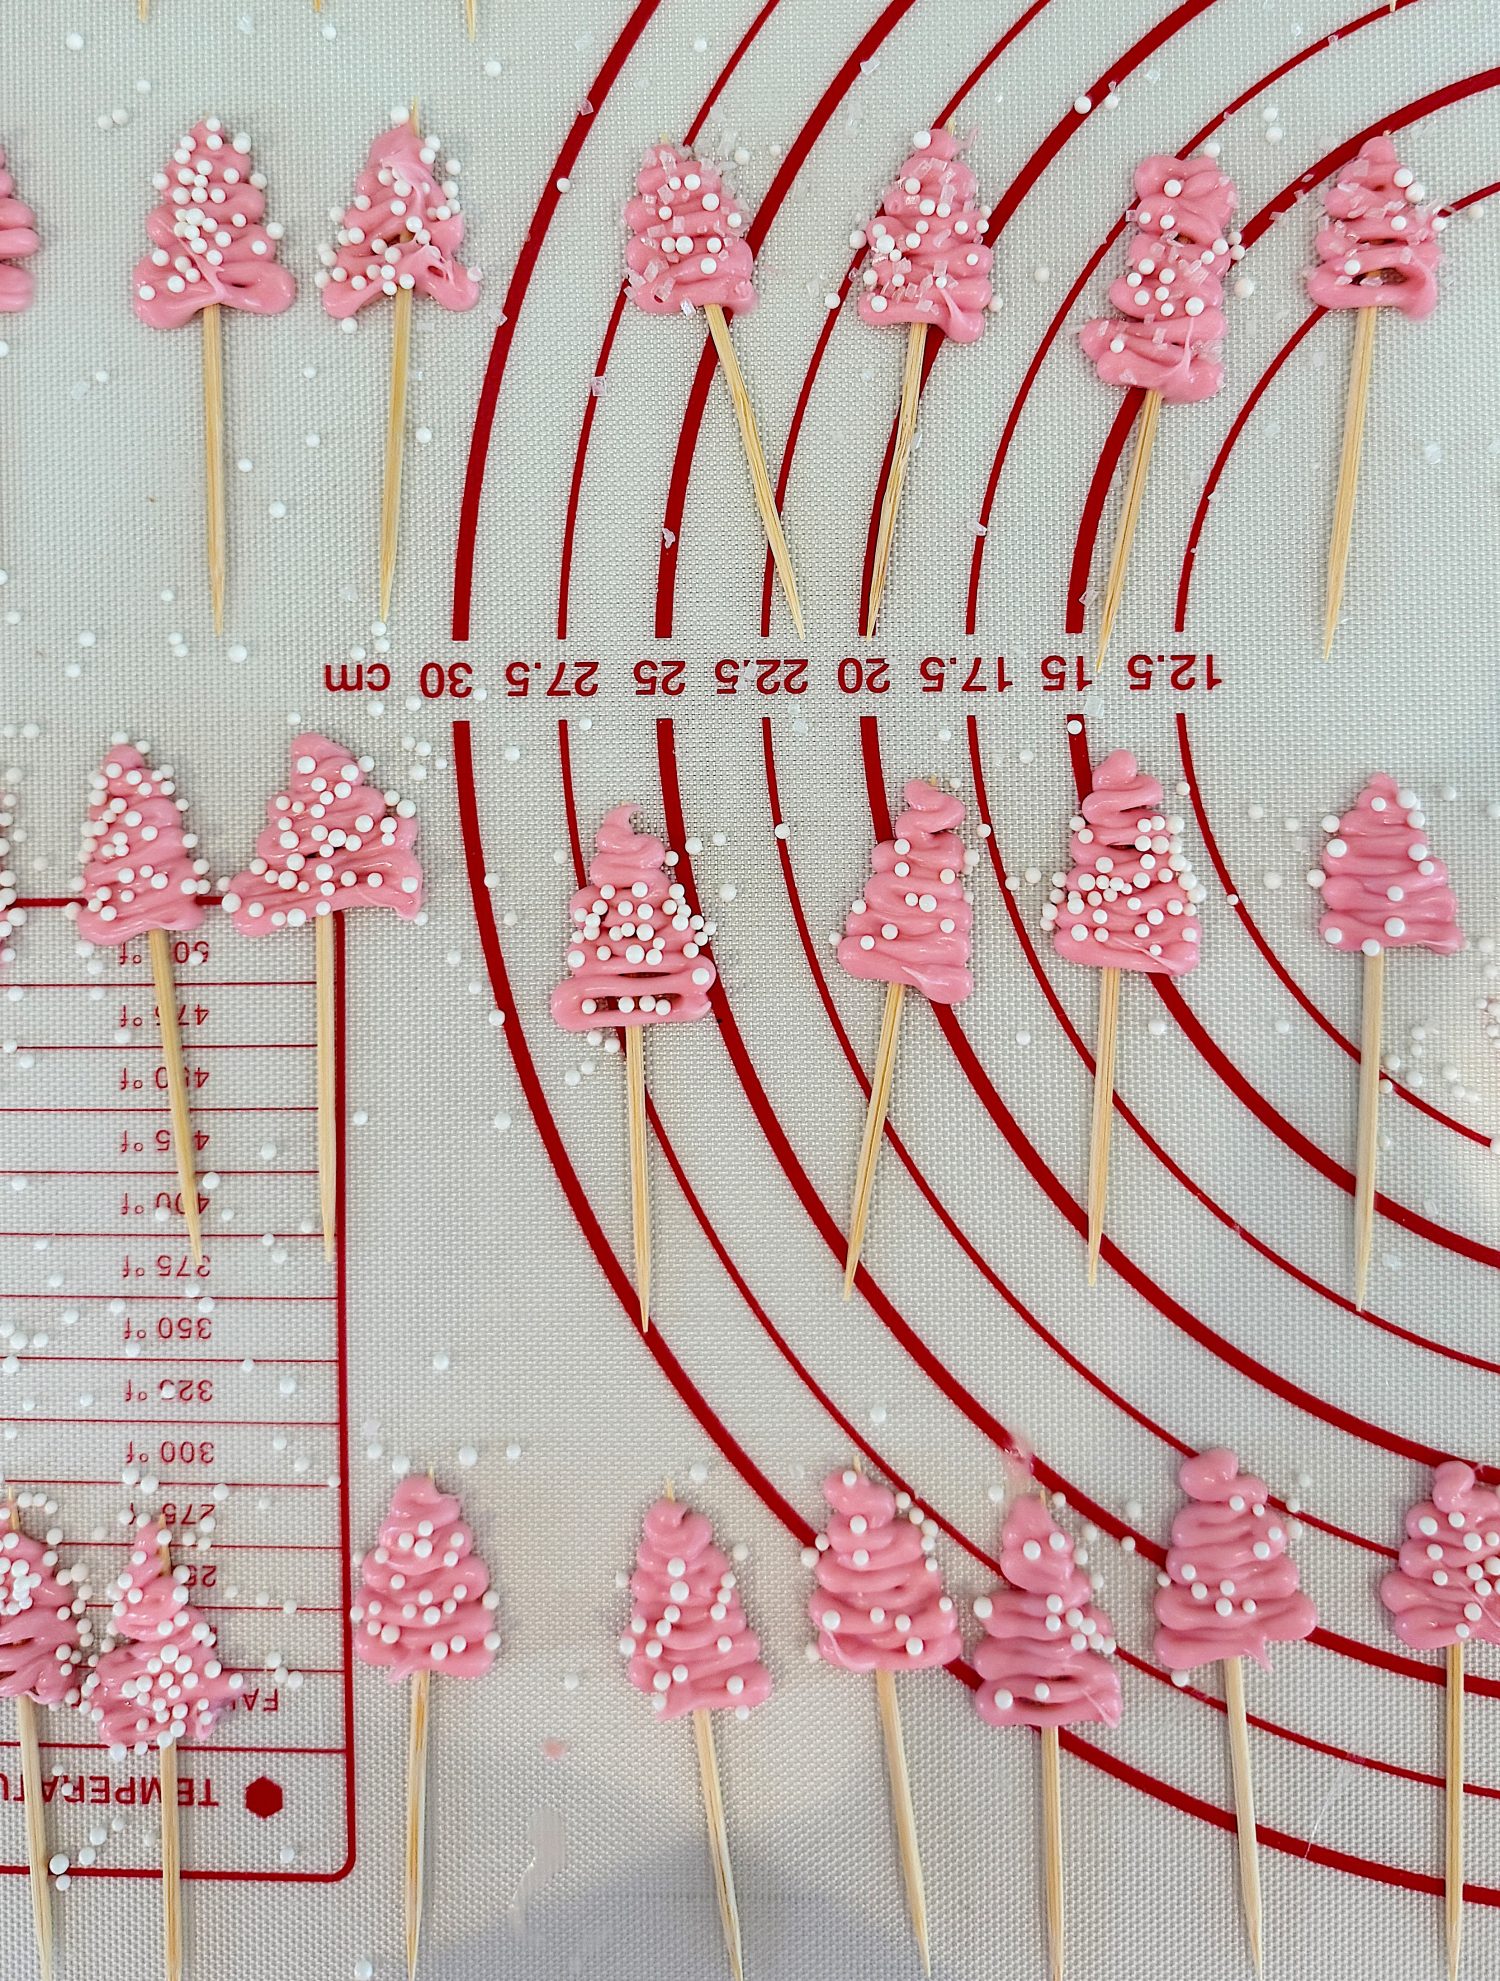
- For the Chocolate Trees
- Candy Melts - one 12 oz.package
- Toothpicks
- Sprinkles
- Pastry bags
Instructions
- Preheat your oven to 350°F (175°C). Line a mini muffin tin with mini cupcake liners (this recipe makes 24 mini cupcakes).
- In a medium-sized bowl, whisk together the flour, baking powder, baking soda, and salt. Set aside.
- In a large mixing bowl, beat the softened butter, granulated sugar, and brown sugar with an electric mixer on medium speed for 2-3 minutes until light and fluffy.
- Add the eggs, one at a time, beating well after each addition. Stir in the vanilla extract.
- Add the dry ingredients in three parts, alternating with the buttermilk. Start and end with the dry ingredients. Mix until just combined.
- Fold in the shredded coconut and sweetened coconut flakes until evenly distributed throughout the batter.
- Divide the batter evenly among the mini cupcake liners, filling each about 2/3 of the way full.
- Bake in the preheated oven for 12-15 minutes, or until a toothpick inserted into the center comes out clean.
- Remove from the oven and let the cupcakes cool in the pan for 5 minutes. Then, transfer them to a wire rack to cool completely.
- In a large bowl, beat the softened butter with an electric mixer on medium speed until creamy, about 2 minutes.
- Gradually add the powdered sugar, 1 cup at a time, mixing well after each addition.
- Add the coconut milk (or regular milk), vanilla extract, and a pinch of salt (if using), and beat until smooth and fluffy.
- Adjust the consistency with more coconut milk or powdered sugar as needed. If the frosting is too thick, add a little more coconut milk; if it's too thin, add more powdered sugar.
- Gently fold in the shredded coconut to give the frosting a nice texture and coconut flavor.
- Once the cupcakes are completely cool, frost them generously with the coconut buttercream using a piping bag fitted with a star or round tip, or simply spread the frosting with a knife.
- Garnish with toasted shredded coconut on top for extra flavor and texture. You can also sprinkle mini coconut flakes or decorative sprinkles for an extra festive touch.
- To make the chocolate trees, melt chocolate melting wafers in a double boiler (a pan on top of a second pan filled with water). Do not let the water boil; add the melted chocolate to a pastry bag with a small round tip. Lay out toothpicks on a baking mat or parchment paper.
- Start just below the top of the toothpick and gently squeeze out the chocolate in the pastry bag.
- Keep the amount of frosting used small, and gently go back and forth with the frosting, crossing over the toothpick each time. Add sprinkles and let dry.
- Insert each toothpick tree into the top of the cupcakes.
Prepare the Cupcakes:
Bake the Cupcakes:
Make the Coconut Buttercream Frosting:
Frost the Cupcakes:
Make the Chocolate Trees:
Mint Chocolate Cookies
These Andes Mint Cookies are a deliciously minty treat featuring a soft, chewy cookie base topped with a melted Andes mint. These cookies are perfect for mint lovers and make for a festive treat around the holidays or when you're craving that perfect balance of chocolate and mint.
Ingredients
- For the Cookies:
- 1 1/2 cups all-purpose flour
- 1/2 tsp baking soda
- 1/4 tsp salt
- 1/2 cup unsalted butter, softened
- 1/2 cup granulated sugar
- 1/2 cup packed brown sugar (light or dark)
- 1 large egg
- 1 tsp vanilla extract
- 1 tsp peppermint extract
- 1 cup semisweet chocolate chips (or chopped chocolate)
- 1/2 cup Andes Mint baking chips or chopped Andes Mints (or a mix of both)
- For Topping:
- 24 Andes Mints (about one per cookie)
- Instructions:
- Preheat the Oven:
- Preheat your oven to 350°F (175°C) and line two baking sheets with parchment paper or silicone baking mats.
- Prepare the Cookie Dough:
- In a medium bowl, whisk together the all-purpose flour, baking soda, and salt. Set aside.
- In a large mixing bowl, use an electric mixer to beat the softened butter, granulated sugar, and brown sugar together on medium speed until light and fluffy, about 2 minutes.
- Add the egg, vanilla extract, and peppermint extract, and beat until fully combined.
- Gradually add the dry ingredients (flour mixture) to the wet ingredients, mixing on low speed until just incorporated.
- Stir in the semisweet chocolate chips and Andes Mint baking chips or chopped Andes Mints. The dough should be thick but soft.
- Shape the Cookies:
- Scoop about 1 tablespoon of dough and roll it into a ball. Place the dough balls on the prepared baking sheets about 2 inches apart to allow for spreading.
- Gently flatten each dough ball slightly with the back of a spoon or your fingers.
- Bake the Cookies:
- Bake in the preheated oven for 9-11 minutes, or until the edges are set and the center is still soft. The cookies will firm up as they cool, so don’t worry if they seem a little soft when you take them out.
- While the cookies are baking, unwrap the Andes Mints (one for each cookie).
- Add the Andes Mints:
- Remove the cookies from the oven and let them cool on the baking sheets for about 2 minutes. Then, gently press one Andes Mint into the center of each cookie.
- Allow the cookies to cool completely on the baking sheets. The heat from the cookies will melt the Andes Mints into a smooth, minty layer.
- Cool and Serve:
- Once the cookies have cooled and the Andes Mints are set, transfer them to a wire rack to cool completely.
- Store the cookies in an airtight container at room temperature for up to 4 days, or freeze them for up to 3 months.
- Tips:
- Extra Mint Flavor: If you like a stronger mint flavor, you can increase the peppermint extract to 1 1/2 tsp, but be careful not to overpower the chocolate and mint balance.
- Chocolate Chips: Feel free to mix in a combination of semisweet chocolate chips, milk chocolate chips, or even white chocolate for a different flavor profile.
- Andes Mint Substitution: If you don’t have Andes Mint baking chips, you can use chopped regular Andes Mints (about 1/2 cup) in the dough. You can also use the baking chips or chopped mints for the topping if you prefer.
- These Andes Mint Cookies are rich, chewy, and packed with that perfect combination of chocolate and mint! They’re sure to be a hit at any holiday gathering or whenever you need a sweet, minty treat. Enjoy! 🌿🍫
Instructions
- In a medium bowl, whisk together the all-purpose flour, baking soda, and salt. Set aside.
- In a large mixing bowl, use an electric mixer to beat the softened butter, granulated sugar, and brown sugar together on medium speed until light and fluffy, about 2 minutes.
- Add the egg, vanilla extract, and peppermint extract, and beat until fully combined.
- Gradually add the dry ingredients (flour mixture) to the wet ingredients, mixing on low speed until just incorporated.
- Stir in the semisweet chocolate chips and Andes Mint baking chips or chopped Andes Mints. The dough should be thick but soft.
- Scoop about one tablespoon of dough and roll it into a ball. Place the dough balls on the prepared baking sheets about 2 inches apart to allow for spreading.
- Gently flatten each dough ball slightly with the back of a spoon or your fingers.
- Bake in the preheated oven for 9-11 minutes or until the edges are set and the center is still soft. The cookies will firm up as they cool, so don’t worry if they seem soft when you take them out.
- While baking, unwrap the Andes Mints (one for each cookie).
- Remove the cookies from the oven and let them cool on the baking sheets for about 2 minutes. Then, gently press one Andes Mint into the center of each cookie.
- Allow the cookies to cool completely on the baking sheets. The heat from the cookies will melt the Andes Mints into a smooth, minty layer.
- Once the cookies have cooled and the Andes Mints are set, transfer them to a wire rack to cool completely.
- Store the cookies in an airtight container at room temperature for up to 4 days, or freeze them for up to 3 months.
Preheat your oven to 350°F (175°C) and line two baking sheets with parchment paper or silicone baking mats.
Prepare the Cookie Dough:
Shape the Cookies:
Bake the Cookies:
Add the Andes Mints:
Cool and Serve:
Notes
Tips:
- Extra Mint Flavor: If you like a stronger mint flavor, you can increase the peppermint extract to 1 1/2 tsp, but be careful not to overpower the chocolate and mint balance.
- Chocolate Chips: Feel free to mix in a combination of semisweet chocolate chips, milk chocolate chips, or even white chocolate for a different flavor profile.
- Andes Mint Substitution: If you don’t have Andes Mint baking chips, you can use chopped regular Andes Mints (about 1/2 cup) in the dough. You can also use the baking chips or chopped mints for the topping if you prefer.
These Andes Mint Cookies are rich, chewy, and packed with that perfect combination of chocolate and mint! They’re sure to be a hit at any holiday gathering or whenever you need a sweet, minty treat. Enjoy!
The Best Ever Peanut Butter Fudge
This is a sweet and salty fudge consisting of a peanut butter graham cracker crust topped with melted chocolate.
Ingredients
- 1 16 oz. box of powdered or confectioners sugar
- 2 cups graham cracker crumbs
- 1 8 oz. jar chunky peanut butter
- 1 cup butter, melted
- 1 12 oz. package semi-sweet chocolate chips
- 1/2 cup butter
Instructions
- Mix the powdered sugar, graham cracker crumbs, peanut butter, and a cup of melted butter into a 6" x 6" square baking pan. Press firmly in the pan to form a flat crust.
- Meanwhile, melt 1/2 cup of butter with chocolate over low heat. Stir until smooth. Pour chocolate over peanut butter mixture, smoothing with a spatula. Refrigerate twenty minutes. Cut into 1" squares and refrigerate until firm.


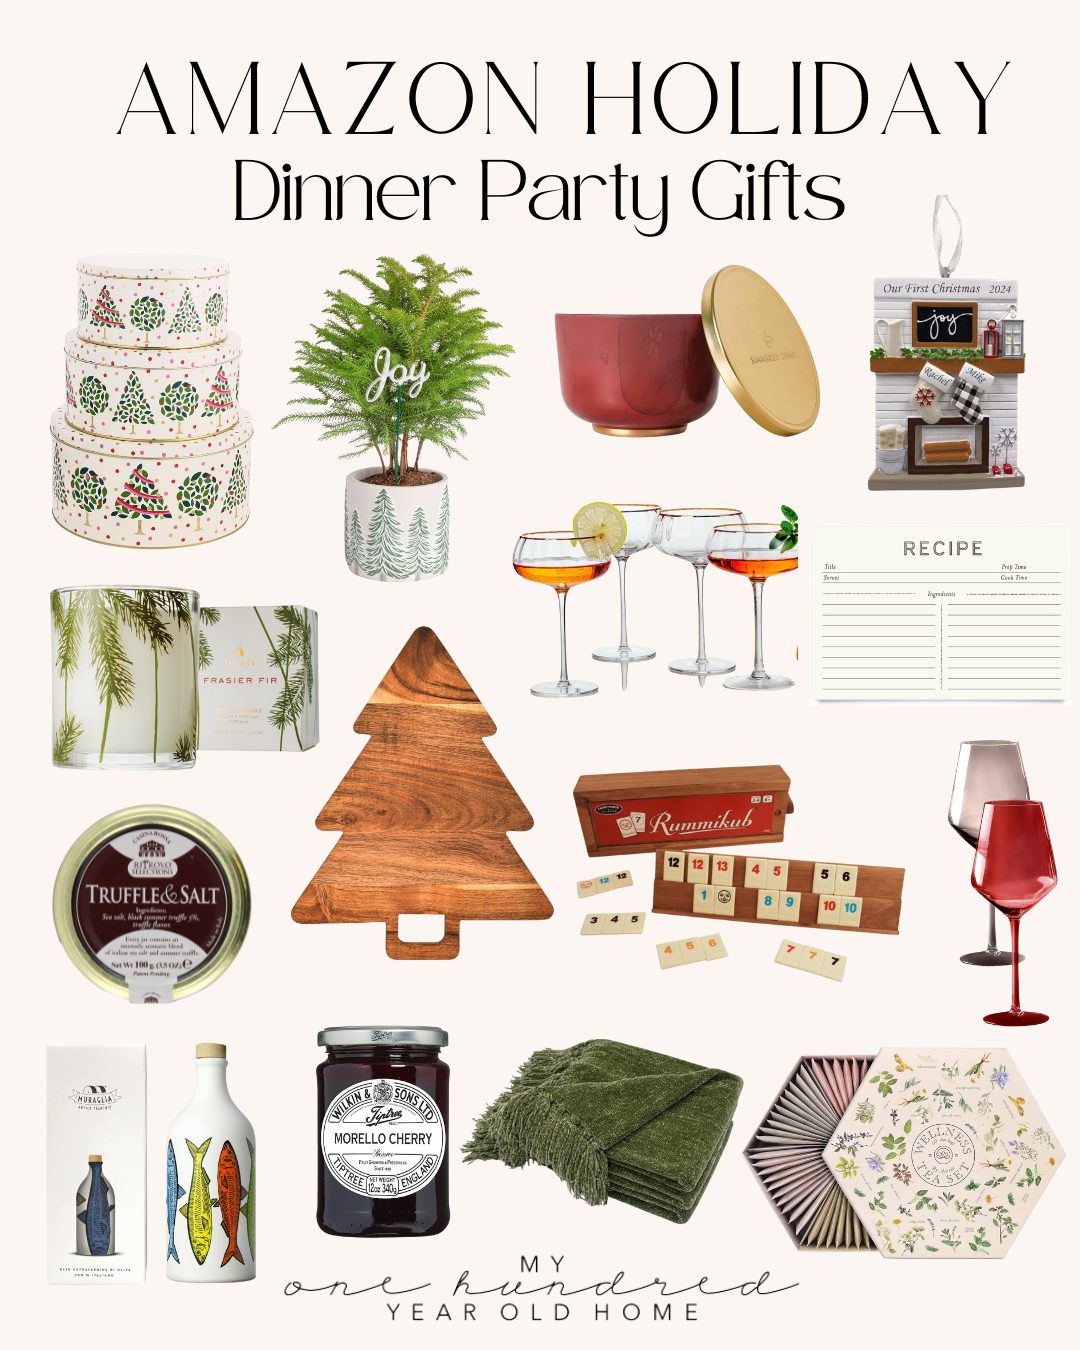
Favorite Holiday Party Hostess Gifts
If you enjoy my blog, you can sign up to receive my updates here.
.
Latest Posts
- DIY Pressed Flowers

- How to Make Strawberry Shortcake Ice Cream Sandwiches

- What’s on My Summer Craft Room Table Now – Mondays in the Craft Room


You can pin the image below to your boards on Pinterest (click the Pin button in the top left corner) or follow me on Pinterest!

For more real-time updates, follow me on Instagram @My100YearOldHome


Hi Leslie! Thank you so much for sharing all of these lovely recipes and the planning notes and pictures! I have a question, please: for the 150-200 guests, how much of each recipe did you make? Did you make only the quantities that each recipe above makes, or did you multiply the recipes to total 150-200? For example, did you make 24 coconut cupcakes with chocolate trees, or did you multiply the recipe by 6 to make 144 cupcakes? I don’t know how to determine how much of each item I need for the number of guests I invite! I know I probably don’t need enough of each thing for every person to have one but how do you calculate how much to make? Thank you for all your tips and tricks! – Cathy
Thank you Leslie! I’m always stuck when it comes to appetizers so I’m very happy you shared!
This is the first year I feel way behind!! I think my age and memory are causing issues. LOL!! We, too, have a group for appetizers only on Christmas Eve, and I use Post-its, all sorts of notes, on Word. Is the procedure an Excel Spreadsheet? Not very good with it, but may be what I need to learn to make Christmas less stressful for next year!!!